Articles
How To Wire An Extension Cord To An Outlet
Modified: October 20, 2024
Learn how to efficiently wire an extension cord to an outlet with our informative articles. Gain valuable knowledge on electrical safety and installation.
(Many of the links in this article redirect to a specific reviewed product. Your purchase of these products through affiliate links helps to generate commission for Storables.com, at no extra cost. Learn more)
Introduction
An extension cord is a versatile and essential tool in any home or workspace. It allows you to extend the reach of your electrical devices and conveniently power them from a distance. Whether you need to plug in a lamp in a hard-to-reach corner or run power tools in your garage, having a properly wired extension cord is crucial for safety and functionality.
In this article, we will guide you through the process of wiring an extension cord to an outlet. We will discuss the necessary safety precautions, tools, and materials required, as well as provide step-by-step instructions to ensure you can successfully wire your extension cord without any difficulties.
Before we begin, it’s important to note that working with electricity can be dangerous, and if you are not comfortable or confident in your abilities, it is best to consult a professional electrician. However, if you are knowledgeable about electrical systems and comfortable working with them, wiring an extension cord can save you time and money.
By following the steps outlined in this article, you’ll be able to create a reliable and safe extension cord that meets your specific needs. So let’s get started by discussing some of the essential safety precautions you should keep in mind.
Key Takeaways:
- Prioritize safety by turning off power, using proper insulation, and avoiding overloading circuits when wiring an extension cord. Secure connections and wear protective gear for a safe DIY electrical project.
- Gather necessary tools and materials, prepare the extension cord and outlet, and follow step-by-step instructions to successfully wire and test an extension cord. Prioritize safety and consult a professional if unsure.
Read more: How To Wire An Extension Cord Plug
Safety Precautions
Before you begin wiring an extension cord to an outlet, it is crucial to prioritize safety to avoid any potential electrical hazards. Keep the following safety precautions in mind:
- Turn off the power: Before starting any electrical work, always turn off the power to the outlet you will be working with. This can be done by switching off the corresponding circuit breaker in your electrical panel. Double-check with a voltage tester to ensure that the power is indeed turned off.
- Work in a well-ventilated area: When working with electrical components, ensure that the area is well-ventilated to prevent the buildup of any potentially dangerous fumes.
- Use proper insulation: Insulation is critical when dealing with electrical wiring. Ensure that you are using insulation-rated extension cords and all wiring connections are properly insulated using electrical tape or heat shrink tubing.
- Avoid overloading the circuit: Pay attention to the electrical load on the circuit where you will be using the extension cord. Make sure the total power draw from all connected devices does not exceed the circuit’s capacity, as this can lead to overheating and potentially start a fire.
- Inspect the extension cord: Before wiring the extension cord, thoroughly inspect it for any signs of damage such as frayed insulation, exposed wires, or loose connections. If any issues are found, do not use the cord and replace it with a new one.
- Secure connections: When connecting wires, ensure they are tightly secured to prevent any accidental disconnections that could disrupt the flow of electricity.
- Keep children and pets away: While working with electrical wiring, it’s essential to create a safe work environment by keeping children and pets away from the area to avoid any accidents or injuries.
- Wear protective gear: To protect yourself from potential electrical shocks and burns, always wear appropriate protective gear such as insulated gloves and safety goggles.
Remember, safety should always be the top priority when working with electricity. If you are unsure about any aspect of the process or feel uncomfortable, it is best to consult a professional electrician to ensure the work is done safely and correctly.
Tools and Materials Required
Before you start wiring an extension cord to an outlet, gather the necessary tools and materials to ensure a smooth and efficient process. Here is a list of the items you will need:
Tools:
- Wire cutters
- Wire strippers
- Needle-nose pliers
- Screwdrivers (flathead and Phillips)
- Voltage tester
Materials:
- Extension cord
- Electrical tape
- Outlet
- Wire connectors (such as wire nuts)
Ensure that you have the correct tools and materials for the job to avoid any unnecessary delays or complications. It’s important to use high-quality materials that are suitable for electrical applications to ensure the safety and longevity of the extension cord.
If you are unsure about which materials to use or need assistance in selecting the appropriate ones, consult with a professional electrician or visit a reputable hardware store for guidance.
Now that you have gathered the necessary tools and materials, we can proceed to the next step of wiring the extension cord to the outlet. Follow the step-by-step instructions provided in the upcoming sections, and remember to refer back to the safety precautions to ensure you are working in a safe environment.
Read also: 10 Amazing 3 Outlet Extension Cord for 2025
Step 1: Gathering the Necessary Components
Before you can start wiring an extension cord to an outlet, it is essential to gather all the necessary components and have them readily available. By ensuring that you have everything prepared, you can work efficiently and minimize any potential delays during the process. Here are the components you will need:
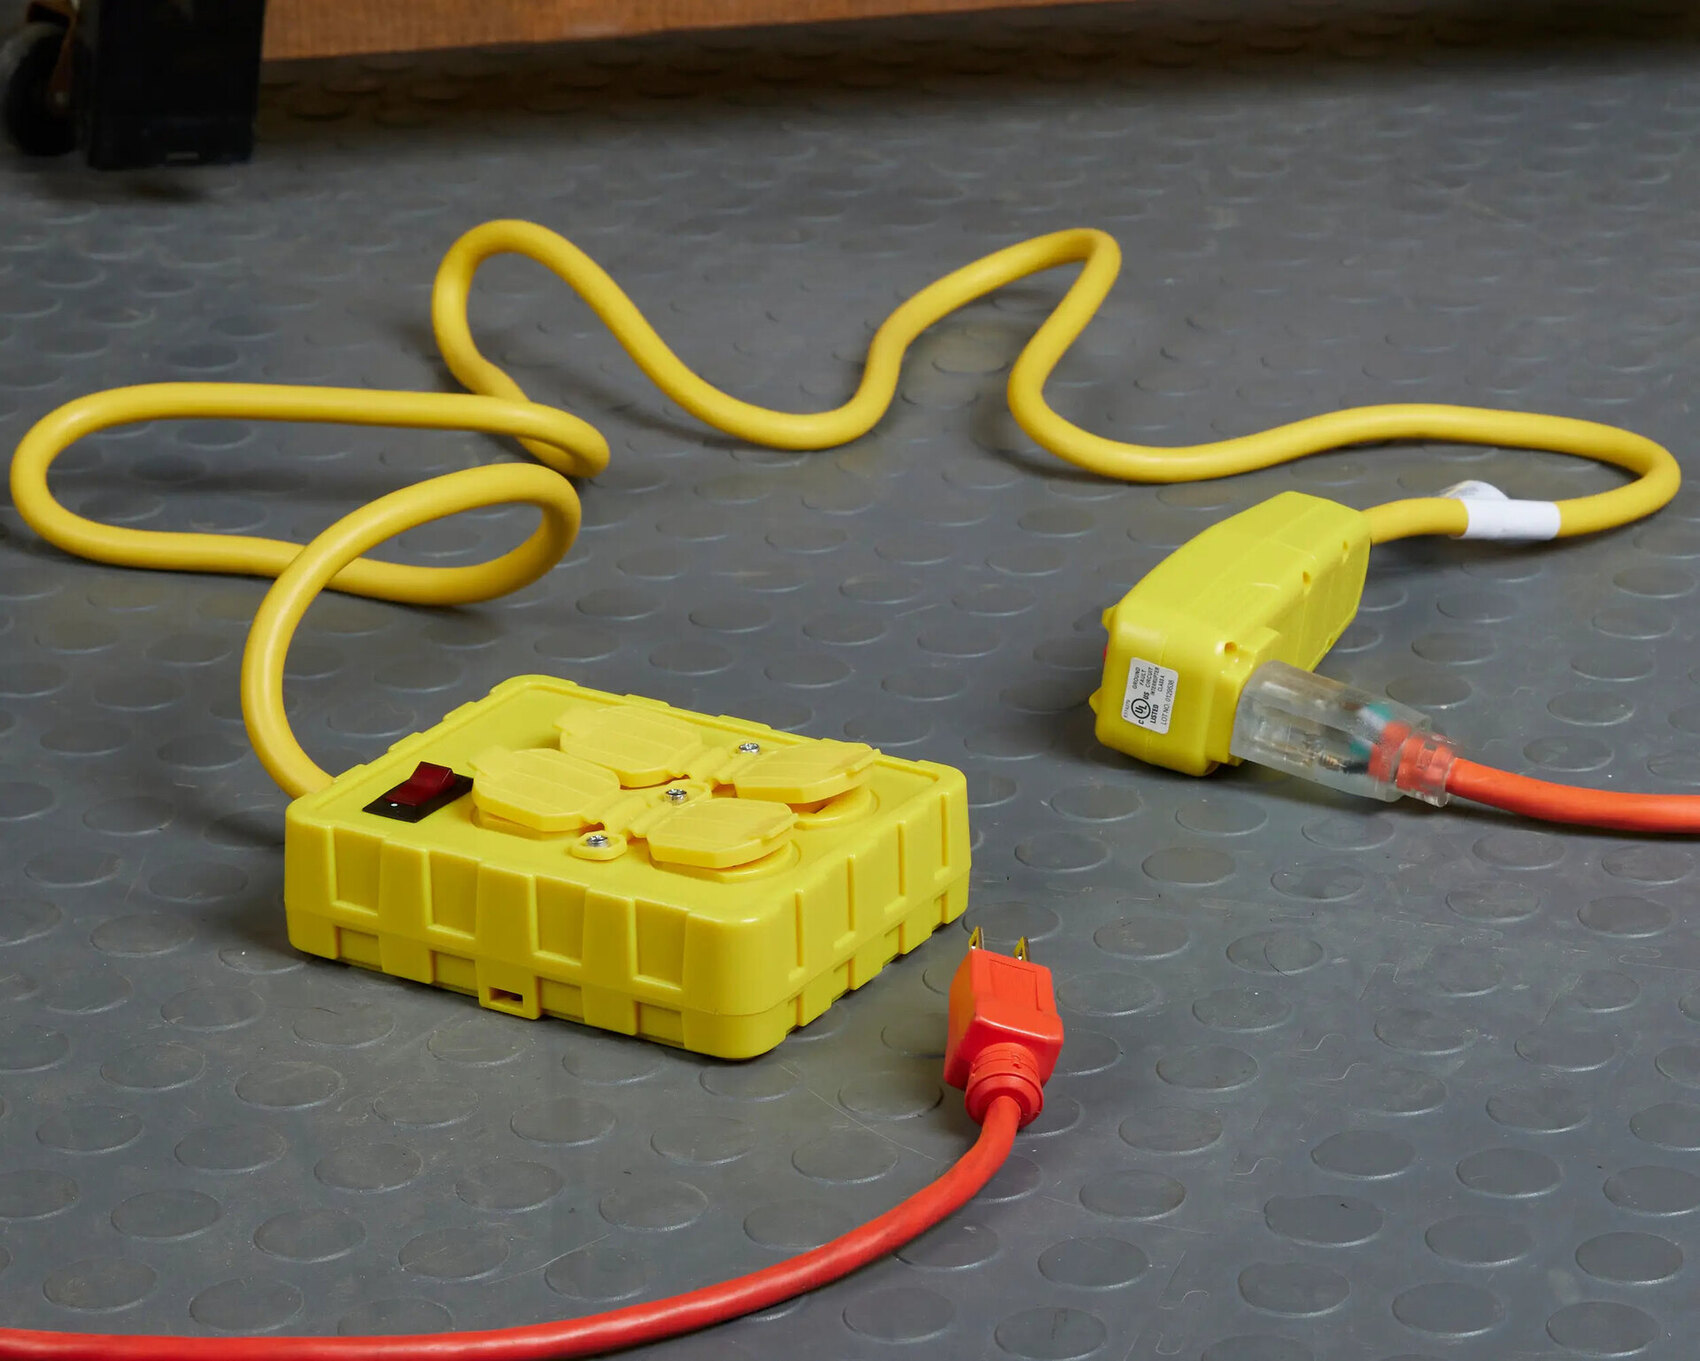
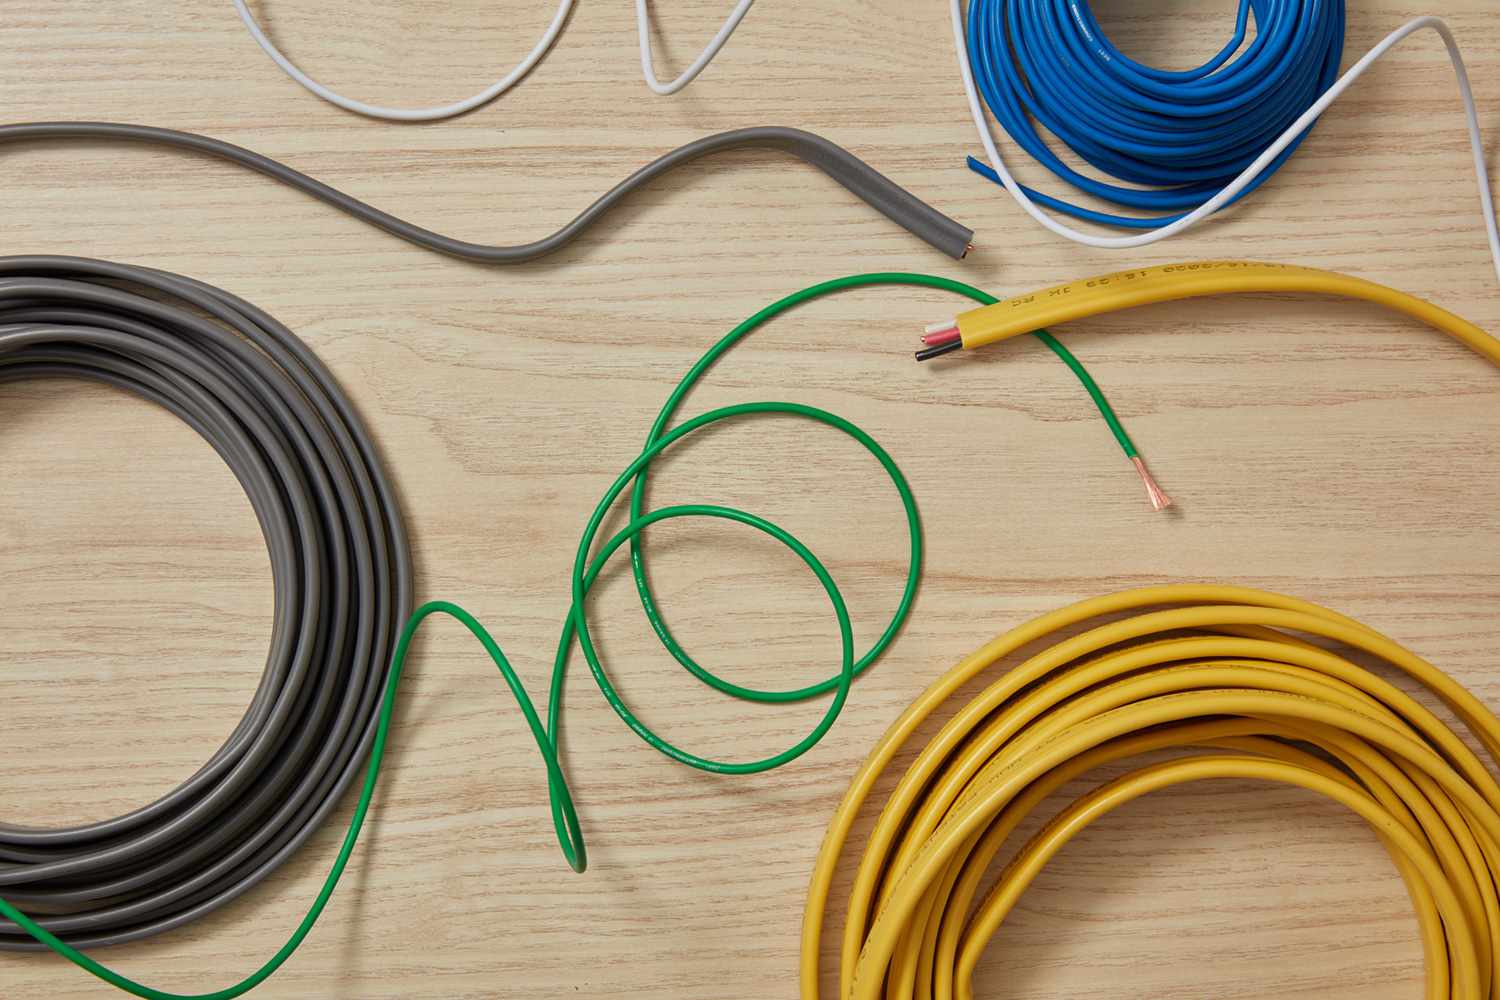
- Extension Cord: Choose an extension cord that is suitable for your intended use. Consider the length, gauge, and rating of the cord to ensure it can handle the load of your devices.
- Electrical Tape: Electrical tape is essential for providing insulation and securing wire connections. Make sure to have enough tape for the project.
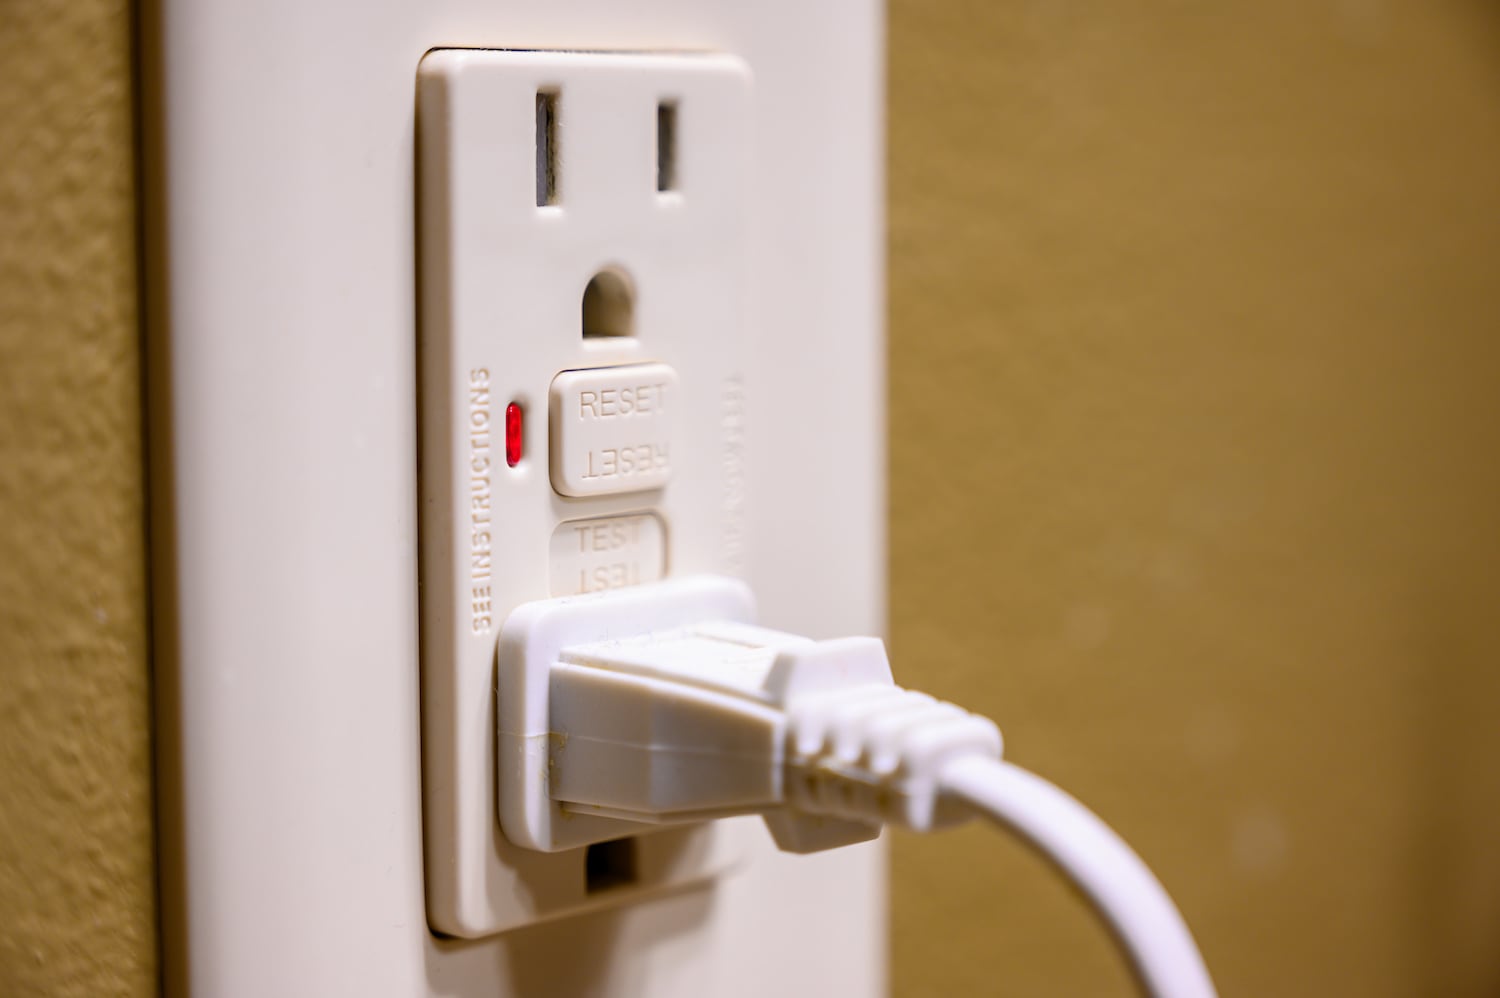
- Outlet: Determine the type of outlet that best suits your needs. There are various types available, including standard outlets, GFCI outlets, and USB outlets. Choose the appropriate outlet that matches the electrical wiring in your location.
- Wire Connectors: Wire connectors, such as wire nuts, are used to securely join wires together. Depending on the type of connection you are making, select the appropriate wire connectors.
- Wire Cutters: Wire cutters are essential for cutting the extension cord to the desired length and trimming any excess wires during the wiring process.
- Wire Strippers: Wire strippers are used to remove the insulation from the wires. Make sure to use wire strippers that are suitable for the gauge of the extension cord wires.
- Needle-Nose Pliers: Needle-nose pliers are useful for bending and shaping wires, as well as holding small components during the wiring process.
- Screwdrivers: Depending on the type of outlet you are using, you may need flathead and/or Phillips screwdrivers to secure the outlet to the electrical box.
- Voltage Tester: A voltage tester is crucial for verifying that the power to the outlet is turned off before starting any electrical work. This ensures your safety during the wiring process.
Once you have gathered all the necessary components, double-check to make sure everything is in good condition and functioning properly. It is important to use high-quality materials to ensure the safety and longevity of your wiring setup.
Now that you have all the components ready, you can move on to the next step: preparing the extension cord for wiring. Stay tuned for the next section, where we will guide you through the process step-by-step.
Step 2: Preparing the Extension Cord
Before you can start wiring an extension cord to an outlet, you need to prepare the extension cord itself. This involves cutting it to the desired length and preparing the wires for connection. Follow these steps to prepare the extension cord:
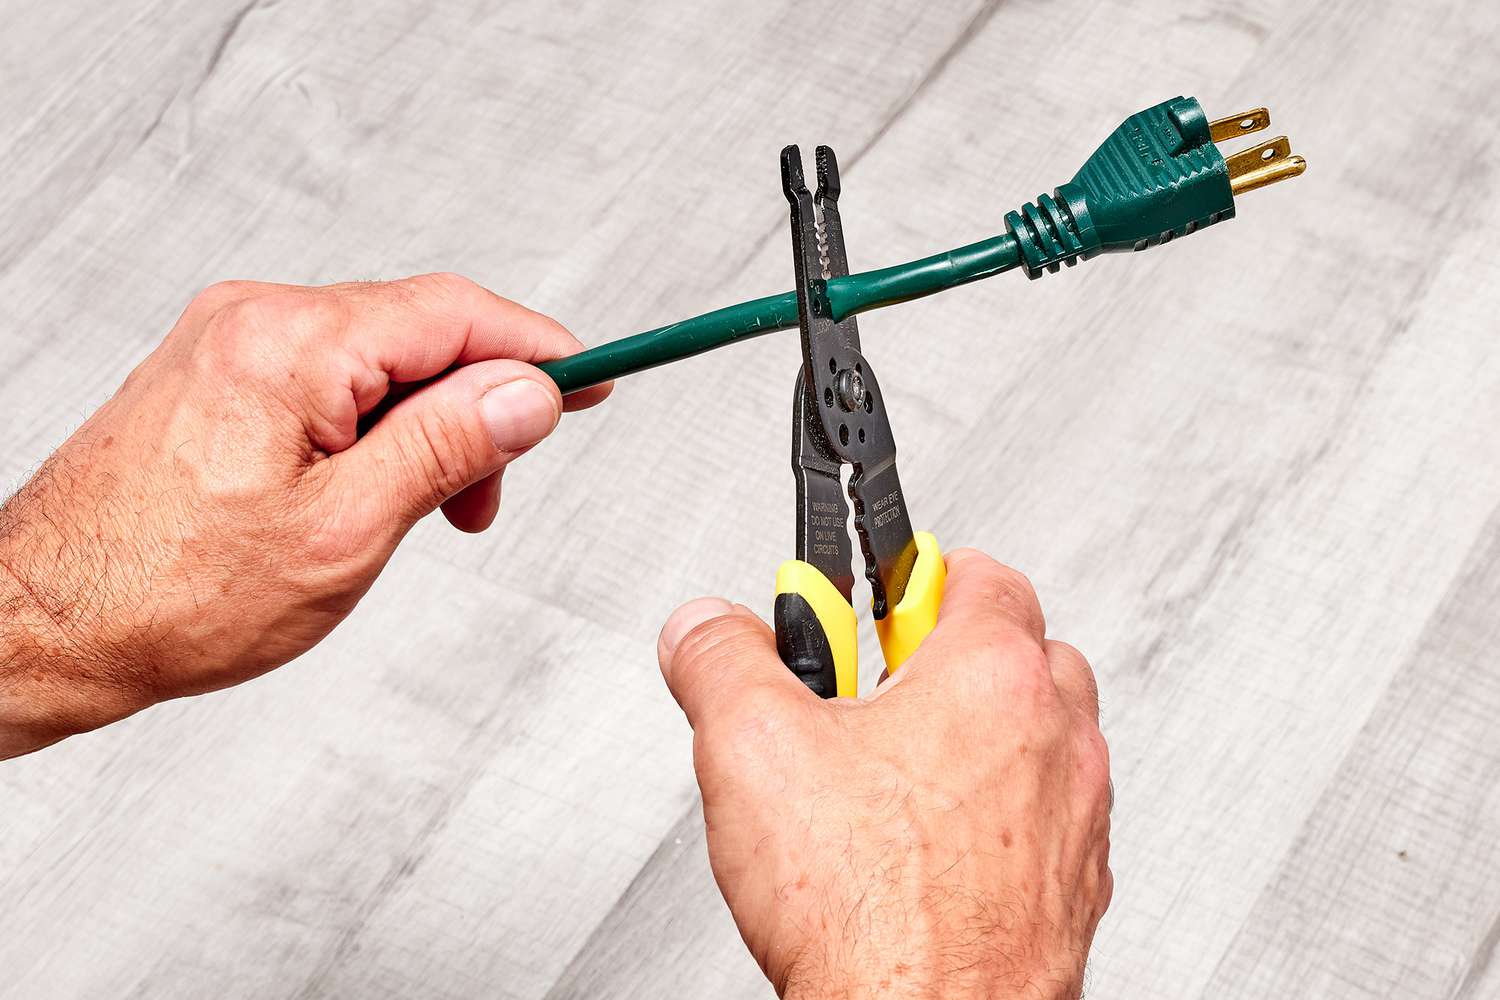
- Measure and cut the extension cord: Determine the length of the extension cord you need for your specific application. Measure the cord and use wire cutters to cut it to the desired length. Make sure to cut the cord cleanly and evenly.
- Trim away the outer insulation: After cutting the cord, use wire strippers to carefully remove a few inches of the outer insulation from both ends of the cut cord. Be cautious not to cut into the inner wires while stripping the insulation.
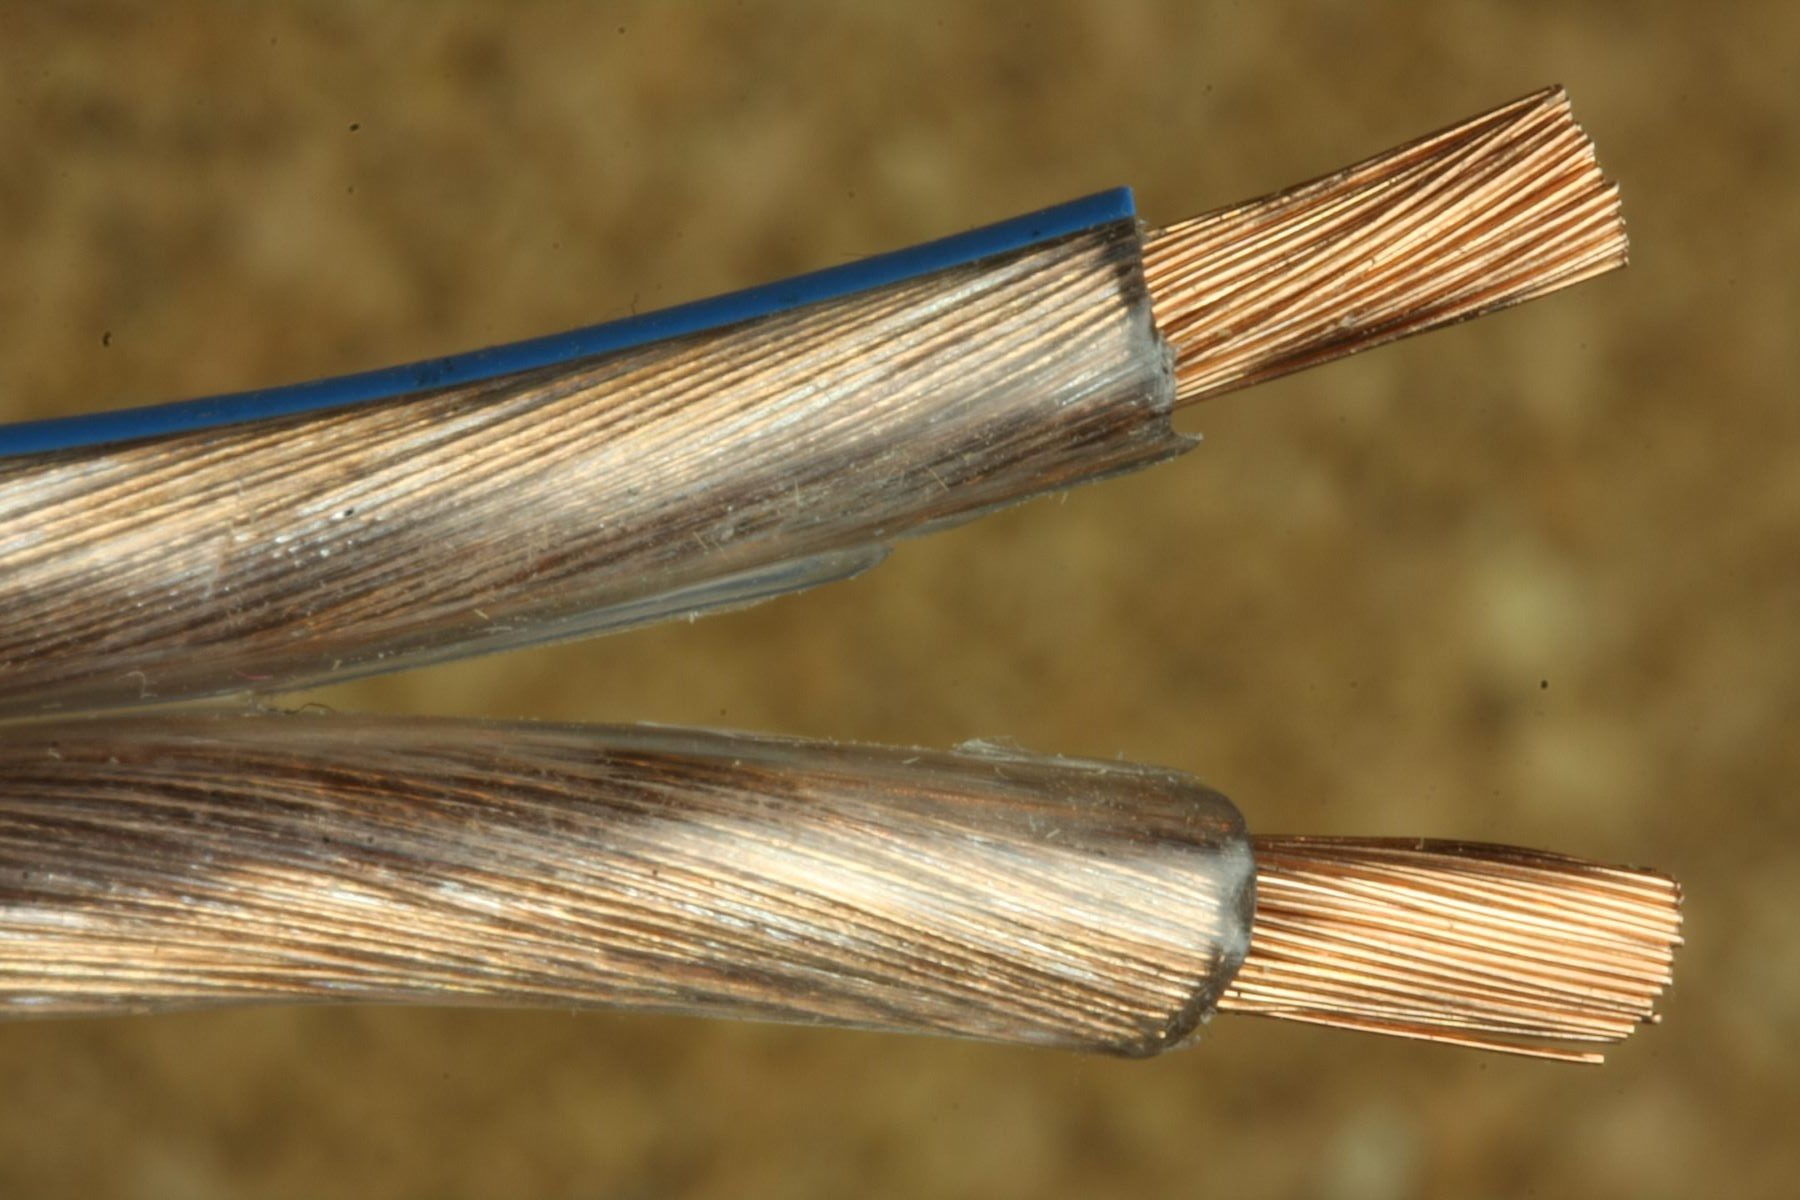
- Expose the inner wires: Within the extension cord, you will find several colored wires. Typically, there will be three wires: a black wire (hot), a white wire (neutral), and a green or bare copper wire (ground). Gently separate and expose approximately 1 inch of each wire for connection.
- The black wire is the live wire and carries the electrical current.
- The white wire is the neutral wire and completes the electrical circuit.
- The green or bare copper wire is the ground wire and is used for safety.
- Inspect the wires: Take a moment to inspect the exposed wires for any signs of damage, such as fraying or stripping. If any wires are damaged, cut them back to a point where the wire is intact and undamaged.
- Check for polarity markings: Some extension cords may have polarity markings on the wires. If present, take note of the markings for proper alignment when connecting the wires later.
By properly preparing the extension cord, you ensure clean and secure connections with the outlet. It is crucial to handle the wires with care and attention to detail to maintain the safety and reliability of the wiring setup.
Now that the extension cord is prepared, we can move on to the next step: preparing the outlet for wiring. Stay tuned for the next section, where we will guide you through the process step-by-step.
Step 3: Preparing the Outlet
In the process of wiring an extension cord to an outlet, it is important to properly prepare the outlet for connection. The following steps will guide you through the process of preparing the outlet:
- Turn off the power: Before starting any work on the outlet, ensure that the power to the circuit is turned off. Locate the corresponding circuit breaker in your electrical panel and switch it off. Use a voltage tester to confirm that there is no electricity flowing to the outlet.
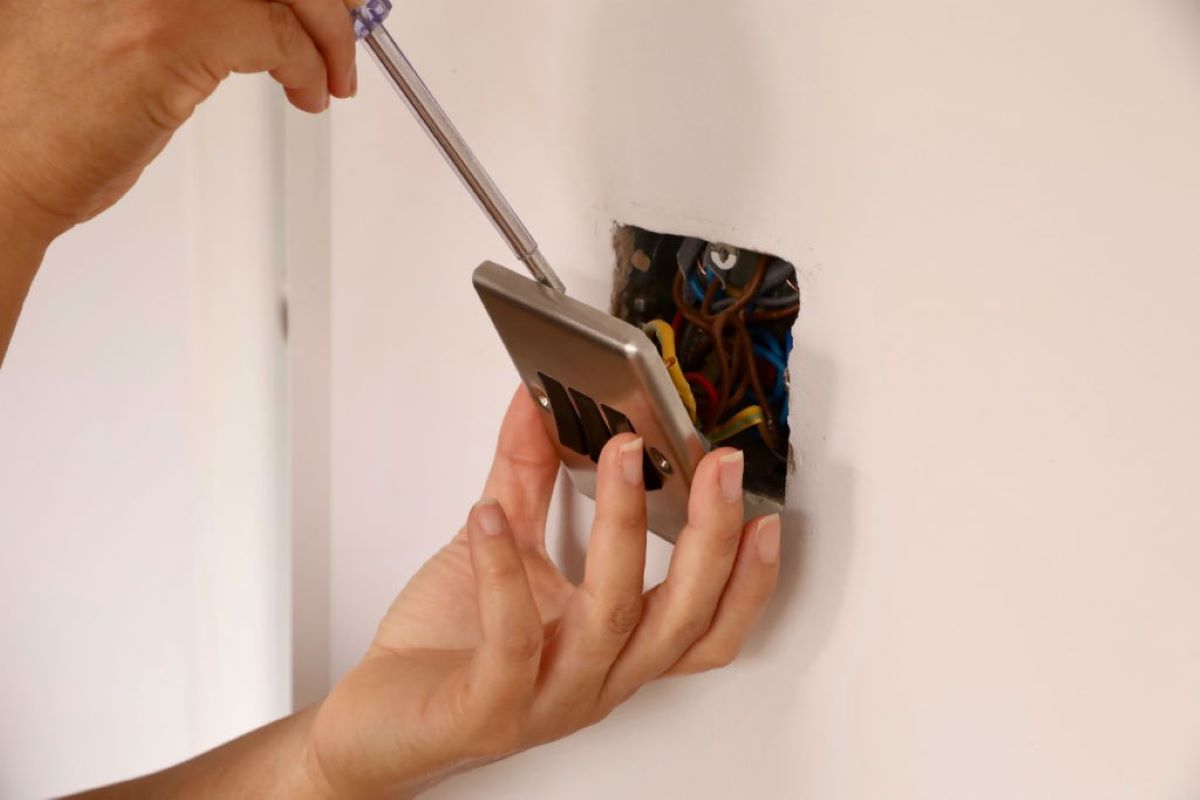
- Remove the outlet cover: Unscrew the screws securing the outlet cover to the electrical box. Carefully remove the cover to expose the wiring inside.
- Inspect the wiring: Take a close look at the existing wiring inside the outlet box. Ensure that the wires are in good condition, securely connected, and free from any damage. If you notice any issues or damage, consult a professional electrician to assess and repair the wiring.
- Release the wiring: Loosen the screws holding the wires in place. Carefully disconnect the existing wires from the outlet by unscrewing the terminal screws. Take note of how the wires are connected to reference later when connecting the new extension cord.
- Choose the appropriate wiring method: Depending on the type of outlet you are installing, you may need to use either the screw terminal or the back wiring method. Follow the instructions provided with your specific outlet to determine the correct wiring method to use.
- Prepare the outlet: If your outlet requires additional preparation, such as removing knockout tabs or cutting wire entry holes, refer to the manufacturer’s instructions. Carefully follow the guidelines to ensure proper installation.
By properly preparing the outlet, you ensure a clean and secure connection for the extension cord. It is essential to handle the wires with care and follow the manufacturer’s instructions for your specific outlet to ensure a safe and reliable wiring setup.
Now that the outlet is prepared, we can move on to the next step: connecting the wires. Stay tuned for the next section, where we will guide you through the process step-by-step.
When wiring an extension cord to an outlet, make sure to match the wire gauge of the extension cord to the amperage of the outlet to avoid overheating and potential fire hazards.
Step 4: Connecting the Wires
Now that the extension cord and outlet are prepared, it’s time to connect the wires. Follow these steps to properly connect the wires:
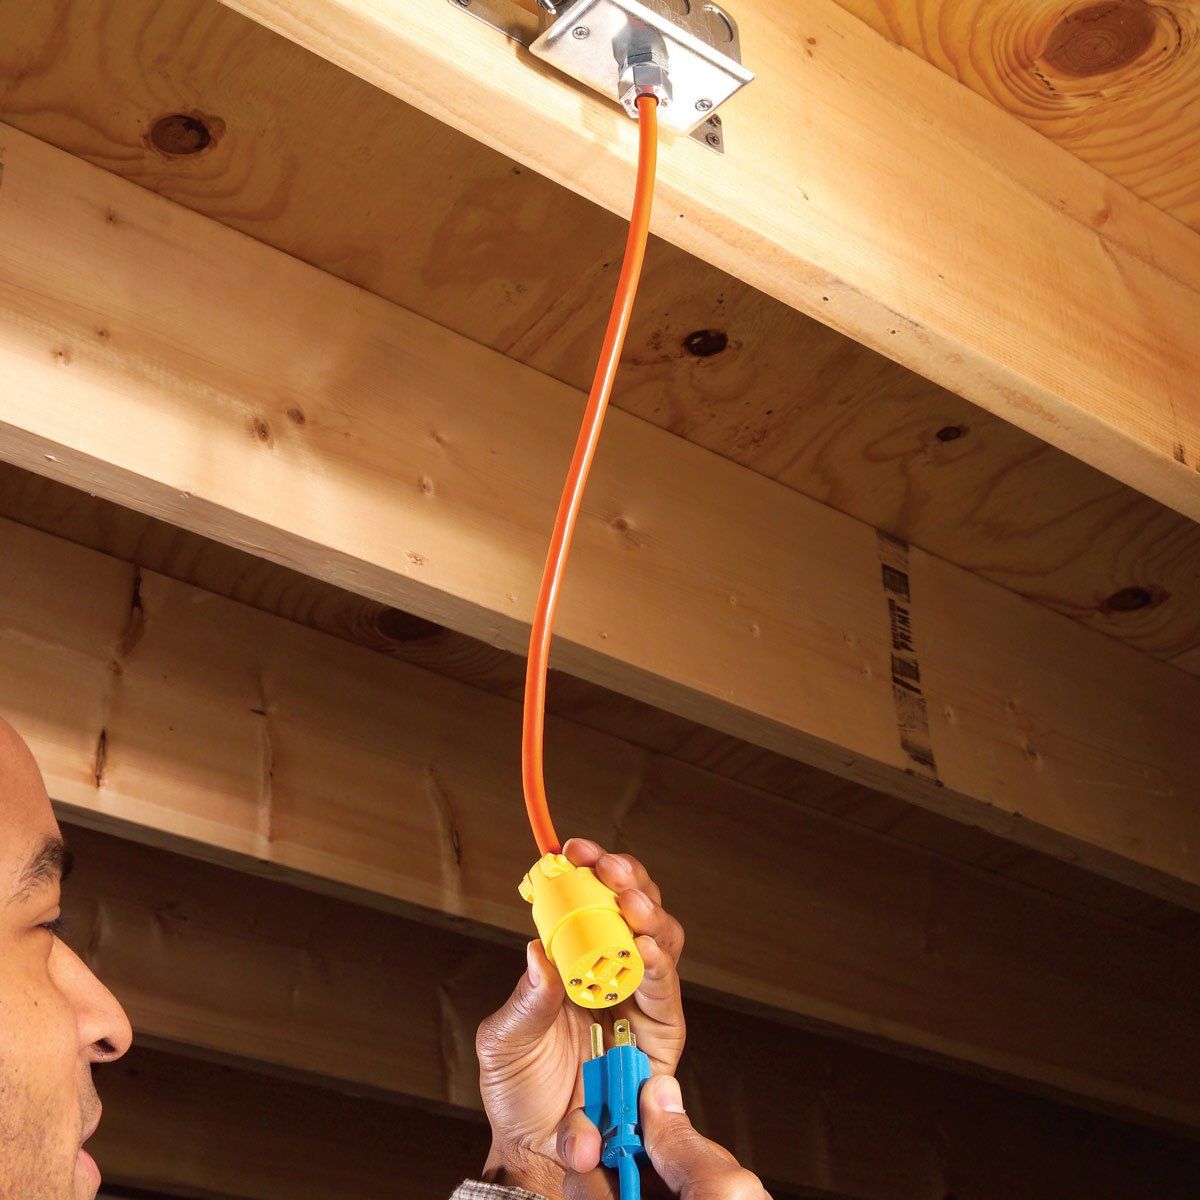
- Identify the wires: Take a moment to identify the wires on both the extension cord and the outlet. The extension cord typically has three wires: a black wire (hot), a white wire (neutral), and a green or bare copper wire (ground). The outlet will have corresponding terminals labeled for each wire.
- Connect the hot wires: Begin by connecting the black wire from the extension cord to the brass or gold terminal on the outlet. Loosen the terminal screw, insert the wire into the terminal hole, and tighten the screw securely.
- Connect the neutral wires: Next, connect the white wire from the extension cord to the silver terminal on the outlet. Follow the same process of loosening the terminal screw, inserting the wire, and tightening the screw securely.
- Connect the ground wires: If present, connect the green or bare copper wire from the extension cord to the green or bare copper terminal on the outlet. Loosen the terminal screw, insert the wire, and tighten the screw securely.
- Double-check the connections: After connecting all the wires, double-check the connections to ensure they are secure. Gently tug on each wire to ensure they are tightly held in place.
It is important to pay attention to the correct placement of the wires to ensure proper electrical connections. The hot wire (black) carries the current, the neutral wire (white) completes the circuit, and the ground wire (green or bare copper) provides additional safety.
Remember to follow any specific instructions provided with your outlet to ensure proper installation. If you are unsure about the wiring connections or need further guidance, consult a professional electrician to assist you.
Now that the wires are connected, we can move on to the next step: securing the connections. Stay tuned for the next section, where we will guide you through the process step-by-step.
Read more: What Size Wire For Welder Extension Cord
Step 5: Securing the Connections
After successfully connecting the wires, it is important to secure the connections to ensure they remain safe and intact. Follow these steps to properly secure the wire connections:
- Trim excess wires: If there is excess wire sticking out from the terminal screws, use wire cutters to trim it. Leaving long strands of wire may increase the risk of accidental contact or short circuits.
- Wrap electrical tape: To provide additional insulation and protection, wrap electrical tape around each individual wire connection. Start about half an inch below the terminal screw and continue wrapping until you reach about half an inch above the connection. Make sure the tape is tight and fully covers the exposed wire and terminal area.
- Secure ground wire: If you have a ground wire (green or bare copper), secure it to the metal grounding screw on the outlet. Loosen the screw, wrap the wire around it, and tighten the screw securely. Ensure that the ground wire is properly attached and cannot come loose.
- Check for loose screws: Double-check all terminal screws to ensure they are securely tightened. Loose screws can cause poor electrical connections and potentially lead to overheating or sparking.
Securing the wire connections is essential to prevent accidental disconnections, minimize the risk of electrical hazards, and maintain the integrity of the electrical system. Taking the time to properly secure the connections adds an extra layer of safety and reliability to your extension cord setup.
Now that the connections are secured, we can move on to the final step: testing the extension cord. Stay tuned for the next section, where we will guide you through the testing process.
Step 6: Testing the Extension Cord
Testing the extension cord is a crucial step to ensure that it is properly wired and safe to use. Follow these steps to test the extension cord before putting it into regular use:
- Reinstate the power: Prior to testing, turn the power back on by flipping the circuit breaker switch to the “on” position.
- Inspect the cord: Check the entire length of the extension cord for any visible signs of damage, such as frayed wires or exposed insulation. If you notice any issues, repair or replace the extension cord before proceeding with the testing.
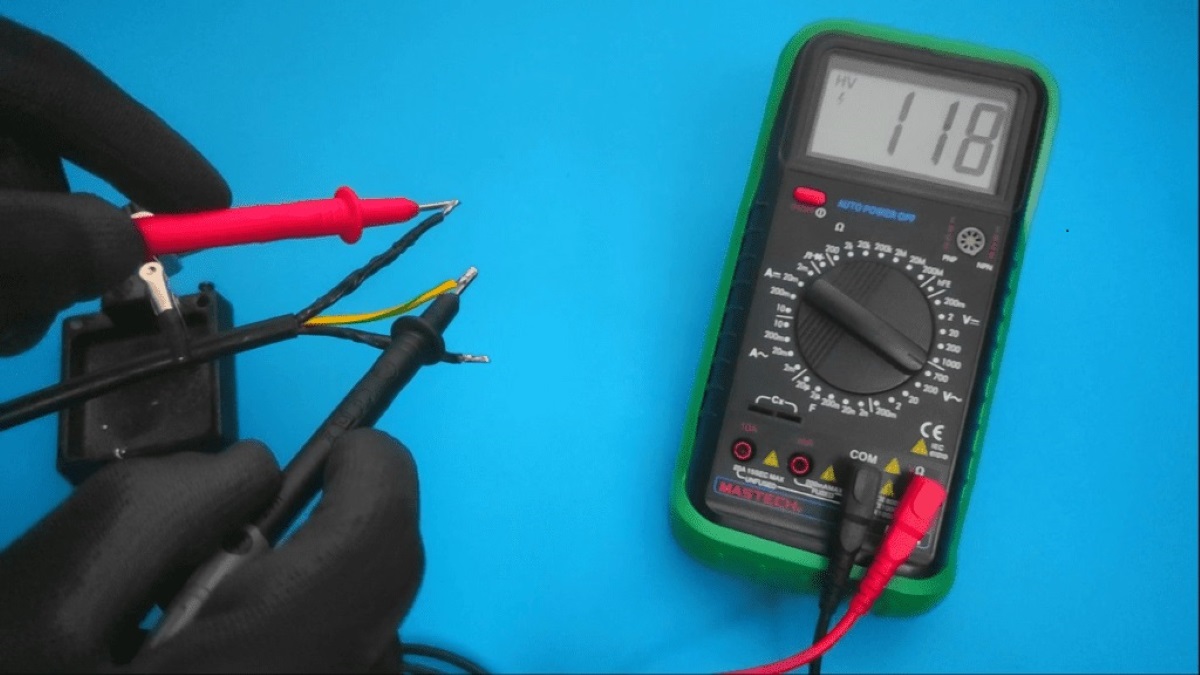
- Use a voltage tester: Hold the voltage tester against the terminals of the outlet to verify that there is power flowing through the extension cord. The voltage tester should indicate the presence of electricity.
- Plug in a device: Plug in a small device, such as a lamp or phone charger, into the outlet at the end of the extension cord. Turn on the device to ensure that it receives power and functions as expected.
- Check for proper grounding (if applicable): If your extension cord has a ground wire, use a ground fault circuit interrupter (GFCI) tester to verify proper grounding. Follow the instructions provided with the tester to perform the test.
- Monitor for any issues: During the testing process, closely monitor the extension cord, outlet, and device for any signs of overheating, sparking, or abnormal behavior. If you notice any problems, immediately discontinue use and investigate the issue further.
It is important to perform these tests to ensure that the extension cord is working correctly and meets safety standards. Keep in mind that periodic testing and visual inspections are recommended to maintain the safety and reliability of the extension cord over time.
With the successful completion of the testing process, you can feel confident that your extension cord is properly wired and ready for use. However, always remain vigilant and promptly address any issues or concerns that may arise during future usage.
Congratulations! You have now successfully wired an extension cord to an outlet. By following these steps and adhering to safety precautions, you can enjoy the convenience and functionality of your newly created extension cord.
Remember, if you are ever unsure about any aspect of the wiring process or feel uncomfortable working with electricity, it is best to consult a professional electrician for assistance. Safety should always be the top priority when working with electrical systems.
Thank you for following this guide, and we hope it has been helpful in your DIY electrical project. Stay safe and enjoy the convenience of your wired extension cord!
Conclusion
Wiring an extension cord to an outlet is a useful skill that allows you to extend the reach of your electrical devices and power them from a distance. By following the step-by-step guide outlined in this article and adhering to the necessary safety precautions, you can successfully wire an extension cord and ensure a safe and reliable electrical setup.
Throughout this process, we emphasized the importance of safety. Before beginning any electrical work, always turn off the power and take the necessary precautions to protect yourself and others. Inspect all components, use proper insulation, avoid overloading circuits, and secure connections to minimize the risk of electrical hazards.
Gathering the necessary tools and materials is crucial for a smooth wiring process. Choose high-quality materials suitable for electrical applications and ensure you have the proper tools for the task at hand. This will help you work efficiently and effectively, ultimately leading to a successful outcome.
Each step in the wiring process plays a critical role in creating a safe and functional extension cord. From preparing the extension cord and outlet to connecting and securing the wires, following the instructions carefully and double-checking your work is essential for a reliable electrical connection.
Testing the extension cord is the final step to confirm that everything is functioning correctly. By using a voltage tester, plugging in a device, and checking for proper grounding, you can ensure the extension cord is wired properly and ready for use.
Remember, it is always important to prioritize safety and consult a professional electrician if you are unsure about any aspect of the wiring process. Safety should always be the top priority when working with electricity, and it is better to seek expert help when needed.
Now that you have successfully wired an extension cord to an outlet, you can enjoy the convenience and flexibility it provides. Use it responsibly, regularly inspect for any signs of wear or damage, and replace it as needed to maintain a safe electrical environment.
Thank you for following this comprehensive guide. We hope it has been informative and helpful in your DIY electrical project. Stay safe and enjoy the practicality of your newly wired extension cord!
Ready to take your DIY electrical skills further? If mastering extension cords was a breeze, you'll definitely want to check out our guide on running overhead electrical wires to your garage. It’s packed with practical steps and safety tips that ensure smooth installation. Whether you’re looking to power up a workshop or simply enhance garage lighting, this guide has got you covered, ensuring your project is safe and successful.
Frequently Asked Questions about How To Wire An Extension Cord To An Outlet
Was this page helpful?
At Storables.com, we guarantee accurate and reliable information. Our content, validated by Expert Board Contributors, is crafted following stringent Editorial Policies. We're committed to providing you with well-researched, expert-backed insights for all your informational needs.


0 thoughts on “How To Wire An Extension Cord To An Outlet”