Home>Home Maintenance>How To Wire An Air Conditioner
Home Maintenance
How To Wire An Air Conditioner
Modified: March 7, 2024
Learn how to wire an air conditioner with this detailed guide on home maintenance. Ensure your cooling system is installed safely and efficiently.
(Many of the links in this article redirect to a specific reviewed product. Your purchase of these products through affiliate links helps to generate commission for Storables.com, at no extra cost. Learn more)
Introduction
When it comes to home maintenance, being able to wire an air conditioner can be a valuable skill. Whether you’re replacing an old unit or installing a new one, understanding how to properly wire an air conditioner is crucial for ensuring optimal performance and safety.
Wiring an air conditioner involves connecting the electrical components of the unit, including the compressor, fan motor, and thermostat, to ensure they work together seamlessly. While this may sound intimidating, with the right knowledge and tools, you can confidently wire your air conditioner without the need for professional assistance.
In this guide, we will walk you through the step-by-step process of wiring an air conditioner. We will cover all the necessary safety precautions, tools and materials you’ll need, as well as detailed instructions to help you wire your air conditioner correctly. Whether you’re a beginner or a seasoned DIY enthusiast, this guide will provide you with the essential information to successfully wire an air conditioner.
Before we dive into the details, it’s important to note that working with electricity can be dangerous. Always prioritize safety when performing any electrical work. If you are uncomfortable or unsure about any step in the process, it is highly recommended to consult a professional electrician.
Now, let’s get started with the safety precautions you need to take before beginning the wiring process.
Key Takeaways:
- Safety first! Always turn off the power, use protective gear, and double-check connections when wiring an air conditioner. Prioritize safety to prevent accidents and ensure a smooth installation process.
- Proper preparation is key. Gather the right tools and materials, carefully connect the wires to the air conditioner and thermostat, and test the unit to enjoy a cool and comfortable home environment.
Read more: How To Winterize An Air Conditioner
Safety Precautions
Wiring an air conditioner involves working with electricity, which can be hazardous if proper precautions are not taken. Before you begin the wiring process, make sure to follow these important safety guidelines:
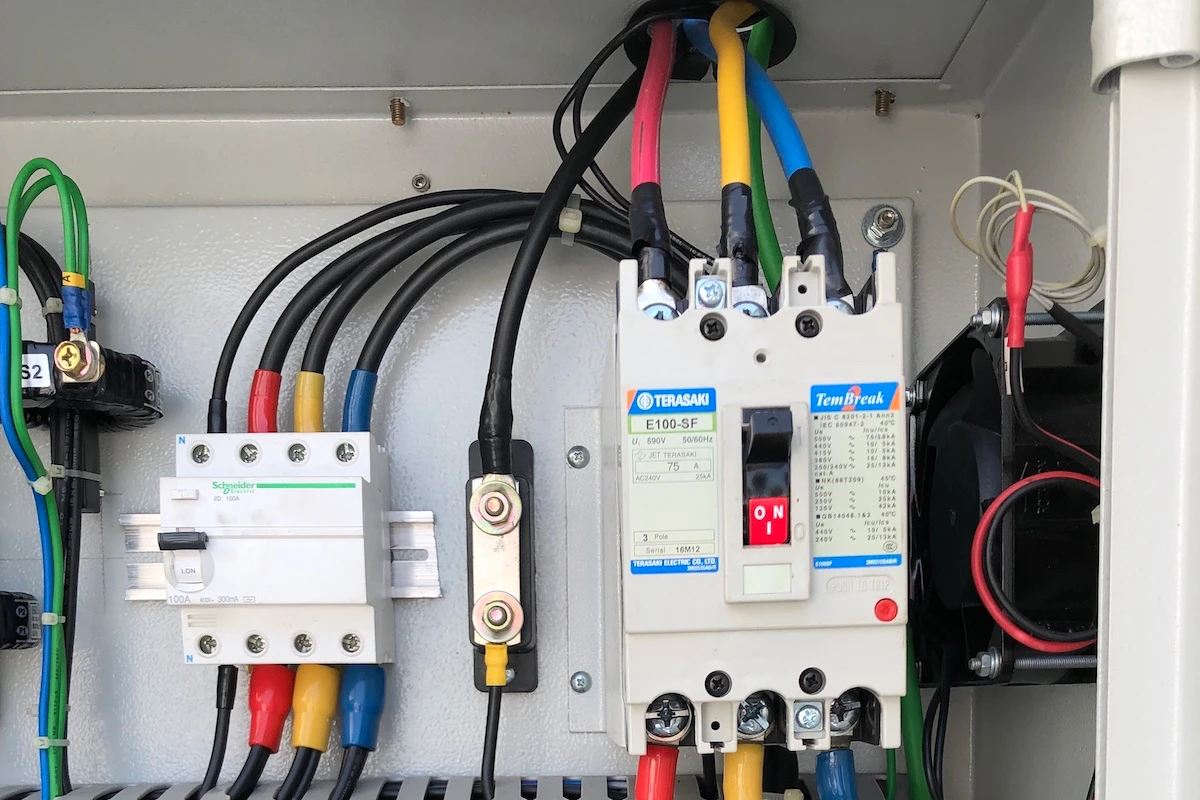
- Turn off the power: Before starting any electrical work, ensure that the power to the air conditioning unit is completely turned off. This can be done by shutting off the circuit breaker at the main electrical panel and verifying that there is no power running to the unit.
- Use appropriate protective gear: Protect yourself from potential electrical shocks by wearing safety goggles, gloves, and non-conductive footwear. This will help minimize the risk of injury while handling electrical components.
- Work in a well-ventilated area: Ensure that the area where you are wiring the air conditioner is well-ventilated to prevent the accumulation of fumes or gases. If necessary, use a fan or open windows to improve air circulation.
- Inspect the wiring and components: Before proceeding with the wiring process, carefully inspect all the wires and components of the air conditioning unit. Look for any signs of damage, frayed wires, or loose connections. If you notice any issues, replace or repair the damaged parts before proceeding.
- Keep children and pets away: Make sure to keep children and pets away from the work area to prevent any accidents or injuries. Electrical work should be done in a controlled and safe environment.
- Double-check connections: Before restoring power to the air conditioner, double-check all the connections to ensure they are properly secured. Loose or incorrect connections can lead to malfunctions or even electrical fires.
- Seek professional help when needed: If you are uncertain about any aspect of the wiring process, it is recommended to seek the assistance of a licensed electrician. They have the expertise to handle complex electrical work and ensure it is done safely and correctly.
By adhering to these safety precautions, you can minimize the risks associated with wiring an air conditioner and create a safe working environment. Now that you understand the importance of safety, let’s take a look at the tools and materials you’ll need for the wiring process.
Tools and Materials Needed
Before you start wiring your air conditioner, it’s important to gather all the necessary tools and materials. Having everything prepared in advance will save you time and ensure a smooth and efficient installation process. Here are the essential tools and materials you’ll need:
Tools:
- Wire cutters
- Wire strippers
- Screwdriver set
- Pliers
- Voltage tester
- Drill (if necessary for mounting)
- Electrical tape
- Label maker or markers
Materials:
- Electrical cable (size and length according to manufacturer’s recommendations)
- Wire nuts
- Electrical conduit
- Mounting brackets (if required)
- Thermostat wiring (if replacing or installing a new thermostat)
Make sure that the electrical cable and wire nuts you choose are appropriate for the voltage and amperage requirements of your air conditioning unit. It’s important to consult the manufacturer’s specifications or seek professional advice to ensure that you select the correct materials.
Additionally, having a label maker or markers on hand will help you label the wires and connections, making future maintenance or troubleshooting easier. Proper labeling will save you time and eliminate any confusion when it comes to identifying the different wires.
Once you have gathered all the necessary tools and materials, you are ready to begin the wiring process. In the next steps, we will guide you through the process of turning off the power, locating the thermostat wiring, preparing the cable, connecting the wires to the air conditioner and the thermostat, checking the connections, and finally restoring power to test your air conditioner. Let’s get started!
Read more: How To Store Air Conditioner
Step 1: Turn off the Power
Before you begin wiring your air conditioner, it’s crucial to turn off the power to ensure your safety. Here’s how to do it:
- Locate the circuit breaker panel: The circuit breaker panel is usually located in a basement, utility room, or garage. It contains a series of switches or breakers that control the electrical circuits in your home.
- Identify the correct circuit: Look for the circuit breaker that controls power to your air conditioning unit. It should be labeled with “AC” or “Air Conditioner.” If there are no labels, you may need to identify the correct circuit by trial and error. It’s recommended to have someone assist you by flipping switches while you test for power at the air conditioner.
- Turn off the circuit breaker: Once you have identified the correct circuit, switch the breaker to the “Off” position. This will cut off power to the air conditioner and ensure that you can work safely without the risk of electrical shock.
- Verify power is off: Once you’ve turned off the circuit breaker, use a voltage tester to double-check that there is no power running to the air conditioner. Carefully touch the tester’s probe to the exposed wires or terminals. If the tester does not light up or indicate any voltage, it is safe to proceed. If the tester detects voltage, there may be another circuit or power source that needs to be turned off.
Turning off the power is a critical step to prevent any accidents or injuries while wiring your air conditioner. Always double-check that the power is completely cut off before proceeding to the next steps. Remember, if you are unsure or uncomfortable with any part of the process, it’s best to seek professional assistance.
Now that you’ve successfully turned off the power, we can move on to the next step: locating the thermostat wiring. Stay tuned!
Step 2: Locate the Thermostat Wiring
In order to wire your air conditioner correctly, you need to locate the thermostat wiring. The thermostat wiring connects the air conditioner to the thermostat, allowing you to control the temperature and settings. Here’s how to locate the thermostat wiring:
- Locate the thermostat: The thermostat is usually located on a prominent wall in a central area of your home. It is used to control the heating and cooling systems.
- Remove the thermostat cover: Depending on the type of thermostat you have, the cover may either snap off or be secured with screws. Carefully remove the cover to expose the wiring behind it.
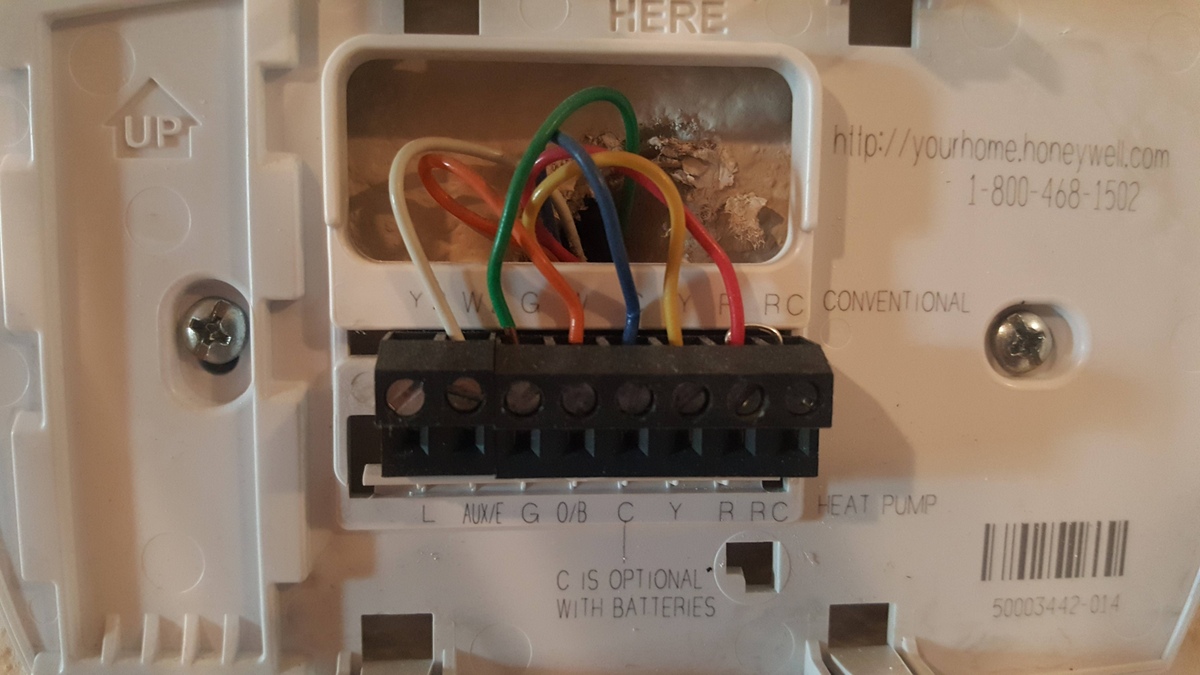
- Inspect the thermostat wiring: Take a look at the wiring inside the thermostat. You will typically find individual labeled wires: R (power), Y (cooling), G (fan), and W (heat). However, the labelings may vary depending on your specific thermostat model. Refer to the thermostat’s user manual for guidance.
- Note the wire colors and connections: Make a note of the wire colors and their corresponding connections on the thermostat. This information will come in handy when connecting the wires later on.
- Check for additional wires: In some cases, you may have additional wires, such as C (common), O/B (reversing valve), or W2 (second stage heating). Take note of these additional wires, as they may be required for certain air conditioning units or thermostat features.
It’s important to accurately identify the wires and their connections at the thermostat, as they will need to be matched with the corresponding wires on the air conditioner unit. Taking clear notes and labeling the wires can help prevent confusion during the wiring process.
Now that you have located the thermostat wiring, you’re ready to move on to the next step: preparing the cable. Stay tuned for step 3!
Step 3: Prepare the Cable
Before you can connect the wires to the air conditioner and thermostat, you need to prepare the cable that will carry the electrical connections. Here’s how to prepare the cable:
- Determine the cable length: Measure the distance between the air conditioner and the thermostat to determine the length of the electrical cable you will need. It’s important to have a cable that is long enough to reach both components with a little extra slack for flexibility.
- Cut the cable: Using wire cutters, carefully cut the electrical cable to the desired length. Ensure that the cut ends are straight and clean for proper connections.
- Strip the cable ends: Using wire strippers, strip about 1/2 inch of the outer insulation from the cut ends of the cable. This will expose the inner wires for connection.
- Identify the individual wires: Within the cable, you will find individual insulated wires. Identify the specific wires needed for your air conditioner and thermostat connections based on the notes you made during step 2. For example, if your thermostat has labels for R, Y, G, and W, ensure that you have the corresponding wires available.
- Strip the wire ends: Using wire strippers, carefully strip about 1/4 inch of the insulation from the ends of each individual wire. This will expose the bare copper conductors for proper connections.
- Label the wires (optional): To avoid any confusion or mix-ups during the wiring process, consider labeling each wire with its corresponding connection. You can use a label maker or markers to mark each wire with its respective label, such as R, Y, G, or W.
By properly preparing the cable, you will ensure that the electrical connections between the air conditioner and thermostat are secure and accurate. Take your time to strip the cable and individual wires carefully to avoid damaging the conductors.
Now that you have prepared the cable, we can move on to the next step: connecting the wires to the air conditioner. Stay tuned!
Step 4: Connect the Wires to the Air Conditioner
Now that you have prepared the cable and stripped the individual wire ends, it’s time to connect the wires to the air conditioner. Follow these steps to ensure a proper connection:
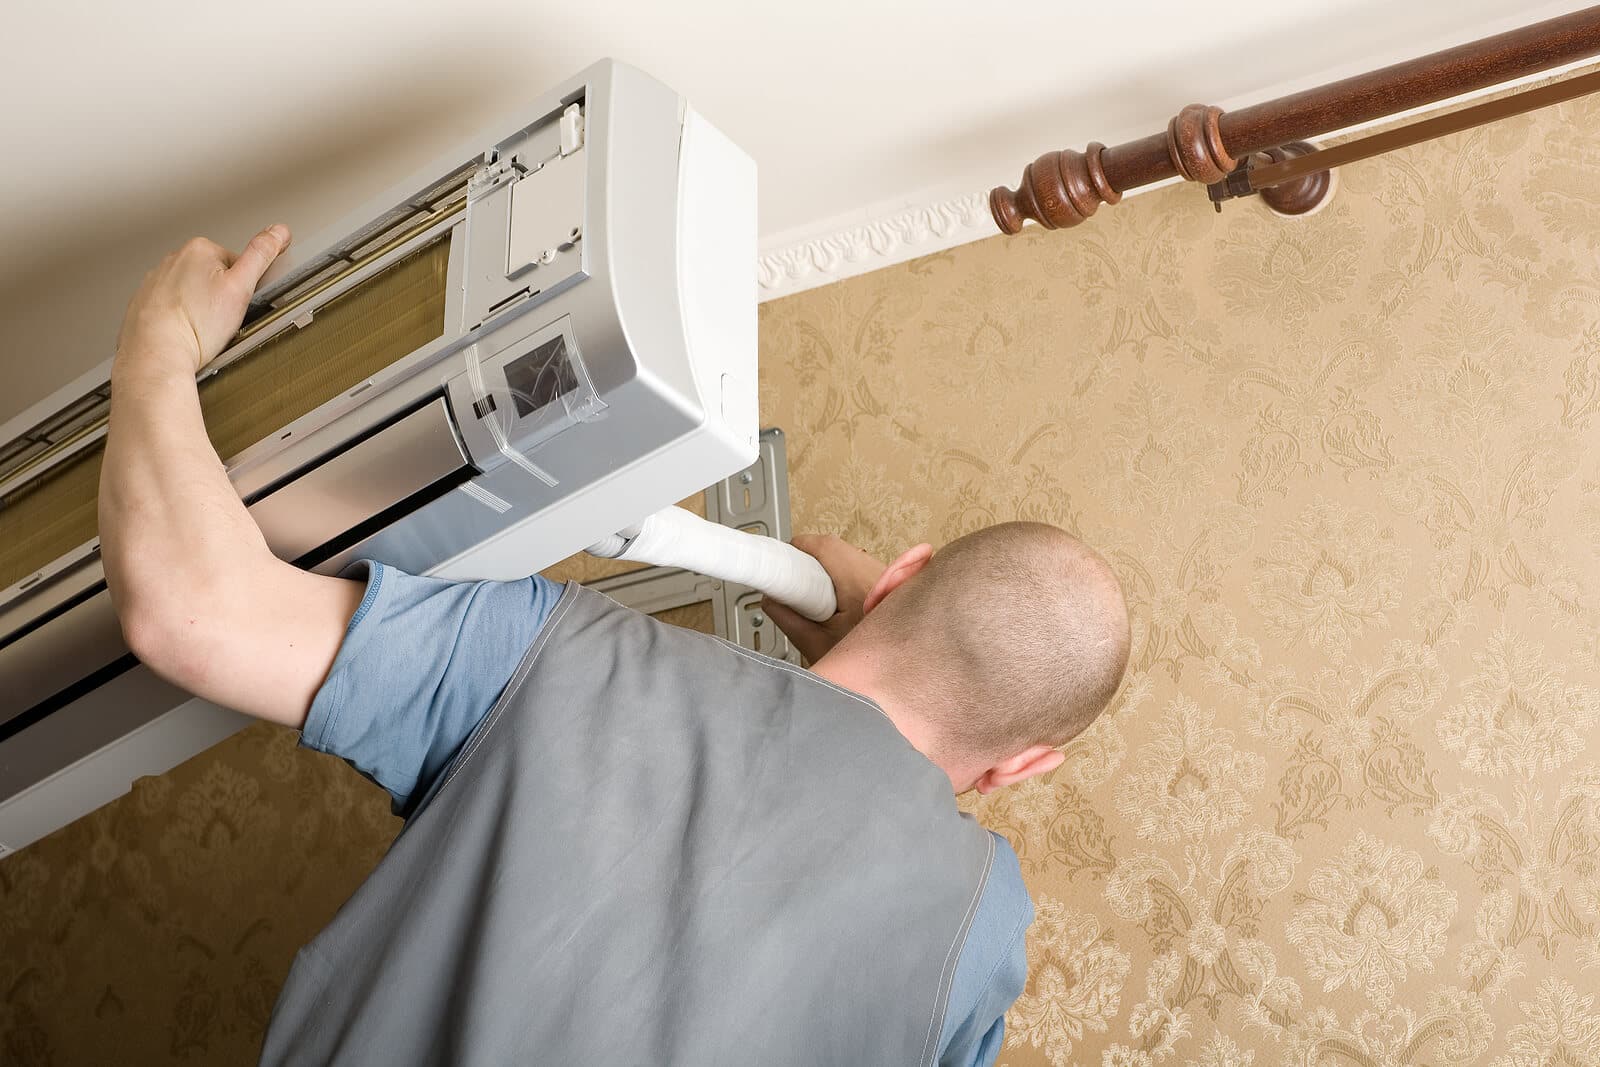
- Locate the air conditioner’s terminal block: The terminal block is where the electrical connections are made on the air conditioner unit. It is typically located on the side or back of the unit. Refer to the air conditioner’s user manual or wiring diagram for guidance on locating the terminal block.
- Identify the corresponding terminals: Each wire from the cable will need to be connected to the appropriate terminal on the air conditioner. Refer to the wiring diagram or color-coded labels on the terminal block to identify the correct terminals. Common terminal labels include R (power), Y (cooling), G (fan), and C (common).
- Make the connections: To connect the wires, follow these steps for each wire:
- Insert the stripped end of the wire into the corresponding terminal on the air conditioner.
- Tighten the terminal screw to secure the wire in place. Ensure that the connection is tight, but be careful not to overtighten and damage the wire.
- Repeat this process for each wire, making sure to connect each wire to the correct terminal based on your wiring diagram or labels.
- Secure the cable: Once all the wires are connected, use electrical tape or cable ties to secure the cable along the air conditioner unit or any nearby conduit. This will prevent the cable from being accidentally pulled or damaged in the future.
Double-check all the connections to ensure that they are secure and properly matched to the correct terminals. Loose or incorrect connections can cause malfunctions or even electrical hazards. Take your time and be meticulous in making the connections.
With the wires successfully connected to the air conditioner, we can now move on to the next step: connecting the wires to the thermostat. Stay tuned!
When wiring an air conditioner, always make sure to follow the manufacturer’s instructions and use the correct gauge of wire for the unit. It’s important to turn off the power before starting and to double check all connections for safety.
Read more: How To Use An Air Conditioner
Step 5: Connect the Wires to the Thermostat
Now that you have connected the wires to the air conditioner, it’s time to connect them to the thermostat. Follow these steps to ensure a proper connection:
- Locate the thermostat’s wiring terminal: The thermostat will have a wiring terminal strip where the wires are connected. Remove the thermostat cover if necessary to access the terminal strip.
- Identify the corresponding terminals: The terminals on the thermostat will be labeled based on the wiring diagram or color-coded labels. Look for terminals such as R (power), Y (cooling), G (fan), and W (heat) that correspond to the wires you prepared.
- Make the connections: To connect the wires to the thermostat, follow these steps for each wire:
- Insert the stripped end of the wire into the corresponding terminal on the thermostat.
- Use a small screwdriver to tighten the terminal screw and secure the wire in place. Ensure that the connection is tight, but be careful not to overtighten and damage the wire.
- Repeat this process for each wire, ensuring that the wires are connected to the correct terminals based on the wiring diagram or labels.
- Secure the wires: Once all the wires are connected, gently guide them along the wall or use cable ties to secure them. This will help keep the wires organized and prevent them from being accidentally pulled or damaged.
- Replace the thermostat cover: Once all the connections are made and secured, carefully replace the thermostat cover. Make sure it is properly aligned and snaps into place or is securely fastened with screws.
Double-check all the connections, ensuring that each wire is connected to the correct terminal on the thermostat. A loose or incorrect connection can lead to improper functioning of the air conditioner or thermostat.
Now that you have successfully connected the wires to the thermostat, we can move on to the next step: checking the connections to ensure they are secure. Stay tuned!
Step 6: Check the Connections
After connecting the wires to both the air conditioner and the thermostat, it’s essential to carefully inspect and check the connections to ensure they are secure. Follow these steps to verify the connections:
- Visually inspect the connections: Take a close look at each wire connection, both at the air conditioner terminal block and the thermostat terminal strip. Ensure that the wires are securely fastened and that there are no loose or exposed wires.
- Tug test: Gently tug on each wire to ensure they are firmly attached. They should not pull out or disconnect easily. If any wire feels loose, recheck the connection and tighten the terminal screw if necessary.
- Check for exposed wires: Look for any exposed bare wires that may be touching other wires or metal surfaces. If you find any exposed wires, cover them with electrical tape to prevent any potential shorts or electrical hazards.
- Verify wire identification: Double-check that the wires are correctly identified and connected to their respective terminals. Refer to your wiring diagram or labels to ensure accuracy.
- Test with a voltage meter (optional): If you have a voltage meter, you can use it to test the connections for voltage. However, exercise extreme caution when working with live wires and only attempt this step if you are comfortable and experienced with using a voltage meter.
By carefully checking the connections, you can ensure that they are secure and properly matched to their respective terminals. This step is crucial to prevent any electrical issues or malfunctions once you restore power to the air conditioner.
If you encounter any issues or concerns during the inspection, it’s best to consult a professional electrician for further assistance and guidance.
Now that the connections have been checked and verified, we can move on to the final step: restoring power and testing the air conditioner. Keep reading to learn how to complete the wiring process!
Step 7: Restore Power and Test the Air Conditioner
After ensuring that all connections are secure and properly checked, you’re now ready to restore power to the air conditioner and test its functionality. Follow these steps to complete the wiring process:
- Double-check the circuit breaker: Make sure the circuit breaker for the air conditioner that you turned off during Step 1 is still in the “Off” position.
- Restore power: Flip the circuit breaker for the air conditioner to the “On” position. This will restore power to the unit.
- Set the thermostat: Adjust the temperature settings on the thermostat to trigger the air conditioner to turn on. Monitor the air conditioner as it starts up to ensure that all components, such as the compressor and fan, are functioning correctly.
- Listen for any abnormal sounds: Pay attention to any strange or unusual sounds coming from the air conditioner. Unusual noises could indicate a problem with the wiring or other components.
- Observe the air conditioner’s performance: Allow the air conditioner to run for a few minutes and observe its performance. Check if cool air is coming out of the vents, if the fan is operating smoothly, and if the temperature adjusts accordingly based on the thermostat settings.
- Test all functions: Test all the available functions of the air conditioner, such as the different cooling modes, fan speed settings, and any other features specific to your unit. Ensure that each function operates correctly without any issues.
- Monitor for any issues: Keep an eye on the air conditioner over the next few days to ensure that it continues to operate smoothly and without any problems. If you notice any issues or abnormalities, it’s advisable to contact a professional for further assistance.
By restoring power and testing the air conditioner, you can confirm that the wiring is successful and that the unit is operating properly. If everything is working as expected, congratulations! You have successfully wired your air conditioner.
However, if you encounter any issues during the testing phase or are unsure about any aspect of the wiring process, it’s recommended to seek the help of a professional electrician to ensure a safe and accurate installation.
Remember, always prioritize your safety and exercise caution when working with electrical components. If you’re unsure or uncomfortable with any step of the process, consult a professional for assistance.
Now that you’ve completed the wiring process and tested your air conditioner, enjoy the cool and comfortable environment it provides!
Conclusion
Wiring an air conditioner may seem like a daunting task, but with the right knowledge and preparation, it can be accomplished successfully. By following the step-by-step process outlined in this guide, you can confidently wire your air conditioner and ensure optimal performance and safety.
We began by emphasizing the importance of safety precautions when working with electricity. Turning off the power, using protective gear, and seeking professional help when needed are crucial steps to safeguard yourself and others during the wiring process.
We then discussed the tools and materials you’ll need, including wire cutters, strippers, screwdrivers, and various electrical components. By gathering these items in advance, you’ll be well-equipped to complete the task efficiently.
Each step of the wiring process was carefully explained, from turning off the power and locating the thermostat wiring to preparing the cable, connecting the wires to the air conditioner and thermostat, checking the connections, and finally restoring power and testing the air conditioner.
Remember, when connecting the wires, it’s important to double-check the terminals, make secure connections, and label the wires for future reference. Taking the time to ensure proper connections will prevent any electrical issues down the line.
Throughout the process, we stressed the importance of safety and offered recommendations for seeking professional assistance if needed. It’s crucial to prioritize your well-being and consult an expert if you’re unsure about any aspect of the wiring process.
Now that you’ve successfully wired your air conditioner and tested its performance, you can enjoy the comfort and coolness it provides. Enjoy the benefits of a properly functioning air conditioner and relish in a comfortable home environment all year round.
By following this comprehensive guide and exercising caution, you’ve demonstrated your ability to wire an air conditioner and enhance your home maintenance skills. With this newfound knowledge, you have the confidence to tackle other home maintenance projects with ease.
Remember, electrical work requires expertise and adherence to safety measures. If you’re uncertain or uncomfortable with any step, it’s always wise to consult a professional electrician.
Thank you for taking the time to learn how to wire an air conditioner. We hope you found this guide informative and helpful. Stay cool and enjoy the comfort of your properly wired air conditioner!
Frequently Asked Questions about How To Wire An Air Conditioner
Was this page helpful?
At Storables.com, we guarantee accurate and reliable information. Our content, validated by Expert Board Contributors, is crafted following stringent Editorial Policies. We're committed to providing you with well-researched, expert-backed insights for all your informational needs.