Home>Home Security and Surveillance>How Do I Change My Linksys Router Wireless Security Settings

Home Security and Surveillance
How Do I Change My Linksys Router Wireless Security Settings
Modified: October 20, 2024
Learn how to change your Linksys router's wireless security settings and enhance your home security with our step-by-step guide on home security and surveillance.
(Many of the links in this article redirect to a specific reviewed product. Your purchase of these products through affiliate links helps to generate commission for Storables.com, at no extra cost. Learn more)
Introduction
Welcome to our comprehensive guide on how to change the wireless security settings on your Linksys router. In today’s interconnected world, securing your home network is paramount to protect your privacy and data. By customizing your wireless security settings, you can ensure that only authorized devices can connect to your network and prevent unauthorized access.
Linksys routers are known for their reliability and user-friendly interface, making it straightforward to navigate and modify the router’s settings. In this article, we will walk you through the step-by-step process of changing your wireless security settings, allowing you to safeguard your network against potential threats.
Before we proceed, it’s essential to mention that accessing and modifying your router’s settings requires administrative privileges. So, please ensure you have the necessary login credentials, typically the username and password, to access the router’s admin panel. In case you don’t have this information, you may need to contact your internet service provider or refer to the documentation provided with your router.
Now, let’s dive into the steps required to change your Linksys router’s wireless security settings and enhance the protection of your home network.
Key Takeaways:
- Takeaway 1:
Changing your Linksys router’s wireless security settings is like putting a lock on your Wi-Fi door. It keeps out unwanted guests and protects your privacy and data. - Takeaway 2:
To secure your Wi-Fi network, access the router’s admin panel, choose a strong security type like WPA2-Personal, and create a robust passphrase. Then, save and apply the changes for enhanced protection.
Step 1: Accessing the Router’s Admin Panel
The first step in changing your Linksys router’s wireless security settings is accessing the router’s admin panel. This web-based interface allows you to customize various settings of your router, including wireless security.
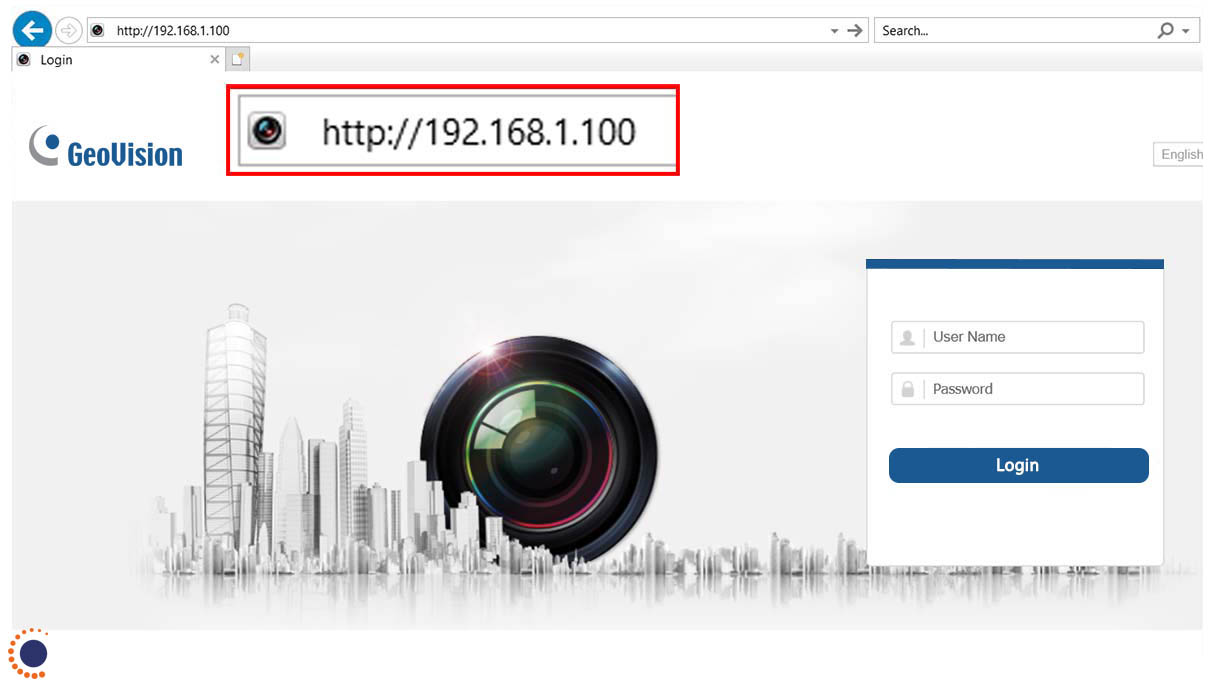
To access the admin panel, you need to open a web browser on a device connected to the same network as your Linksys router. It can be a computer, laptop, or even a smartphone. Once you have your web browser open, follow these steps:
- Type the default IP address of your Linksys router in the address bar of your web browser. The default IP address is usually ‘192.168.1.1’ or ‘192.168.0.1’. If you are unsure about your router’s IP address, you can find it in the documentation provided with your router or contact your internet service provider.
- Press the Enter key on your keyboard or click the Go button to proceed. This action will take you to the login page of the router’s admin panel.
- On the login page, you will need to enter the router’s username and password. By default, the username is often set to ‘admin’, and the password field is left blank. However, if you have previously changed these credentials, make sure to enter the updated information. If you are unsure about the login details, check the documentation or contact your internet service provider.
- After entering the correct login credentials, click the Login button or press Enter. This action will authenticate your access and take you to the main dashboard of the router’s admin panel.
Congratulations! You have successfully accessed your Linksys router’s admin panel. Now, you can proceed to the next step to navigate to the wireless security settings and modify them to enhance the security of your network.
Step 2: Navigating to the Wireless Security Settings
Once you have successfully logged into the router’s admin panel, the next step is to navigate to the wireless security settings. These settings allow you to configure the security parameters for your Wi-Fi network.
To find the wireless security settings, follow these steps:
- Look for the Wireless or Wi-Fi tab in the main menu of the router’s admin panel. The exact location of this tab may vary depending on the model of your Linksys router.
- Click on the Wireless or Wi-Fi tab to expand the menu and reveal additional options.
- Within the Wireless or Wi-Fi menu, search for the Security or Security Settings option. This is where you can access and customize your wireless security settings.
- Click on the Security or Security Settings option to access the wireless security configuration page.
By reaching this page, you have successfully navigated to the wireless security settings of your Linksys router. Now, you can proceed to the next step to select the security type that suits your needs.
Step 3: Selecting the Security Type
After reaching the wireless security configuration page in the router’s admin panel, the next step is to select the security type that best fits your requirements. Linksys routers offer several security options, each with varying levels of protection. It is important to choose a strong security type to ensure the safety of your network.
Follow these steps to select the security type:
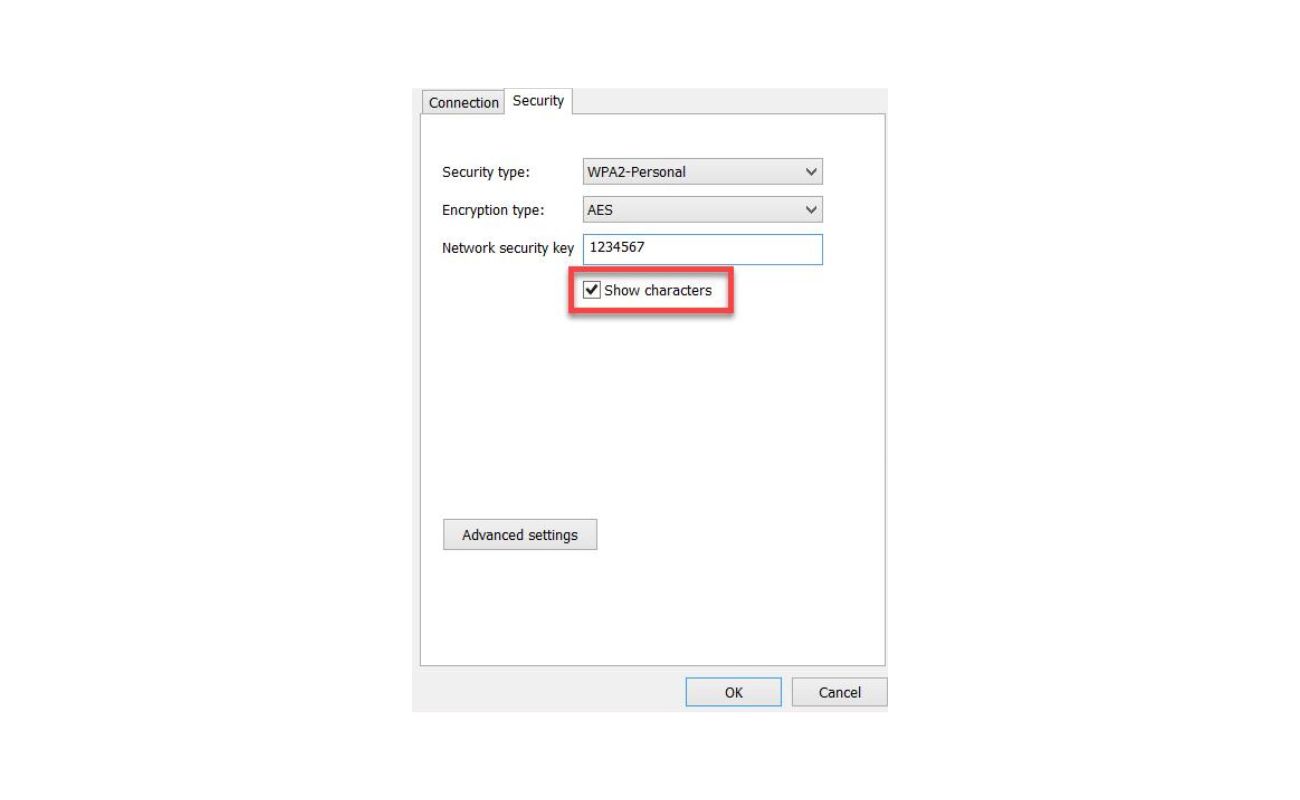
- On the wireless security configuration page, locate the Security Mode or Security Type option. The available options may include WEP, WPA/WPA2-Personal, WPA/WPA2-Enterprise, or others.
- Click on the Security Mode or Security Type field to open a drop-down menu with available options.
- Review the different security types and their descriptions to understand their strengths and weaknesses.
- Based on your needs and preferences, select the security type that aligns with your requirements. For optimal security, it is recommended to choose either WPA2-Personal or WPA3-Personal, as these are the most secure options currently available.
Once you have selected the desired security type, you can proceed to the next step to customize the wireless security key, which is essential for securing your Wi-Fi network.
To change your Linksys router’s wireless security settings, log into the router’s web interface, go to the Wireless tab, and select the Security section. From there, you can choose the type of security (WPA2 is recommended) and set a strong password.
Step 4: Customizing the Wireless Security Key
After selecting the appropriate security type for your Linksys router, the next step is to customize the wireless security key. The security key, also known as the passphrase or password, is a crucial element in securing your Wi-Fi network. It acts as a barrier to prevent unauthorized access to your network.
Here’s what you need to do to customize the wireless security key:
- Locate the field labeled ‘Passphrase’, ‘Security Key’, or ‘Password’ on the wireless security configuration page in the router’s admin panel.
- Click on the field to enter your desired wireless security key. It is recommended to use a combination of uppercase and lowercase letters, numbers, and special characters to create a strong and secure passphrase.
- Ensure that the wireless security key meets the recommended length requirements. For WPA2-Personal and WPA3-Personal security types, it is suggested to use a key with a minimum length of 8 characters. However, for enhanced security, it is advisable to use a longer and more complex passphrase.
- Take note of the wireless security key or passphrase you have set, as you will need it to connect to your Wi-Fi network in the future. It is a good practice to save it in a secure location.
By customizing the wireless security key, you have fortified the protection of your Wi-Fi network. But before you finish, don’t forget to save and apply the changes you have made.
Step 5: Saving and Applying the Changes
After customizing the wireless security key on your Linksys router, the final step is to save and apply the changes you have made. This ensures that the new security settings are implemented and actively protecting your Wi-Fi network.
To save and apply the changes, follow these simple steps:
- Look for the ‘Save’, ‘Apply’, or ‘Save Settings’ button on the wireless security configuration page in the router’s admin panel. This button is usually located at the bottom or top-right corner of the page.
- Click on the ‘Save’, ‘Apply’, or ‘Save Settings’ button to save the changes you have made to the wireless security settings. This action may take a few seconds to process.
- Once the changes are saved, the router will apply the new security settings, and your Wi-Fi network will be reconfigured to reflect the updates.
- It is essential to allow the router enough time to restart and apply the changes. This process can take a few minutes, during which your network may temporarily disconnect. Once the process is complete, your Wi-Fi network will be secured with the new settings.
After completing these steps, you have successfully changed the wireless security settings on your Linksys router. Now you can enjoy enhanced protection and peace of mind as you connect your devices to your secured Wi-Fi network.
Remember, it is always a good practice to periodically review and update your wireless security settings to ensure the ongoing safety of your network. By staying vigilant, you can stay one step ahead of potential threats and safeguard your home network.
With these simple steps, you have taken a significant step towards protecting your Wi-Fi network. Congratulations!
Conclusion
Securing your home network is of utmost importance in today’s digital age. By changing the wireless security settings on your Linksys router, you can take control of your network’s protection and prevent unauthorized access.
In this comprehensive guide, we have walked you through the step-by-step process of changing the wireless security settings on your Linksys router. We started by accessing the router’s admin panel and then navigating to the wireless security settings. We discussed the importance of selecting a strong security type and customizing the wireless security key to create a robust passphrase. Lastly, we emphasized the significance of saving and applying the changes to ensure the new security settings are implemented.
Remember to choose a security type that aligns with your needs and preferences, such as WPA2-Personal or WPA3-Personal, to maximize the protection of your Wi-Fi network. Additionally, don’t forget to periodically review and update your wireless security settings to stay ahead of potential threats.
By following these steps and taking the necessary precautions, you can enjoy a secure home network and protect your privacy and data from unauthorized access.
We hope this guide has provided you with the knowledge and confidence to change the wireless security settings on your Linksys router. Should you have any further questions or need assistance, don’t hesitate to reach out to the Linksys support team or consult the router’s documentation for additional guidance.
Thank you for prioritizing your network security and taking the necessary steps to safeguard your Wi-Fi network. Happy secure surfing!
Frequently Asked Questions about How Do I Change My Linksys Router Wireless Security Settings
Was this page helpful?
At Storables.com, we guarantee accurate and reliable information. Our content, validated by Expert Board Contributors, is crafted following stringent Editorial Policies. We're committed to providing you with well-researched, expert-backed insights for all your informational needs.
