Home>Home Security and Surveillance>How Do I Change My Router’s Wireless Security Settings?
Home Security and Surveillance
How Do I Change My Router’s Wireless Security Settings?
Modified: September 1, 2024
Learn how to change your router's wireless security settings to enhance your home security and surveillance. Secure your network with these step-by-step instructions.
(Many of the links in this article redirect to a specific reviewed product. Your purchase of these products through affiliate links helps to generate commission for Storables.com, at no extra cost. Learn more)
Introduction
Welcome to the world of home security and surveillance! In today’s rapidly evolving digital age, protecting your home and loved ones has become more important than ever before. With advancements in technology, home security solutions have become increasingly sophisticated, providing homeowners with a myriad of options to ensure their peace of mind.
One crucial aspect of home security is the implementation of robust wireless security settings for your router. Your router acts as the gateway to your home network, allowing various devices to connect and access the internet. Ensuring that your wireless network is secure is vital to protect against unauthorized access, data breaches, and potential cyber threats.
In this article, we will guide you through the process of changing your router’s wireless security settings. We’ll show you how to navigate the configuration page, select the appropriate security type, and set up a new security key or passphrase to enhance the protection of your home network.
So, if you’re ready to take control of your router’s wireless security settings and fortify your home network, let’s dive in!
Key Takeaways:
- Protect your home network by changing your router’s wireless security settings. Follow simple steps to choose strong security types like WPA2 and create unique passphrases for maximum protection against cyber threats.
- After updating your wireless security settings, test them to ensure they work. Regularly monitor and update your settings to stay ahead of evolving threats and enjoy a secure home network for you and your family.
Step 1: Accessing the Router’s Configuration Page
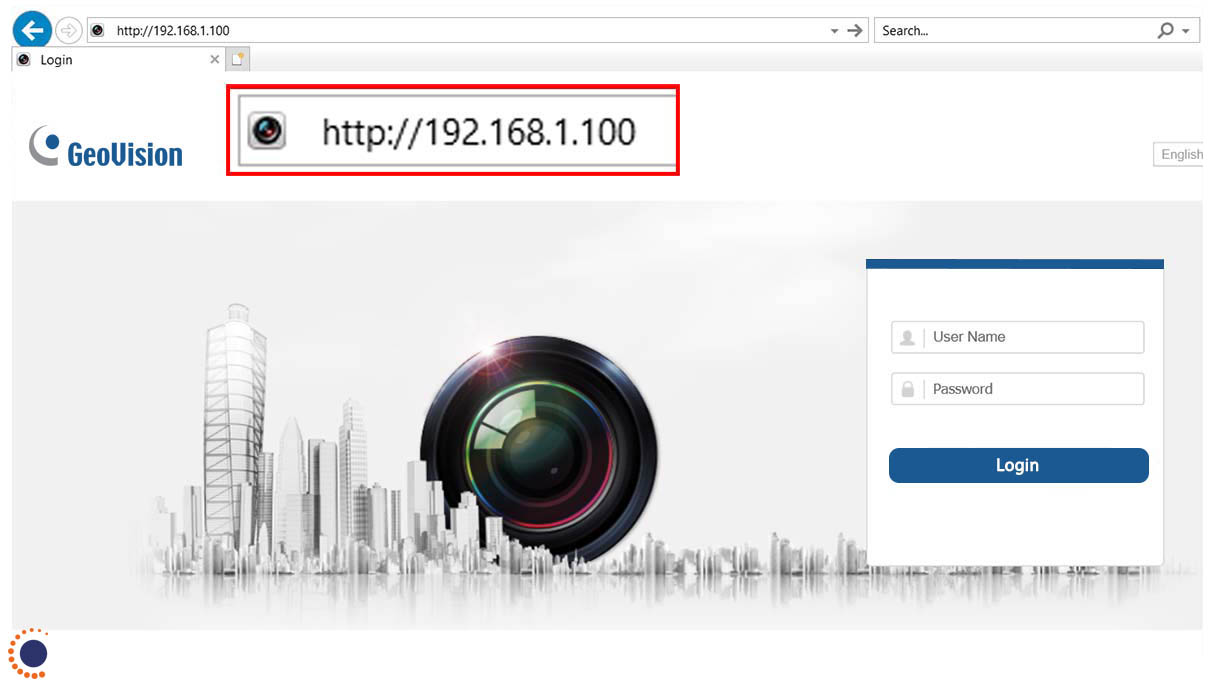
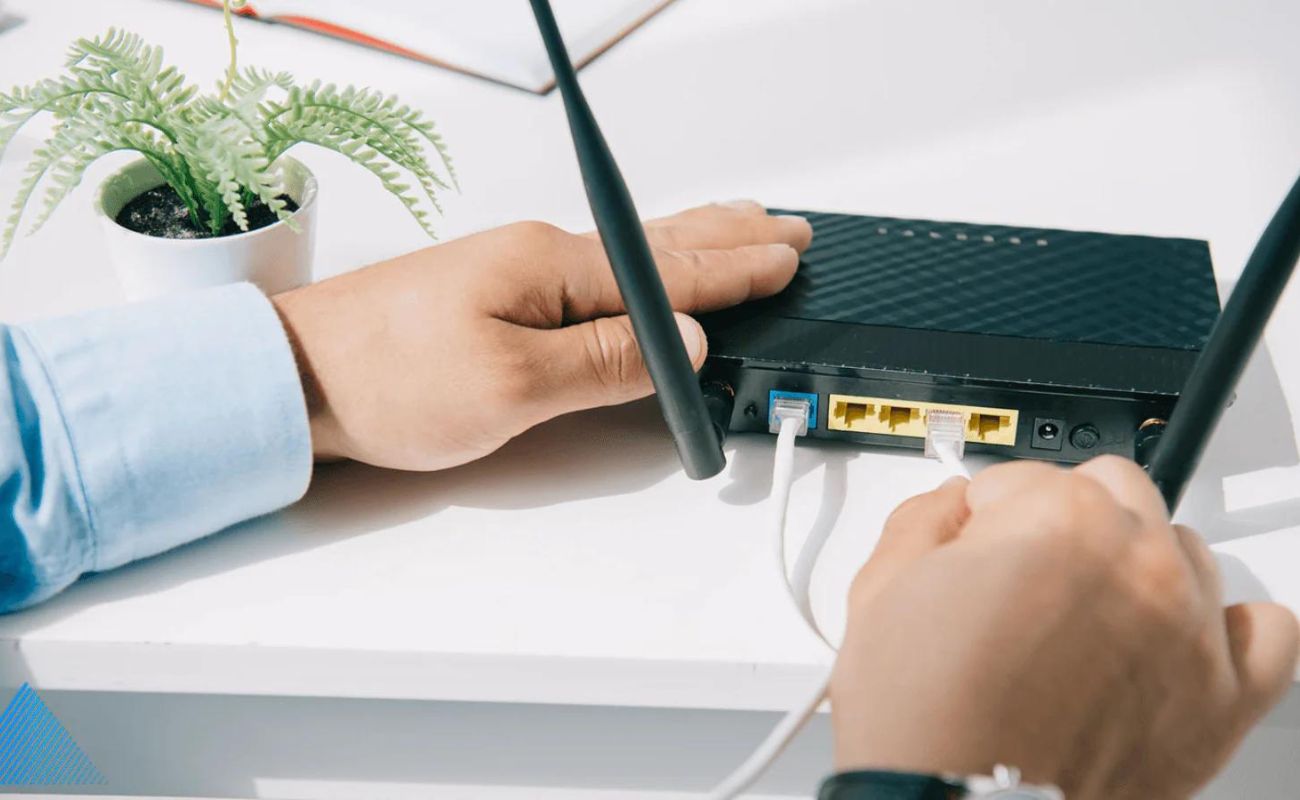
The first step towards changing your router’s wireless security settings is accessing the router’s configuration page. To do this, you need to connect your computer or mobile device to the router either through an Ethernet cable or via a Wi-Fi connection.
Here’s a step-by-step guide on how to access the router’s configuration page:
- Launch a web browser on your computer or mobile device.
- In the address bar, type the default IP address of your router. Common default IP addresses are 192.168.0.1 or 192.168.1.1. Refer to your router’s user manual or check the manufacturer’s website for the correct IP address.
- Press Enter or Return on your keyboard to go to the router’s login page. You may be prompted to enter a username and password. Again, refer to the user manual or manufacturer’s website to find the default login credentials. If you have previously changed the username and password, use the updated login information.
- After successfully logging into the router, you will be redirected to the router’s configuration interface.
Congratulations! You have successfully accessed your router’s configuration page. Now let’s move on to the next step, which is logging into the router.
Step 2: Logging into the Router
Once you have accessed the router’s configuration page, the next step is to log into the router using the appropriate credentials. Logging in allows you to access the router’s settings and make changes to the wireless security options.
Here’s how you can log into your router:
- On the router’s configuration page, locate the section for entering the login credentials. This is usually found on the main dashboard or under a specific section such as “Administration” or “Settings.”
- Enter the username and password for your router. If you haven’t changed the default login credentials, you can find them in the router’s user manual or on the manufacturer’s website. It’s important to note that the username and password are case-sensitive.
- Click on the “Login” or “Submit” button to proceed. If the login information is correct, you will be granted access to the router’s settings.
Most routers allow you to change the default login credentials for added security. If you have already set a custom username and password, make sure to enter those credentials instead of the default ones.
It’s essential to keep your router’s login information secure and only share it with trusted individuals. With the proper login credentials, you can proceed to the next step, which involves navigating to the wireless security settings.
Step 3: Navigating to the Wireless Security Settings
After successfully logging into your router, it’s time to navigate to the wireless security settings. This section will allow you to choose the appropriate security type and configure the necessary parameters to secure your wireless network.
Follow these steps to find the wireless security settings:
- Look for the “Wireless” or “Wi-Fi” tab/menu option in the router’s configuration interface. This is usually located on the main dashboard or in a menu labeled “Network Settings.”
- Click on the “Wireless” or “Wi-Fi” tab to access the wireless settings.
- Within the wireless settings, you should find a submenu or section specifically for “Wireless Security” or “Security Settings.” Click on this option to proceed.
At this point, you will have reached the wireless security settings page, where you can make changes to enhance the security of your wireless network. The available options may vary depending on your router model, but common security types include WEP, WPA, and WPA2.
Now that you have reached the wireless security settings, let’s move on to the next step, where you select the appropriate security type for your network.
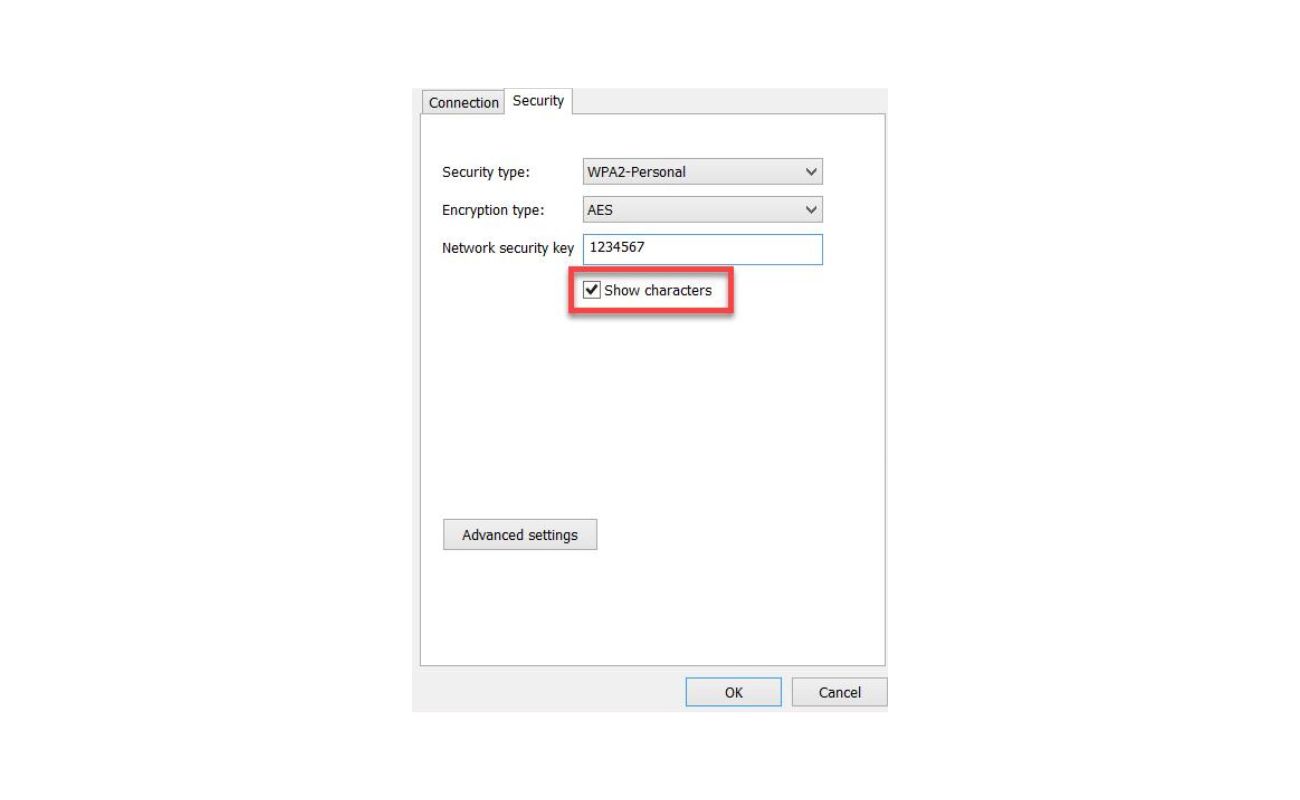
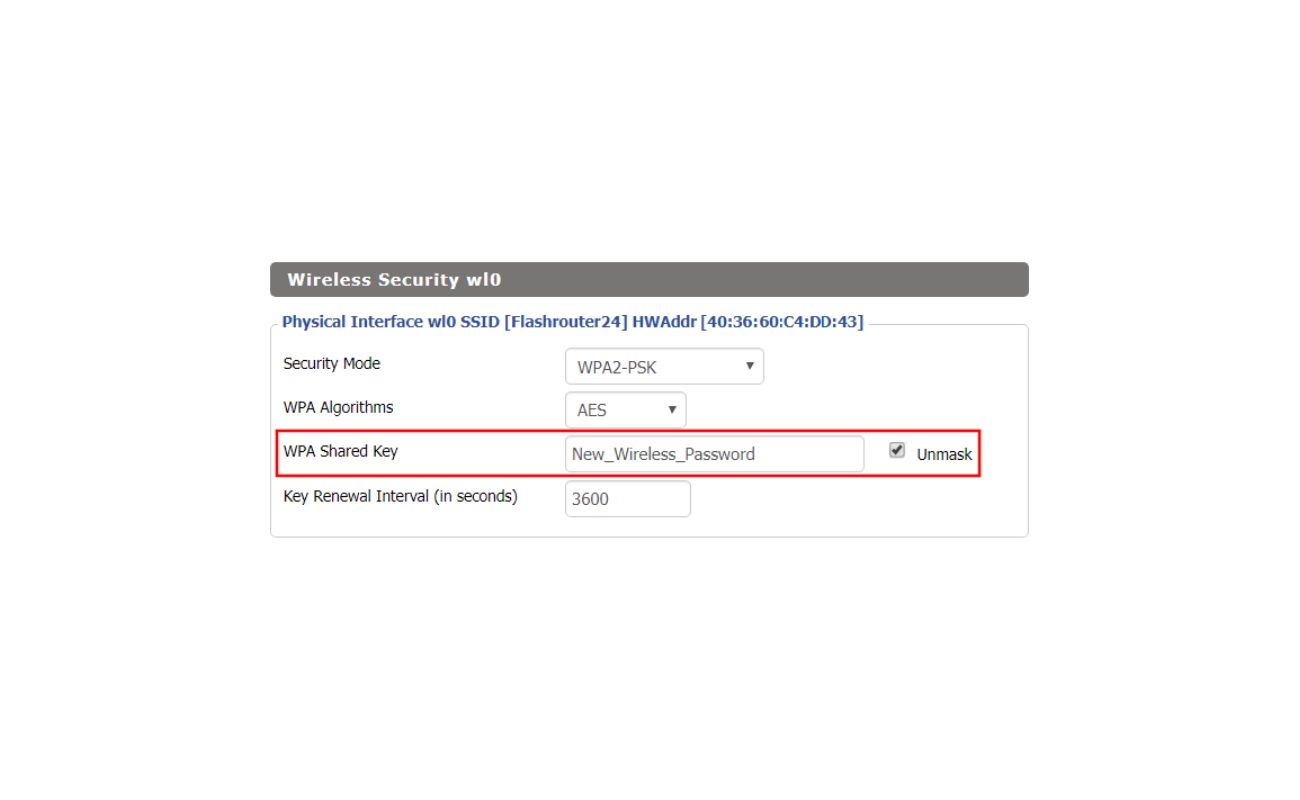
Step 4: Selecting the Desired Security Type
Choosing the right security type for your wireless network is vital to ensure the protection of your data and prevent unauthorized access. Different security types offer varying levels of encryption and authentication, so it’s crucial to select the one that best suits your needs.
Here’s how you can select the desired security type:
- On the wireless security settings page, look for the “Security Type” or “Encryption” dropdown menu. Click on it to view the available options.
- Select the desired security type from the dropdown menu. The most commonly used and recommended security type is WPA2 (Wi-Fi Protected Access 2), as it provides robust encryption and offers better security compared to older standards like WEP (Wired Equivalent Privacy) or WPA (Wi-Fi Protected Access).
- If your router supports it, select WPA2-PSK (Pre-Shared Key) as the authentication method. This option allows you to enter a passphrase or password to secure your wireless network.
By selecting the appropriate security type, you are taking a significant step towards safeguarding your wireless network. Once you have chosen the security type, it’s time to proceed to the next step and configure the new security key or passphrase.
To change your router’s wireless security settings, log into your router’s admin page using a web browser. Navigate to the wireless security settings and choose a strong encryption method such as WPA2. Create a strong password and save your changes.
Step 5: Entering the New Security Key/Passphrase
Now that you have selected the desired security type for your wireless network, it’s time to enter a new security key or passphrase. This key will be used to authenticate devices that want to connect to your network and ensure secure communication.
Here’s how you can enter the new security key/passphrase:
- On the wireless security settings page, locate the field or input box labeled “Security Key,” “Passphrase,” or “Password.” Click on it to activate the text entry mode.
- Enter a strong, unique security key or passphrase. It should be a combination of upper and lowercase letters, numbers, and special characters. Aim for a length of at least 12 characters to ensure maximum security.
- Make a note of the security key or passphrase and keep it in a safe place. This is the password that you will need to provide to connect any new devices to your wireless network.
Remember that the security key or passphrase is case-sensitive, so ensure that you enter it correctly. Additionally, it’s a good practice to change your wireless network’s security key/passphrase periodically for added security.
With the new security key/passphrase entered, you’re almost there! In the next step, we will apply the changes to finalize the setup of the new wireless security settings.
Step 6: Applying the Changes
After entering the new security key or passphrase, it’s time to apply the changes and finalize the setup of your new wireless security settings. Applying the changes will ensure that the updated security settings are implemented and active on your wireless network.
Follow these steps to apply the changes:
- Look for a button or link that says “Apply,” “Save,” or “Submit” on the wireless security settings page. This is usually located at the bottom or top of the page.
- Click on the “Apply,” “Save,” or “Submit” button to save the new security settings. This will trigger the router to apply the changes and update the wireless network configuration.
- Wait for the router to apply the changes. This process may take a few seconds or a couple of minutes, depending on the router’s speed and processing capability.
- Once the changes have been successfully applied, you will typically see a confirmation message or notice that your new wireless security settings have been saved.
By applying the changes, you have successfully updated the wireless security settings of your router. The new security key or passphrase is now in effect, providing improved security for your wireless network.
Now that the changes have been applied, it’s a good practice to test the new wireless security settings to ensure that they are working as intended. Let’s move on to the final step, where we test the new wireless security settings.
Step 7: Testing the New Wireless Security Settings
Now that you have applied the new wireless security settings, it’s important to test them to ensure that the changes have taken effect and that your network is adequately protected. Testing the new security settings will help identify any potential issues or vulnerabilities before they can be exploited.
Here’s how you can test the new wireless security settings:
- Disconnect any devices that are currently connected to your wireless network.
- On a device that is not currently connected to your network, search for available wireless networks in the vicinity.
- Locate and select your wireless network from the list of available networks.
- When prompted, enter the new security key or passphrase that you set up in the previous steps.
- If the device successfully connects to your network and gains access to the internet, it indicates that the new security settings are working correctly.
- If the device is unable to connect or encounters an error, double-check the security key or passphrase you entered and ensure it matches the one you set up.
By testing the new wireless security settings, you can have peace of mind knowing that your network is secure against unauthorized access. If any issues or concerns arise during the testing phase, refer back to the router’s configuration page and review the settings to ensure they are configured correctly.
Congratulations! You have successfully changed your router’s wireless security settings and taken a significant step towards securing your home network. By following these steps, you have enhanced the protection of your network and minimized the risk of potential security breaches.
It’s important to regularly monitor and update your wireless security settings to stay ahead of evolving threats. Keep an eye out for any firmware updates for your router, as these updates often include security patches and feature enhancements.
Thank you for taking the time to learn how to change your router’s wireless security settings. Stay safe and enjoy the peace of mind that comes with a secure home network!
If you have any questions or need further assistance, don’t hesitate to reach out to the router manufacturer’s customer support or consult the router’s user manual for detailed instructions specific to your device.
Conclusion
Securing your home network is of utmost importance in today’s digital landscape. By changing your router’s wireless security settings, you have taken a crucial step towards safeguarding your network and protecting your personal information from potential cyber threats.
In this article, we walked through the process of changing your router’s wireless security settings. We covered everything from accessing the router’s configuration page to selecting the desired security type, entering a new security key/passphrase, applying the changes, and testing the new settings.
Remember, it is essential to choose a strong security type, such as WPA2, and create a unique and complex security key or passphrase. Regularly updating your wireless security settings and keeping your router’s firmware up to date will further enhance the security of your home network.
By following these steps, you have significantly reduced the risk of unauthorized access to your network, protecting your personal data, and ensuring a safe online experience for you and your family.
If you have any further questions or need assistance, do not hesitate to reach out to the manufacturer’s support team or consult your router’s user manual for more detailed instructions.
Thank you for taking the time to prioritize the security of your home network. Stay vigilant, stay secure!
Frequently Asked Questions about How Do I Change My Router's Wireless Security Settings?
Was this page helpful?
At Storables.com, we guarantee accurate and reliable information. Our content, validated by Expert Board Contributors, is crafted following stringent Editorial Policies. We're committed to providing you with well-researched, expert-backed insights for all your informational needs.