Home>Home Security and Surveillance>How To Record Security Camera To PC

Home Security and Surveillance
How To Record Security Camera To PC
Modified: October 21, 2024
Learn how to record security camera footage directly to your PC with our step-by-step guide. Enhance your home security and surveillance system with this easy-to-follow tutorial.
(Many of the links in this article redirect to a specific reviewed product. Your purchase of these products through affiliate links helps to generate commission for Storables.com, at no extra cost. Learn more)
Introduction
Home security is an essential aspect of modern living. With the advancements in technology, protecting your home and loved ones has become easier and more efficient. One of the key components of any home security setup is a surveillance system equipped with cameras that can monitor and record activities in and around your property.
Traditionally, surveillance systems required dedicated recording devices, which added to the cost and complexity of installation. However, with the widespread use of personal computers, it is now possible to leverage your existing PC to record security camera footage.
In this article, we will guide you through the process of recording security camera footage to your PC. By following these steps, you can take advantage of the convenience and cost savings offered by using your computer as a recording device. So, let’s dive in and learn how to turn your PC into a powerful surveillance tool!
Key Takeaways:
- Turn your PC into a surveillance powerhouse by connecting your security camera and using the right software. It’s a cost-effective way to keep an eye on your home and loved ones.
- After setting up, regularly review and manage your recorded footage. Create clips of important moments, back up your recordings, and keep an eye on storage space for optimal performance.
Read more: How To Record Using Security Camera
Step 1: Understand the Requirements
Before you begin recording security camera footage to your PC, it’s important to ensure that you have the necessary requirements in place. Here’s what you’ll need:
- Security Camera: You will need a security camera or a surveillance system that is compatible with PC connectivity. Make sure you have a camera or a set of cameras that can connect to your computer for video input.
- PC with Sufficient Storage: Your PC should have enough storage capacity to accommodate the recorded footage. Consider the number of cameras you have and the desired recording duration to estimate the required storage space.
- Video Capture Card or USB Adapter: Depending on the camera’s output interface, you may need a video capture card or a USB adapter to connect the camera to your PC. Ensure that you have the necessary hardware to establish the connection.
- Software: You’ll need surveillance software that is compatible with your camera and PC. Choose software that offers the features you require, such as motion detection, remote access, and file management.
- Internet Access (optional): If you want to access the recorded footage remotely or receive real-time notifications, you will need an internet connection for your PC.
It’s crucial to understand these requirements before proceeding to the next steps. Having the necessary equipment and software will ensure a smooth setup process and optimal performance. Now that you are familiar with the requirements, let’s move on to the next step: choosing the right software for recording your security camera footage to your PC.
Step 2: Choose the Right Software
When it comes to recording security camera footage to your PC, selecting the right software is crucial. The software you choose should be compatible with your camera and offer the features you need for efficient surveillance. Here are some factors to consider when choosing the right software:
- Compatibility: Ensure that the software you choose is compatible with your security camera model and the operating system of your PC. Check the software’s specifications and requirements to verify compatibility.
- Features: Look for essential features, such as motion detection, scheduling, remote access, and alert notifications. These features can enhance the functionality and convenience of your surveillance system.
- User-Friendliness: Opt for software that is user-friendly and offers a intuitive interface. This will make it easier for you to navigate and customize settings, saving you time and frustration.
- Live View and Playback: The software should provide both live view and playback options, allowing you to monitor real-time footage and review recorded videos whenever needed.
- Cloud Storage: Consider whether the software offers cloud storage options for your recordings. Cloud storage can provide an additional layer of security and flexibility when it comes to accessing and managing your footage.
- Support and Updates: Look for software that offers reliable customer support and regular software updates. This ensures that you have access to assistance if you encounter any issues and that your software stays up-to-date with the latest security patches and features.
Research and compare different software options based on these factors to find the one that best suits your needs. Read reviews and seek recommendations from other users to gather insights and make an informed decision. Once you have selected the right software, you can proceed to the next step: connecting your security camera to your PC.
Step 3: Connect the Security Camera to the PC
Now that you have chosen the right software, it’s time to connect your security camera to your PC. Depending on the camera’s output interface, you may need a video capture card or a USB adapter to establish the connection. Follow these steps to connect the camera to your PC:
- Identify the Output Interface: Determine the type of output interface your camera has. It can be analog, IP, or USB. This information is crucial for selecting the appropriate hardware needed to connect the camera to your PC.
- Install the Video Capture Card or USB Adapter: If your camera has an analog output, you will need a video capture card that supports analog input. Install the video capture card into an available PCIe slot in your PC. If your camera uses a USB output, plug the USB adapter into an available USB port on your PC.
- Connect the Camera to the Video Capture Card or USB Adapter: Using the appropriate cables, connect the camera to the video capture card or USB adapter. Ensure that the connections are secure and tight to avoid any signal disruption.
- Power On the Camera: Plug in the camera’s power supply and turn it on. Verify that the camera is receiving power and functioning properly.
- Configure Camera Settings: Depending on your camera model, you may need to adjust certain settings like resolution, frame rate, and video format. Consult the camera’s user manual or manufacturer’s instructions to configure these settings properly.
- Launch the Surveillance Software: Open the surveillance software on your PC. The software should detect the connected camera and display the live feed from the camera.
By following these steps, you can successfully connect your security camera to your PC. Ensure that you have established a stable and reliable connection before proceeding to the next step.
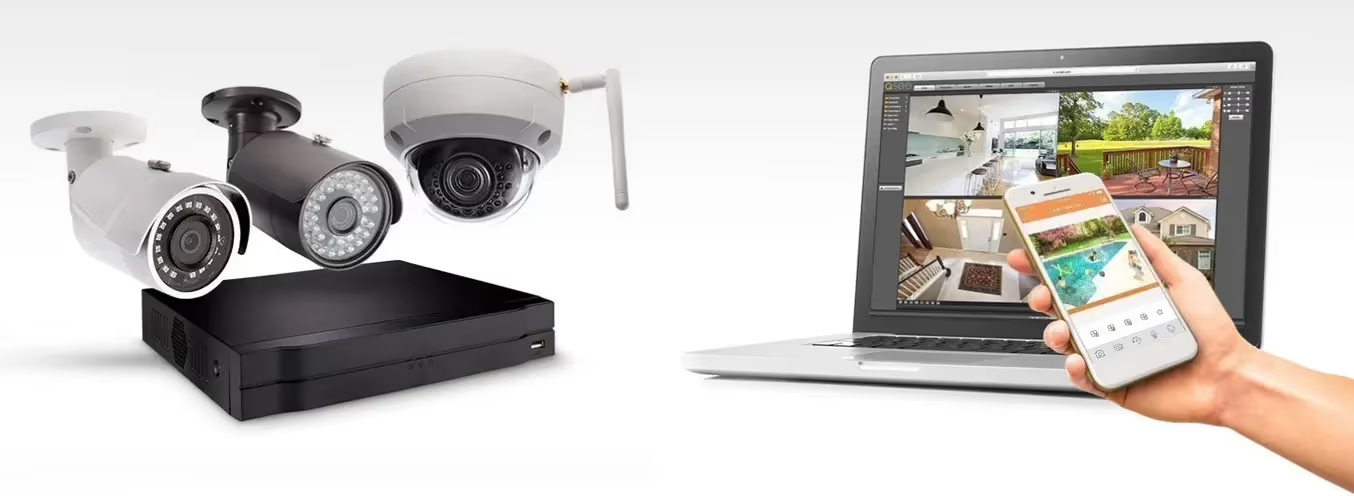
You can record security camera footage to your PC by using a digital video recorder (DVR) or a network video recorder (NVR) that is compatible with your security camera system. Simply connect the DVR or NVR to your PC and follow the manufacturer’s instructions for recording and accessing the footage.
Step 4: Configure the Software Settings
After connecting your security camera to your PC, it’s time to configure the software settings. This step is important as it allows you to customize the surveillance software according to your preferences and security needs. Follow these steps to configure the software settings:
- Access the Software Configuration: Open the surveillance software on your PC. Look for a settings or configuration menu within the software interface. It is usually located in the toolbar or menu options.
- Camera Setup: Navigate to the camera setup section in the software settings. Here, you will find options to add and configure your connected camera. Follow the on-screen instructions to add your camera and select the appropriate camera model or type.
- Recording Settings: Adjust the recording settings based on your preferences and requirements. You can set the recording mode, such as continuous recording or motion detection recording. Select the desired resolution and frame rate for the recorded footage.
- Storage Settings: Configure the storage settings to determine where the recorded footage will be saved on your PC. You can choose a specific folder or directory to store the recordings. Additionally, you may want to set a limit to the storage space used by the software to avoid it occupying excessive storage on your PC.
- Notifications and Alerts: If the software supports it, configure notifications and alerts settings. This allows you to receive notifications on your PC or mobile device when motion is detected or when specific events occur. Set up email notifications or push notifications depending on your preference.
- Remote Access: If you want to access the recorded footage remotely, configure the remote access settings. This may involve setting up port forwarding on your router and configuring the software for remote viewing over the internet.
- Save and Apply: Once you have configured the desired settings, save the changes and apply them. The software will now use the specified settings for recording and managing the security camera footage on your PC.
Take your time to explore the software settings and familiarize yourself with the options available. Customizing the settings according to your preferences will ensure that the software functions optimally and meets your specific surveillance needs.
Step 5: Start Recording
Now that you have connected your security camera to your PC and configured the software settings, it’s time to start recording. With everything set up properly, you can begin capturing and storing the footage from your security camera. Follow these steps to start recording:
- Launch the Surveillance Software: Open the surveillance software on your PC. Ensure that the camera you connected is properly recognized and displayed in the software interface.
- Check the Recording Mode: Verify that the recording mode is set according to your preference. If you want continuous recording, ensure that it’s enabled. If you prefer motion detection recording, make sure it’s activated. Adjust the recording mode if needed.
- Initiate the Recording: Click on the “Record” or “Start” button within the software interface to initiate the recording process. The software will start capturing and saving the footage from the connected security camera onto your PC.
- Monitor the Recording: Keep an eye on the surveillance software interface to monitor the live feed and ensure that the recording is in progress. You should be able to see the timestamp indicating the duration of the recorded footage.
- Review and Manage Footage: Once the recording is complete, you can review and manage the recorded footage within the surveillance software. Depending on the software features, you can play back the recordings, create clips, search for specific events, and export or delete the footage as needed.
Remember to regularly check the recording status to ensure that the software is functioning properly and capturing the necessary footage. Adjust the settings as needed based on your surveillance requirements. With the recording process underway, you can now have peace of mind knowing that your security camera is storing the captured footage on your PC.
Step 6: Review and Manage Recorded Footage
After recording security camera footage to your PC, it’s important to properly review and manage the recorded videos. This step allows you to efficiently organize and access the footage whenever needed. Follow these steps to review and manage your recorded footage:
- Access the Recorded Footage: Open the surveillance software on your PC and navigate to the section where the recorded footage is stored. This can usually be found in the media library or playback menu.
- Playback and Search: Utilize the playback features of the software to view the recorded footage. You can search for specific timeframes or events by using the timeline or the search function. Take note of any specific incidents or moments you want to keep for future reference.
- Create Clips: If the software allows, create clips of notable moments or incidents from the recorded footage. This will make it easier to access and share specific sections of the video when needed.
- Export and Backup: Consider exporting and backing up the recorded footage to external storage devices or cloud storage. This ensures that you have an additional copy of the footage in case your PC experiences any issues or data loss. Follow the software’s export or backup options to safely store the recordings.
- Manage Storage: Regularly monitor the storage space on your PC to prevent it from getting filled up with recorded footage. If the software offers automatic deletion or overwrite options, configure them to manage the storage space efficiently. Alternatively, manually delete older footage that is no longer needed.
- Set Alerts and Notifications: Configure alerts and notifications within the software to receive updates about specific events or movements detected by the security camera. This can help you stay informed and quickly review relevant footage.
- Review and Update Settings: Periodically review your software settings to ensure they align with your requirements. Adjust the recording mode, storage settings, or any other preferences as needed.
By following these steps, you can effectively review and manage the recorded footage from your security camera. Regularly check the software for any software updates or feature enhancements provided by the manufacturer. Additionally, consider creating a backup plan for long-term storage of important recordings, ensuring the security of your surveillance footage.
Conclusion
Recording security camera footage to your PC is an efficient and cost-effective way to enhance your home surveillance system. By following the steps outlined in this article, you can easily set up your PC to capture, store, and manage the recordings from your security cameras. Let’s recap the key points:
First, understanding the requirements is crucial. Ensure that you have a compatible security camera, sufficient storage on your PC, a video capture card or USB adapter, suitable software, and optional internet access.
Secondly, choosing the right software is essential for smooth and effective recording. Consider factors such as compatibility, features, user-friendliness, live view and playback options, cloud storage, and support and updates.
Next, connect your security camera to your PC using the appropriate hardware. Install a video capture card or USB adapter, connect the camera, and configure the camera settings according to the manufacturer’s instructions.
After the physical setup, it’s time to configure the software settings. Access the software’s configuration menu, set up your cameras, adjust recording, storage, and notification settings, and enable remote access if desired.
With the setup complete, you can start recording by launching the surveillance software, ensuring the desired recording mode is selected, and initiating the recording process. Monitor the software interface to ensure proper recording, and review and manage the recorded footage as needed.
Finally, regularly review and manage the recorded footage, create clips of important moments, export and backup the recordings, and keep an eye on storage space and software settings for optimal performance.
By following these steps, you can harness the power of your PC to enhance your home security system and have more control over your surveillance. Remember to regularly update your software and hardware to stay up-to-date with the latest security features and advancements.
Now that you are equipped with the knowledge to record security camera footage to your PC, it’s time to take action and enjoy the benefits of a comprehensive home surveillance system. Stay vigilant, protect what matters most, and have peace of mind knowing that you can easily access and manage your recorded footage when needed.
Frequently Asked Questions about How To Record Security Camera To PC
Was this page helpful?
At Storables.com, we guarantee accurate and reliable information. Our content, validated by Expert Board Contributors, is crafted following stringent Editorial Policies. We're committed to providing you with well-researched, expert-backed insights for all your informational needs.
