Home>Home Security and Surveillance>How To Use IPad As Security Camera
Home Security and Surveillance
How To Use IPad As Security Camera
Modified: March 6, 2024
Learn how to turn your iPad into a secure home surveillance camera with our step-by-step guide. Enhance your home security and surveillance with this simple DIY solution.
(Many of the links in this article redirect to a specific reviewed product. Your purchase of these products through affiliate links helps to generate commission for Storables.com, at no extra cost. Learn more)
Introduction
Home security is a top priority for many homeowners. With advancements in technology, you can now turn your iPad into a powerful and versatile security camera. This innovative solution not only provides you with the ability to monitor your home remotely, but it also offers peace of mind and an added layer of protection.
Using your iPad as a security camera is an excellent option if you have an old device lying around or if you prefer a more affordable alternative to traditional security systems. In this article, we will guide you through the process of setting up your iPad as a security camera and provide you with tips on how to make the most out of this convenient setup.
By repurposing your iPad as a security camera, you can take advantage of its high-quality camera, convenient size, and user-friendly interface. Whether you want to keep an eye on your front door, monitor your children’s activities, or check in on your pets while you’re away, your iPad can serve as a reliable and effective surveillance tool.
Before we dive into the steps of setting up your iPad as a security camera, there are a few things you need to keep in mind. First, ensure that your iPad is running on the latest version of iOS to ensure compatibility with the necessary apps and software. Secondly, make sure you have a stable and secure internet connection to enable remote monitoring. Lastly, consider the location and positioning of your iPad to capture the desired surveillance area effectively.
Now that we have covered the basics, let’s move on to the step-by-step process of setting up your iPad as a security camera. With a few simple steps and the right tools, you can transform your iPad into a reliable and cost-effective home surveillance solution.
Key Takeaways:
- Turn your old iPad into a security camera for free! Follow simple steps to set it up, install a security camera app, and monitor your home remotely for added peace of mind.
- Repurpose your iPad as a security camera to keep an eye on your home, children, or pets. Enjoy cost-effective home surveillance with easy setup and remote monitoring.
Read more: How To Record Using Security Camera
Step 1: Setting up your iPad as a security camera
The first step in turning your iPad into a security camera is to prepare the device for its new role. Follow these simple steps to ensure your iPad is ready to function as an effective surveillance tool:
- Clean and prepare the iPad: Before you begin, clean the iPad screen and remove any unnecessary apps or files to free up storage space. This will ensure optimal performance and prevent any distractions or interruptions during the surveillance process.
- Connect the power source: To avoid any potential battery drain issues, it’s best to keep your iPad connected to a power source while using it as a security camera. This will allow for uninterrupted monitoring and prevent the risk of the iPad running out of power during critical moments.
- Disable auto-lock and notifications: Since you will be using your iPad for continuous monitoring, it’s important to disable the auto-lock feature. This can be done by going into the Settings app, selecting “Display & Brightness,” and adjusting the Auto-Lock setting to “Never.” Additionally, it’s recommended to turn off notifications for non-essential apps to prevent any distractions.
- Position the iPad: Next, determine the ideal location for your iPad to capture the desired surveillance area. Consider mounting options such as tripods or wall mounts to ensure stability and flexibility in positioning. It’s crucial to position the iPad at the optimal height and angle to obtain the best view of the area you want to monitor.
- Ensure a stable internet connection: A reliable and stable internet connection is essential for remote monitoring. Make sure your iPad is connected to a secure Wi-Fi network before proceeding. This will ensure seamless live streaming and smooth access to surveillance footage from anywhere in the world.
Once you have completed these initial setup steps, your iPad is now ready to be transformed into a fully functional security camera. In the following steps, we will guide you through the process of installing a security camera app and configuring the necessary settings to maximize its performance and functionality.
Step 2: Installing a security camera app
Now that your iPad is prepared, it’s time to install a reliable security camera app that will enable you to utilize the device’s camera and surveillance features. There are various apps available in the App Store designed specifically for this purpose, each offering unique functionalities and features. Follow these steps to install a security camera app on your iPad:
- Open the App Store: Launch the App Store on your iPad by tapping on the App Store icon.
- Search for security camera apps: In the App Store’s search bar, type in keywords such as “security camera,” “surveillance,” or “IP camera” to browse the available apps.
- Read reviews and choose an app: Take the time to read user reviews and pay attention to ratings to select a reliable and highly-rated security camera app. Look for key features such as live streaming, motion detection, and cloud storage options to suit your specific requirements.
- Install the app: Once you’ve chosen a security camera app, tap the “Get” or “Install” button next to the app’s name to begin the installation process. You may need to enter your Apple ID password or use Touch ID/Face ID to confirm the download.
- Launch the app: After the installation is complete, locate the app on your iPad’s home screen and tap on it to launch the security camera app.
It’s worth noting that some security camera apps may offer both free and paid versions. While the free versions typically provide basic surveillance functions, opting for the paid versions often unlocks advanced features such as cloud storage, facial recognition, and two-way audio communication.
With the security camera app installed on your iPad, you are now one step closer to transforming your device into a functional security camera. In the next step, we will guide you through the process of configuring the camera settings to optimize its performance and ensure effective surveillance.
Step 3: Configuring the camera settings
Once you have installed a security camera app on your iPad, it’s time to configure the camera settings to tailor them to your specific surveillance needs. Follow these steps to optimize the camera settings:
- Launch the security camera app: Locate the security camera app on your iPad’s home screen and tap on it to launch the app.
- Create a user account: Most security camera apps require you to create a user account before you can start using the app’s features. Follow the app’s instructions to set up an account using your email address or social media profiles.
- Connect to your iPad’s camera: The app will prompt you to connect to your iPad’s camera. Grant the necessary permissions for the app to access the camera, microphone, and other required features.
- Adjust camera settings: Explore the app’s settings menu to customize various camera settings to your preferences. This may include adjusting video quality, selecting video recording options, enabling motion detection, activating night vision, and configuring notification alerts.
- Set up remote access: If you intend to monitor your security camera remotely, ensure that you enable remote access within the app’s settings. This typically involves creating a username and password and configuring port forwarding on your home router for external access.
- Test and fine-tune: Once you have configured the camera settings, take the time to test the app’s functionalities. Walk around your surveillance area and observe the live feed to ensure that the camera captures the desired areas effectively and that the motion detection feature works as intended.
Configuring the camera settings is crucial to maximize the performance and functionality of your iPad-turned-security camera. Take your time to explore the app’s settings thoroughly and adjust them to suit your specific surveillance requirements. In the next step, we will guide you through the process of securely mounting your iPad to enhance its stability and ensure optimal positioning.
Make sure to enable the “Find My” app on your iPad and position it in a secure location with a clear view of the area you want to monitor. You can use apps like Manything or Presence to turn your iPad into a security camera.
Step 4: Mounting the iPad securely
Mounting your iPad securely is an essential step in ensuring optimal positioning, stability, and coverage for your security camera. Follow these steps to mount your iPad securely:
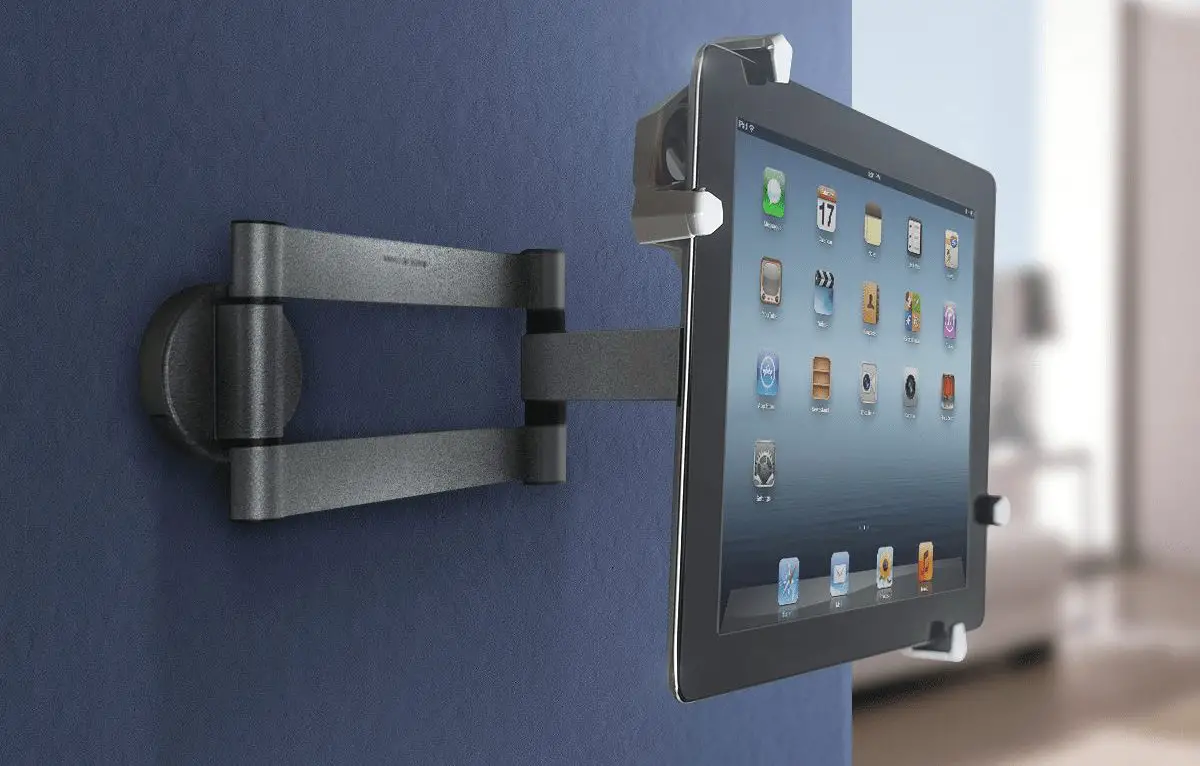
- Select a mounting option: There are various mounting options available for iPads, such as tripods, wall mounts, ceiling mounts, or specialized security camera mounts. Choose the option that best suits your surveillance needs and the layout of the area you want to monitor.
- Position the mounting hardware: Depending on the type of mounting option you have chosen, position the mounting hardware accordingly. For wall mounts or ceiling mounts, ensure that the mounting brackets are securely fixed to the desired surface. For tripods, extend the legs to the desired height.
- Attach the iPad: Carefully attach your iPad to the mounting hardware, following the manufacturer’s instructions. Make sure the iPad is securely fastened and that it is correctly aligned to capture the desired surveillance area.
- Test the stability: Gently test the stability of the mounted iPad by giving it a slight nudge or shake. Ensure that it remains firmly in place and doesn’t wobble or shift. If necessary, make any adjustments or tighten screws to improve stability.
- Optimize the angle and height: Adjust the angle and height of the mounted iPad to obtain the best view of the surveillance area. Ensure that the camera’s field of view covers the intended area effectively and minimizes blind spots.
- Secure any cables: If your iPad needs to be connected to a power source or other accessories, make sure to secure any cables or wires to prevent them from dangling or being accidentally unplugged. This will maintain a tidy appearance and reduce the risk of disruptions to the surveillance process.
By mounting your iPad securely, you can ensure that your security camera remains stable and properly positioned for effective surveillance. Take the time to fine-tune the angle and height of the iPad to optimize the camera’s field of view. Once your iPad is securely mounted, you can move on to the final step: monitoring the camera remotely.
Read more: How To Use Laptop As A Security Camera
Step 5: Monitoring the camera remotely
One of the major advantages of using your iPad as a security camera is the ability to monitor your surveillance feed remotely. Follow these steps to set up remote monitoring and access your camera feed from anywhere:
- Ensure internet connectivity: Before attempting remote monitoring, ensure that your iPad is connected to a stable and secure Wi-Fi network. Without a reliable internet connection, remote access may not be possible.
- Sign in to the security camera app: Launch the security camera app on your iPad and sign in using your user account credentials.
- Enable remote access: Within the app’s settings, enable remote access functionality. This may involve creating a username and password and configuring port forwarding on your home router.
- Install the app on your remote device: Install the same security camera app on the device you will be using to monitor the camera remotely. This can be another iPad, an iPhone, an Android device, or even your computer.
- Sign in to the app on the remote device: Launch the app on the remote device and sign in using the same user account credentials you used on your iPad.
- Access the camera feed: Once signed in on the remote device, you should be able to see the live camera feed from your iPad. You can now monitor your surveillance area, view recorded footage, and access any other app features remotely.
- Set up alerts and notifications: Many security camera apps offer the option to receive alerts and notifications for motion detection or other events. Configure these settings according to your preferences to stay updated on any suspicious activities.
By setting up remote monitoring, you can conveniently check in on your home or property from anywhere in the world. Whether you’re at work, traveling, or simply in another room of your house, you can have peace of mind knowing that you can keep an eye on your surveillance area using your remote device.
Congratulations! Your iPad is now successfully transformed into a security camera, allowing you to monitor your home or property with ease. Remember to periodically check the camera feed, maintain the security camera app’s updates, and ensure that your iPad remains connected to a power source for uninterrupted operation.
Overall, using your iPad as a security camera is a cost-effective and convenient solution for enhancing your home security. With proper installation, configuration, and remote monitoring, you can create a robust surveillance system that offers peace of mind and protection.
Now that you have completed all the necessary steps, you can sit back, relax, and enjoy the added security your iPad-turned-security camera provides.
Conclusion
Transforming your iPad into a security camera is a practical and cost-effective solution for enhancing your home security. With the right security camera app, proper configuration, and secure mounting, you can create a robust surveillance system that provides peace of mind and remote access to monitor your home or property.
By repurposing your iPad as a security camera, you take advantage of its high-quality camera, user-friendly interface, and the ability to access the camera feed remotely. This innovative solution allows you to keep an eye on your home, monitor your children or pets, and receive alerts for motion detection or other events – all from the convenience of your smartphone or computer.
Setting up your iPad as a security camera involves a few simple steps: preparing the iPad, installing a security camera app, configuring the camera settings, securely mounting the iPad, and enabling remote monitoring. By following these steps, you can optimize your iPad’s performance as a security camera and enjoy the added protection it offers.
Remember to prioritize internet connectivity, position the iPad strategically, and fine-tune the camera settings to meet your specific surveillance needs. Regularly check the camera feed, maintain the app’s updates, and ensure the iPad remains connected to a power source for uninterrupted operation.
With the advancements in technology, repurposing your iPad as a security camera has become an accessible and affordable solution for homeowners. By leveraging this innovative approach, you can enhance your home security, increase your peace of mind, and have a proactive means of monitoring your property.
So, don’t let your old iPad go to waste. Give it a new purpose as a powerful security camera and take control of your home security like never before.
Frequently Asked Questions about How To Use IPad As Security Camera
Was this page helpful?
At Storables.com, we guarantee accurate and reliable information. Our content, validated by Expert Board Contributors, is crafted following stringent Editorial Policies. We're committed to providing you with well-researched, expert-backed insights for all your informational needs.