Home>Ideas and Tips>A Step-by-Step Guide To Starting A Compost Pile

Ideas and Tips
A Step-by-Step Guide To Starting A Compost Pile
Published: November 1, 2024
Learn how to start a compost pile with our step-by-step guide. Reduce waste and create nutrient-rich soil for your garden.
(Many of the links in this article redirect to a specific reviewed product. Your purchase of these products through affiliate links helps to generate commission for Storables.com, at no extra cost. Learn more)
Introduction
Composting is one of the most effective ways to reduce your household waste and create a nutrient-rich soil amendment for your garden. It's a simple, eco-friendly process that turns organic materials like food scraps, leaves, and grass clippings into a valuable resource. In this comprehensive guide, we will walk you through the steps of starting a compost pile, from preparation to maintenance, ensuring you have all the knowledge needed to create a thriving composting system.
Why Compost?
Before we dive into the nitty-gritty of composting, let's explore why it's such an important practice for home gardeners and environmentally conscious individuals.
Environmental Benefits
- Reduces Waste: Composting helps divert organic waste from landfills, where it would otherwise contribute to greenhouse gas emissions.
- Conserves Resources: By reusing organic materials, we reduce the need for synthetic fertilizers and other chemical products.
- Improves Soil Health: Compost adds essential nutrients, improves soil structure, and enhances its water-holding capacity.
Practical Benefits
- Cost-Effective: Composting is a free or low-cost method of creating fertilizer.
- Year-Round Use: Compost can be used year-round in gardens, lawns, and indoor plants.
- Versatile Application: It can be used as mulch, potting mix, or even as a natural pest repellent.
Preparing Your Compost Site
Before you start collecting materials for your compost pile, it's crucial to choose the right location and prepare it properly.
Read more: Step-by-Step Guide To Making A Pillowcase
Location Considerations
- Accessibility: Place your compost pile in an easily accessible location so that you can add materials regularly.
- Sunlight: Ensure that your compost pile receives adequate sunlight but is also protected from direct rain.
- Odor Control: Avoid placing your compost near living spaces or areas where odors might be a concern.
Initial Setup
- Base Layer: Start with a base layer of brown materials like dried leaves or shredded newspaper to help with airflow and drainage.
- Drainage: Add a layer of coarse material like straw or wood chips at the bottom to improve drainage.
- Frame (Optional): If you're concerned about pests or want better structure, consider using a wire mesh frame around your compost pile.
Collecting Materials
The success of your compost pile depends largely on the variety and quantity of materials you collect.
Green Materials
These are high in nitrogen and include:
- Food scraps (fruits, vegetables, bread)
- Grass clippings
- Manure from herbivores (e.g., rabbit or horse)
- Fresh leaves
Read more: How To Press Flowers: A Step By Step Guide
Brown Materials
These are high in carbon and include:
- Dried leaves
- Shredded newspaper
- Cardboard
- Straw
Other Materials
- Eggshells
- Coffee grounds
- Tea bags
What Not to Compost
Avoid adding these items as they can hinder the composting process or create unpleasant odors:
- Meat, dairy products, oils, and fats
- Pet waste
- Coal or charcoal ash
- Plastic and synthetic materials
Building Your Compost Pile
Now that you have your materials ready, let's build your compost pile step-by-step.
Read more: A Step-By-Step Guide To DIY Walk In Closet
Layering Technique
- Start with Brown Materials: Begin with a layer of brown materials about 4-6 inches deep.
- Add Green Materials: Add a layer of green materials on top of the brown layer but do not mix them yet.
- Repeat Layers: Continue alternating between brown and green layers until you reach the desired height (about 3-4 feet).
- Finishing Layer: End with another layer of brown materials to help control moisture and odors.
Mixing the Pile
Once you've built your pile, it's time to mix it thoroughly but gently.
- Initial Mixing: Use a pitchfork or shovel to gently turn over all layers, ensuring everything is well combined but not over-mixed.
- Regular Turning: Every week or two, turn over your compost pile again to aerate it and speed up decomposition.
Maintaining Your Compost Pile
A well-maintained compost pile is key to successful decomposition and minimal odors.
Monitoring Moisture Levels
- Optimal Moisture: Aim for a damp but not soggy consistency; if it's too dry, add water; if too wet, add more brown materials.
- Checking Moisture: Stick your hand into the pile up to your elbow; if it feels damp but not dripping wet, you're good to go!
Controlling Odors
- Aeration: Regularly turning your pile helps prevent anaerobic conditions that lead to unpleasant odors.
- Covering: If odors become an issue, cover your pile with a tarp or lid until they dissipate.
Pest Control
- Pest Deterrents: Add materials like cayenne pepper or hot peppers around the edges of your pile to deter pests like rodents and raccoons.
- Physical Barriers: Use wire mesh or hardware cloth around the bottom of your pile if necessary.
Speeding Up Decomposition
While patience is a virtue when it comes to composting, there are some tips that can help speed up the process:
Adding Microorganisms
- Worms: Introduce red wiggler worms into your pile; they break down organic matter quickly and efficiently.
- Compost Tea: Create compost tea by steeping finished compost in water; this liquid solution contains beneficial microorganisms that can accelerate decomposition.
Read more: How To Start A Compost Bin In An Apartment
Temperature Monitoring
- Ideal Temperature Range: Aim for temperatures between 130°F (54°C) and 140°F (60°C); this indicates active microbial activity which speeds up decomposition.
- Using Thermometers: Monitor temperature regularly; if it gets too hot (above 160°F/71°C), turn over the pile immediately.
Harvesting Your Compost
After several months of regular maintenance, your compost should be ready for use!
Signs of Readiness
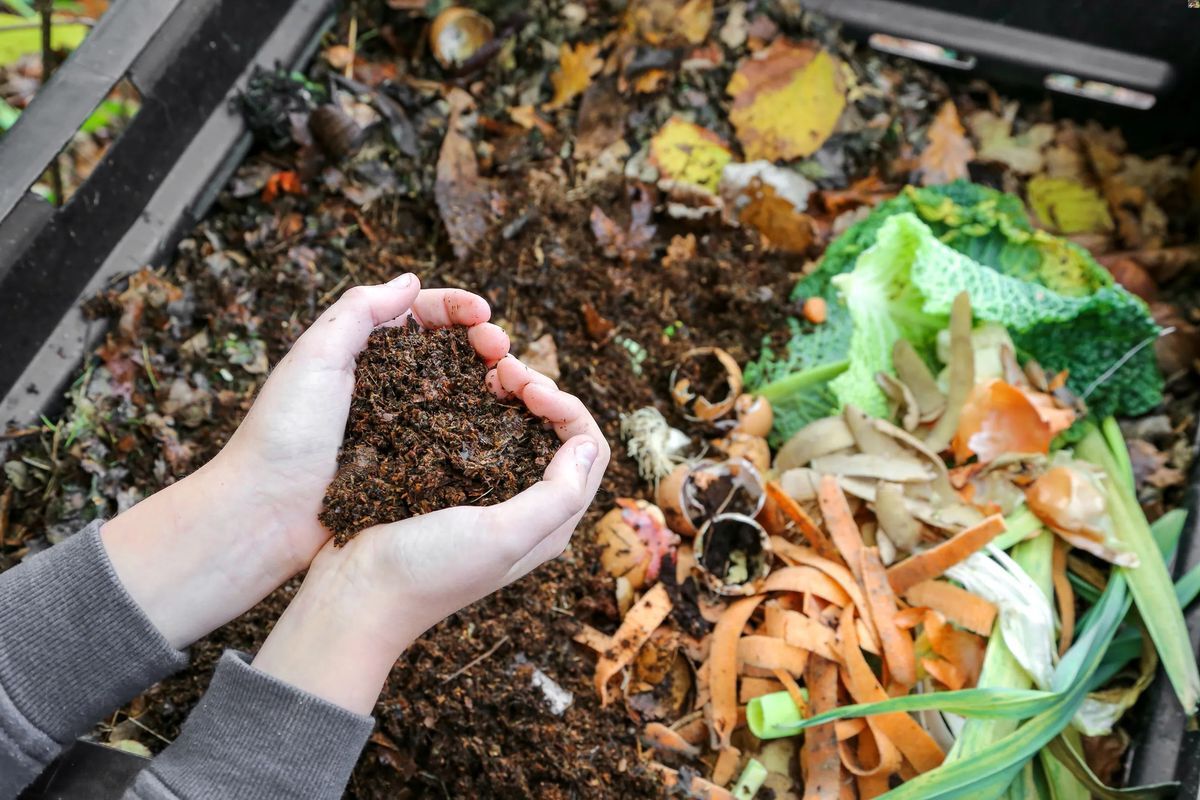
- Texture Change: Finished compost should resemble dark brown soil with an earthy aroma rather than an unpleasant smell.
- Crumbly Consistency: It should crumble easily when pressed between fingers indicating complete decomposition.
Using Your Compost
- Gardening Applications: Mix finished compost into garden beds before planting seeds or seedlings; it enhances soil structure while providing essential nutrients.
- Houseplant Care: Use it as potting mix or mulch around houseplants; improves drainage while supplying necessary nutrients.
Read more: DIY Shed Foundation: A Step-by-Step Guide
Troubleshooting Common Issues
Even with proper setup and maintenance, issues may arise during the composting process:
Odors Persisting
- Overturn Pile Regularly
- Add More Brown Materials
- Check Moisture Levels
Pests Invading
- Use Physical Barriers
- Add Deterrents Like Cayenne Pepper
- Cover Pile Temporarily
Slow Decomposition
- Add Microorganisms Like Worms
- Monitor Temperature Regularly
- Turn Over Pile More Frequently
Conclusion
Starting a compost pile is an easy yet rewarding process that not only reduces household waste but also creates valuable resources for gardening and sustainability efforts alike By following these steps—preparing your site correctly, collecting appropriate materials, building layers effectively—and maintaining it properly—you'll be well on your way towards producing high-quality compost that enhances soil health while promoting environmental stewardship.
Remember patience is key; with consistent effort over time you'll see tangible results transforming waste into wealth through effective composting practices
Was this page helpful?
At Storables.com, we guarantee accurate and reliable information. Our content, validated by Expert Board Contributors, is crafted following stringent Editorial Policies. We're committed to providing you with well-researched, expert-backed insights for all your informational needs.



0 thoughts on “A Step-by-Step Guide To Starting A Compost Pile”