Home>Articles>Our Step-By-Step Guide To Screen Porch Installation
Articles
Our Step-By-Step Guide To Screen Porch Installation
Modified: October 18, 2024
Looking for step-by-step articles on screen porch installation? Our comprehensive guide has you covered, providing expert tips and instructions for a successful project.
(Many of the links in this article redirect to a specific reviewed product. Your purchase of these products through affiliate links helps to generate commission for Storables.com, at no extra cost. Learn more)
Introduction
Welcome to our step-by-step guide to screen porch installation! Having a screened-in porch is a wonderful addition to any home, providing a comfortable space to relax and enjoy the outdoors while keeping pests and bugs at bay. Whether you’re looking to upgrade an existing porch or build a brand new one, this comprehensive guide will take you through each stage of the installation process.
A screen porch offers numerous benefits, such as protection from insects, enhanced privacy, and increased property value. It can serve as a versatile space for entertaining friends and family, enjoying meals alfresco, or simply unwinding after a long day.
Before you dive into the project, it’s important to note that installing a screen porch requires careful planning, proper measurements, and adherence to local building codes and regulations. It’s always a good idea to consult with professionals or seek guidance from building authorities to ensure the project is done correctly and safely.
In this guide, we’ll walk you through each step of the process, providing tips, tricks, and expert advice along the way. From the initial planning and measurement all the way to the finishing touches, we’ve got you covered.
So, whether you’re a seasoned DIY enthusiast or tackling your first major construction project, grab your tools and let’s get started on creating your dream screen porch!
Key Takeaways:
- Proper planning, accurate measurements, and adherence to building codes are crucial for a successful screen porch installation. From obtaining permits to adding finishing touches, attention to detail is key.
- Building a screen porch requires a combination of skills and dedication. Once completed, regular maintenance and personalization will ensure a cozy and inviting outdoor space for years to come.
Step 1: Planning and Measurement
The first and most crucial step in any screen porch installation project is careful planning and accurate measurement. This stage lays the foundation for a successful and seamless construction process. Here are the key steps to follow:
- Define the Purpose: Consider how you plan to use your screen porch. Will it primarily serve as a relaxation area, a dining space, or a combination of both? Understanding its intended purpose will help you determine the size and layout of the porch.
- Determine the Location: Assess your property and identify the best location for your screen porch. Take into account factors such as sunlight exposure, proximity to outdoor amenities, and any potential obstructions. Ensure that the chosen location complies with local zoning regulations.
- Set a Budget: Determine how much you’re willing to invest in your screen porch installation. This will guide your choices in terms of materials, finishes, and additional features.
- Create a Design: Sketch out a basic design for your screen porch, taking into consideration the layout, roof style, and any desired features such as electrical outlets or built-in seating. You can also seek inspiration from online resources, home improvement magazines, or consult with a professional designer.
- Obtain Necessary Permits: Check with your local building authority to determine if you need permits for your screen porch installation. Depending on the size and location of the porch, you may be required to submit detailed plans and obtain approval before proceeding with the project.
- Accurate Measurements: Measure the area where the screen porch will be built. Take note of the dimensions of existing structures, windows, doors, and any other architectural features that may impact the design and construction process.
Take your time during the planning and measurement phase to ensure everything is well-thought-out and accounted for. If you’re unsure about any aspect of the process, consulting with a professional contractor or architect can provide valuable guidance and expertise.
By carefully planning and taking accurate measurements, you’ll create a solid foundation for the rest of the screen porch installation process. So, grab your tape measure and let’s move on to the next step!
Step 2: Obtaining Permits and Permissions
Once you have completed the planning and measurement stage for your screen porch installation, it’s time to move on to the next crucial step: obtaining the necessary permits and permissions. This step is essential to ensure that your project is in compliance with local building codes and regulations. Here’s what you need to do:
- Research Local Building Codes: Familiarize yourself with the building codes and regulations specific to your area. These codes may dictate standards for structural integrity, electrical work, and other aspects of your screen porch construction. Obtain a copy of the building codes from your local municipal office or access them online.
- Contact the Building Permit Office: Reach out to your local building permit office or planning department to discuss your screen porch project. Provide them with your plans, measurements, and any other required documentation. They will guide you through the permit application process and inform you of any fees or additional requirements.
- Submit Your Permit Application: Complete the necessary permit application forms and submit them to the building permit office. Include all the relevant information and any supporting documents as requested. Pay any required fees at this time.
- Follow-Up and Obtaining Approval: After submitting your permit application, it’s important to follow up with the building permit office regularly. Check the status of your application and ask if there are any additional requirements or changes needed. Once your application is approved, obtain the necessary permits before proceeding with the construction of your screen porch.
- Insurance and Liability: While not directly related to permits and permissions, it’s worth considering insurance coverage for your screen porch. Consult with your homeowner’s insurance provider to ensure that your project is adequately protected in case of accidents or damages.
Obtaining permits and permissions may seem like a bureaucratic hurdle, but it’s a crucial step to ensure the safety and compliance of your screen porch installation. Non-compliance can result in fines, penalties, and potential issues when selling your property in the future. Take the time to understand and adhere to the building codes and regulations set by your local authorities.
Once you have obtained the necessary permits and permissions, you can move forward with confidence, knowing that your screen porch installation is in compliance with the law. In the next step, we will cover gathering the materials and tools you’ll need for the construction process.
Step 3: Gathering Materials and Tools
Now that you have obtained the necessary permits and permissions for your screen porch installation, it’s time to gather all the materials and tools you’ll need for the construction process. Having everything on hand before starting will ensure a smoother and more efficient project. Here’s what you’ll need:
- Screening Materials: Depending on your design and preferences, you’ll need to choose the type of screening material for your porch. Options include fiberglass, aluminum, and vinyl screens. Determine the quantity and dimensions needed based on your measurements.
- Frame Materials: Select the materials for your porch frame, such as pressure-treated lumber or aluminum extrusions. Consider the durability, cost, and aesthetic appeal when making your choice.
- Roofing Materials: If you’re planning to install a roof on your screen porch, determine the roofing materials required. Options include shingles, metal panels, or polycarbonate sheets, among others.
- Fasteners and Hardware: Stock up on screws, nails, brackets, and other necessary fasteners and hardware to secure the materials together. Ensure that they are suitable for outdoor use and can withstand the elements.
- Tools: Gather all the tools you’ll need for the construction process. This may include a measuring tape, level, circular saw, drill, screwdriver, framing square, and a miter saw, among others. Rent or purchase any tools you don’t already have.
- Additional Materials: Depending on your design and preferences, you may need additional materials like flashing, sealant, electrical wiring, lighting fixtures, or trim. Consult your plans or design to identify any extra materials required.
It’s advisable to create a detailed checklist of all the necessary materials and tools to ensure that nothing is overlooked. Take the time to carefully review your plans and consult with professionals or experts if needed to determine the exact requirements for your screen porch installation.
Once you have gathered all the materials and tools, organize them in a labeled and accessible manner. This will make the construction process more efficient, as you won’t have to waste time searching for items.
With everything ready to go, you’re one step closer to creating your perfect screen porch. In the next step, we’ll cover how to prepare the area before starting the construction process.
Step 4: Preparing the Area
Before you begin the actual construction of your screen porch, it’s crucial to properly prepare the area where the porch will be built. Adequate preparation ensures a smooth and efficient construction process and helps prevent future issues. Follow these steps to prepare the area:
- Clear the Area: Remove any obstructions, debris, or landscaping features in the area where your screen porch will be constructed. Clearing the space provides a clean slate for the construction process.
- Level the Ground: Ensure that the ground is level and stable. If necessary, make adjustments by adding or removing soil. A level ground will provide a stable foundation for the porch structure.
- Mark the Perimeter: Use stakes and string to mark the perimeter of the screen porch. This will provide a visual guide for the construction process and ensure that the porch is built within the desired boundaries.
- Excavation (Optional): If you plan to have a raised or sunken screen porch, you may need to excavate the ground to create the desired elevation. Consult your plans and consider seeking professional assistance if excavation is required.
- Address Drainage: Take into account the drainage of your screen porch area. Ensure that water doesn’t accumulate on the porch surface or near the foundation of your home. If needed, consider installing a drainage system or sloping the ground away from the porch.
- Remove Sod (Optional): If you’re building your screen porch on a grassy area, you may choose to remove the sod within the porch perimeter to create a clean base. This step is optional, but it can help prevent weed growth and make the construction process easier.
Preparing the area before construction is essential for ensuring a stable and long-lasting screen porch. By taking the time to clear the space, level the ground, and address any potential drainage issues, you’re setting the stage for a successful installation.
As you prepare the area, it’s important to keep safety in mind. Wear appropriate protective gear, such as gloves and safety glasses, when handling tools or performing heavy work. If you’re unsure about any aspect of the preparation process, consult with professionals to ensure it’s done correctly.
With the area properly prepared, you’re now ready to move on to the next step: framing the porch. Stay tuned for our detailed instructions on how to construct the frame for your screen porch.
Step 5: Framing the Porch
With the area prepared and ready, it’s time to move on to the exciting stage of framing your screen porch. The framing provides the structure and support for your porch, ensuring its stability and longevity. Follow these steps to frame your porch:
- Measure and Mark: Refer to your design plans and measurements to determine the dimensions and layout of the frame. Use a measuring tape, level, and framing square to mark the locations for the posts, beams, and other structural components.
- Install Posts: Start by installing the vertical posts that will support the porch structure. Use pressure-treated lumber or aluminum posts for durability and stability. Secure the posts into the ground or onto the existing foundation of your home.
- Create Beams: Install horizontal beams that connect the posts and provide additional support for the porch frame. Use sturdy materials such as pressure-treated lumber or aluminum beams. Ensure that the beams are level and securely attached to the posts.
- Add Joists: Install the joists, which are the horizontal framing members that support the flooring of the porch. Space them evenly and use joist hangers or ledger boards to secure them to the beams. Ensure that the joists are level and properly aligned.
- Install Headers and Rim Joists: Add headers and rim joists around the perimeter of the porch to further strengthen the frame. These will provide support for the walls and help distribute the weight evenly.
- Check for Level and Square: Regularly check the levelness and squareness of the frame as you proceed. Use a level and framing square to ensure that everything is aligned correctly. Make adjustments as needed to maintain a square and stable structure.
- Secure Connections: Use appropriate fasteners, such as screws or nails, to secure all the connections in the frame. Reinforce the joints and corners to ensure stability and prevent any future movement or shifting.
It’s important to follow building codes and regulations when constructing the frame for your screen porch. Consult with local authorities or professionals to ensure that your frame meets the necessary standards for safety and durability.
As you work on framing your porch, remember to prioritize safety. Use proper protective gear, work with a partner if needed, and carefully handle tools and materials. If you’re unsure about any aspect of the framing process, seek guidance from experienced professionals or contractors.
With the frame in place, your screen porch is starting to take shape. In the next step, we’ll cover how to install the roof for your porch, providing protection from the elements. Stay tuned!
When installing a screen porch, make sure to properly seal all seams and joints to prevent water infiltration and ensure a longer lifespan for your porch.
Step 6: Installing the Roof
Now that the frame of your screen porch is complete, it’s time to move on to the next exciting step: installing the roof. The roof not only provides shelter from the elements but also adds to the overall appearance and functionality of your porch. Follow these steps to install the roof for your screen porch:
- Select the Roofing Material: Choose the roofing material that best suits your needs and preferences. Options include shingles, metal panels, polycarbonate sheets, or even a thatched roof for a unique look. Consider factors such as durability, style, and budget when making your selection.
- Measure and Cut: Measure the dimensions of your porch roof area accurately. Mark the roofing material accordingly and use a saw or appropriate cutting tools to trim the material to the desired size and shape.
- Prepare the Surface: Ensure that the roof surface is clean and free from any debris. If needed, apply a roofing underlayment or insulation to create a barrier against moisture and improve thermal efficiency.
- Install the Roofing Material: Start at one corner of the roof and carefully lay the roofing material in place. Begin at the bottom and work your way up, overlapping each row or panel to ensure proper water drainage. Attach the roofing material securely using appropriate fasteners recommended for the specific material.
- Seal and Flash: Seal any gaps or seams between the roofing material and adjacent surfaces to prevent water leakage. Install flashing around the edges, chimneys, or other protrusions to provide additional protection against water intrusion.
- Check for Proper Pitch and Level: Regularly check the roof’s pitch and level as you progress. Use a level to ensure that the roof slopes correctly for water runoff and that it is level along the horizontal plane. Make adjustments as necessary to maintain the proper pitch and level.
- Complete Edging and Trim: Install the necessary edging and trim to provide a finished and polished look to your porch roof. This may include fascia boards, drip edges, or other decorative elements.
- Inspect and Test: Once the roof installation is complete, carefully inspect the work to ensure it’s done properly. Check for any loose or protruding materials, and perform a water test to verify that the roof is watertight.
When installing the roof, it’s essential to follow the manufacturer’s instructions and guidelines for the specific roofing material you’ve chosen. Adhering to proper installation techniques will ensure the longevity and functionality of your porch roof.
As always, prioritize safety during the roof installation process. Use appropriate safety equipment, such as fall protection gear, when working at heights. If you’re not comfortable with working on the roof, consider hiring a professional roofer to handle this step.
With the roof installed, your screen porch is starting to take shape as a comfortable and protected outdoor space. In the next step, we’ll cover how to build the walls for your porch, creating a cozy and enclosed area. Keep following along to complete your screen porch installation project!
Step 7: Building the Walls
With the roof of your screen porch in place, it’s time to move on to the next step: building the walls. Building the walls will enclose your porch and provide privacy, protection from the elements, and a defined space for you to enjoy. Here are the steps to build the walls for your screen porch:
- Measure and Mark: Refer to your design plans and measurements to determine the dimensions of the walls. Use a measuring tape, level, and chalk line to mark the locations of the walls on the porch frame.
- Frame the Walls: Use pressure-treated lumber or aluminum studs to frame the walls. Cut the lumber or aluminum to the required lengths and assemble the wall frames using appropriate fasteners. Ensure that the walls are plumb, square, and securely attached to the porch frame.
- Add Wall Sheathing: Install sheathing material, such as plywood or OSB (oriented strand board), on the exterior surface of the wall frames. Secure the sheathing to the frames using nails or screws, ensuring a tight and secure fit.
- Install Insulation (Optional): Depending on your climate and preferences, you may choose to install insulation within the wall cavities. Insulation helps regulate temperature and provides soundproofing. Consult local building codes and recommendations for insulation type and thickness.
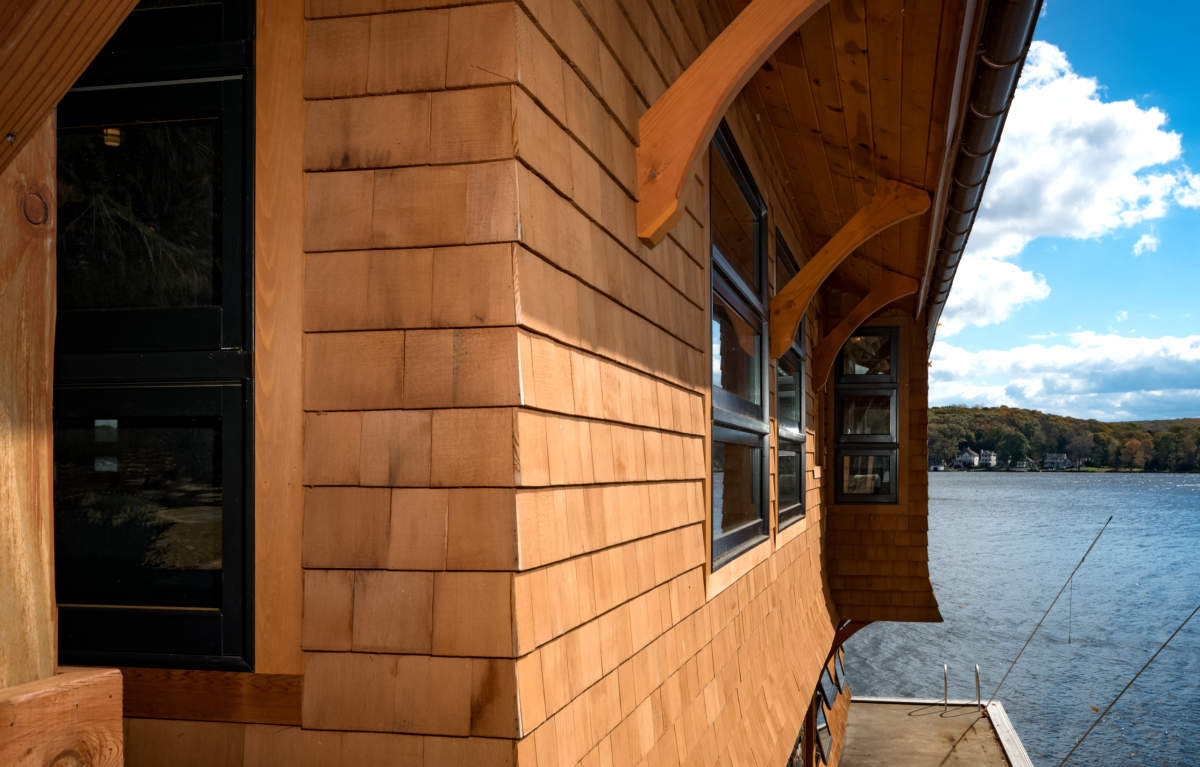
- Install Exterior Siding: Choose and install the exterior siding material of your choice. Options include vinyl, wood, or fiber cement siding. Follow the manufacturer’s instructions for proper installation and ensure that the siding is weatherproof and securely attached.
- Add Windows and Doors: Install windows and doors according to your design and preferences. Use proper flashing and sealing techniques to ensure that the openings are watertight and properly insulated.
- Finish the Interior: Once the walls are built and the exterior is complete, you can finish the interior of your screen porch. This may include adding insulation, electrical wiring, and interior finishes such as drywall, paint, or paneling.
- Inspect and Test: Before proceeding to the next step, carefully inspect the walls to ensure that they are sturdy, plumb, and properly sealed. Test the windows and doors for proper operation and ensure that they provide a tight seal against drafts and moisture.
It’s important to follow local building codes and regulations when constructing the walls for your screen porch. Consult with professionals or building authorities if you’re unsure about any aspect of the process.
As you work on building the walls, prioritize safety. Use appropriate safety equipment, such as goggles and gloves, when handling tools and materials. If you’re not comfortable with certain tasks, consider hiring professionals to assist or handle those specific parts of the construction process.
With the walls in place, your screen porch is now fully enclosed, creating a cozy and protected space that you can enjoy year-round. In the next step, we’ll cover how to add screens and windows, further enhancing the functionality and comfort of your porch. Keep following along to complete your screen porch installation!
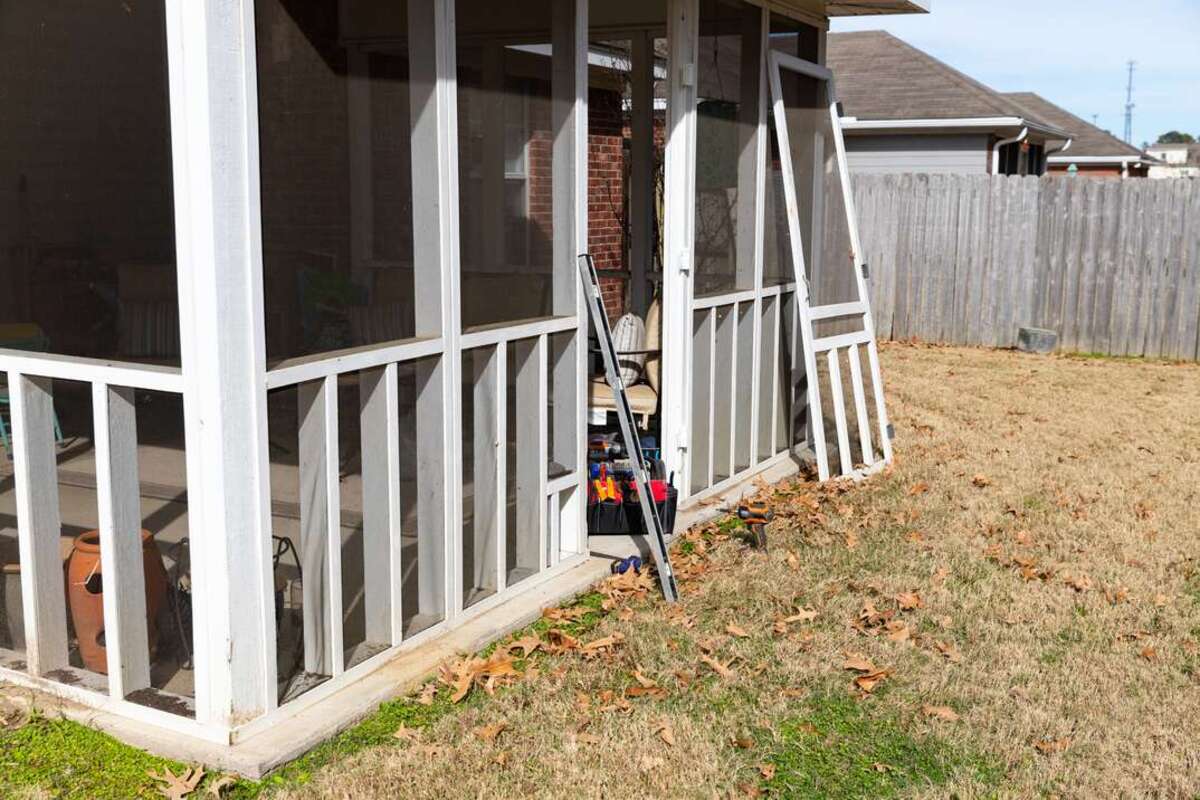
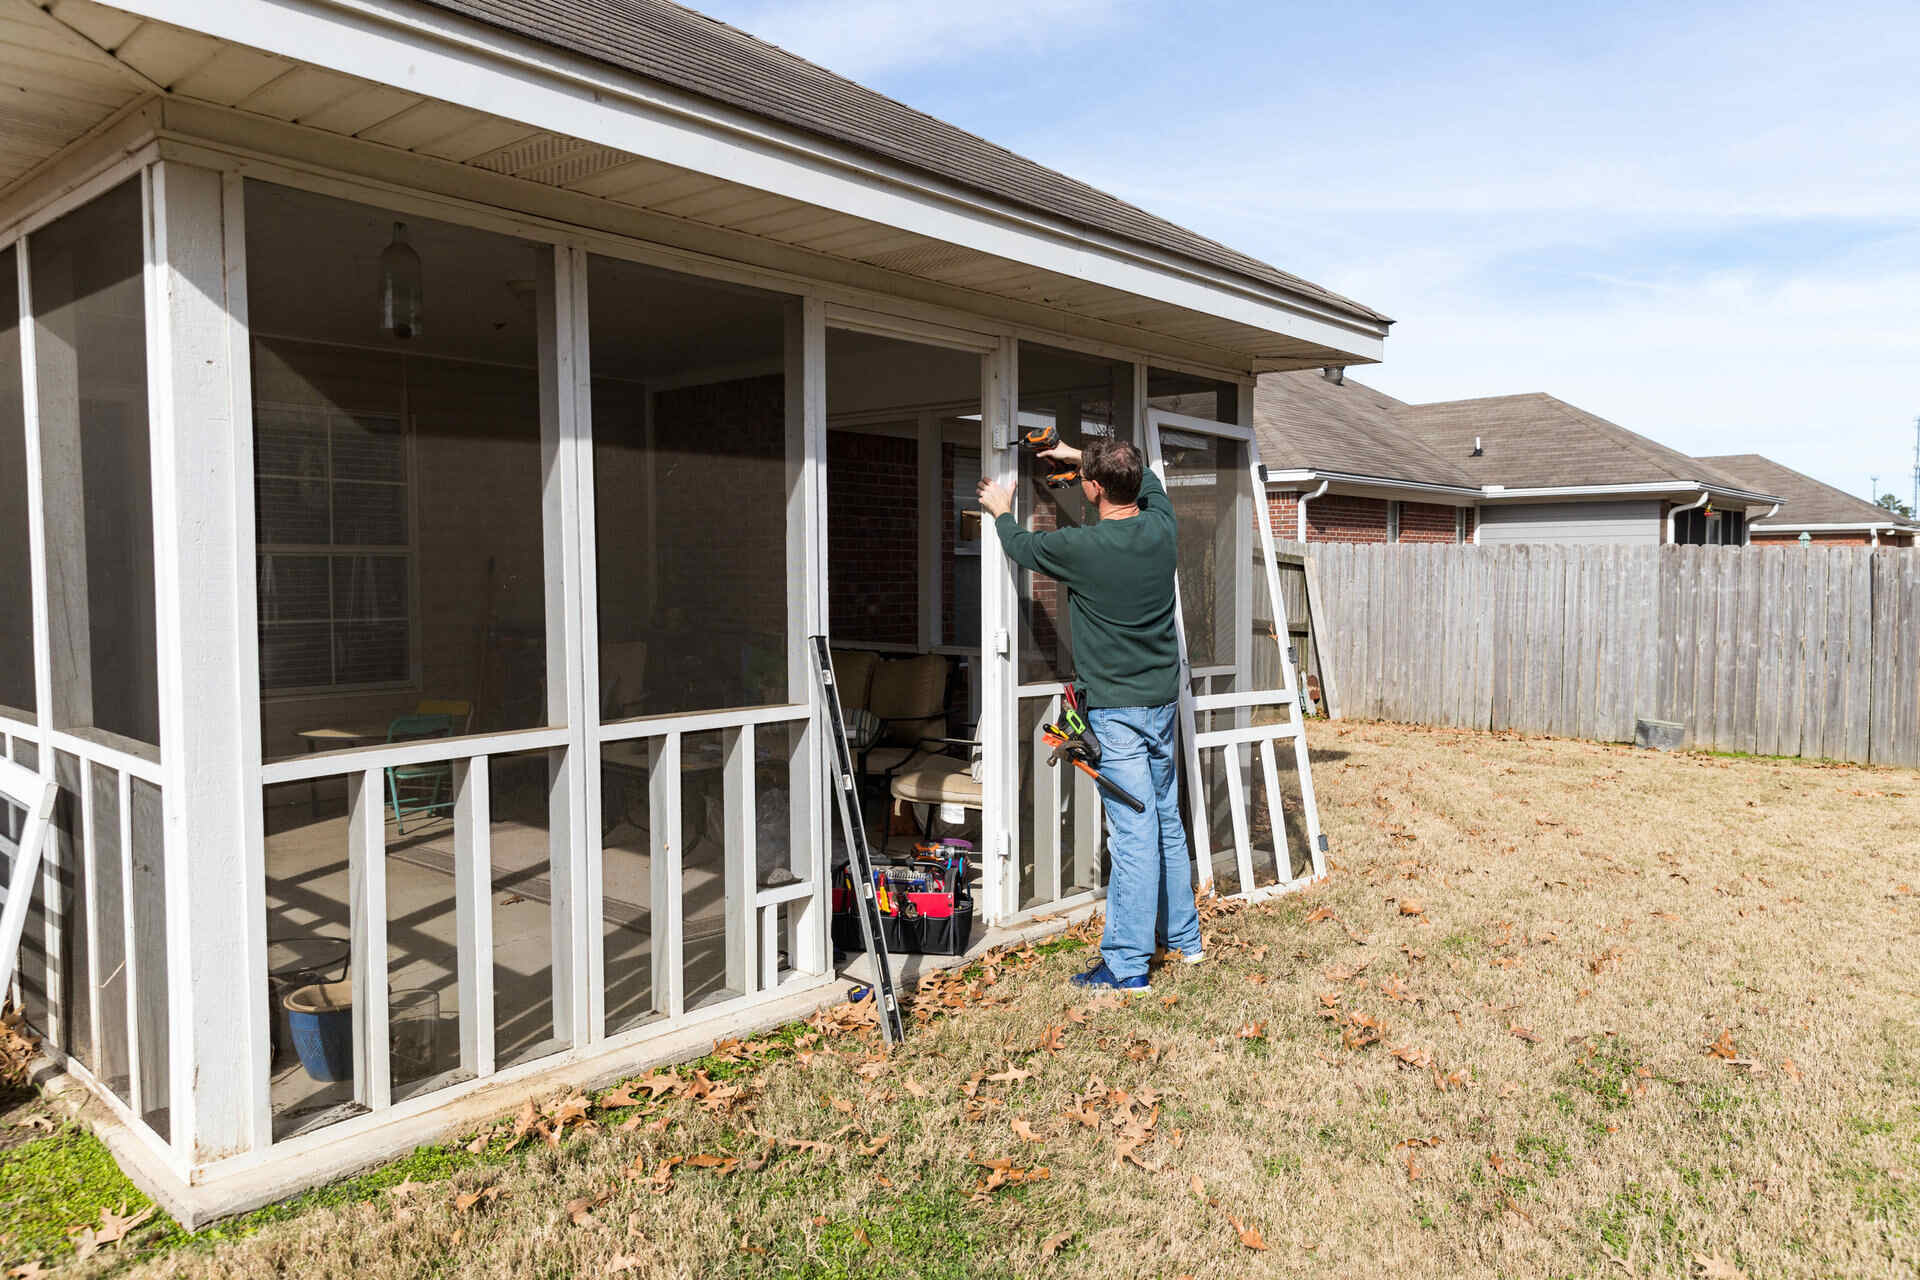
Step 8: Adding Screens and Windows
With the walls of your screen porch constructed, it’s time to move on to the next step: adding screens and windows. Screens and windows are essential components of a screen porch, allowing you to enjoy fresh air and outdoor views while keeping bugs and other unwanted elements at bay. Here’s how to add screens and windows to your screen porch:
- Measure and Select Screens: Measure the dimensions of your window and door openings to determine the size of screens needed. Choose screens that are durable, weather-resistant, and specifically designed for screening porches.
- Prepare the Openings: Remove any temporary coverings or barriers from the openings. Ensure that the walls and trim around the openings are smooth, level, and properly sealed.
- Install Framing: Attach screen framing material, such as aluminum or wood, around the perimeter of the openings. Secure the framing to the walls using screws or nails, ensuring a snug fit.
- Add Screens: Cut the screens according to the size of the openings and stretch them tightly across the framing material. Use a spline and screen roller to secure the screens in place, ensuring they are free from wrinkles or sagging.
- Install Window and Door Frames: If you plan to have windows or doors in your screen porch, install the frames according to the manufacturer’s instructions. Ensure that they fit properly and provide a tight seal against drafts and insects.
- Attach Hardware: Install any necessary hardware, such as handles, latches, or hinges, to ensure smooth operation of the windows and doors.
- Inspect and Test: Carefully inspect the screens, frames, and hardware to ensure that they are properly aligned and securely attached. Test the functionality of the screens and windows to ensure they open, close, and lock smoothly and effectively.
During the installation process, it’s important to follow the manufacturer’s instructions for the screens, frames, and hardware you are using. Proper installation ensures that the screens and windows function optimally and provide the desired level of protection and ventilation.
As you work on adding screens and windows, prioritize safety. Use caution when handling tools and sharp objects, and ensure that all safety features, such as window locks or screen latches, are installed correctly.
With the screens and windows in place, your screen porch is now complete, providing a comfortable and bug-free space to enjoy the outdoors. In the next step, we’ll cover how to install the flooring for your porch, adding the finishing touch to your project. Stay tuned to complete your screen porch installation!
Step 9: Installing the Flooring
With the walls, screens, and windows of your screen porch complete, it’s time to focus on the next step: installing the flooring. The right flooring can enhance the aesthetics, comfort, and durability of your porch. Here’s how to install the flooring for your screen porch:
- Choose the Flooring Material: Consider the style, durability, and maintenance requirements when selecting the flooring material for your screen porch. Options include wood, tile, stone, composite decking, or even outdoor carpeting.
- Prepare the Subfloor: Ensure that the subfloor is clean, level, and dry. Repair any damage or unevenness before proceeding. If necessary, add a moisture barrier or insulation to prevent moisture-related issues.
- Layout and Measurement: Plan the layout of the flooring and measure the dimensions of the porch to determine the quantity of flooring material you’ll need. Consider the direction of the flooring boards, any pattern or design layout, and whether you’ll need to make any cuts or adjustments.
- Install the Flooring: Follow the manufacturer’s instructions for installing the chosen flooring material. This may involve cutting and fitting the boards or tiles, applying adhesive or fasteners, and ensuring that the flooring is properly aligned and secured.
- Allow for Expansion Gaps: Depending on the type of flooring material, allow for proper expansion and contraction by leaving small gaps around the edges or between the boards. This will prevent buckling or warping due to temperature and humidity changes.
- Finish and Seal (if required): If you’re using a natural wood flooring material, consider applying a sealant or stain to protect it from moisture, sunlight, and wear. Follow the manufacturer’s instructions for proper application and drying time.
- Clean and Inspect: Once the flooring is installed, thoroughly clean the surface to remove any debris or dust. Inspect the flooring for any imperfections or loose boards, and make any necessary adjustments or repairs.
During the flooring installation process, ensure proper ventilation by working in a well-ventilated area or opening windows and doors. Follow safety guidelines for handling any tools or adhesives, and use caution when walking on the newly installed flooring to avoid any damage or accidents.
With the flooring installed, your screen porch is nearly complete. In the final step, we’ll cover the finishing touches, such as adding furniture, lighting, and personal touches, to create a beautiful and inviting space. Stay tuned to complete your screen porch installation project!
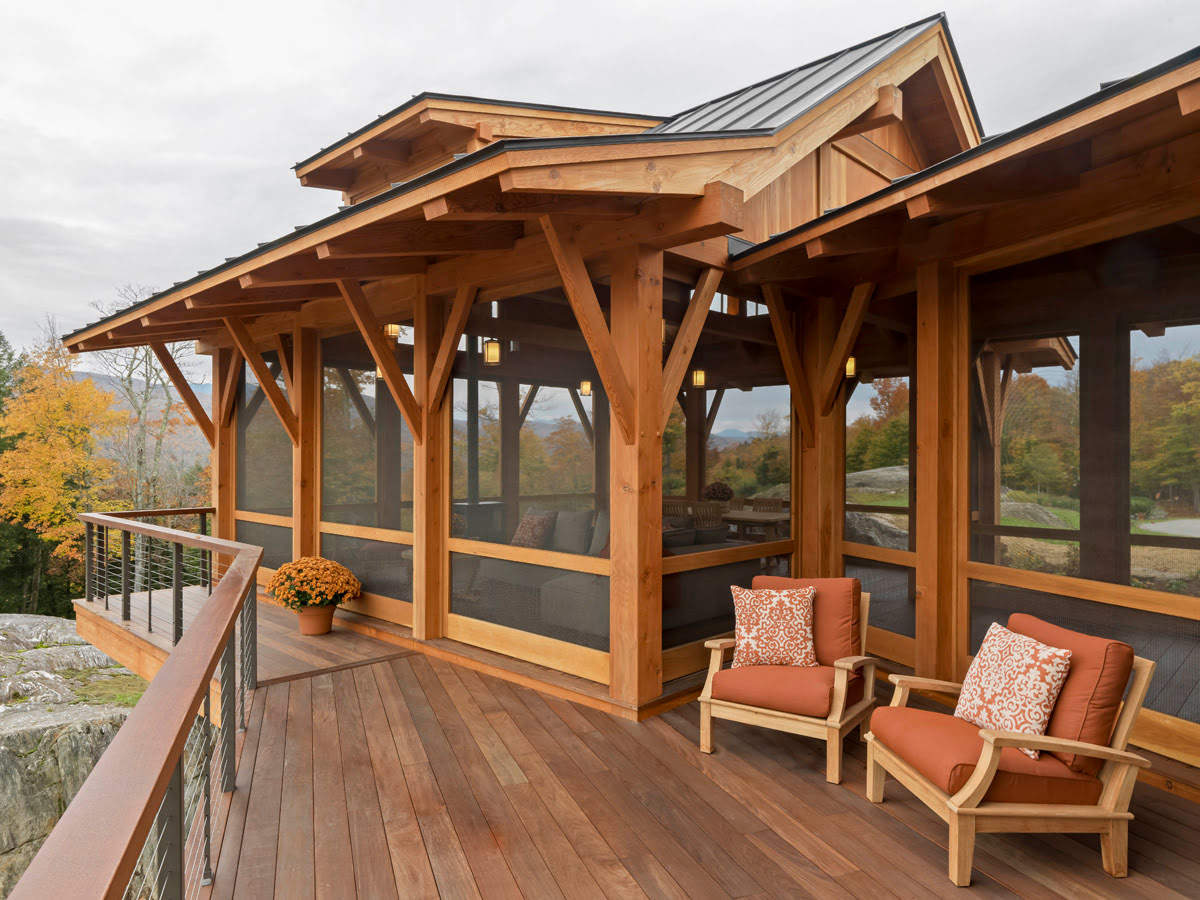
Step 10: Finishing Touches
Congratulations! You’re in the final step of your screen porch installation project. Now it’s time to add the finishing touches that will truly make your porch a beautiful and inviting space. These final touches will add personality and functionality to your screen porch. Here’s what you can do:
- Add Furniture: Choose comfortable and weather-resistant furniture that suits your style and needs. Consider a combination of seating options such as lounge chairs, dining sets, and outdoor sofas to create different areas within your screen porch.
- Accessorize: Add decorative elements such as outdoor rugs, throw pillows, and cushions to make your porch cozy and visually appealing. Incorporate planters, lanterns, and artwork to add color and personality.
- Install Lighting: Install appropriate lighting fixtures to create a warm and inviting atmosphere in the evening. Consider ambient lighting options such as string lights, sconces, or a ceiling fan with built-in lighting.
- Incorporate Shade: If your porch is exposed to direct sunlight, consider adding elements for shade such as retractable awnings, umbrellas, or blinds. This will provide relief from the sun and enhance the comfort of your porch.
- Integrate Electrical Outlets: Install electrical outlets or USB ports for convenient charging of devices and powering lamps or outdoor speakers. Ensure that all electrical work is done by a qualified professional and meets safety standards.
- Personalize: Make your screen porch feel like an extension of your home by adding personal touches. Hang artwork, display sentimental items, or incorporate a small bar cart or mini-fridge for added convenience.
- Maintain and Clean: Regularly clean and maintain your screen porch to keep it in top shape. Sweep away debris, wash the flooring, screens, and windows, and inspect for any necessary repairs or touch-ups.
Remember that the finishing touches are an opportunity to let your style and creativity shine through. Create a space that reflects your personality and preferences, making it a welcoming retreat for yourself, family, and friends.
Now that you’ve completed the final step, take a moment to admire your beautiful screen porch. It’s time to sit back, relax, and enjoy your newly created outdoor oasis.
Thank you for following along with our step-by-step guide to screen porch installation. We hope this comprehensive guide has been helpful in guiding you through each stage of the process. May your screen porch bring you many years of joy and relaxation!
Conclusion
Congratulations on completing your screen porch installation journey! You’ve gone through each step, from careful planning and obtaining permits to the final finishing touches. The result is a beautiful and functional space that allows you to enjoy the outdoors while staying protected from pests and the elements.
Throughout this guide, we’ve emphasized the importance of proper planning, accurate measurements, and following building codes and regulations. By taking the time to prepare and gather the necessary materials and tools, you set yourself up for success.
Building a screen porch requires a combination of skills, patience, and attention to detail. Whether you did it yourself or hired professionals, the effort and dedication you put into this project have paid off.
Remember to maintain your screen porch regularly. Keep the area clean and perform routine inspections to ensure that everything is in good condition. This will help preserve the longevity and beauty of your porch for years to come.
Now it’s time to enjoy your screen porch and make lasting memories. Create a cozy outdoor living space by adding comfortable furniture, lighting, and personal touches that reflect your style and taste.
Thank you for choosing our step-by-step guide to screen porch installation. We hope it has provided you with the knowledge and confidence to complete this project successfully. Sit back, relax, and savor the fruits of your labor in your new screen porch!
Frequently Asked Questions about Our Step-By-Step Guide To Screen Porch Installation
Was this page helpful?
At Storables.com, we guarantee accurate and reliable information. Our content, validated by Expert Board Contributors, is crafted following stringent Editorial Policies. We're committed to providing you with well-researched, expert-backed insights for all your informational needs.


0 thoughts on “Our Step-By-Step Guide To Screen Porch Installation”