
Articles
Step-by-Step Guide To Making A Pillowcase
Modified: August 16, 2024
Learn how to make a pillowcase with this step-by-step guide. Find articles and tutorials to help you create beautiful pillowcases at home.
(Many of the links in this article redirect to a specific reviewed product. Your purchase of these products through affiliate links helps to generate commission for Storables.com, at no extra cost. Learn more)
Introduction
Welcome to this step-by-step guide on how to make a pillowcase. Whether you are a sewing enthusiast or a beginner looking to explore a new hobby, creating your own pillowcase can be a rewarding and enjoyable experience. Not only will you have a unique and personalized addition to your home decor, but you’ll also have the satisfaction of knowing that you made it with your own hands.
In this guide, we will walk you through the process of making a pillowcase from start to finish. We’ll cover everything from selecting the right fabric to adding decorative touches. So let’s dive right in and get started on this creative endeavor!
Key Takeaways:
- Create personalized pillowcases with unique fabrics, trims, and closures to reflect your style and craftsmanship, adding warmth and charm to your home decor.
- Enjoy the satisfaction of completing a functional and creative sewing project, and embrace the opportunity to refine your skills and techniques through practice and experimentation.
Supplies Needed
Before you begin making your pillowcase, it’s essential to gather all the necessary supplies. Here’s a list of items you’ll need:
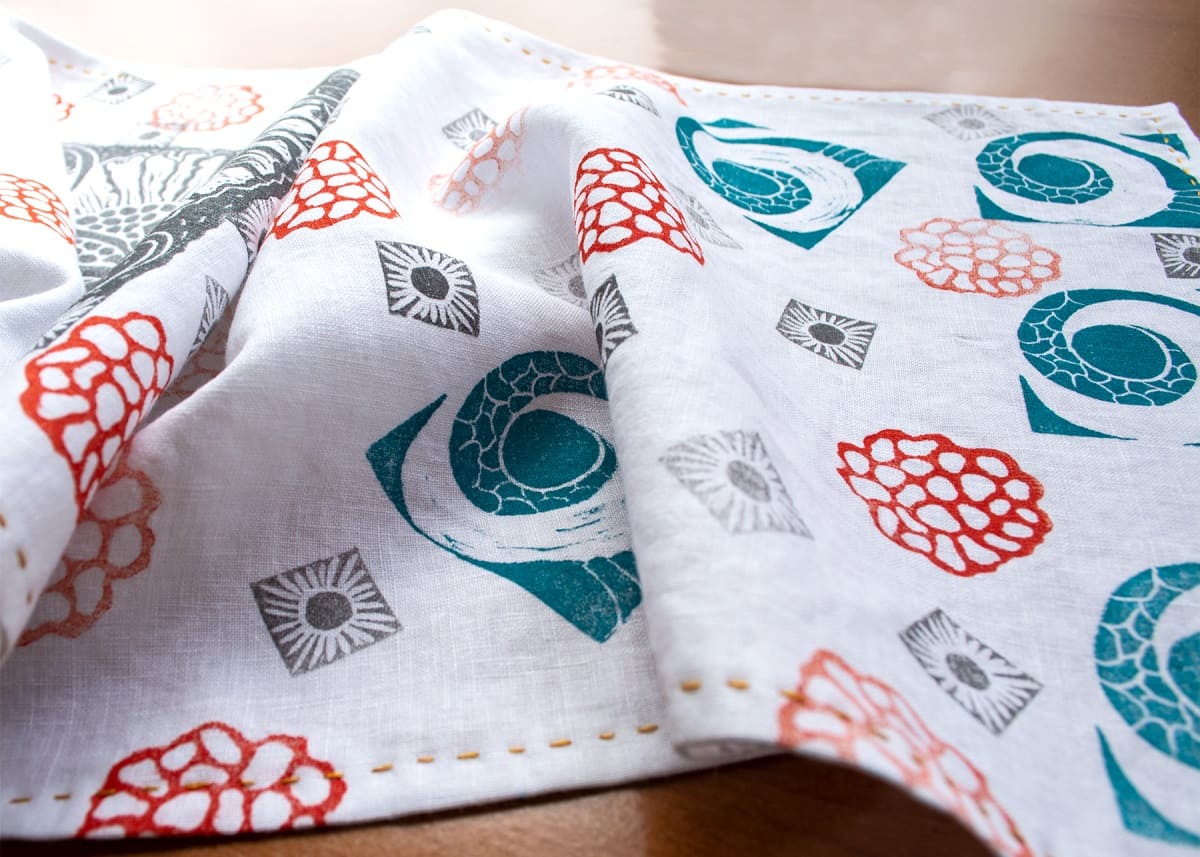
- Fabric: Choose a fabric of your choice, such as cotton, linen, or flannel. Make sure to select a fabric that is suitable for pillowcases and complements your home decor.
- Thread: Select a thread that matches or complements the color of your fabric.
- Pins: These will help secure the fabric in place while sewing.
- Scissors: Ensure you have a sharp pair of scissors for cutting the fabric.
- Ruler or Measuring Tape: You’ll need this to measure and mark the fabric accurately.
- Sewing Machine: While it’s possible to sew the pillowcase by hand, using a sewing machine will make the process faster and more efficient.
- Iron and Ironing Board: These are essential for pressing and creasing the fabric, creating a professional finish.
- Trim (optional): If you want to add decorative trim to your pillowcase, make sure to have it on hand.
Having these supplies ready before you start will make the sewing process smoother and more enjoyable. Once you have everything you need, you’re ready to move on to the next step.
Step 1: Preparing the Fabric
The first step in making a pillowcase is preparing the fabric. Follow these steps to ensure your fabric is ready for sewing:
- Pre-wash the Fabric: Before you begin cutting and sewing, it’s important to pre-wash your fabric. This will help remove any sizing or shrinkage and ensure that your pillowcase doesn’t shrink after it’s been sewn. Follow the fabric washing instructions, and dry it accordingly.
- Iron the Fabric: Once the fabric is dry, iron it to remove any wrinkles or creases. A smooth and flat fabric surface makes it easier to measure and cut accurately.
- Measure the Fabric: Measure and mark the desired size for your pillowcase. A standard pillowcase usually measures 20 inches by 30 inches, but you can adjust the dimensions according to your preferences.
- Cut the Fabric: Use your scissors to carefully cut along the marked lines. Take your time and ensure that the edges are straight.
By pre-washing, ironing, measuring, and cutting the fabric, you are setting the foundation for a well-made pillowcase. Once you’ve completed these steps, you’re ready to move on to the next stage of the process: measuring and cutting the fabric.
Step 2: Measuring and Cutting
Now that you have your fabric prepared, it’s time to measure and cut it to the desired size for your pillowcase. Follow these steps:
- Measure the Fabric: Place your fabric on a flat surface and measure the width and length according to your preferred pillowcase size. For a standard pillowcase, the width should be double the width of the pillow, plus an additional 6 inches for seam allowance.
- Mark the Fabric: Use a ruler or measuring tape to mark the measurements on the fabric. It’s essential to make straight and accurate lines.
- Cut the Fabric: Once you’ve marked the fabric, use your scissors to cut along the lines. Take your time and ensure that the cuts are neat and precise.
- Repeat for the Back Panel: If you want a contrasting back panel for your pillowcase, repeat the measuring and cutting process with another piece of fabric. This panel should be the same width as the front panel but approximately 6-8 inches longer in length to allow for an envelope-style closure.
By carefully measuring and cutting the fabric, you’ll ensure that the pillowcase fits your pillow perfectly. Take your time and double-check your measurements before cutting to avoid any mistakes. Once you’ve completed this step, you’re ready to move on to sewing the hem.
Step 3: Sewing the Hem
Now that you have the fabric panels cut to the desired size, it’s time to sew the hem of the pillowcase. The hem will give your pillowcase a clean and finished look. Follow these steps:
- Fold the Fabric: Take the front panel and fold one edge towards the wrong side of the fabric, about ½ inch. Press it with an iron to create a crease.
- Fold Again: Fold the same edge one more time, about ½ inch, to encase the raw edge. Press it with an iron and use pins to hold it in place.
- Repeat for the Back Panel: If you have a contrasting back panel, repeat the folding and pressing process on one edge of that panel as well.
- Sew the Hem: Set up your sewing machine with a matching thread and stitch a straight line along the folded edge of the fabric, securing the hem in place. Remove the pins as you sew.
- Repeat for the Other Edge: Repeat the folding, pressing, and sewing process for the remaining edge of both front and back panels.
By sewing the hem, you are creating a neat and professional-looking edge for your pillowcase. Take your time and sew with precision to achieve the best results. Once you’ve completed this step, you can move on to the next stage: adding decorative trim, if desired.
When sewing the pillowcase, be sure to backstitch at the beginning and end of each seam to secure the stitches and prevent them from unraveling.
Read more: How To Press Flowers: A Step By Step Guide
Step 4: Adding the Trim (optional)
If you’d like to add a decorative touch to your pillowcase, you can choose to add trim along the hemline. This step is optional but can elevate the overall appearance of your pillowcase. Follow these steps:
- Select the Trim: Choose a trim that complements your fabric and adds the desired aesthetic to your pillowcase. Options include lace, ribbon, pom-pom trim, or any other trim of your choice.
- Measure and Cut the Trim: Measure the length of the hemline on your pillowcase and cut the trim accordingly, allowing for a little extra length for overlap.
- Pin the Trim: Place the trim along the folded edge of the hemline and secure it in place with pins. Make sure the trim is evenly aligned and lies flat against the fabric.
- Sew the Trim: Using a straight stitch, sew along the edge of the trim, attaching it securely to the fabric. Trim any excess thread as needed.
- Repeat for the Back Panel: If you have a contrasting back panel, repeat the measuring, cutting, pinning, and sewing process for that panel as well.
Adding trim can add a whimsical, elegant, or playful touch to your pillowcase, depending on the trim you choose. Take your time to select the right trim and sew it precisely to achieve the desired look. Once you’ve completed this step, you can move on to sewing the sides of the pillowcase.
Step 5: Sewing the Sides
With the hem and trim, if added, in place, it’s time to sew the sides of the pillowcase. This step will join the front and back panels together, creating the body of the pillowcase. Follow these steps:
- Place the Panels: Lay the front and back panels on top of each other, right sides facing inward. Ensure that the hemmed edges and trim, if added, align.
- Pin the Sides: Starting from the top of the panels, pin the sides together, leaving a ½ inch seam allowance. This will ensure that the stitching is straight and secure.
- Sew the Sides: Using a straight stitch, sew along the pinned edges, starting from the top and going all the way down to the bottom. Backstitch at the beginning and end to secure the stitches.
- Trim Excess Thread: After sewing the sides, trim any excess thread for a clean finish.
By sewing the sides of the pillowcase, you are creating a snug and secure enclosure for your pillow. Take your time to align the panels properly and sew with precision for the best results. Once you’ve completed this step, you can move on to sewing the bottom edge and completing the pillowcase.
Step 6: Sewing the Bottom Edge
Now that you have sewn the sides of the pillowcase, you’re almost done! The next step is to sew the bottom edge, which will complete the enclosure for your pillow. Follow these steps:
- Trim the Excess: If there is any excess fabric sticking out from the bottom edge of the pillowcase, trim it so that the edges align neatly.
- Fold and Press: Fold the bottom edge of the pillowcase towards the wrong side of the fabric, about ½ inch. Press it with an iron to create a crease.
- Fold and Press Again: Fold the same edge one more time, about ½ inch, to encase the raw edge. Press it with an iron and use pins to hold it in place.
- Sew the Bottom Edge: Set up your sewing machine with a matching thread, and stitch a straight line along the folded edge of the fabric, securing the bottom edge of the pillowcase.
- Remove the Pins: Once you’ve sewn the bottom edge, carefully remove the pins to complete the stitching.
By sewing the bottom edge, you are finishing off the pillowcase and ensuring that the pillow remains secure inside. Take your time to fold, press, and sew accurately for a neat and professional finish. Once you’ve completed this step, you’re ready for the final touches.
Step 7: Finishing Touches
Congratulations! You’re almost done with creating your own pillowcase. The final step involves adding any finishing touches and ensuring that the pillowcase is ready for use. Follow these steps:
- Trim Loose Threads: Carefully inspect the pillowcase and trim any loose threads or excess fabric that may be sticking out.
- Press the Pillowcase: Give the pillowcase one final press with the iron to ensure that all the seams are flat and the fabric looks crisp.
- Turn the Pillowcase Right-Side-Out: Reach inside the pillowcase through the open end and carefully turn it right-side-out. Using your fingers, gently push out the corners to give them a defined shape.
- Insert the Pillow: Now that your pillowcase is ready, simply insert your pillow through the open end. Adjust it so that it fits snugly inside the case.
- Closure Options (if applicable): If you have an envelope-style closure, tuck the excess back panel fabric under the front panel to secure the pillow inside. If you added buttons or a zipper, close them to complete the enclosure.
Take a moment to admire your finished pillowcase. You’ve successfully created a beautiful and functional decorative item for your home. Now all that’s left is to put it in its intended place or show it off to friends and family.
Remember, the beauty of making your own pillowcase is that you can customize it to suit your preferences. Feel free to experiment with different fabrics, colors, trims, and closure options to create unique and personalized pillowcases that reflect your style.
Now that you’ve learned how to make a pillowcase from start to finish, enjoy the cozy and stylish addition to your bedding or home decor!
Read more: A Step-By-Step Guide To DIY Walk In Closet
Conclusion
Congratulations on completing your journey to make a pillowcase from scratch! By following this step-by-step guide, you have learned the process of transforming fabric into a beautiful and functional pillowcase. Not only have you gained a new skill, but you have also created a personalized and unique piece for your home.
Throughout this tutorial, you have learned how to prepare the fabric, measure and cut it to size, sew the hem, add optional trim, sew the sides, and complete the pillowcase by sewing the bottom edge. Each step was carefully explained to ensure that you understood the process and could achieve the best results.
By using your creativity and selecting your preferred fabrics, trims, and closure options, you can make pillowcases that are truly one-of-a-kind. Whether you’re making them for yourself or as gifts for loved ones, each pillowcase will carry a special touch that reflects your personal style and craftsmanship.
Remember, practice makes perfect. The more you make pillowcases, the more you’ll refine your skills and develop your own techniques. Experiment with different fabrics, trims, and embellishments to create a variety of designs that will add warmth and charm to any home.
Enjoy the process of sewing and creating, and embrace the satisfaction of completing a project that is not only functional but also a representation of your creativity and personal style. Now that you know how to make a pillowcase, you can embark on many more sewing adventures and take your skills to a whole new level.
Thank you for joining us on this sewing journey. We hope you had fun and found this guide helpful. Have a great time making and enjoying your handmade pillowcases!
Frequently Asked Questions about Step-by-Step Guide To Making A Pillowcase
Was this page helpful?
At Storables.com, we guarantee accurate and reliable information. Our content, validated by Expert Board Contributors, is crafted following stringent Editorial Policies. We're committed to providing you with well-researched, expert-backed insights for all your informational needs.


0 thoughts on “Step-by-Step Guide To Making A Pillowcase”