Home>Interior Design>How To Press Flowers: A Step By Step Guide
Interior Design
How To Press Flowers: A Step By Step Guide
Modified: September 2, 2024
Learn how to press flowers for stunning interior design arrangements with this step-by-step guide. Create beautiful botanical displays and elevate your space effortlessly.
(Many of the links in this article redirect to a specific reviewed product. Your purchase of these products through affiliate links helps to generate commission for Storables.com, at no extra cost. Learn more)
Introduction
Welcome to our step-by-step guide on how to press flowers. Pressing flowers is a timeless and beloved method of preserving the natural beauty of blooms. Whether you want to create stunning arrangements, make botanical artwork, or simply keep a special memory of a cherished flower, this guide will walk you through the process.
Pressing flowers is not only a fun and creative activity, but it also allows you to create unique and personalized pieces of art that can be used in various ways. From framing pressed flowers to making greeting cards, the possibilities are endless. So, let’s dive in and discover the art of pressing flowers!
Before we begin, it’s important to note that while many flower types can be successfully pressed, some may not yield desired results. Delicate and highly fragrant flowers, such as roses and tulips, tend to lose their vibrant colors and may wither in the pressing process. However, flowers like daisies, pansies, and lavender are ideal for pressing.
To help you get started on this enchanting journey of preserving nature’s beauty, we will guide you through the necessary materials, flower selection, preparation, and different pressing methods. So, let’s gather our supplies and embark on this delightful journey of pressing flowers!
Key Takeaways:
- Preserve the fleeting beauty of nature by mastering the art of pressing flowers. Create stunning displays and personalized artwork to cherish for years to come.
- Gather the right materials, choose suitable flowers, and embark on an enchanting journey of pressing flowers. Unveil their delicate charm and explore endless creative display options.
Read more: How To Store Pressed Flowers
Step 1: Gather Your Materials
Before diving into the process of pressing flowers, it’s essential to gather all the necessary materials. Having everything prepared will make the process smoother and more enjoyable. Here are the materials you’ll need:
- A selection of fresh flowers: Choose flowers that are in full bloom and at their peak freshness. Avoid flowers that are wilted or have started to brown.
- Gloves: Protect your hands from any potential allergens or irritants that some flowers may contain.
- Garden shears or scissors: Use these to cut the flowers from the stem. Ensure your cutting tool is clean and sharp to avoid crushing the stems.
- Newspapers or blotting paper: These will be used to absorb moisture from the flowers during the pressing process.
- Heavy books or a flower press: These will be used to provide pressure and flatten the flowers.
- Parchment or wax paper: Place these sheets between the flowers and the pressing surface to prevent them from sticking.
- A clean and dry workspace: It’s preferable to work on a surface that won’t be affected by moisture or stains.
Once you have gathered all the materials, make sure your workspace is ready. Lay down the newspapers or blotting paper to protect the surface and ensure you have enough space for the flowers and pressing tools.
It’s important to note that the quality of your materials will affect the outcome of your pressed flowers. Using high-quality paper and a flower press will help to preserve the colors and shape of the flowers.
Now that you have gathered all the necessary materials, it’s time to move on to the next step: choosing the right flowers for pressing.
Step 2: Choose Your Flowers
When it comes to pressing flowers, the selection of blooms plays a crucial role in achieving the desired results. Certain flowers are better suited for pressing due to their characteristics, such as durability and color retention. Here are some factors to consider when choosing flowers for pressing:
- Durability: Select flowers that have sturdy petals and can withstand the pressing process without wilting or losing their shape.
- Flatness: Flowers with flatter blooms, such as pansies or daisies, press more easily and retain their shape well.
- Pigment Intensity: Opt for flowers with vibrant pigments, as they will maintain their colors better after pressing.
- Avoid Highly Fragile Flowers: Flowers like roses and tulips may not be suitable for pressing, as they tend to lose their delicate petals and vivid colors.
It’s important to note that the best time to pick flowers for pressing is in the morning, when they are at their freshest. Avoid selecting flowers that have been exposed to rain or dew, as excess moisture can impact the pressing process.
If you have a garden or access to a local flower market, you’ll have a wider range of flower choices. However, don’t despair if you don’t have access to fresh blooms. You can still find suitable flowers for pressing in your own backyard or nearby parks and meadows.
Now that you have an idea of the type of flowers to look for, it’s time to move on to the next step: preparing the flowers for pressing.
Step 3: Prepare the Flowers
Preparing the flowers before pressing is an important step in ensuring successful results. By properly preparing the flowers, you can remove excess moisture and help them retain their shape and color throughout the pressing process. Here’s how to prepare your flowers:
- Trim the Stems: Start by trimming the stems of the flowers. Use clean garden shears or scissors to make a diagonal cut, about 1-2 inches from the base of the flower.
- Remove Excess Foliage: Remove any leaves or foliage that would come into contact with the pressing surface. This will help prevent the leaves from sticking or molding during the pressing process.
- Inspect for Pests: Check the flowers for any signs of pests or insects. If you notice any pests, gently shake or brush them off the flowers.
- Divide into Blooms: If you have multiple flowers to press, it’s important to divide them into individual blooms. This will make it easier to arrange them in the press or between the pages of a book.
Once you have prepared the flowers, it’s time to move on to the pressing process. Remember to handle the flowers gently to avoid damaging the delicate petals.
Now that your flowers are prepared, it’s time to choose your preferred pressing method. In the next steps, we will discuss two popular methods: pressing using books and using a flower press.
Step 4: Pressing Method 1: Using Books
One of the most commonly used methods for pressing flowers is using books. This method is simple and convenient, as it utilizes materials that are easily accessible. Here’s how to press flowers using books:
- Prepare the Books: Choose a heavy book that is large enough to accommodate the size of your flowers. It’s preferable to use books with thick, absorbent pages. Line the pages with parchment or wax paper to prevent the flowers from sticking to the pages.
- Arrange the Flowers: Lay the flowers flat on a page, making sure they do not overlap. Leave enough space between the flowers to allow for air circulation.
- Add Additional Layers: If you have multiple flowers to press, add more parchment or wax paper between each layer to prevent the flowers from sticking together.
- Close the Book: Once you have arranged the flowers, carefully close the book. Place additional heavy objects on top of the book to add pressure.
It’s important to choose a location where the book can be left undisturbed during the pressing process. The flowers will need to remain in the book for approximately 2-3 weeks to fully dry and flatten.
After the designated time has passed, carefully open the book and check if the flowers are completely dry. If they still feel slightly damp, leave them in the book for a few more days before proceeding to the next step.
Now that you have learned how to press flowers using books, let’s move on to the next pressing method: using a flower press.
After pressing the flowers, store them in a dry, dark place to prevent them from fading. This will help preserve their color and shape for a longer period of time.
Read more: How To Press Flowers In Glass Frame
Step 5: Pressing Method 2: Using a Flower Press
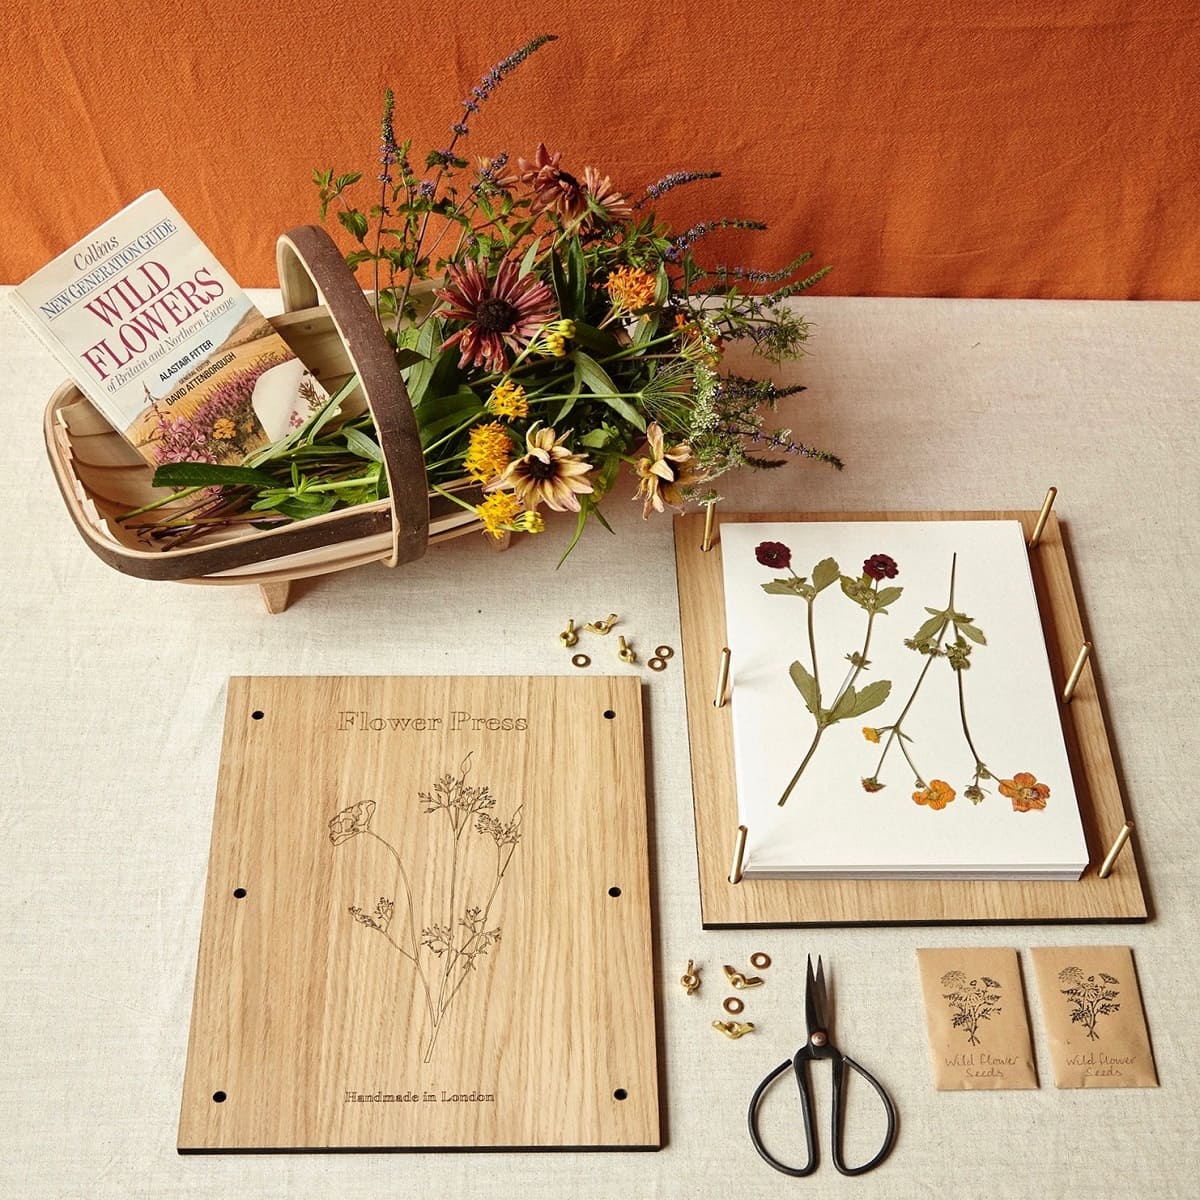
If you’re looking for a more specialized and efficient method of pressing flowers, using a flower press is a great option. Flower presses are designed specifically for preserving flowers and provide more control over the pressing process. Here’s how to press flowers using a flower press:
- Prepare the Flower Press: Start by assembling your flower press according to the manufacturer’s instructions. A flower press typically consists of wooden boards with bolts or straps that apply pressure.
- Arrange the Flowers: Open the flower press and place one of the wooden boards at the bottom. Line the board with parchment or wax paper to prevent the flowers from sticking.
- Arrange the flowers on the parchment paper, ensuring they do not overlap. Leave enough space between the flowers for air circulation.
- Add Additional Layers: If you have multiple flowers to press, add more parchment paper between each layer to avoid sticking.
- Place another wooden board on top of the flowers, sandwiching them between the boards.
- Tighten the Press: Use the bolts or straps on the flower press to secure and tighten the boards together. Apply gentle and even pressure, making sure not to crush the flowers.
Once the flower press is tightly secured, find a safe place to store it undisturbed. The pressing time will vary depending on the thickness and moisture content of the flowers, but it generally takes about 1-2 weeks for them to dry and flatten.
After the recommended time has passed, carefully open the flower press and check if the flowers are completely dry. If they still feel slightly damp, leave them in the press for a few more days until they are fully dry.
Now that you have learned how to press flowers using a flower press, it’s time to move on to the next step: waiting for the flowers to dry.
Step 6: Wait for the Flowers to Dry
After pressing your flowers using either the book or flower press method, it’s important to exercise patience and allow them to dry completely. Drying time can vary depending on the flower type, thickness, and humidity levels. Here’s what you need to know about waiting for the flowers to dry:
Once the flowers are placed in the pressing device, be it a book or flower press, avoid opening it unnecessarily during the drying period. Opening the press too frequently may disrupt the process and prolong the drying time.
Find a dry and well-ventilated area to store the pressing device. Avoid exposing it to direct sunlight or areas with excessive humidity, as this can interfere with the drying process and cause the flowers to become discolored or moldy.
Depending on the thickness and moisture content of the flowers, it can take anywhere from 1 to 3 weeks for them to dry completely. To check if the flowers are dry, gently touch them. If they feel crisp and papery, they are ready to be removed from the press. If they still feel slightly damp or pliable, leave them for a few more days.
Patience is key during this step. Rushing the drying process may result in wrinkled or discolored flowers. It’s better to wait a little longer and ensure the flowers are fully dry before moving on to the next step.
Now that you have allowed enough time for the flowers to dry, it’s time to unveil the pressed flowers and see the beautiful results of your patience and effort!
Step 7: Unveiling the Pressed Flowers
After patiently waiting for the flowers to dry, it’s time to unveil the beautiful results of your pressing efforts. Opening up the press or book and revealing the pressed flowers is an exciting moment. Here’s how to unveil the pressed flowers:
- Carefully open the flower press or book: If you are using a flower press, release the bolts or straps and gently lift off the top board. For a book pressing method, carefully open the book to the page where the flowers were pressed.
- Handle the pressed flowers with care: Use tweezers or your fingers to gently lift the pressed flowers off the parchment or wax paper. Be careful not to touch the fragile petals, as they may be delicate.
- Inspect the pressed flowers: Take a closer look at the flowers and admire their beautifully preserved form. Notice the changes in shape and color that occurred during the pressing process.
- If desired, touch up the flowers: If you notice any petals or leaves that have shifted or folded during the pressing, you can use a pair of tweezers to carefully adjust them back into place.
As you handle the pressed flowers, it’s important to maintain a gentle touch to prevent any damage. The flowers will be more fragile in their pressed state, so handle them with care.
Now that you have successfully unveiled the pressed flowers, it’s time to move on to the final step: displaying your pressed flowers in a creative and appealing way.
Step 8: Displaying Your Pressed Flowers
Once you have completed the process of pressing and unveiling your flowers, it’s time to showcase their beauty and create stunning displays. Displaying your pressed flowers allows you to enjoy and appreciate their delicate charm. Here are some creative and inspiring ways to display your pressed flowers:
- Frame them: One of the most popular ways to display pressed flowers is by framing them. Arrange the pressed flowers onto a piece of acid-free paper or cardstock, and then place it inside a shadow box or frame. Hang it on the wall or place it on a shelf to create a unique and artistic display.
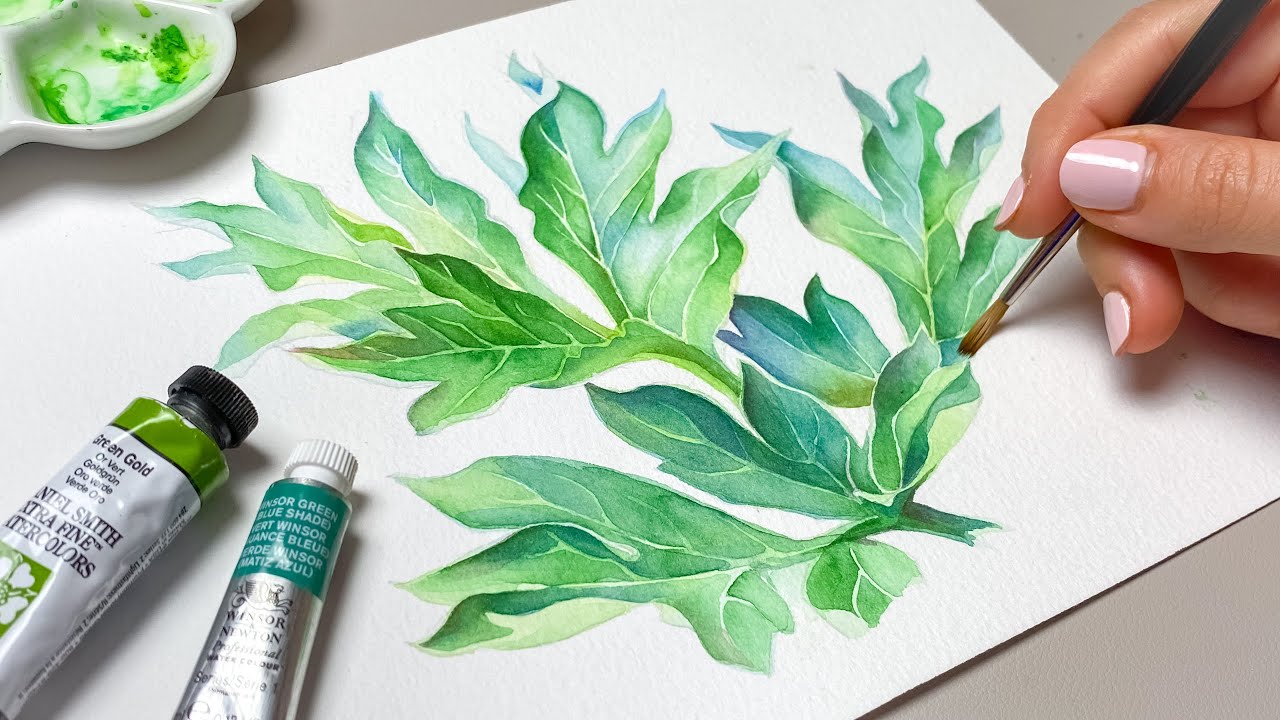
- Create botanical artwork: Use your pressed flowers to create beautiful botanical artwork. Arrange and glue them onto a canvas or a piece of wood to create a stunning floral composition. You can also combine pressed flowers with watercolor or acrylic paintings to add depth and dimension to your artwork.
- Make greeting cards: Utilize your pressed flowers to create personalized greeting cards or stationery. Simply glue the pressed flowers onto the front of blank cards or sheets of paper. You can add additional details such as calligraphy or stamped sentiments to make each card unique.
- Design a floral collage: Arrange your pressed flowers onto a piece of paper or canvas in a collage-style arrangement. Mix and match different shapes, colors, and sizes to create a visually captivating floral collage. You can then frame the collage or have it professionally mounted for a more polished look.
- Create a pressed flower bookmark: Laminate your pressed flowers or sandwich them between clear contact paper to create beautiful and durable bookmarks. Add a ribbon or decorative tassel for an extra touch.
Remember to keep your pressed flowers away from direct sunlight and excessive moisture to ensure their preservation. Over time, the colors of the pressed flowers may fade, but their delicate beauty will continue to captivate and add a touch of nature to your space.
Congratulations! You have now mastered the art of pressing flowers and have learned how to display them creatively. Enjoy the beauty of your pressed flowers and continue exploring new ways to incorporate them into your home decor or gift-giving endeavors.
With this comprehensive guide, you can confidently embark on your journey of preserving floral memories and creating stunning botanical art. Happy pressing!
Read more: Step-by-Step Guide To Making A Pillowcase
Conclusion
Preserving the beauty of nature through the art of pressing flowers is a timeless and delightful activity. It allows us to capture a fleeting moment in time and create keepsakes that can be cherished for years to come. By following the steps outlined in this guide, you have learned how to press flowers and create stunning displays that showcase their delicate charm.
Throughout this journey, you have discovered the importance of gathering the right materials, selecting suitable flowers, and properly preparing them for pressing. You have explored two popular pressing methods: using books and utilizing a flower press. With patience and care, you have successfully dried and unveiled your pressed flowers, revealing their preserved beauty.
From framing the pressed flowers to creating botanical artwork, the possibilities for displaying your pressed flowers are endless. Whether you choose to hang them on the wall, make greeting cards, or design a floral collage, these preserved blooms will bring a touch of nature and elegance to any space.
Remember to handle your pressed flowers with gentleness and keep them away from direct sunlight and excessive moisture to maintain their longevity. Over time, the colors may fade, but the delicate beauty and memories captured within the pressed flowers will remain.
So, gather your materials, choose your flowers, and embark on the enchanting journey of pressing flowers. Let your creativity flow as you explore the various ways to display and enjoy your pressed floral creations. May this guide serve as a starting point for your ongoing exploration of this beautiful art form.
Enjoy the art of pressing flowers and turn nature’s fleeting beauty into timeless treasures.
Frequently Asked Questions about How To Press Flowers: A Step By Step Guide
Was this page helpful?
At Storables.com, we guarantee accurate and reliable information. Our content, validated by Expert Board Contributors, is crafted following stringent Editorial Policies. We're committed to providing you with well-researched, expert-backed insights for all your informational needs.


0 thoughts on “How To Press Flowers: A Step By Step Guide”