Home>Interior Design>How To Build Acoustic Panels
Interior Design
How To Build Acoustic Panels
Modified: August 28, 2024
Learn how to build acoustic panels for your interior design projects. Improve sound quality and create a stylish and functional space with these easy-to-follow steps.
(Many of the links in this article redirect to a specific reviewed product. Your purchase of these products through affiliate links helps to generate commission for Storables.com, at no extra cost. Learn more)
Introduction
Welcome to the world of interior design and acoustics! If you’re passionate about creating a harmonious and immersive space, then understanding the importance of acoustic panels is crucial. Whether you’re a musician, sound engineer, or simply someone who wants to enhance the audio quality in their home, acoustic panels can make a significant difference.
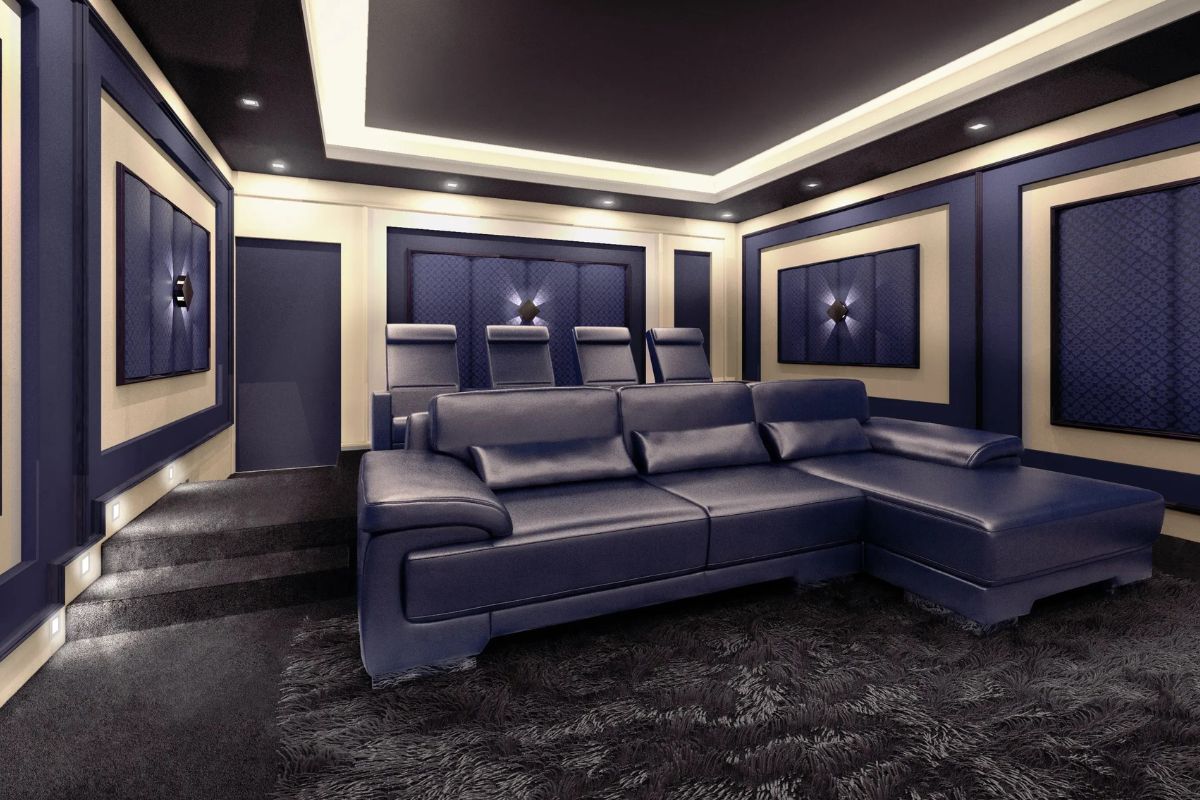
In this article, we will dive deep into the world of acoustic panels, exploring their purpose, benefits, and how you can build them yourself. Whether you have a dedicated home recording studio, a home theater, or simply want to create a more peaceful and noise-free environment, acoustic panels can be a game-changer.
But first, let’s start with the basics.
Key Takeaways:
- Acoustic panels are like superheroes for your room, absorbing sound waves to make your space sound amazing. Choose the right materials, design them thoughtfully, and install them strategically for a harmonious and immersive environment.
- Maintaining and cleaning your acoustic panels is like giving them a spa day. Regular care and attention will keep them performing at their best, ensuring optimal sound quality and a visually appealing space.
Read more: What Are Acoustic Panels
Understanding Acoustic Panels
What are acoustic panels, and how do they work? Acoustic panels are specially designed structures made from sound-absorbing materials that are strategically placed on walls to reduce sound reverberation and echo. Their main purpose is to absorb and diffuse sound waves, creating a more balanced and controlled acoustic environment.
When sound waves hit a hard surface, such as walls or ceilings, they bounce back and forth, causing unwanted echoes and reverberation. This can result in poor audio quality, decreased speech intelligibility, and an overall unpleasant listening experience. Acoustic panels help combat these issues by absorbing the sound waves, preventing them from bouncing around the room.
The benefits of using acoustic panels are numerous. Not only do they improve the audio quality and clarity, but they also enhance the overall acoustic balance in a space. This makes them invaluable in environments such as recording studios, home theaters, conference rooms, offices, restaurants, and even residential living spaces.
Now that we have a clear understanding of acoustic panels, let’s explore how to choose the right materials for your DIY project.
Key Takeaways:
- Acoustic panels are like superheroes for your room, absorbing sound waves to make your space sound amazing. Choose the right materials, design them thoughtfully, and install them strategically for a harmonious and immersive environment.
- Maintaining and cleaning your acoustic panels is like giving them a spa day. Regular care and attention will keep them performing at their best, ensuring optimal sound quality and a visually appealing space.
Read more: What Are Acoustic Panels
Understanding Acoustic Panels
Acoustic panels are an essential component of any well-designed space that aims to achieve optimum sound quality and ambiance. They are designed to absorb and control sound waves, reducing unwanted echoes and reverberations. Let’s explore what exactly acoustic panels are, how they work, and the benefits they offer.
What are acoustic panels?
Acoustic panels, also known as sound panels or sound absorbers, are specialized structures made from sound-absorbing materials. They are typically mounted on walls or ceilings to improve the acoustic qualities of a room. These panels are specifically engineered to absorb sound energy, preventing it from bouncing around the space and creating unwanted echoes.
Acoustic panels come in various shapes, sizes, and designs to suit different aesthetics and installation requirements. They can be fabric-wrapped or made from other materials, such as foam, fiberglass, or wood, which have excellent sound-absorbing properties.
How do acoustic panels work?
Acoustic panels work by reducing sound reflections and controlling the reverberation time in a space. When sound waves hit an acoustic panel, they penetrate the porous material and convert their energy into heat through frictional forces. This absorption process diminishes the sound energy, preventing it from reflecting and causing echoes in the room.
The sound-absorbing qualities of acoustic panels are determined by their material composition, thickness, density, and surface area. Panels with greater surface area and thickness provide better sound absorption performance. Additionally, the design and placement of the panels play a critical role in optimizing their effectiveness.
Read more: How To Attach Acoustic Panels To The Wall
Benefits of using acoustic panels
Acoustic panels offer a myriad of benefits for both professional and residential spaces. Here are some key advantages:
- Improved sound quality: Acoustic panels significantly reduce echoes, reverberations, and standing waves, resulting in clearer sound and enhanced audio quality. This is crucial in spaces where accurate sound reproduction is essential, such as recording studios, home theaters, and concert halls.
- Speech intelligibility: By minimizing background noise and reducing sound reflections, acoustic panels enhance speech intelligibility. This is beneficial in conference rooms, classrooms, offices, and other environments where effective communication is vital.
- Noise control: In residential settings, acoustic panels can effectively control noise transmission between rooms, providing a more peaceful and relaxed living environment. They also minimize external noise pollution, creating a quieter and more comfortable space.
- Aesthetics and design versatility: Acoustic panels are available in various colors, shapes, and fabric options, allowing them to blend seamlessly into any interior design concept. They can be customized to complement the existing decor or used as a statement piece to enhance visual appeal.
- Flexibility and portability: Many acoustic panels are designed to be lightweight and easy to install, providing flexibility for temporary setups or spaces where permanent installation is not desired. This makes them ideal for event venues, home recording studios, and rented spaces.
Understanding the purpose and benefits of acoustic panels is crucial when creating an acoustically pleasing and functional environment. Now that we have explored the fundamentals, let’s delve into the process of choosing the right materials for your acoustic panel project.
Choosing the Right Materials
When it comes to building acoustic panels, selecting the right materials is essential to achieve optimal sound absorption and aesthetics. The choice of materials will impact not only the performance of the panels but also the overall design and cost of the project. In this section, we will explore the different types of acoustic panel materials, factors to consider when selecting materials, and important cost considerations.
Types of acoustic panel materials
Various materials can be used to construct acoustic panels, each with its own unique sound-absorbing properties. Here are some commonly used materials:
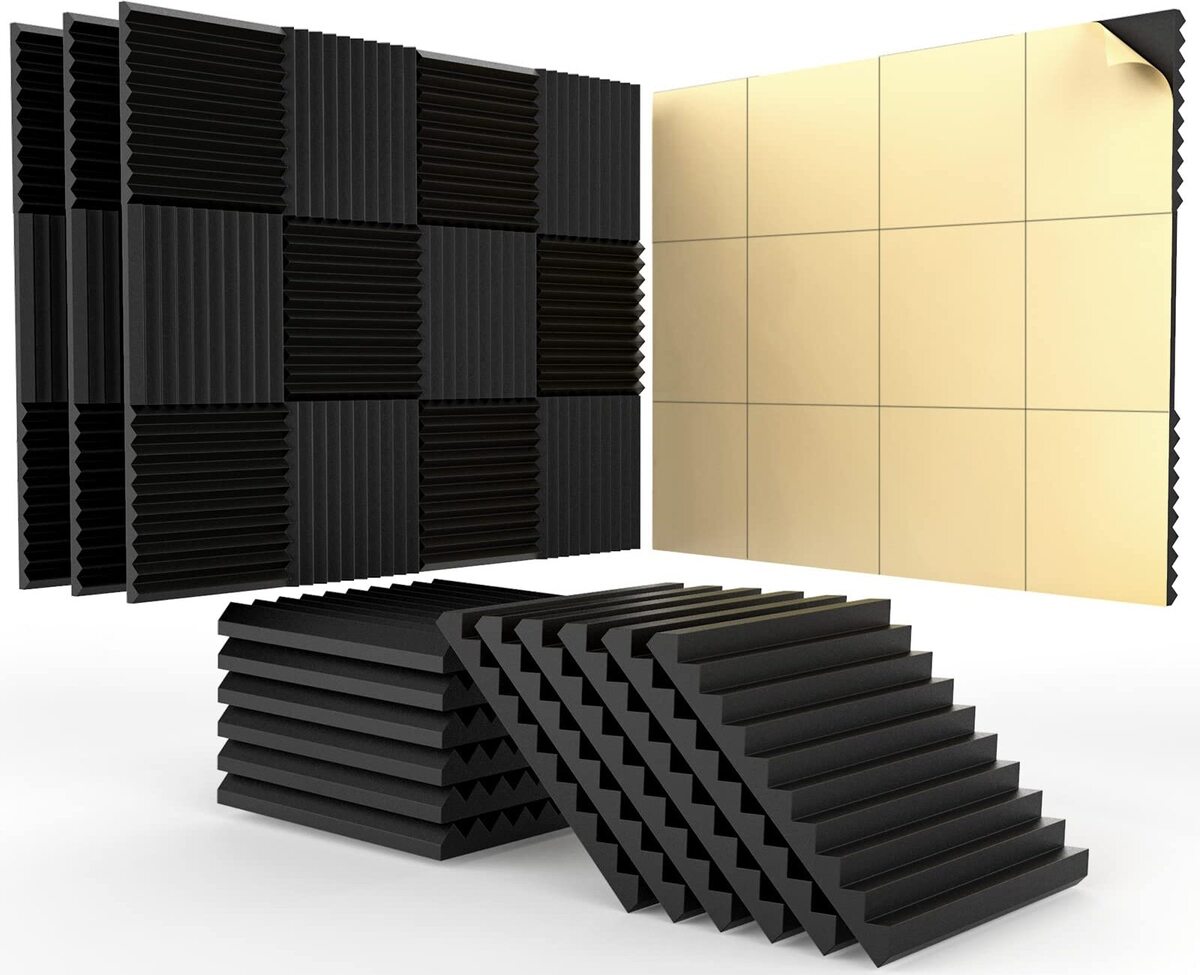
- Foam: Foam panels, typically made from polyurethane or melamine foam, are lightweight, affordable, and easy to work with. They provide good sound absorption across a wide range of frequencies, making them ideal for general-purpose applications.
- Fiberglass: Fiberglass panels are made from glass fibers and are known for their excellent sound absorption capabilities. They can absorb sound across a broader frequency range and are particularly effective at absorbing high-frequency sounds.
- Mineral wool: Mineral wool panels are made from rock or slag fibers and are known for their high sound absorption performance. They offer excellent thermal insulation properties as well and are often used in environments where fire safety is a concern.
- Wood: Wood panels provide a more decorative option for acoustic treatments. They can be perforated or slotted to enhance sound absorption while adding a touch of elegance to the space. Wood panels are often used in areas where aesthetic appeal is important, such as theaters, auditoriums, and restaurants.
Factors to consider when selecting materials
When choosing materials for your acoustic panels, there are several factors to consider:
- Sound absorption performance: Different materials have varying sound absorption capabilities. Consider the specific needs of your space and select a material that best matches the desired sound absorption performance.
- Installation requirements: Some materials may require special installation techniques or additional hardware. Evaluate the ease of installation and ensure that the chosen materials align with your DIY skills and available resources.
- Aesthetics: Consider the visual impact you want the panels to have in your space. Some materials offer a wider range of design options, allowing you to match the panels with your existing décor and create a cohesive look.
- Durability: Assess the durability and longevity of the materials. This is especially important in high-traffic areas or environments where the panels may be subject to wear and tear.
- Cost: Evaluate the cost of the materials, keeping in mind your budget for the project. Balance the desired performance and aesthetics with the affordability of the chosen materials.
Read more: How Do Acoustic Panels Work
Cost considerations
Building acoustic panels can range in cost depending on the materials chosen and the size of the project. Foam panels are generally the most affordable option, while wood and specialty materials may be more expensive. Consider the quantity of panels needed and factor in any additional costs for mounting hardware, fabric, adhesives, or tools required for construction. It is also worth exploring any budget-friendly alternatives or discounts available when purchasing materials.
By carefully considering the types of materials available, important factors in selecting materials, and cost considerations, you can make informed decisions when building your acoustic panels. In the next section, we will discuss the design considerations to keep in mind when creating your DIY acoustic panels.
Design Considerations
When constructing acoustic panels, it’s important to consider various design aspects to ensure optimal sound absorption and visual coherence within your space. In this section, we will explore three key design considerations: determining the panel size, selecting the appropriate thickness, and choosing the panel shape and orientation.
Determining the panel size
The size of your acoustic panels will depend on the specific requirements and dimensions of your space. It’s essential to strike a balance between the number and size of panels to achieve effective sound absorption without overwhelming the room visually. Consider the following factors when determining the panel size:
- Room dimensions: Take accurate measurements of the room’s height, width, and length. This will guide you in determining the appropriate size of the panels to ensure sufficient coverage and even sound absorption throughout the space.
- Intended sound absorption: Evaluate the acoustic challenges in your space and prioritize areas where sound reflections or echoes are prominent. Allocate larger panels or multiple panels in these critical areas to maximize sound absorption.
- Aesthetic considerations: Consider the visual impact and desired arrangement of the panels in the room. Smaller panels may provide more flexibility for creative placement and can be grouped together to create interesting patterns or designs.
Selecting the appropriate thickness
The thickness of the acoustic panels influences their sound absorption performance. Thicker panels typically provide better low-frequency absorption, while thinner panels are more effective at absorbing higher frequencies. Consider the following when selecting the appropriate thickness:
- Target frequency range: Identify the frequency range you want to target for sound absorption. If you primarily need to address low-frequency issues, such as bass or rumble, thicker panels may be more suitable. For general-purpose sound absorption, a medium thickness would suffice.
- Available space: Take into account the available space on the walls or ceiling for mounting the panels. If space is limited, thinner panels may be more practical while still providing noticeable sound absorption benefits.
- Budget considerations: Thicker panels often require more materials, resulting in higher costs. Evaluate your budget and balance the desired sound absorption performance with affordability.
Read more: Where To Place Acoustic Panels In A Room
Choosing the panel shape and orientation
The shape and orientation of the panels contribute to both the sound absorption effectiveness and the visual appeal of the space. Consider the following when making these design choices:
- Rectangular or square panels: These shapes are the most common and versatile options. They can be easily aligned and mounted in various configurations, providing functional sound absorption while maintaining a clean and cohesive look.
- Angled or curved panels: Angled or curved panels can help break up sound reflections and create a more dynamic and aesthetically appealing appearance. These panels can be particularly useful in larger spaces or rooms with unique architectural features.
- Vertical or horizontal orientation: Consider the layout of the room and how the panels will be mounted. The orientation of the panels can help direct sound absorption towards specific areas or address particular acoustic challenges.
By carefully considering the panel size, thickness, and shape and orientation, you can design acoustic panels that effectively address the acoustic needs of your space while enhancing the overall aesthetic appeal. In the next section, we will dive into the construction process and guide you through building the frames for your panels.
Building the Frame
The frame is a crucial component of acoustic panels as it provides structure, stability, and support for the sound-absorbing materials. In this section, we will cover the required tools and materials, provide a step-by-step guide to constructing the frame, and offer tips for ensuring durability and stability.
Required tools and materials
Before getting started, gather the following tools and materials:
- Wood or metal: Choose a material for the frame that is sturdy and durable. Common options include solid wood, plywood, or metal bars.
- Miter saw or circular saw: This tool will be used to cut the frame pieces to the desired lengths.
- Measuring tape or ruler: Accurate measurements are essential for proper frame construction.
- Screwdriver or drill: You will need a screwdriver or drill to assemble the frame securely.
- Screws or nails: Select the appropriate fasteners based on the material and thickness of the frame pieces.
- Corner brackets or braces: These are optional but can provide additional stability to the frame.
Step-by-step guide to constructing the frame
- Measure and cut the frame pieces according to the desired size of your acoustic panel. Make sure to account for any overlapping or mitered corners if desired.
- Place the cut frame pieces on a flat surface and arrange them to form the desired shape of the frame (typically a rectangle or square).
- Attach the frame pieces together at the corners using screws or nails. Pre-drilling pilot holes can prevent splitting of the wood.
- Check the corners to ensure they form right angles. Use a square or measuring tape to confirm the accuracy of the frame.
- If desired, add corner brackets or braces to reinforce the joints and enhance the stability of the frame.
- Inspect the frame for any gaps or loose connections. Tighten any screws or nails as needed to ensure a secure frame structure.
Read more: What Fabric Is Suitable For Acoustic Panels
Tips for ensuring durability and stability
Here are some additional tips to ensure that your frame is durable and stable:
- Choose appropriate material: Select a material for the frame that is strong, rigid, and resistant to warping. Avoid using low-quality or weak materials that may compromise the stability of the frame.
- Use enough fasteners: Ensure that you use an adequate number of screws or nails to properly secure the frame pieces. This will prevent the frame from coming apart over time.
- Reinforce the corners: Consider adding additional corner brackets or braces at the frame’s corners to reinforce their stability. This will help prevent any wobbling or movement of the frame.
- Check for evenness: Use a level to ensure that the frame is even and not tilted. This will help ensure that the acoustic panel fits snugly against the frame and maintains its proper shape.
- Inspect for structural integrity: Regularly examine the frame for any signs of damage or wear. Replace any damaged or weakened components promptly to maintain the overall integrity of the frame.
By following these steps and tips, you can construct a sturdy and stable frame to support your acoustic panel. In the next section, we will explore the process of inserting the absorption material into the frame to complete your DIY acoustic panel.
Inserting the Absorption Material
The absorption material is a critical component of acoustic panels, as it is responsible for absorbing sound waves and reducing reverberations in the room. In this section, we will explore the types of absorption materials you can use, provide step-by-step instructions for inserting the material into the frame, and offer tips for achieving maximum sound absorption.
Types of absorption materials to use
There are several types of absorption materials to choose from, each with different acoustic properties and applications. Some commonly used materials include:
- Acoustic foam: Acoustic foam panels are lightweight and versatile, providing excellent sound absorption across a wide frequency range. They come in various shapes and thicknesses and are easy to cut and shape.
- Fiberglass insulation: Fiberglass insulation is another popular choice for absorption material. It is cost-effective, widely available, and has excellent sound-absorbing properties, particularly for high frequencies. However, it can be irritating to the skin and respiratory system, so take appropriate safety precautions during handling.
- Mineral wool: Mineral wool panels are made from mineral fibers, providing superior sound absorption and thermal insulation properties. They are resistant to fire and can be a good option for areas where fire safety is a concern.
- Natural fibers: Materials like cotton or wool can also be used as absorption material. They offer moderate sound absorption and can be an eco-friendly alternative to synthetic materials.
Step-by-step instructions for inserting the material
- Measure the dimensions of the frame to determine the size of the absorption material needed.
- Cut the absorption material into panels that match the size of the frame, leaving a small allowance for ease of insertion.
- Place one piece of the absorption material into the frame, ensuring it fits snugly against the inner edges of the frame.
- If needed, fold or compress the material slightly to fit it into the frame tightly, making sure there are no gaps or spaces.
- Continue inserting additional pieces of the absorption material until the entire frame is filled, layering them if necessary.
- Press down gently on the absorption material to ensure it is evenly distributed and occupies the entire space within the frame.
- If desired, use adhesive or fabric fasteners to secure the edges of the material to the inner sides of the frame for added stability.
Read more: How To Hang Acoustic Panels On The Ceiling
Tips for achieving maximum sound absorption
Here are some tips to help you achieve maximum sound absorption with your acoustic panels:
- Density matters: Choose absorption materials with the appropriate density for the desired sound absorption. Higher density materials tend to absorb low-frequency sounds more effectively.
- Fill the frame fully: Ensure that the absorption material fills the frame completely, without any gaps or spaces. This will prevent sound from leaking through and maximize absorption efficiency.
- Layer materials for broader frequency absorption: If you require a wider frequency range of sound absorption, consider layering different types of absorption materials within the frame. This can help to address a broader spectrum of sound frequencies.
- Experiment with positioning: Try adjusting the positioning of the absorption material within the frame to find the optimal arrangement that provides the best sound absorption performance in your specific space.
- Regularly inspect and maintain: Over time, the absorption material may settle or deteriorate. Regularly inspect your acoustic panels and replace or adjust the absorption material as necessary to maintain optimal performance.
By selecting the appropriate absorption material, following the step-by-step instructions for insertion, and implementing these tips, you can create acoustic panels that effectively absorb sound and enhance the acoustic quality of your space. In the next section, we will explore the process of upholstering the panels to add a finishing touch and enhance their visual appeal.
Upholstering the Panels
Upholstering the panels not only adds a finishing touch to your acoustic panels but also allows you to customize their appearance to suit your aesthetic preferences. In this section, we will discuss the materials needed for upholstery, provide a step-by-step guide to upholstering the panels, and offer creative ideas for fabric selection.
Materials needed for upholstery
Before you begin upholstering the panels, gather the following materials:
- Fabric: Choose a fabric that is durable, visually appealing, and acoustically transparent. Consider using fabrics specifically designed for acoustic applications.
- Upholstery adhesive: Select a high-quality adhesive suitable for your chosen fabric and the surface of the absorption material.
- Scissors or fabric cutter: Use sharp scissors or a fabric cutter to cut the fabric to the appropriate size.
- Staple gun or upholstery tacks: Depending on your preference, a staple gun or upholstery tacks can be used to secure the fabric to the frame.
- Measuring tape or ruler: Accurate measurements are essential for achieving smooth and even upholstery.
- Trim or decorative elements (optional): If desired, you can add decorative trim or elements to enhance the visual appeal of the upholstered panels.
Step-by-step guide to upholstering the panels
- Measure and cut the fabric pieces, leaving an adequate allowance for wrapping around the panels.
- Starting with one side of the panel, apply a thin layer of upholstery adhesive to the surface of the absorption material.
- Place the fabric over the adhesive, ensuring it is aligned properly and centered on the panel.
- Press the fabric firmly onto the adhesive, smoothing out any wrinkles or bubbles as you go.
- Continue applying adhesive and attaching the fabric, working your way around the panel in a clockwise or counterclockwise direction.
- Trim any excess fabric, leaving a neat and clean edge.
- If using a staple gun, secure the fabric to the frame by stapling along the edges, keeping the tension consistent to create a smooth and taut surface. If using upholstery tacks, carefully position and hammer them into the frame.
- Repeat the process for each panel, ensuring a consistent and professional appearance.
- If desired, add decorative trim or elements to the edges or corners of the panels for extra visual interest.
Read also: 9 Best Foam Acoustic Panels For 2025
Creative ideas for fabric selection
When selecting fabric for your acoustic panel upholstery, consider the following creative ideas:
- Bold colors: Choose vibrant or bold-colored fabric to make a statement and add a pop of color to your space.
- Textured fabric: Opt for textured fabric to add visual interest and depth to the panels. Consider materials with patterns, weaves, or embossed designs.
- Prints and patterns: Explore different prints and patterns, such as stripes, geometric designs, or floral motifs, to create a unique and visually captivating look.
- Fabric with acoustic transparency: Look for fabrics specifically designed for acoustic applications that offer both aesthetic appeal and minimal impact on sound absorption performance.
- Mix and match: Combine different fabrics with complementary colors or patterns to create a diversified and eclectic panel arrangement.
- Consider texture and acoustics: Keep in mind that certain fabrics may have acoustical properties that can affect sound absorption. Consult experts or conduct tests to ensure the selected fabric does not negatively impact the panel’s performance.
By using quality materials, following the step-by-step guide, and incorporating creative ideas for fabric selection, you can achieve beautifully upholstered panels that elevate both the acoustic and visual quality of your space. In the next section, we will explore the process of mounting and installing the acoustic panels for optimum performance.
Mounting and Installing Acoustic Panels
Mounting and installing acoustic panels properly is crucial to ensure their effectiveness in improving sound quality and reducing unwanted echoes. In this section, we will explore different mounting options, provide guidelines for proper installation, and offer tips for achieving optimum sound performance.
Different mounting options
There are several mounting options to consider when installing acoustic panels:
- Direct adhesive mounting: This method involves attaching the panels directly to the wall using adhesive. It is a popular choice for lightweight panels and situations where you prefer a seamless and flush installation.
- French cleat mounting: A French cleat system utilizes two pieces of wood or metal that interlock to securely hang the panels on the wall. This method allows for easy installation and removal while providing stability.
- Impaling clips: Impaling clips are designed to hold acoustic panels flush against the wall. They have sharp metal prongs that puncture the back of the panel, securely holding it in place. This method is ideal for panels with rigid backing.
- Frame-mounted hanging: If your acoustic panels have a sturdy frame, you can use hooks or screws to hang them directly on the wall. This method allows for easy adjustment and removal.
- Suspension from the ceiling: For situations where wall mounting is not feasible or preferred, you can suspend the panels from the ceiling using wires, chains, or hooks. This method is often used in larger spaces or where a more decorative ceiling installation is desired.
Guidelines for proper installation
Follow these guidelines for proper installation of the acoustic panels:
- Locate problem areas: Identify the areas in the room that have the most significant acoustic issues or where sound reflections are prominent. These are the areas where you should prioritize installing the panels.
- Spacing and coverage: Space the panels evenly throughout the room, focusing on covering as much wall space as possible. The goal is to achieve an even distribution of sound absorption for optimal results.
- Consider room layout and function: Take into account the specific needs and functions of the room when deciding on panel placement. For example, in a home theater, focus on areas where the sound from the speakers directly reflects off the walls.
- Ensure secure attachment: Whichever mounting method you choose, ensure that the panels are securely attached to the wall or ceiling to prevent any movement or falling. This is particularly important in environments where people or equipment may come into contact with the panels.
- Follow manufacturer recommendations: If you are using pre-built acoustic panels, consult the manufacturer’s guidelines for installation. They may provide specific instructions or recommendations based on the panels’ design and materials.
Read also: 11 Best Decorative Acoustic Panels For 2025
Tips for achieving optimum sound performance
Here are some additional tips to help you achieve optimum sound performance with your installed acoustic panels:
- Experiment with panel placement: Depending on the unique characteristics of your room, you may need to experiment with the exact placement of the panels. Move them around and listen for changes in sound quality to find the arrangement that works best for your space.
- Consider reflection points: Identify the points in the room where sound directly reflects off the walls and install panels strategically in those areas. These reflection points are usually behind speakers or near seating areas.
- Combine absorption and diffusion: Consider incorporating diffusers alongside your acoustic panels to break up sound reflections and add a sense of spaciousness to the room. This combination can further enhance sound quality and create a more immersive listening experience.
- Regular maintenance: Keep your acoustic panels clean and free from dust or debris to maintain their performance. Regularly inspect and replace any damaged panels, and ensure that they remain securely mounted over time.
- Seek professional guidance: For complex installations or when dealing with critical acoustic requirements, consider consulting with a professional acoustician or sound engineer. They can provide expert guidance tailored to your specific needs.
By considering the different mounting options, following proper installation guidelines, and implementing these tips, you can effectively mount and install your acoustic panels to achieve optimum sound performance in your space. In the next section, we will explore the importance of maintaining and cleaning your acoustic panels to ensure their long-term effectiveness.
Maintaining and Cleaning
Maintaining and cleaning your acoustic panels is essential to ensure their long-term effectiveness and preserve their performance. In this section, we will explore regular maintenance practices, provide tips for cleaning acoustic panels, and highlight common mistakes to avoid.
Regular maintenance practices
Adopt these regular maintenance practices to keep your acoustic panels in optimal condition:
- Visual inspection: Regularly inspect your acoustic panels for any visible signs of damage, such as tears, stains, or loose fabric. Address these issues promptly to maintain the panel’s functionality and appearance.
- Dust removal: Use a soft brush or vacuum cleaner attachment with a low suction setting to remove dust from the surface of the panels. Do this regularly to minimize the accumulation of dust and debris that may impact the panel’s performance.
- Panel adjustment: Every few months, evaluate the placement and effectiveness of the panels. Adjust their position if needed, especially if you notice a change in the room’s acoustics or if you have rearranged furniture or equipment.
- Observing panel condition: Monitor for any changes in the panel’s appearance or performance. If you notice a decrease in sound absorption or unusual changes in sound quality, it may indicate that the panel needs maintenance or replacement.
Tips for cleaning acoustic panels
When it comes to cleaning your acoustic panels, keep in mind these valuable tips:
- Gentle cleaning methods: Use mild cleaning solutions or specialized acoustic panel cleaners, if available. Avoid harsh chemicals or solvents, as they can damage the fabric or the sound-absorbing material.
- Spot cleaning: Address stains or spills promptly using a damp cloth and a small amount of mild detergent. Gently blot the affected area, and avoid rubbing or scrubbing which can spread the stain or damage the fabric.
- Fabric-safe detergents: If necessary, consult the manufacturer’s recommendations for fabric care and use fabric-safe detergents for more thorough cleaning. Test a small, inconspicuous area of the fabric first to ensure it does not cause any discoloration or damage.
- Allow ample drying time: After cleaning, ensure that the panels are thoroughly dry before reinstalling them. Moisture trapped within the panels can lead to mold or mildew growth, compromising both acoustic performance and air quality.
Read also: 15 Amazing Blue Acoustic Panels For 2025
Common mistakes to avoid
Avoid these common mistakes when maintaining and cleaning your acoustic panels:
- Using abrasive materials: Avoid using rough sponges, brushes, or abrasive cleaning pads that can damage the fabric surface or the sound-absorbing material.
- Excessive moisture: Be mindful not to saturate the panels with excessive moisture during cleaning. This can lead to mold growth, fabric discoloration, or a decrease in sound-absorbing properties.
- Skipping regular maintenance: Neglecting regular maintenance practices can lead to a buildup of dust, debris, and potential damage to the panels. Make it a habit to inspect and clean your panels periodically.
- Poor panel handling: When moving or adjusting panels, handle them with care to avoid tearing the fabric or causing damage to the frame. Take precautions to prevent panels from falling, especially during installation or removal.
By implementing regular maintenance practices, following proper cleaning techniques, and avoiding common mistakes, you can ensure the longevity and performance of your acoustic panels. Regular care and attention will help maintain their effectiveness in providing optimal sound quality and enhancing the acoustic environment of your space.
Now that we have covered maintaining and cleaning acoustic panels, let’s conclude our journey into the world of DIY acoustic panels and the insights on how to optimize sound quality and control in your space.
Conclusion
Congratulations! You have now embarked on a journey into the world of DIY acoustic panels and gained valuable insights on how to optimize sound quality and control within your space. By understanding the purpose and benefits of acoustic panels, choosing the right materials, considering design aspects, constructing the frame, inserting the absorption material, upholstering the panels, and properly mounting and maintaining them, you are well-equipped to create a harmonious and immersive environment.
Acoustic panels play a vital role in controlling sound reflections, reducing echoes, and improving the overall acoustic balance of a room. They find applications in various settings, from recording studios and home theaters to conference rooms, offices, and even residential living spaces.
When it comes to building acoustic panels, choosing the right materials is key. Consider factors such as sound absorption performance, installation requirements, aesthetics, and durability. By selecting the appropriate materials, you can achieve optimal sound absorption while ensuring that the panels complement the interior design concept of your space.
Design considerations, such as determining the panel size, selecting the appropriate thickness, and choosing the panel shape and orientation, help create panels that are tailored to the specific requirements of your room. Careful attention to these design aspects ensures that the panels not only enhance the sound quality but also blend seamlessly into the visual aesthetics of the space.
Constructing the frame is the foundation of your acoustic panels. By following the step-by-step guide and ensuring durability and stability, you can create a sturdy frame that provides the necessary support for the sound-absorbing materials. Inserting the absorption materials properly and upholstering the panels with carefully selected fabric further enhance their sound absorption capabilities and visual appeal.
Mounting and installing the acoustic panels correctly is crucial to their effectiveness. Consider different mounting options, follow proper installation guidelines, and strategically place the panels to address reflection points and sound-related challenges in your room. By doing so, you can optimize their performance and create an improved acoustic environment.
Maintaining and cleaning your acoustic panels on a regular basis preserves their functionality and extends their lifespan. By implementing regular maintenance practices, following proper cleaning techniques, and avoiding common mistakes, you can ensure that your panels consistently provide optimal sound absorption and maintain their visual appeal.
Now armed with the knowledge and understanding of DIY acoustic panels, you can confidently create a space that not only looks stunning but also sounds incredible. So go ahead, unleash your creativity, and enjoy the transformative power of acoustic panels in your home, studio, or workplace.
Frequently Asked Questions about How To Build Acoustic Panels
Was this page helpful?
At Storables.com, we guarantee accurate and reliable information. Our content, validated by Expert Board Contributors, is crafted following stringent Editorial Policies. We're committed to providing you with well-researched, expert-backed insights for all your informational needs.


0 thoughts on “How To Build Acoustic Panels”