Home>Interior Design>Ikea Room Divider Ideas: 9 Clever Ways To Arrange Your Space
Interior Design
Ikea Room Divider Ideas: 9 Clever Ways To Arrange Your Space
Modified: October 28, 2024
Discover 9 clever and stylish Ikea room divider ideas to arrange your space efficiently. Transform your interior design with these innovative solutions.
(Many of the links in this article redirect to a specific reviewed product. Your purchase of these products through affiliate links helps to generate commission for Storables.com, at no extra cost. Learn more)
Introduction
Creating defined spaces within your home can be a challenge, especially in open floor plans or small apartments. However, with a little creativity and the right room divider, you can easily rearrange your space to meet your needs. One of the most popular and versatile options for room dividers is Ikea. With their wide range of stylish and functional products, you can transform your living area into separate zones without sacrificing style or functionality.
In this article, we will explore nine clever ways to arrange your space using Ikea room dividers. From hanging plants to vintage doors, these ideas will not only divide your room but also add visual interest and personality to your decor. So, let’s dive in and discover the possibilities that Ikea room dividers offer!
Key Takeaways:
- Bring the Outdoors In: Use hanging plants as room dividers to add privacy, greenery, and improved air quality to your space, while creating a calming and visually appealing environment.
- Functional and Stylish: From bookshelves to vintage doors, Ikea offers a diverse range of room dividers that not only provide privacy but also add character and style to your living space.
Hanging Plants Room Divider
Overview:
Hanging plants are a fantastic way to create a room divider that adds a touch of nature to your space. Not only do they provide privacy, but they also bring a calming and fresh ambiance to any room. By suspending a series of hanging plants from the ceiling, you can create a natural barrier that allows light to filter through while still maintaining an open and airy feel.
Materials Needed:
- Planter pots or hanging baskets
- Strong ceiling hooks or rods
- Adjustable hangers or chains
- Selection of indoor plants
- Watering can or spray bottle
- Drainage trays or saucers
Step-by-step Instructions:
- Choose a location for your hanging plant room divider. This could be near a window or in the middle of the room, depending on your desired effect.
- Install the ceiling hooks or rods securely, ensuring they can bear the weight of the hanging plants.
- Attach adjustable hangers or chains to the hooks or rods at the desired height.
- Select a variety of indoor plants that are suitable for hanging, such as cascading vines or ferns.
- Place the plants in planter pots or hanging baskets, ensuring they have proper drainage.
- Hang the plants from the hangers or chains, spacing them evenly along the room divider.
- Water the plants regularly and ensure they receive adequate sunlight.
Benefits of Hanging Plants as Room Dividers:
- Privacy: Hanging plants create a natural barrier that provides privacy without completely closing off the space.
- Greenery: Adding plants to your room divider brings a touch of nature indoors, creating a calming and visually appealing environment.
- Improved Air Quality: Indoor plants act as natural filters, purifying the air and improving overall indoor air quality.
- Space-saving: Hanging plants don’t take up valuable floor space, making them an ideal option for smaller rooms or apartments.
- Easy Maintenance: Most indoor plants are low-maintenance and require minimal care, making them perfect for busy individuals.
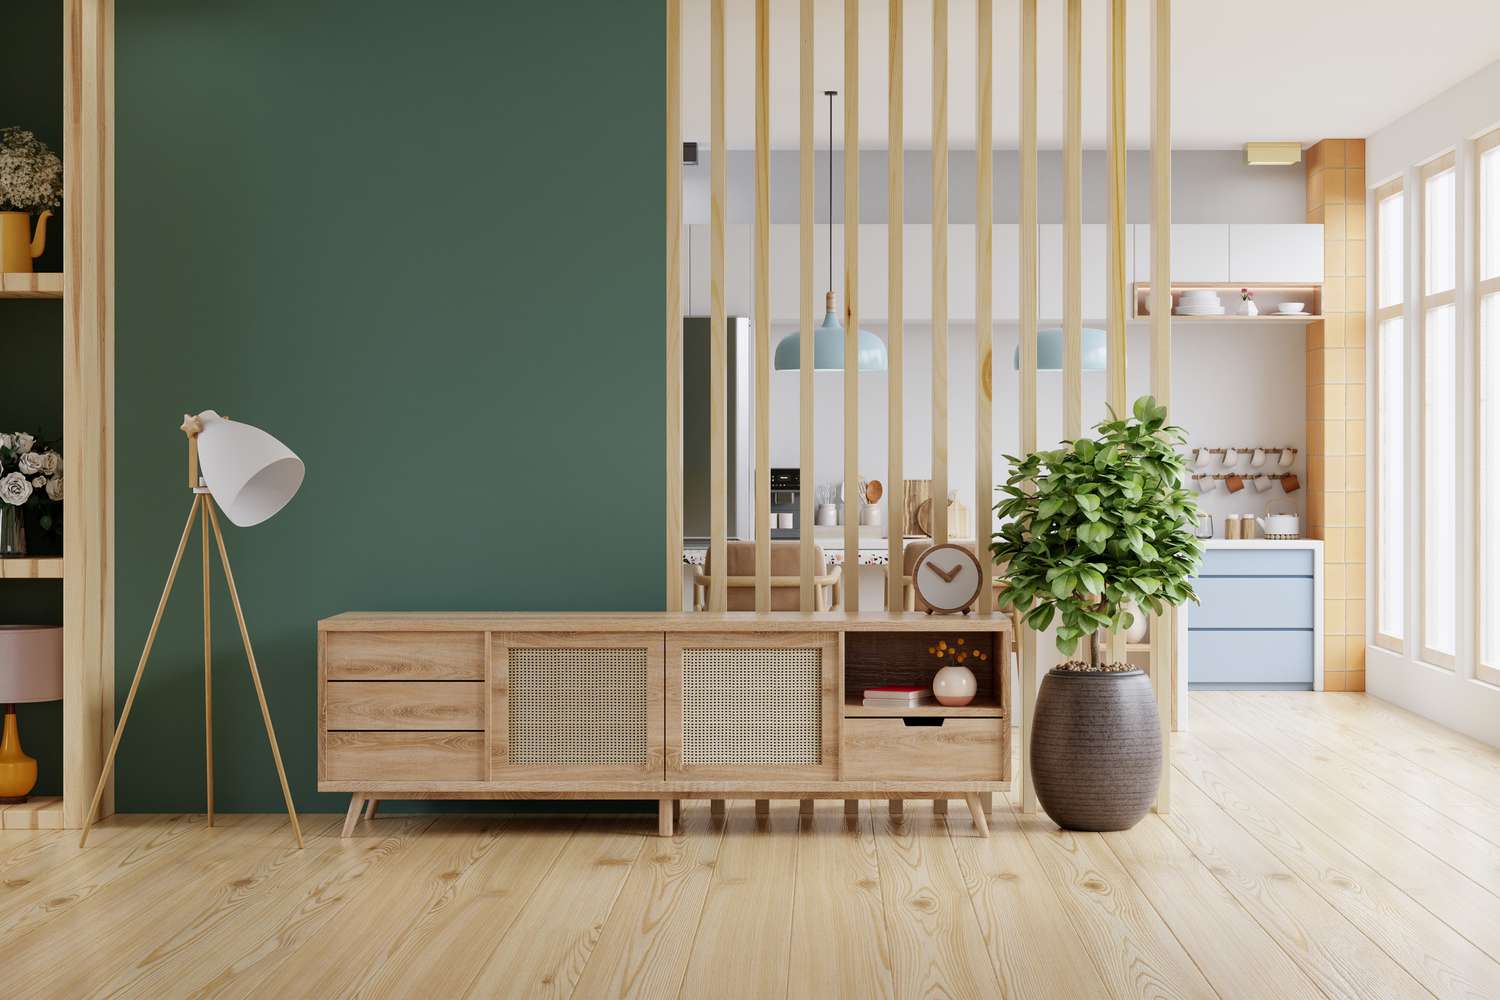
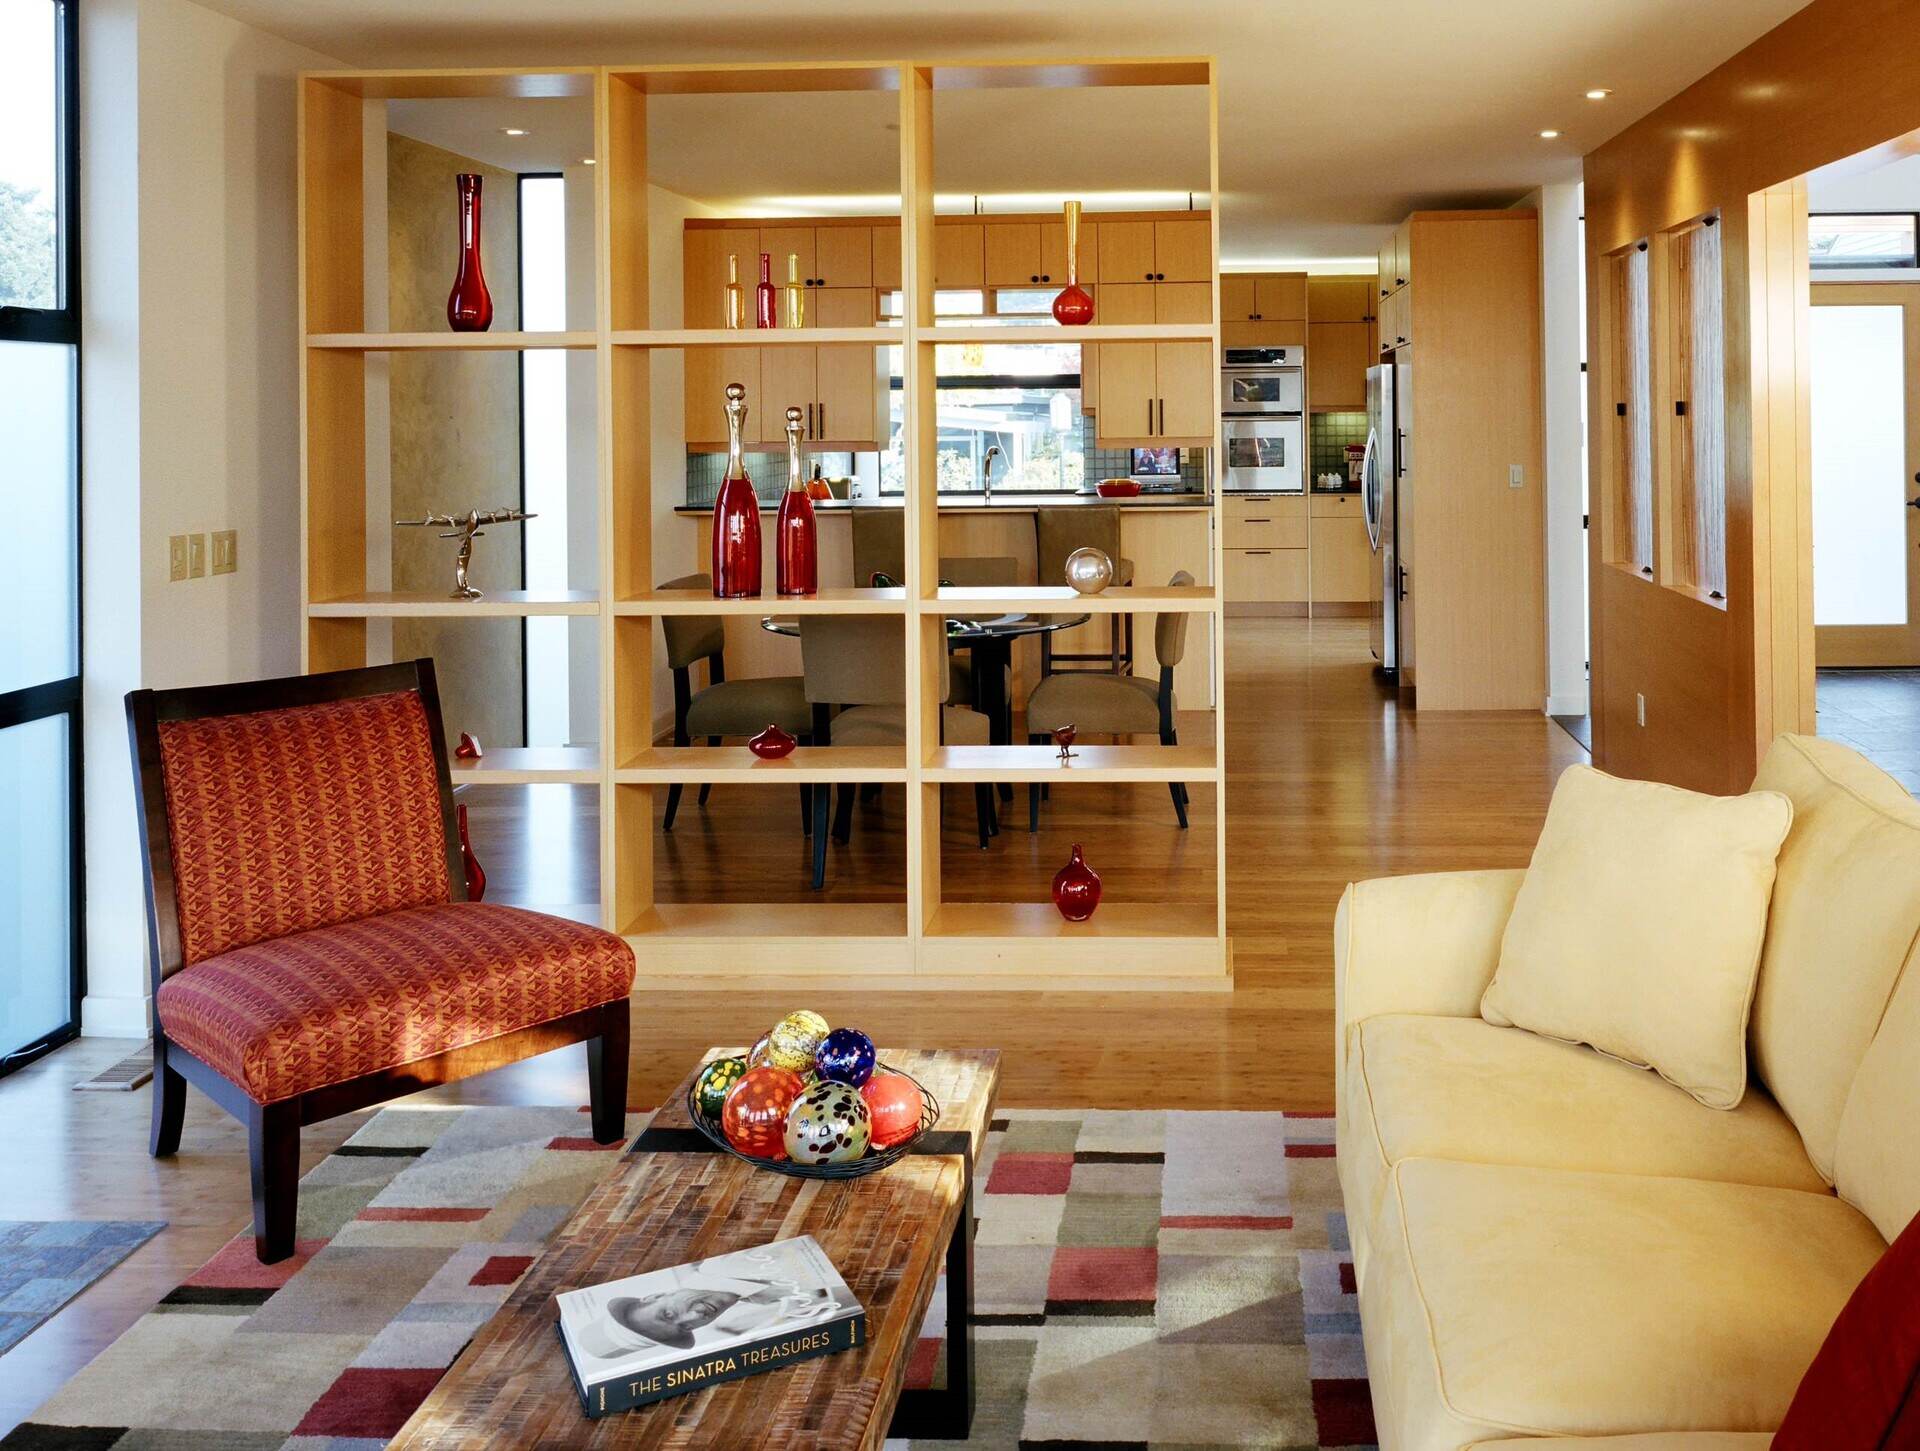
Bookshelf Room Divider
Overview:
A bookshelf room divider is a practical and stylish way to separate different areas in your home. Not only does it provide storage space for books and decor, but it also acts as a visual barrier that adds depth and structure to your living space. Bookshelves come in various sizes and styles, allowing you to choose one that complements your existing decor while fulfilling your storage needs.
Materials Needed:
- Bookshelf unit
- Books, decor items, or storage boxes
- Level
- Wall anchors (if required)
- Hardware for securing the bookshelf to the wall (if needed)
Step-by-step Instructions:
- Measure the area where you want to place the bookshelf room divider to ensure it fits properly.
- Choose a bookshelf unit that suits your style and storage requirements. Consider the height, width, and number of shelves.
- Position the bookshelf in the desired location, ensuring it is leveled and stable.
- If needed, secure the bookshelf to the wall using wall anchors and hardware for added stability.
- Arrange your books, decor items, or storage boxes on the shelves, creating a visually appealing display.
- Organize the items on the shelves to ensure a balanced look, alternating between books and decorative pieces.
- Use the bookshelf room divider to separate different areas of your home, such as a living room and dining area.
Benefits of Using Bookshelves as Room Dividers:
- Storage Space: Bookshelves provide ample storage for books, decor items, and other belongings, helping to keep your space organized and clutter-free.
- Visual Appeal: Bookshelves add depth and structure to your room, creating a focal point and enhancing the overall aesthetics of your space.
- Flexibility: Bookshelves can be easily moved or repositioned to change the layout of your room or adapt to your changing needs.
- Privacy: Depending on the design of the bookshelf, it can offer some level of privacy by partially blocking the view between different areas of your home.
- Display Opportunities: Bookshelves allow you to showcase your favorite books, collectibles, and decorative items, adding a personal touch to your room divider.
Curtain Room Divider
Overview:
A curtain room divider is a versatile and cost-effective way to create separate areas within a room. Whether you want to divide a large living space or add privacy to a bedroom, curtains offer both functionality and style. They come in a variety of colors, patterns, and fabrics, allowing you to choose one that complements your existing decor and personal taste.
Materials Needed:
- Curtain rod or tension rod
- Curtains or drapes
- Measuring tape
- Curtain rings or hooks
- Wall anchors and screws (if needed)
Step-by-step Instructions:
- Measure the height and width of the area where you want to install the curtain room divider.
- Choose a curtain rod or tension rod that fits the width of the space. Make sure it is sturdy enough to hold the weight of the curtains.
- Install the curtain rod or tension rod according to the manufacturer’s instructions. Use wall anchors and screws if necessary for added support.
- Attach curtain rings or hooks to the top of the curtains, spacing them evenly across the width.
- Slide the curtain rings or hooks onto the curtain rod or tension rod.
- Hang the curtains by placing the rod onto the brackets or by adjusting the tension rod to fit snugly within the space.
- Adjust the curtains as needed to achieve the desired level of privacy and division.
Benefits of Using Curtains as Room Dividers:
- Cost-effective: Curtains are an affordable solution compared to other room divider options.
- Flexible: Curtains can be easily opened or closed, allowing you to adjust the division of space as needed.
- Light Control: Curtains provide the option to block or filter natural light, creating a desired ambiance in each section of the room.
- Style Variety: With countless colors, patterns, and fabrics available, you can find curtains that match your decor and personal style.
- Easy Installation: Hanging curtains requires minimal tools and can be done by anyone, making it a convenient DIY project.
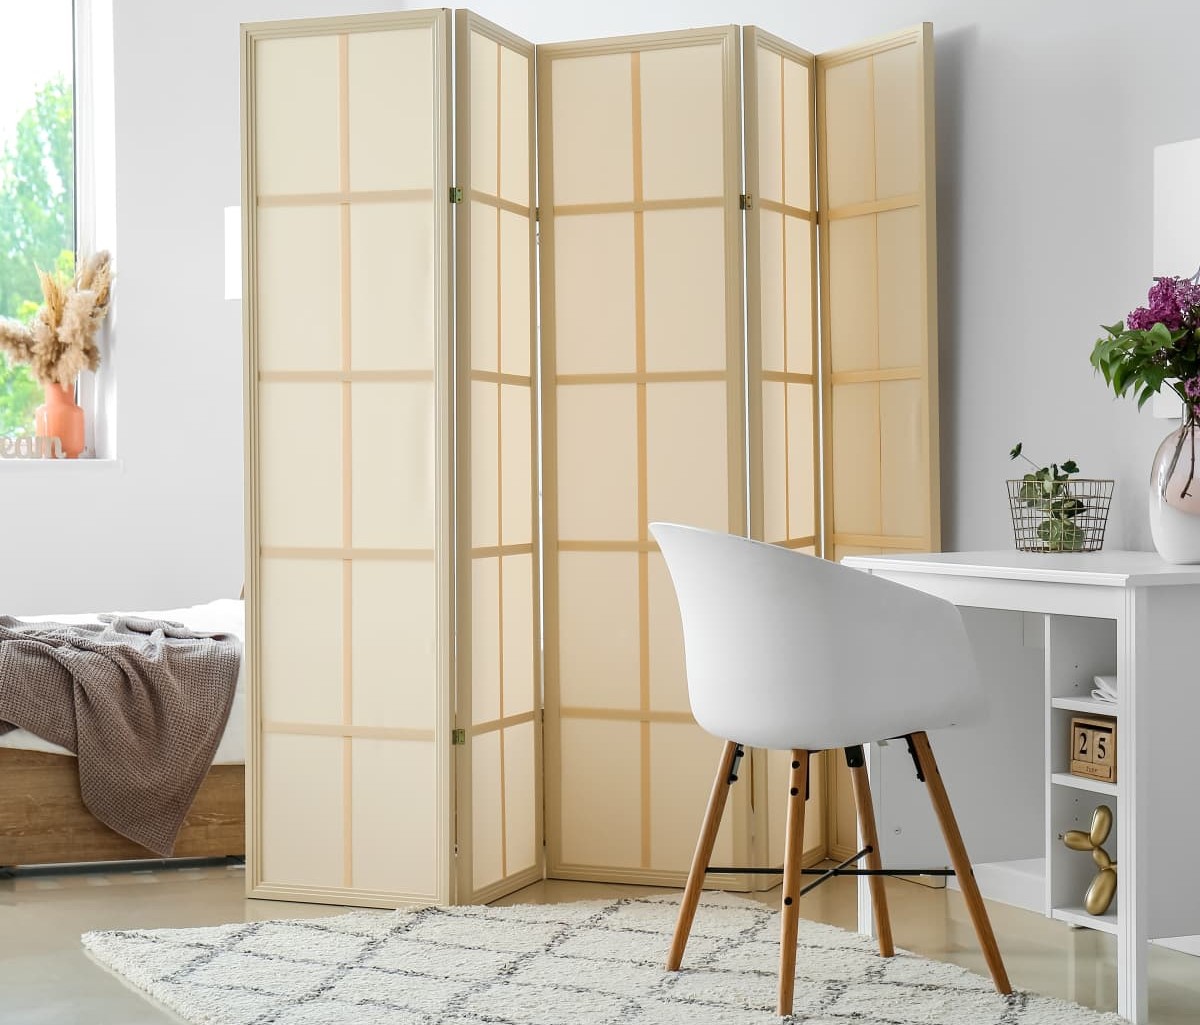
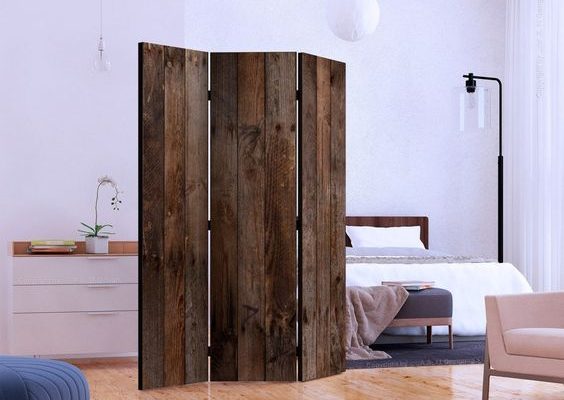
Folding Screen Room Divider
Overview:
A folding screen room divider is a versatile and portable option that allows you to create separate areas within a room with ease. These decorative screens come in various styles, sizes, and materials, making them a stylish addition to any space. Folding screens can be easily moved and adjusted according to your needs, providing flexibility and functionality in dividing your room.
Materials Needed:
- Folding screen
- Measuring tape
- Level
- Wall anchors and screws (if needed, for stability)
Step-by-step Instructions:
- Measure the area where you want to place the folding screen room divider, considering the height and width needed for proper coverage.
- Choose a folding screen that complements your decor and fits your desired size requirements.
- Position the folding screen in the desired location, ensuring it is stable and balanced.
- If necessary, secure the folding screen to the wall using wall anchors and screws for added stability.
- Adjust the angles of each panel of the folding screen to create the desired division and configuration.
- Experiment with different arrangements and positioning of the folding screen to suit your needs and style preferences.
Benefits of Using Folding Screens as Room Dividers:
- Flexibility: Folding screens can be easily moved and rearranged to create different layouts and configurations in your space.
- Privacy: By placing a folding screen in strategic locations, you can create private areas within a room, such as a dressing area or a workspace.
- Decoration: Folding screens are not just functional but also serve as decorative pieces, adding visual interest and style to your room.
- Portability: Unlike permanent room dividers, folding screens can be folded up and stored away when not in use or easily transported to different locations.
- Spatial Definition: Folding screens help define and separate different zones in an open-concept space, creating a sense of structure and organization.
Vintage Door Room Divider
Overview:
A vintage door room divider adds a touch of charm and character to your space while creating defined areas. Vintage doors offer a unique and stylish way to divide a room, giving it a distinctive and eclectic look. Whether you prefer rustic barn doors or elegant French doors, using vintage doors as room dividers adds architectural interest and serves as a beautiful focal point in your home.
Materials Needed:
- Vintage doors (at least two)
- Measuring tape
- Level
- Door hardware (hinges, doorknobs, etc.)
- Screws
- Wall anchors (if needed, for stability)
Step-by-step Instructions:
- Measure the width and height of the area where you want to install the vintage door room divider.
- Select vintage doors that are suitable for your space and match your desired style.
- Install hinges on one side of each door, ensuring they are properly aligned.
- Decide on the configuration of the doors (e.g., side-by-side or folding) and adjust the hinges accordingly.
- Secure the hinges to the wall or doorframe, ensuring they are sturdy and level.
- If needed, install door locks or doorknobs for added functionality and privacy.
- Adjust the doors as necessary to create the desired division and aesthetics.
Benefits of Using Vintage Doors as Room Dividers:
- Unique Style: Vintage doors add a distinct and personalized touch to your space, bringing character and charm.
- Architectural Interest: The intricate details and craftsmanship of vintage doors become an eye-catching focal point in your room.
- Privacy and Division: Vintage doors provide a visual and physical barrier between different areas, creating separate zones within a room.
- Reuse and Sustainability: Upcycling vintage doors reduces waste and contributes to sustainable living.
- Customization Options: Vintage doors can be refinished or painted to match your existing decor or create a contrasting statement piece.
Consider using a combination of open and closed storage options in your room divider to maximize functionality and create a visually appealing space. This will help you keep your belongings organized and maintain a clean, clutter-free look.
Bamboo Room Divider
Overview:
A bamboo room divider is a stylish and eco-friendly option to divide your living space. Bamboo is a sustainable material that adds a natural and serene ambiance to any room. Whether you are aiming for a tropical or Zen-inspired decor, bamboo room dividers offer both functionality and aesthetic appeal, complementing a wide range of interior styles.
Materials Needed:
- Bamboo poles or bamboo blinds
- Twine or zip ties
- Measuring tape
- Level
- Optional: hooks or nails for securing the divider
Step-by-step Instructions:
- Measure the height and width of the area where you want to install the bamboo room divider.
- Decide on the desired number of bamboo poles or the size of bamboo blinds needed to cover the space.
- If using bamboo poles, place them side by side at the desired width and secure them together with twine or zip ties at the top, middle, and bottom.
- If using bamboo blinds, adjust them to the desired width and secure them to each other by tying twine or using zip ties along the edges.
- Position the bamboo divider in the desired location, ensuring it is stable and level.
- If desired, secure the divider to the wall using hooks or nails for added stability.
- Adjust the bamboo poles or blinds as necessary to create the desired division and aesthetics.
Benefits of Using Bamboo Room Dividers:
- Natural and Sustainable: Bamboo is an eco-friendly material that adds a natural and earthy vibe to your room.
- Privacy: Bamboo room dividers provide a visual barrier, offering a sense of privacy and separation within a larger space.
- Light Filtering: Bamboo dividers allow natural light to pass through, creating a soft and warm glow in your room.
- Texture and Visual Interest: The unique texture and pattern of bamboo add visual interest and a captivating focal point to your room.
- Portable and Lightweight: Bamboo room dividers are lightweight and easy to move around, making them a versatile option for changing the room layout or decor.
- Easy Maintenance: Bamboo is low-maintenance and requires minimal cleaning, making it a practical choice for busy households.
Pallet Room Divider
Overview:
A pallet room divider is a creative and budget-friendly solution to divide your space while adding a rustic and charming touch. By repurposing wooden pallets, you can create a stylish and eco-friendly room divider that showcases your DIY skills. Pallets offer versatility in design and can be customized to fit any interior style, making them a popular choice for those looking for a unique and sustainable room divider option.
Materials Needed:
- Wooden pallets
- Hammer
- Nails or screws
- Measuring tape
- Saw (if necessary)
- Sandpaper
- Paint or stain (optional)
Step-by-step Instructions:
- Determine the height and width you want for your pallet room divider and measure the pallets accordingly.
- If needed, cut the pallets to the desired size using a saw.
- Sand down any rough edges or splinters on the pallets to create a smooth surface.
- Arrange the pallets side by side in the desired configuration, ensuring they are even and aligned.
- Secure the pallets together by nailing or screwing them at the top, middle, and bottom points of connection.
- If desired, paint or stain the pallets to match your interior decor or leave them in their natural state for a rustic look.
- Position the pallet room divider in the desired location, ensuring it is stable and secure.
Benefits of Using Pallets as Room Dividers:
- Cost-effective: Pallets are readily available and often free, making them a budget-friendly option for room dividers.
- Customizable: Pallets can be easily modified to fit different sizes and configurations, allowing you to create a personalized room divider.
- Eco-friendly: By repurposing pallets, you are reducing waste and giving new life to a material that would otherwise be discarded.
- Unique Aesthetics: Pallets offer a rustic and industrial charm, adding a touch of warmth and character to your space.
- Functional: Pallets can also serve as shelves or display areas for plants, decor, or other belongings, maximizing both form and function.
- DIY Project: Building a pallet room divider is a rewarding DIY project that allows you to showcase your creativity and woodworking skills.
Sliding Door Room Divider
Overview:
A sliding door room divider is a practical and stylish solution for dividing your space while maintaining flexibility and functionality. Sliding doors offer a sleek and modern look that complements various interior styles, from contemporary to minimalist. They not only create separate areas within a room but also allow you to easily open or close the division as needed, providing privacy when desired and an open layout when preferred.
Materials Needed:
- Sliding door track system
- Sliding doors
- Measuring tape
- Level
- Wall anchors and screws (if needed, for stability)
Step-by-step Instructions:
- Measure the width and height of the area where you want to install the sliding door room divider.
- Select a sliding door track system that fits the size of the space and matches your desired style.
- Install the sliding door track system according to the manufacturer’s instructions, ensuring it is level and securely attached to the wall or ceiling.
- Attach the sliding doors to the track system, ensuring they are properly aligned and slide smoothly along the track.
- If needed, adjust the height or width of the doors to fit the opening, following the instructions provided by the manufacturer.
- If necessary, secure the track system or doors to the wall using wall anchors and screws for added stability.
- Test the sliding doors to ensure they operate smoothly and securely.
Benefits of Using Sliding Doors as Room Dividers:
- Space-saving: Sliding doors do not require floor space to swing open or closed, making them ideal for smaller rooms or tight spaces.
- Flexibility: Sliding doors allow you to easily open or close the division between rooms, providing versatile options for privacy and openness.
- Design Integration: Sliding doors seamlessly blend into your interior decor, adding a sleek and modern touch to your space.
- Sound Insulation: Sliding doors help to minimize noise transmission between rooms, creating a more peaceful and private environment.
- Light Control: Sliding doors with translucent or frosted glass panels allow natural light to filter through while maintaining privacy.
- Customization: Sliding doors are available in various materials, finishes, and designs, allowing you to choose one that suits your style and preferences.
Hanging Beads Room Divider
Overview:
A hanging beads room divider offers a whimsical and decorative way to divide your space while adding a touch of elegance and charm. These beaded curtains not only create a visual separation between different areas but also allow light and air to pass through, maintaining an open and airy feel. Hanging beads come in various colors and designs, making it easy to find one that complements your interior style and enhances the overall aesthetic of your space.
Materials Needed:
- Hanging bead curtain
- Curtain rod or tension rod
- Hooks or screws for mounting
- Measuring tape
- Level
Step-by-step Instructions:
- Measure the height and width of the area where you want to install the hanging bead room divider.
- Choose a hanging bead curtain that fits the desired dimensions and matches your style preferences.
- Install a curtain rod or tension rod that spans across the width of the space.
- Position the rod at the desired height, using a level to ensure it is straight.
- Attach the hanging bead curtain to the rod, ensuring it is evenly distributed.
- Mount the rod with the attached curtain to the wall or ceiling using hooks or screws.
- Adjust the curtain as necessary for the desired level of privacy and division.
Benefits of Using Hanging Beads as Room Dividers:
- Elegant and Decorative: Hanging bead curtains add a touch of elegance and style to your space, creating a visually appealing room divider.
- Light and Airy: The beads allow light and air to pass through, maintaining an open and breathable atmosphere in your room.
- Visual Interest: The movement and shimmer of the hanging beads create a captivating visual spectacle, adding a dynamic element to your space.
- Easy Installation: Hanging bead room dividers are easy to install and can be quickly set up without the need for any specialized tools or skills.
- Versatile: Hanging bead curtains can be used in various settings, including bedrooms, living rooms, and even outdoor spaces.
- Customizable: With a wide range of colors and designs to choose from, you can find a hanging bead curtain that perfectly suits your personal style and complements your existing decor.
Conclusion
Creating defined spaces within your home is essential for maintaining functionality and aesthetics. Ikea offers a diverse range of room dividers that not only serve their practical purpose but also add style and character to your living space. From hanging plants to vintage doors, there are numerous creative options to explore.
By opting for hanging plants as room dividers, you can bring the beauty of nature indoors while enjoying the benefits of added privacy and improved air quality. Bookshelf room dividers offer storage space along with the ability to display your personal collection of books and decor items.
Curtain room dividers are versatile and easy to install, allowing you to change the layout of your space and control the amount of light entering each section. Folding screen room dividers offer portability and can be effortlessly adjusted to suit your changing needs.
Vintage doors as room dividers provide a unique and eclectic element to your decor while maintaining division and privacy. Bamboo room dividers offer a natural and sustainable option, adding a serene ambiance to your space.
Repurposing pallets as room dividers not only offers a budget-friendly solution but also allows you to showcase your creativity and DIY skills. Sliding doors offer a sleek and modern option, providing flexibility in creating separate areas.
Lastly, hanging bead room dividers offer an elegant and decorative touch, adding visual interest and allowing light to filter through.
Whichever option you choose, it’s important to consider your specific needs and the style of your space. By integrating an Ikea room divider, you can transform your room into functional and stylish zones that suit your lifestyle. Experiment with different dividers to find the perfect balance between privacy, functionality, and visual appeal.
Explore the possibilities and let your imagination guide you as you create a beautifully divided space in your home using Ikea room dividers!
Ready for more inspired living? Dive into our latest guide on IKEA hacks, where elegance meets practicality in every project. Whether you're keen on transforming everyday items into eye-catching decor or optimizing space with ingenuity, this collection is a must-read. Not stopping there, if getting organized sparks joy, our curated list of the best fabric storage cubes will help streamline clutter and enhance your home's functionality seamlessly. Both guides are brimming with actionable tips that make a real difference.
Frequently Asked Questions about Ikea Room Divider Ideas: 9 Clever Ways To Arrange Your Space
Was this page helpful?
At Storables.com, we guarantee accurate and reliable information. Our content, validated by Expert Board Contributors, is crafted following stringent Editorial Policies. We're committed to providing you with well-researched, expert-backed insights for all your informational needs.

0 thoughts on “Ikea Room Divider Ideas: 9 Clever Ways To Arrange Your Space”