Home>Interior Design>Tile Layout Patterns: 16 Clever Design Tricks With Tile
Interior Design
Tile Layout Patterns: 16 Clever Design Tricks With Tile
Modified: August 28, 2024
Enhance your interior design with these 16 clever tile layout patterns. Discover unique ways to incorporate tiles into your space for a stylish and stunning finish.
(Many of the links in this article redirect to a specific reviewed product. Your purchase of these products through affiliate links helps to generate commission for Storables.com, at no extra cost. Learn more)
Introduction
When it comes to interior design, one element that can transform the look and feel of a space is tile. Whether it’s in the bathroom, kitchen, or any other area of the home, the right tile choice can make a significant impact on the overall design. But it’s not just about selecting the right type of tile; how you lay the tile can also make a big difference.
Tile layout patterns can bring depth, dimension, and visual interest to a room. By strategically arranging tiles, you can create unique designs that reflect your personal style and elevate the aesthetic appeal of your space. From classic designs to modern twists, there are numerous tile layout patterns you can choose from to achieve the desired look.
In this article, we will explore 16 clever design tricks with tile, showcasing various layout patterns that you can use to create stunning and eye-catching interiors. Whether you prefer a traditional, contemporary, or eclectic style, there’s a tile layout pattern that will suit your taste and enhance the overall ambiance of your home.
Key Takeaways:
- Elevate your space with 16 clever tile layout patterns, from classic straight lay to whimsical fish scale. Transform your home with timeless elegance or modern flair to reflect your unique style and personality.
- Create visually stunning interiors with tile layout patterns that add depth, dimension, and character to any space. From sophisticated herringbone to dynamic chevron, unleash your creativity and make a lasting impression.
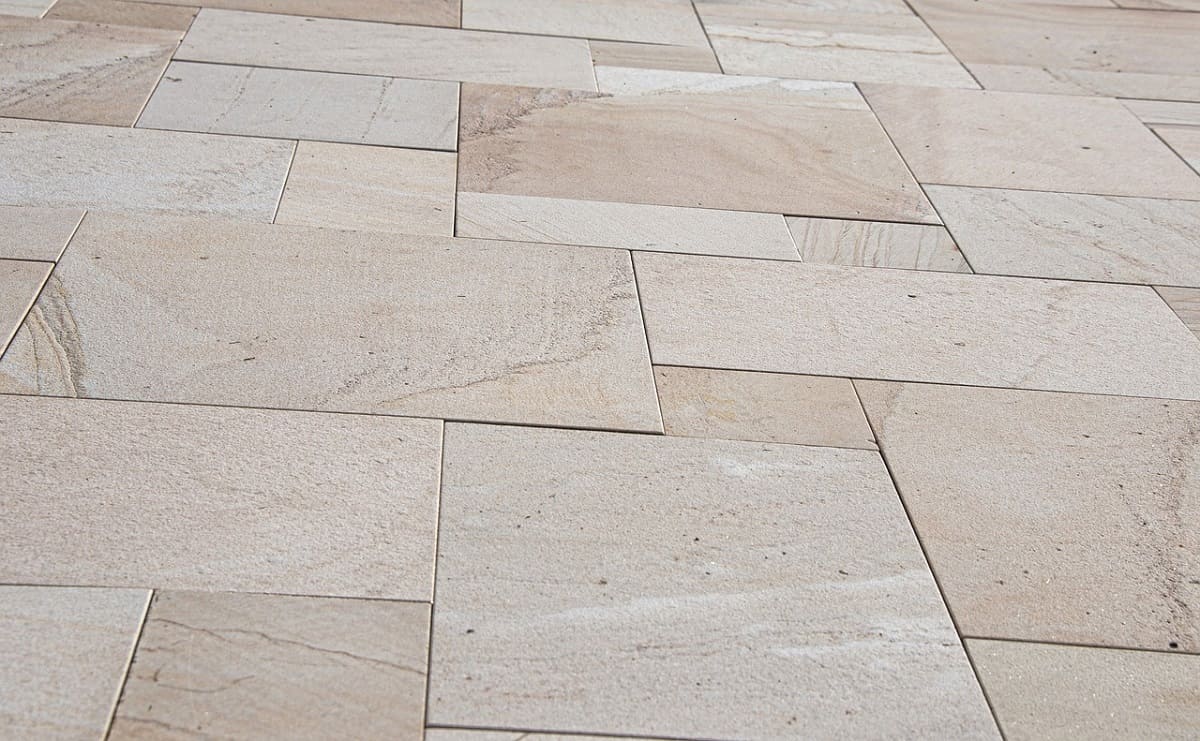
Straight Lay Pattern
The straight lay pattern is one of the most common and straightforward tile layout patterns. It involves installing tiles in a straight line, with each tile aligned with the one next to it. This simple yet timeless pattern is ideal for creating a clean and minimalist look in any space.
The straight lay pattern works well with both square and rectangular tiles. It is often used in bathrooms, kitchens, and other areas where a clean and symmetrical layout is desired. It is also a popular choice for subway tiles, which are characterized by their long and narrow shape.
To achieve the straight lay pattern, start by measuring and marking the centerline of the room or area where you will be installing the tiles. Then, begin laying the tiles from the centerline and work your way out to the edges. Use tile spacers to ensure even spacing between the tiles and maintain a consistent straight line.
This pattern is versatile and can be used with any size or type of tile. You can create visual interest by using contrasting colored tiles or experimenting with different textures and finishes. The straight lay pattern is also compatible with different grout colors, allowing you to further customize the look of your tiled space.
Keep in mind that the straight lay pattern can highlight any imperfections in tile alignment, so it’s important to take your time during installation to ensure precise positioning. Additionally, consider the size of the room and the size of the tiles to determine if any cuts or adjustments are needed at the edges to achieve a balanced and aesthetically pleasing layout.
Diagonal Lay Pattern
The diagonal lay pattern is a variation of the straight lay pattern that adds a touch of visual interest and sophistication to any space. Instead of aligning the tiles in a straight line, the tiles are installed diagonally at a 45-degree angle.
This pattern is particularly effective in elongating a room and creating the illusion of more space. It can make a small room feel larger and add a sense of depth to larger areas. The diagonal lines draw the eye across the space, making it more visually dynamic and engaging.
To achieve the diagonal lay pattern, start by finding the center point of the room or the area where you will be laying the tiles. From there, measure and mark the 45-degree angle lines using a chalk line or a straight edge tool. Begin laying the tiles along these lines, starting from the center and working your way out.
When using square tiles, the corners of each tile will touch, creating a diamond pattern. If you are using rectangular tiles, the long edges will align with the diagonal lines, resulting in a zigzag effect. This pattern can be used with tiles of any size and material, and it works well in a variety of spaces, including bathrooms, kitchens, and living areas.
The diagonal lay pattern can be combined with different tile colors or textures to create unique and striking designs. Consider using contrasting colors to highlight the diagonal lines, or opt for tiles with interesting patterns or finishes to add more visual impact.
Keep in mind that the diagonal lay pattern may require more precision and cutting compared to the straight lay pattern. Take care during installation to ensure that the tiles are aligned correctly and that the corners or edges are properly cut to maintain the diagonal layout.
Overall, the diagonal lay pattern is an excellent choice for adding a touch of elegance and drama to your space. It provides a fresh and unexpected twist on the traditional straight lay pattern and can instantly elevate the aesthetic appeal of any room.
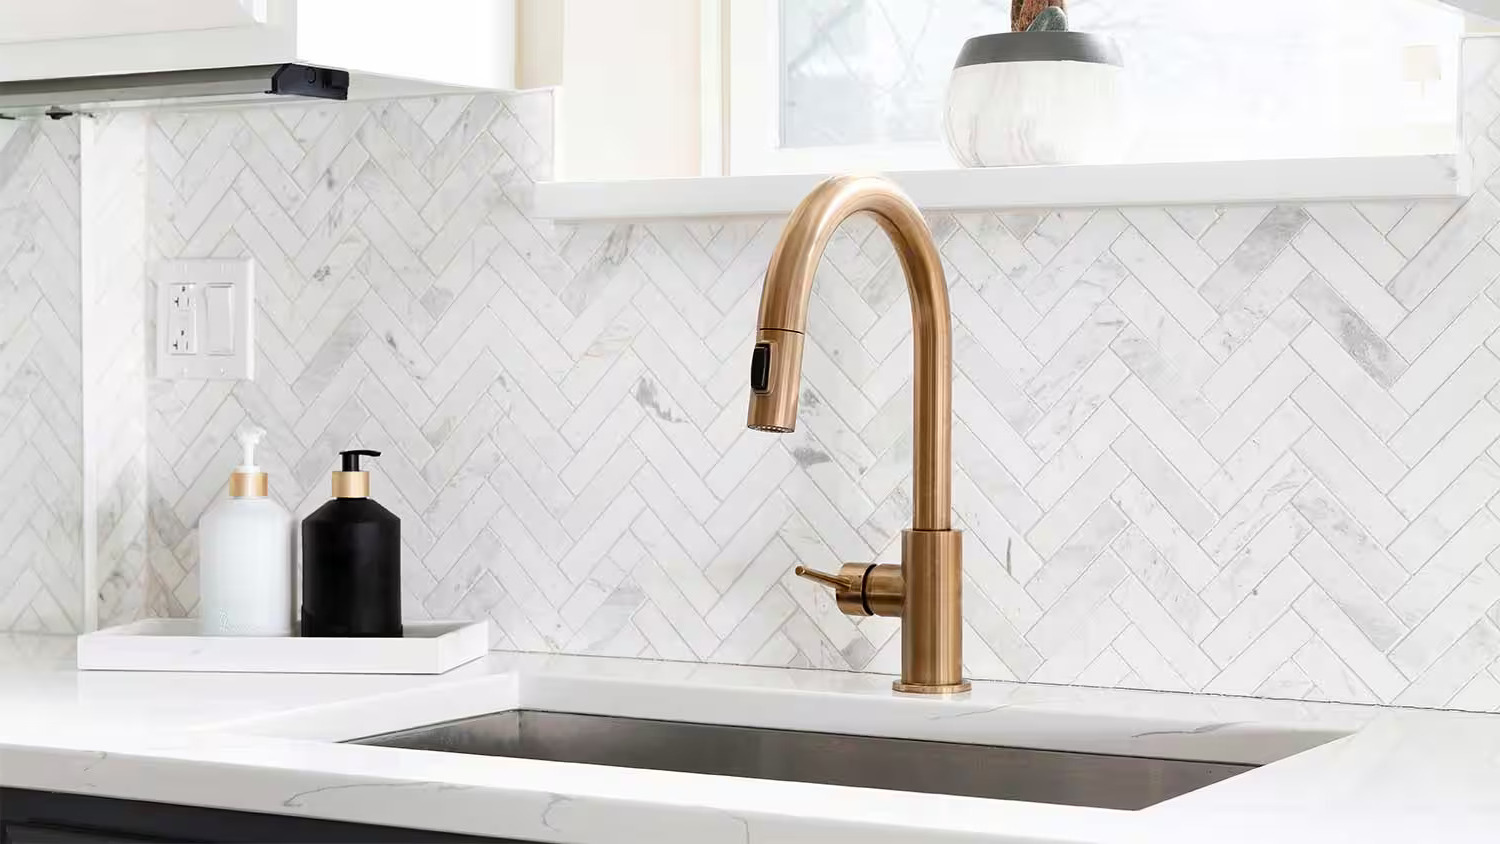
Herringbone Lay Pattern
The herringbone lay pattern is a timeless and popular choice that adds a sense of sophistication and style to any space. This pattern features tiles arranged in a V-shaped, zigzag pattern that resembles the bones of a fish. The result is a visually striking design that adds texture and visual interest to floors, walls, and backsplashes.
To achieve the herringbone pattern, the tiles are laid at a 45-degree angle, with each tile placed perpendicular to the adjacent tiles. This creates a distinctive chevron pattern that can be installed using square or rectangular tiles.
The herringbone pattern works exceptionally well in narrow spaces, as it can visually widen the area by drawing the eye towards the longest point of the V-shape. It can also be used to create focal points or feature walls, transforming an ordinary space into a statement piece.
When installing the herringbone pattern, it’s essential to plan ahead and ensure proper tile alignment and spacing. Start by finding the centerline of the room or area where you will be installing the tiles. From there, lay the tiles in a diagonal pattern, working from the centerline towards the edges.
To add a sense of depth and dimension to your herringbone layout, consider using contrasting tile colors or textures. This will emphasize the unique pattern and make it visually captivating. Additionally, using larger tiles can create a bolder and more impactful herringbone design.
While the herringbone pattern adds a touch of elegance to any space, it does require careful attention to detail during installation. Precise tile cutting and placement are essential to create a seamless and visually pleasing pattern. It’s advisable to seek professional assistance or take your time to ensure an impeccably installed herringbone pattern.
Whether used on floors, walls, or as a decorative element, the herringbone lay pattern is a fantastic choice for those seeking a sophisticated, timeless, and visually captivating design. Its versatility allows it to be used in various interior styles, from traditional to contemporary, making it a truly versatile and stylish option.
Basketweave Lay Pattern
The basketweave lay pattern is a classic and versatile design that adds a touch of elegance and texture to any space. This pattern creates the illusion of interwoven tiles, reminiscent of a traditional basketweave pattern.
To achieve the basketweave lay pattern, square tiles are set in pairs, with each pair rotated at a 90-degree angle to the adjacent pairs. This creates a visually interesting and intricate pattern that can be used on floors, walls, and even as a decorative border.
The basketweave pattern works well in both traditional and contemporary settings, adding a timeless and sophisticated element to the overall design. It is a popular choice for bathrooms, kitchens, and entryways, as well as for creating visually captivating focal points.
When installing the basketweave pattern, it’s important to plan ahead and ensure precise alignment and spacing. Start by measuring and marking the centerline of the room or area where you will be installing the tiles. From there, lay the pairs of tiles in alternating directions, forming the basketweave pattern.
Consider using contrasting tile colors or textures to enhance the basketweave design. This will make the pattern more visually striking and allow you to customize the look to suit your personal style. Additionally, using larger tiles can create a more dramatic effect, while smaller tiles can provide a finer and more intricate weave.
As with any intricate pattern, careful attention to detail is required during installation. Take your time to ensure accurate tile placement and precise cuts, especially at the edges and corners. A professional tile installer can help you achieve a flawless and seamless basketweave pattern.
The basketweave lay pattern offers a unique and sophisticated alternative to traditional tile layouts. Its intricate design adds character and visual interest to any space, making it a popular choice for those seeking a timeless and elegant look.
Brick Lay Pattern
The brick lay pattern is a classic and versatile tile layout that replicates the look of traditional brickwork. It is characterized by tiles that are offset in a staggered arrangement, just like bricks in a wall. This pattern adds a sense of texture, depth, and visual interest to any space.
When installed in a horizontal orientation, the brick lay pattern creates a clean and contemporary look. Vertical installation, on the other hand, can add a sense of height and elongation to a room. Both orientations offer unique design opportunities for various interior styles.
To achieve the brick lay pattern, rectangular tiles are laid so that the long sides of each tile are aligned with the short sides of the adjacent tiles. The next row is offset by half the length of the tile. This results in a pattern that resembles a brick wall.
The brick lay pattern is popular for both indoor and outdoor applications. It is often used in kitchens, bathrooms, and living areas, as well as on feature walls or in exterior facades. Its versatility allows it to complement a wide range of design aesthetics, from rustic and industrial to modern and contemporary.
This pattern offers several design possibilities. You can experiment with different tile colors and finishes to create contrast and visual interest. For a more traditional look, consider using tiles that mimic the appearance of aged or weathered bricks. Alternatively, opt for sleek and contemporary tiles to achieve a more modern vibe.
During installation, pay attention to the alignment and spacing of the tiles to achieve a seamless brickwork effect. Properly cutting the tiles at the edges and corners is also important to maintain the pattern’s integrity. Consulting a professional tile installer can ensure a precise and expertly executed brick lay pattern.
The brick lay pattern is a timeless and versatile option for those who want to add character and texture to their space. Its resemblance to traditional brickwork brings a sense of warmth and familiarity while allowing for endless design possibilities.
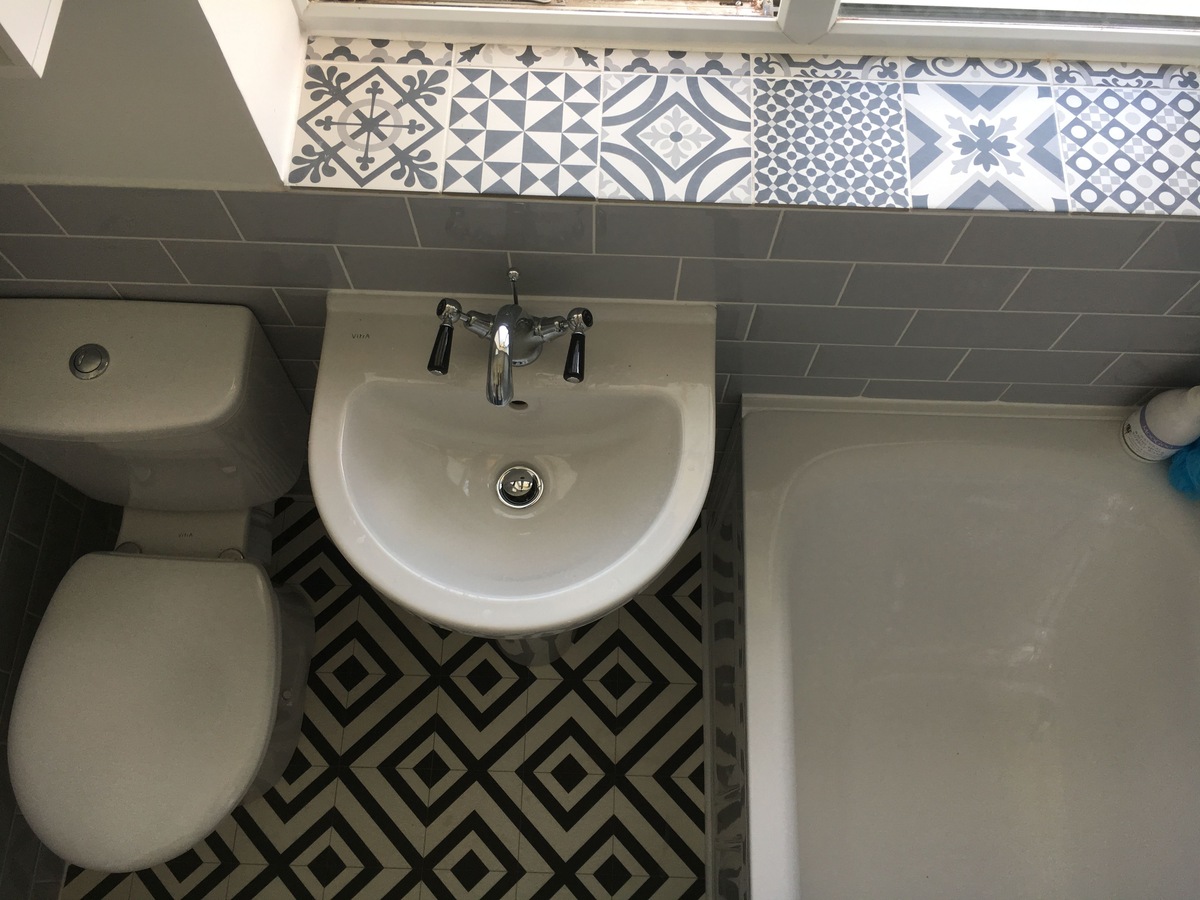
Checkerboard Lay Pattern
The checkerboard lay pattern is a classic and visually captivating design that creates a playful and dynamic look. As the name suggests, this pattern resembles a checkerboard, with tiles of contrasting colors placed in a regular alternating pattern.
The checkerboard pattern is commonly used in spaces where a bold and eye-catching design is desired. It can add a touch of retro charm to kitchens, bathrooms, entryways, and even outdoor areas such as patios or pathways.
To achieve the checkerboard lay pattern, square tiles of contrasting colors are installed in a grid-like formation, with each tile positioned adjacent to four others. The result is a visually striking pattern that adds depth and visual interest to the floor or wall surface.
The most common color combinations for the checkerboard pattern are black and white or any two contrasting colors. However, you can get creative with your choice of colors to match your personal style and the overall theme of the space.
When installing the checkerboard pattern, pay attention to the alignment and spacing of the tiles to ensure a symmetrical and visually pleasing layout. Precision in cutting tiles at the edges and corners is crucial to maintaining the uniformity of the pattern.
The checkerboard pattern works well in both traditional and contemporary settings. In a more traditional space, it can add a sense of nostalgia and elegance. In a modern setting, it can create a sleek and bold statement.
One key aspect to consider when using the checkerboard pattern is the tile size. Smaller square tiles, such as 1-inch or 2-inch tiles, are commonly used to achieve a crisp and defined checkerboard effect. However, larger tiles can also be used for a more dramatic and impactful look.
In summary, the checkerboard lay pattern is a versatile and visually captivating option for those looking to make a bold statement with their tile design. Its classic appeal and playful nature can transform any space into a focal point of style and personality.
Stacked Lay Pattern
The stacked lay pattern, also known as the grid or stacked bond pattern, is a simple yet modern design choice that creates a clean and streamlined look. This pattern involves aligning tiles in perfect horizontal and vertical lines, creating a uniform grid-like appearance.
The stacked lay pattern is suitable for both square and rectangular tiles and works well in a variety of settings, from bathrooms and kitchens to living areas and commercial spaces. Its simplicity and versatility make it a popular choice for contemporary and minimalist interiors.
To achieve the stacked lay pattern, simply lay the tiles in a straight line, aligning the edges both horizontally and vertically. This creates a seamless and uniform grid-like effect. The result is a clean and sleek look that can make a room appear larger and more spacious.
This pattern is particularly effective when using large-format tiles as it showcases their size and shape. It also works well with tiles that have interesting textures or finishes, adding visual depth and dimension to the design.
While the stacked lay pattern is relatively straightforward to install, attention to detail is essential to ensure precise alignment and spacing between the tiles. Properly cutting the tiles at the edges and corners is also crucial for achieving a polished and professional finish.
The stacked lay pattern can be combined with other patterns, such as a border or accent tiles, to add visual interest and break up the uniformity of the grid. Additionally, using contrasting tile colors or mixing different tile finishes can create a dynamic and captivating design.
With its clean lines and timeless appeal, the stacked lay pattern offers a sleek and modern design solution for those who prefer a minimalist and contemporary aesthetic. Its understated elegance can complement a variety of interior styles and make a lasting impression.
Pinwheel Lay Pattern
The pinwheel lay pattern is a unique and visually striking tile layout that adds a touch of creativity and charm to any space. It is characterized by a combination of square tiles and smaller rectangular tiles, forming a pinwheel or windmill-like design.
To achieve the pinwheel pattern, a larger square tile is surrounded by four smaller rectangular tiles, creating a rotating effect. The square tile serves as the focal point, while the smaller tiles add visual interest and a sense of movement to the design.
The pinwheel pattern offers a playful and dynamic look, making it a popular choice for children’s rooms, bathrooms, kitchens, and entryways. Its versatility allows it to work well with a variety of tile shapes, sizes, and colors.
When installing the pinwheel pattern, start by laying the larger square tiles first. Ensure they are perfectly aligned and spaced. Then, position the smaller rectangular tiles around the square tile, with their long sides parallel to the sides of the square.
This pattern allows for customization and creativity. You can experiment with different tile colors, contrasts, and textures to create unique and personalized designs. Additionally, using tiles with intricate patterns or mixed finishes can further enhance the pinwheel pattern’s visual impact.
Precision is crucial when installing the pinwheel pattern to ensure that all tiles are properly aligned and that the rotation effect is seamless. Take your time to ensure exact measurements and accurate cuts, especially at the edges and corners, to maintain the integrity of the pattern.
The pinwheel lay pattern offers a fresh and playful twist to traditional tile layouts. Its unique and whimsical design adds character and visual interest to any space, making it an excellent choice for those who want to infuse creativity into their interior design.
Consider using a herringbone pattern to add visual interest and a sense of movement to your tile layout. This classic pattern works well with both square and rectangular tiles, and can be used on floors, walls, or backsplashes.
Read more: How To Layout A Herringbone Tile Floor
Windmill Lay Pattern
The windmill lay pattern is a captivating and intricate tile layout that exudes elegance and sophistication. This pattern gets its name from the resemblance to the rotating blades of a windmill, with tiles arranged in a rotational design around a central point.
To achieve the windmill pattern, a larger square or rectangular tile is surrounded by smaller rectangular or diamond-shaped tiles, creating a mesmerizing rotational effect. The result is a visually stunning and dynamic pattern that adds a sense of movement and artistry to any space.
The windmill pattern offers a unique and eye-catching design, making it an ideal choice for areas where you want to create a focal point or add a touch of luxury. From grand entrances to bathrooms and feature walls, this pattern can transform a space into a work of art.
When installing the windmill pattern, start by finding the center point where the larger tile will be placed. From there, position the smaller tiles around the central tile, alternating between vertical and horizontal orientation. This creates the swirling effect reminiscent of a windmill.
Choosing tiles with contrasting colors or textures can enhance the visual impact of the windmill pattern. Consider using tiles with intricate patterns, metallic accents, or glossy finishes to further elevate the sophistication and elegance of the design.
The windmill pattern requires precision during installation to ensure that each tile is properly aligned and spaced. Accuracy in measuring and cutting the tiles is crucial to maintain the symmetry and integrity of the pattern. Consulting a professional tile installer may be helpful to achieve a flawless windmill pattern.
The windmill lay pattern offers a truly unique and artistic approach to tile design. Its captivating rotation design adds a sense of movement and drama to any space, making it a perfect choice for those who wish to make a bold statement and create a visually stunning focal point.
Hexagon Lay Pattern
The hexagon lay pattern is a stylish and contemporary tile layout that brings a modern and eye-catching element to any space. This pattern features hexagonal tiles arranged in a honeycomb-like design, creating a geometric and visually intriguing pattern.
The hexagon pattern offers a unique and unconventional look, making it a popular choice for those who want to add a touch of creativity and individuality to their interior design. It works well in a variety of spaces, from bathrooms and kitchens to living areas and even outdoor patios.
To achieve the hexagon lay pattern, hexagonal tiles of the same size are laid in a tight, interlocking formation. Each tile is positioned adjacent to the surrounding tiles, creating the honeycomb effect. This pattern allows for endless design possibilities, as it can be created with tiles of any color, material, or finish.
One of the advantages of the hexagon pattern is its versatility. It can be used to create a bold and dramatic look by using contrasting colored tiles or to achieve a more subtle and seamless design by using tiles of the same color or neutral tones. The geometric shape of the hexagon lends itself well to modern and minimalist interiors, adding a touch of sophistication and style.
When installing the hexagon pattern, attention to detail is crucial. Precise measurement, alignment, and spacing are necessary to achieve a flawless and symmetrical layout. Properly cutting the tiles at the edges and corners is also important to ensure a polished and professional finish.
Experiencing the hexagon pattern on both floors and walls can create an interesting and cohesive look. Consider using different tile sizes or finishes to add depth and dimension to the design. You can also play with the orientation of the tiles, alternating between horizontal and vertical placement for added visual interest.
The hexagon lay pattern offers a contemporary and visually captivating option for those seeking a unique and stylish tile design. Its geometric shape and versatility allow for endless possibilities, making it a favored choice among interior designers and homeowners looking to make a statement.
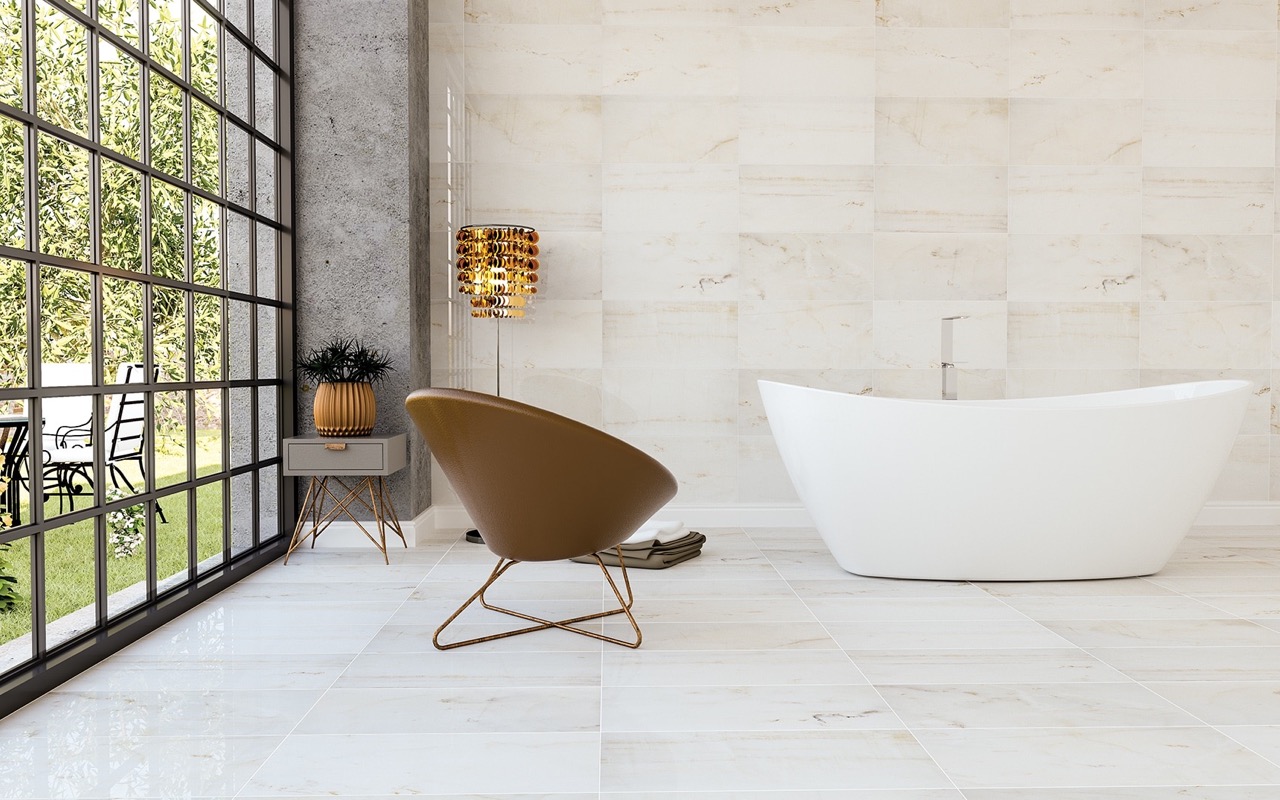
Subway Lay Pattern
The subway lay pattern is a classic and timeless tile layout that originated from the iconic subway stations of the early 20th century. This pattern features rectangular tiles, typically with a ratio of 2:1, arranged in a simple and clean brick-like pattern.
The subway pattern has become widely popular and can be found in various interior settings, from bathrooms and kitchens to commercial spaces. Its simplicity and versatility make it a go-to option for those seeking a clean and contemporary look.
To achieve the subway lay pattern, the rectangular tiles are installed in a staggered brick-like pattern. Each tile is offset by half its length from the tile above and below it, creating a visually appealing and orderly arrangement.
This pattern can work with tiles of various sizes, but the most common size for subway tiles is 3 inches by 6 inches. However, larger or smaller subway tiles can be used to achieve different design effects.
The subway pattern offers a clean and polished aesthetic that works well in both traditional and modern interiors. It can create a sense of space and openness, making it an excellent choice for smaller rooms or areas where a bright and airy ambiance is desired.
One of the advantages of the subway pattern is its versatility in terms of color and finish. Subway tiles come in a wide range of colors, from classic white to bold and vibrant shades. They can also be found in various finishes, such as glossy, matte, or textured, allowing for customization to suit any design preference.
Installing the subway pattern requires precision to ensure even spacing and alignment. Taking care during the layout process can result in a beautifully executed design. It’s also crucial to pay attention to the grout lines, as they contribute to the overall look and feel of the pattern.
The subway lay pattern offers a clean, timeless, and versatile option for those seeking a simple yet visually appealing tile design. Its popularity and enduring style have cemented its status as a design staple, ensuring its relevance for years to come.
Mosaic Lay Pattern
The mosaic lay pattern is a versatile and artistic tile layout that allows for endless design possibilities. This pattern involves arranging small tiles, known as tesserae, in intricate and visually captivating patterns or images.
Mosaic tile patterns have a rich history dating back centuries and have been used to create stunning murals, decorative accents, and intricate flooring designs. Today, mosaic patterns are still admired for their beauty, craftsmanship, and ability to add a unique touch to any space.
With mosaic tiles, you can create intricate geometric patterns, floral motifs, landscapes, or abstract designs. The options are limitless, and your imagination is the only constraint. The smaller size of the tiles allows for intricate detailing, making mosaic patterns truly works of art.
Mosaic patterns can be created using various types of tiles, including ceramic, glass, stone, or even recycled materials. These tiles are carefully cut and arranged to form the desired design or image. The tesserae are often mounted on a mesh backing for easier installation.
The mosaic lay pattern can be used in a range of spaces and applications, from custom backsplashes and accent walls to floors and even outdoor murals. Its ability to create a focal point, tell a story, or add a touch of luxury makes it a popular choice among designers and homeowners.
When planning a mosaic pattern, careful consideration should be given to the color palette, tile shapes, and overall design. The tiles can be arranged in a random or symmetrical pattern, depending on the desired effect. Paying attention to the spacing and grout lines is crucial to ensure a seamless and visually pleasing result.
Installing a mosaic pattern requires a high level of precision and may be best left to professional tile installers experienced in working with intricate designs. Their expertise can ensure the tiles are properly aligned and securely installed.
The mosaic lay pattern offers a unique and captivating design solution for those looking to add an artistic element to their space. Its ability to transform any surface into a personalized masterpiece makes it a remarkable choice for creating a one-of-a-kind interior or exterior design.
Border Lay Pattern
The border lay pattern is a classic and decorative tile layout that adds a finishing touch to a space. As the name suggests, this pattern involves using tiles to create a border or frame around the perimeter of a room, wall, or specific area.
The border lay pattern serves both a practical and aesthetic purpose. It provides a visual delineation between different areas or sections of a room while adding a decorative element that enhances the overall design. It can be used to define the edges of a backsplash, highlight a shower area, or frame a fireplace, among other applications.
This pattern offers endless possibilities in terms of tile choice and design. The border can be created using tiles of the same color and shape as the main tiles, or contrasting tiles for a more striking effect. Decorative tiles, such as those with intricate patterns, textures, or different sizes, can be incorporated to add further visual interest.
When installing a border lay pattern, careful planning is vital. Measure the area where the border will be installed and determine the desired width. A tile spacer is necessary to create even spacing and ensure a consistent border width throughout.
The border can be installed either horizontally or vertically, depending on the desired effect. For example, a horizontal border can create a sense of width in a narrow space, while a vertical border can add height to lower ceilings.
In terms of installation, the border tiles are typically installed after the main tiles have been placed. This allows for precise alignment and ensures a seamless transition between the two. Attention to detail is essential to achieve straight and even lines, as well as precise cuts for corner tiles.
The border lay pattern offers a practical and decorative solution for adding a finishing touch to your tile design. It allows you to customize and personalize the look of your space, while also providing a visually pleasing element that elevates the overall aesthetic.
Versailles Lay Pattern
The Versailles lay pattern is a luxurious and intricate tile arrangement that evokes the elegance and grandeur of the Palace of Versailles. This pattern originated in 17th-century France and has since become a symbol of opulence and sophistication in interior design.
The Versailles pattern uses a combination of square and rectangular tiles arranged in a repeating geometric pattern. It typically features a central square tile surrounded by smaller rectangular tiles in a diagonal or herringbone layout. The result is a captivating design that adds texture, visual interest, and a sense of timeless beauty to any space.
This pattern is commonly used in large open areas such as living rooms, entryways, and formal dining rooms. It can create a statement floor or even an accent wall, transforming the space into a stunning focal point.
To achieve the Versailles lay pattern, careful planning and precise installation are crucial. The large central square tile serves as the starting point, and the smaller rectangular tiles are positioned around it. Paying attention to proper spacing, alignment, and symmetry is essential to create a seamless and harmonious design.
The Versailles pattern offers endless possibilities for customization. You can choose tiles in various colors, finishes, and materials to suit your personal style and the overall aesthetic of the room. The combination of different tile sizes and shapes adds depth and dimension to the design.
When installing the Versailles pattern, it’s important to consider the size and scale of the room. This pattern works best in larger spaces where it can be fully appreciated. It is also important to consult with a skilled tile installer who has experience with intricate designs to ensure a flawless installation.
The Versailles lay pattern provides a touch of old-world charm and elegance to contemporary spaces. Its intricate details and historical significance add a sense of luxury and sophistication, making it an exquisite choice for those who want to create a truly exceptional interior.
Chevron Lay Pattern
The chevron lay pattern is a dynamic and visually captivating tile layout that adds a sense of energy and movement to any space. This pattern features tiles arranged in a V-shaped zigzag pattern, creating a striking and modern design.
The chevron pattern offers a contemporary twist on the classic herringbone pattern. While both patterns involve diagonal alignment, the chevron layout creates a more prominent and pronounced V-shape.
To achieve the chevron lay pattern, rectangular tiles are positioned at an angle against each other to form a seamless continuous V-shape. This results in a chevron or arrow-like design that adds depth and visual interest to floors, walls, and backsplashes.
The chevron pattern works well in a variety of settings, from entryways and living rooms to contemporary kitchens and bathrooms. Its bold and eye-catching nature makes it a popular choice for those seeking a modern and stylish design.
When installing the chevron pattern, precision and attention to detail are important to ensure accurate tile alignment and spacing. The angles must be consistent and precise to create a seamless and symmetrical chevron pattern.
The chevron pattern lends itself well to customization and experimentation. The use of contrasting tile colors can emphasize the V-shape and make the pattern visually striking. Additionally, using tiles with different finishes or textures can add depth and dimension to the design.
While the chevron pattern is commonly created with rectangular tiles, it can also be achieved with other tile shapes, such as squares or triangles. The choice of tile size and shape can further enhance the uniqueness and visual impact of the chevron design.
The chevron lay pattern offers a modern and energetic look that adds a touch of contemporary flair to any space. Its bold and dynamic design makes it a favorite choice among interior designers and homeowners who want to make a stylish statement.
Fish Scale Lay Pattern
The fish scale lay pattern, also known as mermaid or scallop pattern, is a captivating and whimsical tile layout that resembles the scales of a fish. This pattern adds a touch of charm and intrigue to any space, creating a unique and visually stunning design.
The fish scale pattern is characterized by small, rounded tiles arranged in an overlapping pattern, much like the scales of a fish or the tiles of a mosaic. The individual tiles create a beautiful organic shape that adds movement and texture to walls, floors, and even accents.
This pattern is particularly popular in bathrooms, where it can be used to create a stunning focal point as a backsplash or shower wall. However, it can also be utilized in other areas of the home, such as the kitchen or as a decorative feature in living spaces.
To achieve the fish scale lay pattern, individual tiles are meticulously aligned and overlapped to create a flowing and continuous pattern. The position and direction of each tile are carefully considered to ensure a seamless and visually pleasing design.
The fish scale pattern offers the opportunity for creative expression and customization. It can be created using tiles of various colors, materials, and finishes, allowing you to tailor the design to suit your personal style and the overall aesthetic of the space.
When installing the fish scale pattern, it’s important to pay attention to the curvature and placement of each tile to maintain the organic shape and overall flow of the pattern. Properly aligning and spacing the tiles is essential to achieve a harmonious and visually pleasing effect.
The fish scale lay pattern offers a whimsical and enchanting look that adds a touch of fantasy and elegance to any space. Its unique shape and texture create a stunning visual impact, making it a delightful choice for those seeking an eye-catching and artistic tile design.
Read more: How To Layout Stairs
Conclusion
When it comes to interior design, the choice of tile and the way it is laid can have a significant impact on the overall aesthetic of a space. The 16 tile layout patterns explored in this article offer a wide range of design possibilities, each with its own unique charm and style.
From the classic and clean lines of the straight lay pattern to the intricate and captivating designs of the mosaic and Versailles patterns, there is a tile layout pattern for every taste and preference. Whether you prefer a modern and minimalist look or a more traditional and ornate style, these patterns allow you to create visually stunning and personalized interiors.
Each pattern brings its own distinct character to a space. The chevron pattern adds a sense of movement and energy, while the fish scale pattern lends a whimsical and enchanting touch. The herringbone pattern offers a timeless elegance, while the basketweave pattern adds texture and depth.
It’s important to consider factors such as the size of the room, the type of tile, and the desired mood or ambiance when selecting a tile layout pattern. Taking the time to plan and execute the installation with precision will ensure a seamless and professionally finished result.
Whether you opt for a classic and straightforward design or a more intricate and unconventional pattern, tile layout patterns have the power to transform a space and make a lasting impression. They provide an opportunity to personalize your home, express your creativity, and create a unique environment that reflects your style and personality.
So, explore the world of tile layout patterns, experiment with different designs and tile combinations, and allow your imagination to run wild. Let these patterns inspire you to create stunning and captivating interiors that you will love for years to come.
Frequently Asked Questions about Tile Layout Patterns: 16 Clever Design Tricks With Tile
Was this page helpful?
At Storables.com, we guarantee accurate and reliable information. Our content, validated by Expert Board Contributors, is crafted following stringent Editorial Policies. We're committed to providing you with well-researched, expert-backed insights for all your informational needs.


0 thoughts on “Tile Layout Patterns: 16 Clever Design Tricks With Tile”