Articles
How To Tile A Porch
Modified: October 20, 2024
Learn step-by-step instructions on how to tile a porch with our informative articles. Achieve a beautiful and durable porch flooring with expert guidance.
(Many of the links in this article redirect to a specific reviewed product. Your purchase of these products through affiliate links helps to generate commission for Storables.com, at no extra cost. Learn more)
Introduction
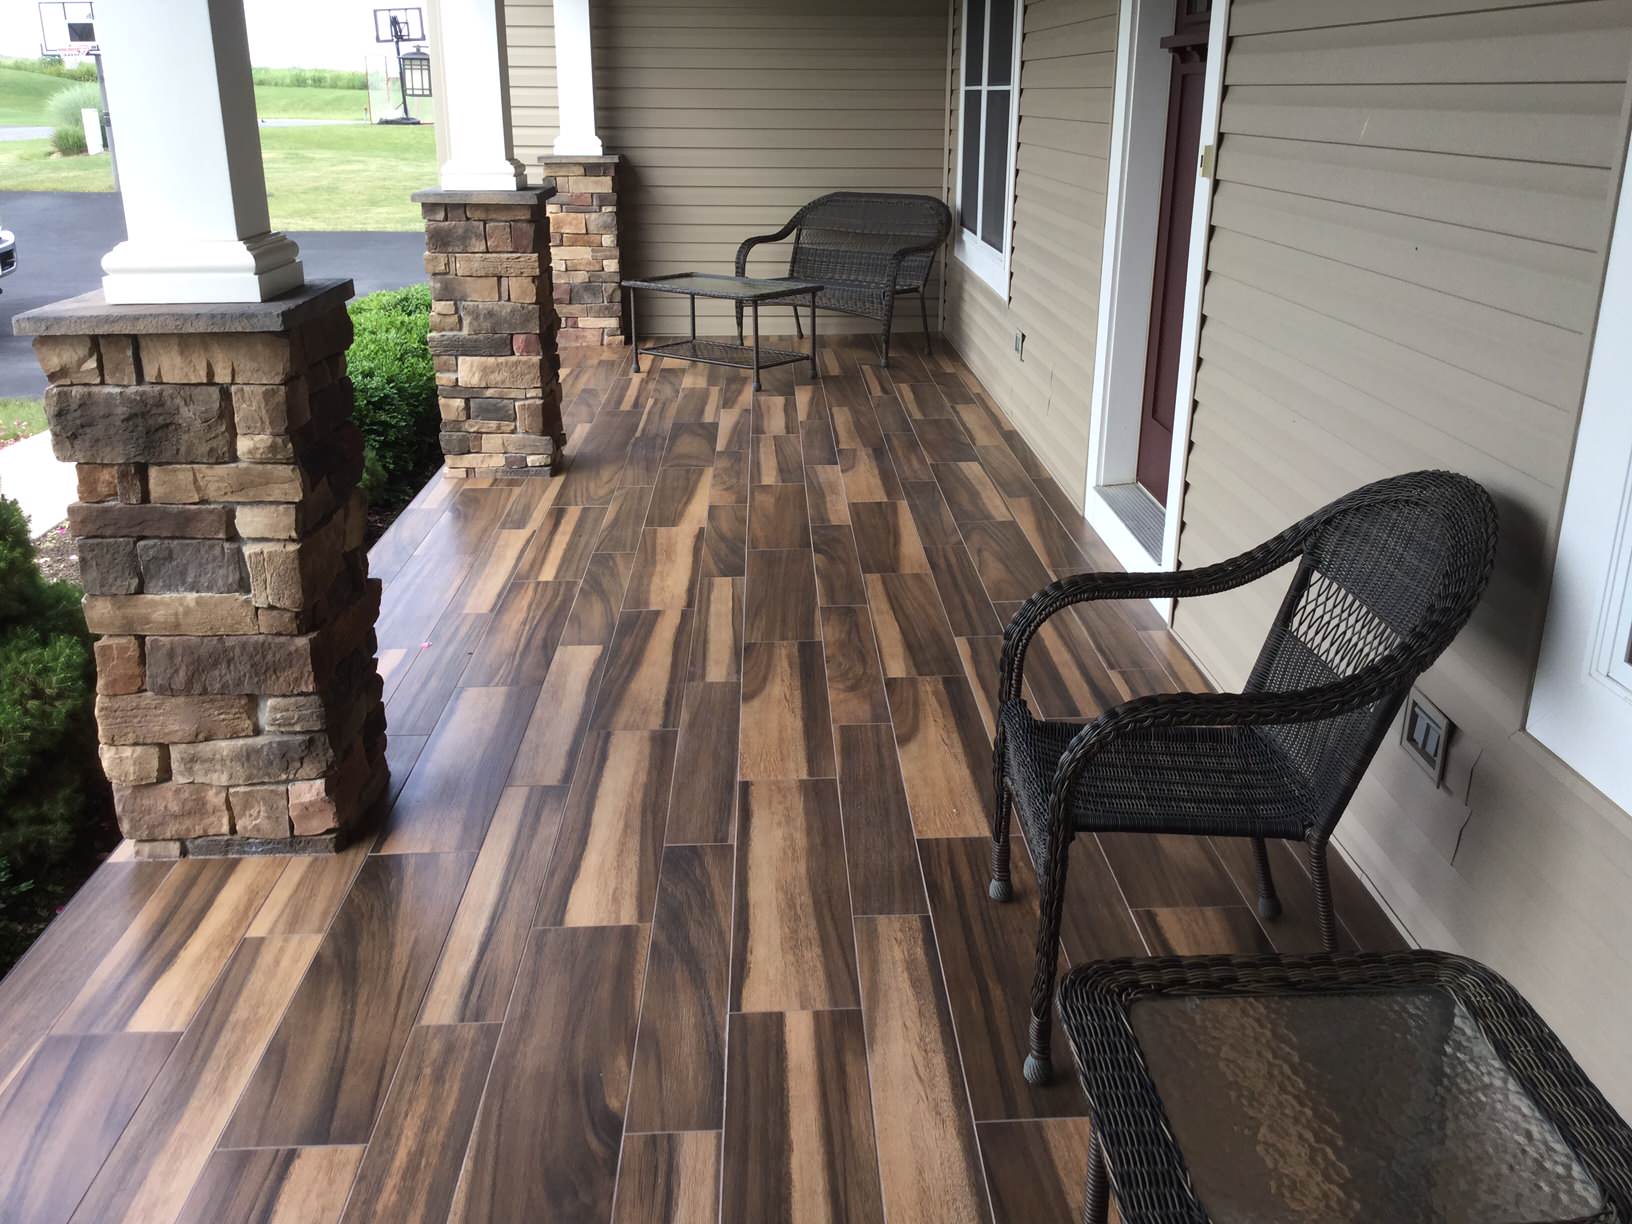
Adding tiles to your porch can transform it into a stunning and functional space. Whether you have a small porch or a spacious outdoor area, tiling not only adds aesthetic appeal but also enhances durability and longevity. By following the right steps and using the proper materials and tools, you can easily tile your porch and create a beautiful outdoor space that you’ll love to spend time in.
In this article, we will guide you through the process of tiling a porch, ensuring that you have a solid foundation of knowledge to achieve a successful project. From preparing the porch surface to sealing the grout, we will cover all the essential steps to help you make your porch the envy of your neighbors.
Before you begin, make sure you have all the necessary materials and tools ready. This will ensure that your tiling project goes smoothly and without any interruptions. Let’s take a look at what you’ll need:
Materials Needed:
- Porcelain or ceramic tiles
- Tile adhesive
- Grout
- Tile spacers
- Tile cutter
- Tile saw (if necessary)
- Grout float
- Sponge
- Bucket
- Waterproof sealer
Tools Needed:
- Trowel
- Level
- Measuring tape
- Pencil
- Notched trowel
- Knee pads
- Safety goggles
Now that you have all the necessary materials and tools, let’s dive into the step-by-step process of tiling your porch and creating a beautiful outdoor space.
Key Takeaways:
- Transform your porch into a stunning and functional outdoor space by following the step-by-step guide to tiling. From preparing the surface to sealing the grout, achieve a professional and long-lasting result with the right materials and tools.
- Enjoy your newly tiled porch by adding finishing touches and establishing a regular maintenance routine. Create a cozy and inviting outdoor space that will provide endless enjoyment for you and your loved ones.
Materials and Tools Needed
Before starting your porch tiling project, it’s essential to gather all the necessary materials and tools. Having everything prepared in advance will save you time and ensure a smooth workflow. Here is a list of what you’ll need:
Materials Needed:
- Porcelain or ceramic tiles: Choose tiles that are suitable for outdoor use and can withstand the elements.
- Tile adhesive: Use a high-quality adhesive specifically designed for outdoor applications.
- Grout: Select a grout color that complements your chosen tiles and matches the style you want to achieve.
- Tile spacers: These small plastic pieces will help ensure even spacing between the tiles.
- Tile cutter: A tile cutter is necessary for cutting tiles to fit around corners, edges, or obstacles.
- Tile saw (if necessary): If you need to make intricate cuts or work with larger tiles, a tile saw will come in handy.
- Grout float: This tool is used to spread the grout evenly and fill in the gaps between the tiles.
- Sponge: A damp sponge is needed for cleaning excess grout off the tiles.
- Bucket: You’ll need a bucket to mix the tile adhesive and grout.
- Waterproof sealer: Applying a waterproof sealer to the grout will protect it from stains and moisture.
Tools Needed:
- Trowel: A notched trowel is used to spread the adhesive evenly on the porch surface.
- Level: A level is essential for ensuring that your tiles are laid flat and level.
- Measuring tape: Use a measuring tape to accurately measure the dimensions of your porch.
- Pencil: Marking your measurements and tile layout with a pencil will help guide your installation.
- Knee pads: Tiling can be hard on the knees, so wearing knee pads will provide comfort and protection.
- Safety goggles: Protect your eyes from any potential debris or tile fragments with safety goggles.
Gathering the necessary materials and tools before you begin your project will ensure that you have a seamless tiling experience. Take the time to double-check your supplies and make any necessary purchases. With everything ready, you’ll be prepared to move onto the next steps of preparing the porch surface and planning the tile layout.
Preparing the Porch Surface
Before you start tiling your porch, it’s crucial to prepare the surface properly. This preparation ensures that the tiles adhere well and that the finished result is smooth and long-lasting. Follow these steps to prepare the porch surface:
1. Clean the porch: Remove any debris, dirt, or loose particles from the porch surface. Sweep the area thoroughly, and use a pressure washer if necessary to ensure a clean base for tiling.
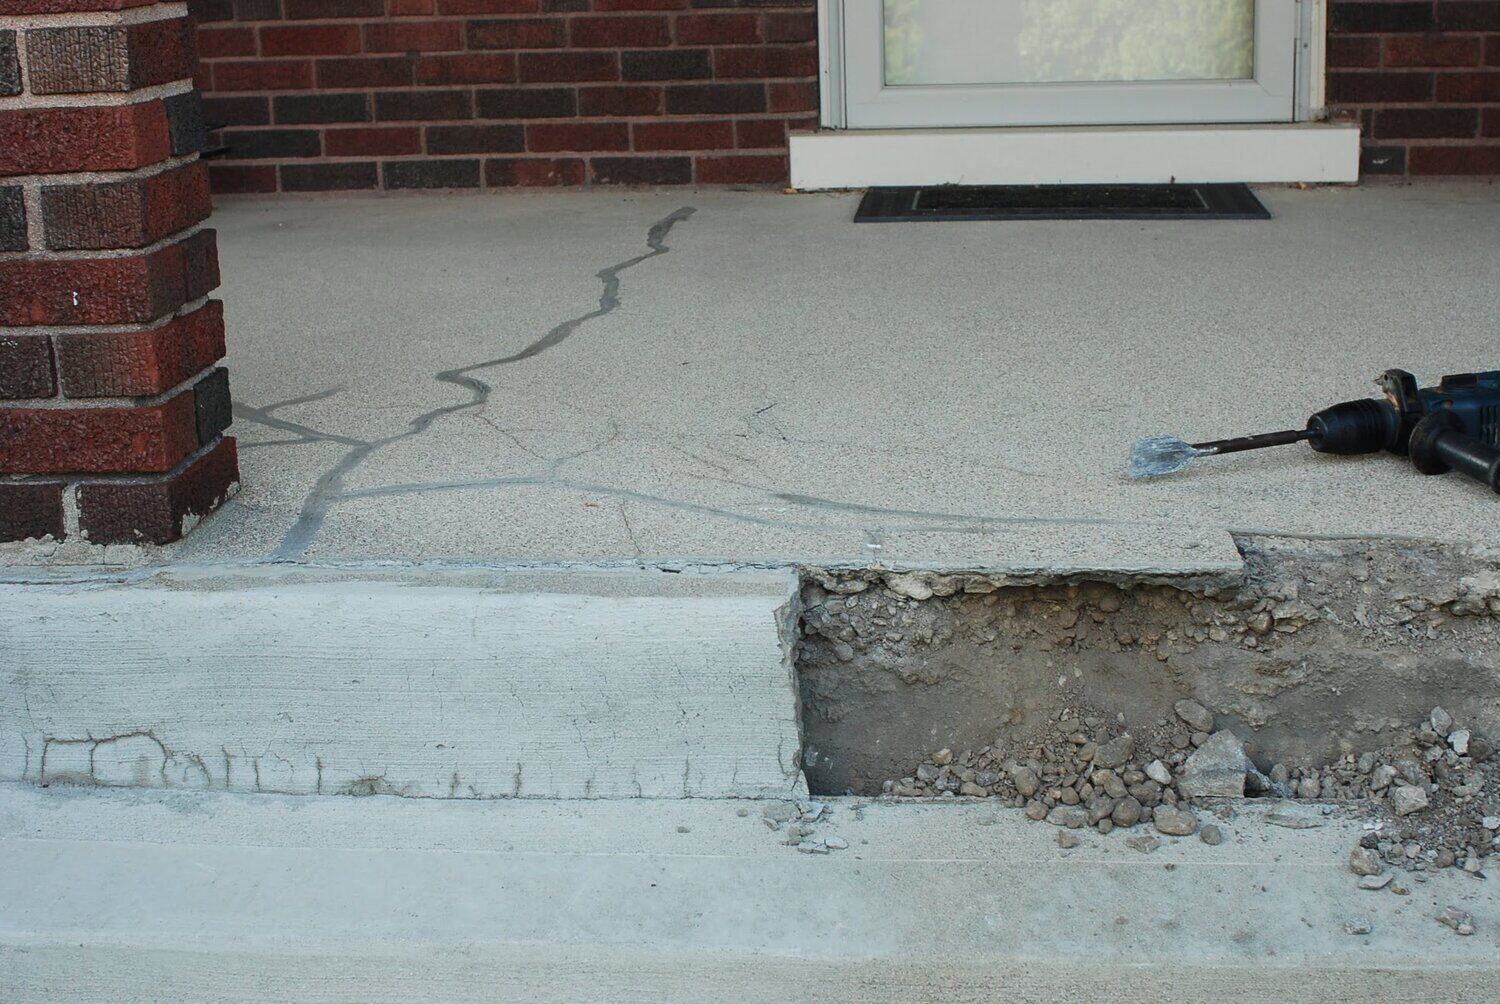
2. Repair any damages: Inspect the porch for any cracks, holes, or uneven areas. Fill in these imperfections with a suitable patching compound and allow it to dry completely before proceeding.
3. Sand the surface: If your porch has a rough texture, sand it down using coarse-grit sandpaper. This step ensures a smooth and even surface for the tiles to be laid on.
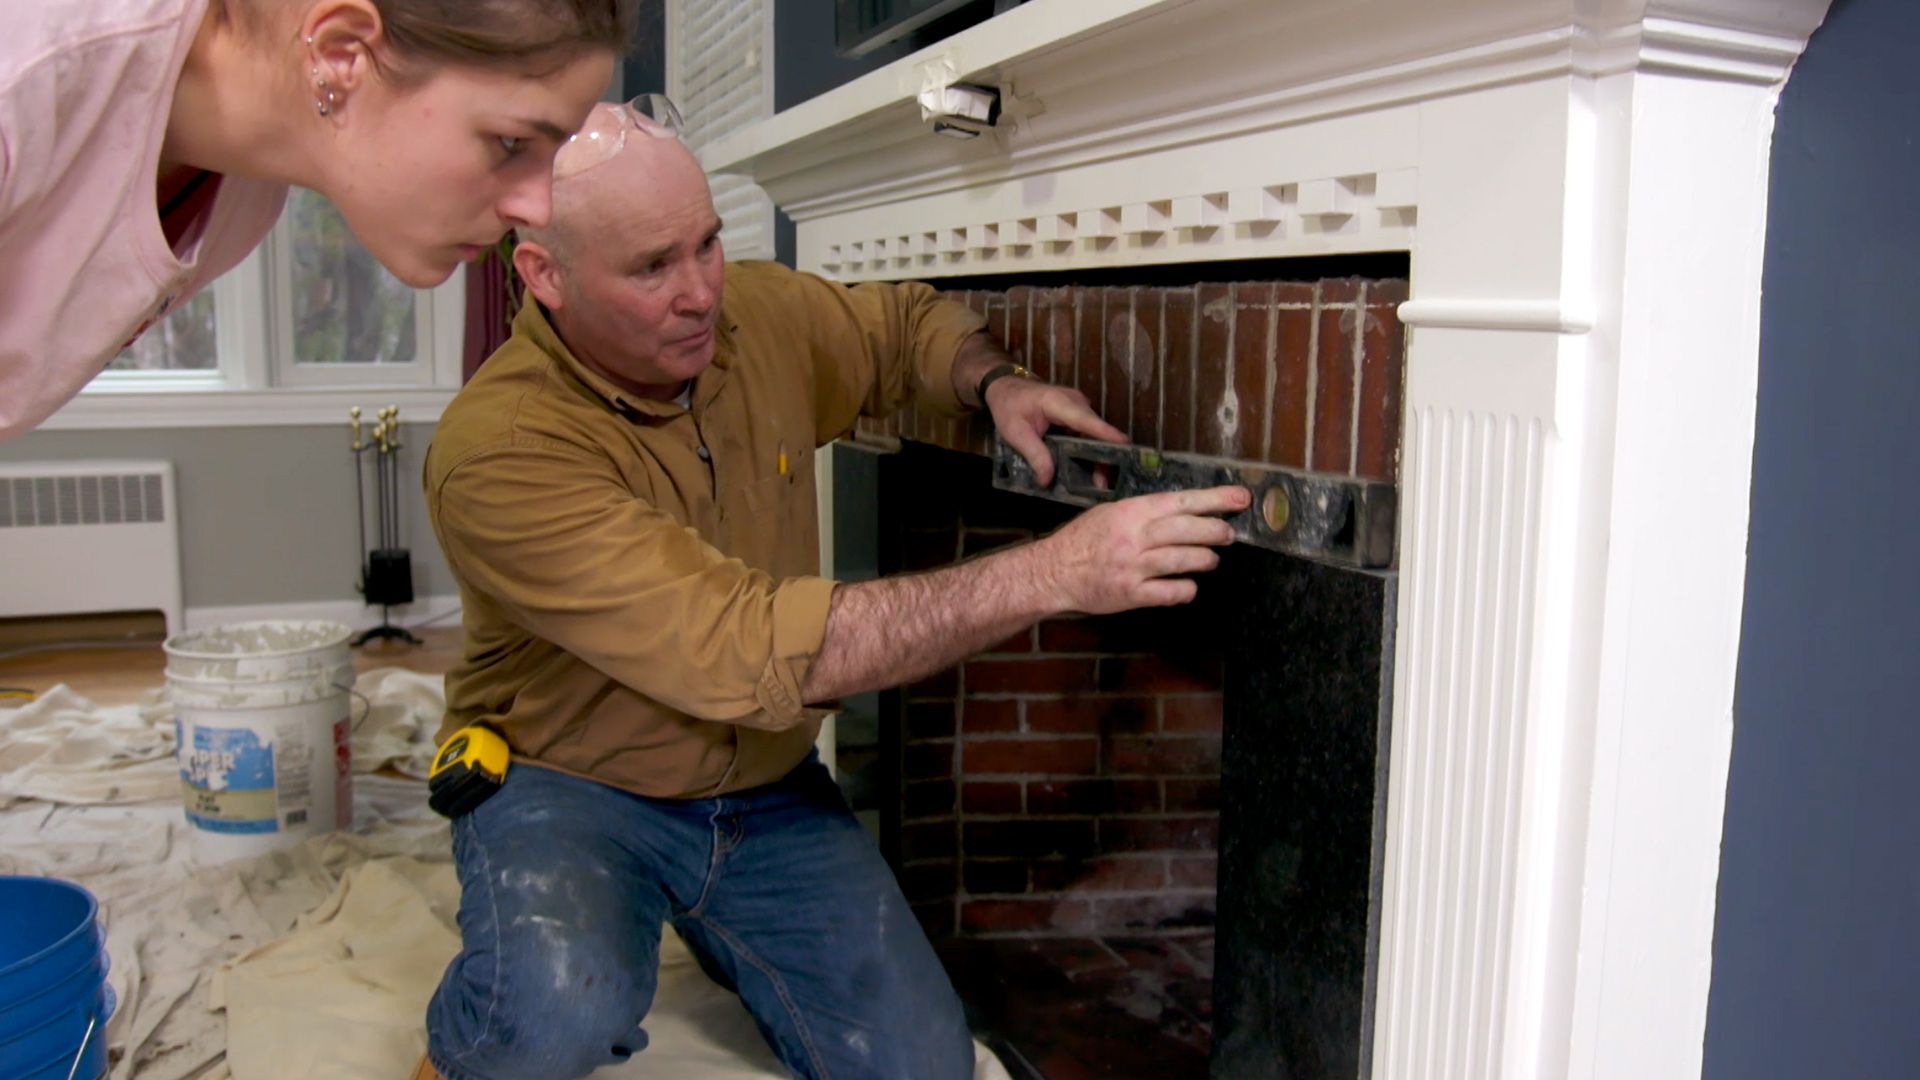
4. Check for levelness: Use a level tool to check if the porch surface is level. If you find any uneven areas, you may need to use a leveling compound to even it out. Follow the manufacturer’s instructions for mixing and applying the leveling compound.
5. Apply a primer: Depending on the type of porch surface, you may need to apply a primer before tiling. This step helps the adhesive bond better with the surface. Follow the primer manufacturer’s instructions for application and drying time.
By taking the time to properly prepare the porch surface, you are setting the foundation for a successful tiling project. A clean, smooth, and level surface will ensure that the tiles adhere well and that the final result is a visually pleasing and durable porch floor.
After completing the surface preparation, the next step is to plan the tile layout. This involves measuring and marking the porch floor to determine the position and arrangement of the tiles. Proper planning helps ensure that the tile installation is symmetrical and aesthetically pleasing.
Planning the Tile Layout
Properly planning the tile layout is a crucial step in creating a visually appealing and balanced porch floor. A well-planned layout ensures that the tiles are evenly spaced, aligned correctly, and fit perfectly within the space. Follow these steps to plan the tile layout:
1. Measure the porch: Use a measuring tape to measure the dimensions of your porch. Take note of any obstructions or irregularities, such as columns or steps, as these will impact the tile layout.
2. Determine the tile size: Decide on the size and shape of the tiles you’ll be using. Consider both functional and aesthetic aspects when making this decision.
3. Map out the layout: Use a pencil and measuring tape to mark the layout on the porch floor. Start from the center and work your way outwards for a balanced and symmetrical design. Make sure to account for grout lines when marking the positions of the tiles.
4. Dry-fit the tiles: Lay out a few tiles based on your marked layout to ensure they fit correctly and align properly. Use tile spacers to maintain consistent spacing between the tiles.
5. Make adjustments: If necessary, make adjustments to the layout to accommodate for any odd-shaped or small spaces. You may need to cut tiles to fit around edges, corners, or obstacles. Use a tile cutter or a tile saw to make these precise cuts.
6. Check the symmetry: Stand back and assess the overall layout for symmetry and balance. Ensure that the tile edges align with the porch edges and that any focal points or design elements are aesthetically pleasing.
By taking the time to carefully plan the tile layout, you can avoid any surprises during the installation process and achieve a polished and professional finish for your porch floor. Once you’re satisfied with the layout, it’s time to move on to the next step: mixing the tile adhesive.
Mixing the Tile Adhesive
Mixing the tile adhesive is a critical step in ensuring that your tiles adhere properly to the porch surface. The adhesive acts as the bonding agent, securing the tiles in place and providing long-lasting durability. Follow these steps to mix the tile adhesive correctly:
1. Read the manufacturer’s instructions: Different types of tile adhesive may have specific instructions and ratios for mixing. It’s essential to read and follow the instructions provided by the manufacturer to achieve the best results.
2. Gather the necessary materials: You’ll need a mixing bucket, a trowel, and the tile adhesive itself. Ensure that you have all the materials ready before you start the mixing process.
3. Pour the adhesive powder into the bucket: Start by emptying the required amount of adhesive powder into the mixing bucket. Use a measuring cup or scale if precise measurements are specified by the manufacturer.
4. Add water gradually: Slowly pour water into the bucket, mixing it with the adhesive powder as you go. Use a trowel or mixing paddle to combine the water and powder, ensuring a smooth and consistent mixture.
5. Follow the mixing ratio: Pay attention to the recommended water-to-adhesive ratio specified by the manufacturer. Adding too much or too little water can affect the adhesive’s strength and bonding capabilities.
6. Mix until the desired consistency: Continue mixing the adhesive until you achieve a thick, creamy consistency. The adhesive should be easy to spread but not runny. Make sure there are no lumps or dry pockets in the mixture.
7. Allow the adhesive to rest: Let the mixed adhesive rest for a few minutes according to the manufacturer’s instructions. This resting period allows the adhesive to activate and reach its maximum bonding capabilities.
8. Check the adhesive consistency: After the resting period, give the adhesive a final stir to ensure it hasn’t become too thick or too thin. Adjust the consistency if needed by adding small amounts of water or adhesive powder as required.
By following these steps and adhering to the manufacturer’s instructions, you can mix the tile adhesive correctly. A properly mixed adhesive will ensure strong and secure bonding between the tiles and the porch surface, resulting in a stable and long-lasting tile installation. With the adhesive ready, it’s time to proceed with installing the first row of tiles.
Installing the First Row of Tiles
Installing the first row of tiles is a crucial step in your porch tiling project, as it sets the foundation for the rest of the installation. Properly laying the first row ensures that the subsequent tiles align correctly and the entire porch floor looks seamless. Follow these steps to install the first row of tiles:
1. Apply adhesive to the porch: Using a notched trowel, spread a layer of tile adhesive along the starting edge of the porch. Make sure the adhesive is applied evenly and covers the width of the first row.
2. Create grooves in the adhesive: After applying the adhesive, use the notched edge of the trowel to create grooves or ridges. This helps improve the adhesion and ensures proper coverage of the adhesive underneath the tiles.
3. Place the first tile: Carefully place the first tile at the starting edge, pressing it firmly into the adhesive. Wiggle the tile slightly to help it settle and achieve good contact with the adhesive.
4. Check for levelness and alignment: Use a level to ensure that the first tile is level and aligned with your planned layout. Adjust as necessary before continuing with the remaining tiles.
5. Insert tile spacers: Place tile spacers on each side of the first tile to ensure even spacing between the tiles. The spacers help maintain consistent grout lines throughout the installation.
6. Continue with the remaining first-row tiles: Repeat steps 2 to 5 for the rest of the first row. Apply adhesive, create grooves, place the tiles, check for levelness, and insert tile spacers.
7. Cut tiles if needed: If the last tile in the first row is too wide, you may need to cut it to fit. Measure and mark the tile, then use a tile cutter or tile saw to make the necessary cuts.
8. Allow the adhesive to set: Follow the manufacturer’s instructions for the recommended drying time. It’s crucial to allow the adhesive to set before proceeding with the next steps to ensure a secure bond.
By following these steps, you can successfully install the first row of tiles on your porch. Taking the time to ensure proper alignment and levelness in this initial stage will make the rest of the tiling process smoother and produce a professional-looking end result. With the first row in place, you can now move on to cutting tiles to fit around edges and obstacles.
Cutting Tiles to Fit
When tiling your porch, it’s common to encounter edges, corners, or obstacles that require you to cut tiles to fit properly. Cutting tiles to the correct size and shape allows for a clean and seamless installation. Follow these steps to cut tiles to fit:
1. Measure and mark: Measure the area where the tile needs to be cut and mark it on the tile’s surface. Use a pencil or tile marker to make clear and precise markings.
2. Safety precautions: Put on safety goggles to protect your eyes from any flying tile fragments. It’s also recommended to wear work gloves for added safety.
3. Choose the cutting method: There are different methods for cutting tiles, such as using a tile cutter, tile nippers, or a wet saw. The choice of method depends on the type of cut you need to make and the tools you have available.
4. Tile cutter: If using a tile cutter, align the marked cutting line with the cutter’s guide. Apply gentle pressure and score the tile along the marked line. Then, apply pressure on the tile cutter’s handles to snap the tile along the scored line.
5. Tile nippers: Tile nippers are useful for making small and irregular cuts. Start by making small nips along the marked line, working your way gradually. Repeat the nipping process until the desired shape is achieved.
6. Wet saw: A wet saw is the most precise tool for cutting tiles, especially for complex cuts or cutting through thicker tiles. Follow the manufacturer’s instructions for operating the wet saw and wear safety goggles and gloves.
7. Test the cut: After making the cut, place the tile in its designated spot to ensure it fits properly. Make any additional adjustments if necessary.
8. Smooth the edges: Use sandpaper or a tile file to smooth the edges of the cut tile. This will prevent any rough or sharp edges that could be a tripping hazard or cause injury.
Remember, practice makes perfect when it comes to cutting tiles. It’s advisable to have extra tiles available in case of mistakes or accidents. Take your time and proceed with caution to ensure accurate and clean cuts. With the tiles cut to fit, you can proceed to apply the tile adhesive and begin setting the tiles on your porch floor.
When tiling a porch, make sure to use outdoor-rated tiles and a waterproof adhesive to ensure durability and longevity. Additionally, consider using a textured or non-slip surface to prevent accidents in wet conditions.
Applying the Tile Adhesive
Now that you have prepared the porch surface and cut the tiles to fit, it’s time to apply the tile adhesive and secure the tiles onto the porch floor. Properly applying the adhesive ensures a strong bond between the tiles and the surface, ensuring a long-lasting and durable installation. Follow these steps to apply the tile adhesive:
1. Mix the adhesive: Refer to the manufacturer’s instructions to mix the tile adhesive. Follow the specified water-to-adhesive ratio and ensure that the adhesive has a smooth and workable consistency.
2. Work in small sections: Start by applying the tile adhesive to a small area of the porch floor. This allows you to work efficiently and prevents the adhesive from drying before you can lay the tiles.
3. Use a notched trowel: Using the notched side of the trowel, spread a layer of adhesive onto the porch floor. Hold the trowel at a 45-degree angle and create even ridges in the adhesive.
4. Apply the adhesive to the tile: Before placing a tile onto the adhesive, apply a thin layer of adhesive to the back of the tile using the flat side of the trowel. This helps create a stronger bond and ensures full coverage.
5. Place the tile: Carefully place the tile onto the adhesive, aligning it with the marked layout and adjacent tiles. Press down firmly to ensure good contact between the tile and adhesive.
6. Wiggle the tile: Slightly wiggle the tile back and forth to ensure it settles into the adhesive and achieves a flush and level surface. If using tile spacers, insert them between the tiles to maintain consistent spacing.
7. Repeat the process: Continue applying adhesive, both to the porch floor and the back of each tile, and placing the tiles in the desired pattern or layout. Remember to periodically check for levelness and alignment.
8. Clean off excess adhesive: As you work, be mindful of any excess adhesive that squeezes out between the tiles. Use a damp sponge or cloth to carefully remove the excess adhesive before it dries.
By following these steps and taking care to apply the adhesive correctly, you can ensure a secure bond between the tiles and the porch floor. Take your time to work in small sections and maintain a consistent application. With the tiles set in place, it’s time to move to the next step: setting the tiles.
Setting the Tiles
Setting the tiles is the next crucial step after applying the adhesive. This step involves positioning the tiles on the porch floor in accordance with your planned layout and ensuring a level and well-aligned installation. Follow these steps to set the tiles:
1. Start from the center: Begin setting the tiles from the center of the porch floor. This allows for a balanced and symmetrical installation.
2. Apply pressure: Press each tile firmly into the adhesive, ensuring good contact and a secure bond. Use a hand or rubber mallet to gently tap the tiles into place, if needed.
3. Check for levelness: Use a level to ensure that the tiles are level and evenly aligned. Adjust as necessary by tapping or adding/removing adhesive under individual tiles.
4. Maintain consistent spacing: Use tile spacers to ensure consistent spacing between the tiles. Insert the spacers at the corners of each tile and remove them once the adhesive has set.
5. Work in small sections: Set the tiles in small sections, gradually working your way outward from the center. This ensures that the adhesive doesn’t dry out before you can complete the installation.
6. Double-check alignment: Periodically step back and assess the alignment and layout of the tiles. Make any necessary adjustments to maintain a uniform and visually appealing installation.
7. Cut tiles to fit: As you reach edges or obstacles, use the appropriate tools to cut tiles to fit. Take accurate measurements and use a tile cutter or tile saw to achieve precise cuts.
8. Continuously clean excess adhesive: Throughout the process, be diligent about removing any excess adhesive that oozes out from the joints. Use a damp sponge or cloth to wipe away the excess before it dries.
9. Allow the adhesive to dry: Follow the manufacturer’s instructions for the recommended drying time. Avoid walking on the tiles or placing heavy objects on them until the adhesive has fully set.
By following these steps and taking the time to set the tiles carefully and accurately, you can achieve a beautiful and professional-looking porch floor. Maintaining levelness, alignment, and consistent spacing ensures a visually pleasing and durable tile installation. With the tiles set, the next step is to grout the joints.
Read more: How To Cover Porch
Grouting the Tiles
Grouting the tiles is a crucial step in completing your porch tiling project. Grout not only fills the gaps between the tiles but also provides stability, durability, and a finished look to the floor. Follow these steps to grout the tiles:
1. Choose the right grout: Select a grout color that complements the tiles and matches your desired aesthetic. Ensure that the grout is suitable for the type of tiles you have used and for outdoor applications.
2. Prepare the grout mixture: Follow the manufacturer’s instructions to mix the grout. Usually, this involves adding water to the grout powder and stirring until you achieve a smooth, lump-free consistency.
3. Apply the grout: Using a grout float, scoop an adequate amount of grout onto the float’s flat edge. Hold the float at a 45-degree angle and spread the grout diagonally across the tiles, pressing it into the joints.
4. Work in small sections: Grout the tiles in small sections, starting from one corner of the porch and working your way across. This prevents the grout from drying out before you can complete the entire area.
5. Fill the joints: Firmly press the grout into the joints, ensuring that they are completely filled. Move the float diagonally and across the joints to pack the grout tightly and remove any excess.
6. Clean off excess grout: Using a damp sponge or cloth, carefully wipe the surface of the tiles to remove the excess grout before it dries. Rinse the sponge or cloth frequently to maintain cleanliness.
7. Shape the grout lines: Use a grout shaping tool or your finger to shape the grout lines to achieve a uniform and professional look. Ensure that the lines are straight and level throughout the porch floor.
8. Allow the grout to cure: Follow the recommended curing time provided by the grout manufacturer. Avoid walking on the grouted area or subjecting it to any moisture until the grout has fully cured.
9. Seal the grout (optional): Consider applying a waterproof grout sealer to protect the grout from stains and moisture. Follow the manufacturer’s instructions for application, ensuring the grout is clean and dry beforehand.
By following these steps and paying attention to detail, you can achieve a clean and professional grouting finish for your porch tiles. Properly grouted tiles not only enhance the visual appeal of your porch but also provide the necessary stability and durability. With the grout set, the final step is to clean and finish up your newly tiled porch floor.
Sealing the Grout
Sealing the grout is an optional but highly recommended step in the tiling process. Sealing the grout provides an additional layer of protection against stains, moisture, and dirt, helping to maintain the appearance and longevity of your porch floor. Follow these steps to seal the grout:
1. Allow the grout to cure: Before sealing the grout, make sure it has fully cured according to the manufacturer’s instructions. This may take several days, so be patient and avoid any heavy traffic or excessive moisture on the porch floor during this time.
2. Clean the grout: Thoroughly clean the grout lines to remove any dust, dirt, or residue. Use a mild grout cleaner and a grout brush or toothbrush to scrub the grout gently. Rinse with clean water and allow it to dry completely.
3. Choose a grout sealer: Select a high-quality grout sealer that is compatible with the type of grout used and suitable for outdoor applications. Ensure that the sealer is specifically designed to protect against moisture and stains.
4. Test the sealer: Before applying the grout sealer to the entire porch floor, it’s a good idea to perform a small test on a small and inconspicuous area. Follow the sealer manufacturer’s instructions for application and drying time.
5. Apply the sealer: Using a small brush or roller, apply the grout sealer onto the grout lines. Work in small sections, ensuring even coverage and avoiding any excess sealer on the tiles. Allow the sealer to penetrate the grout for the recommended time specified by the manufacturer.
6. Wipe off excess sealer: After the recommended penetration time, take a clean and dry cloth or sponge and gently wipe off any excess sealer from the tiles. Ensure that no sealer residue is left on the tile surface, as it can create a hazy appearance.
7. Allow the sealer to cure: Follow the manufacturer’s instructions for the recommended curing time. Avoid subjecting the sealed grout to moisture or heavy traffic during this time to allow the sealer to fully dry and bond with the grout.
8. Regular maintenance: While the grout sealer provides added protection, it is essential to regularly maintain and clean your tiled porch floor. Use a mild cleaner and a soft brush to clean the tiles and grout regularly, avoiding any harsh or abrasive cleaners that can damage the sealer.
By sealing the grout, you are taking an extra step to protect and preserve your newly tiled porch floor. The sealer helps to repel stains, moisture, and dirt, extending the lifespan of your grout and maintaining the beautiful appearance of your porch. With the grout sealed and your porch floor complete, take the time to clean and finish up the area before enjoying your transformed outdoor space.
Cleaning and Finishing Up
With the tiling and grouting complete, it’s time to give your porch floor a final cleaning and finishing touches. This step ensures that your newly tiled porch looks its best and is ready to be enjoyed. Follow these steps to clean and finish up your porch:
1. Clean the tiles: Using a mild tile cleaner and warm water, thoroughly clean the tiles and remove any dust, grout haze, or debris. Use a soft sponge or mop to gently scrub the tiles, being careful not to damage the grout lines or scratch the tiles.
2. Rinse the porch floor: Once the tiles are clean, rinse the porch floor with clean water to remove any leftover cleaning solution. This step ensures that no residue is left behind that could dull the appearance of your tiles.
3. Dry the porch floor: Use clean towels or allow the porch floor to air dry completely. Avoid walking on the tiles until they are fully dry, as wet tiles can become slippery and may cause accidents.
4. Inspect and touch up: Take a close look at the grout lines and tiles for any imperfections or areas that may need touch-up. Fix any loose tiles, reapply grout if necessary, and address any small repairs or adjustments before the final finish.
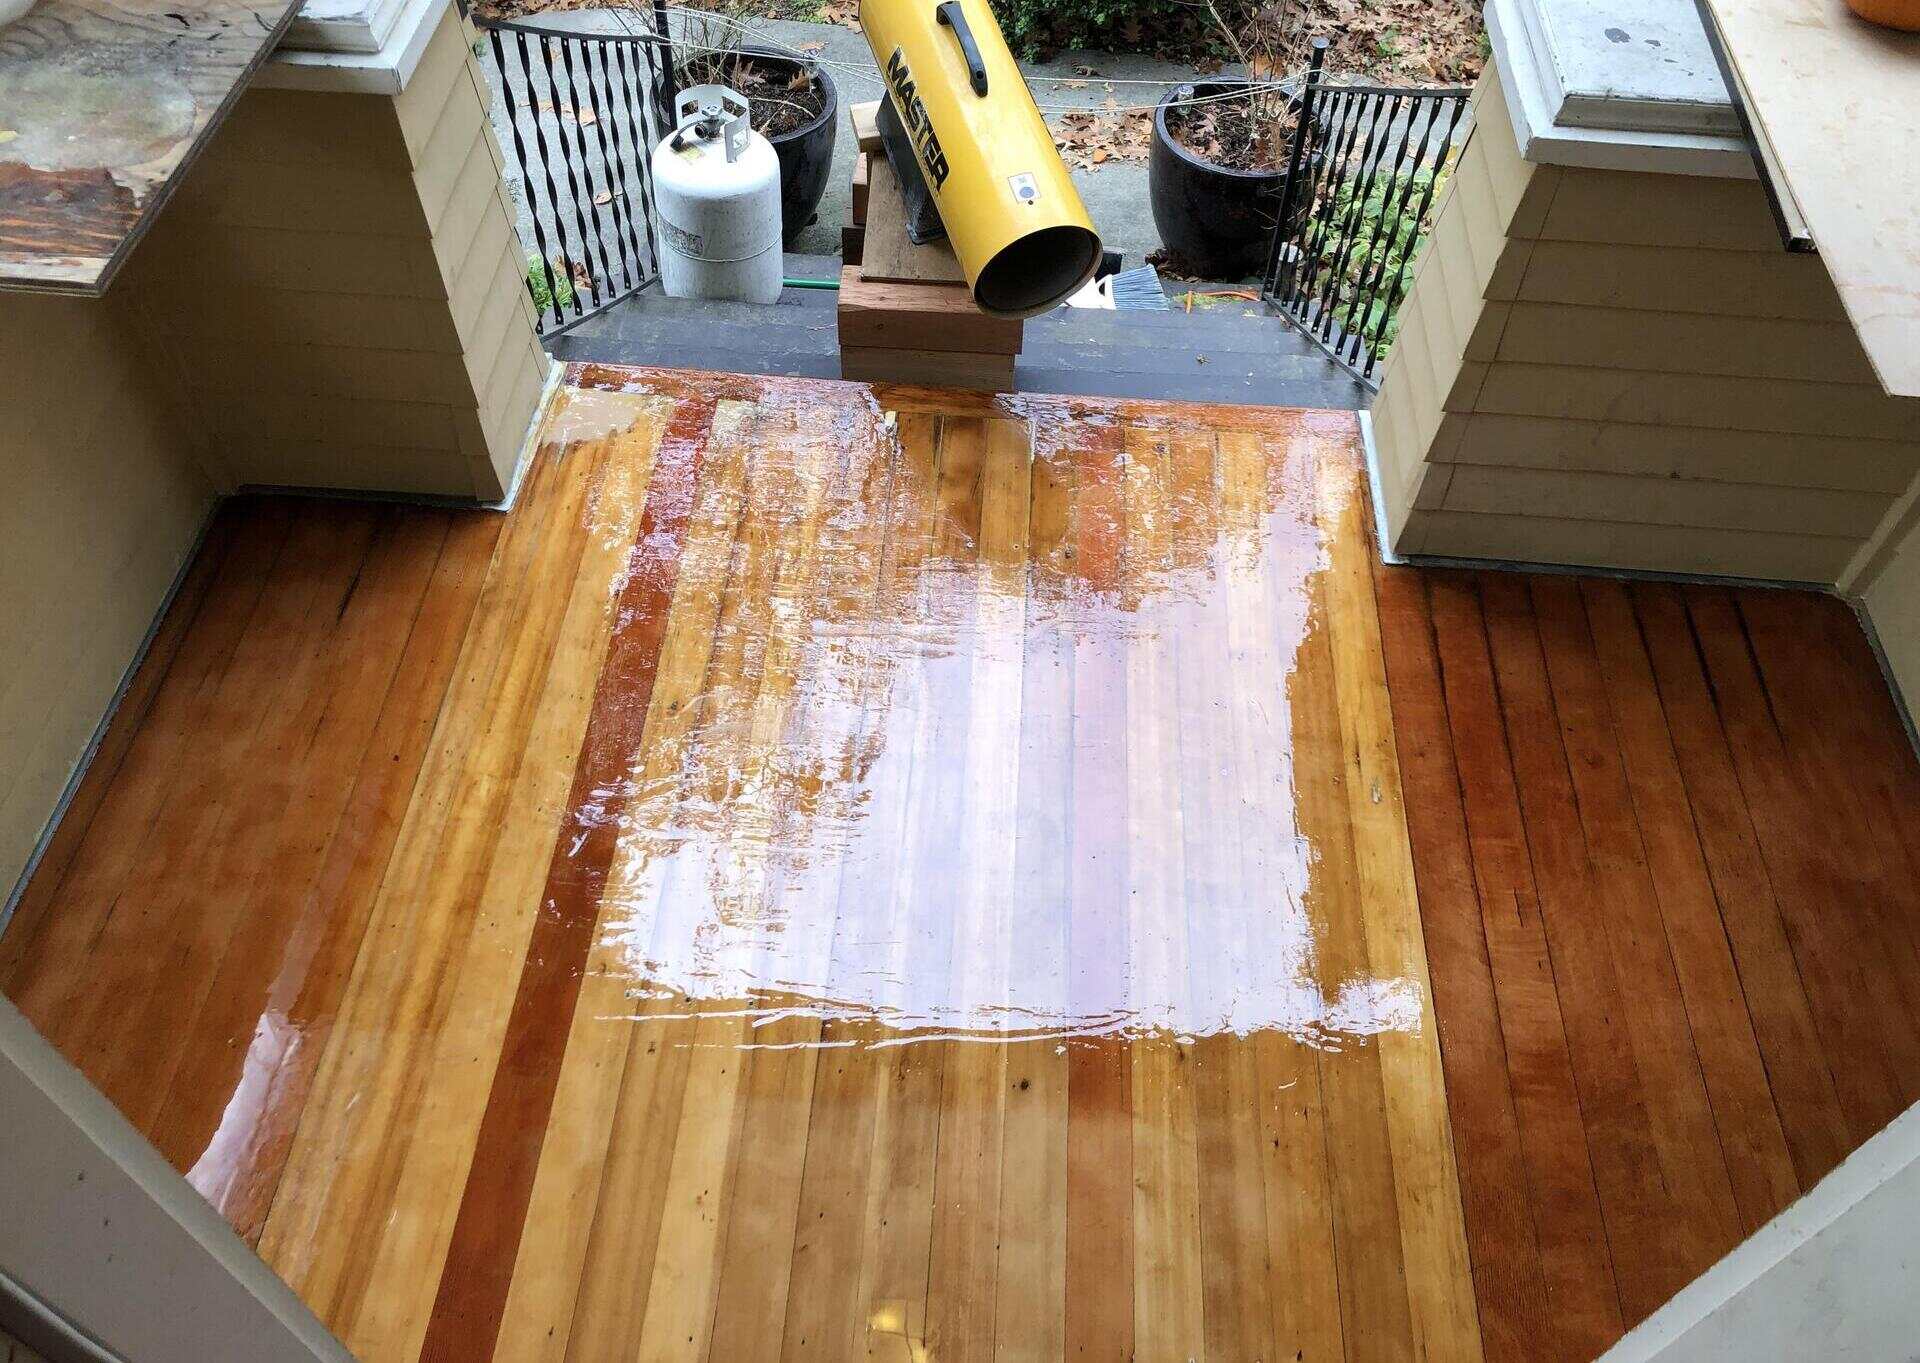
5. Apply a tile sealer (optional): Consider applying a tile sealer to the tiles themselves, especially if you’re using natural stone or porous tiles. A tile sealer can enhance the appearance, protect against stains, and make cleaning easier. Follow the manufacturer’s instructions for application and drying time.
6. Add finishing touches: Enhance the overall look of your porch by adding finishing touches. This can include placing outdoor furniture, potted plants, or decorative elements that complement your porch’s aesthetic and create a cozy and inviting space.
7. Regular maintenance: To keep your porch floor looking its best, establish a regular maintenance routine. Sweep or brush away debris regularly, clean up spills promptly, and perform periodic deep cleaning to remove any stubborn stains or dirt buildup.
Cleaning and finishing up your porch floor will give it that polished and inviting appearance, ready for you to enjoy. Regular maintenance and cleaning will ensure that your tiled porch lasts for years to come, maintaining its beauty and functionality. Now, it’s time to sit back, relax, and admire your newly tiled porch!
Conclusion
Congratulations on successfully tiling your porch! By following the steps outlined in this guide, you have transformed your outdoor space into a stunning and functional area. From preparing the porch surface to grouting the tiles, each step was crucial in achieving a professional and long-lasting result.
Throughout the process, you carefully prepared the porch surface, planned the tile layout, mixed and applied the tile adhesive, set the tiles, grouted the joints, and sealed the grout (optional). These steps ensured a solid foundation, proper alignment, and protection against stains and moisture.
Remember, taking the time to gather the necessary materials and tools, as well as having a well-thought-out plan, is key to a successful tiling project. Always follow the manufacturer’s instructions for the materials and tools you are using and prioritize safety precautions during every step of the process.
Maintaining your newly tiled porch is also essential for its longevity and beauty. Regular cleaning, promptly addressing any repairs or touch-ups, and following a maintenance routine will help preserve the appearance and functionality of your porch floor for years to come.
Now that you have a beautifully tiled porch, take the opportunity to enjoy your outdoor space. Whether it’s relaxing with a book, hosting gatherings, or simply basking in the beauty of your newly transformed area, your tiled porch will provide endless enjoyment for you and your loved ones.
Thank you for following this guide, and best of luck with your newly tiled porch!
Frequently Asked Questions about How To Tile A Porch
Was this page helpful?
At Storables.com, we guarantee accurate and reliable information. Our content, validated by Expert Board Contributors, is crafted following stringent Editorial Policies. We're committed to providing you with well-researched, expert-backed insights for all your informational needs.


0 thoughts on “How To Tile A Porch”