Home>Storage Ideas>Kitchen Storage>Organizing Kitchen Cabinets: 16 Tricks To Arrange Essentials
Kitchen Storage
Organizing Kitchen Cabinets: 16 Tricks To Arrange Essentials
Modified: October 20, 2024
Discover 16 genius kitchen storage ideas for organizing your cabinets and arranging essential items. Maximize your space and keep your kitchen clutter-free with these helpful tricks.
(Many of the links in this article redirect to a specific reviewed product. Your purchase of these products through affiliate links helps to generate commission for Storables.com, at no extra cost. Learn more)
Introduction
Welcome to the wonderful world of kitchen organization! If you’re tired of rummaging through cluttered cabinets and struggling to find the right utensils or ingredients, then this article is for you. We understand that having a well-organized kitchen is essential for both functionality and peace of mind. With a few clever tricks and ideas, you can transform your kitchen cabinets into efficient spaces that make cooking and meal prep a breeze.
In this article, we will explore 16 practical and creative ways to maximize the storage potential of your kitchen cabinets. From categorizing and decluttering to utilizing vertical space and implementing innovative storage solutions, we’ve got you covered. So let’s dive in and discover the secrets to achieving a beautifully organized kitchen!
Key Takeaways:
- Transform your kitchen cabinets into efficient spaces by categorizing, decluttering, and utilizing vertical storage. Implement under-cabinet organizers and drawer dividers for a seamless and enjoyable cooking experience.
- Maximize corner storage with shelving, store cutting boards vertically, and create a spice organization system to save time, reduce waste, and elevate your culinary creations.
Read more: 15 Pantry Cabinet to Store Your Essentials
Categorize and Declutter
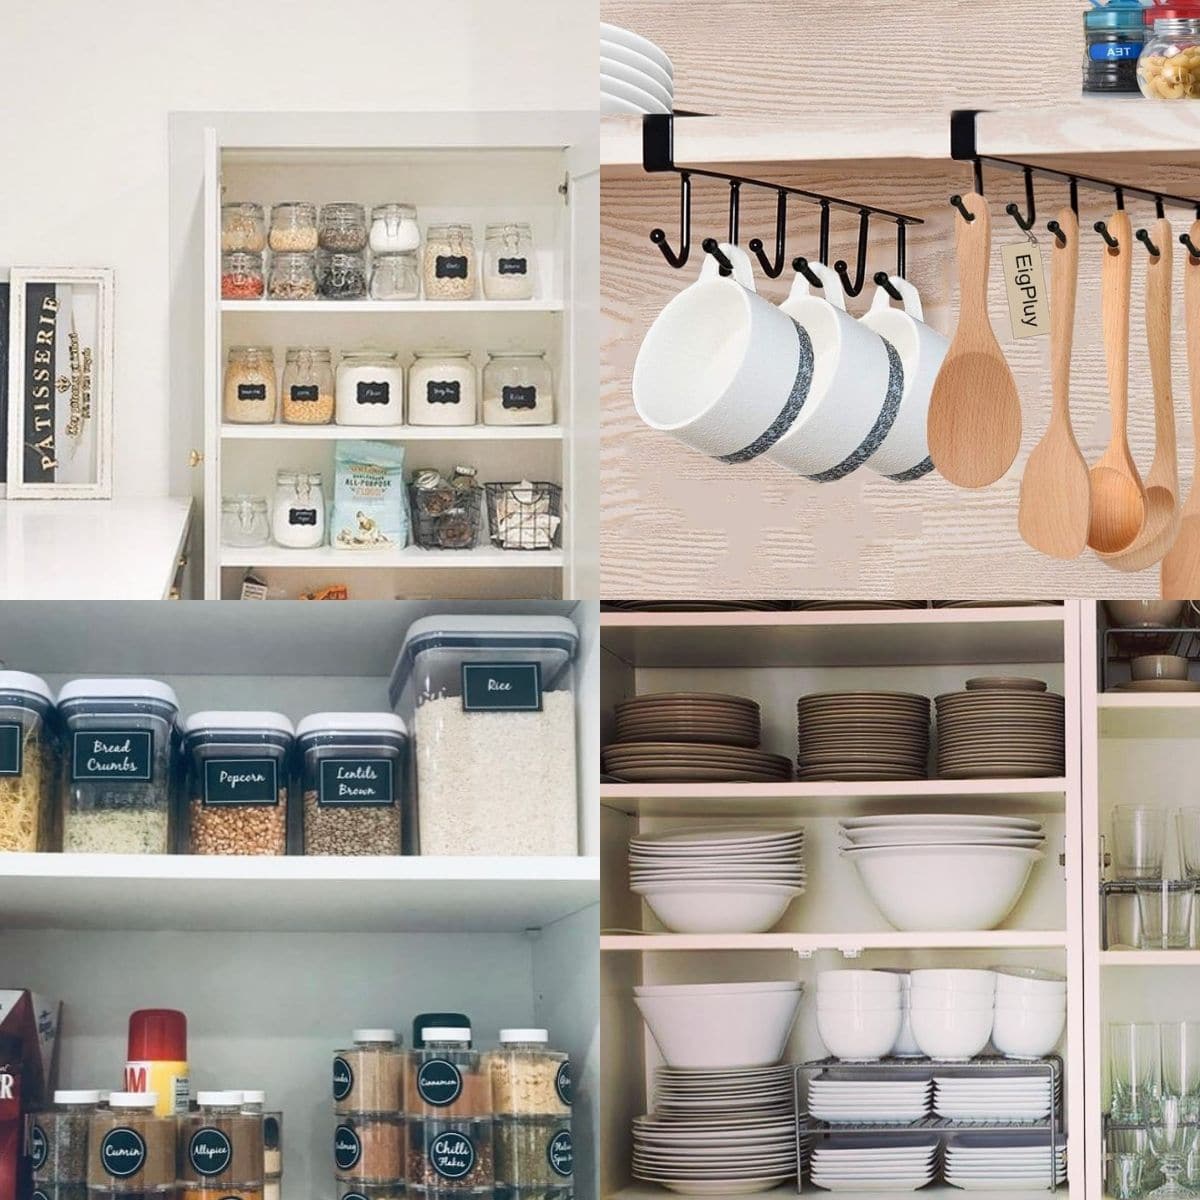
The first step in organizing your kitchen cabinets is to categorize and declutter your items. Go through each cabinet and sort your kitchen essentials into categories such as cookware, bakeware, dinnerware, food storage containers, and pantry items.
As you categorize, take the opportunity to declutter. Get rid of any items that are broken, damaged, or no longer serve a purpose in your kitchen. Consider donating or giving away items that are in good condition but not frequently used.
Once you have decluttered, assess the storage space in your cabinets. Determine the most convenient and accessible cabinets for each category of items. Reserve prime real estate for frequently used items and place them at eye level for easy access.
For example, store your pots and pans in a cabinet near the stove, your food storage containers in a cabinet near the fridge, and your everyday dishes in a cabinet close to the dishwasher or dining area.
If you have limited cabinet space, consider using alternative storage solutions such as open shelving, hanging racks, or storage containers that can be placed on countertops or inside drawers.
By categorizing and decluttering your kitchen items, you will not only create more space in your cabinets but also make it easier to find and access the items you need while cooking or baking.
Use Vertical Space
When it comes to maximizing storage in your kitchen cabinets, don’t forget about the vertical space. Many cabinets have wasted space above the shelves that can be put to good use. Here are a few ideas to make the most of your vertical space:
Install hooks or racks on the inside of cabinet doors. These can be used to hang mugs, pot holders, or even measuring cups. This not only saves space but also keeps frequently used items within easy reach.
Utilize tension rods. Tension rods can be inserted vertically inside cabinets to create additional storage for trays, cutting boards, or baking sheets. Simply adjust the rods to fit the width of your cabinet and slide in your items.
Invest in stackable shelves. Stackable shelves are a great way to double the storage capacity in your cabinets. They allow you to create multiple levels and tiers for storing plates, bowls, or even canned goods.
Consider using pegboards. Install a pegboard on the back wall of your cabinet to hang kitchen utensils, pots, and pans. This not only frees up cabinet space but also adds a visual element to your kitchen.
Don’t forget about the space above your cabinets. This area is often overlooked but can be used to display decorative items or store infrequently used items such as specialty cookware or large serving dishes.
By utilizing the vertical space in your kitchen cabinets, you’ll be able to make the most of every inch and create a more organized and efficient kitchen.
Install Under-Cabinet Organizers
If you’re looking to maximize storage space and keep your kitchen essentials easily accessible, installing under-cabinet organizers is a game-changer. These handy additions create additional storage options and help keep your countertops clear of clutter. Here are a few under-cabinet organizers to consider:
1. Under-Cabinet Drawers: These slide-out drawers are perfect for storing small items like spice jars, measuring spoons, or kitchen gadgets. They utilize the unused space beneath your upper cabinets and keep everything neatly organized and within reach.
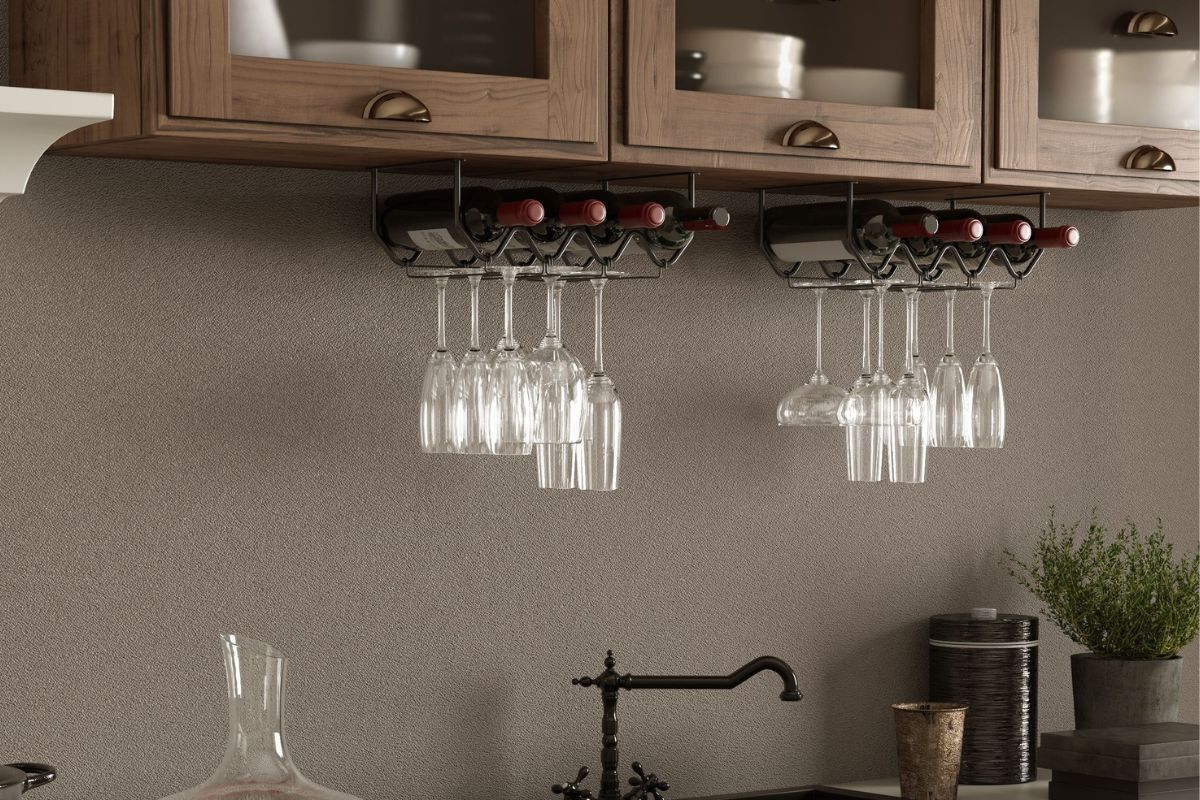
2. Wine Glass Holders: If you’re a wine lover, installing under-cabinet wine glass holders is a fantastic way to free up cabinet space and showcase your stemware. These holders come in various styles and sizes to accommodate different glass shapes.
3. Paper Towel Holder: Keep your paper towels easily accessible and off the counter by installing an under-cabinet paper towel holder. It saves valuable space and ensures that you always have paper towels within reach when you need them.
4. Mug Hooks: Hang a row of hooks beneath your cabinets to create a stylish and functional mug display. This not only saves cabinet space but also adds a charming touch to your kitchen decor.
5. Knife Block: Tired of a cluttered countertop with knives taking up valuable space? Install an under-cabinet knife block to keep your knives organized and safely stored. This helps to declutter your countertops and provides a safe and convenient storage solution.
6. Utensil Rack: Maximize drawer space by installing an under-cabinet utensil rack. This allows you to hang frequently used utensils such as spatulas, ladles, and slotted spoons, keeping them within arm’s reach while cooking.
By utilizing under-cabinet organizers, you can free up valuable counter and cabinet space, while keeping your essentials organized and easily accessible. Plus, these additions can add a stylish and functional element to your kitchen design.
Use Drawer Dividers
If you’re tired of rummaging through messy drawers to find the kitchen utensil you need, it’s time to invest in some drawer dividers. Drawer dividers are a simple and effective way to keep your drawers neat and organized. Here’s how you can make the best use of drawer dividers:
1. Categorize Your Utensils: Before adding dividers, categorize your utensils by type. Group cooking utensils, serving utensils, baking tools, and other kitchen gadgets together. This will help you determine the right size and number of compartments needed in each drawer.
2. Choose the Right Dividers: There are various types of drawer dividers available, such as adjustable dividers, bamboo dividers, or plastic dividers. Choose ones that fit your drawers and suit your style preferences.
3. Create Compartments: Place dividers in your drawer and create compartments for each category of utensils. Ensure that the compartments are wide enough to accommodate the largest utensils you have. This will prevent items from shifting and keep everything neatly organized.
4. Consider Customization: If your utensil collection is unique or doesn’t fit into standard drawer dividers, consider customizing dividers according to your needs. You can use small bins, trays, or even repurpose items like cutlery organizers or ice cube trays to create compartments.
5. Optimize Space: Take advantage of the vertical space within your drawers by using stackable organizers or adding dividers that extend to the full height of the drawer. This will maximize storage and allow you to make the most of the available space.
6. Maintain Order: To ensure that your drawers stay organized, always return utensils to their designated compartments after use. This will prevent items from getting mixed up, making it easier to find and access what you need.
With drawer dividers, you can transform messy drawers into well-organized storage spaces. You’ll be amazed at how much time and frustration you save by having your utensils neatly arranged and easily accessible.
Create Zones for Different Items
Creating zones within your kitchen cabinets is an effective way to enhance organization and streamline your cooking process. By assigning specific areas for different items, you can easily locate and access what you need. Here’s how you can create zones in your kitchen cabinets:
1. Group Similar Items Together: Start by grouping similar items together. For example, designate one cabinet for your spices and cooking oils, another for baking supplies, and a separate one for canned goods. This grouping will make it easier to find and restock specific items.
2. Consider Frequency of Use: Arrange your zones based on the frequency of use. Keep frequently used items within easy reach, such as placing everyday dinnerware and glasses in a cabinet that is easily accessible. Store infrequently used or seasonal items in higher or more difficult-to-reach cabinets.
3. Utilize Adjustable Shelves: Adjustable shelves are a great way to customize your cabinet storage and create zones. You can lower or raise shelves to accommodate different heights of items. This flexibility allows you to maximize each shelf’s space and create designated areas for specific items.
4. Label Your Zones: Use labels or sticky notes to mark the different zones within your cabinets. This will make it easier for family members or guests to find items and maintain the organization. You can use generic labels or get creative with decorative tags or stickers.
5. Consider Visibility: Store items in clear containers or use transparent bins to enhance visibility within your zones. This will make it easier to locate specific items without having to move things around. It will also serve as a reminder to restock things when supplies are running low.
6. Optimize Space Efficiency: Make the most of your cabinet space by utilizing organizers within each zone. Use stackable storage containers, drawer dividers, or shelf risers to maximize vertical space. This will help keep items organized and prevent them from toppling over or getting lost in the back of the cabinet.
By creating zones within your kitchen cabinets, you’ll be able to maintain order, save time, and easily navigate through your essentials. It’s a simple yet effective way to bring structure and efficiency to your kitchen storage.
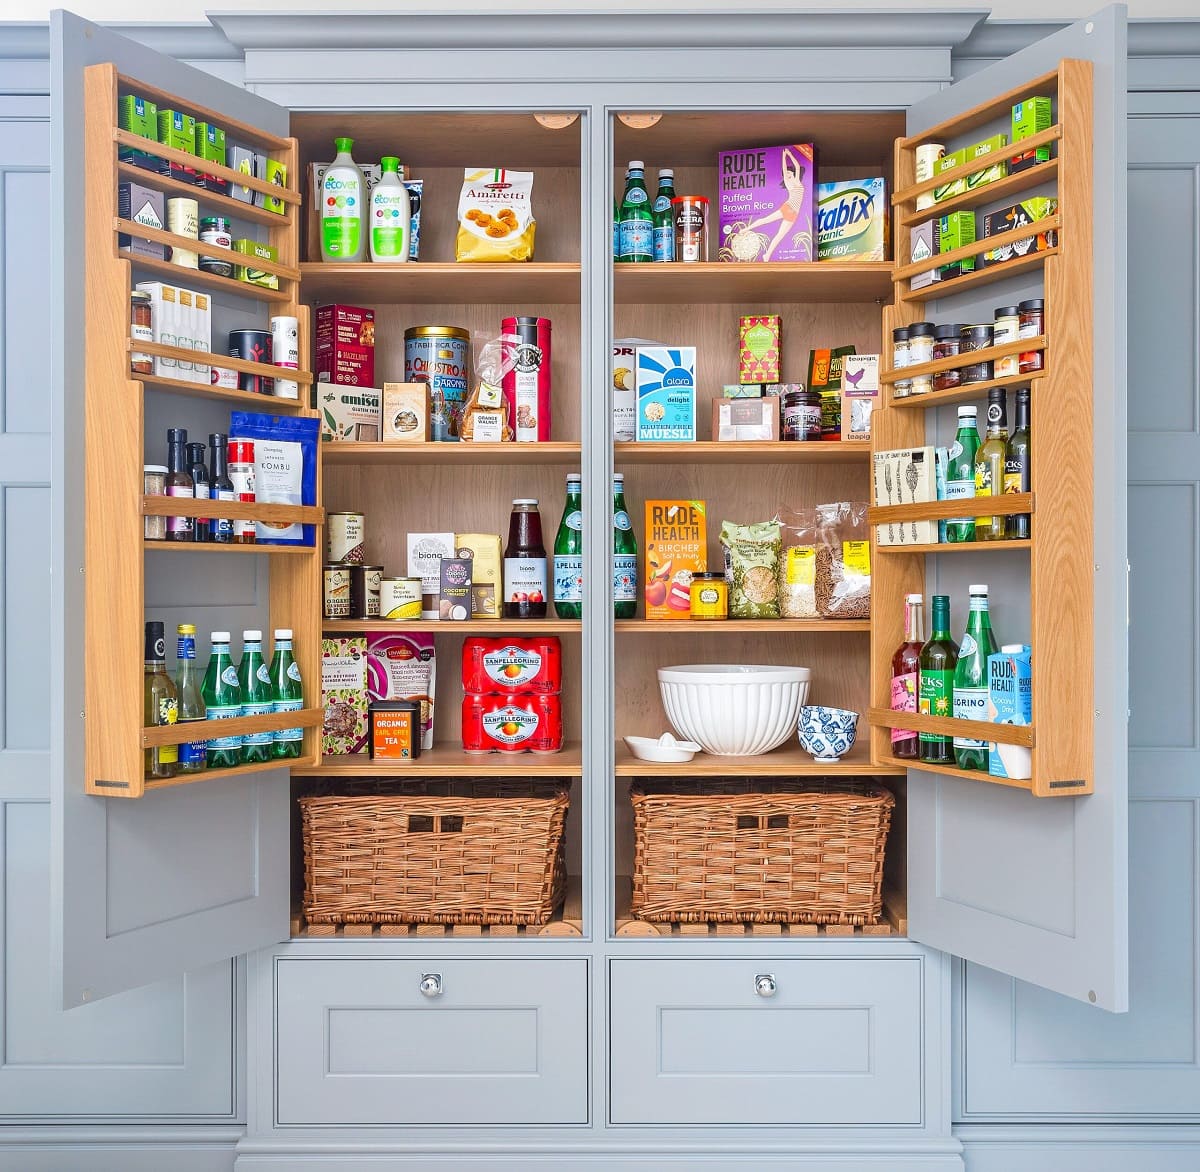
Utilize the Inside of Cabinet Doors
Don’t overlook the valuable storage space available on the inside of your cabinet doors. When used effectively, this often underutilized area can provide extra storage and help keep your kitchen essentials organized. Here are some ideas to make the most of the inside of your cabinet doors:
1. Add Hooks: Install adhesive hooks or screw-in hooks on the inside of the cabinet doors to hang items such as oven mitts, measuring spoons, or small cutting boards. This not only saves space but also keeps frequently used items easily accessible.
2. Attach Wire Racks: Mount wire racks on the inside of the cabinet doors to hold items like lids for pots and pans, cutting boards, or baking sheets. This keeps these items upright and prevents them from taking up valuable shelf space.
3. Install Door-Mounted Spice Racks: Spice jars can take up a lot of space in your cabinets. Consider installing door-mounted spice racks to maximize storage capacity and easily locate your spices. This makes them conveniently accessible while cooking.
4. Use Adhesive Organizers: Adhesive organizers, such as mesh or plastic pockets, can be attached to the inside of cabinet doors to hold small items like recipes, kitchen conversion charts, or grocery lists. This keeps important information within reach but out of the way.
5. Hang a Chalkboard or Whiteboard: Transform the inside of a cabinet door into a functional command center by hanging a chalkboard or whiteboard. This allows you to jot down grocery lists, meal plans, or reminders, keeping them visible and saving valuable counter space.
6. Install Corkboard: Attach a corkboard to the inside of a cabinet door to display recipes, cooking techniques, or cooking conversion charts. Pinning these useful references to the corkboard keeps them organized and easily accessible while you’re in the midst of cooking.
Remember to consider the size and weight of the items you plan to store on the inside of the cabinet doors. Be sure to use strong adhesive or proper mounting hardware to ensure everything stays in place securely.
By utilizing the often overlooked inside space of your cabinet doors, you can create additional storage options, keep essentials easily accessible, and enhance the overall efficiency of your kitchen.
Install Lazy Susans
If you’re tired of digging through the depths of your cabinets to find what you need, consider installing lazy Susans. Lazy Susans are rotating trays that make it easy to access items stored at the back of deep cabinets. They are a fantastic solution for organizing and optimizing corner cabinets. Here’s how you can make the most of lazy Susans:
1. Choose the Right Size: Measure the dimensions of your cabinet and select a lazy Susan that fits snugly inside. You can find lazy Susans in various sizes, shapes, and materials to suit your specific needs and cabinet space.
2. Sort and Categorize: Before placing items on the lazy Susan, sort and categorize them. Group similar items together, such as spices, condiments, canned goods, or baking supplies. This will make it easier to find and access items when you spin the lazy Susan.
3. Maximize Space: Optimize the space on the lazy Susan by using stackable containers or bins. This will help prevent items from toppling over and make the most of the available space. Clear, transparent containers are ideal for easy visibility and organization.
4. Utilize Corner Cabinets: Lazy Susans are especially useful for corner cabinets, which often pose a challenge for efficient storage. The rotating function ensures that no space goes wasted, and everything is easily accessible with a quick spin.
5. Consider Adjustable Shelves: Some lazy Susans come with adjustable shelves, allowing you to customize the height and create multiple tiers. This is beneficial for organizing different-sized items and maximizing vertical storage space within the cabinet.
6. Maintain Order: To ensure your lazy Susan remains organized, regularly sort and arrange the items. Remove expired or unused items and replace them with new ones. This will help prevent clutter and make it easier to find what you need at a glance.
Installing lazy Susans in your cabinets is a smart storage solution that saves time and eliminates frustration. They provide easy access, create efficient use of space, and keep your items neatly organized and within reach.
Use Tension Rods for Vertical Storage
If you’re looking to maximize vertical space in your kitchen cabinets, consider using tension rods. These versatile and inexpensive tools can be easily installed to create additional storage options and keep items organized. Here’s how you can make the most of tension rods for vertical storage:
1. Divide and Conquer: Install tension rods vertically inside your cabinets to create separate compartments for items such as baking sheets, cutting boards, or pot lids. This prevents them from leaning against each other and creates a more organized and accessible storage solution.
2. Secure Spice Jars: Place tension rods in a horizontal position at the back of a cabinet to create a tiered system for your spice jars. This allows you to easily read labels and access spices without having to dig through a cluttered cabinet.
3. Create Hanging Storage: Install multiple tension rods parallel to each other inside a cabinet to create a hanging area for dish towels, oven mitts, or small utensils. This keeps these items organized and readily available.
4. Organize Pot and Pan Lids: Place tension rods vertically between cabinet shelves to create a dedicated space for holding pot and pan lids. This keeps them upright, prevents them from getting scratched, and makes it easier to find the right lid when you need it.
5. Declutter Baking Pans: Use tension rods to create a vertical divider within a cabinet to hold baking pans. This keeps pans upright and prevents them from nesting inside each other, making it easier to reach the one you need without disrupting the rest.
6. Stabilize Cutting Boards: Install tension rods at the side of a cabinet to create a secure spot for storing cutting boards vertically. This allows them to be conveniently accessed and prevents them from sliding around or taking up valuable shelf space.
Remember to choose tension rods that are sturdy and can be adjusted to fit the width of your cabinets. Ensure they are securely tightened to prevent any accidents or shifting of items.
By utilizing tension rods for vertical storage, you can maximize your cabinet space, keep items neatly organized, and easily access what you need while cooking or baking.
Use shelf risers to maximize vertical space in your cabinets, allowing you to store more items without cluttering the shelves.
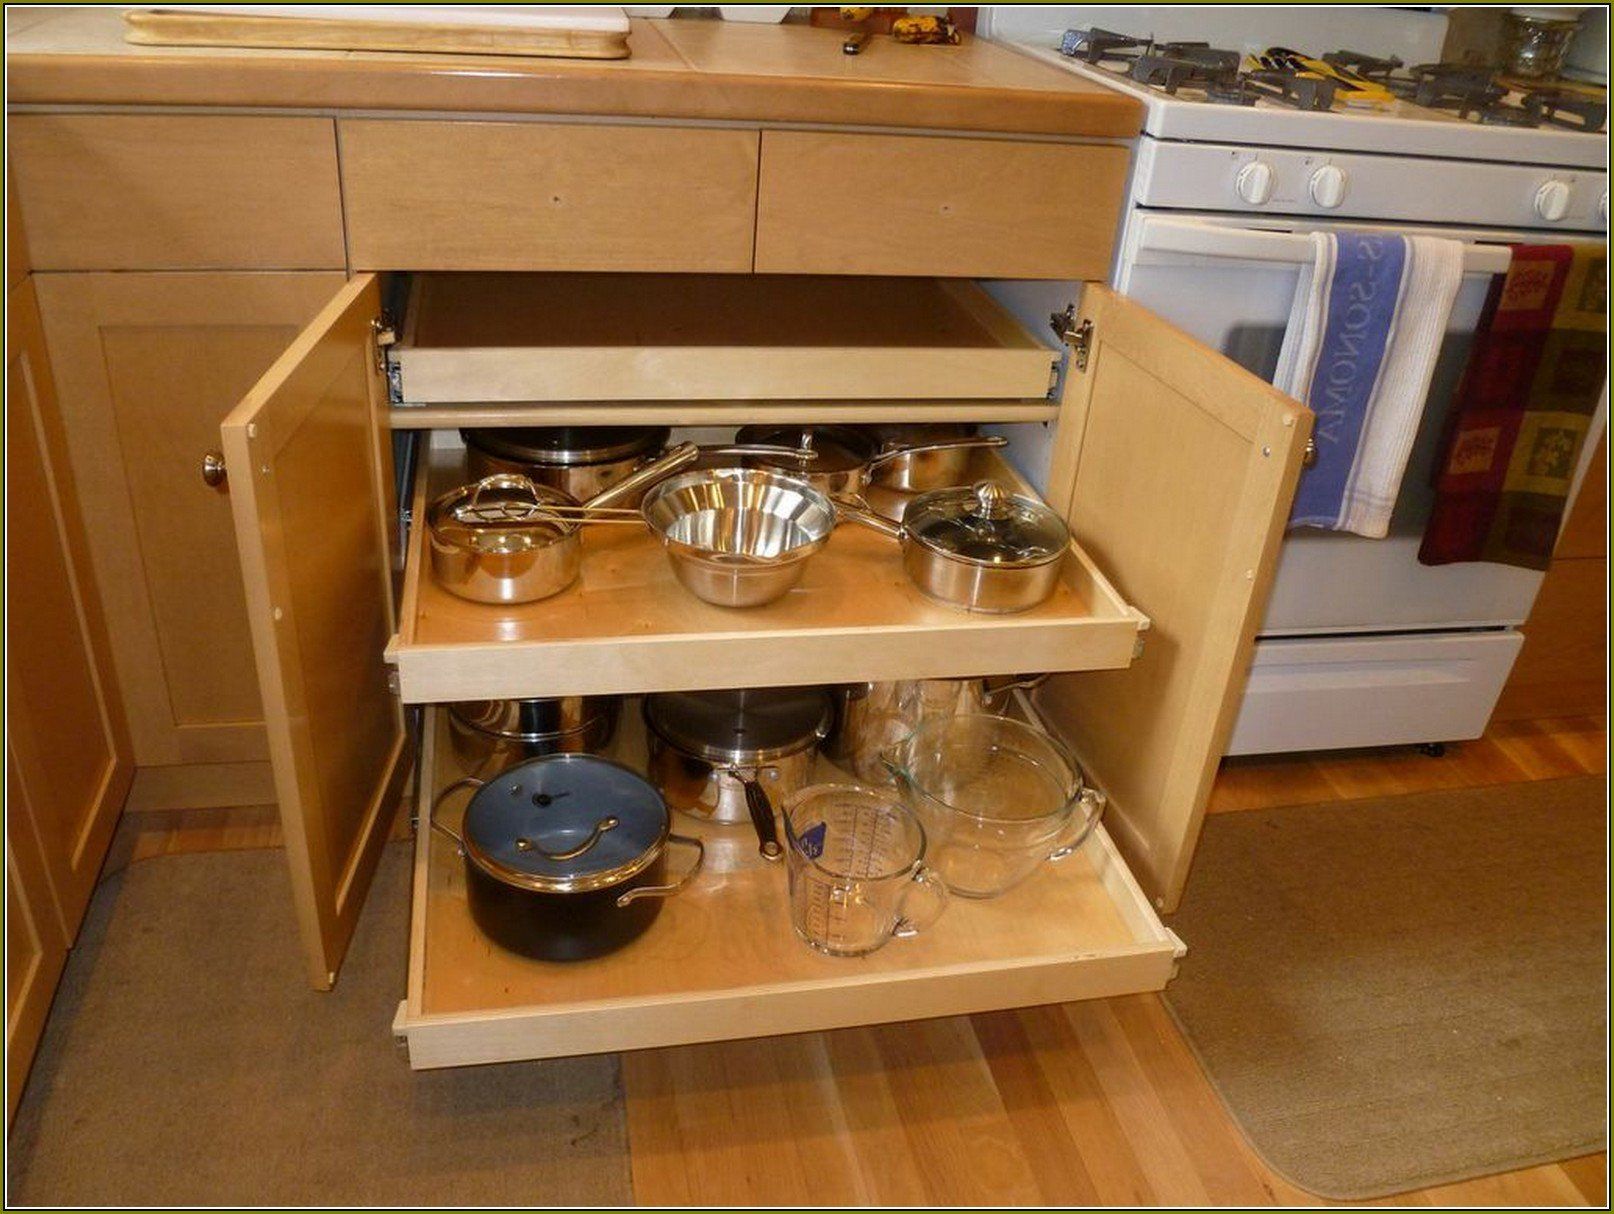
Stack Pots and Pans
When it comes to organizing your kitchen cabinets, effectively storing pots and pans is key. These large and bulky items can take up a lot of space if not properly arranged. Here are some tips for stacking pots and pans to optimize storage:
1. Choose the Right Cabinet: Designate a lower cabinet close to your stove or cooking area specifically for pots and pans. This ensures that they are easily accessible when you need them during meal preparation.
2. Invest in Stackable Pots and Pans: Consider purchasing pots and pans that are designed to stack on top of one another. Stackable cookware takes up less space and keeps your cabinets more organized. Look for pans with detachable handles or nesting lids for added convenience.
3. Use Pot Protectors: To prevent scratches and damage to your cookware, place pot protectors or felt pads between stacked pots and pans. This will help them slide easily and safeguard their surfaces.
4. Organize Lids: Store lids separately to save space and make them more accessible. You can use a lid organizer or place them vertically in a file holder to keep them neatly organized. Another option is to attach a small adhesive hook on the inside of the cabinet door to hang them.
5. Utilize Dividers: Install dividers or wire racks vertically inside your cabinet to create compartments for organizing pots and pans. This prevents them from toppling over or nesting together and makes it easier to locate the right one for your cooking needs.
6. Consider Hanging Options: If you have limited cabinet space or prefer a more unconventional storage solution, consider hanging your pots and pans. Installing a hanging rack above your kitchen island or using a pot rack suspended from the ceiling can not only save space but also add a decorative element to your kitchen.
Remember to prioritize the arrangement of your pots and pans based on frequency of use. Place the most frequently used ones within easy reach and reserve the higher or harder-to-reach space for less frequently used items.
By stacking and organizing your pots and pans, you can make the most of your cabinet space, keep your cookware protected, and easily access the needed items for your culinary endeavors.
Label Containers and Jars
Labeling containers and jars in your kitchen cabinets is a simple yet effective way to keep everything organized and easily identifiable. Whether you’re storing bulk ingredients, leftovers, or spices, clear labeling ensures that you can quickly locate what you need. Here are some tips for labeling containers and jars:
1. Use Clear and Consistent Labels: Opt for clear labels that are easy to read and won’t obstruct the contents of the containers. Use a consistent labeling system throughout your kitchen to maintain uniformity and make it easier to find specific items.
2. Consider Different Labeling Methods: Choose a labeling method that suits your preference and the type of containers you’re using. Options include adhesive labels, chalkboard labels, or even using a label maker for a clean and professional look.
3. Include Key Information: When labeling, include key information such as the contents of the container, expiry dates, or cooking instructions. This will help you make informed decisions about using the items and prevent any confusion or waste.
4. Label Spice Jars: Spice jars can easily look alike, making it difficult to find the specific spice you need. Label each spice jar with its name or customized spices labels to make identification quick and hassle-free.
5. Label Bulk Ingredient Containers: If you store bulk ingredients such as flour, sugar, or rice, label the containers with the name of the ingredient to prevent mix-ups. This is especially helpful if you transfer ingredients from their original packaging into larger containers for more efficient storage.
6. Use Removable Labels: If you frequently switch out the contents of your containers or frequently update labels, consider using removable labels. This allows for easy removal and re-labeling without leaving residue or creating a messy appearance.
Remember to regularly update or replace labels as needed, especially if items are consumed or replaced. This will ensure that your labeling remains accurate and up to date.
By labeling containers and jars in your kitchen cabinets, you’ll be able to quickly locate ingredients or leftovers and maintain an organized and efficient kitchen space. Plus, it will add a neat and visually appealing touch to your cabinets.
Utilize Clear Storage Bins
When it comes to organizing your kitchen cabinets, clear storage bins are a game-changer. These versatile containers help maximize space, keep items grouped together, and make it easy to locate what you need. Here are some tips for utilizing clear storage bins:
1. Categorize Similar Items: Before placing items in the storage bins, categorize them according to type or purpose. Group similar items together, such as baking supplies, snacks, or cleaning supplies. This will make it easier to determine the size and number of storage bins needed.
2. Choose the Right Size: Select storage bins that fit the dimensions of your cabinets and maximize available space. Avoid bins that are too large, as they can waste valuable space, or too small, as they won’t hold enough items. Measure your cabinet space beforehand to ensure a perfect fit.
3. Opt for Transparent Bins: Clear or transparent bins allow you to easily see the contents without having to remove the lid. This makes it simple to locate specific items and know when to restock supplies.
4. Maximize Vertical Space: Stack multiple clear storage bins to make the most of your vertical cabinet space. This creates efficient use of the available height and allows you to stack items without them becoming difficult to access.
5. Label Your Bins: Attach labels to each storage bin to identify the contents. Use adhesive labels, chalkboard labels, or even masking tape and a marker to clearly indicate what is stored inside. This makes it easy to find what you need at a glance.
6. Create Zones: Use clear storage bins to create zones within your cabinets. Assign specific bins for different categories, such as a bin for snacks, a bin for baking supplies, or a bin for cleaning supplies. This keeps everything organized and makes it easier to quickly locate items.
7. Utilize Portable Bins: If you have items that you frequently use outside of the kitchen, such as picnic supplies or baking tools for a shared kitchen space, consider using portable clear storage bins. These can be easily transported and stored elsewhere when not in use, keeping your kitchen cabinets dedicated to essentials.
By utilizing clear storage bins in your kitchen cabinets, you can create an organized and visually appealing space. With everything neatly contained and easily visible, you’ll save time and frustration searching for items while maintaining a clutter-free environment.
Hang Measuring Cups and Spoons
If you’re tired of rummaging through kitchen drawers to find the right measuring cup or spoon, it’s time to consider hanging them for easy access. Hanging measuring cups and spoons not only keeps them organized but also saves valuable drawer space. Here’s how you can efficiently hang your measuring cups and spoons:
1. Choose a Convenient Location: Select a space in your kitchen that is easily accessible and close to your cooking or baking area. Ideal locations include the inside of a cabinet door, the side of a fridge, or a backsplash with hooks or magnet strips.
2. Install Hooks or Magnetic Strips: Depending on your preferred method, install hooks or magnetic strips in your chosen location. Hooks can be screwed into the surface, while magnetic strips can be attached using adhesive backing.
3. Hang Measuring Cups: Attach hooks or magnetic clips to hang your measuring cups. Arrange them in order of size, with the smallest cups at the top and the largest at the bottom. This allows for easy access and prevents any confusion when measuring ingredients.
4. Add Labels or Measurement Conversion Chart: To make measuring even more convenient, consider adding labels to your measuring cups or hanging a measurement conversion chart nearby. This will help you quickly and accurately measure ingredients as needed.
5. Hang Measuring Spoons: Attach hooks or magnetic clips to hang your measuring spoons. Arrange them in order of size, with the smaller spoons at the top and the larger spoons at the bottom. This facilitates easy selection and ensures that the correct measurement is always within reach.
6. Use Decorative Hooks or Clips: If you prefer a more aesthetically pleasing display, opt for decorative hooks or clips that match your kitchen decor. This adds a stylish touch while also being functional.
By hanging your measuring cups and spoons, you’ll save valuable drawer space, eliminate clutter, and always have the right measuring tools readily available while cooking or baking. This simple organizational method adds convenience and efficiency to your kitchen routine.
Read more: Shelf Liner Rolls To Organize Your Cabinets
Store Cutting Boards Vertically
If you’re tired of your cutting boards cluttering up precious counter space or getting damaged in drawers, storing them vertically is a great solution. By storing cutting boards vertically, you can save space, keep them organized, and easily access the right board when needed. Here’s how you can effectively store cutting boards vertically:
1. Designate a Vertical Storage Area: Select a cabinet or section of your kitchen specifically for storing cutting boards vertically. It could be a cabinet near your food prep area or an empty space on the side of your fridge.
2. Choose a Secure Storage Method: There are several ways to store cutting boards vertically. One option is to install tension rods inside the cabinet or on the side of the fridge, allowing you to slide the cutting boards in between the rods. Alternatively, use adhesive hooks or mounted racks to hang the boards on the inside of the cabinet doors.
3. Organize by Size: Arrange your cutting boards vertically according to their size. Place the larger ones at the back and the smaller ones at the front. This organization method makes it easier to find the right size board without having to dig through a stack of boards.
4. Secure the Boards: To ensure the cutting boards stay in place and don’t slide or shift, secure them with rubber bands or Velcro straps. This will keep them neatly organized and prevent them from falling out when you open the cabinet doors.
5. Consider Using Cutting Board Dividers: Invest in cutting board dividers or custom-sized slots to make the storage area even more organized. These dividers will keep the cutting boards separated and prevent them from scratching or damaging each other.
6. Label or Color-Code: If you have different types of cutting boards (e.g., for meat, vegetables, or bread), consider labeling or color-coding them. Attach labels or use colored tape to easily identify the purpose of each board and ensure proper food safety practices.
By storing cutting boards vertically, you can free up counter space and keep your boards organized and easily accessible. This method also prevents the boards from damage and prolongs their lifespan, ensuring they remain in good condition for all your food preparation needs.
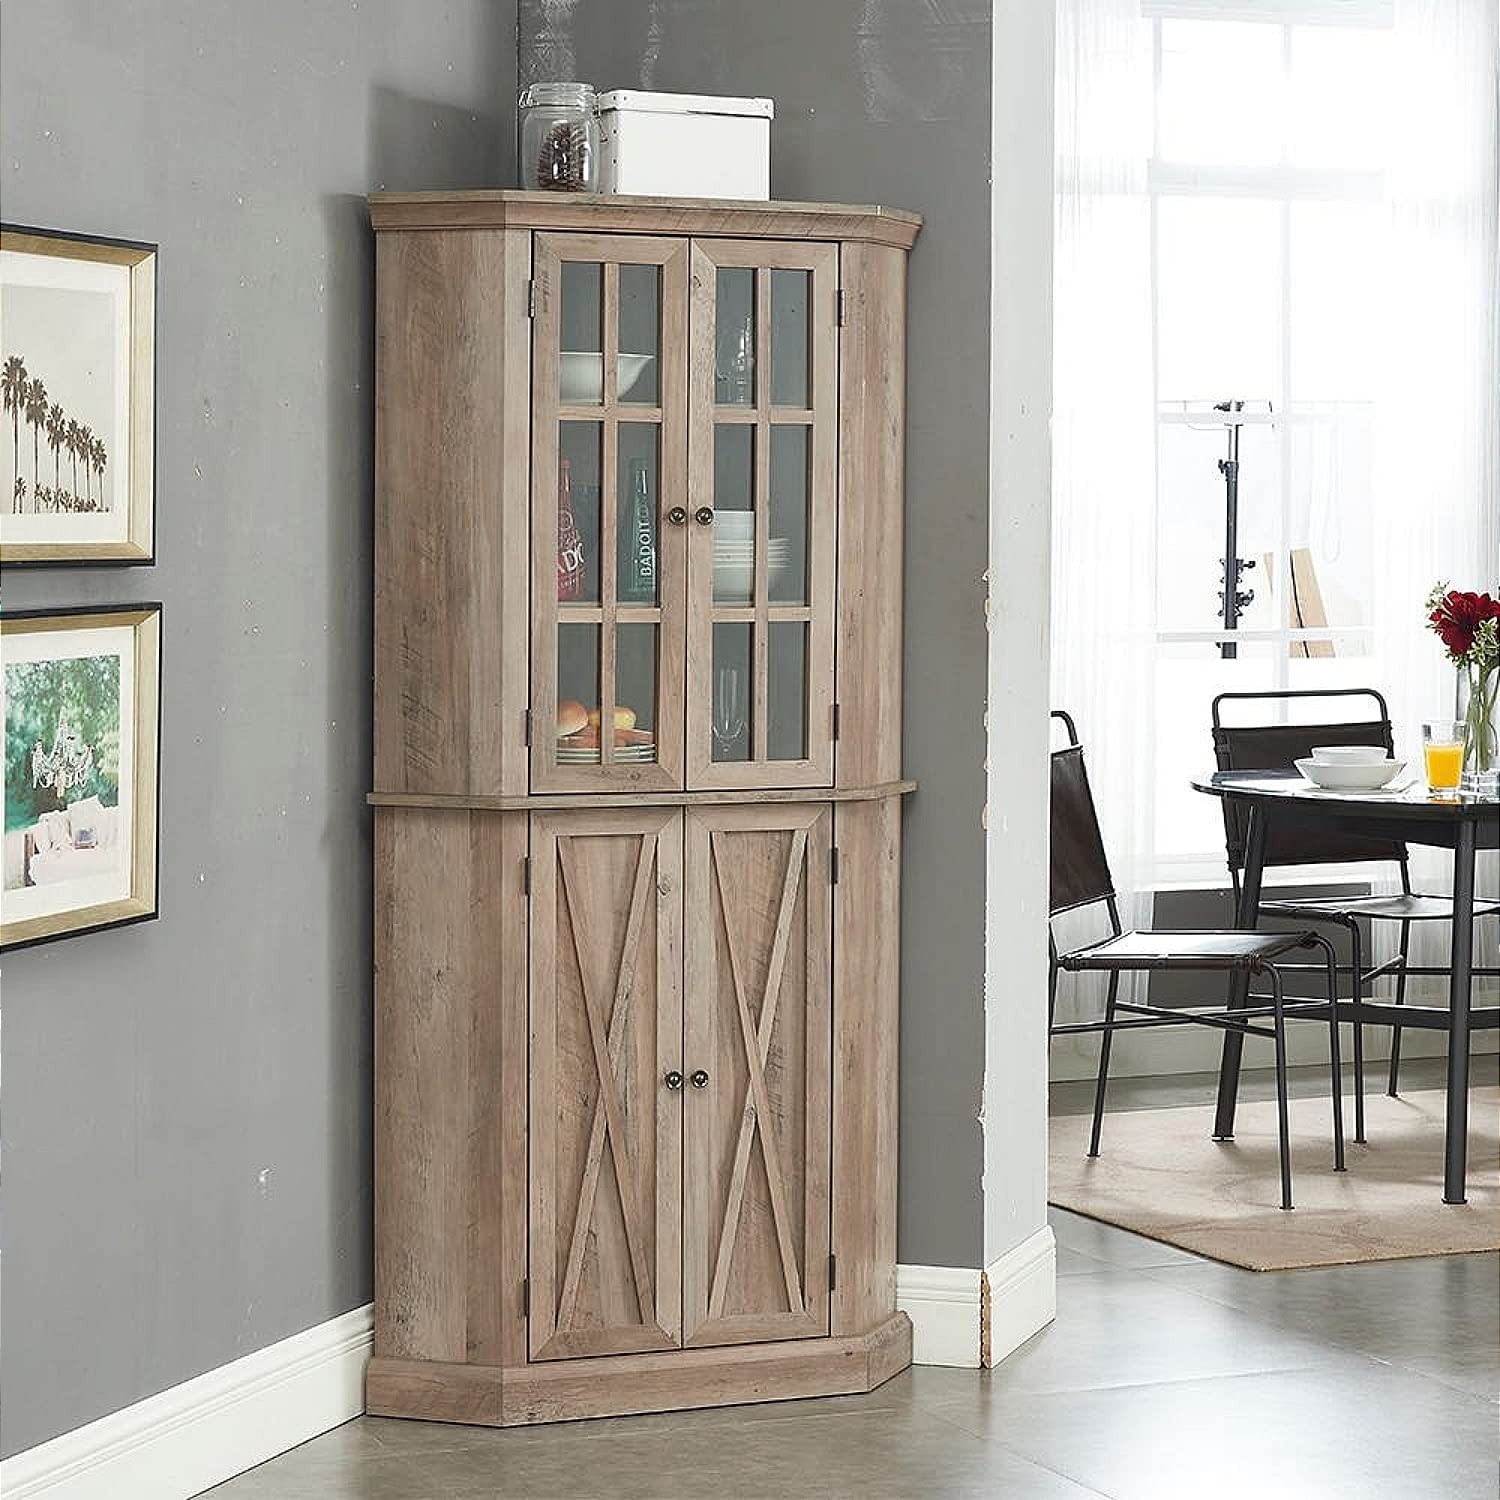
Maximize Corner Storage with Shelving
Corner cabinets in the kitchen can often be tricky to utilize effectively due to their deep and hard-to-reach spaces. However, with the right shelving solutions, you can maximize corner storage and transform those awkward corners into functional and organized spaces. Here’s how you can make the most of corner storage with shelving:
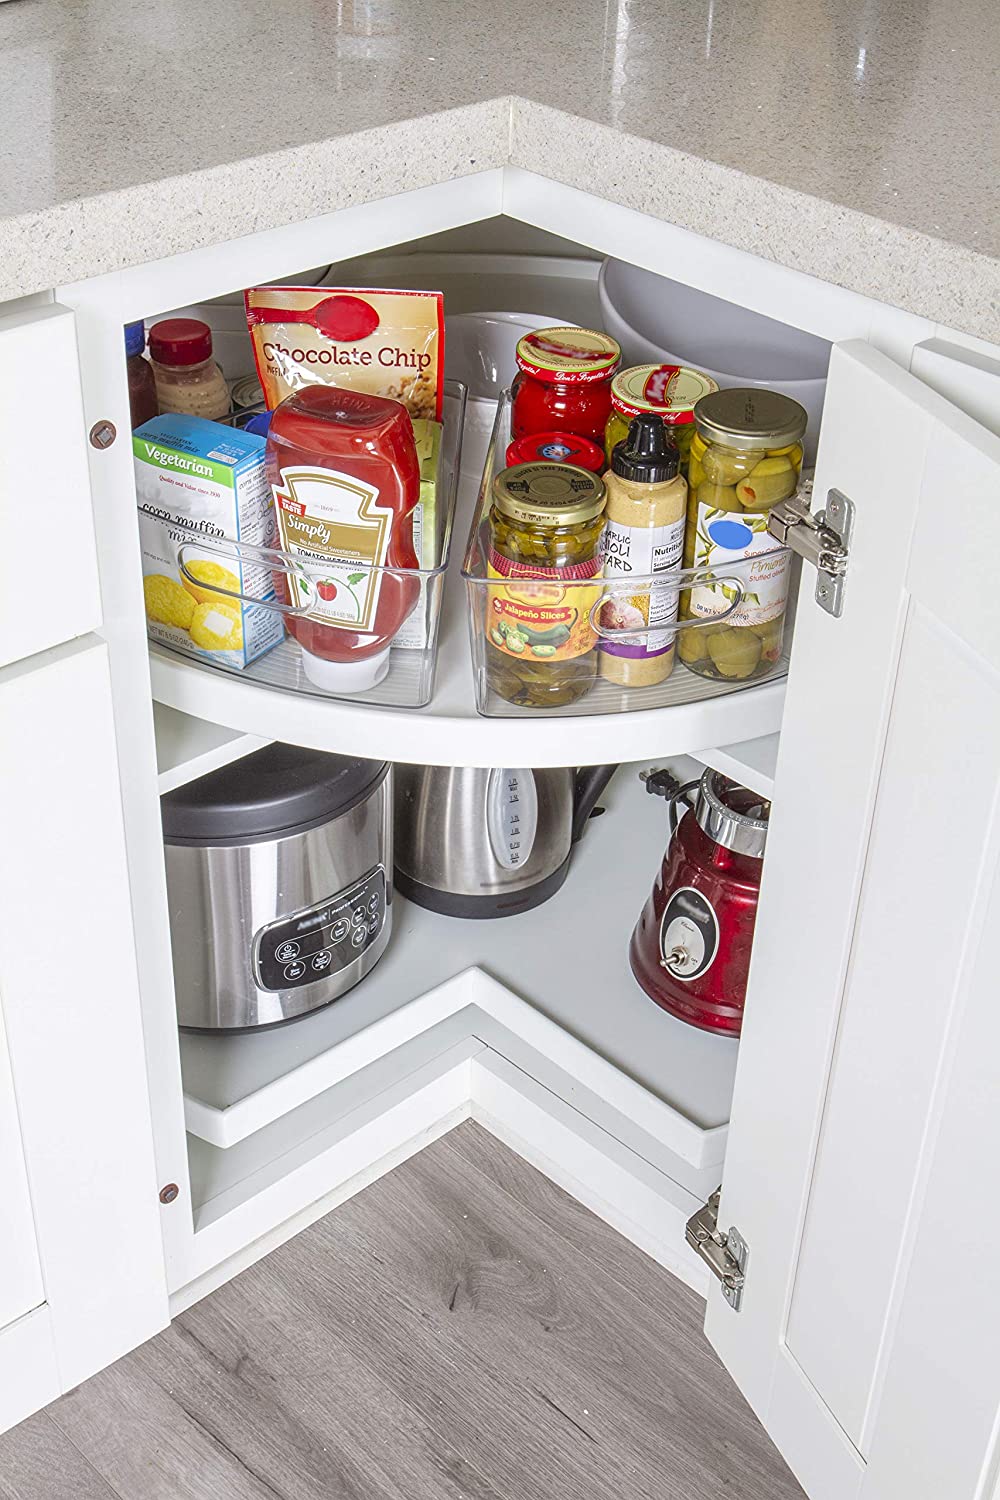
1. Install a Lazy Susan: Lazy Susans are rotating shelves that are perfect for corner cabinets. They allow you to easily access items at the back of the cabinet without having to reach and dig deep. With the turntable design, you can quickly spin the shelves to find what you need.
2. Use Pull-Out Shelves: Consider installing pull-out shelves in your corner cabinet. These shelves slide out smoothly, allowing you to access items without straining or reaching into the back of the cabinet. Pull-out shelves provide better visibility and make it easier to organize and retrieve items stored in the corner.
3. Add Corner Shelving Units: Utilize corner-specific shelving units designed to fit in the deep corners of your cabinets. These specialized shelves effectively utilize the vertical space and provide additional surfaces for storing items like plates, bowls, or cans.
4. Stack Storage Bins: Use stackable storage bins or baskets to make the most of corner storage. Stack the bins in a staircase-like fashion, starting with the largest bin at the bottom and gradually reducing the size as you stack. This ensures easy access to each bin without having to remove the entire stack.
5. Opt for Diagonal Shelves: Diagonal or angled shelving units are specifically designed to fit into corner spaces. These shelves take advantage of the entire corner cabinet, providing ample storage for items like pots, pans, or small kitchen appliances. They make efficient use of the available space and ensure that nothing goes wasted.
6. Label and Organize: Regardless of the type of shelving you choose, label and organize your corner storage. Use categories or color-coding methods to make it easier to locate items. This will prevent confusion and save time when you’re in a hurry.
By maximizing corner storage with shelving solutions, you can efficiently utilize the often underutilized space in your kitchen cabinets. Transforming those corners into functional storage areas will help declutter your kitchen and keep essential items within easy reach.
Use Drawer Organizers for Utensils
Utensils are essential tools in the kitchen, but they can easily become a jumbled mess if not organized properly. One of the best solutions for keeping your utensils neat and accessible is to utilize drawer organizers. These handy inserts can be easily placed in your kitchen drawers to create separate compartments for each type of utensil. Here’s how you can make the most of drawer organizers for utensils:
1. Select the Right Size Organizer: Measure your drawer’s dimensions and choose a drawer organizer that fits perfectly. Look for adjustable organizers that can be expanded or contracted to fit various drawer sizes, ensuring a snug and efficient fit.
2. Categorize Your Utensils: Before placing utensils in the organizer, categorize them by type. Group similar utensils together, such as cooking spoons, serving utensils, spatulas, or whisks. This will help determine the number and size of compartments needed in the drawer organizer.
3. Create Compartments: Arrange the utensils in the drawer organizer, creating separate compartments for each category. Dividers and slots in the organizer keep each utensil in its designated place, preventing them from rolling or shifting around when the drawer is opened or closed.
4. Consider Specialized Organizers: Depending on your utensil collection and preference, you may want to use specialized organizers. For example, you can opt for a separate knife organizer or a dedicated section for measuring spoons and cups within the drawer organizer. This allows for even more specific organization and easy access to commonly used utensils.
5. Utilize Vertical Space: If you have a deep drawer, take advantage of vertical space by adding stacking organizers. These allow for the efficient use of space and help keep your utensils neatly arranged, preventing them from getting tangled or lost in the depths of the drawer.
6. Maintain Order: To keep your utensil drawer organized, make a habit of returning utensils to their designated compartments after each use. Regularly declutter the drawer by removing any utensils that are no longer needed or in use. This ensures that your utensil drawer remains functional and clutter-free.
By using drawer organizers for utensils, you can create an orderly and efficient storage solution in your kitchen. This not only makes it easier to locate and retrieve the utensils you need when cooking, but it also adds a sense of tidiness and organization to your culinary space.
Create a Spice Organization System
Spices are the secret ingredients that add flavor and depth to our culinary creations. However, finding the right spice in a cluttered cabinet can be a frustrating experience. By creating a spice organization system, you’ll save time, reduce waste, and make cooking a more enjoyable experience. Here’s how you can create an effective spice organization system:
1. Sort and Discard: Begin by taking inventory of your spice collection. Sort through your spices, check expiration dates, and discard any that are outdated or no longer potent. This ensures that you are only working with fresh and flavorful spices.
2. Group by Category: Categorize your spices by type or cuisine. Group similar spices together, such as baking spices, herbs, or international spices. This categorization will make it easier to locate specific spices when you need them.
3. Choose the Right Storage Containers: Invest in high-quality, airtight spice jars or containers that will preserve the freshness and aroma of your spices. Clear glass containers are ideal for easily identifying the contents, but you can also use labeled spice tins or magnetic spice jars that can be attached to a metal surface.
4. Label Your Containers: Label each spice container with the name of the spice using clear and legible labels. You can include additional information such as the purchase date or the spice’s preferred usage. This ensures quick and accurate identification of spices while cooking.
5. Create a Systematic Layout: Decide on a consistent layout for your spice containers within your cabinet or drawer. Arrange them alphabetically, by category, or in order of frequency of use. This will make it easier to locate spices and maintain an organized spice collection.
6. Utilize Spice Racks or Drawers: Install spice racks or use designated spice drawers to keep your spice containers organized and easily accessible. Spice racks can be mounted on a wall or inside a cabinet door, while spice drawers can be customized with dividers or inserts for a clutter-free storage solution.
7. Consider a Spice Inventory Checklist: Maintain a spice inventory checklist where you can note the quantity of each spice and mark when it needs to be replenished. This will help you stay organized and ensure you don’t run out of spices when you need them most.
8. Regularly Update and Maintain: Check your spice collection regularly to keep it updated and organized. Remove spices that have expired or lost their potency and replace them with fresh ones. Cleaning your spice containers and tidying up your spice storage area will help maintain an organized and functional system.
By creating a spice organization system, you’ll have easy access to your spices, streamline your cooking process, and elevate your culinary creations. This system will not only bring order to your kitchen but also enhance your culinary experience.
Conclusion
A well-organized kitchen with efficient storage solutions can make a world of difference in your cooking experience. By implementing the various tips and tricks discussed in this article, you can transform your kitchen cabinets into functional and organized spaces. Whether it’s categorizing and decluttering, utilizing vertical space, or investing in storage tools, each step contributes to a seamless and enjoyable cooking process.
By categorizing and decluttering your kitchen items, you’ll create more space and easier accessibility to your essentials. Utilizing the vertical space in your cabinets through hooks, tension rods, or stackable shelves expands storage potential and helps maintain order. Installing under-cabinet organizers, using drawer dividers, and creating zones for different items bring further organization and efficiency to your kitchen cabinets.
Maximizing corner storage with shelving, storing cutting boards vertically, and using clear storage bins all contribute to creating more functional and accessible spaces within your cabinets. Hanging measuring cups and spoons, as well as utilizing drawer organizers for utensils, help save drawer space and keep essential tools within reach.
And finally, a well-designed spice organization system not only saves time but adds flavor and creativity to your cooking. From sorting and categorizing spices to choosing the right storage containers and implementing a systematic layout, an organized spice collection enhances your culinary experience.
In conclusion, an organized kitchen with optimized storage solutions not only saves time, but it also reduces frustration and enhances your overall cooking experience. By implementing these kitchen organization ideas, your cabinets will become functional, efficient, and delightful spaces that inspire creativity and make every cooking endeavor a breeze. So roll up your sleeves, prepare your spices, and get ready to enjoy a beautifully organized kitchen!
Ready to tackle more space-saving challenges in your cooking area? If you've mastered your cabinets, why not extend those skills to every nook and cranny of your small kitchen? For folks struggling with limited space, mastering kitchen organization will transform the way you use this vital room. But don't stop there—your pantry deserves attention too! Dive into our detailed guide on pantry organization, ensuring every item has its place, making meal prep simpler and your cooking space a model of efficiency.
Frequently Asked Questions about Organizing Kitchen Cabinets: 16 Tricks To Arrange Essentials
Was this page helpful?
At Storables.com, we guarantee accurate and reliable information. Our content, validated by Expert Board Contributors, is crafted following stringent Editorial Policies. We're committed to providing you with well-researched, expert-backed insights for all your informational needs.
0 thoughts on “Organizing Kitchen Cabinets: 16 Tricks To Arrange Essentials”