Articles
How To Layout Stairs
Modified: December 7, 2023
Learn how to layout stairs effectively with our informative articles. Explore various techniques and tips to ensure your stair design is accurate and visually appealing.
(Many of the links in this article redirect to a specific reviewed product. Your purchase of these products through affiliate links helps to generate commission for Storables.com, at no extra cost. Learn more)
Introduction
When it comes to designing a home or renovating an existing space, stairs are often a key element that cannot be overlooked. The layout of stairs plays a crucial role in functionality, safety, and aesthetics. Whether you are a homeowner, contractor, or DIY enthusiast, understanding how to layout stairs is a valuable skill that can save you time, money, and headaches.
In this comprehensive guide, we will take you through the step-by-step process of laying out stairs, from measuring and calculating to installing treads and risers. By following these instructions, you will be able to design and construct stairs that meet building codes, provide a comfortable rise and run, and seamlessly integrate into your space.
Before we dive into the details, it’s important to note that stair layout can vary depending on local building codes, the specific design of your space, and personal preferences. It’s always a good idea to consult with a professional, such as an architect or contractor, to ensure that your stair layout meets all safety requirements and complies with local regulations.
Now, let’s get started on this exciting journey of learning how to layout stairs!
Key Takeaways:
- Precision and attention to detail are essential when laying out stairs. From measuring and calculating to installing treads and risers, each step plays a crucial role in creating a safe and visually appealing staircase.
- Consult with professionals and adhere to local building codes to ensure the safety and compliance of your staircase design. Incorporate features such as handrails, balusters, and non-slip materials to enhance safety and functionality.
Read more: How To Layout Stairs With Framing Square
Step 1: Measure and Calculate
The first step in laying out stairs is to accurately measure the space where the staircase will be installed. This includes measuring the vertical height and horizontal length of the area. The key measurements you need to take are:
- Total Rise: The total vertical height from the finished floor at the bottom to the finished floor at the top of the staircase. Measure this distance directly along the intended path of the stairs.
- Total Run: The total horizontal length from the outside edge of the bottom riser to the outside edge of the top riser. Measure this distance along the floor where the stairs will be installed.
- Tread Depth: The horizontal depth of each step, measured from the front edge of one tread to the front edge of the next. Building codes typically require a minimum tread depth of 9 inches.
- Riser Height: The vertical height of each step, measured from the top of one tread to the top of the next. Building codes typically require a maximum riser height of 7.75 inches.
Once you have these measurements, you can use them to calculate the number of steps needed for your staircase. To calculate the number of steps, divide the total rise by the desired riser height. Round the result to the nearest whole number and adjust accordingly to ensure the final step has a consistent height.
For example, if the total rise is 120 inches and the desired riser height is 7 inches, the calculation would be:
Number of Steps = Total Rise / Riser Height = 120 inches / 7 inches = 17.14
Since we cannot have a fraction of a step, we round up to 18 steps. If the result was a decimal below 0.5, we would round down to 17 steps.
It’s important to note that the number of steps is directly related to the riser height and tread depth. If you find that the calculated number of steps does not fit within the available space, you may need to adjust the riser height or tread depth to ensure the staircase fits comfortably in the given area.
Now that you have your measurements and calculated the number of steps, you are ready to move on to the next step: determining the rise and run of each step.
Step 2: Determine Rise and Run
After measuring the space and calculating the number of steps needed, the next step in laying out stairs is to determine the rise and run for each step. The rise refers to the height of each step, while the run refers to the depth.
It’s crucial to ensure that the rise and run of each step are consistent and meet building code requirements. To determine the rise and run, follow these steps:
- Divide the Total Rise: Divide the total rise by the number of steps (as calculated in the previous step) to determine the exact rise for each step. Round the result to the nearest whole number.
- Calculate the Tread Depth: To calculate the tread depth, subtract the desired riser height (as determined in step 1) from the ideal stair height. The ideal stair height is typically around 7 inches, but it can vary based on personal preference and local building codes.
- Verify the Rise and Run: Check that the rise and run measurements of each step adhere to local building codes. In most cases, the maximum rise allowed is 7.75 inches, while the minimum tread depth is 9 inches.
For example, if the total rise is 120 inches and there are 18 steps, the rise for each step would be:
Rise per Step = Total Rise / Number of Steps = 120 inches / 18 steps = 6.67 inches
Since we need to round the result to the nearest whole number, the rise per step would be 7 inches.
To calculate the tread depth, subtract the desired riser height (let’s say 7 inches) from the ideal stair height (typically 7 inches). The result would be 0 inches, which means the tread depth should be flush with the riser.
Once you determine the rise and run of each step, ensure they meet local building codes and adjust accordingly if necessary. Building codes may have specific regulations regarding maximum and minimum measurements for rise and run to ensure the safety and comfort of users.
Now that you have determined the rise and run for your stairs, you can proceed to the next step: calculating the number of steps.
Step 3: Calculate Number of Steps
Calculating the number of steps needed is an essential part of the stair layout process. It ensures that the staircase is proportional, safe, and comfortable to use. To determine the exact number of steps required, follow these steps:
- Divide the Total Rise: Divide the total rise (the vertical height from the bottom to the top of the stairs) by the desired riser height. The riser height is typically between 6 and 8 inches, depending on local building codes and personal preference.
- Round to the Nearest Whole Number: Round the result to the nearest whole number. You cannot have a fractional step, so round up if the decimal is 0.5 or greater, and round down if it is less than 0.5. This will give you the total number of steps needed for your staircase.
- Check for Consistency: Ensure that the calculated number of steps is consistent with the overall proportions of the staircase. If the number of steps is too high or too low, you may need to adjust the riser height to achieve a visually appealing and functional staircase.
For example, if the total rise of the stairs is 120 inches and the desired riser height is 7 inches:
Number of Steps = Total Rise / Riser Height = 120 inches / 7 inches = 17.14
Since we cannot have a fraction of a step, we round up or down to the nearest whole number. In this case, we would round up to 18 steps.
Keep in mind that the number of steps is directly influenced by the riser height and tread depth. It’s important to ensure that the calculated number of steps fits within the available space and meets local building code requirements.
Calculating the number of steps accurately is crucial to maintaining a safe and comfortable staircase. It ensures that the rise and run of each step are consistent, reducing the risk of tripping or falling.
Now that you have determined the number of steps required, you can move on to the next step: designing the layout of the staircase.
Step 4: Design the Layout
Designing the layout of the staircase is an important step in the stair layout process. It involves determining the direction, shape, and positioning of the stairs in relation to the surrounding space, as well as considering any architectural or design elements that may influence the layout. Follow these guidelines to design an effective and visually appealing staircase layout:
- Consider Space Constraints: Take into account the available space where the stairs will be located. Measure the width and depth of the area to ensure the staircase fits comfortably and complies with building codes. Consider any obstacles, such as doorways or walls, that may affect the layout.
- Determine the Staircase Direction: Decide whether the stairs will go straight up, turn at a landing, or curve around a central point. The direction will depend on the available space and the overall design aesthetic.
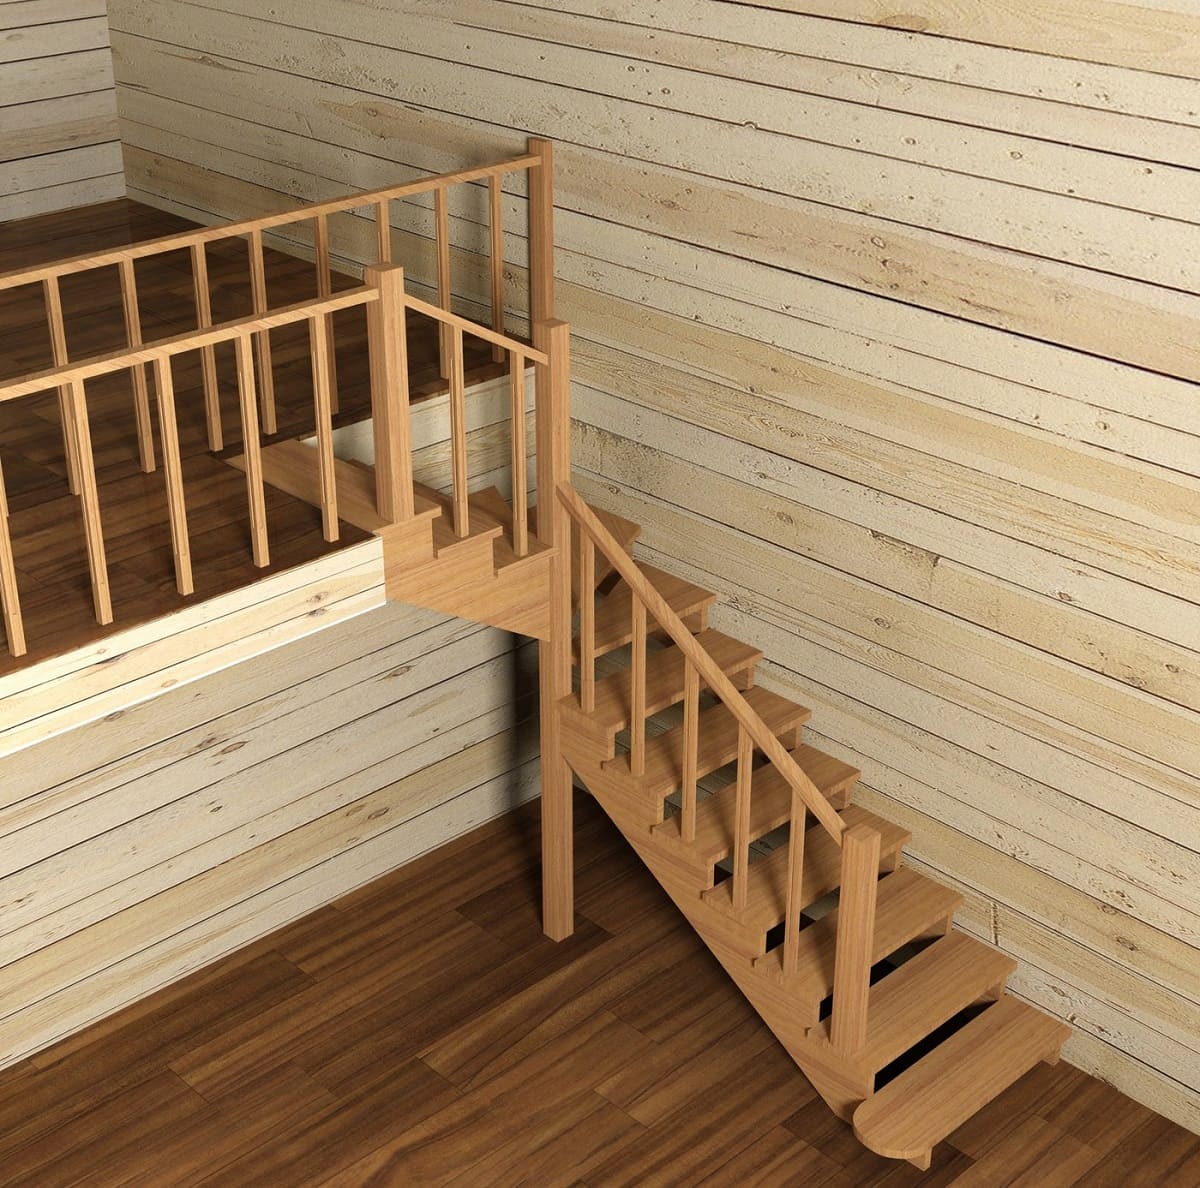
- Choose a Staircase Style: Select a staircase style that complements the overall design of your home or space. Popular styles include straight stairs, L-shaped stairs, U-shaped stairs, and spiral stairs. Consider the architectural style and the functionality of the stairs when making your decision.
- Create a Staircase Blueprint: Use measurements and calculations from previous steps to create a detailed blueprint of the staircase layout. Include dimensions, rise and run for each step, as well as any landings or platforms. This will serve as a visual guide during the construction process.
- Consider Safety and Building Codes: Ensure that the designed layout follows local building codes and safety standards. Check the maximum and minimum requirements for rise, run, and overall dimensions. Consider incorporating handrails, guardrails, and non-slip materials for added safety.
Designing the layout of the staircase involves a balance between functionality, aesthetics, and safety. Take your time to visualize the final appearance of the stairs and how they will integrate with the surrounding space.
Remember to consult with a professional, such as an architect or contractor, as they can provide expert advice and guidance throughout the design process. They will also help ensure that the staircase layout meets all necessary requirements and regulations.
Once you have finalized the design layout, you can move on to the next step: establishing the starting point of the stairs.
Step 5: Establish the Starting Point
Establishing the starting point of the stairs is a crucial step in the stair layout process. It determines the precise location where the staircase will begin, taking into account the existing floor level and any transitions that may be required. Follow these steps to establish the starting point:
- Identify the Existing Floor Level: Measure and determine the finished floor level where the stairs will connect. This will be the starting point of the staircase.
- Account for Subfloor and Underlayment: If there are subfloor or underlayment layers in the construction, take their thickness into consideration when establishing the starting point. This ensures that the first step is level with the finished floor.
- Consider Transitions: If there are existing transitions, such as a change in floor height or a landing, take them into account when determining the starting point. You may need to adjust the riser height and adjust the number of steps accordingly.
- Make Clear Markings: Use a pencil or chalk to mark the starting point on the floor. This will serve as a reference point during the installation process.
It’s important to establish the starting point accurately to ensure that the stairs seamlessly integrate with the surrounding area. A misaligned or incorrect starting point can result in uneven steps and a visually unappealing staircase.
During this step, it’s also a good idea to double-check your measurements and calculations to ensure that the entire stair layout aligns with the established starting point. This will help prevent any potential issues or rework later on in the construction process.
Remember to consult with a professional, such as an architect or contractor, if you have any doubts or questions regarding the establishment of the starting point. They can provide valuable guidance and ensure that the placement of the stairs is in line with all safety and building code requirements.
Now that you have established the starting point of the stairs, you can move on to the next step: marking the stringers.
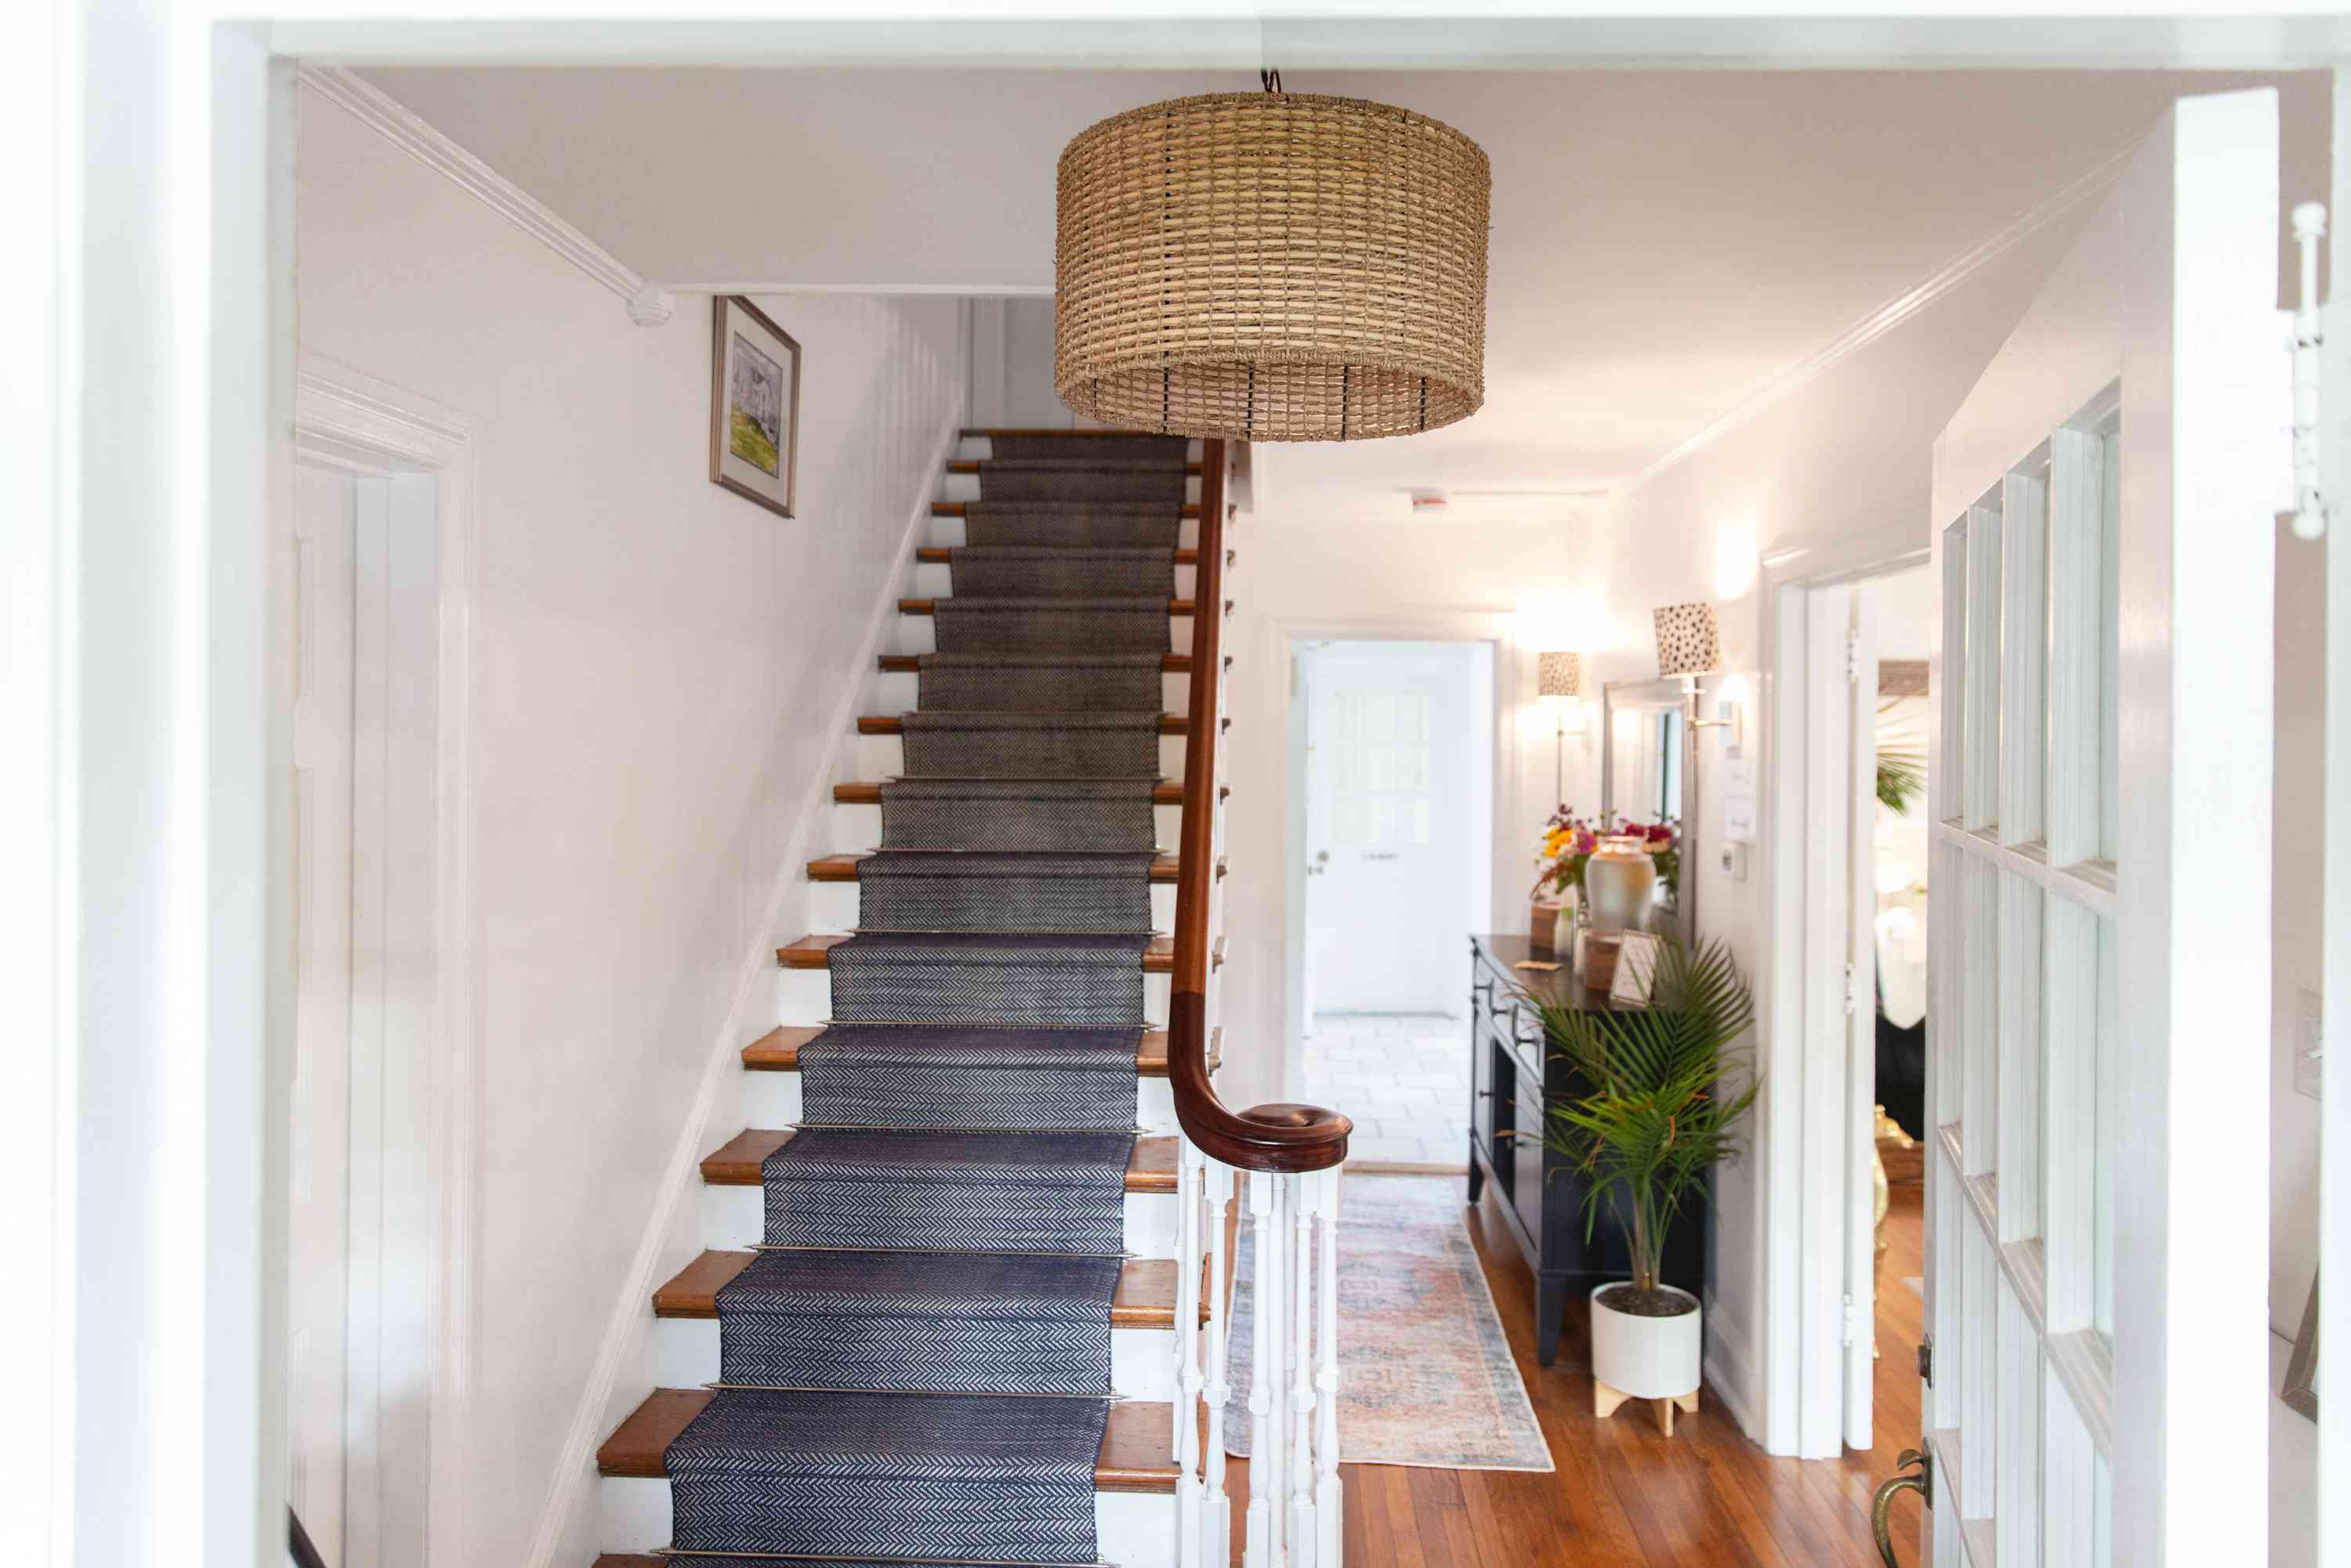
When laying out stairs, ensure that the rise and run of each step is consistent to provide a safe and comfortable walking experience. Use a level and tape measure to accurately measure and mark the layout before installation.
Step 6: Mark Stringers
Marking the stringers is an important step in the stair layout process as it defines the outline of the stairs and serves as a guide for cutting the stringers, which are the structural supports that hold the treads and risers in place. Follow these steps to accurately mark the stringers:
- Gather Necessary Tools: Before you begin, gather the necessary tools, including a carpenter’s square, measuring tape, pencil, and straight edge. These tools will help you create precise markings on the stringers.
- Position the Stringers: Position the stringers in their intended location, aligning them with the established starting point. Ensure that they are accurately placed and securely fastened.
- Measure and Mark the Riser and Tread Positions: Starting from the top of the stringer, use a carpenter’s square to measure and mark the position of each riser and tread. Measure the rise and run for each step as determined in the earlier steps of the stair layout process.
- Mark the Cut Lines: Use a straight edge to connect the marks for the risers and treads, creating the cut lines on the stringers. These cut lines will determine the shape and size of each step.
- Add Extra Support: If desired, add additional support elements such as blocking or wedges between the stringers to reinforce the structure and ensure stability.
It’s essential to be precise when marking the stringers to ensure that the steps align correctly and provide a safe and comfortable staircase. Take your time and double-check your measurements and markings before moving on to the next step.
Additionally, it’s crucial to follow local building codes and regulations regarding stringer dimensions, attachment methods, and reinforcement requirements. These guidelines ensure the structural integrity and safety of the staircase.
If you are unfamiliar with marking stringers or are unsure about any aspect of the process, it’s recommended to consult with a professional, such as a contractor or experienced carpenter, for guidance and assistance.
Now that you have marked the stringers, it’s time to move on to the next step: cutting the stringers.
Step 7: Cut Stringers
After marking the stringers in the previous step, it’s time to cut them. Cutting the stringers involves carefully following the marked lines to create the individual steps of the staircase. Follow these steps to accurately cut the stringers:
- Gather Necessary Tools: Before you begin, gather the necessary tools, including a circular saw, jigsaw, hand saw, or any other suitable cutting tool. Ensure that the blade is appropriate for cutting through the material of the stringers.
- Wear Safety Gear: Put on safety goggles and work gloves to protect your eyes and hands during the cutting process.
- Cut the Top and Bottom of the Stringers: Start by cutting along the marked lines at the top and bottom of the stringers. Use a saw to carefully follow the lines and create clean, straight cuts.
- Cut the Risers and Treads: Once the top and bottom cuts are made, move on to cutting the risers and treads. Follow the marked lines carefully, ensuring that the cuts are straight and match the dimensions of each step.
- Make Notches for Treads and Risers: If using notched stringers, make notches on the stringers for the treads and risers to fit into. Use a saw or chisel to create the notches, ensuring that they are the correct size to securely hold the treads and risers.
It’s essential to take your time and maintain precision when cutting the stringers. Accuracy is crucial to ensure that each step fits securely into place and provides a stable and safe staircase.
Remember to follow any specific manufacturer instructions or local building codes regarding stringer cutting and installation. These guidelines ensure that the stairs are structurally sound and meet all necessary safety requirements.
As cutting stringers requires skill and precision, it is highly recommended to seek the assistance of a professional, such as a contractor or experienced carpenter, if you are unsure about any aspect of the process or do not have the necessary experience or tools.
With the stringers accurately cut, you are one step closer to completing your staircase installation. The next step is to install the stringers, which we will cover in the following step.
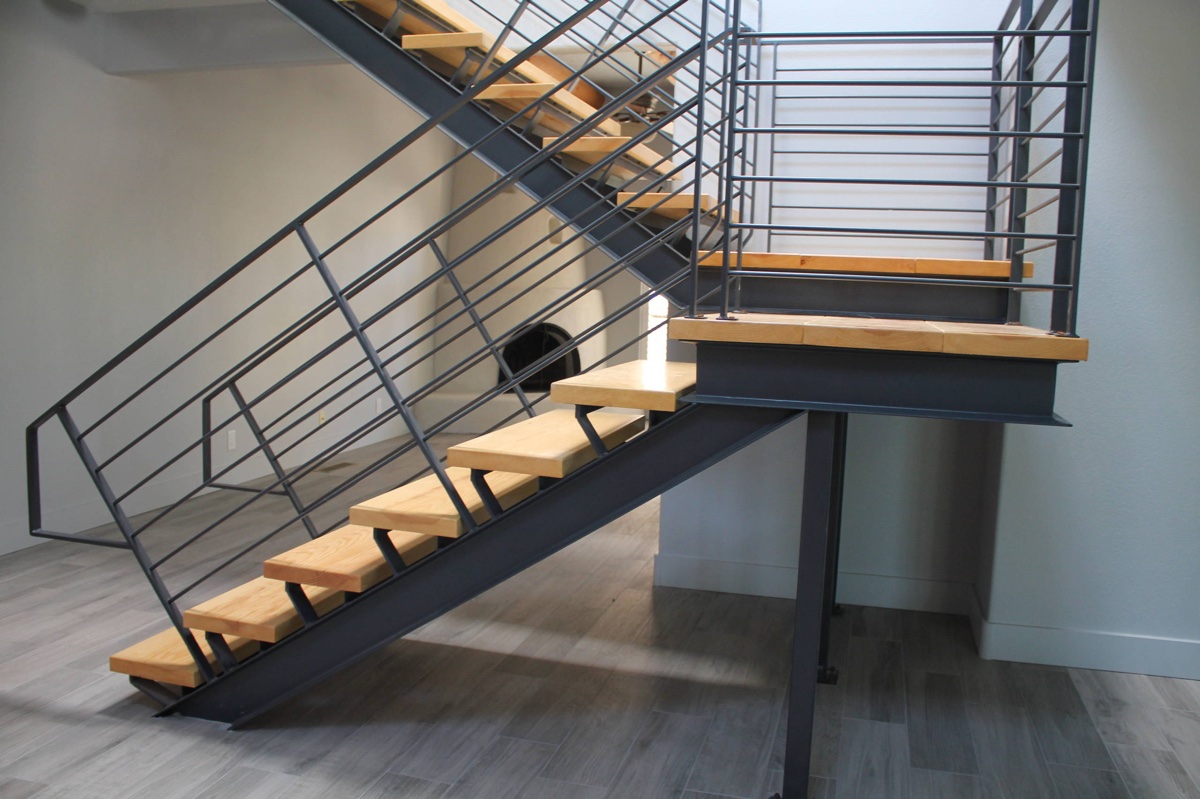
Step 8: Install Stringers
With the stringers cut to the appropriate size and shape, it’s time to install them. The stringers serve as the structural support for the staircase, so it’s crucial to ensure a secure and stable installation. Follow these steps to install the stringers:
- Prepare the Install Area: Clear the area where the stringers will be installed, ensuring it is clean and free of debris. If necessary, remove any existing flooring or obstacles that may obstruct the installation process.
- Position the Stringers: Place the stringers in their intended position, ensuring they are aligned with the established starting point and the marked locations for each step.
- Secure the Stringers: Use construction adhesive or fasteners, such as screws or nails, to secure the stringers to the supporting structure. Ensure that the stringers are firmly attached and aligned vertically and horizontally.
- Check for Level: Use a level to ensure that the stringers are plumb vertically and level horizontally. Any discrepancies can lead to uneven steps and an unsafe staircase. Make any necessary adjustments to ensure a level installation.
- Reinforce the Stringers: Depending on the size and materials used for the stringers, additional reinforcement may be required. This can include adding blocking or brackets for extra support and stability.
- Verify Stability: Carefully test the stability of the stringers by applying weight or pressure to ensure they can support the weight of the stairs and users without wobbling or flexing.
It’s crucial to follow local building codes and manufacturer instructions for stringer installation. Adhering to these guidelines ensures that the stairs are structurally sound and meet all necessary safety requirements.
If you are unsure about any aspect of the installation process or do not have the necessary experience or tools, it is advisable to seek the assistance of a professional, such as a contractor or experienced carpenter, to ensure a safe and accurate installation.
With the stringers securely installed, you are ready to move on to the next step: installing the treads and risers.
Read more: How To Do Layout In Construction
Step 9: Install Treads and Risers
Installing the treads and risers is an important step in completing the construction of your staircase. Treads are the horizontal surfaces that you step on, while risers are the vertical surfaces that connect each tread. Follow these steps to properly install the treads and risers:
- Prepare the Treads and Risers: Ensure that the treads and risers are cut to the correct size and shape, matching the dimensions of the stringers and following your stair design plans.
- Apply Adhesive: Apply construction adhesive to the back of each tread and riser. This adhesive helps to secure them in place and prevents squeaking.
- Start at the Bottom: Begin installing from the bottom of the staircase, working your way up. Position the first riser in place, aligning it with the stringers and ensuring it is level horizontally.
- Install the Treads: Place the first tread on top of the installed riser, aligning it with the stringers. Make sure it is level and securely attached to the riser and stringers.
- Repeat the Process: Continue installing the remaining treads and risers, one at a time, alternating between a riser and a tread. Double-check that each one is level and properly secured.
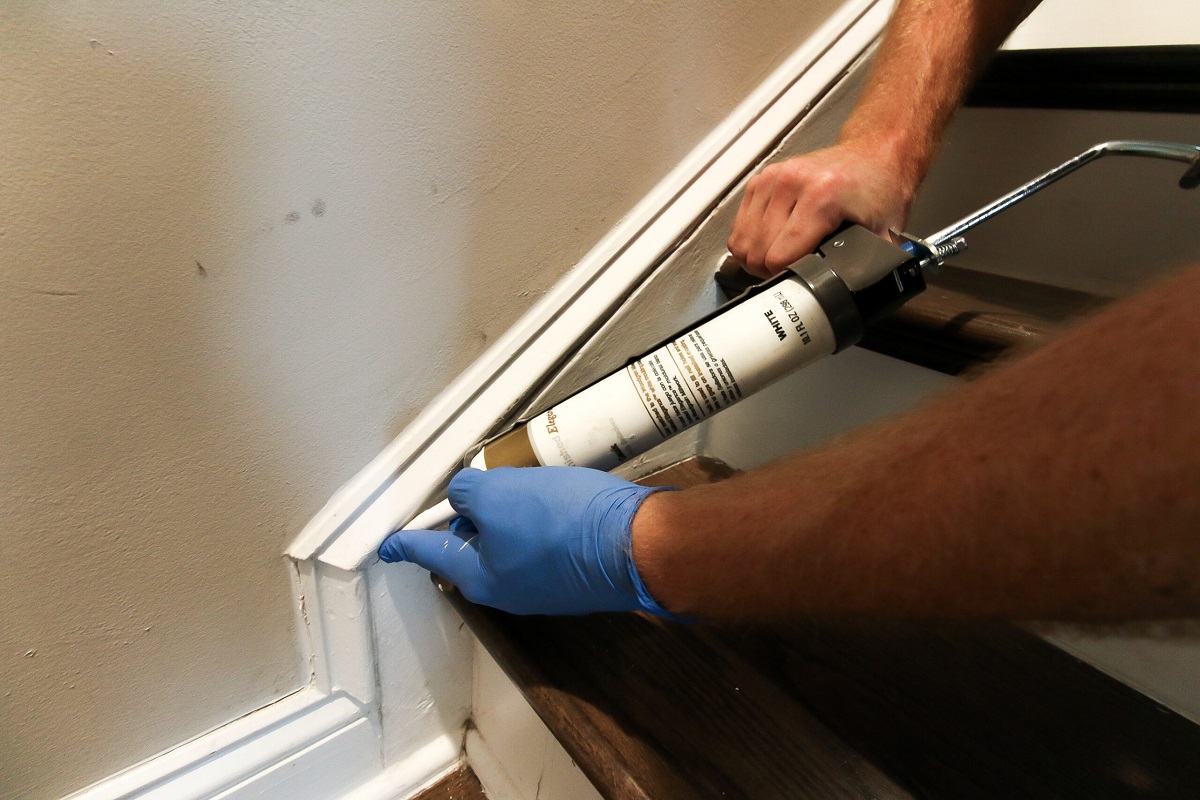
- Attach Treads and Risers: Secure the treads and risers to the stringers by using screws, nails, or finishing nails. Make sure to countersink the fasteners and fill the holes with wood filler for a seamless finish.
- Verify Stability: Once all the treads and risers are installed, check the stability of the staircase. Apply weight or pressure to test for any movement or flexing. Make any necessary adjustments to ensure a stable structure.
It’s important to follow local building codes and guidelines for the installation of treads and risers. Consider using non-slip materials or adding non-slip strips to the treads to enhance safety.
If you are unfamiliar with the installation process or don’t have the necessary tools or experience, it’s recommended to consult with a professional, such as a contractor or experienced carpenter, to ensure a properly installed and safe staircase.
With the treads and risers securely in place, you are almost done! The final step is to install the handrail and balusters, which we will cover in the following step.
Step 10: Install Handrail and Balusters
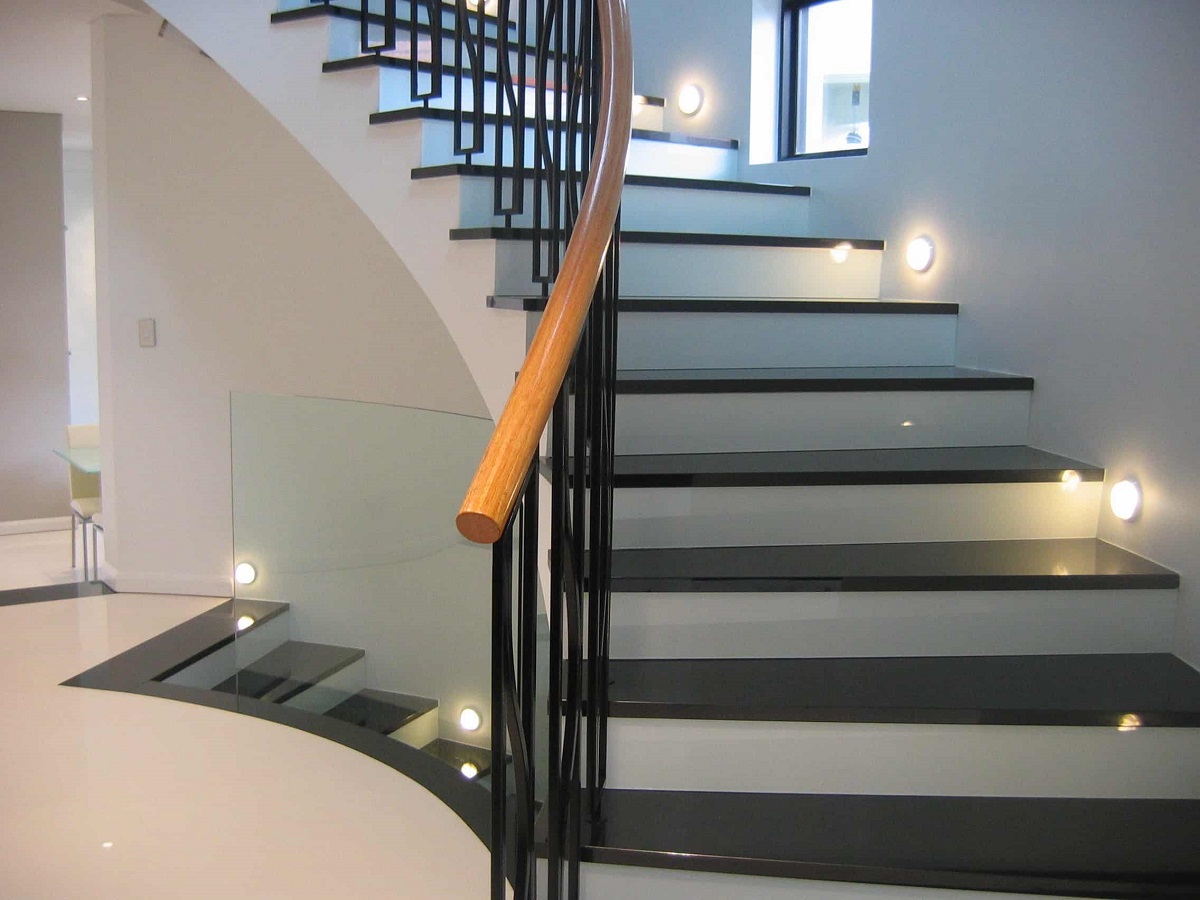
The final step in completing your staircase is to install the handrail and balusters. The handrail provides support and safety while ascending or descending the stairs, and the balusters act as vertical supports for the handrail. Follow these steps to properly install the handrail and balusters:
- Measure and Cut Handrail: Measure and cut the handrail to the appropriate length, taking into consideration any angles or turns that may be required. Make sure to follow local building codes regarding handrail height and clearance.
- Attach Handrail Brackets: Install handrail brackets on the wall, positioned at appropriate intervals along the length of the handrail. Use a level to ensure that the brackets are mounted straight and securely.
- Position Handrail: Slide the handrail onto the brackets and secure them in place. Make sure the handrail is level and properly aligned with the stairs.
- Measure and Cut Balusters: Measure and cut the balusters to the desired height, accounting for any variation in the level of the stairs. Make sure to follow local building codes regarding baluster spacing.
- Position Balusters: Place the balusters in the pre-drilled holes or baluster shoes along the stairs or handrail. Make sure they are evenly spaced and securely attached.
- Secure Balusters: Use screws or adhesives to secure the balusters in place, ensuring they are straight and aligned with the handrail and stairs.
- Check for Stability: Once the handrail and balusters are installed, check the stability of the entire staircase. Apply pressure or weight to make sure there is no movement or wobbling. Make any necessary adjustments to ensure a stable and secure installation.
- Apply Finishing Touches: Sand any rough edges or surfaces, and apply a protective finish to the handrail and balusters to enhance their durability and appearance.
It’s important to adhere to local building codes and guidelines regarding handrail height, clearance, and baluster spacing. These regulations are in place to ensure the safety and accessibility of the staircase.
If you are unsure about any aspect of the installation process or don’t have the necessary tools or experience, it’s highly recommended to consult with a professional, such as a contractor or experienced carpenter, to ensure a proper and secure installation.
Congratulations! By completing the installation of the handrail and balusters, you have successfully finished constructing your staircase. Take a moment to admire your work and enjoy the functionality and beauty that the staircase brings to your space.
Conclusion
Congratulations on successfully completing the process of laying out stairs! By following the step-by-step guide outlined in this article, you have gained the knowledge and skills necessary to design and construct a safe and visually appealing staircase.
Remember, the key to a successful stair layout is accuracy, adherence to local building codes, and attention to detail. From measuring and calculating the rise and run to cutting and installing the stringers, treads, and risers, each step plays a crucial role in creating a functional and aesthetically pleasing staircase.
Throughout the process, it’s important to consult with professionals such as architects, contractors, or experienced carpenters to ensure compliance with building codes and safety regulations. They can provide guidance, answer any specific questions, and offer valuable insights that will help you achieve the best possible results.
Always prioritize safety when planning and constructing stairs. Ensure that the design meets local building codes and guidelines to prevent accidents and ensure the well-being of users. Remember to incorporate features such as handrails, balusters, non-slip materials, and adequate lighting to further enhance safety.
By taking the time and effort to properly layout stairs, you are not only adding functionality to your space but also enhancing its aesthetic appeal. A well-designed staircase can become a focal point of your home, displaying your attention to detail and craftsmanship.
Now that you possess the knowledge and skills required to layout stairs, don’t hesitate to tackle your next staircase project with confidence. Whether you’re renovating, remodeling, or building from scratch, this guide will serve as a valuable resource.
Enjoy the process of enhancing your space with a beautifully designed and expertly laid out staircase. Embrace the creativity and ingenuity that goes into each step, and create a staircase that leaves a lasting impression.
Good luck on your future stair layout endeavors!
Frequently Asked Questions about How To Layout Stairs
Was this page helpful?
At Storables.com, we guarantee accurate and reliable information. Our content, validated by Expert Board Contributors, is crafted following stringent Editorial Policies. We're committed to providing you with well-researched, expert-backed insights for all your informational needs.


0 thoughts on “How To Layout Stairs”