Home>Kitchen & Cooking>Kitchen Furniture & Decor>How To Make Your Own Napkin Rings
Kitchen Furniture & Decor
How To Make Your Own Napkin Rings
Published: February 16, 2024
Learn how to create unique napkin rings for your kitchen furniture and decor with our easy DIY guide. Elevate your dining experience today!
(Many of the links in this article redirect to a specific reviewed product. Your purchase of these products through affiliate links helps to generate commission for Storables.com, at no extra cost. Learn more)
Introduction
Napkin rings are a delightful addition to any table setting, adding a touch of elegance and personal flair to your dining experience. Crafting your own napkin rings allows you to infuse your unique style and creativity into your table decor. Whether you're hosting a special dinner party or simply want to elevate your everyday meals, making your own napkin rings is a rewarding and enjoyable DIY project.
Creating custom napkin rings provides an opportunity to showcase your personality and style, as well as to tailor the design to suit different occasions and themes. From casual gatherings to formal events, the versatility of handmade napkin rings allows you to set the perfect tone for your table setting.
In this guide, we will explore the process of crafting personalized napkin rings, from selecting the base materials to adding decorative elements that reflect your individual taste. By following these steps, you can unleash your creativity and produce stunning napkin rings that will impress your guests and elevate the overall aesthetic of your table decor. Let's embark on this creative journey and discover how to make your own unique and charming napkin rings.
Key Takeaways:
- Crafting your own napkin rings allows you to add a personal touch to your table decor, reflecting your unique style and creativity while creating a charming and memorable dining experience.
- By infusing your handmade napkin rings with personal stories, customized details, and thoughtful presentation, you can elevate the visual appeal of your table decor and create a warm and inviting ambiance for your guests.
Read more: How To Make Nautical Napkin Rings
Materials Needed
To embark on the delightful journey of creating your own personalized napkin rings, you will need a few essential materials to bring your vision to life. Gathering the following items will set the stage for a fun and rewarding crafting experience:
-
Base Material: Select a sturdy and versatile base material for your napkin rings. Options include wooden or metal rings, PVC pipe segments, or even repurposed items such as cardboard tubes or decorative bangles. The choice of base material will influence the overall look and feel of your napkin rings, so consider the theme and style you wish to achieve.
-
Decorative Elements: Explore a variety of decorative elements to adorn your napkin rings. This may include ribbons, twine, lace, or fabric strips to wrap around the base. Additionally, consider embellishments such as faux flowers, beads, charms, or small ornaments that align with your desired aesthetic. These elements will add charm and personality to your napkin rings, making them truly unique.
-
Adhesive or Fasteners: Depending on the materials you choose, you may need adhesive such as hot glue, craft glue, or double-sided tape to secure the decorative elements to the base. Alternatively, if you opt for metal rings, small fasteners or wire may be necessary to attach the embellishments securely.
-
Crafting Tools: Equip yourself with basic crafting tools such as scissors, a glue gun, or a strong adhesive tape. These tools will aid in cutting and securing materials, ensuring a smooth and efficient crafting process.
-
Optional Embellishments: Consider incorporating additional embellishments to further personalize your napkin rings. This could include personalized tags, small trinkets, or themed charms that resonate with the occasion or your personal style.
-
Protective Gear: If you are using adhesive or crafting tools that require caution, ensure you have protective gear such as gloves or eye protection to prioritize safety during the crafting process.
By gathering these materials, you will be well-prepared to embark on the creative journey of crafting your own stunning napkin rings. With these essentials at your disposal, you can infuse your unique style and creativity into each handmade piece, resulting in charming and personalized napkin rings that will enhance your table decor.
Step 1: Choose Your Base
The first step in creating your own personalized napkin rings is to carefully select the base material that will form the foundation of your design. The choice of base material will significantly influence the overall look and feel of the finished napkin rings, allowing you to tailor them to suit your personal style and the theme of your table setting.
When considering the base material for your napkin rings, it's essential to take into account the desired aesthetic, the occasion for which they will be used, and the level of customization you wish to achieve. Here are some popular options for base materials, each offering unique characteristics and creative possibilities:
-
Wooden Rings: Wooden rings provide a classic and natural appeal, making them a versatile choice for various table settings. They can be left in their original state for a rustic look or painted and embellished to complement a specific theme or color scheme.
-
Metal Rings: Metal rings exude a sense of elegance and sophistication, ideal for formal dining occasions. They can be polished for a sleek and modern appearance or adorned with decorative elements to add a touch of glamour and personality.
-
PVC Pipe Segments: Repurposing PVC pipe segments as napkin ring bases offers a contemporary and unconventional twist. These can be painted, wrapped with fabric, or adorned with embellishments to achieve a unique and eclectic look.
-
Cardboard Tubes: Upcycling cardboard tubes from paper towel or toilet paper rolls presents an eco-friendly and budget-friendly option. These can be easily customized with decorative paper, fabric, or paint, allowing for endless creative possibilities.
-
Decorative Bangles: Utilizing decorative bangles as napkin ring bases introduces a stylish and fashion-forward element to your table decor. They can be wrapped with fabric, adorned with charms, or embellished with intricate details to reflect your personal style.
Once you have chosen the base material that resonates with your vision, you are ready to embark on the next step of the crafting process, where you will have the opportunity to adorn and personalize the selected base to create stunning and unique napkin rings. The careful selection of the base material sets the stage for a truly customized and visually captivating end result, ensuring that your handmade napkin rings will make a memorable impression on your table setting.
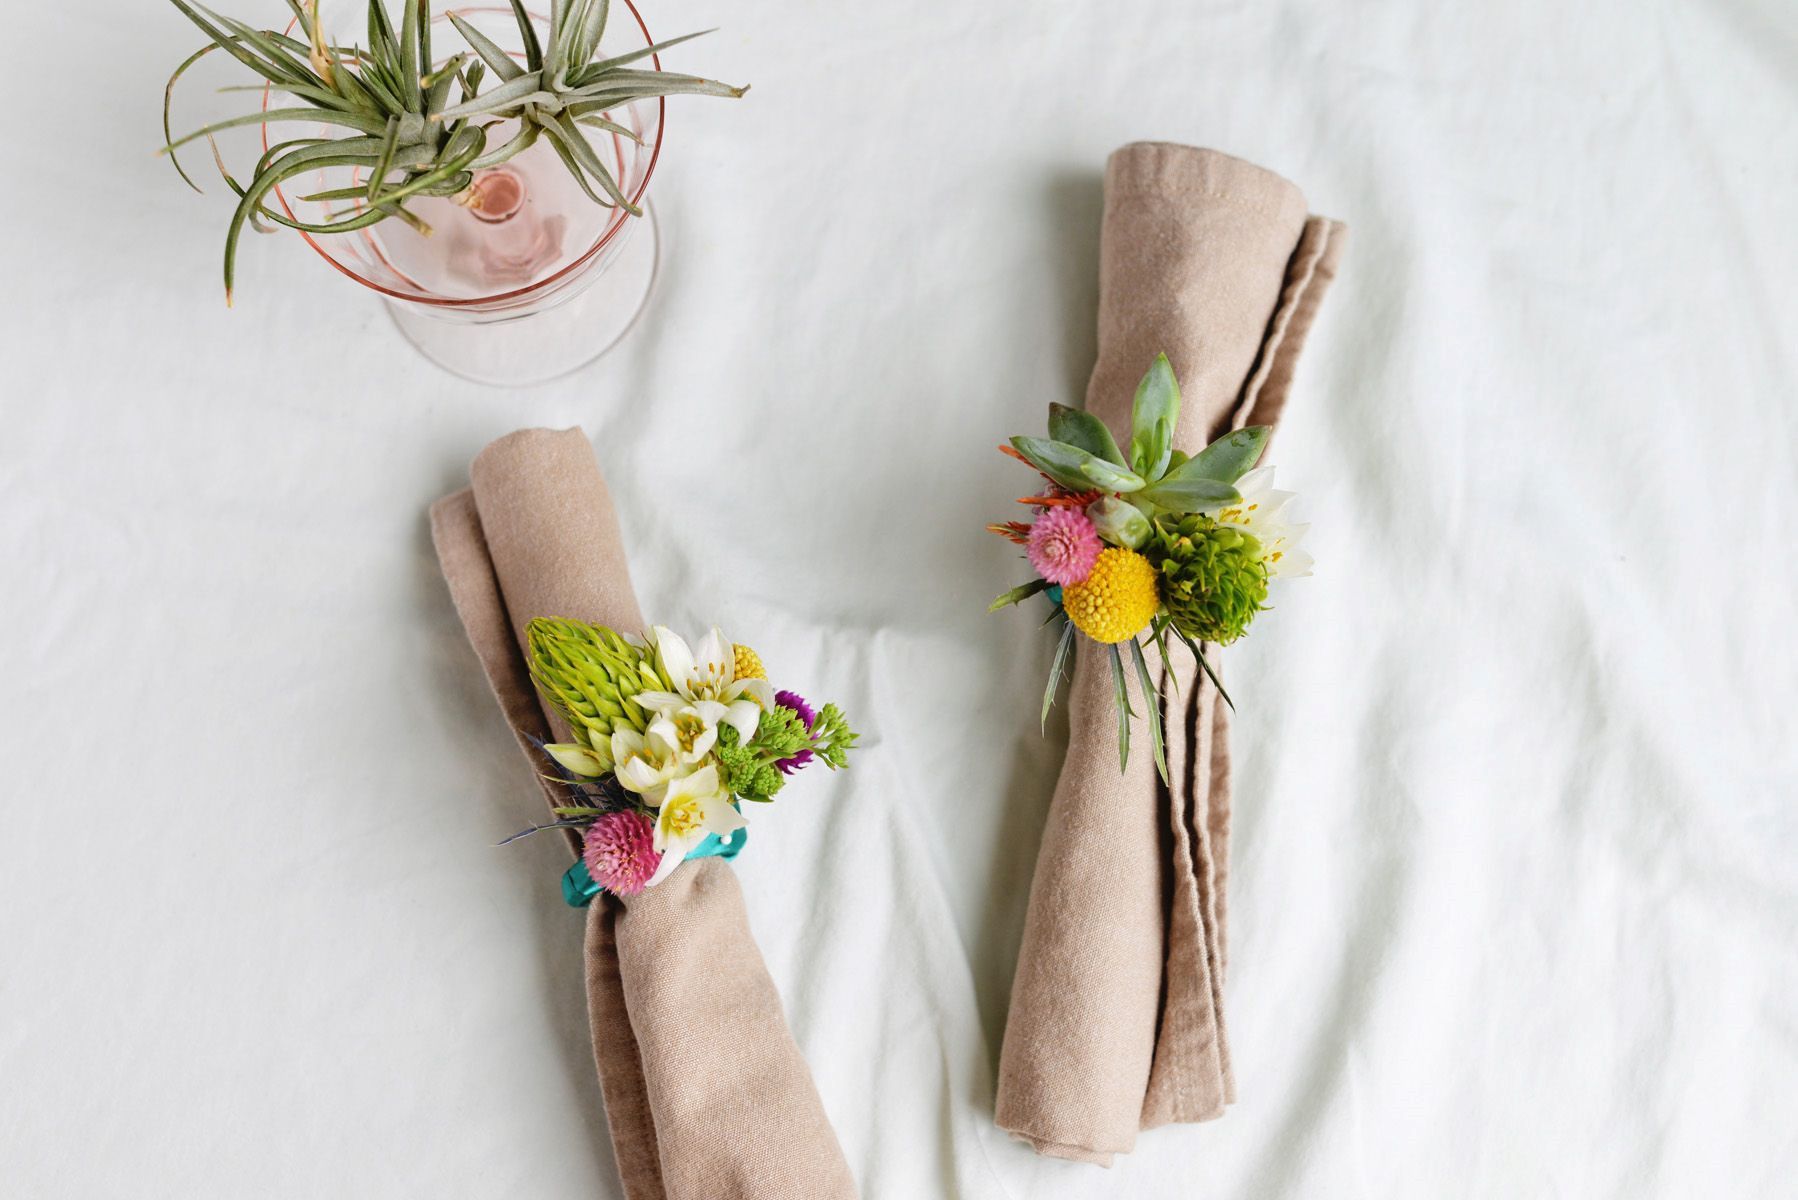
Step 2: Decorate Your Base
With the base material selected, it's time to unleash your creativity and infuse the chosen foundation with decorative elements that will elevate your napkin rings to new heights of charm and individuality. Decorating the base is where your personal style and artistic vision come to life, allowing you to tailor each napkin ring to suit the occasion, theme, or your unique preferences.
Wrapping and Adorning
One of the most versatile and visually impactful ways to decorate your base is by wrapping it with various materials. Consider using ribbons, twine, lace, or fabric strips to encircle the base, adding texture, color, and visual interest. The choice of wrapping material can be tailored to complement the overall aesthetic you wish to achieve, whether it's a rustic, elegant, or whimsical look.
In addition to wrapping, adorning the base with embellishments such as faux flowers, beads, charms, or small ornaments can further enhance its appeal. These decorative elements can be strategically positioned to create a focal point or a harmonious arrangement that reflects your personal style and the desired ambiance of your table setting.
Read more: How To Make A Napkin Ring Holder
Personalization and Theme Integration
To add a personalized touch to your napkin rings, consider incorporating elements that hold special meaning or significance. This could involve attaching personalized tags, small trinkets, or themed charms that resonate with the occasion or the individuals who will be sharing the dining experience. By infusing your napkin rings with personal touches, you can create a meaningful and memorable addition to your table decor.
Furthermore, integrating a specific theme into the decoration of your napkin rings can contribute to a cohesive and visually striking table setting. Whether it's a seasonal theme, a celebration of cultural traditions, or a reflection of your favorite colors and motifs, aligning the decorative elements with a central theme can enhance the overall aesthetic impact and create a captivating visual narrative.
Experimentation and Creativity
The process of decorating your base presents an opportunity for experimentation and creative expression. Don't be afraid to explore unconventional materials, mix and match different textures, or incorporate unexpected elements to achieve a truly unique and eye-catching design. Embracing creativity and allowing your imagination to guide the decorative process will result in napkin rings that reflect your individuality and showcase your artistic flair.
As you embark on the journey of decorating your base, remember that each napkin ring is an opportunity to infuse your personal style and creativity into your table decor. By carefully considering wrapping materials, embellishments, personalization, and thematic integration, you can transform the chosen base material into a stunning and personalized napkin ring that will leave a lasting impression on your guests and elevate the overall dining experience.
Step 3: Add Personal Touches
Adding personal touches to your handmade napkin rings is a meaningful and creative process that allows you to infuse each piece with individuality and significance. By incorporating elements that hold personal meaning or resonate with the occasion, you can elevate the emotional impact of your table decor and create a memorable dining experience for yourself and your guests.
Reflecting Personal Stories
Consider integrating elements that reflect personal stories or shared memories into the design of your napkin rings. This could involve using charms, trinkets, or small tokens that hold sentimental value, such as miniature representations of hobbies, travel destinations, or shared experiences. By incorporating these personal artifacts, you can create a tangible connection between the napkin rings and the individuals sharing the dining experience, fostering a sense of warmth and familiarity.
Read more: How To Fold A Napkin With A Napkin Ring
Customized Tags and Labels
Incorporating customized tags or labels into your napkin ring design provides an opportunity to add a personalized touch and convey special messages to your guests. Whether it's a simple initial, a meaningful quote, or a personalized message tailored to each guest, these small details can make a significant impact. Customized tags also serve as thoughtful keepsakes that guests can take home, serving as a lasting memento of the shared dining experience.
Family Heirlooms and Treasures
Infusing your napkin rings with family heirlooms or cherished treasures can imbue them with a sense of heritage and tradition. Consider incorporating small heirlooms, vintage buttons, or pieces of jewelry that have been passed down through generations. By integrating these meaningful artifacts, you can create napkin rings that not only enhance the visual appeal of your table setting but also carry the weight of family history and cherished memories.
Celebrating Milestones and Achievements
For special occasions and celebratory gatherings, consider incorporating elements that celebrate milestones and achievements. This could involve using symbolic charms, tokens of accomplishment, or small representations of significant milestones. By acknowledging and celebrating these moments through the design of your napkin rings, you can create a sense of festivity and honor the individuals being celebrated.
Embracing Cultural Traditions
If you are hosting a gathering that celebrates cultural traditions or customs, consider integrating elements that reflect these cultural influences into your napkin ring design. This could involve using colors, patterns, or symbols that hold cultural significance, allowing you to honor and showcase the richness of diverse traditions.
By adding these personal touches to your handmade napkin rings, you can create a deeply meaningful and visually captivating addition to your table decor. Each element serves as a reflection of personal stories, shared experiences, and cherished traditions, enriching the dining experience and creating lasting memories for both you and your guests.
Read more: How To Make Bunny Napkin Rings
Step 4: Final Touches and Display
As you approach the final stage of crafting your personalized napkin rings, it's time to add the finishing touches that will enhance their visual appeal and prepare them for display on your table. This pivotal step allows you to refine the overall look of the napkin rings and ensure that they seamlessly integrate into your table setting, creating a cohesive and captivating dining experience for you and your guests.
Refinement and Quality Check
Before finalizing your napkin rings, take a moment to review each piece and make any necessary refinements. Ensure that all decorative elements are securely attached and that the wrapping or adorning materials are neatly arranged. This quality check will guarantee that your napkin rings exude a polished and professional appearance, reflecting the care and attention to detail invested in their creation.
Coordination with Table Decor
Consider the overall theme and color scheme of your table decor as you prepare to display your napkin rings. Ensure that the decorative elements and colors harmonize with the tablecloth, dinnerware, and centerpieces, creating a cohesive and visually appealing ensemble. By coordinating the napkin rings with the existing table decor, you can elevate the aesthetic impact of the entire setting and create a unified visual narrative.
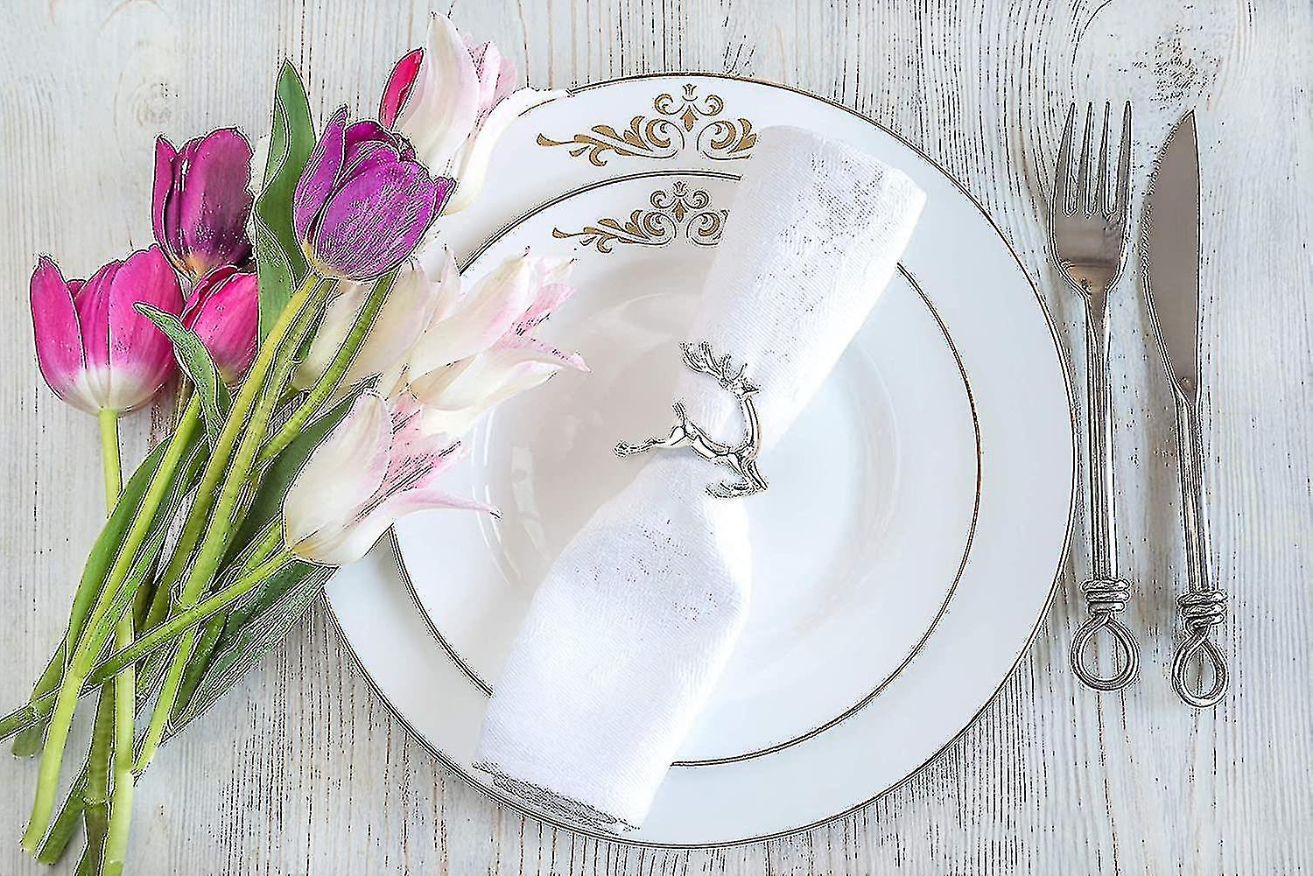
Presentation and Placement
When it comes to displaying your napkin rings, thoughtful presentation and placement can significantly enhance their impact. Consider carefully folding your cloth napkins and sliding the personalized napkin rings onto them, ensuring that they are positioned prominently and attractively on each place setting. The placement of the napkin rings contributes to the overall visual balance of the table and serves as a delightful focal point for your guests.
Read more: How To Make Napkin Rings Out Of Ribbon
Lighting and Ambiance
Take into account the lighting and ambiance of your dining space as you prepare to showcase your handmade napkin rings. Whether you are hosting a daytime brunch or an evening dinner, the lighting can accentuate the intricate details and embellishments of the napkin rings. Consider utilizing candles, string lights, or ambient lighting to create a warm and inviting atmosphere that highlights the charm and craftsmanship of your personalized table decor.
Appreciation and Enjoyment
As you complete the final touches and proudly display your handmade napkin rings, take a moment to appreciate the creative journey and the personal touch you have infused into each piece. Embrace the joy of sharing your unique table decor with your guests and relish the delightful ambiance that your personalized napkin rings contribute to the dining experience. By savoring the fruits of your creative endeavor, you can fully immerse yourself in the warmth and beauty of your thoughtfully crafted table setting.
By attending to these final touches and thoughtfully displaying your personalized napkin rings, you can elevate the visual appeal of your table decor and create a captivating dining environment that reflects your individual style and creativity. Each napkin ring serves as a testament to your artistic vision and attention to detail, enriching the dining experience and leaving a lasting impression on your guests.
Conclusion
Crafting your own napkin rings is a delightful and rewarding endeavor that allows you to infuse your personal style, creativity, and meaningful touches into your table decor. Throughout this creative journey, you have explored the process of selecting base materials, adorning them with decorative elements, adding personal touches, and preparing the final display. As you conclude this crafting experience, it's important to reflect on the significance of handmade napkin rings and the impact they can have on your dining environment.
By embracing the art of creating personalized napkin rings, you have the opportunity to transform ordinary table settings into captivating and memorable dining experiences. Each handmade napkin ring serves as a reflection of your individuality, allowing you to convey personal stories, celebrate traditions, and create meaningful connections with your guests. The process of crafting napkin rings goes beyond mere decoration; it becomes a means of expressing your creativity and infusing warmth and personality into your dining space.
As you prepare to showcase your personalized napkin rings, consider the joy and pride that comes with sharing your handmade creations with others. Whether you are hosting a casual gathering, a festive celebration, or an intimate dinner, the presence of your thoughtfully crafted napkin rings will undoubtedly enhance the ambiance and leave a lasting impression on your guests. The attention to detail, personal touches, and cohesive presentation of your table decor contribute to a dining experience that is not only visually appealing but also emotionally resonant.
Furthermore, the act of crafting napkin rings fosters a sense of connection and mindfulness, allowing you to immerse yourself in the creative process and savor the satisfaction of bringing your artistic vision to life. As you admire the final display of your handmade napkin rings, take a moment to appreciate the artistry, care, and dedication that have gone into each piece. Embrace the joy of creating a welcoming and aesthetically pleasing dining environment that reflects your unique sensibilities and hospitality.
In conclusion, the journey of making your own napkin rings transcends the realm of crafting; it becomes a means of expressing creativity, celebrating cherished moments, and fostering a sense of togetherness. As you continue to explore the art of handmade table decor, may each napkin ring serve as a testament to the beauty of personal expression and the warmth of shared experiences around the dining table.
Frequently Asked Questions about How To Make Your Own Napkin Rings
Was this page helpful?
At Storables.com, we guarantee accurate and reliable information. Our content, validated by Expert Board Contributors, is crafted following stringent Editorial Policies. We're committed to providing you with well-researched, expert-backed insights for all your informational needs.


0 thoughts on “How To Make Your Own Napkin Rings”