Home>Kitchen & Cooking>Kitchen Furniture & Decor>How To Make Wire And Bead Napkin Rings
Kitchen Furniture & Decor
How To Make Wire And Bead Napkin Rings
Modified: February 18, 2024
Learn how to create beautiful wire and bead napkin rings to add a touch of elegance to your kitchen furniture and decor. Follow our step-by-step guide for stunning results. Ideal for DIY enthusiasts and craft lovers.
(Many of the links in this article redirect to a specific reviewed product. Your purchase of these products through affiliate links helps to generate commission for Storables.com, at no extra cost. Learn more)
Introduction
Napkin rings are a simple yet elegant addition to any dining table. They not only keep napkins neatly rolled but also add a touch of sophistication to the table setting. While there are numerous napkin ring options available in the market, creating your own wire and bead napkin rings can be a delightful and rewarding DIY project. This creative endeavor allows you to infuse your personal style and flair into your dining experience.
Crafting wire and bead napkin rings is a wonderful way to unleash your creativity and add a personalized touch to your table decor. By using a few basic materials and following simple steps, you can create stunning napkin rings that reflect your unique style and complement your table setting. Whether you're hosting a special dinner party or simply want to elevate your everyday dining experience, handmade napkin rings can add a charming and bespoke element to the occasion.
In this guide, we will walk you through the process of making wire and bead napkin rings, providing detailed instructions and tips to help you achieve beautiful results. With just a few tools and a dash of creativity, you can embark on this enjoyable DIY project and create napkin rings that are not only functional but also serve as eye-catching accents on your dining table. So, gather your materials and get ready to embark on a delightful crafting adventure as we guide you through the steps of making your very own wire and bead napkin rings.
Key Takeaways:
- Crafting wire and bead napkin rings is a fun and rewarding DIY project that allows you to personalize your dining table with handmade elegance and charm. With just a few materials and simple steps, you can create stunning napkin rings that reflect your unique style and creativity.
- Making wire and bead napkin rings is not just about creating table accessories; it’s a celebration of creativity and individuality. Each handmade napkin ring adds a touch of artistry and warmth to the dining experience, enriching everyday moments with beauty and personality.
Read more: How To Make Beaded Napkin Ring Holders
Materials Needed
To embark on the delightful journey of creating wire and bead napkin rings, you will need a handful of simple yet essential materials. These items can be easily sourced from craft stores or online suppliers, allowing you to gather everything you need to bring your creative vision to life. Here's a comprehensive list of the materials required for this engaging DIY project:
-
Wire: Select a pliable yet sturdy wire, such as aluminum or copper wire, with a gauge that allows for easy manipulation while retaining its shape. The wire will serve as the foundation for your napkin rings, providing structure and form.
-
Beads: Choose an assortment of beads in various colors, shapes, and sizes to add a decorative touch to your napkin rings. Opt for beads that complement your table decor and personal style, whether you prefer classic pearls, vibrant glass beads, or rustic wooden beads.
-
Wire Cutters: A pair of wire cutters will be indispensable for trimming the wire to the desired length, ensuring precision and accuracy as you prepare the foundation for your napkin rings.
-
Round-Nose Pliers: These specialized pliers are essential for shaping the wire and creating neat loops to secure the beads in place. The round-nose pliers enable you to manipulate the wire with ease, allowing for graceful curves and precise bends.
-
Flat-Nose Pliers: Equally important, flat-nose pliers will aid in straightening and bending the wire, providing additional control and versatility as you craft your napkin rings.
-
Ruler or Measuring Tape: A ruler or measuring tape will help you accurately determine the length of wire needed for each napkin ring, ensuring uniformity and consistency across your creations.
-
Optional Embellishments: Depending on your creative vision, you may choose to incorporate additional embellishments such as charms, crystals, or decorative findings to further personalize your napkin rings.
By gathering these materials, you will be well-equipped to embark on the process of crafting wire and bead napkin rings. With a touch of creativity and attention to detail, you can transform these basic components into stunning and functional table accessories that elevate your dining experience. Now that you have assembled your materials, it's time to delve into the step-by-step process of bringing your wire and bead napkin rings to life.
Step 1: Measure and Cut the Wire
The first step in creating wire and bead napkin rings is to measure and cut the wire to the desired length. Using a ruler or measuring tape, carefully determine the appropriate length for each napkin ring, keeping in mind the circumference of your napkins and allowing for a slight overlap to ensure a secure fit. Whether you prefer standard-sized napkin rings or custom dimensions to accommodate specific napkin sizes, precise measurements are crucial for achieving uniformity and consistency across your creations.
Once you have determined the required length for the wire, use wire cutters to trim the wire with precision. It's essential to use sharp wire cutters to achieve clean and even cuts, ensuring that the wire ends are neat and free from any jagged edges. This attention to detail will contribute to the professional and polished appearance of your wire and bead napkin rings.
As you proceed with cutting the wire, consider the overall aesthetic you wish to achieve. Whether you envision sleek and modern napkin rings or rustic and whimsical designs, the length of the wire will play a significant role in shaping the final look. By taking the time to measure and cut the wire accurately, you set the foundation for creating napkin rings that not only complement your table decor but also reflect your personal style and attention to detail.
Throughout this process, it's important to work methodically, ensuring that each piece of wire is cut to the exact specifications. Consistency in length is key to producing a cohesive set of napkin rings that exude a sense of harmony and balance when displayed on your dining table. With the wire cut to size, you are now ready to embark on the next phase of crafting wire and bead napkin rings, where you will shape the wire to form the elegant and distinctive loops that will hold the beads in place.
Step 2: Shape the Wire
With the wire cut to the desired length, the next crucial step in creating wire and bead napkin rings is to shape the wire into elegant loops that will securely hold the beads in place. This process requires precision and finesse, as the graceful curves of the wire will not only provide structural integrity but also contribute to the visual appeal of the finished napkin rings.
Using round-nose pliers, gently grasp one end of the wire and begin to form a small loop. The size of this initial loop will depend on your design preference and the overall aesthetic you wish to achieve. Whether you opt for dainty and understated loops or bold and expressive curves, the round-nose pliers allow for flexibility in shaping the wire to suit your creative vision.
As you continue to manipulate the wire with the round-nose pliers, maintain a steady and deliberate approach to ensure uniformity across all the napkin rings. Consistency in the size and shape of the loops is essential for creating a cohesive set of napkin rings that exude a sense of harmony and refinement.
Once the first loop is formed, carefully guide the wire to create additional loops, taking care to maintain even spacing and symmetry. The pliability of the wire enables you to sculpt graceful arcs and curves, allowing you to infuse each napkin ring with a touch of artistry and individuality.
Throughout this process, it's important to periodically assess the overall form of the wire, making any necessary adjustments to achieve the desired shape. Whether you prefer classic circular loops, contemporary angular designs, or whimsical asymmetrical patterns, the shaping process offers an opportunity to express your personal style and creativity.
As you near the end of the wire, create a final loop that mirrors the initial one, ensuring a balanced and polished appearance for the napkin ring. With the wire now shaped into elegant and distinctive loops, you have laid the foundation for the next phase of the crafting process, where you will add the decorative elements that will transform the wire loops into captivating wire and bead napkin rings.
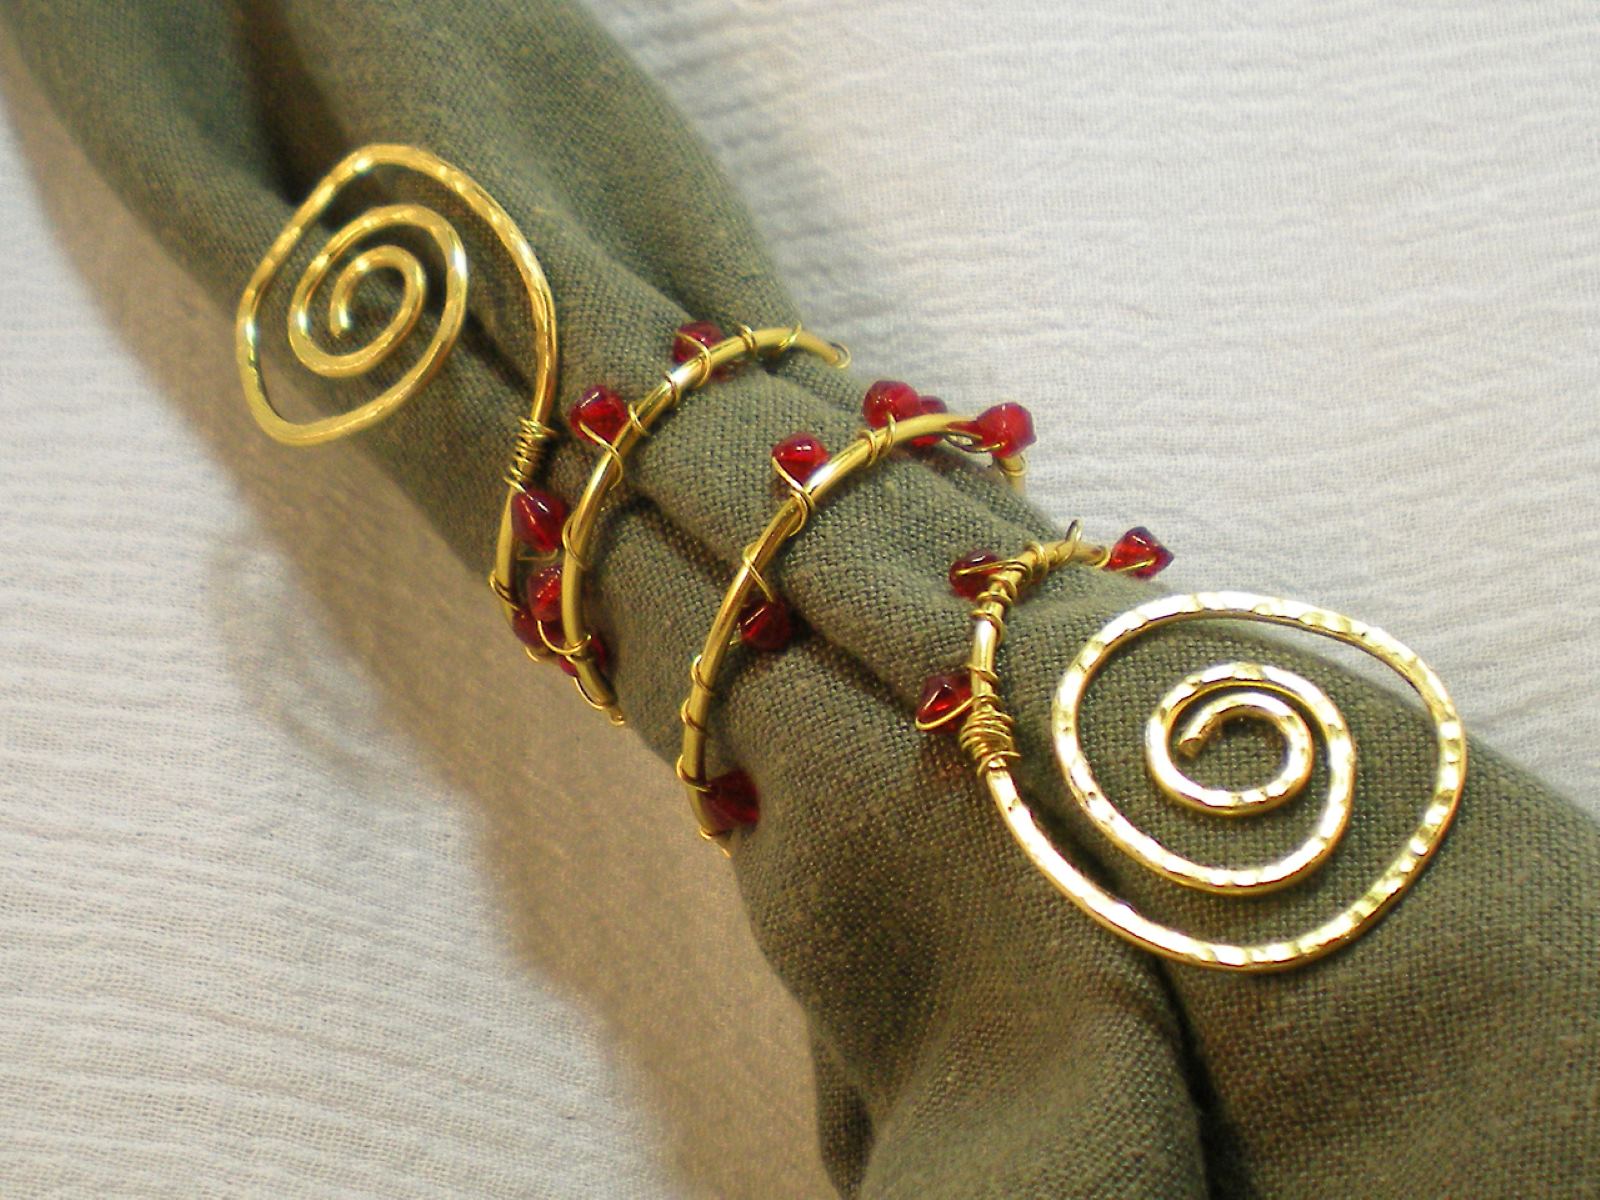
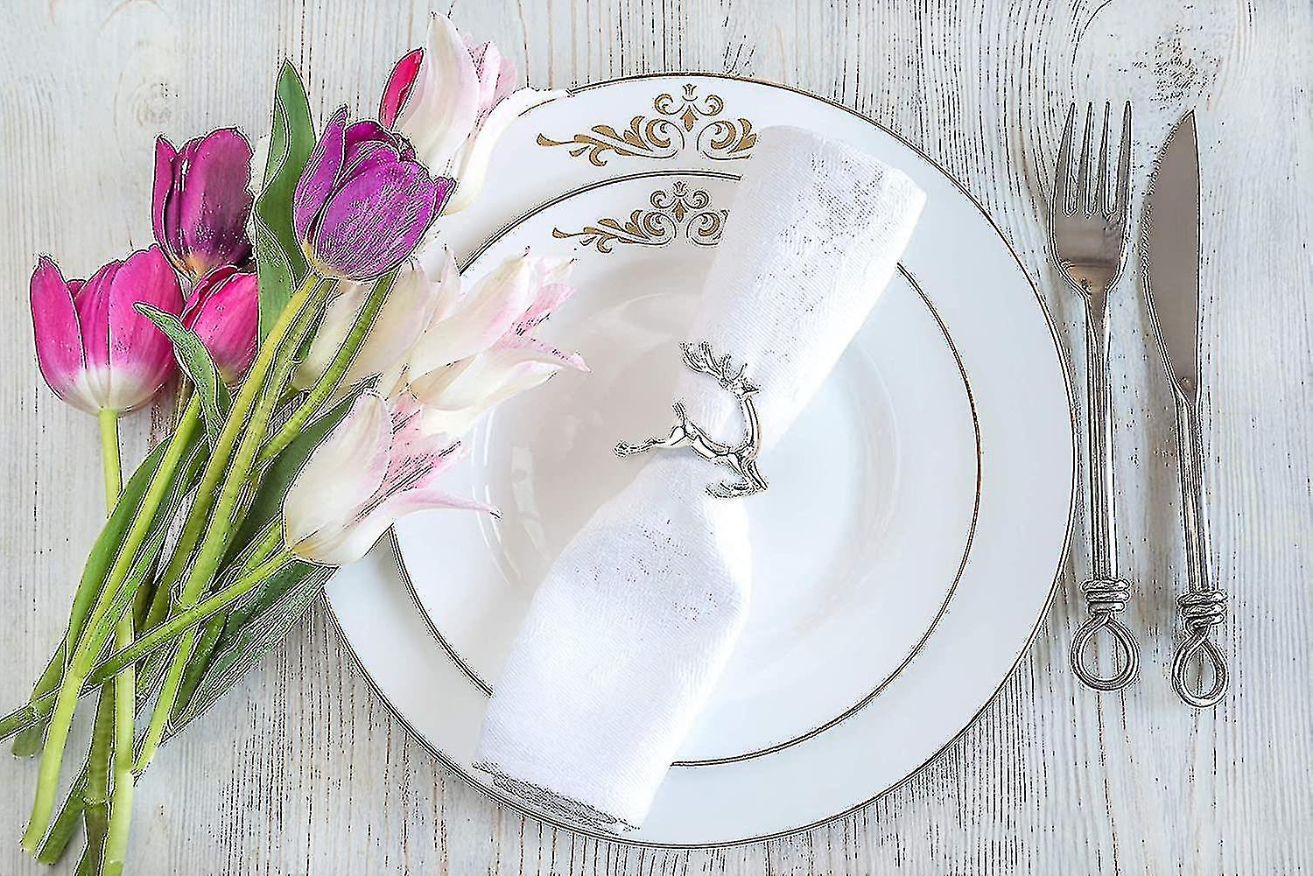
When making wire and bead napkin rings, use pliers to bend the wire into a circle and then thread the beads onto the wire. Secure the ends of the wire to hold the beads in place.
Step 3: Add Beads
With the wire loops elegantly taking shape, it's time to infuse your wire napkin rings with a delightful burst of color and texture by adding beads. This step allows you to unleash your creativity and personalize each napkin ring with a carefully curated selection of beads that complement your table decor and reflect your unique style.
Begin by selecting the beads you wish to incorporate into your napkin rings. Whether you opt for classic pearls, vibrant glass beads, or earthy wooden beads, the choice of materials will play a significant role in defining the aesthetic appeal of the finished napkin rings. Consider the color palette of your table setting and the overall ambiance you wish to create, allowing these considerations to guide your selection of beads.
Using flat-nose pliers, gently open the loop at one end of the wire, creating an opening large enough to thread the beads onto the wire. This meticulous process requires patience and precision, ensuring that the wire remains smooth and free from any kinks or bends as you add the beads.
Carefully slide the beads onto the wire, arranging them in a sequence that resonates with your creative vision. Whether you opt for a symmetrical pattern, a random assortment, or a carefully curated sequence of colors and shapes, this step allows you to infuse each napkin ring with a unique and personalized touch.
As you thread the beads onto the wire, take a moment to appreciate the interplay of colors and textures, envisioning how the beads will enhance the visual appeal of the napkin rings once they are completed. This process offers a delightful opportunity to engage with the tactile and visual aspects of crafting, allowing you to immerse yourself in the creative journey.
Once the beads are in place, gently close the loop at the other end of the wire using flat-nose pliers, securing the beads within the graceful curves of the wire. This careful maneuver ensures that the beads are held firmly in position, creating a seamless and polished appearance for the napkin rings.
With the beads now adorning the wire loops, you have added a captivating and personalized element to your wire napkin rings, infusing them with charm and character. This transformative step sets the stage for the final phase of the crafting process, where you will secure the ends of the wire to complete the wire and bead napkin rings.
Read more: How To Make Burlap Napkin Rings
Step 4: Secure the Ends
As you approach the final stage of crafting your wire and bead napkin rings, it's essential to ensure that the ends of the wire are securely fastened to maintain the integrity of the design. This step not only adds a practical element to the napkin rings but also contributes to their overall durability and longevity.
Using flat-nose pliers, carefully manipulate the wire to create a small hook at one end, allowing for a secure closure that prevents the beads from sliding off. This meticulous maneuver requires precision and attention to detail, as the integrity of the entire napkin ring hinges on the effectiveness of this closure.
Once the hook is formed, gently guide the wire to create a loop that aligns with the initial curve, ensuring a seamless and harmonious appearance. This deliberate approach to shaping the wire contributes to the professional and polished look of the napkin rings, elevating them from simple DIY creations to elegant and functional table accessories.
With the first end securely fastened, repeat the process at the opposite end of the wire, mirroring the technique to create a matching closure. Consistency in the execution of these closures is crucial for producing a set of napkin rings that exude a sense of uniformity and refinement, enhancing their visual impact when displayed on your dining table.
As you secure the ends of the wire, take a moment to inspect each napkin ring, ensuring that the closures are snug and secure. This attention to detail underscores your commitment to creating high-quality and meticulously crafted napkin rings that will enhance your dining experience.
By securing the ends of the wire with precision and care, you complete the structural integrity of the wire and bead napkin rings, readying them for their role as stylish and functional table accents. This transformative step sets the stage for the final phase of the crafting process, where you will admire and showcase your handiwork, adding a touch of elegance and charm to your dining table.
With the ends of the wire securely fastened, your wire and bead napkin rings are now ready to take center stage, adding a delightful and personalized touch to your table setting.
Step 5: Complete the Napkin Rings
With the wire shaped and the beads adorning the graceful loops, the wire and bead napkin rings are now poised for the final touches that will complete their transformation into captivating table accessories. This pivotal step involves a meticulous assessment of each napkin ring, ensuring that every detail is refined to perfection before they take their place on the dining table.
Begin by inspecting each napkin ring, paying close attention to the alignment of the wire loops and the positioning of the beads. This critical evaluation allows you to make any necessary adjustments, ensuring that each napkin ring exudes a sense of balance and harmony. By fine-tuning the arrangement of the wire and beads, you elevate the visual appeal of the napkin rings, creating a cohesive and polished look that will captivate the eye.
As you assess the overall form of the napkin rings, take a moment to appreciate the artistry and craftsmanship that has gone into their creation. Each wire loop and bead has been thoughtfully selected and meticulously positioned, resulting in a set of napkin rings that bear the hallmark of handmade elegance. This reflection on the creative process adds a meaningful dimension to the napkin rings, infusing them with a sense of authenticity and individuality.
Once you are satisfied with the arrangement of the wire and beads, take a final moment to ensure that the closures are secure and the wire loops maintain their graceful shape. This last check ensures that the napkin rings are not only visually stunning but also practical and functional, ready to adorn your napkins with effortless charm.
With the completion of this meticulous assessment, your wire and bead napkin rings are now ready to take center stage, adding a delightful and personalized touch to your table setting. Whether you are preparing for a special occasion or simply enhancing your everyday dining experience, these handcrafted napkin rings are a testament to your creativity and attention to detail, infusing your table decor with a touch of elegance and charm.
Conclusion
In conclusion, the process of creating wire and bead napkin rings is a delightful journey that combines creativity, craftsmanship, and a personal touch. From the initial steps of measuring and cutting the wire to the final touches that complete the transformation of simple materials into elegant table accessories, this DIY project offers a rewarding and fulfilling experience.
Crafting wire and bead napkin rings allows individuals to infuse their dining table with a sense of individuality and style. The careful selection of beads, the meticulous shaping of the wire, and the thoughtful arrangement of elements culminate in a set of napkin rings that reflect the creator's unique aesthetic sensibilities. Each handmade napkin ring becomes a testament to the artistry and attention to detail that goes into its creation, adding a personalized and charming element to the dining experience.
Furthermore, the process of crafting wire and bead napkin rings provides an opportunity for individuals to engage with the tactile and visual aspects of creativity. From selecting beads that resonate with a specific color scheme to shaping the wire into graceful loops, this DIY project invites creators to immerse themselves in a hands-on and rewarding endeavor. The act of crafting napkin rings becomes a form of self-expression, allowing individuals to showcase their creativity and bring a touch of artistry to their dining table.
Moreover, the satisfaction of completing a set of wire and bead napkin rings is not limited to the aesthetic appeal of the finished products. It extends to the sense of accomplishment and pride that comes from creating something beautiful and functional with one's own hands. Whether used for personal enjoyment or shared as thoughtful gifts, these handmade napkin rings carry with them the essence of creativity and craftsmanship, enriching the dining experience and adding a touch of warmth and charm to the table setting.
In essence, the process of making wire and bead napkin rings transcends the mere act of crafting table accessories. It becomes a celebration of creativity, individuality, and the joy of infusing everyday objects with beauty and personality. As these handcrafted napkin rings find their place on the dining table, they serve as a reminder of the artistry and care that went into their creation, enriching the dining experience and creating lasting memories for those who gather around the table.
Frequently Asked Questions about How To Make Wire And Bead Napkin Rings
Was this page helpful?
At Storables.com, we guarantee accurate and reliable information. Our content, validated by Expert Board Contributors, is crafted following stringent Editorial Policies. We're committed to providing you with well-researched, expert-backed insights for all your informational needs.

0 thoughts on “How To Make Wire And Bead Napkin Rings”