Home>Renovation & DIY>Home Renovation Guides>How To Dry A Wet Crawl Space
Home Renovation Guides
How To Dry A Wet Crawl Space
Modified: October 28, 2024
Learn how to effectively dry a wet crawl space with our comprehensive home renovation guide. Protect your home from moisture and mold issues today!
(Many of the links in this article redirect to a specific reviewed product. Your purchase of these products through affiliate links helps to generate commission for Storables.com, at no extra cost. Learn more)
Introduction
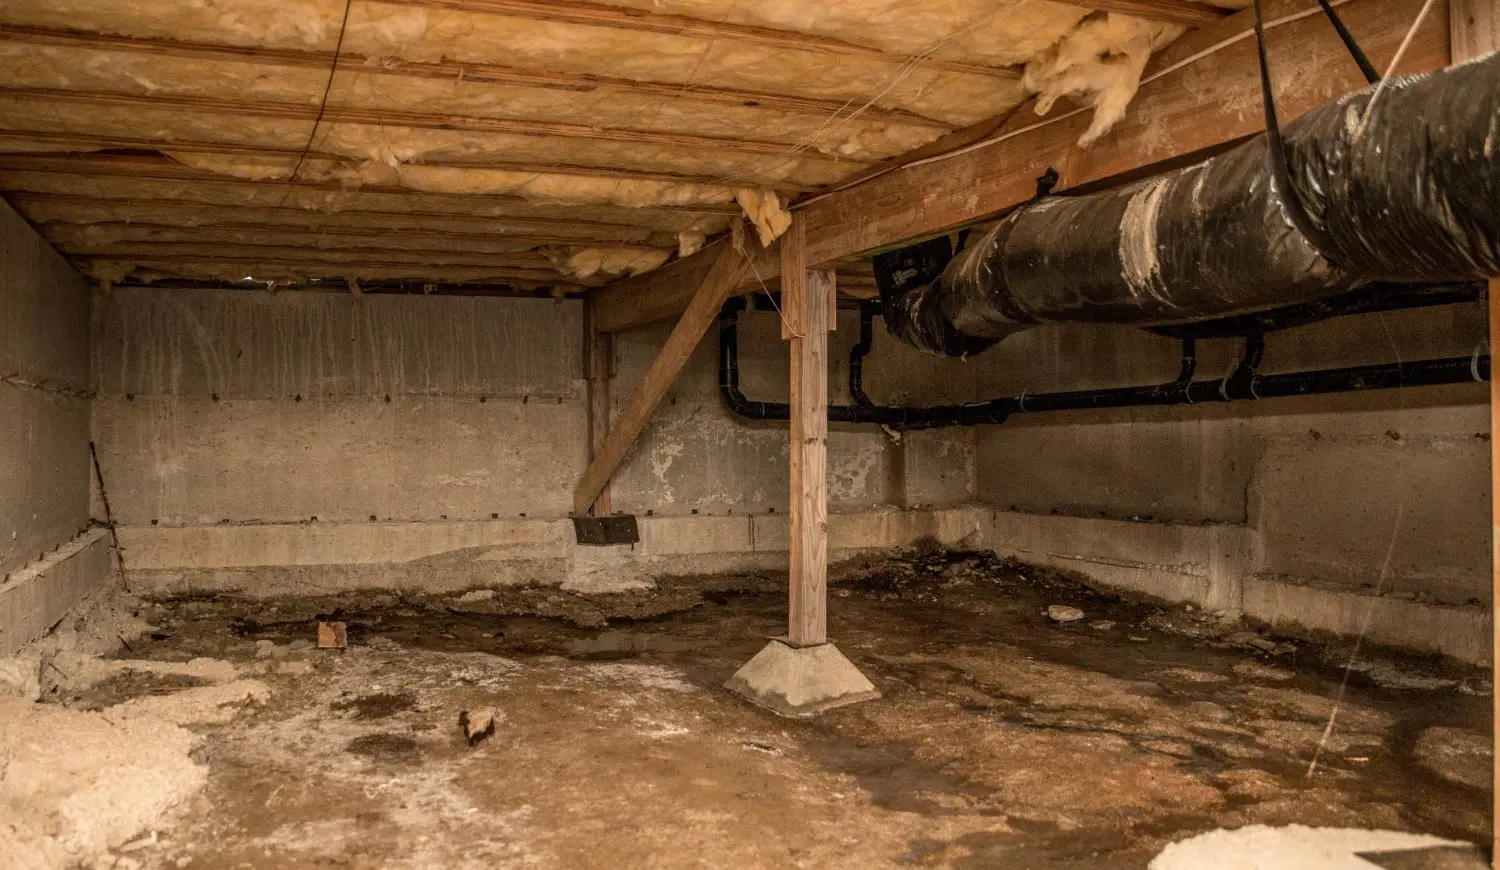
Dealing with a wet crawl space can be a daunting challenge for homeowners. Whether caused by heavy rainfall, plumbing leaks, or high humidity levels, a damp crawl space can lead to a host of problems, including mold growth, wood rot, and compromised indoor air quality. However, with the right approach and a bit of elbow grease, it's possible to effectively dry out a wet crawl space and prevent future moisture-related issues.
In this comprehensive guide, we'll walk you through the step-by-step process of drying a wet crawl space, offering practical tips and expert advice to help you tackle this common household concern. By following these proven methods, you can safeguard your home against the damaging effects of excess moisture and create a healthier living environment for you and your family.
So, roll up your sleeves and get ready to transform your damp crawl space into a dry, clean, and functional area that contributes to the overall well-being of your home. Let's dive into the essential steps for drying a wet crawl space and reclaiming control over your living space.
Key Takeaways:
- Say goodbye to a wet crawl space by removing standing water, installing a dehumidifier, and improving ventilation. Insulate pipes, seal cracks, and add a vapor barrier for a drier, healthier home.
- Transform your damp crawl space into a dry, clean, and functional area by following the step-by-step process. Remove water, install a dehumidifier, improve ventilation, insulate pipes, seal cracks, and add a vapor barrier.
Read more: How To Dry Wet Carpet
Step 1: Remove Standing Water
The first crucial step in drying a wet crawl space is to eliminate any standing water that may have accumulated. This is essential for preventing further moisture-related issues and creating a clean, dry environment. Here's how to effectively remove standing water from your crawl space:
-
Assess the Situation: Begin by assessing the extent of the water accumulation in your crawl space. Use a flashlight to carefully inspect the area and identify any pooling or standing water. Take note of the areas with the highest water levels and prioritize these for immediate attention.
-
Safety First: Before entering the crawl space, ensure that the electricity to the area is turned off to avoid any potential hazards. Additionally, wear protective gear such as rubber boots, gloves, and a face mask to shield yourself from potential contaminants in the water.
-
Pump Out the Water: If the standing water is several inches deep, a submersible pump may be necessary to effectively remove it. Submersible pumps are designed to handle water removal in confined spaces and can efficiently drain large volumes of water from the crawl space.
-
Utilize a Wet-Dry Vacuum: For smaller amounts of standing water, a wet-dry vacuum can be a valuable tool. Use the vacuum to extract water from the crawl space, paying close attention to corners and low-lying areas where water may collect.
-
Promote Drainage: Once the majority of the standing water has been removed, encourage proper drainage by directing any remaining water towards the sump pump or a suitable drainage outlet. This will help prevent future water accumulation and aid in the overall drying process.
By diligently removing standing water from your crawl space, you can lay the foundation for effective moisture remediation and create a healthier environment within your home. This initial step sets the stage for implementing further measures to address the underlying causes of the moisture issue and prevent its recurrence.
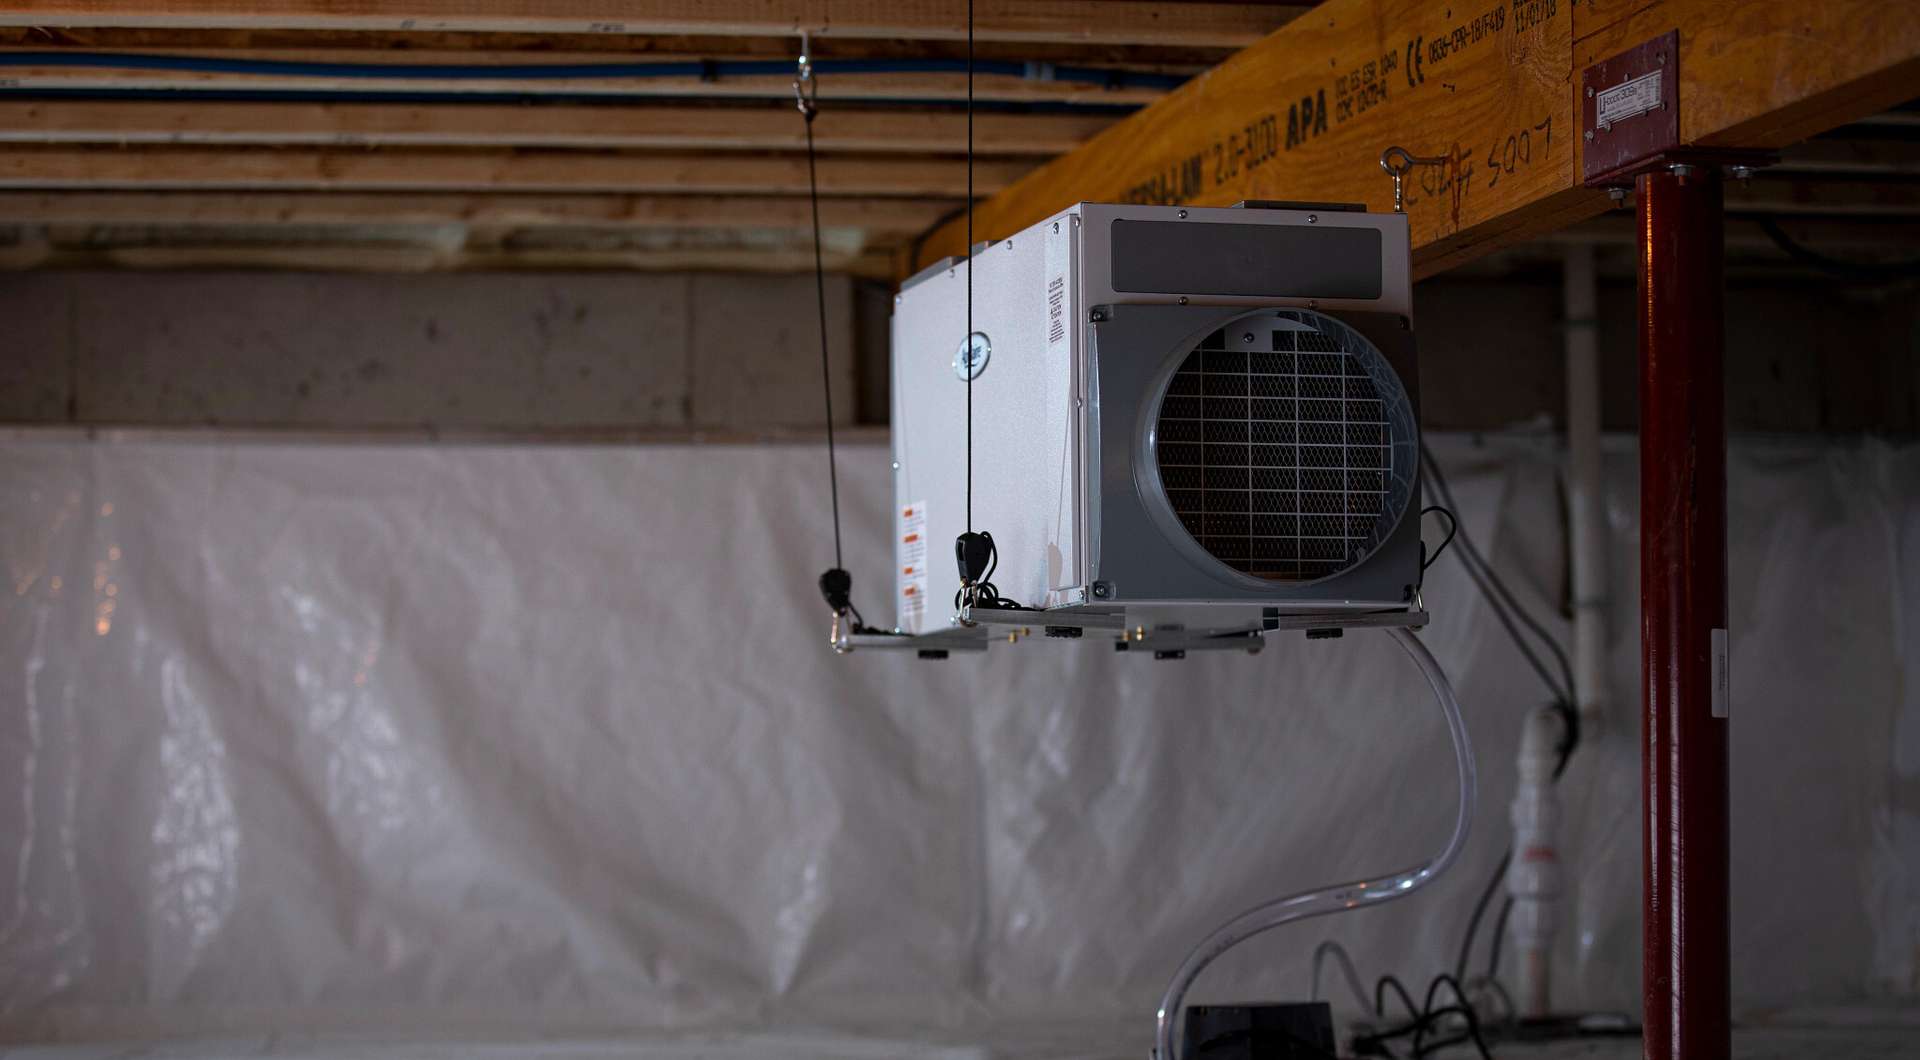
Step 2: Install a Dehumidifier
Installing a dehumidifier is a pivotal step in the process of drying a wet crawl space. A dehumidifier works by extracting excess moisture from the air, helping to maintain optimal humidity levels and prevent the reoccurrence of dampness. Here's a detailed look at how to effectively install and utilize a dehumidifier in your crawl space:
-
Selecting the Right Dehumidifier: When choosing a dehumidifier for your crawl space, opt for a model specifically designed for use in enclosed or confined spaces. Look for a unit with a high pint capacity to effectively manage moisture levels in the crawl space environment.
-
Determining Placement: Identify the most suitable location for the dehumidifier within the crawl space. Ideally, it should be placed in a central area to ensure even moisture extraction throughout the space. Additionally, consider proximity to a power source and accessibility for maintenance and monitoring.
-
Preparing the Space: Before installing the dehumidifier, ensure that the crawl space is free of debris and obstructions. Clear any clutter or obstacles to provide unobstructed access to the chosen installation spot.
-
Securing the Dehumidifier: Once the placement is determined, securely mount the dehumidifier in the designated location. Follow the manufacturer's instructions for proper installation, ensuring that the unit is stable and level.
-
Connecting Drainage: Many dehumidifiers feature a drainage hose or pump to expel the collected water. Connect the drainage system according to the manufacturer's guidelines, directing the expelled water towards a suitable drainage outlet or sump pump.
-
Setting Humidity Levels: After installation, set the desired humidity level on the dehumidifier. Aim for a relative humidity level of around 50% to 60% to effectively mitigate moisture-related issues and maintain a healthy crawl space environment.
-
Regular Maintenance: Establish a routine maintenance schedule for the dehumidifier, including periodic cleaning of the unit and monitoring of its performance. Regularly empty the water collection reservoir or ensure proper drainage to prevent overflow.
By installing a dehumidifier in your crawl space, you can actively combat excess moisture and create a drier, more comfortable environment. This proactive measure not only aids in drying out the crawl space but also contributes to the overall well-being of your home by mitigating the risk of mold growth and structural damage caused by prolonged exposure to moisture.
Step 3: Improve Ventilation
Improving ventilation is a critical aspect of drying a wet crawl space and preventing the buildup of excess moisture. Proper airflow helps to reduce humidity levels, expel stagnant air, and promote the evaporation of residual moisture. By enhancing ventilation within the crawl space, you can create a more inhospitable environment for mold and mildew while contributing to the overall health and integrity of your home.
Assessing Current Ventilation
Before implementing ventilation improvements, it's essential to assess the existing airflow and ventilation within the crawl space. Check for the presence of vents, air circulation obstructions, and signs of inadequate ventilation, such as musty odors or condensation on surfaces. This evaluation provides valuable insights into the specific ventilation needs of the crawl space and guides the implementation of targeted improvements.
Read more: How To Dry A Wet Car Carpet
Installing Vents and Air Circulation Systems
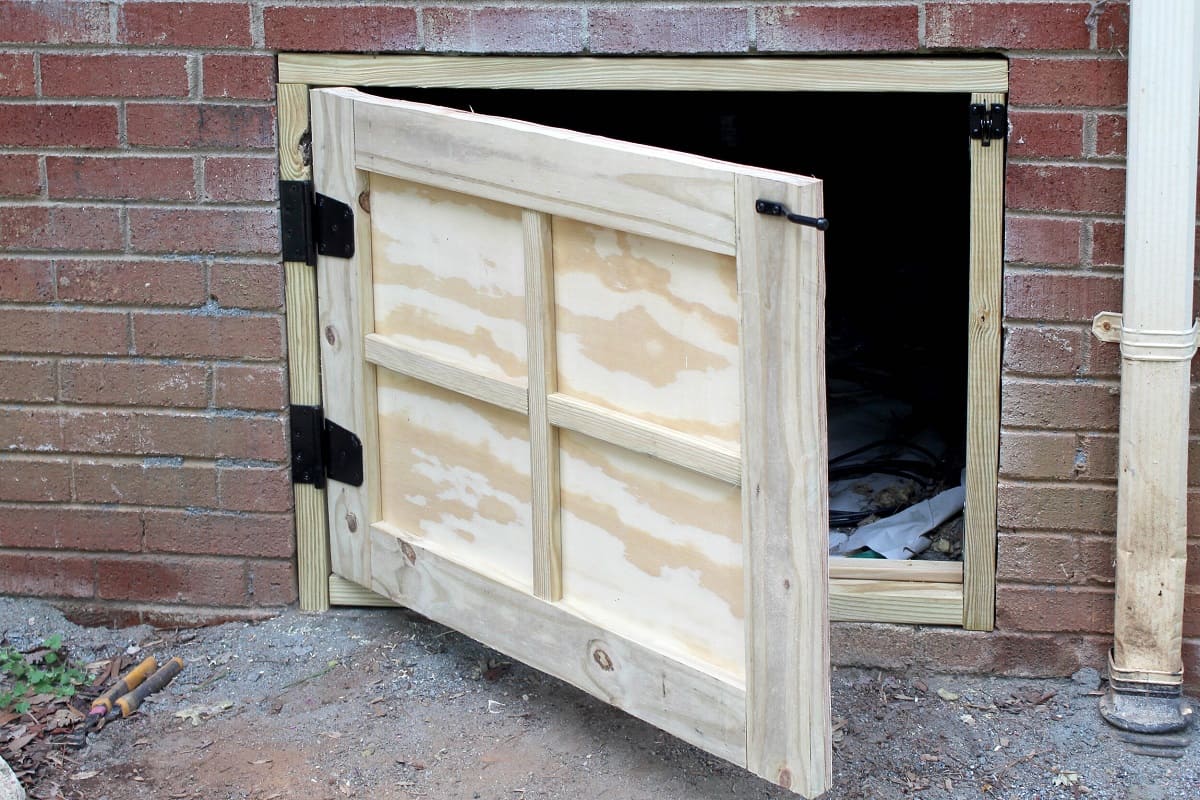
One effective method of improving ventilation is by installing vents to facilitate the exchange of air between the crawl space and the exterior environment. Vents allow fresh air to enter the space while enabling stale, moisture-laden air to exit, promoting air circulation and reducing humidity levels. Additionally, consider incorporating air circulation systems, such as fans or ductwork, to further enhance airflow and ventilation efficiency within the crawl space.
Utilizing Natural Ventilation Strategies
Harnessing natural ventilation strategies can significantly contribute to drying out the crawl space. This can be achieved by strategically placing vents or access points to capitalize on natural air currents and breezes. Cross-ventilation, which involves creating openings on opposite sides of the crawl space to encourage airflow, can be particularly effective in promoting natural ventilation and expelling damp air.
Sealing and Insulating Ductwork
In addition to introducing vents and air circulation systems, it's crucial to seal and insulate ductwork within the crawl space. Leaky or uninsulated ducts can contribute to moisture buildup and compromise ventilation efficiency. By sealing duct joints and insulating ductwork, you can prevent the infiltration of humid air and ensure that the ventilation system operates optimally, effectively expelling moisture and maintaining a dry environment.
Monitoring and Adjusting Ventilation
Once ventilation improvements are in place, it's important to monitor the airflow and humidity levels within the crawl space. Regularly check vents, fans, and air circulation systems to ensure they are functioning as intended. Adjust ventilation strategies as needed based on seasonal changes, weather patterns, and humidity fluctuations to maintain optimal airflow and moisture control.
By focusing on improving ventilation within the crawl space, you can effectively mitigate moisture-related issues and create a healthier, more resilient environment within your home. These targeted ventilation enhancements work in tandem with other moisture remediation measures to comprehensively address the underlying causes of dampness and promote long-term crawl space integrity.
Read more: How To Dry A Soaking Wet Blanket
Step 4: Insulate Pipes and Ducts
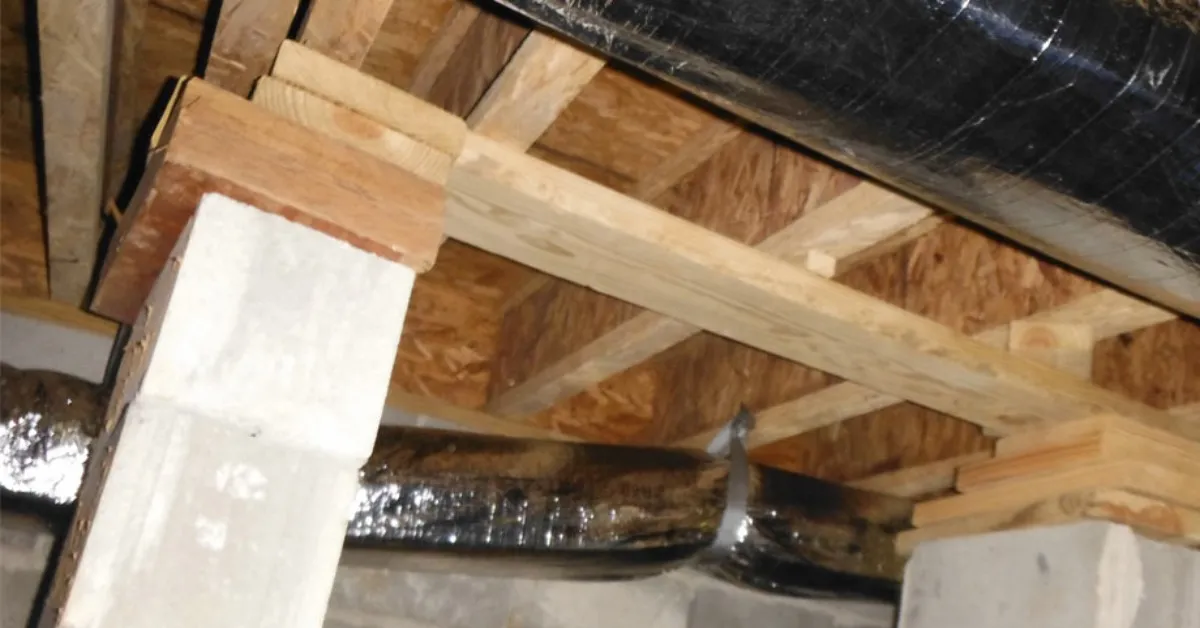
Proper insulation of pipes and ducts within the crawl space is a crucial step in the process of drying out a wet crawl space and safeguarding against moisture-related issues. Uninsulated pipes and ductwork are susceptible to condensation and temperature fluctuations, which can lead to the accumulation of moisture and compromise the overall integrity of the crawl space environment. By effectively insulating pipes and ducts, homeowners can mitigate the risk of moisture buildup, prevent energy loss, and maintain a more stable and dry crawl space.
Assessing Insulation Needs
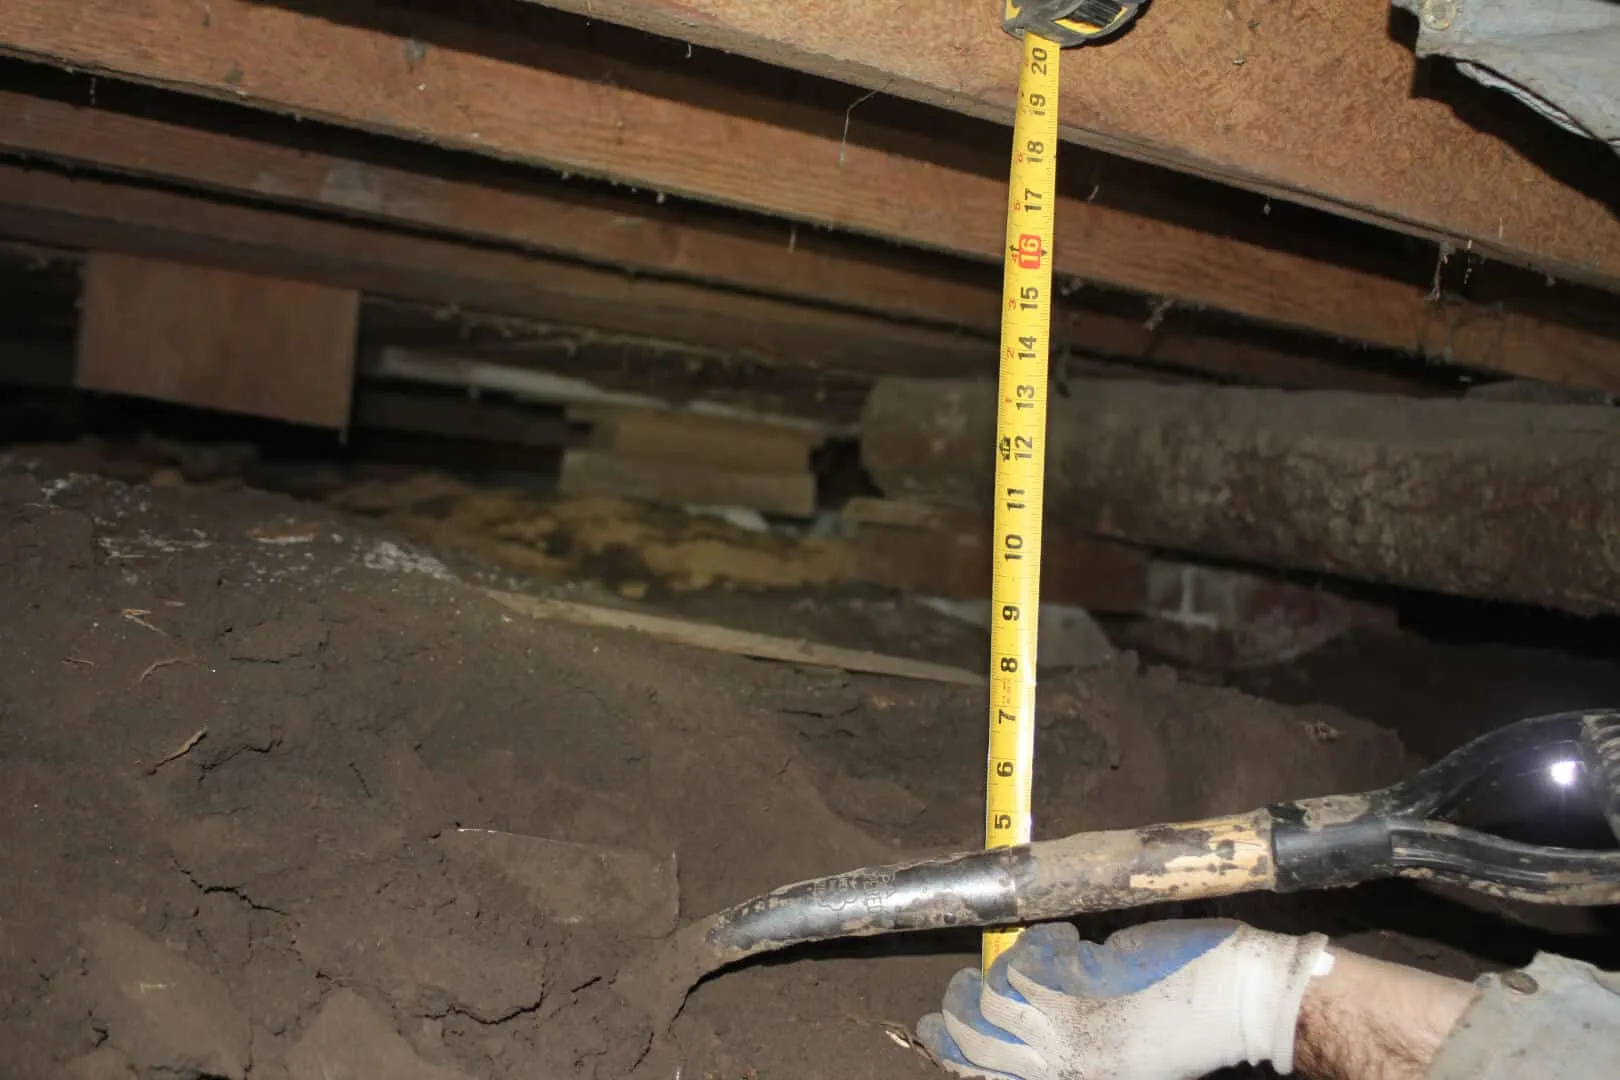
Before initiating the insulation process, it's essential to assess the current condition of pipes and ducts within the crawl space. Check for signs of condensation, moisture accumulation, or inadequate insulation, as these indicators can highlight areas requiring immediate attention. Additionally, evaluate the insulation R-value, which indicates the material's thermal resistance, to ensure that it meets the recommended standards for crawl space environments.
Selecting Insulation Materials
When selecting insulation materials for pipes and ducts, opt for products specifically designed for use in damp or enclosed spaces. Closed-cell foam insulation, fiberglass wraps, or foam pipe sleeves are commonly used for insulating pipes, providing a protective barrier against temperature variations and condensation. For ductwork insulation, consider utilizing foil-faced fiberglass insulation or rigid foam board insulation to effectively encapsulate and protect the ducts.
Insulation Installation Process
Begin the insulation process by thoroughly cleaning and preparing the surfaces of the pipes and ducts. Remove any debris, dust, or existing insulation material to ensure a clean and smooth application surface. Next, carefully measure and cut the insulation materials to fit the dimensions of the pipes and ducts, ensuring a snug and secure fit. Secure the insulation in place using appropriate fastening methods, such as tape, adhesive, or mechanical fasteners, to prevent displacement and ensure long-term effectiveness.
Read more: How To Maintain A Crawl Space
Sealing and Protecting Joints
In addition to insulating the pipes and ducts, it's crucial to seal and protect joints, seams, and connections to prevent air leakage and moisture infiltration. Utilize high-quality duct sealant or mastic to seal duct joints and seams, creating airtight connections that minimize the risk of air and moisture penetration. Similarly, apply insulation tape or sealant to seal gaps and joints in pipe insulation, effectively encapsulating the pipes and preventing condensation or temperature-related issues.
Monitoring and Maintenance
Once the insulation process is complete, regularly monitor the condition of the insulation to ensure its integrity and effectiveness. Periodically check for signs of moisture, condensation, or damage to the insulation materials, and promptly address any issues to maintain optimal insulation performance. Additionally, consider scheduling routine inspections of the pipes and ducts to identify and mitigate potential insulation-related concerns.
By insulating pipes and ducts within the crawl space, homeowners can fortify the space against moisture intrusion, temperature fluctuations, and energy inefficiency. This proactive measure not only contributes to the comprehensive drying of the crawl space but also enhances the overall resilience and functionality of the home's infrastructure. Properly insulated pipes and ducts play a pivotal role in creating a drier, more stable crawl space environment, ultimately contributing to the long-term well-being of the home.
Step 5: Seal Cracks and Holes
Addressing cracks and holes within the crawl space is a fundamental step in the process of drying out a wet crawl space and fortifying it against moisture intrusion. Cracks and gaps in the foundation, walls, and flooring can serve as entry points for water, humidity, and pests, compromising the integrity of the crawl space environment. By effectively sealing these openings, homeowners can mitigate the risk of moisture infiltration, enhance energy efficiency, and create a more resilient and habitable crawl space.
Assessment and Identification
Begin by conducting a thorough assessment of the crawl space to identify areas of concern, including cracks, gaps, and holes. Utilize a flashlight and inspect the perimeter walls, foundation, and flooring for signs of structural vulnerabilities. Pay close attention to areas where plumbing, electrical conduits, and utility penetrations are present, as these are common locations for cracks and openings that require sealing.
Read more: How To Inspect A Crawl Space
Selecting Sealant Materials
When sealing cracks and holes, it's essential to choose appropriate sealant materials that are designed for use in crawl spaces and can effectively withstand moisture and fluctuating environmental conditions. Consider using polyurethane-based sealants, epoxy injections, or hydraulic cement to seal larger cracks and gaps, providing durable and water-resistant protection. For smaller gaps and holes, silicone-based caulks or expanding foam sealants can be utilized to create airtight seals and prevent moisture intrusion.
Preparation and Application
Prepare the surfaces around the cracks and holes by cleaning them thoroughly to remove debris, dust, and any existing sealant or insulation material. Use a wire brush or vacuum to ensure that the surfaces are clean and free of contaminants. Next, carefully apply the selected sealant material to the cracks and gaps, ensuring complete coverage and a secure seal. For larger cracks, consider employing injection methods to effectively fill and seal the openings, creating a robust barrier against moisture and pests.
Reinforcing Structural Integrity
In addition to sealing visible cracks and holes, it's important to address any underlying structural issues that may contribute to moisture intrusion. Evaluate the integrity of the foundation, walls, and flooring, and consider consulting a professional if significant structural concerns are identified. Reinforcing the structural integrity of the crawl space through repairs and reinforcements can complement the sealing efforts, creating a more resilient and watertight environment.
Regular Inspection and Maintenance
After sealing the cracks and holes, regularly inspect the crawl space for signs of new cracks, gaps, or sealant deterioration. Periodically check the sealed areas for any indications of moisture infiltration or pest activity, and promptly address any issues to maintain the effectiveness of the seals. Additionally, consider incorporating regular maintenance of the crawl space as part of your home care routine to ensure ongoing protection against moisture intrusion.
By diligently sealing cracks and holes within the crawl space, homeowners can significantly enhance the space's resilience against moisture intrusion, pests, and structural vulnerabilities. This proactive measure not only contributes to the comprehensive drying of the crawl space but also reinforces the overall integrity and functionality of the home's foundation. A well-sealed crawl space serves as a vital component of a healthy and sustainable home environment, providing long-term protection against moisture-related concerns.
Read more: What Is A Crawl Space?
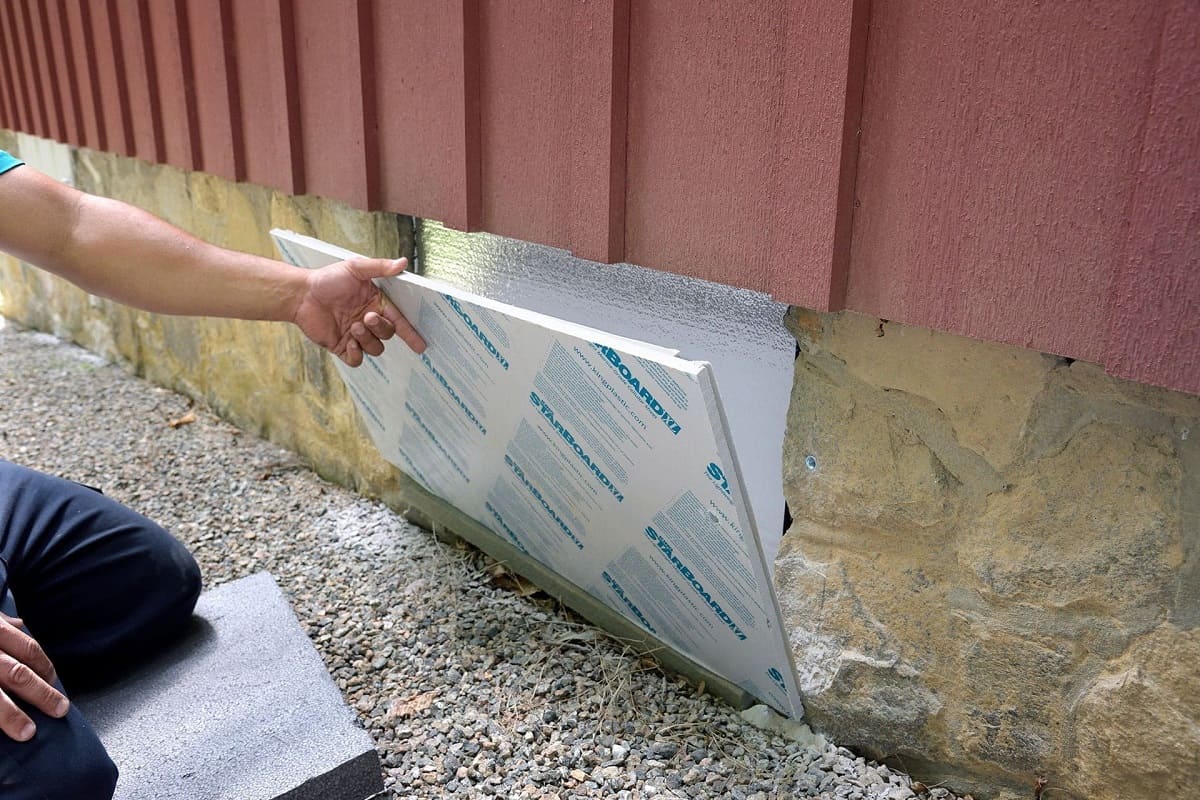
Step 6: Install a Vapor Barrier
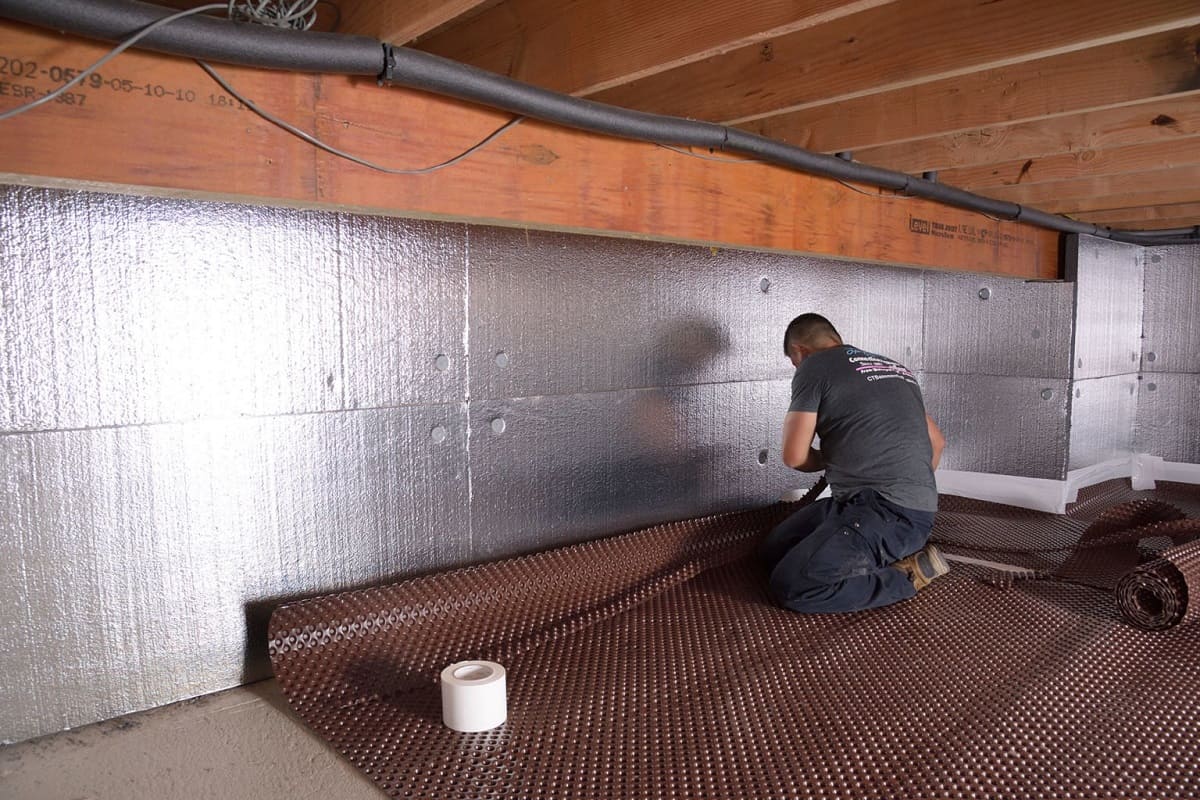
Installing a vapor barrier is a pivotal step in the process of drying out a wet crawl space and fortifying it against moisture infiltration. A vapor barrier, also known as a moisture barrier, serves as a protective layer that prevents the transmission of water vapor from the ground into the crawl space environment. By effectively installing a vapor barrier, homeowners can create a durable and resilient shield against moisture, condensation, and potential structural damage, ultimately contributing to a drier and healthier crawl space.
Assessing the Crawl Space Environment
Before proceeding with the installation of a vapor barrier, it's essential to assess the current condition of the crawl space and evaluate the specific moisture-related concerns. Check for signs of dampness, condensation, or water intrusion, and identify areas where moisture may be seeping into the space. Additionally, assess the composition of the crawl space floor, whether it is soil, gravel, or concrete, as this will influence the vapor barrier installation method.
Selecting Vapor Barrier Materials
When choosing vapor barrier materials, opt for high-quality, durable products designed for use in crawl spaces. Common vapor barrier materials include polyethylene sheets or reinforced plastic liners, which offer excellent moisture resistance and durability. Consider the thickness and strength of the vapor barrier material to ensure it can effectively withstand the conditions within the crawl space and provide long-term protection against moisture infiltration.
Preparation and Installation Process
Begin the installation process by thoroughly cleaning and preparing the crawl space floor to ensure a smooth and even surface for the vapor barrier. Remove any debris, rocks, or obstructions that may compromise the integrity of the vapor barrier installation. Next, carefully measure and cut the vapor barrier material to fit the dimensions of the crawl space floor, allowing for sufficient overlap at the seams and edges to create a continuous barrier.
Secure the vapor barrier in place using appropriate fastening methods, such as adhesives, tapes, or mechanical fasteners, to ensure that it remains taut and securely anchored to the floor. Pay special attention to sealing the seams and edges of the vapor barrier to create a seamless and watertight barrier that effectively prevents moisture penetration.
Monitoring and Maintenance
Once the vapor barrier is installed, regularly monitor its condition to ensure that it remains intact and effective in preventing moisture infiltration. Periodically inspect the vapor barrier for any signs of damage, tears, or displacement, and promptly address any issues to maintain its protective function. Additionally, consider incorporating routine maintenance of the vapor barrier as part of your overall crawl space care regimen to ensure ongoing moisture protection.
By installing a vapor barrier in the crawl space, homeowners can establish a robust defense against moisture intrusion, condensation, and potential structural concerns. This proactive measure not only contributes to the comprehensive drying of the crawl space but also reinforces the overall resilience and longevity of the home's foundation. A well-installed vapor barrier serves as a vital component of a healthy and sustainable crawl space environment, providing long-term protection against moisture-related challenges.
Conclusion
In conclusion, addressing a wet crawl space is a multifaceted endeavor that requires a strategic and comprehensive approach to effectively mitigate moisture-related issues and create a healthier living environment. By following the step-by-step process outlined in this guide, homeowners can successfully dry out a wet crawl space and fortify it against the damaging effects of excess moisture. From removing standing water to installing a vapor barrier, each step plays a crucial role in creating a drier, more resilient crawl space that contributes to the overall well-being of the home.
The initial step of removing standing water sets the stage for subsequent moisture remediation measures, laying the foundation for a comprehensive drying process. Installing a dehumidifier further aids in maintaining optimal humidity levels and preventing the reoccurrence of dampness, actively combating excess moisture and creating a more comfortable environment. Improving ventilation within the crawl space contributes to reducing humidity levels, expelling stagnant air, and promoting the evaporation of residual moisture, essential for creating an inhospitable environment for mold and mildew.
Insulating pipes and ducts, sealing cracks and holes, and installing a vapor barrier serve as vital protective measures, fortifying the crawl space against moisture intrusion, temperature fluctuations, and potential structural damage. These proactive steps not only contribute to the comprehensive drying of the crawl space but also enhance the overall resilience and functionality of the home's infrastructure.
By diligently addressing each aspect of the moisture remediation process, homeowners can create a drier, healthier crawl space that contributes to the long-term well-being of the home. Regular monitoring and maintenance of the crawl space, including ventilation systems, insulation, and vapor barriers, are essential for sustaining the effectiveness of the moisture remediation measures and ensuring ongoing protection against moisture-related concerns.
In essence, the successful drying of a wet crawl space is a testament to the proactive care and maintenance of the home, safeguarding against the detrimental effects of excess moisture and creating a more resilient and habitable living environment. By implementing the strategies outlined in this guide, homeowners can reclaim control over their crawl space, mitigate moisture-related concerns, and foster a healthier and more sustainable home environment for years to come.
Frequently Asked Questions about How To Dry A Wet Crawl Space
Was this page helpful?
At Storables.com, we guarantee accurate and reliable information. Our content, validated by Expert Board Contributors, is crafted following stringent Editorial Policies. We're committed to providing you with well-researched, expert-backed insights for all your informational needs.

0 thoughts on “How To Dry A Wet Crawl Space”