Home>Renovation & DIY>Home Renovation Guides>How To Replace Joists In Crawl Space
Home Renovation Guides
How To Replace Joists In Crawl Space
Modified: October 20, 2024
Learn how to replace joists in your crawl space with our comprehensive home renovation guide. Get expert tips and step-by-step instructions for a successful project.
(Many of the links in this article redirect to a specific reviewed product. Your purchase of these products through affiliate links helps to generate commission for Storables.com, at no extra cost. Learn more)
Introduction
When it comes to home renovation, addressing structural issues is crucial for maintaining the integrity and safety of your living space. One common concern that homeowners may encounter is the deterioration of joists in the crawl space. Joists play a vital role in supporting the floors above and ensuring the stability of the entire structure. Over time, factors such as moisture, pests, and age can lead to the weakening of these essential components, necessitating their replacement.
In this comprehensive guide, we will walk you through the step-by-step process of replacing joists in a crawl space. Whether you're a seasoned DIY enthusiast or a homeowner looking to tackle this project for the first time, understanding the intricacies of this undertaking is essential. By following the detailed instructions and expert tips provided in this guide, you can effectively address joist-related issues and restore the structural soundness of your home.
From assessing the extent of the damage to securing the new joists in place, each stage of the replacement process requires careful planning and execution. By gaining a thorough understanding of the tasks involved and the necessary materials and tools, you can approach this project with confidence and precision. Additionally, we will highlight the importance of proper preparation, safety measures, and post-replacement inspections to ensure that the new joists are installed securely and function as intended.
Whether you're dealing with sagging floors, noticeable structural issues, or simply aiming to fortify the foundation of your home, this guide will equip you with the knowledge and insights needed to navigate the joist replacement process effectively. By taking the time to address this critical aspect of home maintenance, you can enhance the longevity and stability of your property, providing a safe and secure environment for you and your family.
Now, let's delve into the detailed steps and essential considerations for replacing joists in your crawl space, empowering you to tackle this renovation project with skill and confidence.
Key Takeaways:
- Replacing joists in a crawl space involves assessing damage, gathering materials, preparing the space, removing old joists, installing new ones, and securing them. It’s a meticulous process that ensures a stable and resilient home foundation.
- By following a step-by-step guide and prioritizing safety and precision, homeowners can effectively address structural issues, fortify their home’s foundation, and create a safe living environment for their families.
Read more: How To Support Floor Joists In A Crawl Space
Step 1: Assessing the Damage
Before embarking on the process of replacing joists in your crawl space, it's crucial to conduct a thorough assessment of the existing damage. This initial step sets the foundation for the entire project, allowing you to accurately gauge the extent of the deterioration and formulate a targeted plan for the subsequent stages of the replacement process.
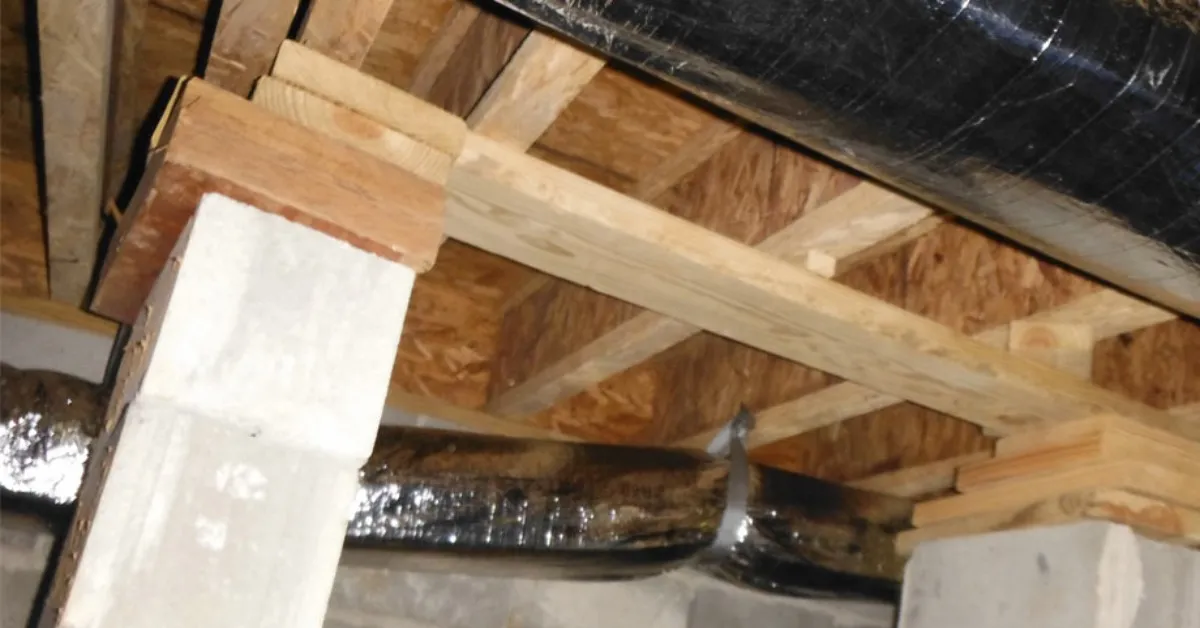
Begin by entering the crawl space and carefully inspecting the condition of the joists. Look for signs of water damage, such as rot, mold, or mildew, which can significantly weaken the structural integrity of the wood. Additionally, be on the lookout for pest infestations, as termites and other wood-destroying insects can cause extensive harm to the joists over time.
As you assess the damage, pay close attention to any visible sagging or unevenness in the floors above, as these issues often indicate joist-related problems. Use a flashlight to illuminate the crawl space, enabling you to identify areas of concern with clarity. Take note of any cracks, splits, or areas of decay in the joists, as these indicators will inform the scope of the replacement work required.
Furthermore, evaluate the overall condition of the crawl space, noting the presence of excess moisture or standing water. High humidity levels can exacerbate joist deterioration, making it essential to address any underlying moisture issues as part of the replacement process.
In addition to visual inspection, consider using a moisture meter to measure the level of dampness in the wood. This tool can provide valuable insights into the moisture content of the joists, aiding in the identification of areas that require targeted attention during the replacement.
Document the specific areas of damage and take measurements as needed, as this information will guide your decision-making when sourcing replacement materials and determining the scope of the repair work. By conducting a comprehensive assessment of the damage, you can gain a clear understanding of the challenges ahead and lay the groundwork for a successful joist replacement project.
Remember, a meticulous evaluation at this stage will inform the subsequent steps, ensuring that the replacement process is tailored to address the specific issues affecting your crawl space. With a detailed assessment in hand, you can proceed to gather the necessary materials and tools, ready to tackle the next phase of the joist replacement journey.
Step 2: Gathering Materials and Tools
Once you have completed a thorough assessment of the damage in your crawl space, the next crucial step in the joist replacement process is gathering the essential materials and tools required for the project. By ensuring that you have all the necessary items at your disposal, you can streamline the replacement process and minimize potential disruptions, allowing for a more efficient and effective execution of the renovation work.
Materials
-
Pressure-Treated Joists: Select high-quality pressure-treated lumber that is specifically designed for structural use. Ensure that the dimensions of the new joists align with the specifications of your crawl space, providing a precise fit for the replacement.
-
Joist Hangers and Nails: Acquire durable joist hangers and corrosion-resistant nails to securely attach the new joists to the existing framework. Opt for galvanized or stainless steel nails to mitigate the risk of rust and corrosion over time.
-
Shims and Blocking Material: Stock up on shims and blocking material to facilitate the leveling and stabilization of the new joists. These components play a crucial role in ensuring that the replacement joists are properly aligned and supported within the crawl space.
-
Moisture Barrier: Invest in a high-quality moisture barrier, such as a heavy-duty plastic sheet, to shield the new joists from potential moisture-related issues. This protective layer helps safeguard the wood against dampness, contributing to the long-term durability of the replacement structure.
-
Safety Equipment: Prioritize safety by obtaining protective gear, including gloves, goggles, and a respirator, to shield yourself from potential hazards during the replacement process. Additionally, consider using a headlamp or portable lighting to enhance visibility in the confined crawl space environment.
Tools
-
Circular Saw: A reliable circular saw is essential for accurately cutting the new joists to the required dimensions, ensuring a precise fit within the crawl space framework.
-
Pry Bar and Hammer: Equip yourself with a sturdy pry bar and a hammer to facilitate the removal of the old joists and any associated fasteners. These tools enable efficient dismantling of the deteriorated components, paving the way for the installation of the replacements.
-
Level and Measuring Tape: Utilize a high-quality level and a measuring tape to assess the alignment and dimensions of the replacement joists, promoting accuracy and uniformity in the installation process.
-
Power Drill and Screws: A power drill, accompanied by appropriate screws, is indispensable for securing the joist hangers and fastening the new joists to the existing framework. Opt for screws designed for outdoor or structural applications to ensure robust and reliable connections.
-
Crawl Space Access Tools: Depending on the accessibility of your crawl space, consider acquiring specialized tools such as a crawl space door opener or a compact work light to facilitate entry and maneuverability within the confined area.
By proactively gathering these materials and tools, you can set the stage for a seamless and efficient joist replacement endeavor. With the essential components in hand, you are well-prepared to progress to the subsequent stages of the project, ready to embark on the installation and securing of the new joists within your crawl space.
Read more: How To Remove Mold From Crawl Space Joists
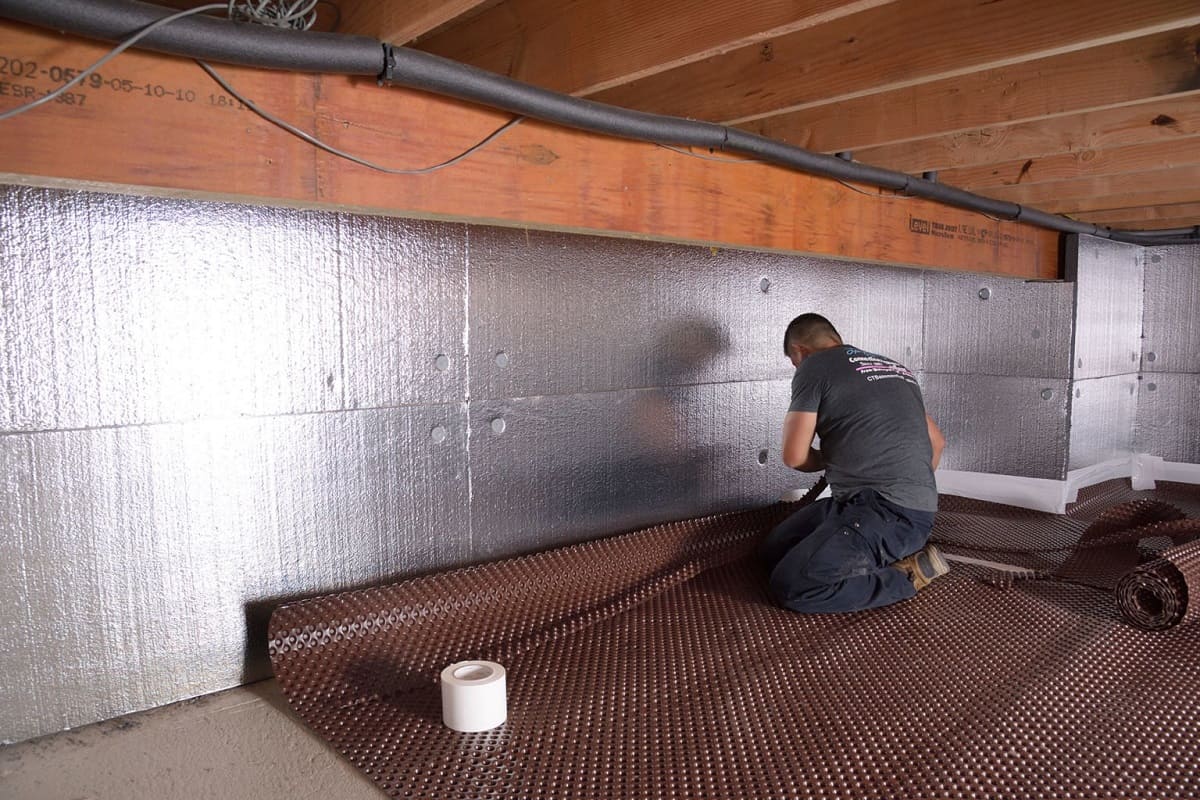
Step 3: Preparing the Crawl Space
Before initiating the installation of the new joists, it is imperative to prepare the crawl space to facilitate a smooth and efficient replacement process. This preparatory phase involves clearing the area, addressing any existing moisture issues, and creating a conducive environment for the subsequent stages of the joist replacement project.
Clearing Debris and Obstructions
Commence the preparation by clearing the crawl space of any debris, accumulated clutter, or obstructions that may impede the replacement work. Remove any stored items, excess insulation, or debris that could hinder access to the joist framework. This step not only enhances maneuverability within the crawl space but also ensures a clean and organized workspace for the installation of the new joists.
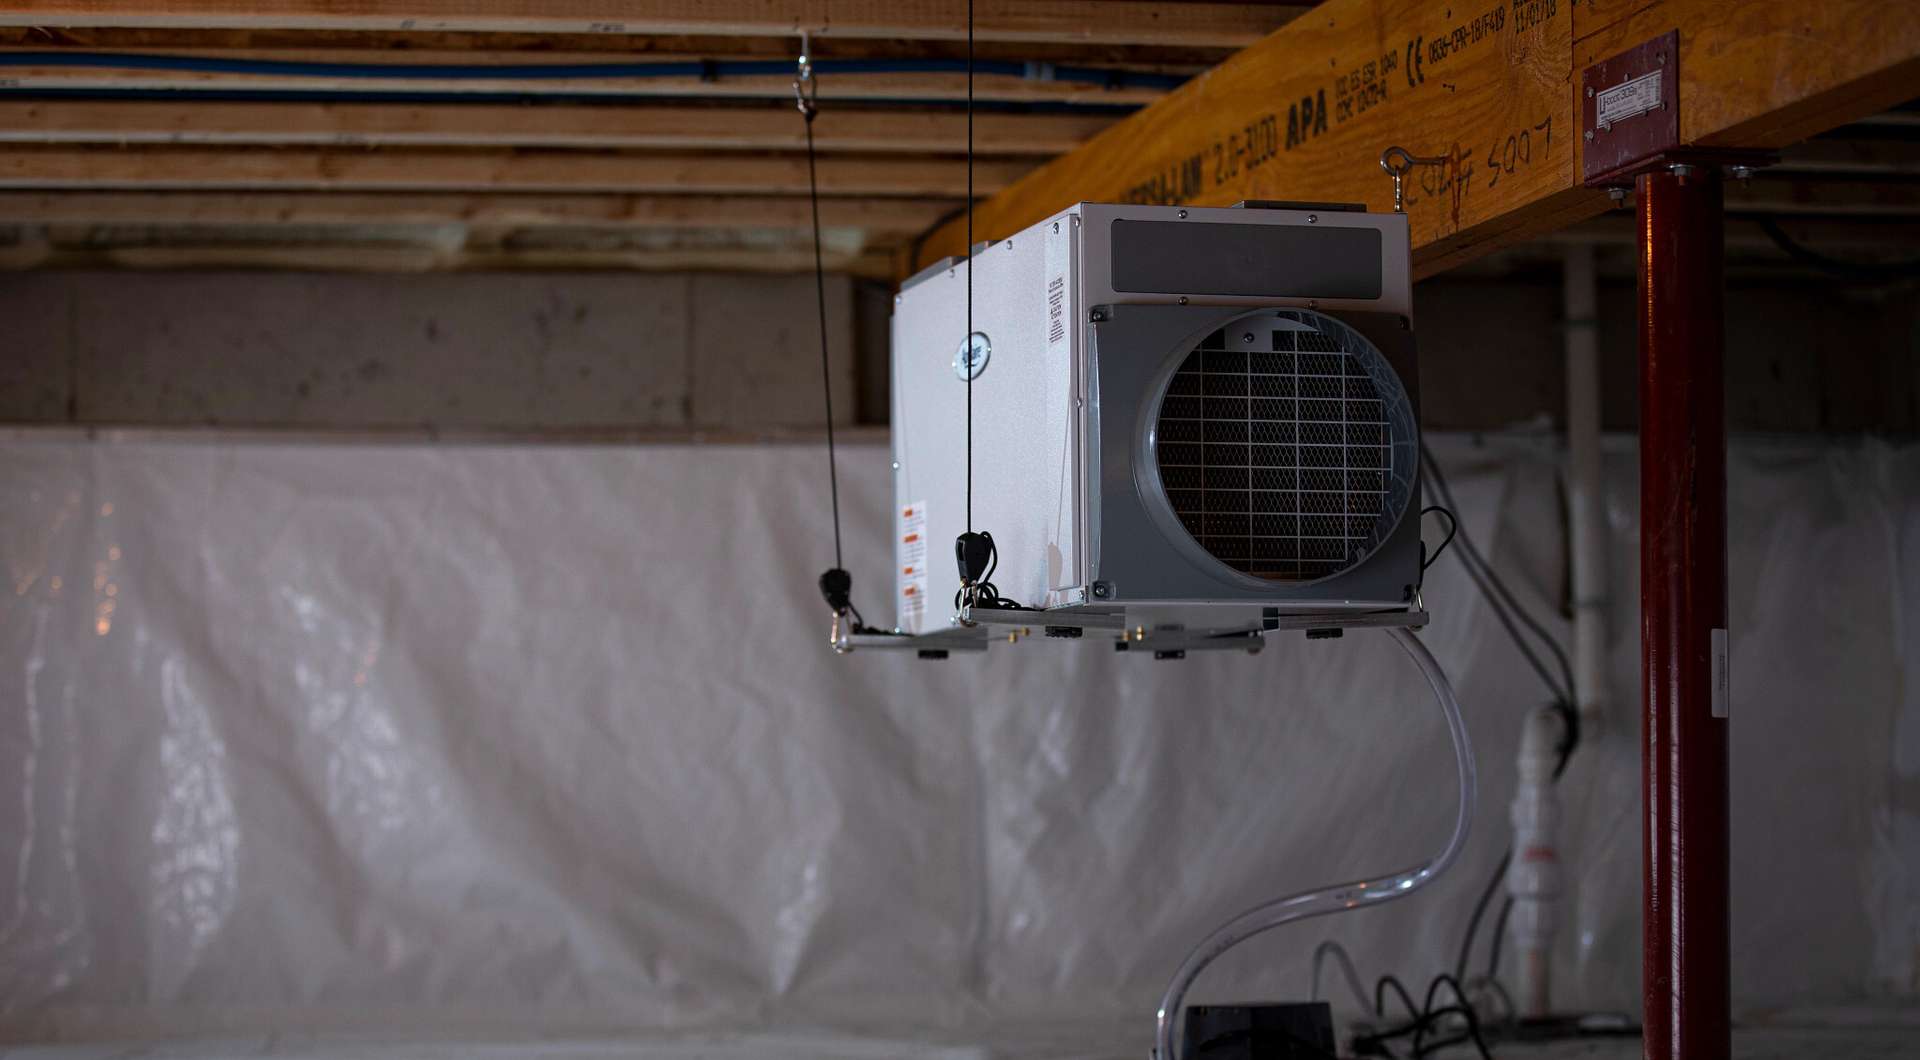
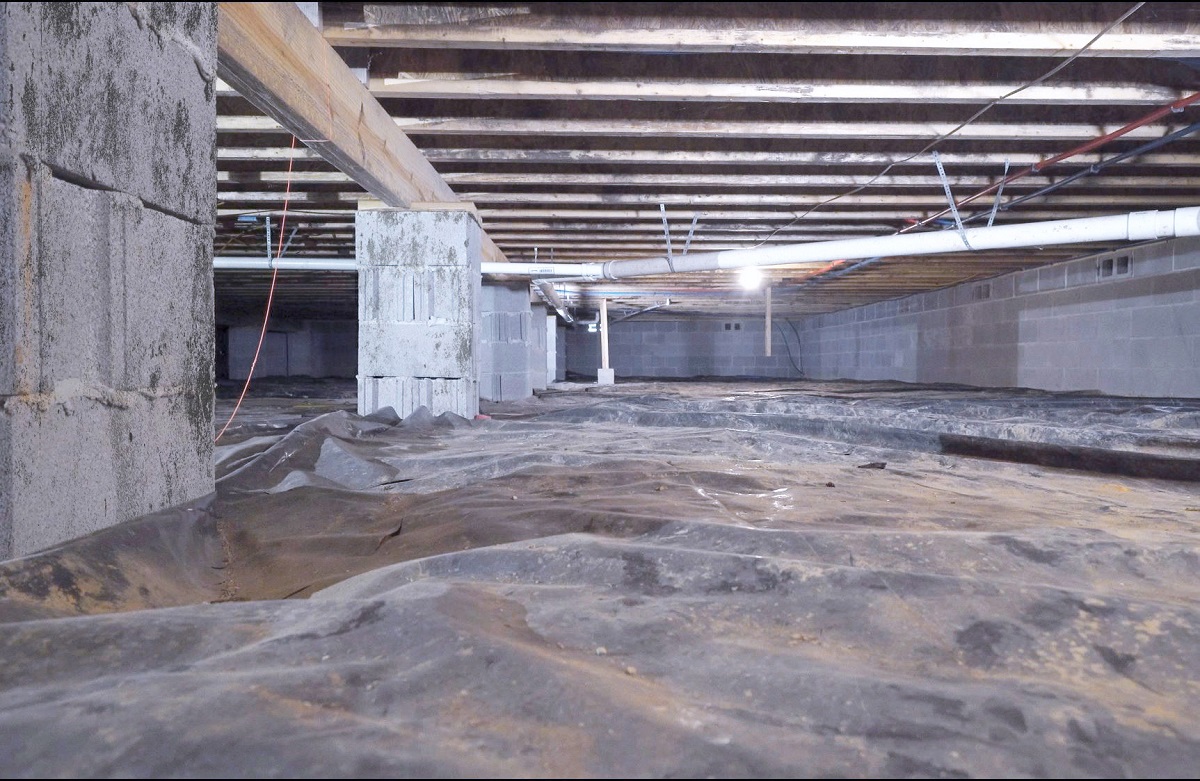
Addressing Moisture Concerns
Assess the moisture levels in the crawl space and take proactive measures to mitigate any existing dampness or humidity issues. If the area exhibits signs of moisture accumulation or inadequate ventilation, consider implementing moisture control strategies such as installing a dehumidifier, improving ventilation, or addressing drainage issues around the perimeter of the foundation. Additionally, verify that the crawl space floor is free from standing water and implement appropriate drainage solutions if necessary.
Creating Adequate Lighting and Ventilation
Enhance the visibility and air circulation within the crawl space by setting up portable lighting sources and ensuring proper ventilation. Adequate lighting is essential for carrying out precise measurements and installation tasks, while improved ventilation helps mitigate moisture buildup and promotes a more comfortable working environment. Consider utilizing portable LED work lights or battery-powered lanterns to illuminate the crawl space effectively.
Read more: How To Replace Sill Plate In A Crawl Space
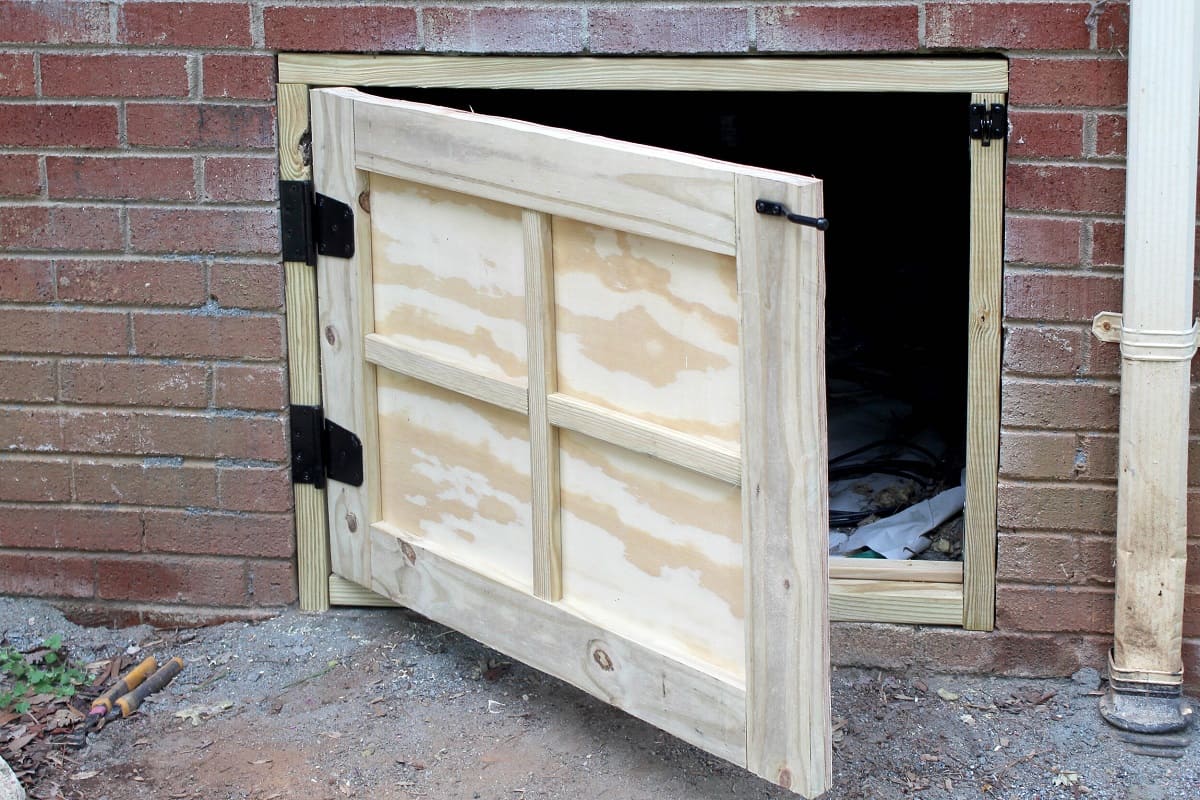
Establishing Safe Entry and Exit Points
Prioritize safety by establishing clear entry and exit points to the crawl space, ensuring ease of access for yourself and any assisting individuals. If the crawl space access point is obstructed or requires modifications, take the necessary steps to create a safe and unobstructed entryway. This may involve adjusting the crawl space door, installing a temporary access hatch, or utilizing specialized tools designed for confined space entry.
Implementing Protective Measures
Safeguard the surrounding areas and components within the crawl space by covering exposed surfaces and utilities with protective materials. Use durable drop cloths or plastic sheeting to shield HVAC ducts, electrical wiring, and plumbing fixtures from dust and debris generated during the replacement process. Additionally, consider securing the moisture barrier in place to prevent displacement during the installation of the new joists.
By meticulously preparing the crawl space in advance, you can optimize the conditions for replacing the joists, ensuring a well-organized and safe working environment. This proactive approach sets the stage for a successful and efficient joist replacement project, laying the groundwork for the subsequent stages of installing and securing the new structural components within the crawl space.
Step 4: Removing the Old Joists
The process of removing the old joists from the crawl space is a critical phase in the joist replacement project, requiring precision and careful execution. By systematically dismantling the deteriorated components, you pave the way for the installation of the new joists, setting the stage for a structurally sound and resilient foundation.
Assessment and Preparation
Before initiating the removal of the old joists, conduct a comprehensive assessment of the existing framework, identifying the points of attachment, fasteners, and any associated structural elements. Take note of any areas of decay, damage, or compromised integrity in the joists, as this information will guide the dismantling process. Additionally, ensure that the surrounding areas within the crawl space are adequately prepared, with protective measures in place to safeguard utilities and surfaces from potential debris.
Read more: How To Replace A Floor Joist
Dismantling Procedure
Begin the dismantling process by carefully removing any fasteners, nails, or screws securing the old joists to the supporting structure. Utilize a pry bar and hammer to delicately dislodge the joists, taking care to avoid unnecessary force that may cause damage to the adjacent components. As you progress, assess the condition of the subfloor and supporting beams, noting any areas that may require additional attention or reinforcement.
Safe Extraction and Disposal
Once the fasteners are removed, extract the old joists from the crawl space with caution, ensuring that surrounding areas and utilities remain undisturbed. Exercise care to prevent unnecessary strain on the surrounding framework and components, maintaining a methodical approach to minimize potential disruptions. Dispose of the old joists responsibly, adhering to local waste disposal regulations and environmental guidelines.
Inspection and Cleanup
Following the removal of the old joists, conduct a thorough inspection of the exposed framework and subfloor, verifying the integrity of the supporting elements. Address any residual debris or remnants from the dismantling process, clearing the workspace to prepare for the subsequent installation of the new joists. Take this opportunity to assess the overall condition of the crawl space, noting any additional measures required to optimize the environment for the upcoming replacement work.
By meticulously executing the removal of the old joists, you lay the groundwork for the seamless integration of the new structural components, advancing towards the restoration of a resilient and stable foundation within your crawl space. This pivotal phase sets the stage for the subsequent installation and securing of the replacement joists, propelling the joist replacement project towards its culmination.
Step 5: Installing the New Joists
With the old joists successfully removed and the crawl space meticulously prepared, the installation of the new joists marks a pivotal phase in the joist replacement process. This step involves positioning and securing the replacement components with precision and care, ensuring that they seamlessly integrate with the existing framework and contribute to the structural stability of the entire system.
Read more: How To Maintain A Crawl Space
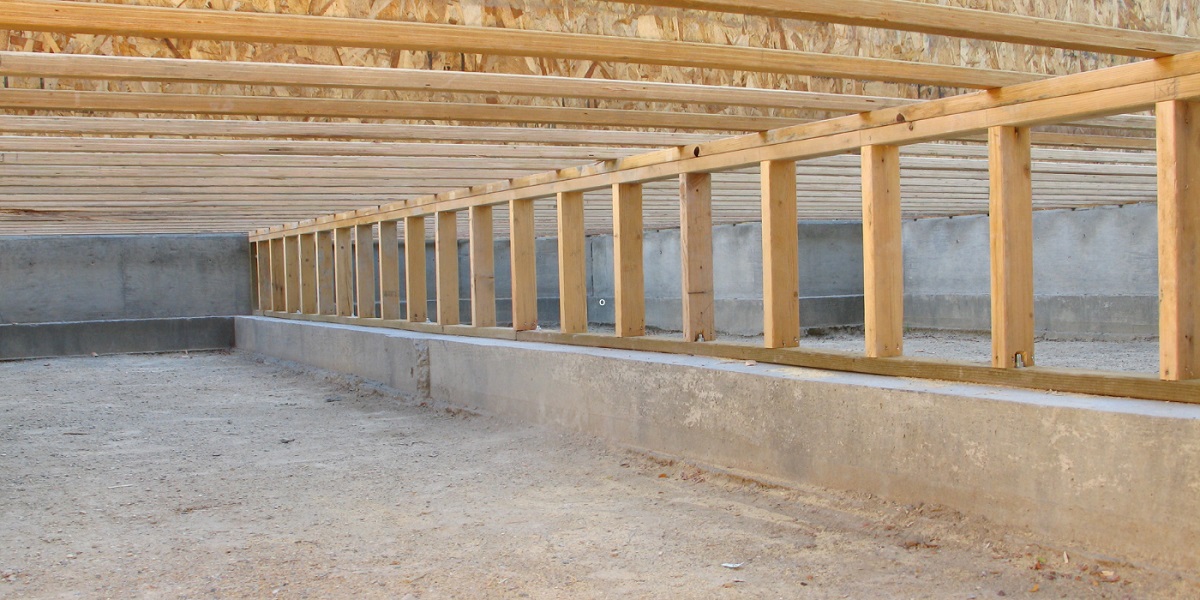
Positioning and Alignment
Commence the installation by carefully positioning the new joists within the crawl space, aligning them with the designated support points and ensuring uniform spacing between the components. Utilize a level and measuring tape to verify the alignment and dimensions of the replacement joists, promoting accuracy and consistency in their placement. Pay close attention to any shimming or leveling requirements, addressing any discrepancies to achieve a balanced and uniform framework.
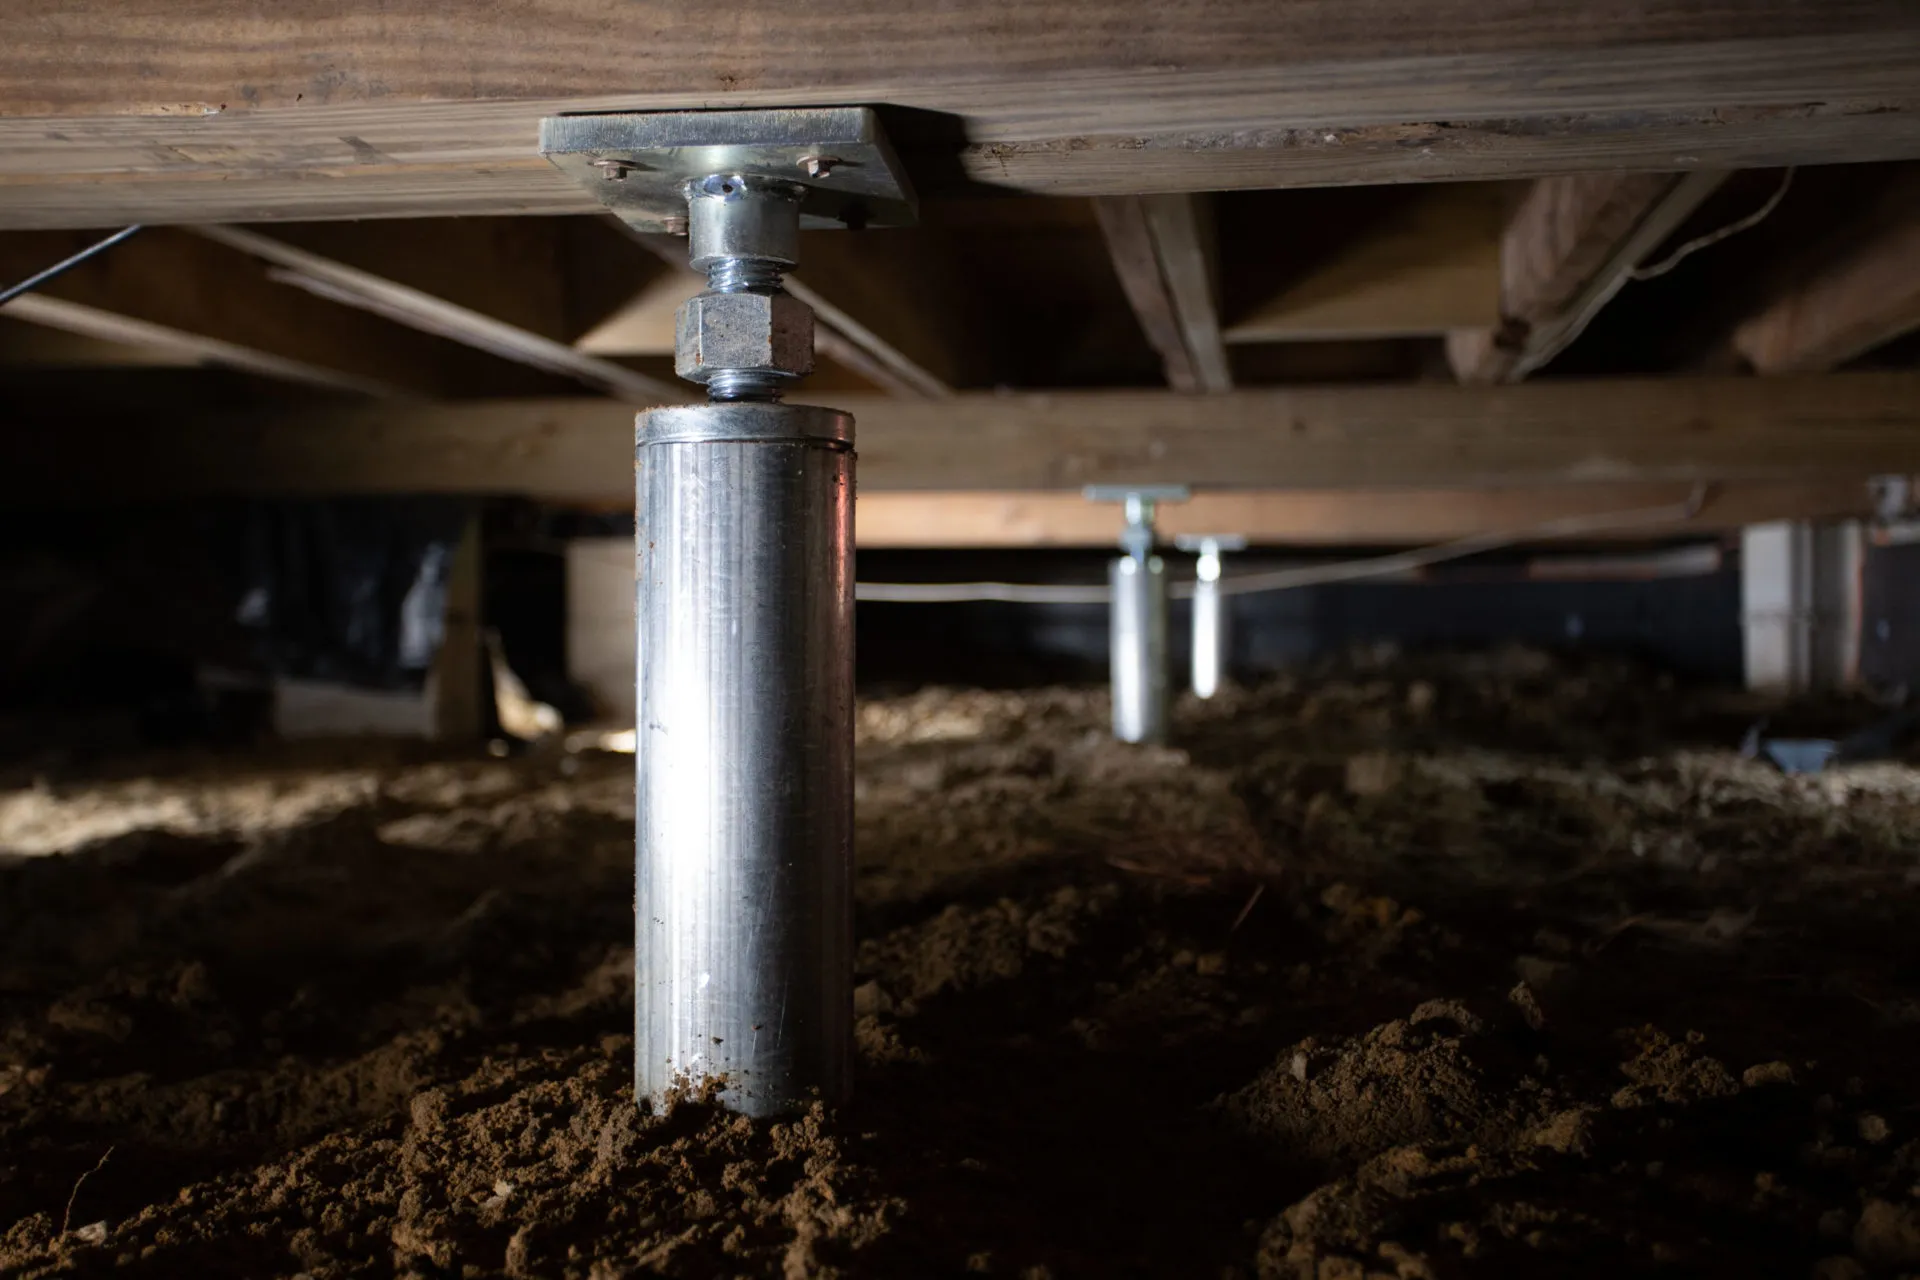
Attachment and Securing
Once the new joists are positioned, proceed to secure them to the existing framework using high-quality joist hangers and corrosion-resistant nails. Ensure that the joist hangers are affixed securely to the supporting structure, providing robust and reliable connections for the replacement components. Utilize appropriate fastening techniques and tools to guarantee the stability and integrity of the newly installed joists, reinforcing their role in supporting the floors above and maintaining the structural cohesion of the crawl space.
Integration of Blocking and Supports
Incorporate blocking and additional supports as needed to fortify the new joists and enhance their load-bearing capacity. Strategically place blocking material between the replacement components, reinforcing their alignment and minimizing potential movement or shifting. By integrating these supplementary elements, you bolster the structural robustness of the joist framework, contributing to its long-term resilience and functionality.
Verification and Adjustment
Following the initial installation, conduct a comprehensive verification of the newly installed joists, assessing their alignment, stability, and integration with the surrounding framework. Address any minor adjustments or fine-tuning required to optimize the positioning and support of the replacement components, ensuring that they function cohesively within the crawl space environment. Utilize the level and visual inspection to confirm the uniformity and integrity of the installed joists, making necessary refinements to achieve an optimal outcome.
Read more: How To Inspect A Crawl Space
Adherence to Specifications and Standards
Throughout the installation process, adhere to the recommended specifications and structural standards governing the placement and securing of joists within a crawl space. Verify that the dimensions, materials, and attachment methods align with industry best practices and local building codes, ensuring compliance with regulatory requirements and safety protocols. By upholding these standards, you reinforce the structural integrity of the joist framework, promoting a secure and resilient foundation for the floors above.
By methodically executing the installation of the new joists, you advance towards the culmination of the joist replacement project, setting the stage for the subsequent securing and inspection of the newly integrated components. This pivotal phase represents a significant stride towards fortifying the structural soundness of your home, underscoring the importance of precision and diligence in the installation process.
Step 6: Securing the Joists in Place
Securing the newly installed joists within the crawl space is a critical phase that demands meticulous attention to detail and a steadfast commitment to structural integrity. This step focuses on fortifying the connections, enhancing the stability of the joists, and ensuring their seamless integration with the existing framework. By prioritizing robust securing methods and adherence to industry standards, you can solidify the foundation of your home and instill confidence in the long-term resilience of the structural system.
Reinforcement of Connections
Begin by reinforcing the connections between the new joists and the supporting structure, utilizing appropriate fasteners and attachment methods to establish durable and reliable bonds. Employ corrosion-resistant screws or nails to secure the joist hangers and ensure that the fastening points exhibit exceptional strength and stability. By fortifying these connections, you enhance the load-bearing capacity of the joists and mitigate the risk of displacement or structural compromise over time.
Application of Blocking and Bracing
Integrate blocking and bracing elements as needed to augment the stability and rigidity of the newly installed joists. Strategically position blocking material between the joists, reinforcing their alignment and minimizing potential lateral movement. Additionally, consider the implementation of diagonal bracing to further bolster the structural integrity of the framework, promoting enhanced resistance to dynamic loads and environmental factors.
Read more: What Is A Crawl Space?
Evaluation of Load Distribution
Conduct a comprehensive evaluation of the load distribution across the newly secured joists, verifying that the weight-bearing capacity is uniformly distributed and aligned with the intended structural design. Utilize a level and measuring tools to assess the deflection and alignment of the joists, making necessary adjustments to optimize their load-bearing performance. By ensuring balanced load distribution, you contribute to the longevity and functionality of the joist framework, mitigating the risk of uneven stress and potential structural issues.
Adherence to Safety and Compliance
Throughout the securing process, prioritize safety considerations and adherence to regulatory standards governing structural installations. Verify that the securing methods align with industry best practices and local building codes, encompassing the use of appropriate fasteners, hangers, and bracing components. By upholding these safety and compliance measures, you reinforce the stability and resilience of the joist framework, fostering a secure and code-compliant structural system.
Post-Securing Inspection
Following the completion of the securing process, conduct a thorough post-installation inspection of the joists, verifying the integrity of the connections and the overall stability of the framework. Address any potential areas of concern or deviations from the prescribed securing methods, ensuring that the joists are firmly anchored and poised to fulfill their structural role effectively. By conducting a meticulous inspection, you instill confidence in the reliability and longevity of the secured joists, laying the groundwork for the final phase of the joist replacement project.
By methodically securing the newly installed joists within the crawl space, you elevate the structural robustness of your home, underscoring the significance of precision and diligence in fortifying the foundation. This pivotal phase represents a decisive stride towards ensuring the enduring stability and resilience of the structural system, setting the stage for the subsequent inspection and testing of the secured joists.
Step 7: Inspecting and Testing the Repairs
With the newly installed joists securely in place within the crawl space, the final phase of the joist replacement project centers on conducting a comprehensive inspection and rigorous testing of the repairs. This critical step serves as a pivotal validation of the structural integrity and functionality of the replaced joists, ensuring that they meet the requisite standards and contribute to the enduring stability of the home.
Read more: How To Close Vents In Crawl Space
Thorough Visual Inspection
Initiate the inspection process by conducting a thorough visual assessment of the newly installed joists and the surrounding framework. Verify that the joists exhibit uniform alignment, secure attachment, and optimal load-bearing positioning. Pay close attention to the connections, hangers, and bracing elements, scrutinizing them for any signs of compromise or inadequacy. Additionally, assess the overall condition of the crawl space, noting any residual debris, moisture, or potential sources of concern that may impact the long-term performance of the joists.
Structural Alignment and Leveling
Utilize a level and measuring tools to confirm the structural alignment and leveling of the replaced joists, ensuring that they adhere to the prescribed specifications and industry standards. Address any minor deviations or discrepancies, making necessary adjustments to optimize the uniformity and stability of the framework. By prioritizing precise alignment and leveling, you reinforce the foundational integrity of the joists, mitigating the risk of structural issues and ensuring their seamless integration within the crawl space environment.
Load-Bearing Capacity Verification
Conduct load-bearing capacity tests to validate the resilience and functionality of the replaced joists, assessing their ability to support the designated loads and distribute weight effectively. Utilize calibrated weights or simulated loads to subject the joists to controlled stress, evaluating their deflection and response under varying pressure. Verify that the load distribution remains uniform and within the prescribed tolerances, affirming the structural soundness and load-bearing capacity of the newly installed components.
Moisture and Environmental Resilience
Assess the resilience of the replaced joists to moisture and environmental factors, verifying that they are adequately protected against potential deterioration and decay. Utilize a moisture meter to measure the moisture content of the wood, ensuring that it falls within the acceptable range for structural integrity. Additionally, consider implementing supplementary moisture barriers or protective coatings to fortify the joists against the detrimental effects of humidity and environmental exposure.
Read more: How To Dig Out Crawl Space
Compliance and Safety Validation
Ensure that the joist replacement work aligns with regulatory standards and safety protocols, encompassing adherence to local building codes and industry best practices. Verify that the installation methods, materials, and securing techniques comply with the prescribed guidelines, promoting a secure and code-compliant structural system. By upholding these standards, you reinforce the safety and longevity of the joist framework, instilling confidence in its resilience and compliance with regulatory requirements.
Post-Testing Adjustments and Refinements
Address any identified areas of concern or deviations from the prescribed specifications, making necessary adjustments and refinements to optimize the performance and resilience of the replaced joists. Fine-tune the securing methods, alignment, or load distribution as needed, ensuring that the joists meet the stringent criteria for structural stability and longevity. By proactively addressing potential issues, you bolster the reliability and functionality of the joist framework, setting the stage for its enduring performance and resilience.
By meticulously conducting the inspection and testing of the repairs, you validate the efficacy and resilience of the replaced joists, underscoring the significance of precision and diligence in ensuring the enduring stability and functionality of the structural system. This pivotal phase represents a decisive stride towards fortifying the foundation of your home, setting the stage for its enduring structural soundness and resilience.
Conclusion
In conclusion, the process of replacing joists in a crawl space is a substantial undertaking that demands meticulous attention to detail, precision, and a steadfast commitment to structural integrity. By embarking on this comprehensive renovation journey, homeowners can address critical structural issues, fortify the foundation of their homes, and ensure the enduring stability and resilience of the entire structural system.
Throughout the step-by-step guide, we have delved into the intricacies of the joist replacement process, from the initial assessment of damage to the final inspection and testing of the repairs. Each stage of the replacement journey underscores the importance of thorough preparation, precise execution, and adherence to industry standards, culminating in the restoration of a resilient and stable foundation within the crawl space.
The assessment of damage serves as the foundational pillar of the replacement process, providing crucial insights into the extent of deterioration and guiding the subsequent phases of the project. By meticulously evaluating the condition of the existing joists and the crawl space environment, homeowners can formulate targeted plans for the replacement work, ensuring that the subsequent steps are tailored to address the specific structural challenges.
The meticulous gathering of materials and tools underscores the proactive approach to streamlining the replacement process, minimizing potential disruptions, and fostering an efficient and effective execution of the renovation work. By ensuring that essential components are readily available, homeowners can navigate the replacement journey with confidence and precision, equipped with the necessary resources to address joist-related issues effectively.
The preparatory phase, focusing on clearing the crawl space, addressing moisture concerns, and establishing safe entry points, underscores the significance of creating a conducive environment for the subsequent replacement work. By prioritizing safety, organization, and environmental optimization, homeowners set the stage for a seamless and efficient joist replacement endeavor, ensuring a well-prepared and secure workspace for the installation of the new joists.
The meticulous execution of removing the old joists and installing the new components underscores the pivotal strides towards fortifying the structural integrity of the crawl space. By methodically dismantling the deteriorated components and seamlessly integrating the replacements, homeowners advance towards the restoration of a resilient and stable foundation, underscoring the importance of precision and diligence in the renovation process.
The securing of the newly installed joists and the subsequent inspection and testing of the repairs represent the conclusive validation of the structural integrity and functionality of the replaced components. By prioritizing robust securing methods, adherence to industry standards, and rigorous testing, homeowners instill confidence in the enduring stability and resilience of the structural system, underscoring the significance of precision and diligence in fortifying the foundation of their homes.
In essence, the comprehensive guide to replacing joists in a crawl space empowers homeowners to navigate this critical renovation endeavor with skill, confidence, and a steadfast commitment to structural soundness. By embracing the intricacies of the replacement process and upholding the prescribed standards, homeowners can fortify the foundation of their homes, ensuring a safe, secure, and resilient living environment for themselves and their families.
Frequently Asked Questions about How To Replace Joists In Crawl Space
Was this page helpful?
At Storables.com, we guarantee accurate and reliable information. Our content, validated by Expert Board Contributors, is crafted following stringent Editorial Policies. We're committed to providing you with well-researched, expert-backed insights for all your informational needs.

0 thoughts on “How To Replace Joists In Crawl Space”