Home>Renovation & DIY>Home Renovation Guides>How To Clean Out Crawl Space
Home Renovation Guides
How To Clean Out Crawl Space
Modified: October 20, 2024
Learn how to effectively clean out your crawl space with our comprehensive home renovation guide. Ensure a healthier home environment with our expert tips and advice.
(Many of the links in this article redirect to a specific reviewed product. Your purchase of these products through affiliate links helps to generate commission for Storables.com, at no extra cost. Learn more)
Introduction
Cleaning out a crawl space may not be the most glamorous home renovation task, but it is a crucial aspect of maintaining a healthy and functional home. Over time, crawl spaces can accumulate debris, moisture, and even mold, posing potential risks to both the structural integrity of the house and the health of its occupants. Therefore, taking the time to thoroughly clean and maintain this often overlooked area can have a significant impact on the overall well-being of your home.
In this comprehensive guide, we will walk you through the step-by-step process of cleaning out a crawl space, from safety precautions to sealing and insulating. By following these guidelines, you can ensure that your crawl space remains clean, dry, and free from potential hazards. Whether you are a seasoned DIY enthusiast or a homeowner looking to tackle this project for the first time, this guide will equip you with the knowledge and confidence to effectively clean out your crawl space and create a healthier living environment for you and your family.
So, roll up your sleeves and get ready to dive into the nitty-gritty of crawl space maintenance. With the right approach and a bit of elbow grease, you can transform this often neglected area into a clean and functional space that contributes to the overall well-being of your home. Let's get started!
Key Takeaways:
- Don’t overlook your crawl space! Cleaning it out ensures a healthier home. Prioritize safety, remove debris, inspect for mold, clean thoroughly, and seal for long-term well-being.
- Safety first! Equip yourself, remove clutter, inspect for mold, clean and disinfect, then seal and insulate for a healthier home. Prioritize safety and thoroughness for long-term benefits.
Read more: How To Dig Out Crawl Space
Step 1: Safety Precautions
Before embarking on the task of cleaning out a crawl space, it is crucial to prioritize safety. Crawl spaces can present a range of potential hazards, from sharp objects and electrical wiring to mold and mildew. By taking the necessary safety precautions, you can minimize risks and ensure a secure working environment.
1.1. Protective Gear
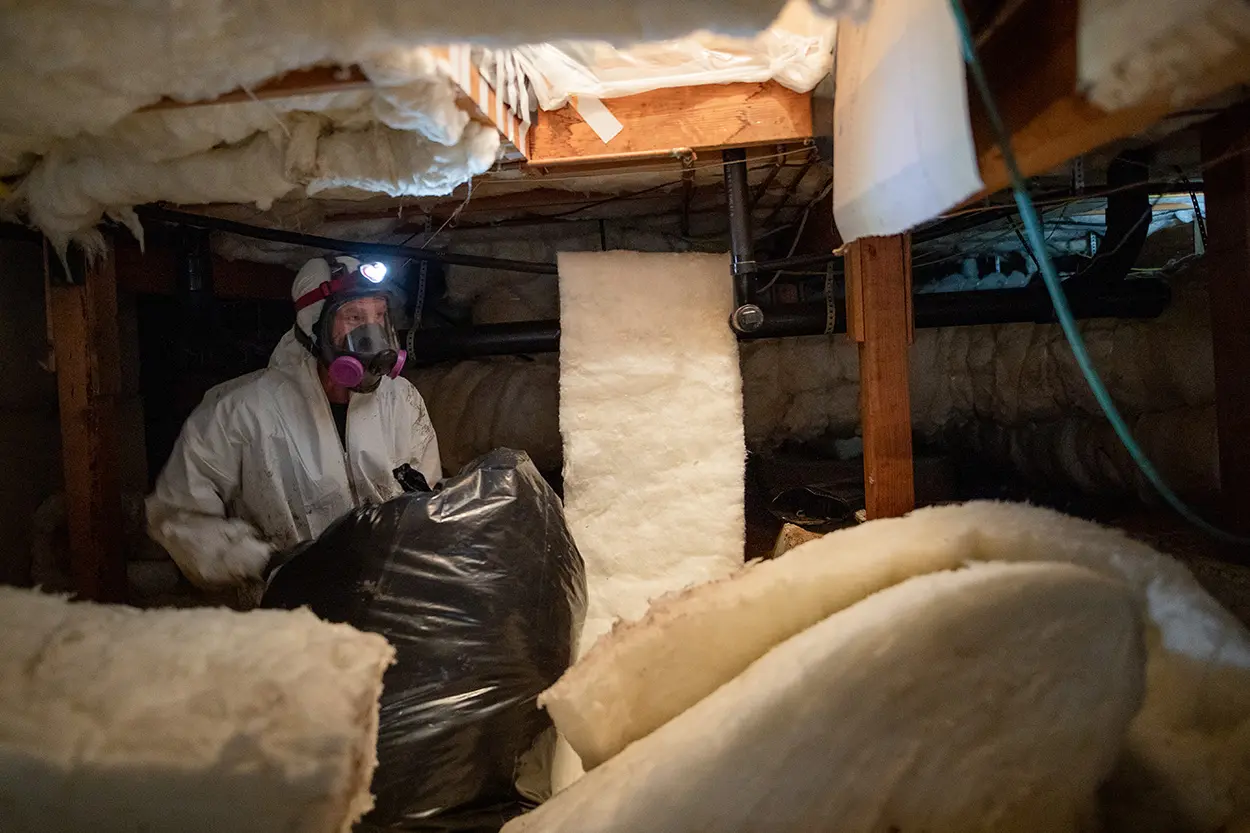
First and foremost, it is essential to equip yourself with the appropriate protective gear. This includes wearing long sleeves, pants, and sturdy work boots to shield your skin from potential contaminants and sharp objects. Additionally, donning a respirator mask will protect you from inhaling dust, mold spores, and other airborne particles that may be present in the crawl space.
1.2. Ventilation
Proper ventilation is key to maintaining a safe and breathable environment within the crawl space. Before entering, ensure that there is adequate airflow to prevent the accumulation of harmful gases and airborne particles. If necessary, use portable fans or open windows to improve ventilation during the cleaning process.
1.3. Lighting
Crawl spaces are often dimly lit, making it challenging to navigate and identify potential hazards. Prior to cleaning, ensure that you have sufficient lighting, such as portable work lights or headlamps, to illuminate the space effectively. This will not only enhance safety but also facilitate thorough inspection and cleaning.
Read more: How To Get Mice Out Of Crawl Space
1.4. Electrical Safety
Given the presence of electrical wiring in many crawl spaces, it is crucial to exercise caution to avoid potential electrocution hazards. Before entering the crawl space, turn off the power to any electrical outlets or fixtures in the area. If you are unsure about electrical safety measures, consider consulting a qualified electrician to assess and address any potential risks.
1.5. Secure Entry and Exit Points
Lastly, ensure that the entry and exit points to the crawl space are secure and easily accessible. This includes using sturdy ladders or steps to enter and exit the space safely. Additionally, communicate your whereabouts to a family member or friend in case of an emergency, and consider having a means of communication, such as a mobile phone, readily available while working in the crawl space.
By prioritizing safety precautions at every step of the cleaning process, you can create a secure and controlled environment for tackling the task of cleaning out the crawl space. These measures not only protect your well-being but also contribute to a more efficient and effective cleaning process.
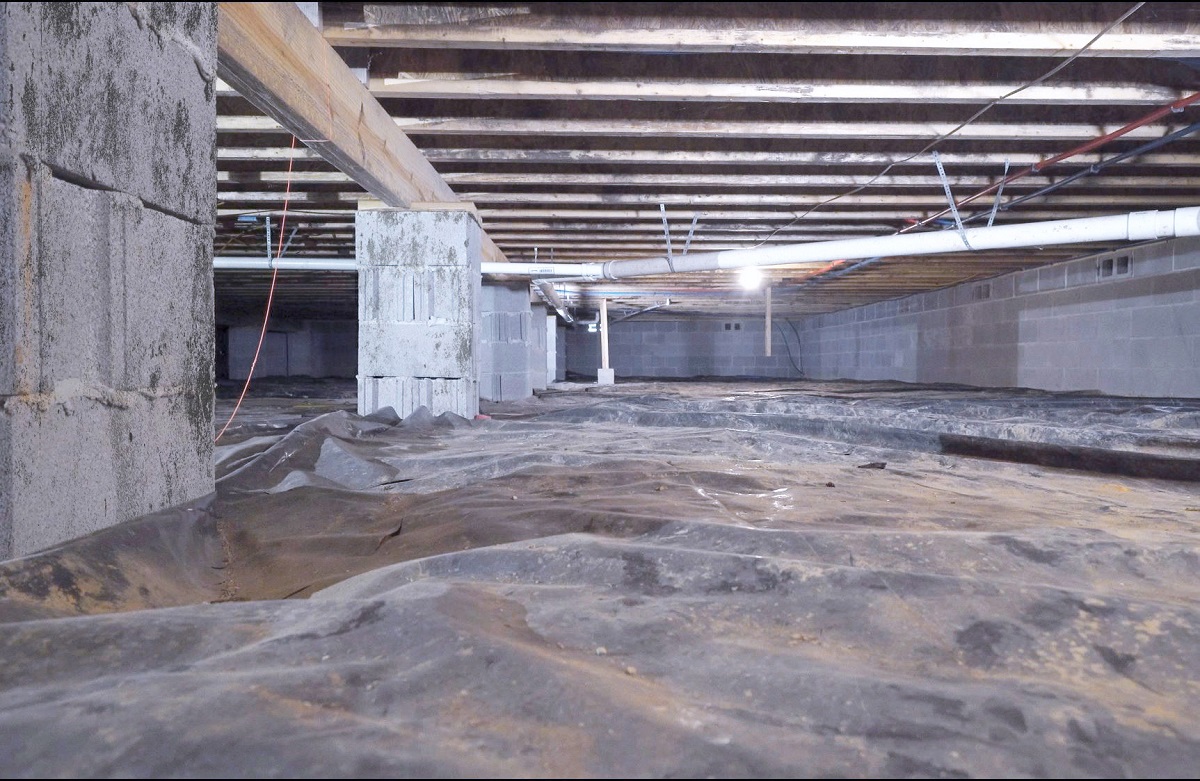
Step 2: Removing Debris and Clutter
The process of cleaning out a crawl space begins with the essential task of removing debris and clutter. Over time, crawl spaces can accumulate a variety of unwanted items, including old insulation, debris from pests, and general clutter. Clearing out these materials is crucial to create a clean and functional space that promotes healthy indoor air quality and prevents potential structural issues.
2.1. Clearing Obvious Debris
Start by visually inspecting the crawl space and identifying any obvious debris or clutter. This may include discarded building materials, old insulation, fallen leaves, and other items that have found their way into the space. Carefully remove these items, taking care to avoid disturbing any potential contaminants or hazardous materials.
Read more: How To Maintain A Crawl Space
2.2. Addressing Pest Infestations
Pests such as rodents and insects can leave behind debris and nesting materials in the crawl space. It's important to address any pest infestations before proceeding with the cleaning process. Safely remove any pest-related debris and consider implementing pest control measures to prevent future infestations.
2.3. Removing Old Insulation
If the crawl space is insulated, assess the condition of the insulation. Over time, insulation can become damp, moldy, or damaged, compromising its effectiveness. Remove any old or damaged insulation, taking care to wear appropriate protective gear and avoid inhaling airborne particles.
2.4. Clearing Clutter and Miscellaneous Items
In some cases, homeowners may use the crawl space for storage, leading to the accumulation of miscellaneous items and clutter. Evaluate the contents of the crawl space and determine which items can be safely removed or relocated. Clearing out unnecessary clutter will not only improve the cleanliness of the space but also create a more organized and functional environment.
2.5. Vacuuming and Sweeping
Once the larger debris and clutter have been removed, use a vacuum equipped with a HEPA filter to thoroughly clean the crawl space floor and surfaces. Pay close attention to corners, crevices, and areas near entry points, as these are common locations for dust and debris accumulation. Follow up with sweeping to ensure that all loose particles are collected and removed from the space.
By diligently addressing the removal of debris and clutter, you can lay the foundation for a thorough and effective crawl space cleaning process. This initial step sets the stage for subsequent tasks, such as inspecting for mold and mildew and implementing cleaning and disinfection procedures. With a clear and clutter-free space, you are well-positioned to proceed with the next phases of the cleaning process, ultimately contributing to a healthier and more functional crawl space.
Read more: How To Inspect A Crawl Space
Step 3: Inspecting for Mold and Mildew
After clearing out debris and clutter from the crawl space, the next critical step is to thoroughly inspect the area for the presence of mold and mildew. Mold and mildew thrive in damp, dark environments, making crawl spaces an ideal breeding ground for these potentially harmful substances. Identifying and addressing mold and mildew early on is essential for maintaining a healthy indoor environment and preventing structural damage to the home.
3.1. Visual Inspection
Begin the inspection by carefully examining the walls, floor, and any exposed structural elements within the crawl space. Look for visible signs of mold growth, which may appear as discolored patches, fuzzy spots, or powdery residue. Pay close attention to areas with higher moisture levels, such as near plumbing fixtures or areas prone to water seepage.
3.2. Checking for Musty Odors
In addition to visual inspection, be attentive to any musty or earthy odors emanating from the crawl space. These odors are often indicative of mold and mildew growth, even if no visible signs are immediately apparent. Take note of any distinct odors and their locations within the space.
3.3. Assessing Moisture Levels
Use a moisture meter to measure the relative humidity and moisture levels within the crawl space. Elevated moisture levels create an optimal environment for mold and mildew to flourish. Focus on areas where moisture accumulation is more likely, such as near plumbing, HVAC systems, or areas with inadequate ventilation.
Read more: How To Clean Out Closet
3.4. Identifying Potential Water Intrusion
Inspect the crawl space for any signs of water intrusion, such as damp or wet areas, water stains, or condensation on surfaces. Addressing the source of water intrusion is crucial for preventing ongoing moisture issues that can lead to mold and mildew growth.
3.5. Documenting Findings
As you conduct the inspection, document your findings, including any visual evidence of mold, musty odors, moisture levels, and potential sources of water intrusion. This documentation will serve as a valuable reference for developing a targeted plan to address mold and mildew issues effectively.
Thoroughly inspecting the crawl space for mold and mildew is a proactive measure that can safeguard both the structural integrity of the home and the health of its occupants. By identifying and addressing these potential hazards early on, you can take the necessary steps to mitigate their impact and create a cleaner, healthier living environment.
Step 4: Cleaning and Disinfecting
With the debris cleared and mold identified, the next crucial step in the crawl space maintenance process is thorough cleaning and disinfection. This phase is essential for removing lingering contaminants, eliminating mold spores, and creating a clean, sanitized environment within the crawl space.
4.1. Surface Cleaning
Begin by thoroughly cleaning the surfaces within the crawl space using a mild detergent or specialized cleaning solution. Scrub the walls, floor, and any exposed structural elements to remove dirt, dust, and residual mold spores. Pay particular attention to areas where mold was identified during the inspection.
Read more: What Is A Crawl Space?
4.2. Disinfection
After cleaning, apply a disinfectant solution to the surfaces to eliminate any remaining mold spores and bacteria. Choose a disinfectant specifically formulated for mold remediation, ensuring that it is safe for use in enclosed spaces. Follow the manufacturer's instructions for proper application and dwell time to maximize effectiveness.
4.3. Encapsulating Surfaces
Consider encapsulating the cleaned and disinfected surfaces with a specialized sealant or encapsulation product designed for crawl spaces. This additional layer of protection can help prevent future mold growth, improve indoor air quality, and create a moisture-resistant barrier within the crawl space.
4.4. HVAC System Maintenance
If the crawl space is connected to the home's HVAC system, it is essential to inspect and maintain the ductwork, air vents, and filters. Clean or replace air filters, remove any debris from vents, and consider scheduling professional duct cleaning to prevent the circulation of contaminants throughout the home.
4.5. Odor Neutralization
Address any lingering musty odors within the crawl space by utilizing odor-neutralizing products or treatments. These products can help eliminate residual odors associated with mold and mildew, creating a fresher and more pleasant environment within the space.
Read more: How To Close Vents In Crawl Space
4.6. Post-Cleaning Inspection
After completing the cleaning and disinfection process, conduct a thorough post-cleaning inspection to ensure that all surfaces are clean, dry, and free from visible mold or contaminants. Document the completion of the cleaning process and any additional maintenance tasks for future reference.
By meticulously cleaning and disinfecting the crawl space, you can effectively mitigate mold and bacterial contamination, improve indoor air quality, and create a cleaner, healthier environment within your home. This proactive approach to maintenance sets the stage for long-term crawl space integrity and contributes to the overall well-being of your living space.
Step 5: Sealing and Insulating
After completing the essential tasks of debris removal, mold inspection, and thorough cleaning, the final step in the crawl space maintenance process involves sealing and insulating the space. This critical phase is aimed at creating a barrier against moisture intrusion, regulating temperature, and enhancing energy efficiency within the home.
5.1. Sealing Entry Points
Begin by inspecting and sealing any potential entry points for moisture, pests, and outdoor air. This includes sealing gaps around pipes, vents, and utility penetrations using a durable sealant or expanding foam. Additionally, ensure that the crawl space access door or hatch is properly sealed to prevent air and moisture infiltration.
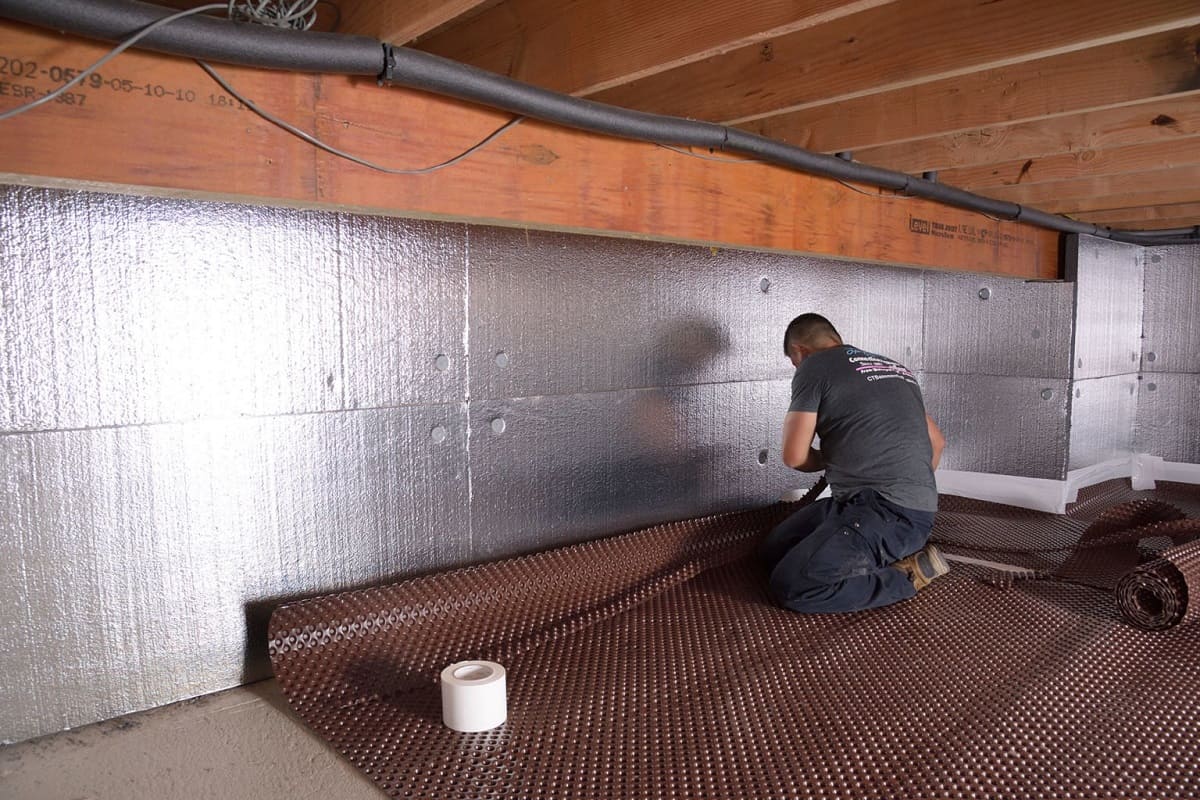
5.2. Vapor Barrier Installation
Install a high-quality vapor barrier across the crawl space floor to create a moisture-resistant barrier. Choose a durable, puncture-resistant material such as reinforced polyethylene or encapsulation liner. Overlap and secure the seams of the vapor barrier to create a continuous barrier that prevents ground moisture from permeating the space.
Read more: How Long To Dehumidify Crawl Space
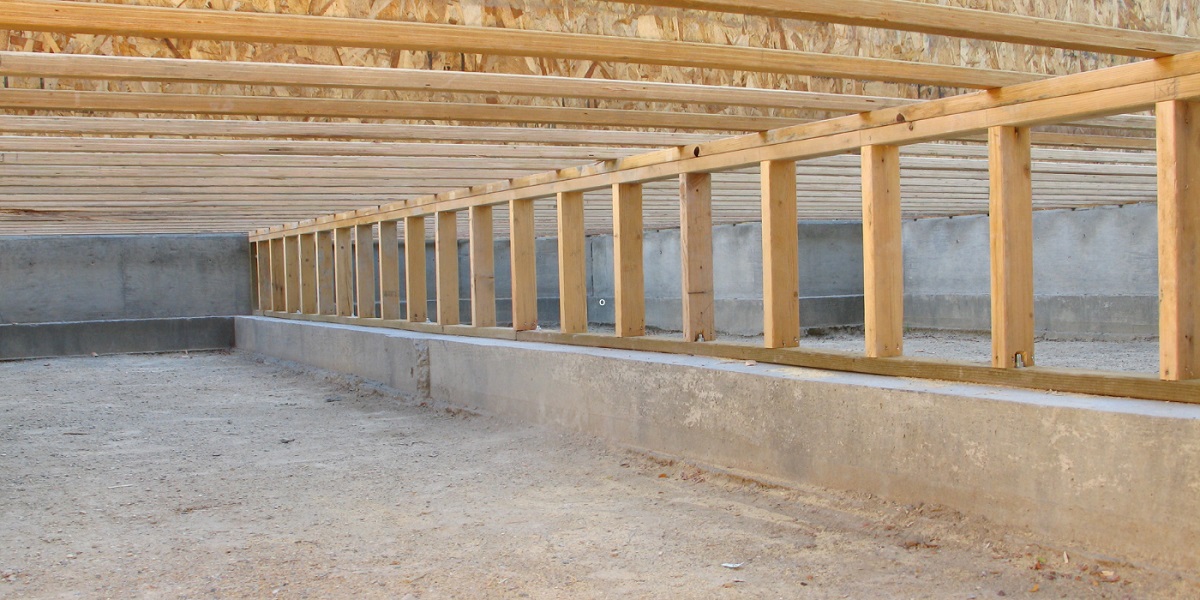
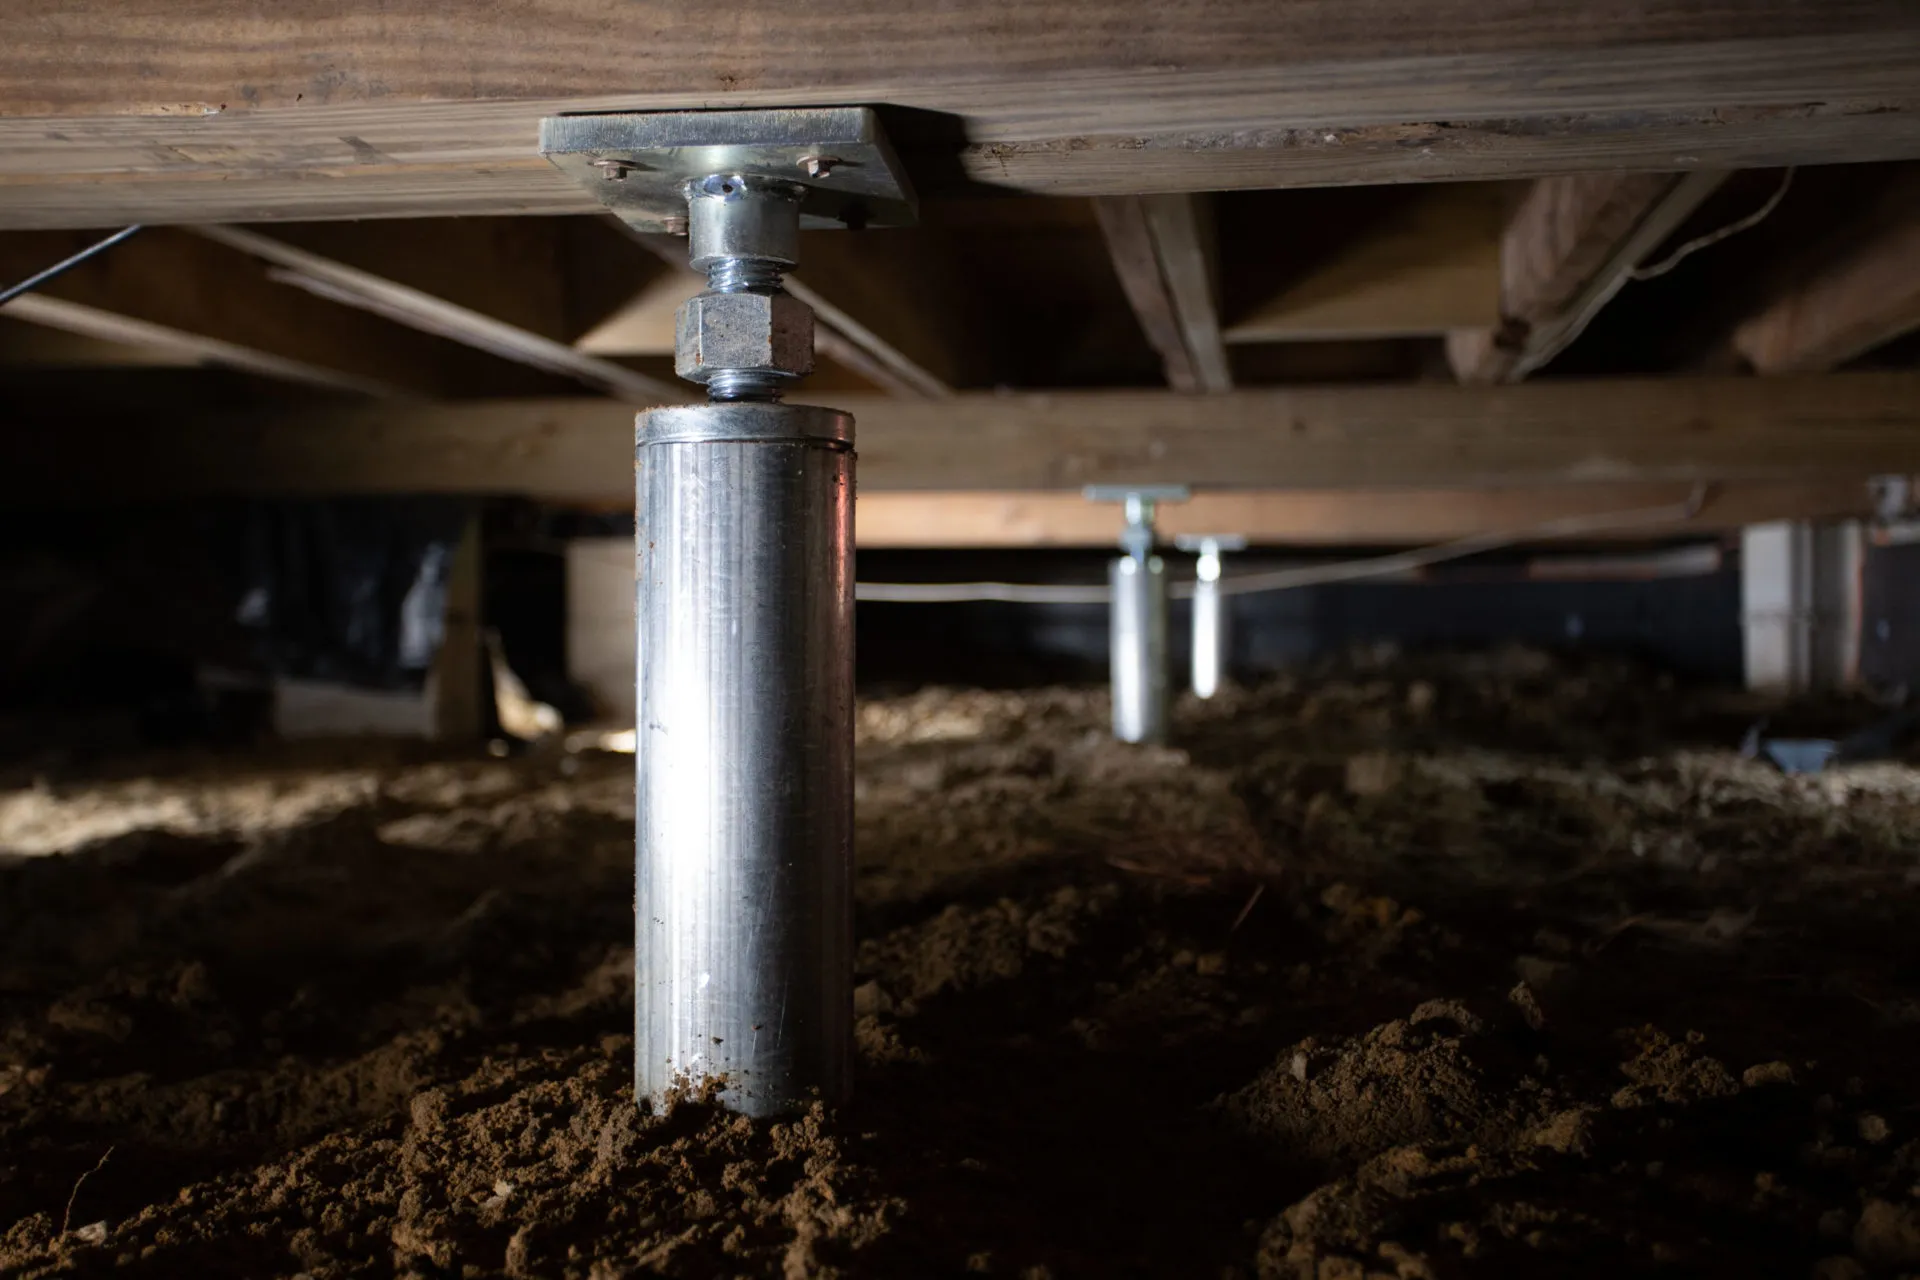
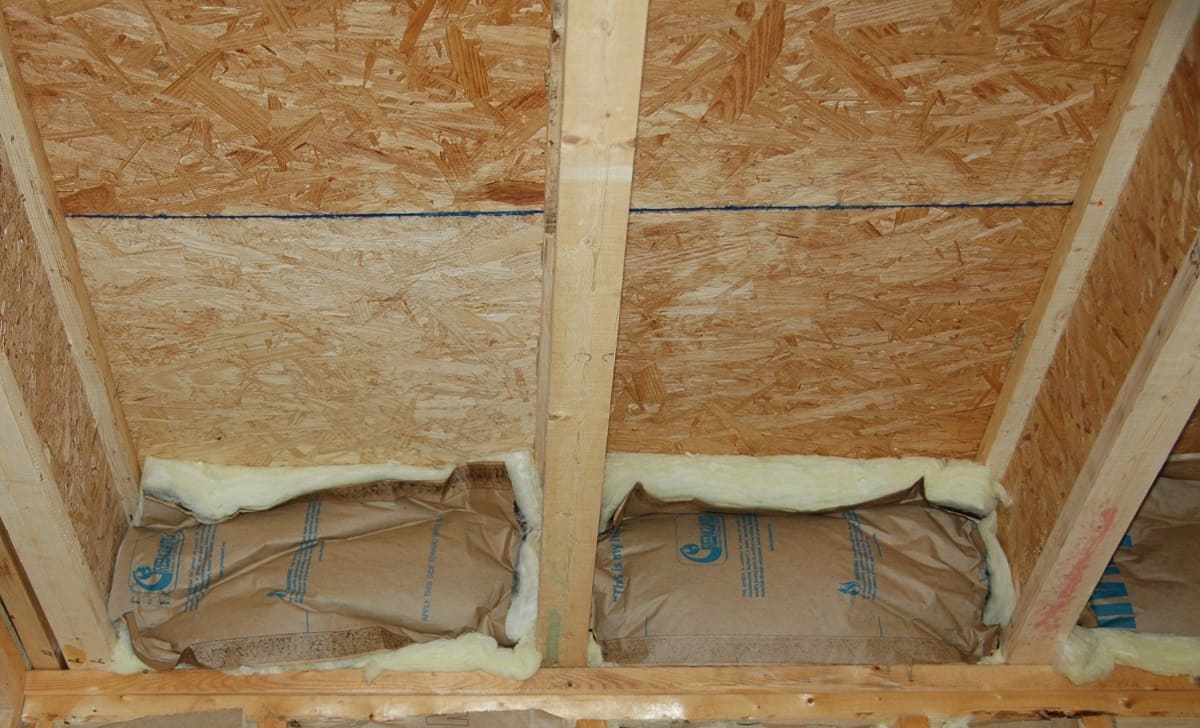
5.3. Insulating Walls and Pipes
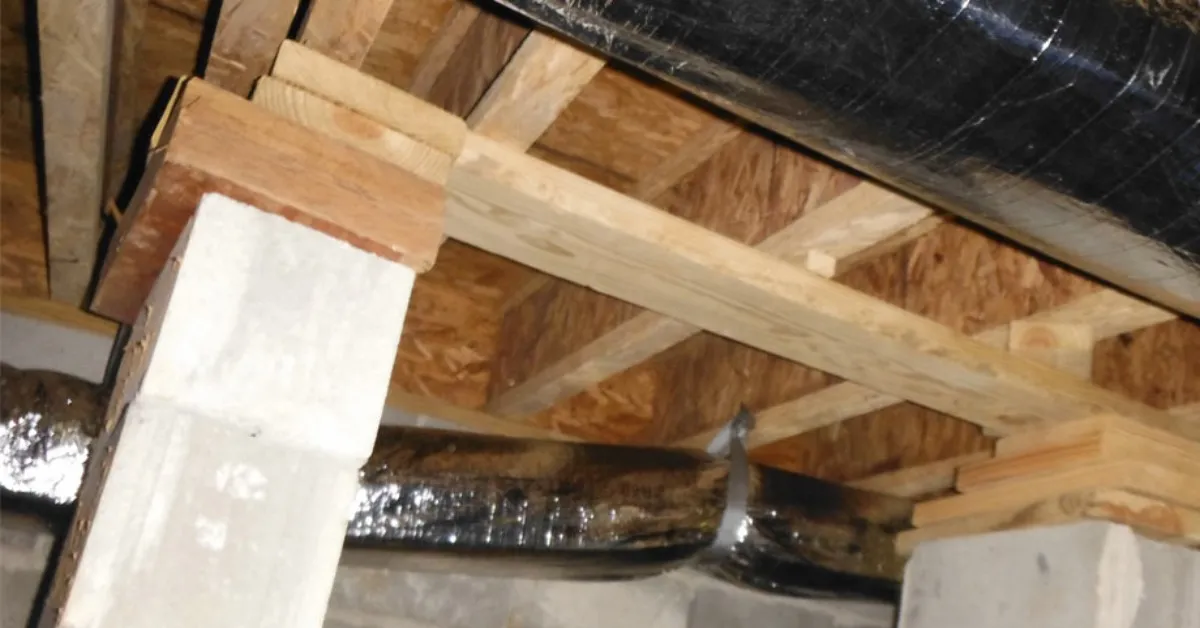
Insulate the crawl space walls using rigid foam insulation to regulate temperature and minimize heat transfer between the crawl space and the living areas above. Additionally, insulate any exposed pipes within the crawl space to prevent freezing during colder months and minimize energy loss.
5.4. Air Sealing and Ventilation
Address air leaks and ensure proper ventilation within the crawl space to prevent stagnant air and moisture buildup. Seal gaps and cracks in the crawl space walls and foundation to minimize air infiltration. Consider installing a dedicated crawl space ventilation system or incorporating passive vents to promote air circulation and prevent humidity buildup.
5.5. Professional Assessment
Consider engaging a qualified professional to assess the crawl space and provide guidance on optimal sealing and insulation practices. A professional inspection can identify specific areas for improvement and ensure that the sealing and insulation measures align with industry best practices and local building codes.
5.6. Ongoing Maintenance
Regularly monitor the condition of the crawl space sealing and insulation to address any signs of damage, wear, or deterioration. Periodically inspect the vapor barrier, insulation, and seals to ensure their effectiveness in maintaining a dry, well-insulated crawl space environment.
By meticulously sealing and insulating the crawl space, you can create a controlled environment that minimizes moisture intrusion, regulates temperature, and enhances the overall energy efficiency of your home. This proactive approach to maintenance not only contributes to a healthier living environment but also supports the long-term integrity and functionality of your home's crawl space.
Read more: How To Build A Crawl Space Door
Conclusion
In conclusion, the process of cleaning out a crawl space is a vital aspect of home maintenance that directly impacts the overall well-being of your living environment. By following the comprehensive steps outlined in this guide, you have taken proactive measures to create a cleaner, healthier, and more functional crawl space. From prioritizing safety precautions to meticulously sealing and insulating the space, each step contributes to the long-term integrity and efficiency of your home.
The initial focus on safety precautions underscores the importance of creating a secure working environment before delving into the cleaning process. By equipping yourself with the necessary protective gear, ensuring proper ventilation, and addressing potential electrical hazards, you have established a safe foundation for the subsequent tasks.
The meticulous removal of debris and clutter not only improves the cleanliness of the crawl space but also sets the stage for thorough mold inspection and cleaning. By identifying and addressing potential mold and mildew issues early on, you have taken proactive steps to safeguard both the structural integrity of your home and the health of its occupants.
The comprehensive cleaning and disinfection process further contributes to a healthier living environment by eliminating lingering contaminants and mold spores. By applying targeted cleaning and disinfection measures, you have mitigated potential health risks and improved indoor air quality within the crawl space.
Finally, the sealing and insulating phase serves as a proactive measure to create a controlled environment that minimizes moisture intrusion and enhances energy efficiency. By implementing effective sealing, insulation, and ventilation practices, you have taken significant strides toward maintaining a dry, well-regulated crawl space environment.
In essence, the thorough cleaning and maintenance of your crawl space not only contributes to the overall well-being of your home but also reflects your commitment to creating a safe and healthy living environment for you and your family. By following this guide and implementing the recommended practices, you have positioned yourself to enjoy the long-term benefits of a clean, functional, and well-maintained crawl space.
Frequently Asked Questions about How To Clean Out Crawl Space
Was this page helpful?
At Storables.com, we guarantee accurate and reliable information. Our content, validated by Expert Board Contributors, is crafted following stringent Editorial Policies. We're committed to providing you with well-researched, expert-backed insights for all your informational needs.

0 thoughts on “How To Clean Out Crawl Space”