Home>Renovation & DIY>Home Renovation Guides>How To Dig Out Crawl Space
Home Renovation Guides
How To Dig Out Crawl Space
Modified: February 17, 2024
Learn how to dig out a crawl space for your home renovation project with our comprehensive guide. Get expert tips and advice for a successful renovation.
(Many of the links in this article redirect to a specific reviewed product. Your purchase of these products through affiliate links helps to generate commission for Storables.com, at no extra cost. Learn more)
Introduction
Digging out a crawl space beneath your home can be a game-changer, offering valuable extra space and potential for increased property value. Whether you're looking to create a new living area, storage space, or simply improve the accessibility of your home, this comprehensive guide will walk you through the step-by-step process of excavating and renovating your crawl space.
By following the detailed instructions provided in this guide, you'll gain the knowledge and confidence needed to tackle this ambitious home improvement project. From clearing the area to adding finishing touches, each step is crucial in ensuring a successful and safe transformation of your crawl space. With careful planning and execution, you can turn an underutilized area into a functional and inviting part of your home.
So, roll up your sleeves and get ready to embark on this rewarding journey. With the right tools, materials, and a can-do attitude, you'll soon be on your way to unlocking the full potential of your home's foundation. Let's dive into the first step: clearing the area.
Key Takeaways:
- Uncover the Potential: Digging out a crawl space can transform your home, adding valuable space and increasing property value. Clearing, digging, and renovating step by step can unlock this hidden potential.
- Create a Functional Space: Installing support beams, adding insulation, and finishing touches can turn a neglected crawl space into a well-organized, insulated, and visually appealing area, enhancing your home’s value and livability.
Read more: How To Clean Out Crawl Space
Step 1: Clearing the Area
Before you begin the excavation process, it's essential to clear the crawl space area of any debris, obstructions, and potential hazards. This initial step sets the stage for a safe and efficient digging process, ensuring that the work area is accessible and free from impediments. Here's a detailed breakdown of the tasks involved in clearing the area:
-
Remove Debris: Start by removing any loose debris, such as rocks, branches, and old construction materials, from the crawl space. This not only creates a cleaner work environment but also minimizes the risk of tripping or injury during the excavation.
-
Inspect for Hazards: Conduct a thorough inspection to identify and address potential hazards, such as exposed wiring, sharp objects, or unstable structures. It's crucial to prioritize safety at this stage to prevent accidents and ensure a smooth progression to the next steps.
-
Clear Vegetation: If vegetation has encroached upon the crawl space, trim back any overgrown plants or roots that could impede the excavation process. This step is particularly important for crawl spaces with exterior access points, as it facilitates easier movement of equipment and materials.
-
Address Moisture and Mold: Take this opportunity to assess the moisture levels and presence of mold within the crawl space. Address any moisture issues and mold growth before proceeding with the excavation, as these can compromise the structural integrity of the space and pose health risks.
-
Secure Access Points: If there are entry points to the crawl space from the interior or exterior of the home, ensure that they are securely sealed or barricaded to prevent unauthorized access during the clearing and digging process.
By meticulously clearing the area, you'll establish a solid foundation for the subsequent steps of excavating and renovating the crawl space. This proactive approach not only streamlines the workflow but also contributes to a safer and more controlled work environment. With the area cleared and potential hazards mitigated, you're now ready to move on to the next pivotal phase: digging out the space.
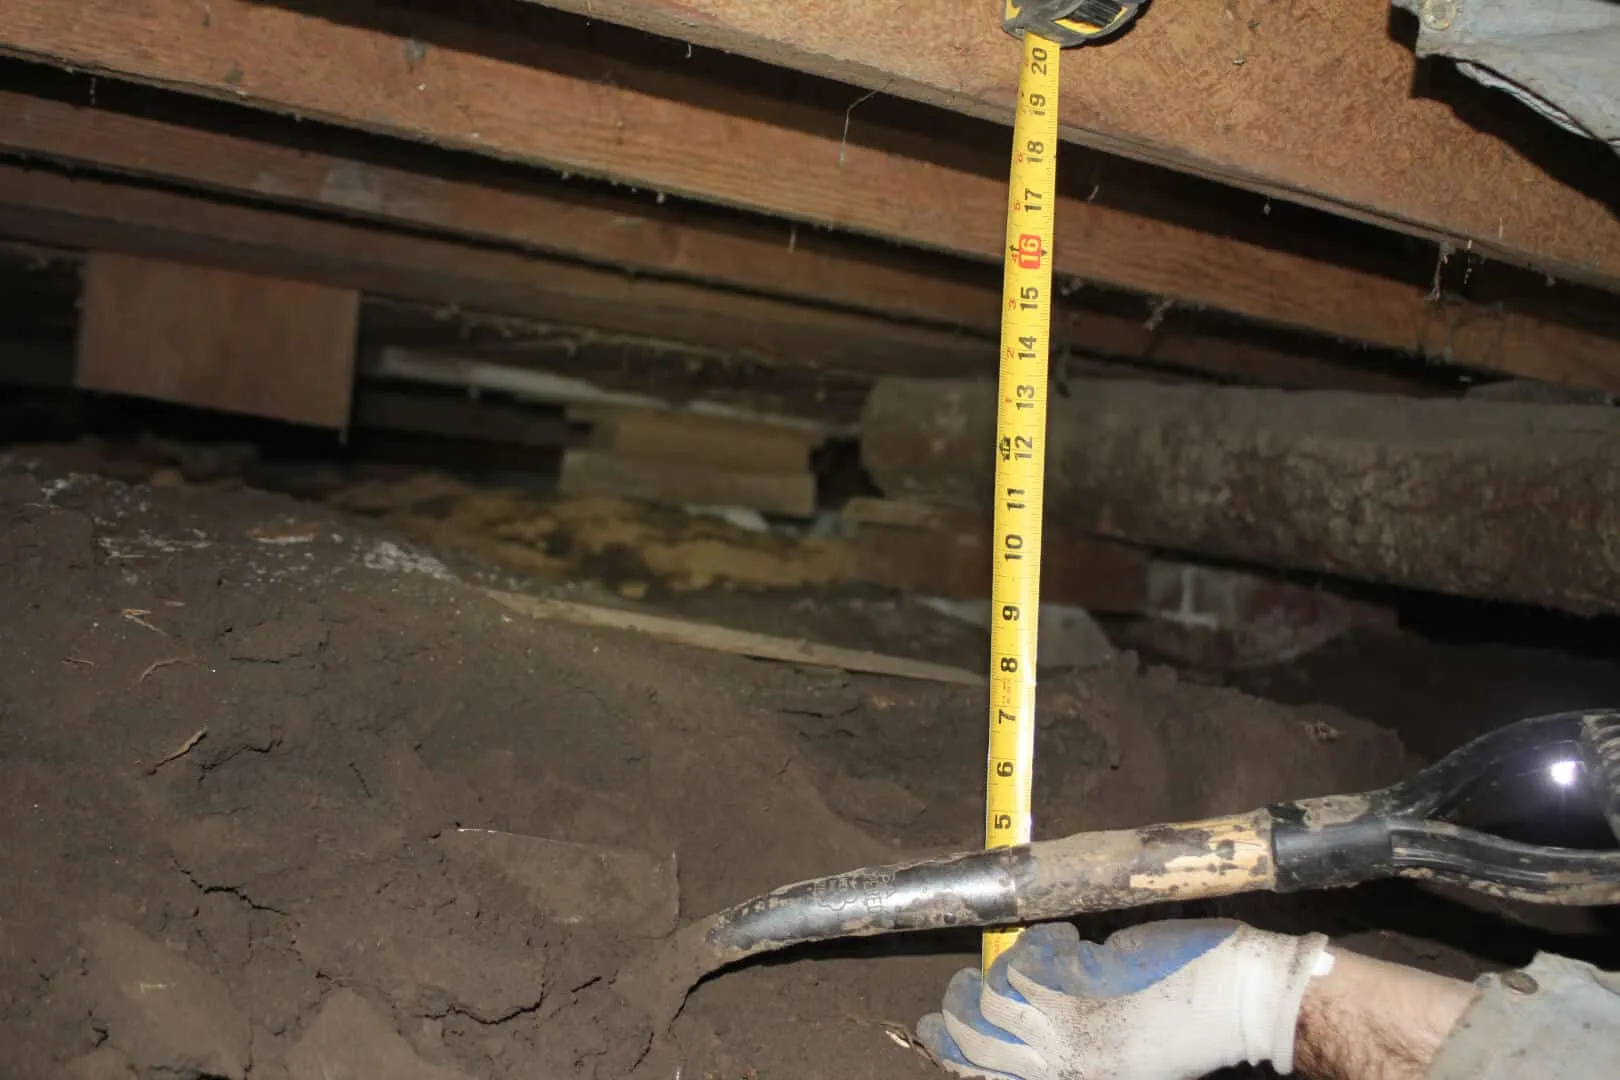
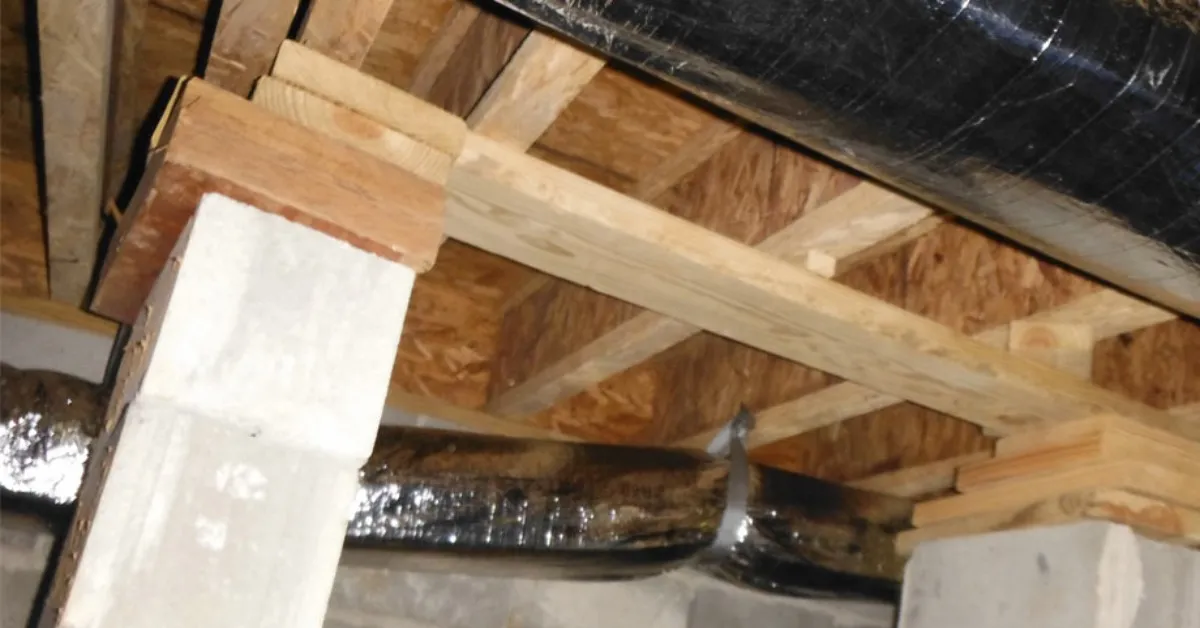
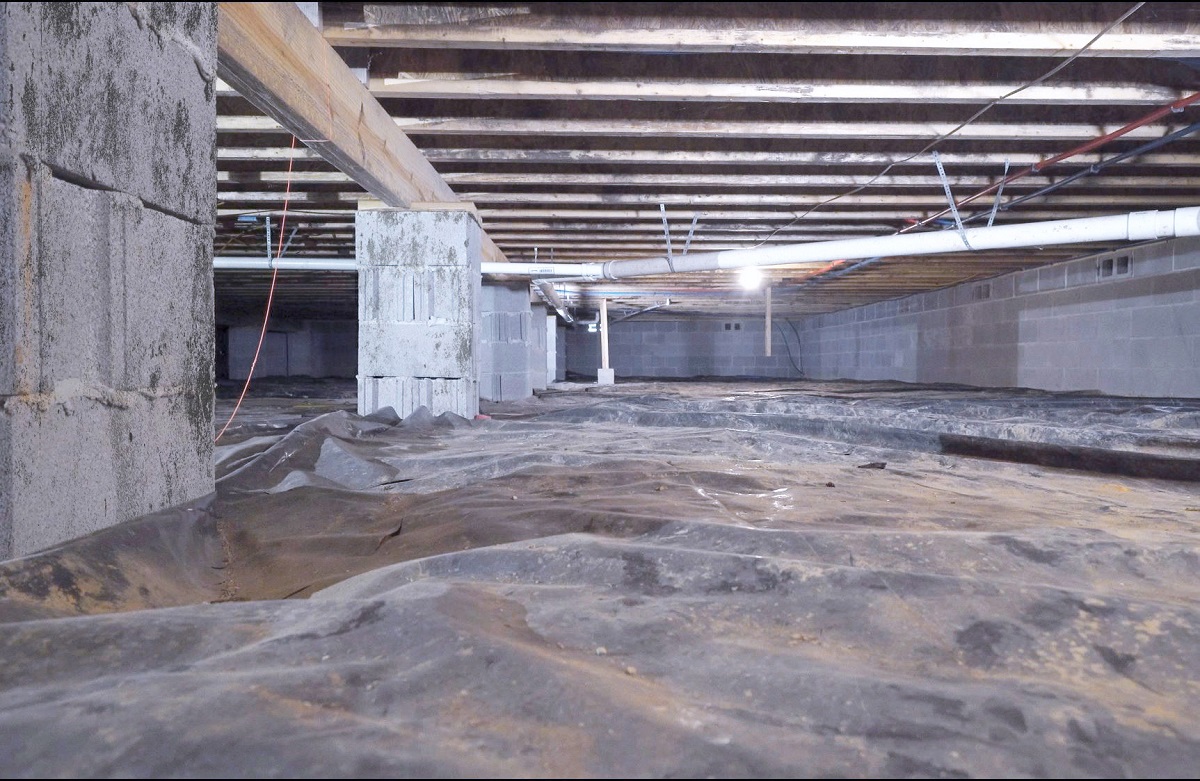
Step 2: Digging Out the Space
With the area cleared and safety measures in place, the next phase involves the meticulous process of digging out the crawl space. This step requires careful planning, precise execution, and a keen eye for detail to ensure the structural integrity of the space and the safety of the surrounding areas. Here's a comprehensive guide to navigating the intricacies of digging out the space:
Assessing Soil Conditions
Before commencing the excavation, it's crucial to assess the soil conditions within the crawl space. Factors such as soil type, moisture levels, and potential presence of underground utilities must be carefully evaluated. Conducting a soil analysis can provide valuable insights into the stability of the ground and any necessary precautions to be taken during the digging process.
Excavation Equipment and Techniques
Selecting the appropriate excavation equipment and techniques is paramount to the success of this phase. Depending on the size and accessibility of the crawl space, options may include using a mini excavator, backhoe, or manual digging tools. Each method has its advantages and considerations, and the choice should align with the specific requirements of the project.
Read more: How To Get Mice Out Of Crawl Space
Strategic Digging and Disposal
The process of digging out the space demands a strategic approach to ensure precision and efficiency. Begin by excavating the perimeter of the crawl space, gradually working toward the center. This systematic method allows for better control over the excavation and minimizes the risk of destabilizing the surrounding soil. Additionally, proper disposal of excavated soil is essential to maintain a tidy work area and prevent obstructions.
Monitoring and Adjustments
Throughout the digging process, continuous monitoring of the excavation site is imperative. Regular inspections for any signs of shifting soil, unexpected obstacles, or changes in ground conditions enable prompt adjustments to be made, safeguarding the integrity of the space and the safety of the workers.
Safety Protocols
Adhering to strict safety protocols during the excavation is non-negotiable. This includes wearing appropriate personal protective equipment, securing the work area to prevent unauthorized access, and implementing measures to mitigate the risk of cave-ins or collapses. Prioritizing safety at every stage of the digging process is fundamental to the overall success of the project.
By meticulously navigating the intricacies of digging out the space, you'll lay the groundwork for the subsequent phases of renovating the crawl space. This pivotal step sets the stage for the installation of support beams, insulation, and finishing touches, bringing you closer to realizing the full potential of your transformed crawl space.
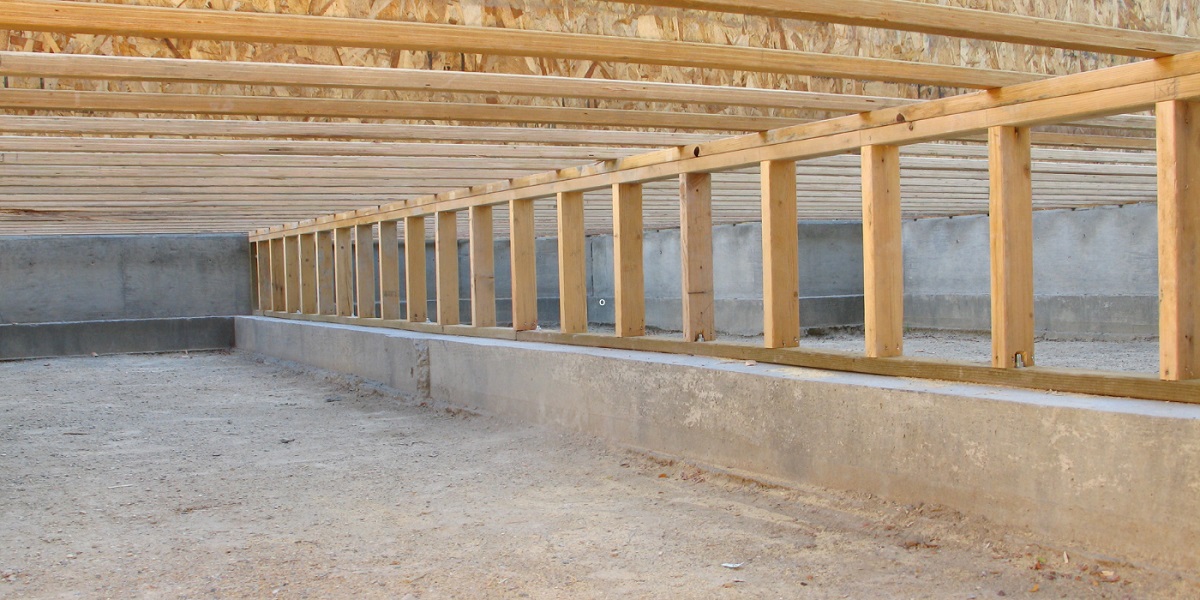
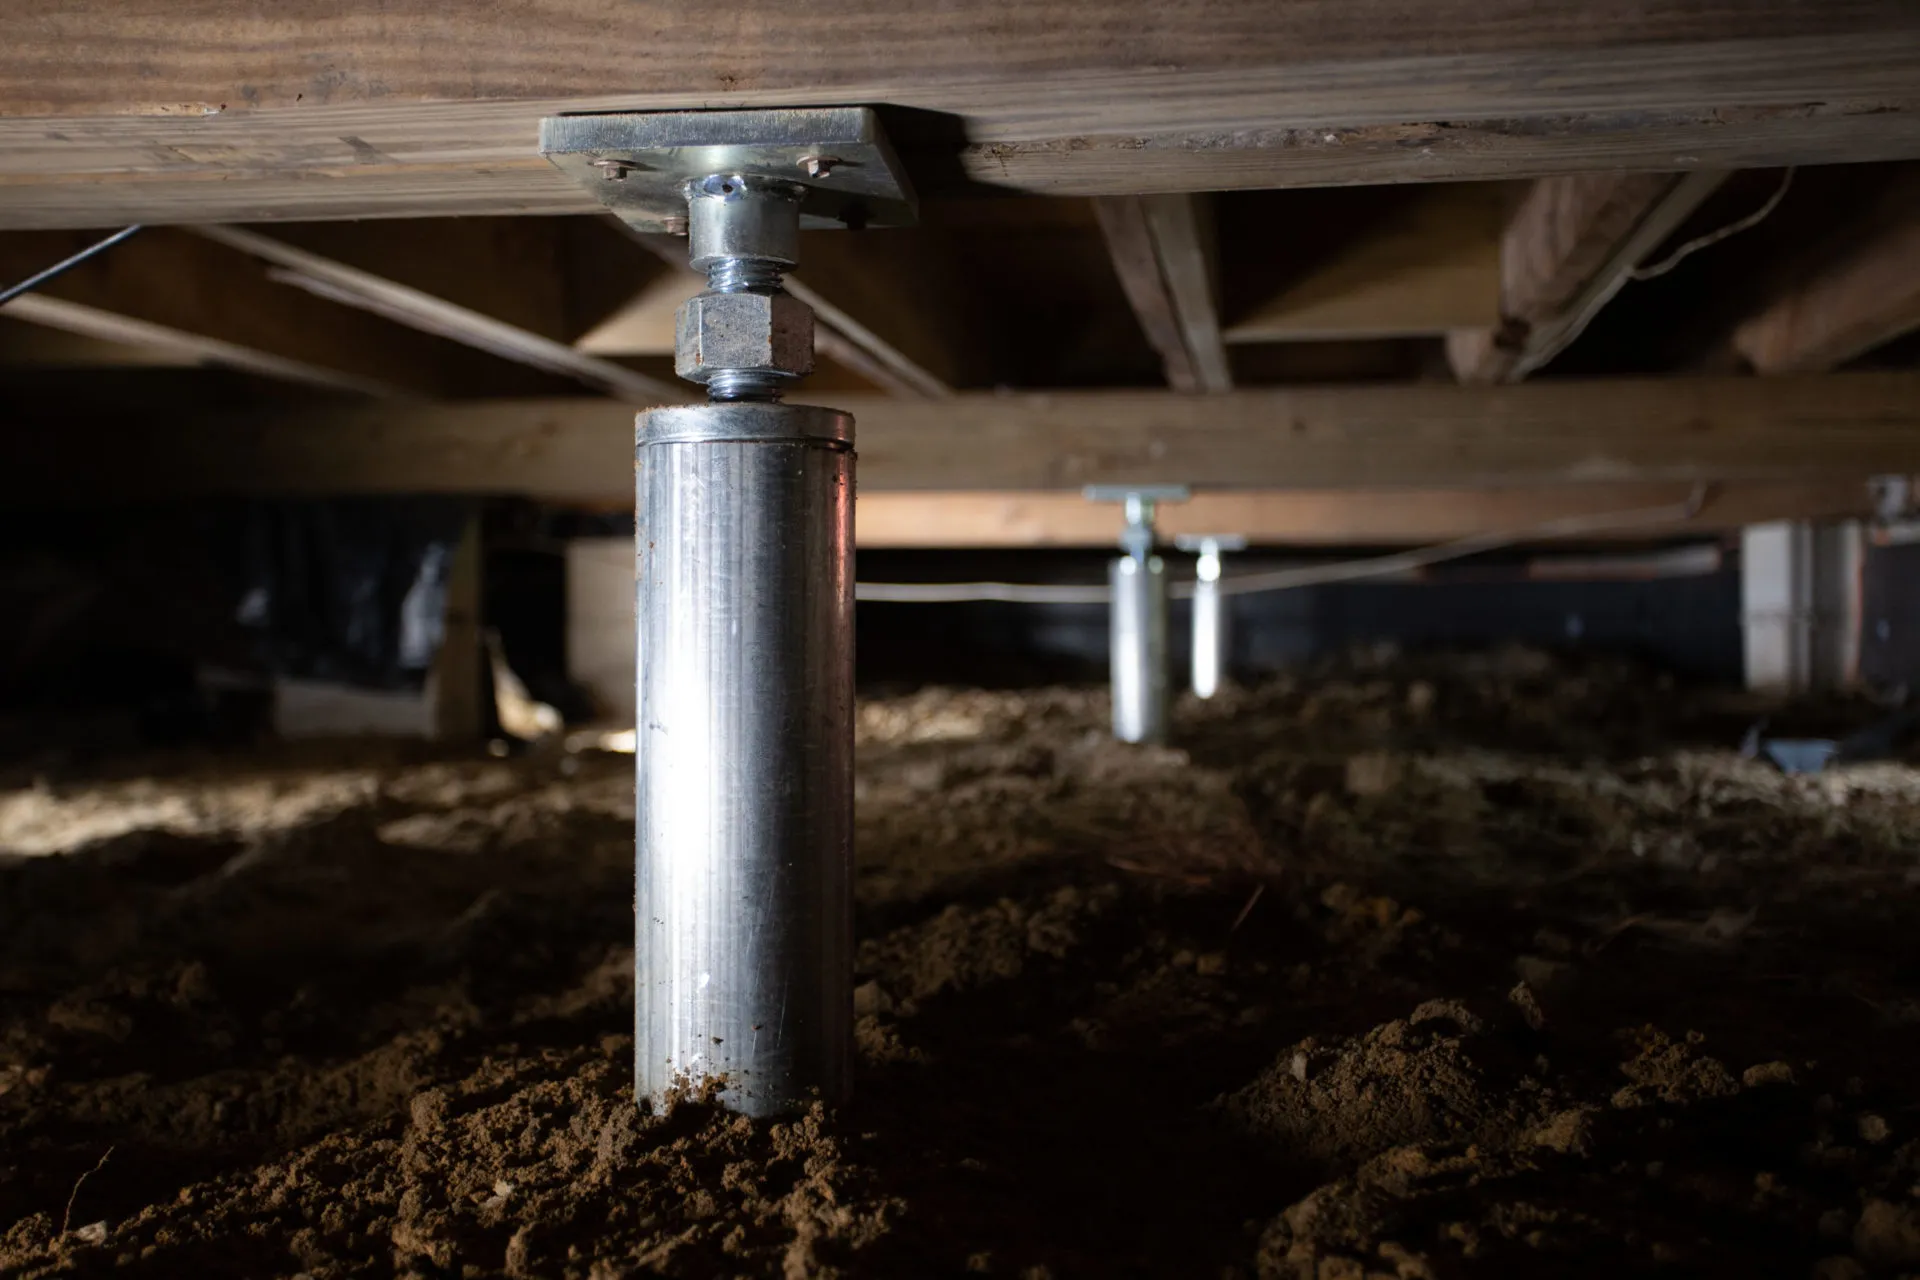
Step 3: Installing Support Beams
The installation of support beams is a critical phase in the renovation of a crawl space, as it lays the foundation for structural stability and load-bearing capacity. This step involves strategically placing and securing support beams to reinforce the newly excavated space, ensuring that it can effectively bear the weight of the home above. Here's a detailed exploration of the key aspects involved in installing support beams:
Read more: How To Maintain A Crawl Space
Assessment and Planning
Before proceeding with the installation, a thorough assessment of the crawl space's structural requirements is essential. Factors such as the home's architectural design, load distribution, and local building codes must be carefully considered. Additionally, a comprehensive plan outlining the placement, size, and material specifications of the support beams should be developed to guide the installation process.
Material Selection
The selection of suitable materials for the support beams is pivotal to their effectiveness and longevity. Common options include pressure-treated lumber, steel beams, or engineered wood products, each offering distinct advantages in terms of strength, durability, and resistance to moisture and pests. The choice of material should align with the specific structural demands and environmental conditions of the crawl space.
Precise Installation
The installation of support beams demands precision and meticulous attention to detail. Each beam must be strategically positioned to evenly distribute the weight of the home and minimize structural stress points. Utilizing specialized tools and equipment, such as hydraulic jacks and laser levels, can facilitate accurate placement and alignment of the support beams, ensuring optimal support for the crawl space.
Securing and Fastening
Once the support beams are in position, securing them to the foundation and adjacent structural elements is paramount. This may involve the use of anchor bolts, brackets, or specialized fastening hardware, depending on the construction materials and design specifications. Proper fastening techniques are crucial in ensuring the stability and integrity of the support system.
Read more: How To Inspect A Crawl Space
Compliance and Inspection
Adherence to local building codes and regulations is non-negotiable when installing support beams. Compliance with established standards not only ensures the structural soundness of the crawl space but also contributes to the overall safety and longevity of the home. Following the installation, a comprehensive inspection by a qualified professional can provide assurance of the support beams' effectiveness and compliance with regulatory requirements.
By meticulously navigating the intricacies of installing support beams, you'll fortify the crawl space with a robust and reliable support system, setting the stage for the subsequent phases of adding insulation, vapor barrier, and finishing touches. This pivotal step brings you closer to realizing the full potential of your renovated crawl space, enhancing its structural integrity and functional versatility.
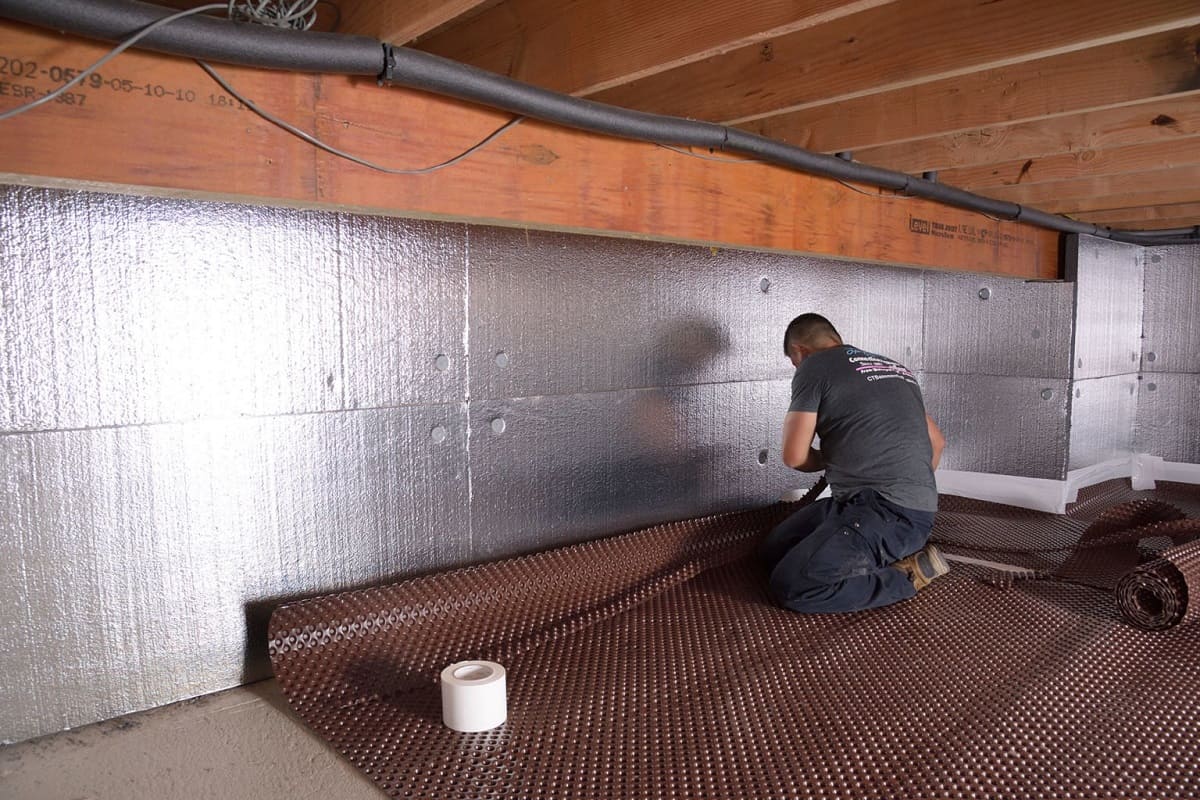
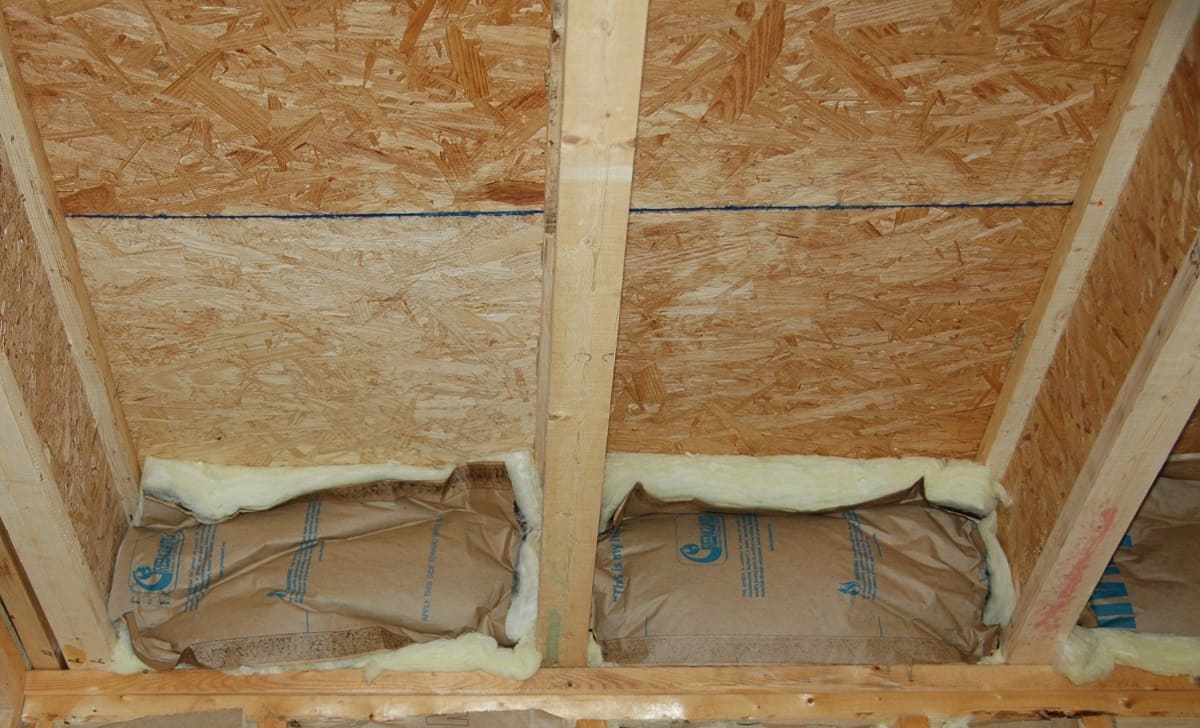
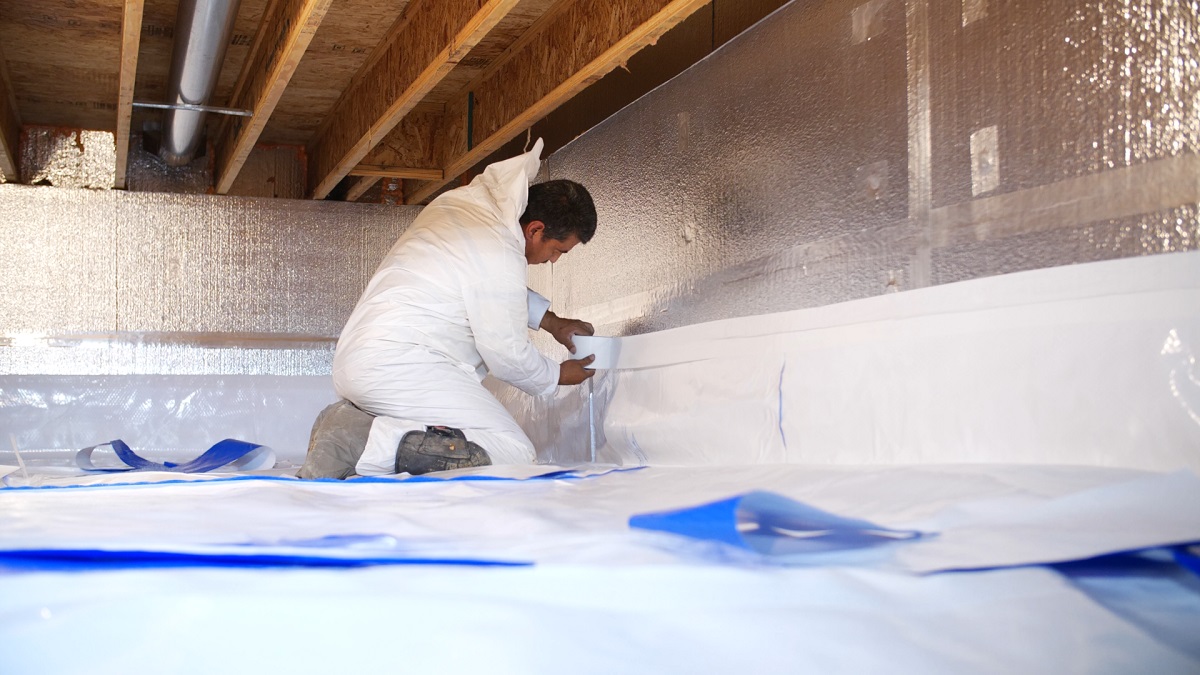
Step 4: Adding Insulation and Vapor Barrier
The addition of insulation and a vapor barrier is a crucial phase in the renovation of a crawl space, serving to enhance energy efficiency, moisture control, and overall comfort within the home. This step involves meticulously installing insulation materials and a vapor barrier to create a well-insulated and protected environment within the crawl space. Here's a comprehensive exploration of the key aspects involved in adding insulation and a vapor barrier:
Assessment and Selection
Before commencing the installation, a thorough assessment of the crawl space's insulation needs and moisture levels is essential. Factors such as climate, humidity, and potential sources of moisture infiltration must be carefully evaluated to determine the most suitable insulation materials and vapor barrier specifications. Common insulation options include fiberglass batts, spray foam, or rigid foam boards, each offering distinct advantages in terms of thermal performance and moisture resistance.
Installation Techniques
The installation of insulation demands precision and attention to detail to maximize its effectiveness. Depending on the selected insulation materials, techniques such as fitting, cutting, and securing the insulation to the crawl space walls and subfloor must be executed meticulously. Additionally, sealing any gaps, joints, or penetrations in the insulation layer is crucial to prevent air leakage and ensure consistent thermal performance.
Read more: What Is A Crawl Space?
Vapor Barrier Placement
The installation of a vapor barrier is integral to controlling moisture and preventing water vapor from permeating the crawl space. The vapor barrier, typically a durable plastic sheet, is strategically placed over the insulation to create a moisture-resistant barrier. Careful attention to overlapping and sealing the seams of the vapor barrier is essential to maintain its integrity and effectiveness in mitigating moisture infiltration.
Moisture Control Considerations
In addition to the vapor barrier, implementing moisture control measures, such as proper ventilation and drainage, can further enhance the effectiveness of the insulation and vapor barrier. Adequate ventilation promotes air circulation within the crawl space, reducing the risk of moisture buildup, while proper drainage mechanisms help divert water away from the foundation, safeguarding the integrity of the insulation and vapor barrier.
Compliance and Quality Assurance
Adhering to industry standards and building codes is paramount when adding insulation and a vapor barrier. Compliance with established guidelines ensures the proper installation and performance of these essential components, contributing to energy efficiency, indoor air quality, and long-term durability. Additionally, conducting a thorough inspection post-installation can provide assurance of the insulation and vapor barrier's effectiveness and compliance with regulatory requirements.
By meticulously navigating the intricacies of adding insulation and a vapor barrier, you'll create a well-insulated, moisture-controlled environment within the crawl space, contributing to enhanced energy efficiency and indoor comfort. This pivotal step brings you closer to realizing the full potential of your renovated crawl space, ensuring a well-protected and insulated foundation for your home.
Step 5: Finishing Touches
As the renovation of the crawl space nears completion, the focus shifts to the crucial phase of adding the finishing touches. This step involves the meticulous execution of details that enhance the functionality, aesthetics, and overall appeal of the newly transformed space. From addressing surface finishes to optimizing accessibility, each aspect contributes to the comprehensive revitalization of the crawl space. Here's a detailed exploration of the key components involved in adding the finishing touches:
Read more: How To Close Vents In Crawl Space
Surface Treatments
Applying appropriate surface treatments to the walls and subfloor of the crawl space is essential to protect against moisture, mold, and potential deterioration. Options such as waterproof paint, sealants, or specialized coatings can be utilized to create a durable and resilient surface that withstands environmental factors and facilitates easy maintenance.
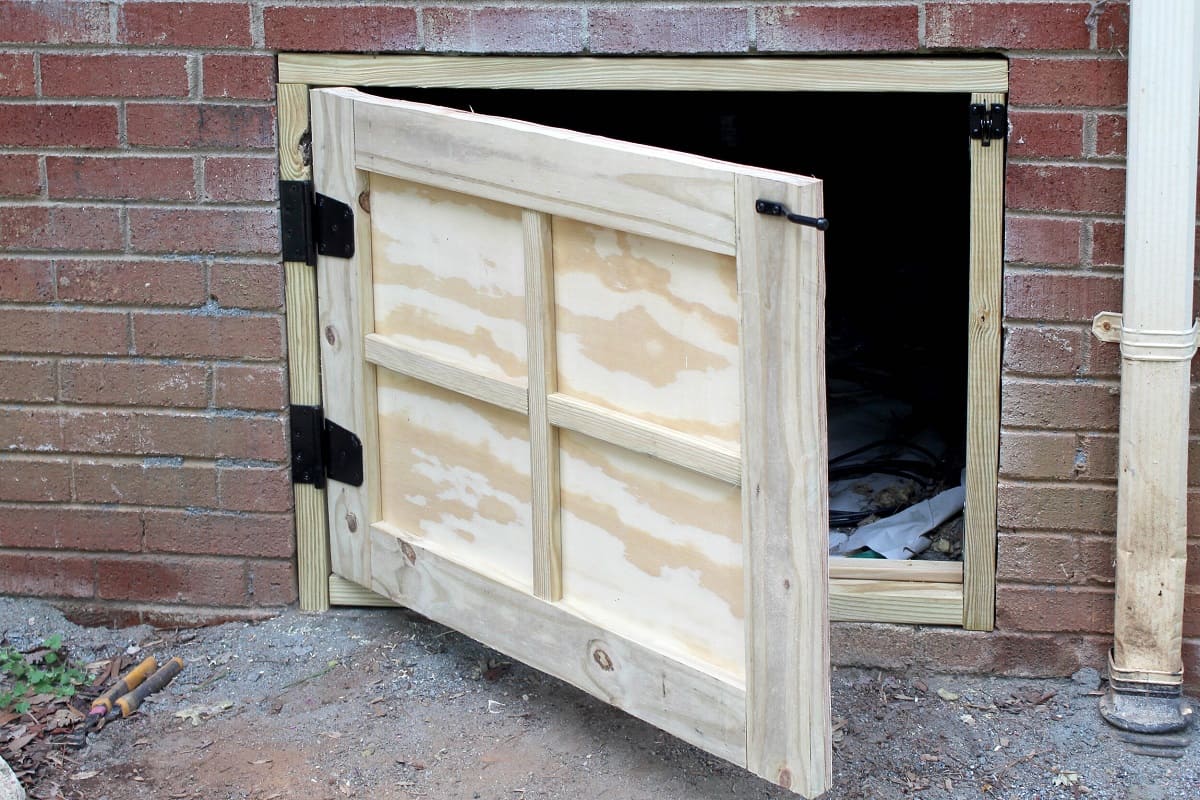
Access and Entry Points
Ensuring convenient and secure access to the crawl space is paramount. Installing access doors or hatches that provide a tight seal and easy entry for maintenance and inspections is crucial. Additionally, incorporating weather-stripping and insulation around access points helps maintain the integrity of the crawl space's environmental controls.
Lighting and Electrical Considerations
Integrating adequate lighting within the crawl space enhances visibility and safety. Installing energy-efficient LED fixtures or task lighting illuminates the area, making it more functional for storage or potential utility use. Furthermore, addressing electrical needs, such as outlets for power tools or appliances, contributes to the versatility of the space.
Pest Control Measures
Implementing pest control measures, such as sealing entry points, installing screens, or utilizing non-toxic repellents, helps safeguard the crawl space against unwanted intrusions. Preventing pest infestations not only preserves the integrity of the space but also contributes to a healthier indoor environment.
Read more: How Long To Dehumidify Crawl Space
Organization and Storage Solutions
Optimizing the crawl space for efficient storage and organization adds practical value to the renovation. Incorporating shelving, storage bins, or modular systems maximizes the utility of the space, allowing for orderly storage of seasonal items, tools, or household supplies.
Final Inspections and Maintenance Guidelines
Conducting a comprehensive inspection of the renovated crawl space ensures that all components are in place and functioning as intended. This includes verifying the integrity of insulation, vapor barrier, support beams, and overall structural stability. Additionally, providing maintenance guidelines to homeowners ensures the long-term preservation of the crawl space's enhancements.
By meticulously attending to the finishing touches, you'll bring the renovation of the crawl space to its culmination, creating a well-organized, functional, and visually appealing space within your home. These final details not only elevate the practicality and aesthetics of the crawl space but also contribute to the overall value and livability of your property.
Frequently Asked Questions about How To Dig Out Crawl Space
Was this page helpful?
At Storables.com, we guarantee accurate and reliable information. Our content, validated by Expert Board Contributors, is crafted following stringent Editorial Policies. We're committed to providing you with well-researched, expert-backed insights for all your informational needs.

0 thoughts on “How To Dig Out Crawl Space”