Home>Storage Ideas>Kitchen Storage>How To Clean A Stove Top, Including Tough Stains And Grease
Kitchen Storage
How To Clean A Stove Top, Including Tough Stains And Grease
Modified: January 8, 2024
Learn how to effectively clean your stove top, removing tough stains and grease for a spotless kitchen. Discover kitchen storage ideas for a more organized space.
(Many of the links in this article redirect to a specific reviewed product. Your purchase of these products through affiliate links helps to generate commission for Storables.com, at no extra cost. Learn more)
Introduction
Having a clean and well-maintained stove top is essential for ensuring efficient cooking and a neat kitchen. Over time, stove tops can accumulate tough stains and grease, making them unsightly and challenging to clean. However, with the right materials and techniques, you can easily restore your stove top’s shine and keep it looking brand new.
In this article, we will guide you through the step-by-step process of cleaning a stove top, including tackling tough stains and grease. Whether you have a glass, ceramic, or coil electric stove top, or a gas stove top, these methods will work effectively to remove dirt and grime.
Before we dive into the cleaning process, let’s gather the materials you’ll need.
Key Takeaways:
- Easily restore your stove top’s shine and keep it looking brand new with simple materials and techniques, including baking soda paste and vinegar solution for tough stains and grease.
- Maintain a spotless stove top by promptly addressing spills, cleaning after each use, and being mindful of cookware. Avoid abrasive cleaners and consider using protective covers for long-lasting cleanliness.
Materials Needed
Before you begin cleaning your stove top, gather the following materials:
- Microfiber cloth or sponge
- Baking soda
- Vinegar
- Hot water
- Dish soap
- Plastic scraper or spatula
- Paper towels
- Soft-bristled brush
Having these materials on hand will make the cleaning process easier and more effective. Now, let’s move on to preparing the stove top for cleaning.
Preparing the Stove Top
Before you start cleaning your stove top, it’s important to take some preparatory steps to ensure a successful cleaning process:
- Turn off the stove: Before cleaning, make sure the stove is completely turned off and cool to the touch. Safety should always be your top priority.
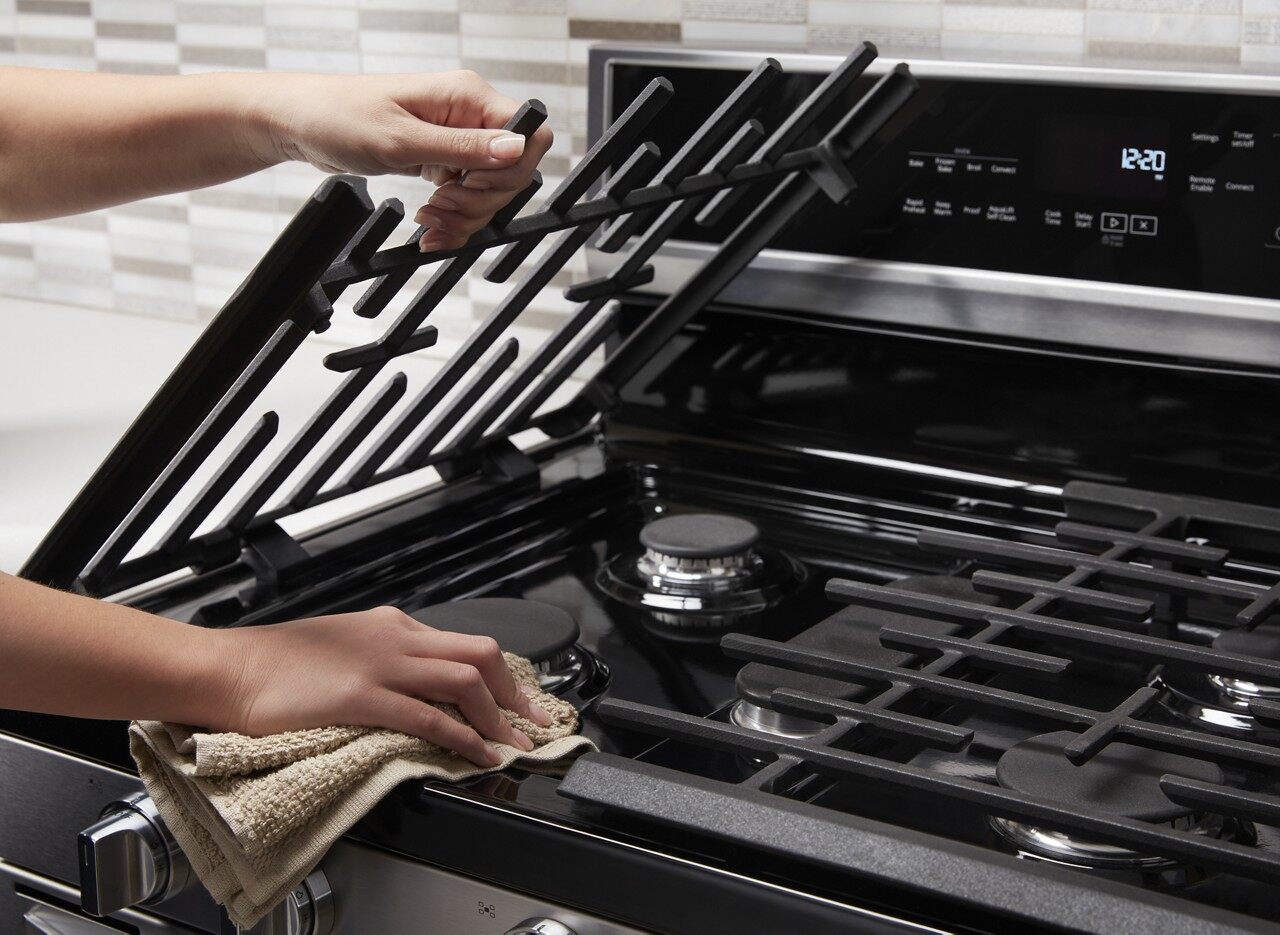
- Remove grates and burner caps: If you have a gas stove top, carefully remove the grates and burner caps. These can be soaked and cleaned separately.
- Disconnect and remove electric coils: For electric stove tops, unplug the coils and remove them from the stove top. This will make it easier to access the surface for cleaning.
- Wipe away loose debris: Use a dry microfiber cloth or sponge to gently wipe away any loose debris, such as crumbs or food particles, from the stove top. This will prevent them from spreading and making the cleaning process more difficult.
Once you’ve completed these steps, you’re ready to move on to the next stage – removing the loose debris from the stove top.
Removing Loose Debris
Now that you’ve prepared your stove top, it’s time to tackle the loose debris. This step is essential for achieving a thorough clean. Here’s what you need to do:
- Use a plastic scraper or spatula: Gently scrape off any large pieces of food or stubborn residues from the stove top surface. Be careful not to scratch or damage the stove top.
- Collect the debris: Gather the loosened debris using a paper towel or damp cloth. You want to remove as much of the loose dirt and grime as possible.
- Pay attention to crevices and nooks: Use a soft-bristled brush to reach into the crevices, corners, and edges of the stove top. This will help dislodge any hidden debris or stuck-on particles.
- Dispose of the debris: Empty the collected debris into a trash bin or compost. Make sure to properly dispose of it to maintain cleanliness.
By removing the loose debris, you’re laying the groundwork for a more effective and thorough cleaning process. With this step completed, you can now move on to cleaning the stove top using a baking soda paste.
Cleaning with Baking Soda Paste
Baking soda is a versatile and effective cleaner that can tackle tough stains and grease on your stove top. It’s a mild abrasive that won’t scratch the surface, making it perfect for deep cleaning. Here’s how to use it:
- Mix the paste: In a small bowl, combine baking soda with water to create a thick paste. The consistency should be similar to toothpaste.
- Apply the paste: Using a damp cloth or sponge, apply the baking soda paste to the stained areas of your stove top. Focus on areas with stubborn grime or greasy residue. Let the paste sit on the surface for about 10-15 minutes to allow it to work its magic.
- Gently scrub: After the paste has had time to sit, take a soft-bristled brush or cloth and gently scrub the surface in circular motions. The baking soda acts as a gentle abrasive, lifting away the dirt and grime.
- Rinse and wipe: Once you’ve thoroughly scrubbed the stove top, rinse the surface with warm water to remove any residue. Use a clean cloth or sponge to wipe away the excess moisture.
Using a baking soda paste is an effective way to remove stains and grime from your stove top. However, if you’re dealing with tough, baked-on grease, you may need to use a vinegar solution to break it down. We’ll explore that method next.
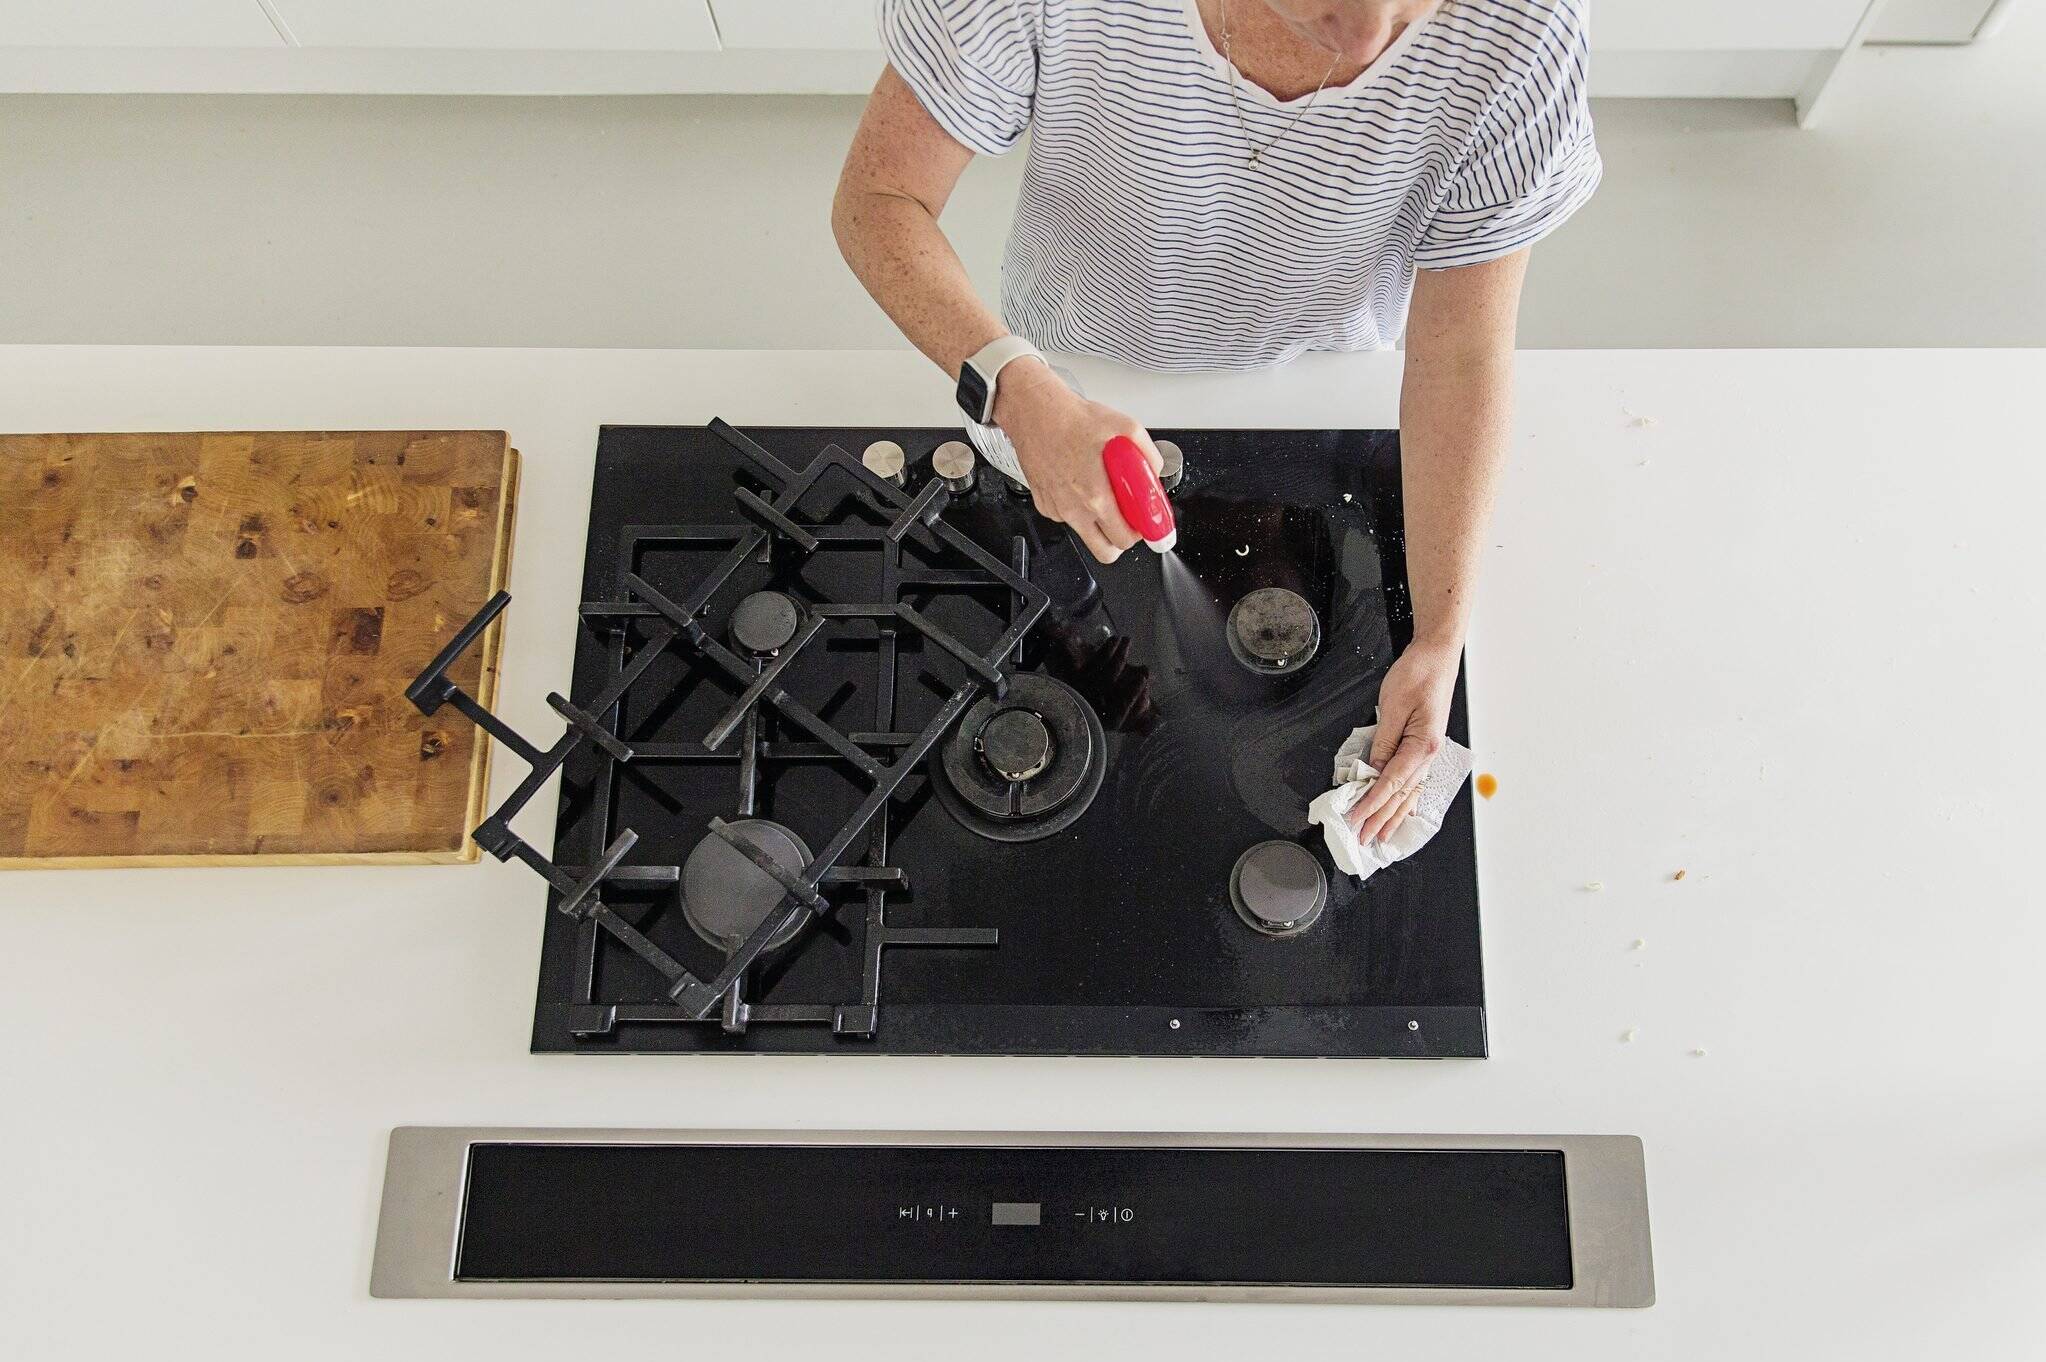
Cleaning with Vinegar Solution
Vinegar is a natural disinfectant and degreaser, making it a fantastic option for cleaning stubborn grease stains on your stove top. Here’s how to use it:
- Mix the solution: In a spray bottle, combine equal parts white vinegar and water. Shake the bottle well to ensure the solution is thoroughly mixed.
- Spray the surface: Liberally spray the vinegar solution onto the greasy areas of your stove top. Pay close attention to any heavily soiled areas or spots with built-up grease.
- Let it sit: Allow the vinegar solution to sit on the surface for about 5-10 minutes. The acidic properties of the vinegar will help break down the grease and make it easier to remove.
- Scrub gently: Take a soft-bristled brush or non-abrasive sponge and gently scrub the surface in circular motions. This will help lift and dissolve the grease stains. Be careful not to apply excessive pressure, especially if you have a glass or ceramic stove top.
- Rinse and wipe: Once you’ve scrubbed the surface, rinse with warm water to remove any remaining vinegar solution. Use a clean cloth or sponge to wipe away the excess moisture.
Using a vinegar solution is an effective way to cut through tough grease stains on your stove top. The acidity of the vinegar helps to break down the grease, making it easier to clean. If you’re still struggling with stubborn stains or greasy residues, read on for tips on removing them.
Use a mixture of baking soda and vinegar to create a paste and apply it to tough stains and grease on your stove top. Let it sit for 15 minutes, then scrub with a sponge and wipe clean.
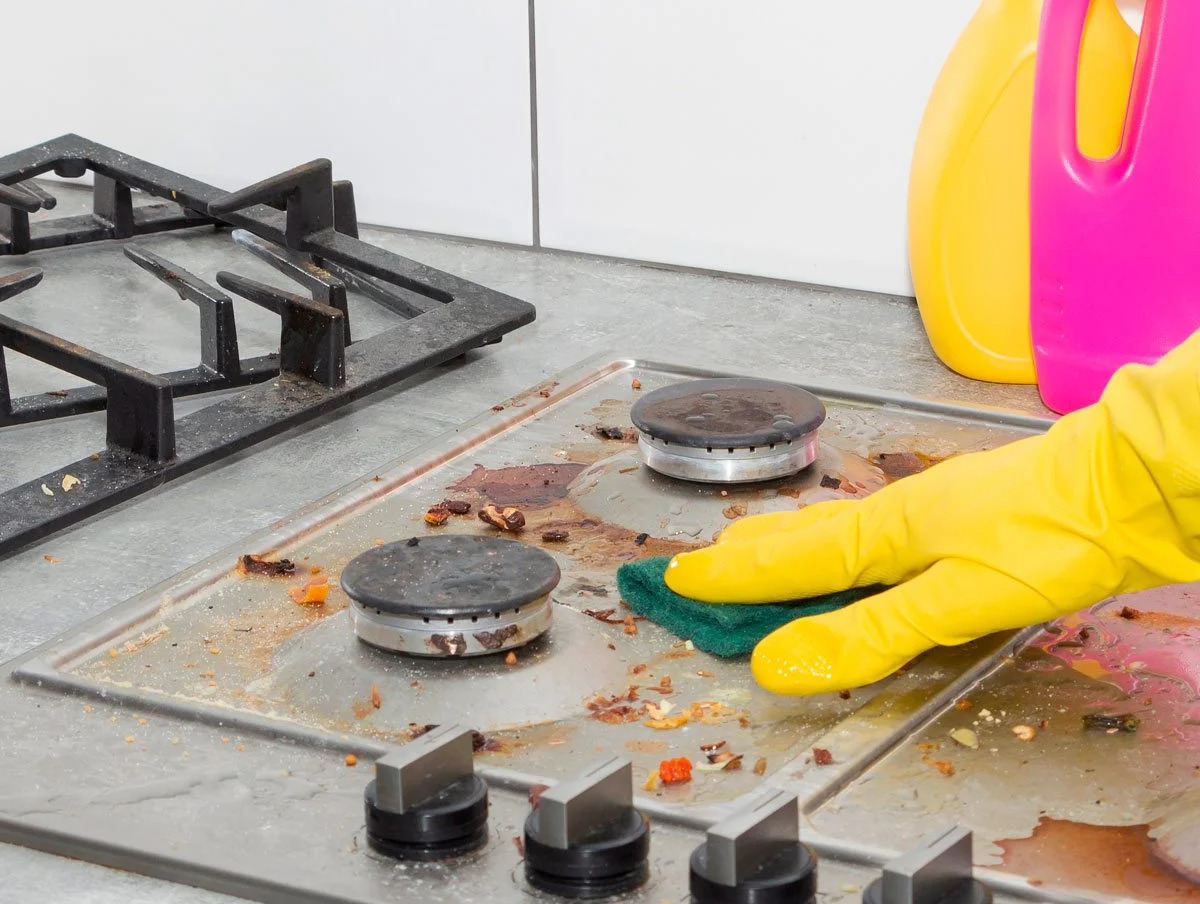
Removing Stubborn Stains and Grease
If you’re dealing with stubborn stains and grease that haven’t been fully removed with the baking soda paste and vinegar solution, don’t worry. There are a few additional methods you can try:
- Lemon juice: Squeeze some fresh lemon juice onto the stained area and let it sit for a few minutes. The acidity of the lemon juice can help break down the stubborn stains. Scrub gently with a soft-bristled brush or sponge, then rinse and wipe as usual.
- Commercial stove top cleaner: There are various commercial stove top cleaners available on the market. Follow the instructions on the product packaging and use them to target and remove tough stains and grease. Be sure to choose a cleaner that is compatible with your type of stove top.
- Boiling water: For particularly stubborn or sticky residue, you can try pouring boiling water over the affected area. Let it sit for a few minutes, then gently scrub and rinse. This method helps to loosen and dissolve the grease and grime.
Remember to always follow the manufacturer’s instructions and test any cleaning method on a small, inconspicuous area of your stove top before applying it to the entire surface. This will help ensure that the cleaning method is safe and effective for your specific stove top.
Now that you’ve tackled the stubborn stains and grease, it’s time to give the stove top an overall scrub to remove any remaining residue.
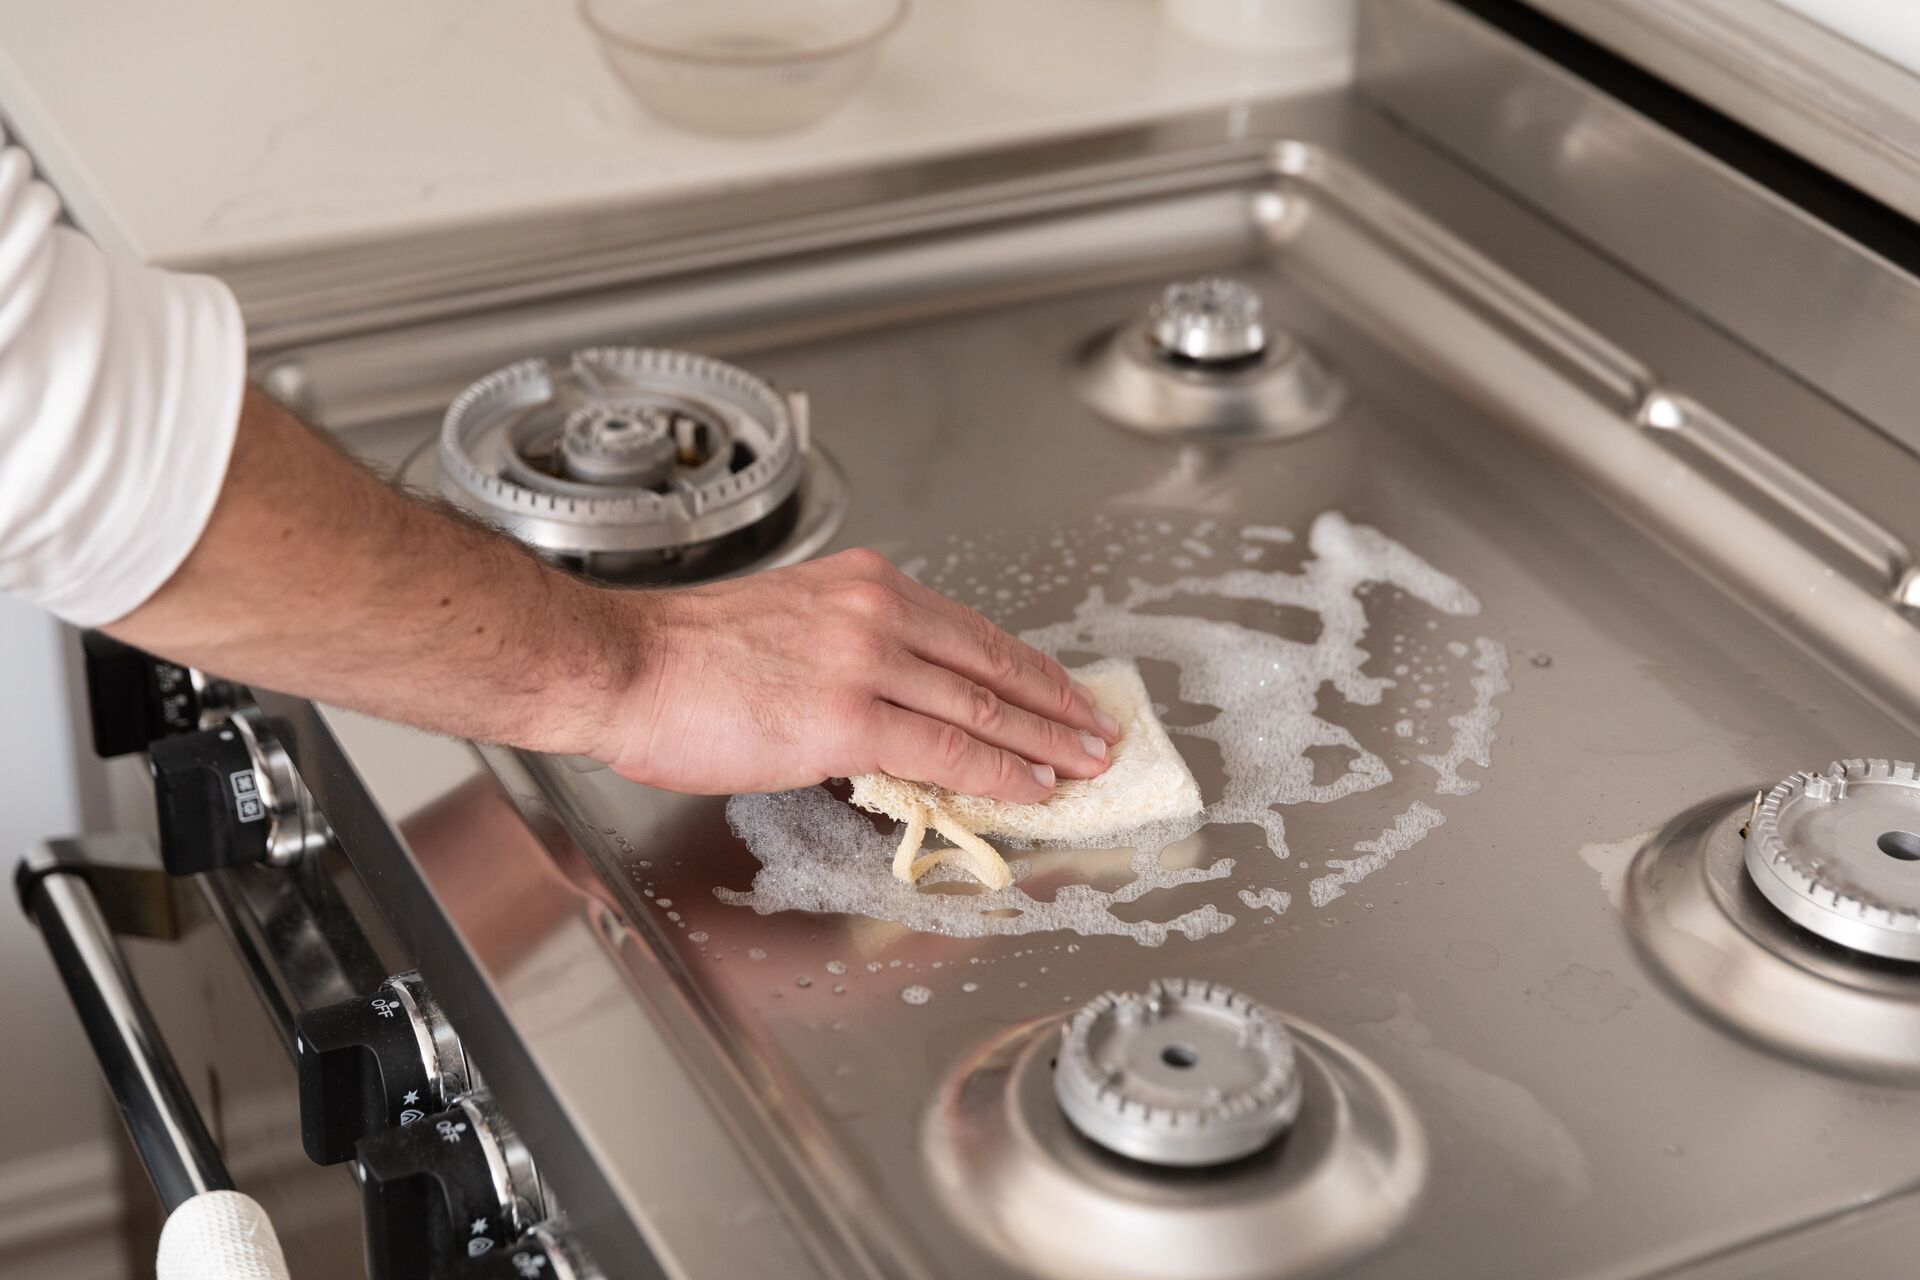
Scrubbing the Stove Top
Now that you’ve dealt with the stubborn stains and grease, it’s time to give your stove top a thorough scrub to ensure it’s clean and shiny. Here’s how to proceed:
- Dampen a soft cloth or sponge: Dip a cloth or sponge in warm soapy water. Make sure it’s damp, but not dripping wet.
- Gently scrub the surface: Use the damp cloth or sponge to scrub the entire stove top surface. Pay attention to any remaining residue or spots that need extra attention.
- Apply gentle pressure: Apply light to moderate pressure as you scrub, depending on the type of stove top you have. Be careful not to scrub too hard, especially if you have a delicate glass or ceramic surface.
- Continue until clean: Work your way around the stove top, ensuring you cover the entire surface. If necessary, rinse and reapply soapy water to the cloth or sponge as you go.
By scrubbing the stove top, you’ll remove any remaining dirt, grime, and cleaning product residue. This will leave your stove top looking clean and ready to use.
After the scrubbing process, it’s time to wipe down and dry the stove top to give it a final touch.
Wiping Down and Drying the Stove Top
After scrubbing the stove top, it’s important to wipe down and dry the surface to prevent water spots and ensure a clean and shiny finish. Follow these steps:
- Use a clean cloth or paper towel: Take a clean cloth or paper towel and dampen it with water. Make sure it’s not too wet, as excess water can leave streaks.
- Wipe the stove top: Gently wipe down the entire surface, removing any remaining soap residue or debris. Pay attention to corners and edges to ensure a thorough clean.
- Dry with a clean cloth: Once the stove top is wiped down, use a dry cloth or paper towel to dry the surface completely. This will prevent water spots and give your stove top a pristine appearance.
Make sure to also dry the grates, burner caps, and electric coils thoroughly before placing them back on the stove top.
With the stove top clean and dry, you’re ready to maintain its cleanliness for future cooking adventures.
Maintaining a Clean Stove Top
Now that your stove top is clean and spotless, it’s important to implement some maintenance practices to keep it looking its best for years to come. Here are some tips for maintaining a clean stove top:
- Wipe up spills immediately: Whenever a spill occurs, whether it’s food or liquid, make sure to wipe it up promptly. Leaving spills to linger can lead to stubborn stains and can be more difficult to clean later on.
- Regularly clean after use: Make it a habit to clean your stove top after every use. Even a quick wipe-down with a damp cloth or sponge can prevent build-up and make deep cleaning less frequent.
- Be mindful of pots and pans: When cooking, be mindful of the pots and pans you use. Avoid dragging heavy or rough-bottomed cookware across the stove top, as this can cause scratches and damage the surface.
- Use protective covers: Consider using protective covers or liners on your stove top to minimize the risk of spills and stains. These covers can be easily cleaned or replaced as needed.
- Avoid abrasive cleaners: Steer clear of abrasive cleaners, scrub brushes, or steel wool when cleaning your stove top. These can scratch and damage the surface. Stick to gentle, non-abrasive cleaning methods.
By incorporating these simple maintenance practices, you’ll be able to enjoy a clean and elegant stove top for years to come. Regular upkeep will prevent the build-up of dirt and grime, and make deep cleaning sessions less frequent and easier.
Now that you’re equipped with the knowledge and techniques to maintain a clean stove top, you’re ready to put them into practice and enjoy a sparkling kitchen!
Conclusion
A clean and well-maintained stove top not only enhances the overall appearance of your kitchen but also ensures a safe and efficient cooking experience. By following the steps outlined in this article, you can easily tackle tough stains and grease, leaving your stove top looking brand new.
Remember to gather the necessary materials, prepare the stove top, remove any loose debris, and clean with baking soda paste or vinegar solution. If needed, address stubborn stains and grease with additional methods such as lemon juice or commercial stove top cleaner. Scrub the surface gently, wipe it down, and make sure to dry it thoroughly for a spotless finish.
Maintaining a clean stove top is just as important as the initial cleaning process. By promptly addressing spills, cleaning after each use, and being mindful of cookware, you can keep your stove top looking its best with minimal effort. Avoid abrasive cleaners and consider using protective covers or liners to prevent damage.
By incorporating these cleaning and maintenance practices into your routine, you’ll enjoy a sparkling and aesthetically pleasing stove top in your kitchen for years to come.
So why wait? Start implementing these tips and enjoy the satisfaction of cooking in a clean and pristine environment. Happy cooking!
Frequently Asked Questions about How To Clean A Stove Top, Including Tough Stains And Grease
Was this page helpful?
At Storables.com, we guarantee accurate and reliable information. Our content, validated by Expert Board Contributors, is crafted following stringent Editorial Policies. We're committed to providing you with well-researched, expert-backed insights for all your informational needs.


0 thoughts on “How To Clean A Stove Top, Including Tough Stains And Grease”