Home>Storage Ideas>Kitchen Storage>How To Remove Permanent Marker From Almost Any Surface
Kitchen Storage
How To Remove Permanent Marker From Almost Any Surface
Modified: October 20, 2024
Learn how to remove permanent marker stains from various surfaces with these effective kitchen storage ideas. Say goodbye to stubborn marks and keep your surfaces looking clean and pristine.
(Many of the links in this article redirect to a specific reviewed product. Your purchase of these products through affiliate links helps to generate commission for Storables.com, at no extra cost. Learn more)
Introduction
Welcome to the world of kitchen storage ideas! Whether you have a small apartment kitchen or a spacious culinary haven, proper organization is key to maximizing space and efficiency. And one area that often gets neglected in the kitchen is storage. From pots and pans to utensils and ingredients, finding the right storage solutions can make a world of difference in keeping your kitchen clutter-free and functional.
In this article, we will explore a variety of kitchen storage ideas that will help you optimize your space and create an organized and efficient kitchen. From clever storage hacks to innovative product recommendations, we have got you covered!
Before we dive into the specifics, there are a few precautions to keep in mind when it comes to kitchen storage. First and foremost, always be mindful of safety. Ensure that heavy items are securely stored and that cabinets and shelves are properly installed to prevent any accidents. Additionally, take note of any food storage guidelines to maintain freshness and prevent contamination.
Now, let’s get started with some general tips to consider when tackling kitchen storage:
- Assess your needs: Take stock of what you have and evaluate your storage requirements. This will help you determine the best solutions for your specific kitchen.
- Utilize vertical space: Expand your storage options by utilizing walls and the vertical space in your kitchen. Consider installing shelves or hooks for additional storage.
- Invest in multi-purpose storage: Look for storage items that serve multiple functions. For example, a kitchen cart with built-in shelves can provide additional counter space and storage.
- Label containers: To avoid confusion and save time, make sure to label containers with the contents and expiration dates.
- Regularly declutter: Keep your kitchen organized by regularly decluttering and getting rid of items you no longer use or need.
Now that we have covered some general tips, let’s explore specific kitchen storage ideas for different areas of your kitchen, starting with walls.-
Key Takeaways:
- Maximize kitchen space with clever storage ideas and precautions for safety, freshness, and organization. Tackle stubborn permanent marker stains on various surfaces with effective and gentle cleaning methods.
- Create an efficient and organized kitchen with smart storage solutions and techniques to remove permanent marker stains from walls, wood, glass, metal, fabric, plastic, leather, ceramic, whiteboards, and electronics.
Read more: How To Get Permanent Marker Out Of A Carpet
Precautions to Take
When it comes to kitchen storage, it’s important to take certain precautions to ensure the safety and longevity of your items. By following these precautions, you can prevent accidents, maintain the quality of your kitchen tools and ingredients, and make the most out of your storage space.
Here are some precautions to keep in mind:
- Properly store knives and sharp objects: Knives and other sharp objects should be stored in a safe and secure manner to avoid accidents. Consider using a knife block or magnetic strip to keep your knives organized and out of reach of children.
- Keep chemicals and cleaning agents separate: Store cleaning agents, chemicals, and other potentially harmful substances away from food and cooking utensils. Make sure to label them properly and keep them in a designated storage area out of reach of children.
- Seal and store food properly: Use airtight containers to store food items and prevent spoilage. This will help maintain freshness and keep pests away. Label containers with the contents and expiration dates to ensure food safety.
- Avoid overcrowding shelves and cabinets: Overcrowding can lead to disorganization and difficulty in finding items. Leave enough space between items to easily access and retrieve them.
- Store heavy items on lower shelves: To prevent accidents and injuries, store heavy items, such as appliances or cookware, on lower shelves. This will also help maintain the stability of your shelves and cabinets.
- Regularly inspect and clean storage areas: Regularly inspect your storage areas for any signs of damage or pests. Clean and sanitize shelves, cabinets, and drawers to maintain a hygienic kitchen environment.
- Protect delicate items: Use padding or protective materials to store delicate items such as glassware or fragile cookware. This will prevent them from getting scratched or damaged.
- Consider temperature and humidity: Some items, such as spices or certain foods, are sensitive to temperature and humidity. Store them in appropriate containers or in designated spaces to maintain their quality and flavor.
By taking these precautions, you can ensure the safety of your kitchen items, maintain their longevity, and create an organized and efficient storage system. With these guidelines in mind, let’s explore some specific kitchen storage ideas for different surfaces in your kitchen.
General Tips
When it comes to kitchen storage, there are several general tips and strategies that can help you make the most of your space and keep your kitchen organized. These tips are applicable to various areas of your kitchen, from cabinets and drawers to countertops and pantry shelves.
Here are some general tips to consider:
- Declutter regularly: One of the most important steps in efficient kitchen storage is decluttering. Regularly go through your kitchen items and get rid of anything you no longer use or need. This will free up space and make it easier to organize.
- Categorize your items: Sort your kitchen items into categories, such as cooking utensils, baking supplies, or spices. This will make it easier to find what you need and keep things organized.
- Use drawer dividers: Drawer dividers are a great way to separate and organize smaller items like cutlery, measuring spoons, and kitchen gadgets. They help maximize drawer space and keep everything neat and accessible.
- Invest in clear containers: Clear storage containers are ideal for storing dry goods, snacks, and pantry items. They allow you to see what’s inside at a glance, making it easier to keep track of your supplies and prevent food waste.
- Utilize vertical space: Take advantage of vertical space by installing hooks or hanging racks on the inside of your cabinet doors. This is a great way to store frequently used items like pots, pans, and cutting boards, and it helps free up valuable cabinet space.
- Label everything: Labels are your best friend when it comes to kitchen storage. Label containers, jars, and shelves to ensure everything is in its proper place. This not only keeps your kitchen organized, but it also makes it easier for family members or housemates to find what they need.
- Maximize pantry space: Make the most of your pantry space by using stackable containers, can racks, and spice racks. These tools help create more shelf space and keep pantry items easily accessible.
- Group similar items together: Keep similar items together to create designated zones in your kitchen. For example, Group baking supplies in one area, cooking oils and spices in another, and utensils in a separate drawer. This makes it easier to find and grab what you need when cooking or baking.
By implementing these general tips, you will be well on your way to creating an organized and efficient kitchen storage system. Now, let’s delve into the specifics of removing permanent marker from various surfaces in your kitchen.
Removing Permanent Marker from Walls
Discovering permanent marker stains on your walls can be frustrating, but fear not! There are several methods you can try to remove them effectively.
Here are a few techniques to remove permanent marker stains from walls:
- Rubbing Alcohol: Dampen a clean cloth with rubbing alcohol and gently rub the marker stain in a circular motion. Start from the outside of the stain and work your way towards the center. Once the stain begins to fade, wipe the area with a clean, damp cloth to remove any residue.
- Toothpaste: Apply a small amount of non-gel toothpaste directly to the marker stain on the wall. Use a clean cloth or sponge to gently scrub the area in circular motions. Rinse the wall with water and wipe it dry with a clean cloth.
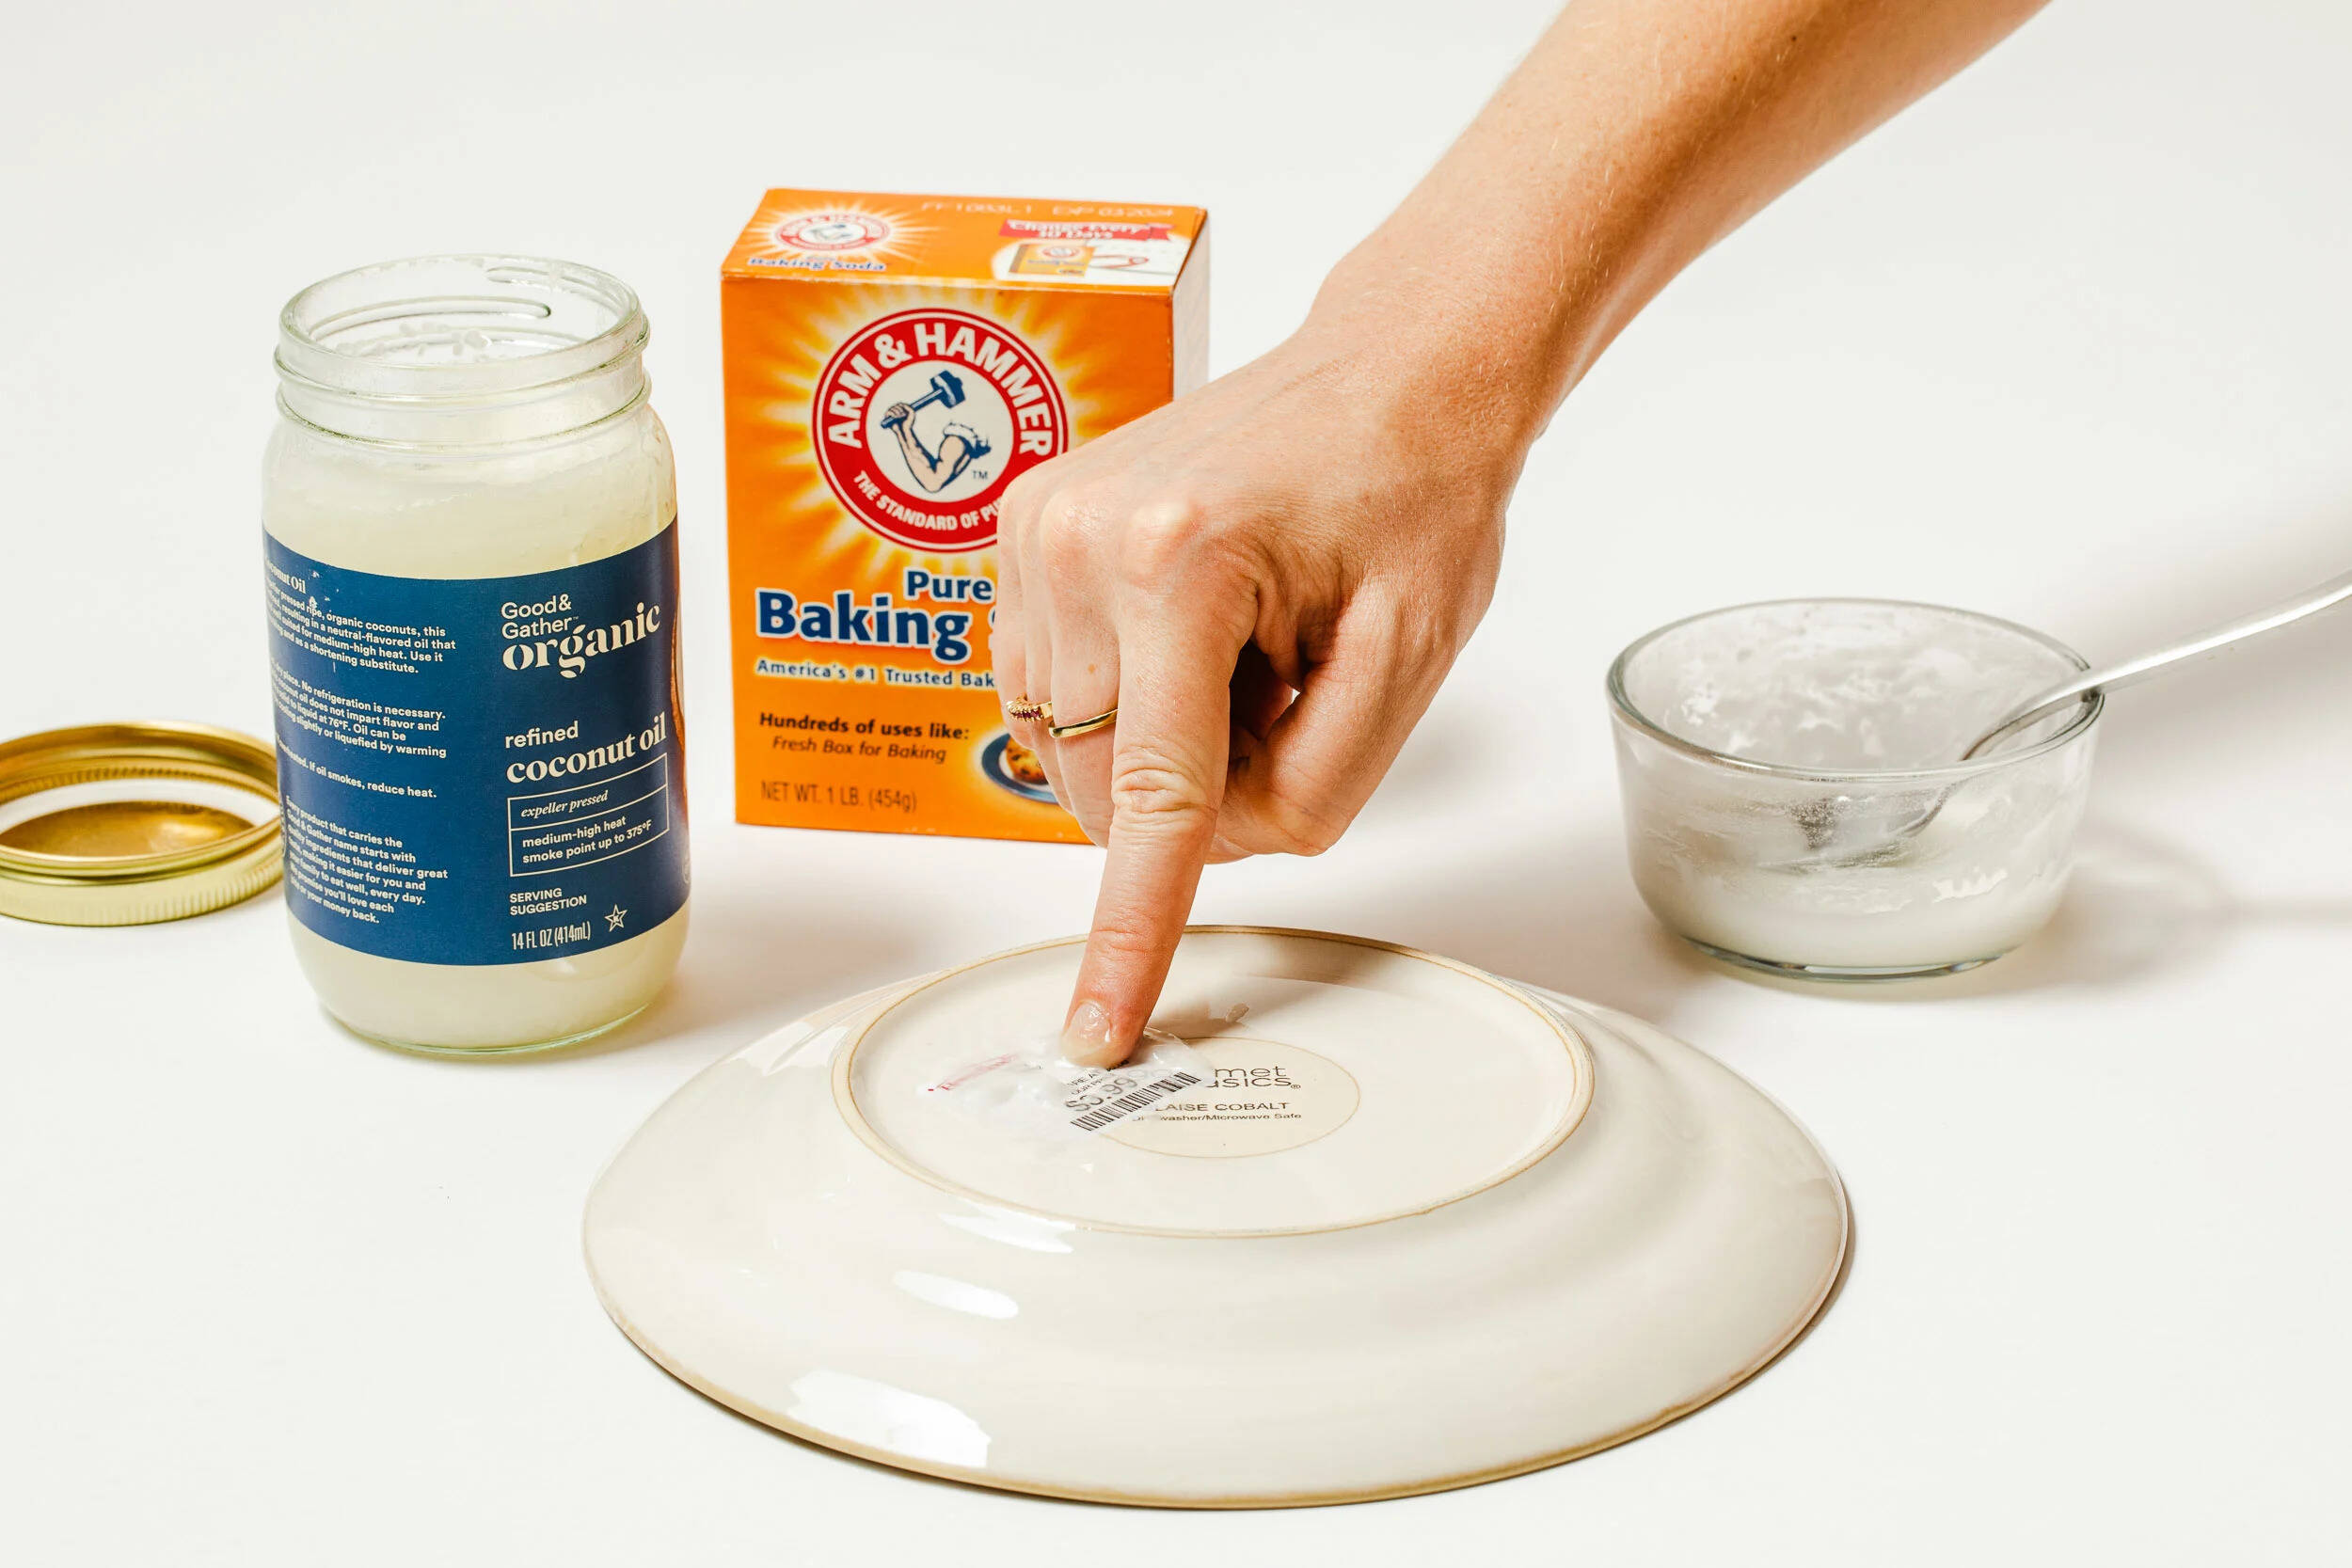
- Baking Soda and Water: Create a paste by mixing baking soda with water until it forms a thick consistency. Apply the paste to the marker stain and use a soft cloth to gently scrub the area. Rinse with water and wipe dry.
- Vinegar: Dampen a cloth with white vinegar and gently blot the marker stain until it begins to fade. Wipe the area with a clean cloth moistened with water to remove any residue.
- Hairspray: Spray a small amount of hairspray directly onto the marker stain. Let it sit for a few seconds, and then wipe the area with a clean cloth or sponge. Rinse with water and pat dry.
Remember to test any cleaning method on a small, inconspicuous area of your wall before applying it to the marker stain. This helps ensure that the cleaning agent does not damage or discolor the paint.
If the marker stain persists or the methods above are not suitable for your wall surface, you may consider repainting the affected area for a fresh, clean look.
Now that you have learned how to remove permanent marker from walls, let’s explore methods for removing permanent marker stains from other surfaces in your kitchen.
Removing Permanent Marker from Wood
Accidentally getting permanent marker on your wooden furniture or surfaces can be quite distressing. However, there are a few methods you can try to effectively remove those stubborn marks without damaging the wood.
Here are some techniques to remove permanent marker stains from wood:
- White Toothpaste: Apply a small amount of non-gel white toothpaste directly to the marker stain on the wood. Gently scrub the area with a soft, damp cloth or sponge. Wipe away the toothpaste and marker residue with a clean, damp cloth.
- Isopropyl Alcohol: Dampen a clean cloth with isopropyl alcohol and gently dab the marker stain on the wood. Be careful not to apply too much alcohol, as it could damage the finish. Gently wipe the area with a clean, damp cloth and dry it thoroughly.
- Acetone: Use caution with this method, as acetone can be harsh on some types of wood finishes. Apply a small amount of acetone to a clean cloth and gently dab the marker stain. Wipe the area with a clean, damp cloth and dry it thoroughly. Test this method on a small, inconspicuous area first to ensure it does not cause any damage.
- Pencil Eraser: Try using a clean pencil eraser to gently rub the marker stain on the wood. This method works best on lighter-colored woods and may require some patience for deeper stains.
- Olive Oil or Baby Oil: Apply a small amount of olive oil or baby oil to a clean cloth and gently rub the marker stain on the wood. The oil helps break down the marker ink and can be especially useful for porous or unfinished woods.
Remember to always test any cleaning method on a small, inconspicuous area of the wood before applying it to the marker stain. This helps ensure that the cleaning agent does not cause any discoloration or damage to the wood finish.
If the marker stain persists or the methods above are not suitable for your specific type of wood, you may need to consult a professional furniture restorer or consider refinishing the affected area.
Now that you know how to remove permanent marker from wood, let’s move on to methods for removing permanent marker stains from glass surfaces in your kitchen.
Read more: How To Get Permanent Marker Off Glass
Removing Permanent Marker from Glass
Dealing with permanent marker stains on glass surfaces can be frustrating, but don’t worry! There are several effective methods to remove those unwanted marks and restore the clarity of your glass.
Here are some techniques to remove permanent marker stains from glass:
- Rubbing Alcohol: Dampen a clean cloth or cotton ball with rubbing alcohol and gently rub the marker stain on the glass. The alcohol helps break down the ink, allowing you to wipe it away. Be sure to wipe the glass with a clean, dry cloth afterwards to remove any residue.
- Nail Polish Remover: Apply a small amount of non-acetone nail polish remover to a clean cloth or cotton ball. Gently rub the marker stain on the glass in a circular motion. Rinse the glass with water and dry it thoroughly.
- White Vinegar: Dampen a cloth with white vinegar and gently dab the marker stain on the glass. The acidity of the vinegar helps dissolve the ink. Afterward, rinse the glass with water and dry it with a clean cloth.
- Mr. Clean Magic Eraser: Moisten a Mr. Clean Magic Eraser with water and gently scrub the marker stain on the glass. The micro-abrasive material of the eraser helps lift off stubborn marks. Rinse the glass with water and dry it thoroughly afterwards.
For particularly stubborn permanent marker stains, you may need to repeat the cleaning process or use a combination of different methods. It’s also a good idea to test any cleaning solution on a small, inconspicuous area of the glass before applying it to the marker stain.
If you prefer using natural cleaning solutions, you can try using a paste made of baking soda and water or a mixture of lemon juice and salt. Apply these mixtures to the marker stain, gently scrub, and rinse with water.
Keep in mind that some glass surfaces may have protective coatings or delicate finishes. In such cases, it’s advisable to consult a professional or the manufacturer for specific cleaning recommendations to prevent any damage.
Now that you have learned how to remove permanent marker from glass, let’s move on to methods for removing permanent marker stains from metal surfaces in your kitchen.
Removing Permanent Marker from Metal
Finding permanent marker stains on metal surfaces in your kitchen can be bothersome, but don’t worry! There are several effective methods to remove those stubborn marks and restore the shine of your metal.
Here are some techniques to remove permanent marker stains from metal:
- Isopropyl Alcohol: Dampen a clean cloth with isopropyl alcohol and gently rub the marker stain on the metal surface. The alcohol helps dissolve the ink, allowing you to wipe it away. Rinse the metal surface with water and dry it thoroughly.
- Acetone/Nail Polish Remover: Apply a small amount of acetone or non-acetone nail polish remover to a clean cloth or cotton ball. Gently rub the marker stain on the metal in a circular motion. Rinse the metal surface with water and dry it thoroughly afterwards.
- White Vinegar: Dampen a cloth with white vinegar and gently dab the marker stain on the metal. Let the vinegar sit on the stain for a few minutes to help break down the ink. Rinse the metal surface with water and dry it with a clean cloth.
- Baking Soda Paste: Create a paste by mixing baking soda with a small amount of water. Apply the paste to the marker stain and gently scrub the metal surface with a soft cloth or sponge. Rinse with water and dry thoroughly.
- WD-40: Spray a small amount of WD-40 lubricant onto a clean cloth and gently rub the marker stain on the metal. The lubricant helps loosen the ink, making it easier to wipe away. Clean the metal surface with warm, soapy water and rinse it well.
As with any cleaning method, it’s important to test it on a small, inconspicuous area of the metal surface before applying it to the marker stain. This helps ensure that the cleaning agent doesn’t compromise the integrity of the metal finish.
For extra stubborn or older marker stains on certain types of metal, you may need to use a fine-grade steel wool or a metal polish paste. These options should be used with caution, as they can potentially scratch or alter the appearance of the metal surface. Follow the manufacturer’s instructions and be sure to thoroughly rinse and dry the metal afterwards.
Now that you know how to remove permanent marker from metal surfaces, let’s move on to methods for removing permanent marker stains from fabric in your kitchen.
For non-porous surfaces like glass or metal, try using rubbing alcohol or nail polish remover. For porous surfaces like wood or fabric, try using a mixture of baking soda and toothpaste. Always test in a small, inconspicuous area first.
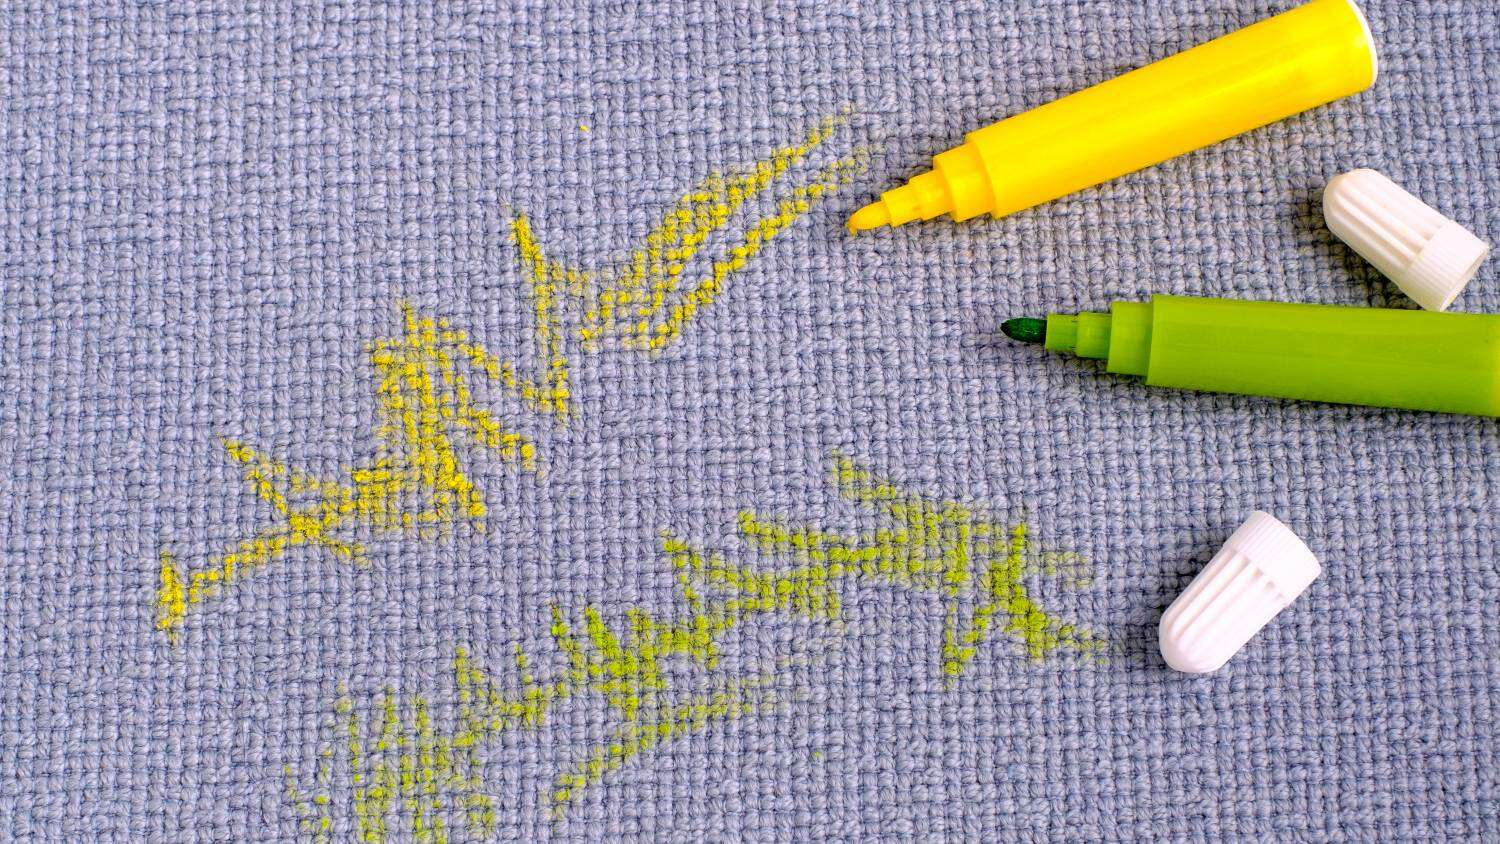
Removing Permanent Marker from Fabric
Accidentally getting permanent marker on fabric can be distressing, but don’t panic! With the right techniques, you can effectively remove those stubborn marks and salvage your fabric items.
Here are some methods to remove permanent marker stains from fabric:
- Isopropyl Alcohol: Dampen a clean cloth with isopropyl alcohol and gently dab the marker stain on the fabric. Blot the stain from the outside in to prevent spreading. Repeat the process until the stain fades. Rinse the fabric with cold water and launder as usual.
- Milk: Soak the stained fabric in milk for about 30 minutes. Gently rub the fabric together to loosen the marker stain. Rinse the fabric with cold water and launder as usual.
- Hairspray: Spray a small amount of hairspray onto the marker stain and let it sit for a few minutes. Blot the area with a clean cloth or sponge. Rinse the fabric with cold water and launder as usual.
- White Vinegar: Mix equal parts of white vinegar and water in a bowl. Dampen a cloth with the vinegar solution and gently blot the marker stain. Rinse the fabric with cold water and launder as usual.
- Hydrogen Peroxide: Use caution with this method, as hydrogen peroxide can fade or bleach certain fabrics. Test the peroxide on a small, inconspicuous area of the fabric first. If there is no adverse reaction, apply a small amount to the marker stain and gently blot with a clean cloth. Rinse the fabric with cold water and launder as usual.
It’s important to act quickly when treating a permanent marker stain on fabric. The longer the stain sets, the more difficult it might be to remove.
If the fabric is delicate or requires special care, consider consulting a professional cleaner for tailored advice on removing the marker stain. They have the expertise to handle different fabric types and ensure the best results.
Remember to read and follow the care instructions on the fabric label to prevent any damage during the cleaning process.
Now that you know how to remove permanent marker from fabric, let’s move on to methods for removing permanent marker stains from plastic in your kitchen.
Removing Permanent Marker from Plastic
Discovering permanent marker stains on plastic surfaces can be frustrating, but fear not! With a few simple techniques, you can effectively remove those stubborn marks and restore the appearance of your plastic items.
Here are some methods to remove permanent marker stains from plastic:
- Rubbing Alcohol: Dampen a clean cloth or cotton ball with rubbing alcohol and gently rub the marker stain on the plastic. The alcohol helps dissolve the ink, allowing you to wipe it away. Rinse the plastic surface with water and dry it thoroughly.
- Toothpaste: Apply a small amount of non-gel toothpaste directly to the marker stain on the plastic. Use a soft cloth or sponge to gently scrub the area in circular motions. Rinse the plastic with water and dry it with a clean cloth.
- Baking Soda and Water: Create a paste by mixing baking soda with a small amount of water. Apply the paste to the marker stain on the plastic and gently scrub with a soft cloth or sponge. Rinse the plastic with water and dry it thoroughly.
- White Vinegar: Dampen a cloth with white vinegar and gently dab the marker stain on the plastic. Let the vinegar sit on the stain for a few minutes to help dissolve the ink. Rinse the plastic surface with water and dry it with a clean cloth.
- Acetone/Nail Polish Remover: Use caution with this method, as acetone can potentially damage certain types of plastic. Apply a small amount of acetone or non-acetone nail polish remover to a clean cloth or cotton ball. Gently rub the marker stain on the plastic until it dissipates. Rinse the plastic with water and dry it thoroughly.
Remember to test any cleaning method on a small, inconspicuous area of the plastic surface before applying it to the marker stain. This helps ensure that the cleaning agent doesn’t cause any damage or discoloration.
If you’re dealing with a plastic item that’s sensitive to abrasion, such as eyeglass lenses or electronic screens, it’s best to consult the manufacturer’s guidelines or seek professional assistance to avoid causing any harm.
By applying these methods and using a gentle touch, you can effectively remove permanent marker stains from plastic surfaces in your kitchen.
Now that you know how to remove permanent marker from plastic, let’s explore methods for removing permanent marker stains from leather in your kitchen.
Read more: How To Get Permanent Marker Off A Dresser
Removing Permanent Marker from Leather
Discovering permanent marker stains on your leather items can be disheartening, but don’t give up just yet! With the right techniques and a little patience, you can effectively remove those unwanted marks and restore the look of your leather.
Here are some methods to remove permanent marker stains from leather:
- Rubbing Alcohol: Dampen a clean cloth with rubbing alcohol and gently blot the marker stain on the leather. Be sure to blot, rather than rub, to avoid spreading the ink. Continue until the stain begins to lift. Rinse the cloth with water and wipe away any residue. Dry the leather with a clean cloth.
- Non-Acetone Nail Polish Remover: Apply a small amount of non-acetone nail polish remover to a clean cloth or cotton ball. Gently blot the marker stain on the leather, being careful not to saturate the leather. Work in small sections and continue until the stain fades. Rinse the cloth with water and wipe away any residue. Dry the leather with a clean cloth.
- Hairspray: Spray a small amount of hairspray directly onto the marker stain on the leather. Let it sit for a few minutes, then gently blot the area with a clean cloth. Repeat as necessary until the stain diminishes. Rinse the cloth with water and remover any residue. Dry the leather with a clean cloth.
- Commercial Leather Cleaner: If the marker stain persists, you can try using a commercial leather cleaner. Follow the instructions on the product and apply the cleaner to a clean cloth. Gently blot the marker stain on the leather, working in small sections. Wipe away any residue and dry the leather with a clean cloth.
- Lemon Juice and Cream of Tartar: Create a paste by mixing equal parts of lemon juice and cream of tartar. Apply the paste to the marker stain and gently rub it into the leather using a soft cloth. Let the paste sit on the stain for a few minutes, then wipe it away with a damp cloth. Dry the leather with a clean cloth.
Remember to test any cleaning method on a small, inconspicuous area of the leather before applying it to the marker stain. This helps ensure that the cleaning agent doesn’t cause any damage or discoloration to the leather.
For delicate or expensive leather items, it’s advisable to seek professional assistance or consult the manufacturer for specific cleaning recommendations to prevent any unintended consequences.
By employing these methods and treating the leather with care, you can effectively remove permanent marker stains from your leather items and restore their original beauty.
Now that you know how to remove permanent marker from leather, let’s move on to methods for removing permanent marker stains from ceramic surfaces in your kitchen.
Removing Permanent Marker from Ceramic
Discovering permanent marker stains on ceramic surfaces can be frustrating, but don’t worry! With a few simple techniques, you can effectively remove those stubborn marks and restore the look of your ceramic items. Whether it’s a dish, a mug, or a ceramic countertop, these methods can work wonders.
Here are some methods to remove permanent marker stains from ceramic:
- Isopropyl Alcohol: Dampen a clean cloth with isopropyl alcohol and gently rub the marker stain on the ceramic. The alcohol helps dissolve the ink, allowing you to wipe it away. Rinse the ceramic surface with water and dry it with a clean cloth.
- White Vinegar: Dampen a cloth with white vinegar and gently dab the marker stain on the ceramic. Let the vinegar sit on the stain for a few minutes to help break down the ink. Rinse the ceramic surface with water and dry it with a clean cloth.
- Baking Soda Paste: Create a paste by mixing baking soda with a small amount of water. Apply the paste to the marker stain on the ceramic and gently scrub with a soft cloth or sponge. Rinse the ceramic with water and dry it with a clean cloth.
- Mr. Clean Magic Eraser: Moisten a Mr. Clean Magic Eraser with water and gently scrub the marker stain on the ceramic. The micro-abrasive material helps lift off stubborn marks. Rinse the ceramic with water and dry it with a clean cloth.
- Hydrogen Peroxide: Use caution with this method, as hydrogen peroxide can potentially lighten or bleach the ceramic surface. Test the peroxide on a small, inconspicuous area of the ceramic. If there is no adverse reaction, apply a small amount to the marker stain and gently scrub with a soft cloth or sponge. Rinse the ceramic with water and dry it with a clean cloth.
Remember to test any cleaning method on a small, inconspicuous area of the ceramic surface before applying it to the marker stain. This helps ensure that the cleaning agent doesn’t cause any damage or discoloration.
If the marker stain is particularly stubborn or embedded in porous ceramic surfaces, you may need to repeat the cleaning process or use a combination of different methods. It’s also a good idea to avoid using abrasive materials or harsh chemicals that could damage the ceramic.
By applying these methods and exercising caution, you can effectively remove permanent marker stains from ceramic surfaces in your kitchen.
Now that you know how to remove permanent marker from ceramic, let’s move on to methods for removing permanent marker stains from whiteboards in your kitchen.
Removing Permanent Marker from Whiteboards
If you accidentally use permanent marker instead of a dry-erase marker on your whiteboard, don’t worry! There are effective methods to remove those stubborn marks and restore the pristine surface of your whiteboard.
Here are some techniques to remove permanent marker stains from whiteboards:
- Dry-Erase Marker: Surprisingly, using a regular dry-erase marker can help remove permanent marker stains. Simply color over the permanent marker with a dry-erase marker, then wipe it off with a dry cloth or eraser. The solvent in the dry-erase marker dissolves the permanent marker ink, making it easier to remove.
- Rubbing Alcohol: Dampen a clean cloth or paper towel with rubbing alcohol and gently blot the marker stain on the whiteboard. The rubbing alcohol helps break down the ink, allowing you to wipe it away. Finish by wiping the whiteboard with a dry cloth or eraser.
- Nail Polish Remover: Apply a small amount of non-acetone nail polish remover to a clean cloth or paper towel. Gently rub the marker stain on the whiteboard until it begins to fade. Wipe away any residue with a damp cloth and finish by drying the whiteboard with a clean cloth or eraser.
- Whiteboard Cleaner: There are commercially available whiteboard cleaners specifically designed to remove stains and ink residue. Follow the instructions on the cleaner, applying it to a clean cloth or paper towel. Gently rub the marker stain on the whiteboard and wipe away any residue. Dry the whiteboard with a clean cloth or eraser.
- Vinegar and Water Solution: Mix equal parts of white vinegar and water in a spray bottle. Spray the solution onto a clean cloth or paper towel and gently rub the marker stain on the whiteboard. Wipe away any residue with a damp cloth and dry the whiteboard with a clean cloth or eraser.
Remember to test any cleaning method on a small, inconspicuous area of the whiteboard before applying it to the marker stain. This ensures that the cleaning agent doesn’t damage or affect the whiteboard surface.
For particularly stubborn permanent marker stains, you can create a paste using baking soda and water. Apply the paste to the marker stain, let it sit for a few minutes, then gently scrub with a clean cloth or eraser. Rinse the whiteboard with water and dry it thoroughly.
By utilizing these methods and being gentle with your whiteboard, you can effectively remove permanent marker stains and restore the surface for a fresh start.
Now that you know how to remove permanent marker from whiteboards, let’s move on to methods for removing permanent marker stains from electronics in your kitchen.
Removing Permanent Marker from Electronics
Accidentally getting permanent marker on your electronics can be concerning, but don’t panic! With a few careful techniques, you can effectively remove those stubborn marks without damaging your devices.
Before attempting any cleaning method, it’s important to exercise caution and ensure that you follow the manufacturer’s instructions for cleaning and maintenance. Always disconnect the device from any power source and proceed with care.
Here are some methods to remove permanent marker stains from electronics:
- Isopropyl Alcohol: Dampen a clean cloth with isopropyl alcohol and gently dab the marker stain on the electronics. Be careful not to let the liquid seep into any openings or ports. Blot the stain until it begins to fade, then wipe the area with a clean, dry cloth.
- Cotton Swabs: Dip a cotton swab into isopropyl alcohol or nail polish remover (non-acetone) and carefully dab the marker stain. Use a gentle, circular motion to remove the ink. Wipe the area with a clean, dry cloth.
- Mild Soap and Water: Mix a small amount of mild liquid soap with water to create a gentle cleaning solution. Dampen a clean cloth with the solution and gently blot the marker stain, being careful not to saturate the cloth. Wipe the area with a clean, damp cloth and dry it thoroughly.
- Eraser: For certain electronics with a smooth surface, such as plastic or glass screens, you can try using a soft eraser to gently rub the marker stain. Use light pressure and be cautious not to scratch the surface. Wipe away any residue with a clean, dry cloth.
- Commercial Electronics Cleaner: There are specialized electronics cleaning sprays or wipes available in the market. Follow the instructions on the product carefully and use them to clean the affected area. Ensure that the cleaner is suitable for use on the specific electronic device you are cleaning.
Remember to test any cleaning method on a small, inconspicuous area of the electronic device before applying it to the marker stain. This helps ensure that the cleaning agent doesn’t damage or affect the device’s appearance or functionality.
If the marker stain persists or the methods above are not suitable for your specific electronic device, it’s advisable to consult the manufacturer’s guidelines or seek professional assistance to avoid causing any damage.
By following these methods and taking proper precautions, you can effectively remove permanent marker stains from your electronic devices and restore their appearance.
Now that you know how to remove permanent marker from electronics, let’s summarize our findings.
Read more: How To Remove Marker Stains From A Carpet
Conclusion
Keeping your kitchen organized and clutter-free is essential for a functional and enjoyable cooking experience. With the right storage solutions, you can optimize space and efficiently store your kitchen essentials. Additionally, knowing effective methods for removing permanent marker stains from various surfaces can help maintain the cleanliness and aesthetics of your kitchen.
In this article, we explored a variety of kitchen storage ideas, from utilizing vertical space to decluttering regularly. By following these tips, you can create an organized and efficient storage system that suits your specific needs and maximizes space in your kitchen.
We also discussed various methods for removing permanent marker stains from different surfaces commonly found in the kitchen. Whether it’s walls, wood, glass, metal, fabric, plastic, leather, ceramic, whiteboards, or electronics, there are techniques available to tackle those unwanted marker stains.
Remember to always test any cleaning method on a small, inconspicuous area before applying it to the marker stain. This helps ensure that the cleaning agent does not cause any damage or discoloration to the surface.
Ultimately, creating a well-organized kitchen and knowing how to handle unexpected stains can contribute to a more enjoyable and stress-free cooking experience. So, implement these kitchen storage ideas, be prepared to tackle marker stains, and enjoy your organized and pristine kitchen!
Frequently Asked Questions about How To Remove Permanent Marker From Almost Any Surface
Was this page helpful?
At Storables.com, we guarantee accurate and reliable information. Our content, validated by Expert Board Contributors, is crafted following stringent Editorial Policies. We're committed to providing you with well-researched, expert-backed insights for all your informational needs.


0 thoughts on “How To Remove Permanent Marker From Almost Any Surface”