Home>Interior Design>How To Strip Paint From Wood To Refresh The Surface
Interior Design
How To Strip Paint From Wood To Refresh The Surface
Modified: October 20, 2024
Learn how to strip paint from wood to refresh your surface with our interior design tips. Remove old layers of paint for a fresh and updated look.
(Many of the links in this article redirect to a specific reviewed product. Your purchase of these products through affiliate links helps to generate commission for Storables.com, at no extra cost. Learn more)
Introduction
Welcome to the world of interior design! As an expert in the field, I’m here to guide you through the process of stripping paint from wood surfaces to refresh the look of your furniture or architectural elements. Whether you want to restore an old piece to its natural beauty or prepare it for a fresh coat of paint, knowing how to strip paint effectively is essential.
Painted wood surfaces can become worn, chipped, or discolored over time, detracting from the overall aesthetic of your space. By stripping away the old paint, you can revitalize the wood, revealing its natural grain and texture. A freshly stripped and refinished piece can breathe new life into your interior design scheme, adding character and style.
Before we dive into the process of stripping paint from wood, it’s important to note that safety should be your top priority. Paint and paint strippers can contain harmful chemicals, so it’s crucial to take the necessary precautions to protect yourself and the environment.
Key Takeaways:
- Transform your space by stripping paint from wood surfaces to reveal natural beauty and add character to your interior design scheme. Prioritize safety, choose the right method, and enjoy the rewarding process.
- Prepare, strip, and revitalize wood surfaces with patience and attention to detail. Follow safety precautions, choose the right tools, and unleash your creativity to achieve stunning results in your interior design projects.
Read more: How To Remove Paint From Weather Stripping
Safety Precautions
When working with paint strippers and other chemicals, it is essential to prioritize safety. Here are some crucial safety precautions to keep in mind:
- Protective Gear: Wear gloves, safety goggles, and a face mask to prevent any contact with the paint stripper or inhalation of fumes.
- Ventilation: Ensure that the work area is well-ventilated by opening windows or using fans to minimize exposure to fumes. If working indoors, consider using a respirator with appropriate filters.
- Working Area: Set up your work area in a well-lit and well-ventilated space, preferably outdoors. Lay down a drop cloth or newspaper to protect the surrounding area from any spills or drips.
- Read the Instructions: Carefully read and follow the instructions provided with the paint stripper product. Different products may have specific application methods and safety guidelines.
- Dispose of Waste Responsibly: Dispose of used paint stripper, paint chips, and other waste materials according to local regulations. Avoid pouring chemicals down drains or disposing of them in regular trash bins.
- Keep Out of Reach: Ensure that paint strippers and other chemicals are stored in a secure place, out of reach of children and pets.
By following these safety precautions, you can minimize the risk of accidents and protect yourself and the environment while working on your paint stripping project.
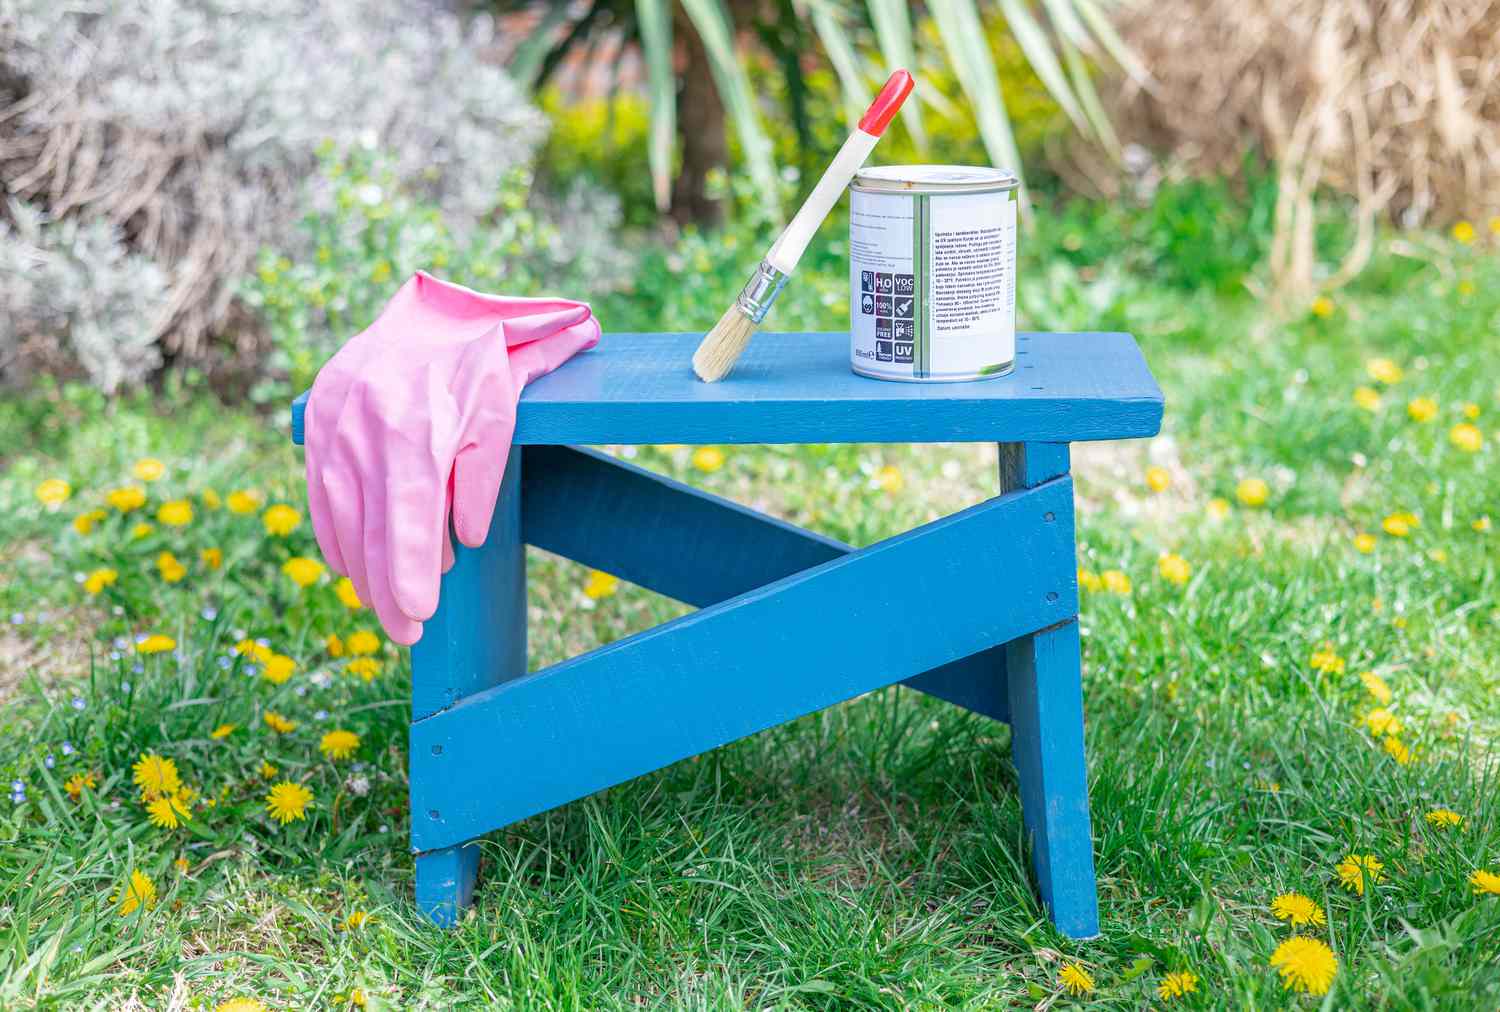
Tools and Materials Required
Before you begin the paint stripping process, it’s important to gather the necessary tools and materials. Here’s a list of what you’ll need:
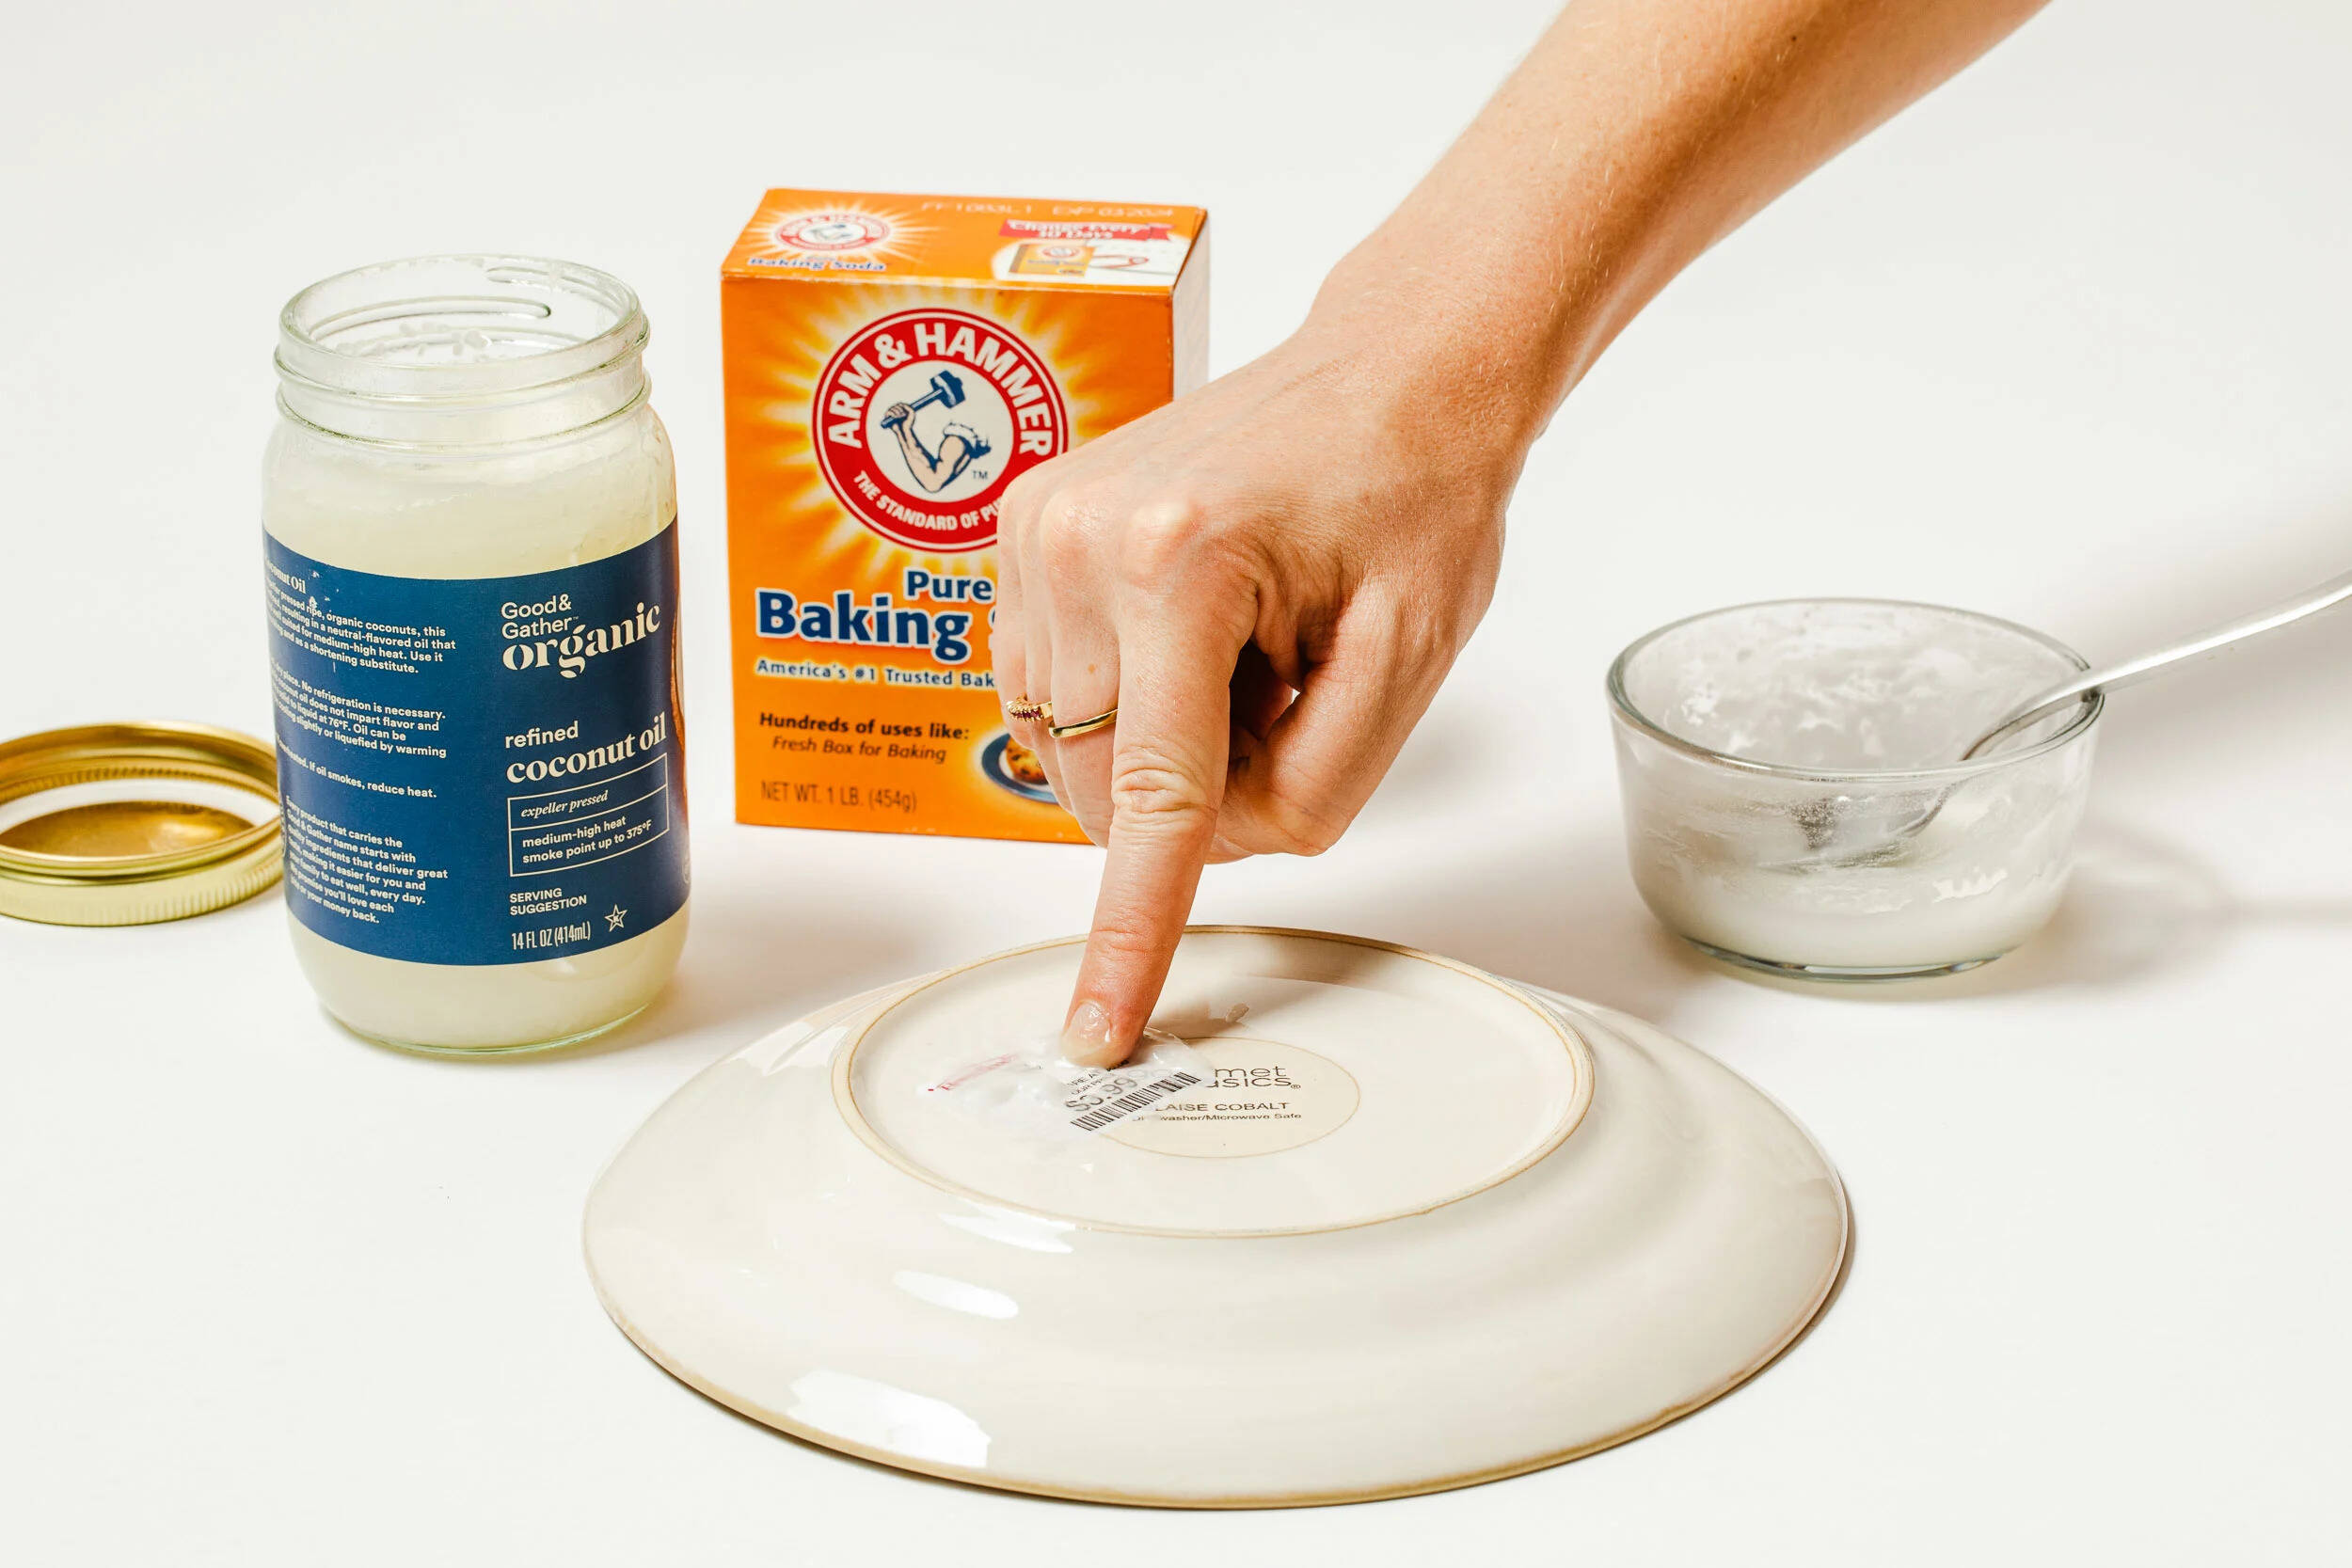
- Paint Stripper: Choose a paint stripper suitable for your specific project and type of paint. There are various options available, including liquid strippers, gel strippers, and paste strippers. Make sure to read the labels and follow the manufacturer’s instructions.
- Safety Gear: Wear protective gloves, safety goggles, and a face mask to protect yourself from chemical exposure and fumes.
- Scrapers: Have a variety of scrapers on hand, such as a putty knife, paint scraper, and a toothed scraper, which will help you remove the paint effectively. Choose the appropriate scraper based on the size and intricacy of your project.
- Brushes or Rollers: Depending on the type of paint stripper you’re using, you may need brushes or rollers to apply the stripper evenly on the wood surface.
- Clean Cloths or Rags: Keep clean cloths or rags nearby to wipe away excess paint stripper, as well as to clean the wood surface.
- Bucket of Water: Having a bucket of water nearby will allow you to rinse off the scraper and brushes when they become clogged with paint residue.
- Sanding Tools: After stripping the paint, you’ll need sandpaper or a sanding block to smooth the wood surface. Choose the appropriate grit depending on the desired finish and condition of the wood.
- Cleaner and Solvent: Depending on the condition of the wood, you may need a cleaner or solvent to remove any remaining residue or old finish from the surface.
- Finishing Products: If you plan to refinish the wood surface, make sure you have the necessary finishing products such as stain, varnish, or paint.
Gathering these tools and materials before starting your project will ensure that you have everything you need to strip the paint effectively and achieve the desired results.
Step 1: Prepare the Work Area
Before diving into the paint stripping process, it’s crucial to properly prepare your work area. Following these steps will help you create a safe and organized environment for your project:
- Cover nearby surfaces: Remove any furniture or objects near the wood surface you’re planning to strip. Cover the surrounding area with a drop cloth or layers of newspaper to protect it from any paint drips or spills.
- Ensure good ventilation: If possible, choose an outdoor area to work in. If you need to work indoors, open windows and use fans to ensure proper air circulation and minimize fumes.
- Protect yourself: Put on your safety goggles, gloves, and a face mask to protect your eyes, hands, and respiratory system from any potential chemical exposure or fumes.
- Remove obstacles: Clear the wood surface of any obstacles, such as nails or hardware. Use a screwdriver or pliers to safely remove any screws or fasteners to ensure that the surface is clean and ready for paint stripping.
- Test an inconspicuous area: Before applying the paint stripper to the entire surface, it’s essential to test a small, inconspicuous area. This will help you determine if the paint stripper is effective and compatible with the wood surface.
- Read the instructions: Familiarize yourself with the manufacturer’s instructions on the paint stripper product you’re using. Different products may have specific application methods and safety guidelines.
By adequately preparing your work area, you’ll create an environment that is safe, well-ventilated, and free from potential obstacles or distractions. Taking these steps will help you achieve the best results when stripping paint from your wood surface.
Step 2: Remove Hardware and Tape Off
Before you begin the paint stripping process, it’s important to remove any hardware or fixtures from the wood surface. This will allow you to fully strip the paint and ensure that these elements don’t get damaged in the process. Follow these steps:
- Identify and remove hardware: Take note of any screws, knobs, hinges, or other hardware attached to the wood surface. Use a screwdriver or appropriate tool to carefully remove them. Place the hardware in a labeled container or ziplock bag for safekeeping.
- Tape off non-removable items: If there are elements on the wood surface that cannot be removed, such as decorative molding or glass inserts, it’s essential to tape them off to protect them from the paint stripper. Use painter’s tape or masking tape to cover these areas completely.
- Protect adjacent surfaces: If the wood surface you’re working on is in close proximity to other surfaces or materials that you want to protect, use painter’s tape or masking tape to create a barrier between the wood and the adjacent areas.
By removing hardware and properly taping off non-removable items and adjacent surfaces, you’ll ensure that these elements are not damaged or affected by the paint stripping process. This step will also make the paint stripping process more efficient and allow for thorough coverage of the wood surface.
Read more: How To Remove Old Paint From Wood Siding
Step 3: Choose the Paint Stripping Method
When it comes to paint stripping, there are several methods you can choose from depending on the type of paint, the condition of the wood, and your personal preferences. Here are the most common paint stripping methods:
- Liquid Paint Stripper: Liquid paint strippers are the most commonly used method for stripping paint from wood surfaces. They are typically applied using a brush or roller, left on for a specified amount of time to soften the paint, and then scraped away using a scraper or putty knife.
- Gel Paint Stripper: Gel paint strippers have a thicker consistency compared to liquid strippers, making them ideal for vertical surfaces or intricate details. The gel adheres to the painted surface, allowing for longer contact time to dissolve the paint before being scraped off.
- Paste Paint Stripper: Paste paint strippers are a more heavy-duty option for stubborn or multiple layers of paint. They are applied as a thick paste and left on the surface for an extended period, giving the chemicals ample time to penetrate and break down the paint. Paste strippers are typically scraped off, similar to gel or liquid strippers.
- Heat Gun: A heat gun can be used to soften the paint and make it easier to scrape away. However, this method requires caution as excessive heat or prolonged exposure can damage the wood or even cause a fire hazard. It’s important to follow the manufacturer’s instructions and take safety precautions when using a heat gun.
Consider the specific requirements of your project, the type and number of paint layers to be removed, and the tools or equipment available to you when choosing the paint stripping method. Each method has its pros and cons, so be sure to select the one that aligns with your needs.
Remember, regardless of the method you choose, follow the manufacturer’s instructions and take necessary safety precautions to protect yourself and the wood surface.
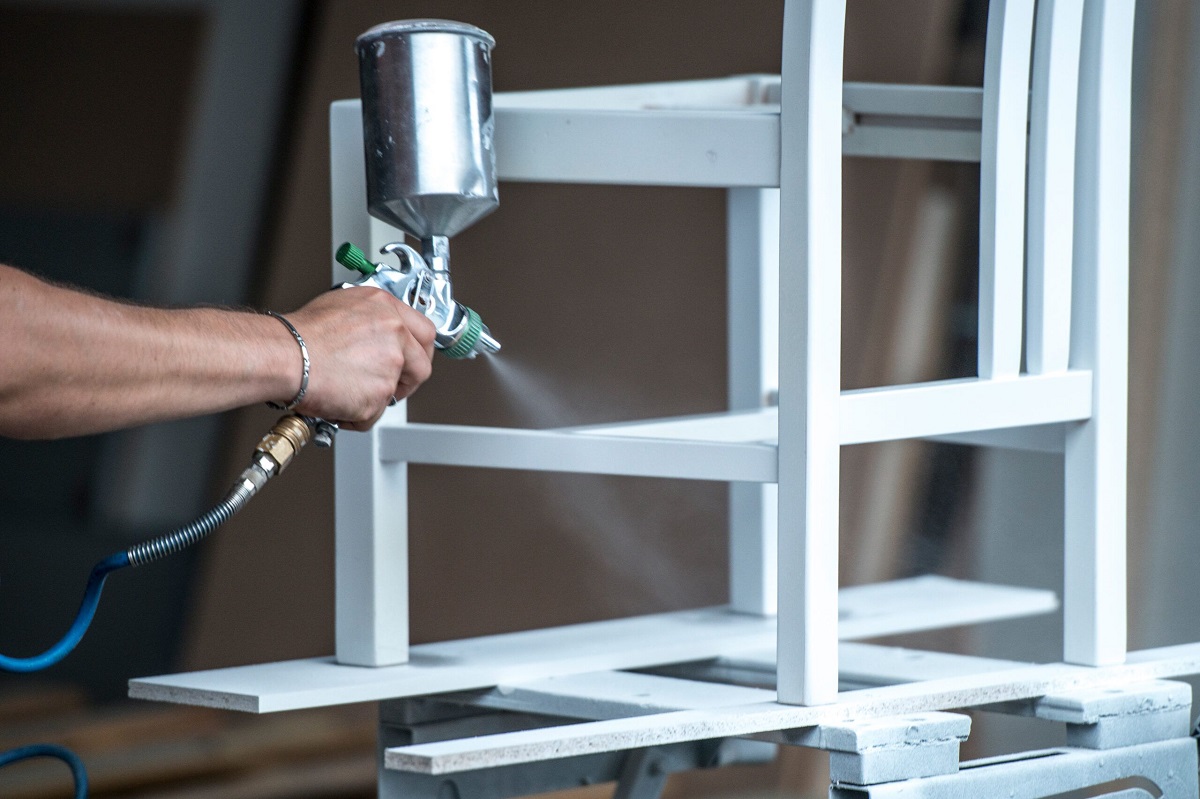
Step 4: Apply the Paint Stripper
Once you have chosen the paint stripping method, it’s time to apply the paint stripper to the wood surface. Follow these steps to ensure effective and even application:
- Read the instructions: Review the manufacturer’s instructions on the paint stripper product you’ve chosen. Each product may have specific application guidelines, such as recommended thickness or recommended application tools.
- Protect yourself: Put on your safety goggles, gloves, and a face mask to protect yourself from any potential chemical exposure while handling the paint stripper.
- Apply the paint stripper: Using a brush or roller, apply the paint stripper evenly to the wood surface. Make sure to follow the instructions for the desired thickness and coverage. Avoid applying the paint stripper in direct sunlight or hot temperatures, as it can dry too quickly and be less effective.
- Allow the paint stripper to work: After applying the stripper, give it sufficient time to work as per the instructions provided. This varies depending on the type and brand of paint stripper, but typically ranges from 15 minutes to several hours. During this time, the paint stripper will start to break down and soften the paint layers.
- Check condition and adjust: After the recommended time, check the condition of the paint. If it appears soft and has started to bubble or lift, it is likely ready for removal. If the paint is still hardened, you may need to let the paint stripper work for a bit longer.
By following these steps and adhering to the manufacturer’s instructions, you can ensure that the paint stripper is applied correctly and has sufficient time to penetrate the paint layers, making the removal process more efficient and effective.
Use a chemical paint stripper for large areas, and a heat gun or sanding for smaller areas. Always wear protective gear and work in a well-ventilated area.
Step 5: Let the Paint Stripper Work
After applying the paint stripper to the wood surface, it’s important to allow it sufficient time to work its magic. This step ensures that the paint layers are adequately softened, making them easier to remove. Here’s what you should do:
- Follow the manufacturer’s instructions: Different paint strippers have varying recommended waiting times. Read the instructions provided with your chosen product to determine the ideal duration for letting the paint stripper work.
- Patience is key: Be patient and resist the temptation to start scraping off the paint prematurely. Giving the paint stripper enough time to penetrate and dissolve the paint layers will yield better results and make the paint removal process easier.
- Monitor the progress: During the waiting period, keep an eye on the paint surface to observe any changes. You may notice the paint starting to bubble or lift, indicating that the paint stripper is effectively breaking down the layers.
- Avoid excessive drying: To prevent the paint stripper from drying out too quickly, especially in hot or dry environments, consider covering the treated area with plastic wrap or a plastic sheet. This helps to retain moisture and ensure optimum effectiveness.
- Test a small area: If you’re unsure whether the paint has softened enough, you can test a small area by gently scraping it with a scraper or putty knife. If the paint easily lifts and comes off, it’s a good indication that the paint stripper has done its job.
Remember, the key to successful paint removal is allowing the paint stripper sufficient time to work. Rushing this step may result in incomplete paint removal or the need for excessive scraping, potentially damaging the wood surface. So, exercise patience and let the chemical reaction between the paint stripper and the paint layers do its work.
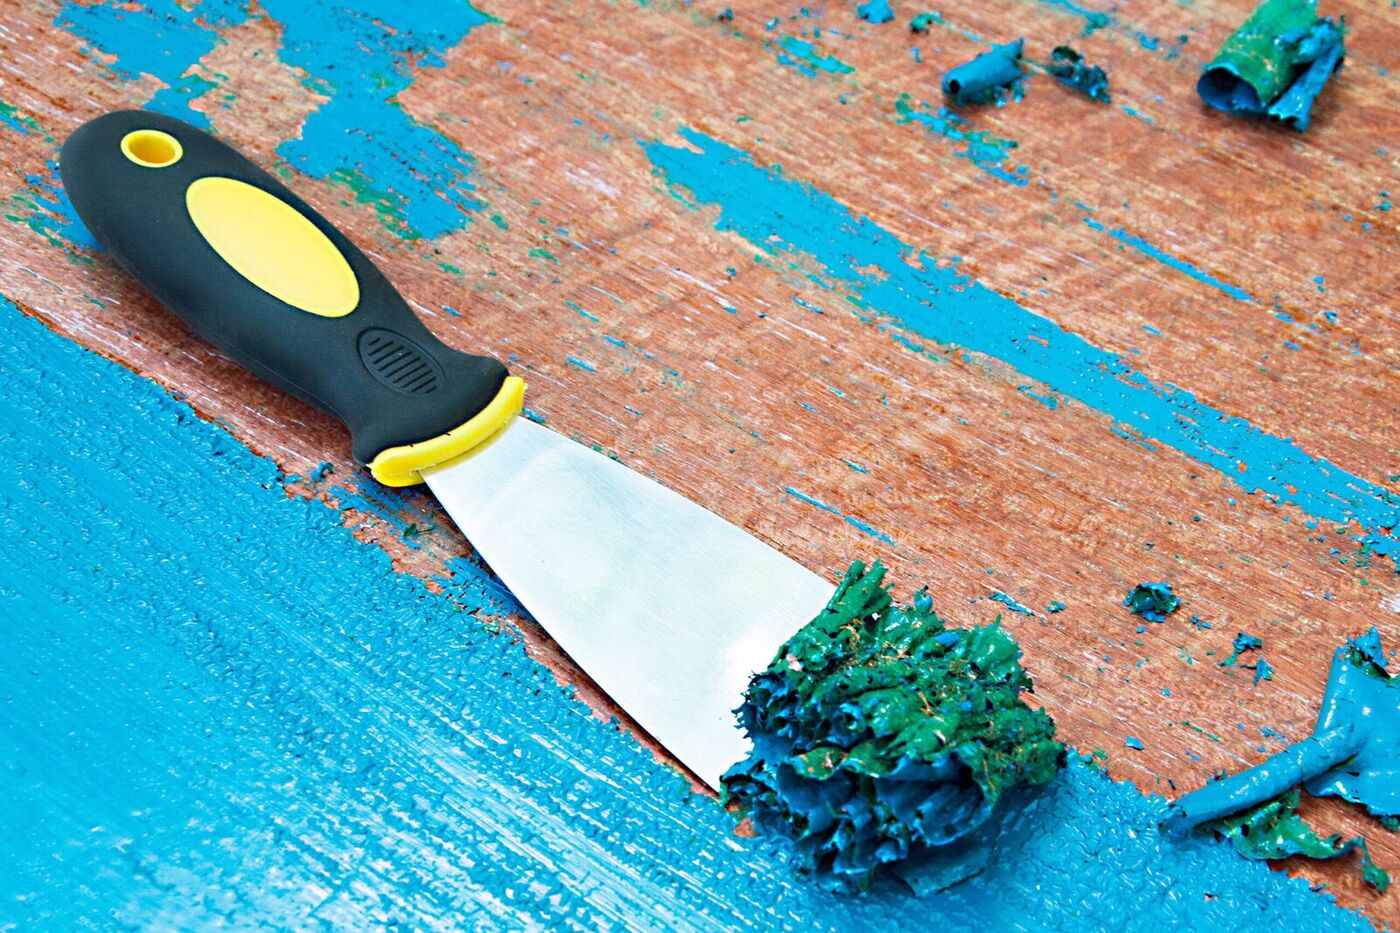
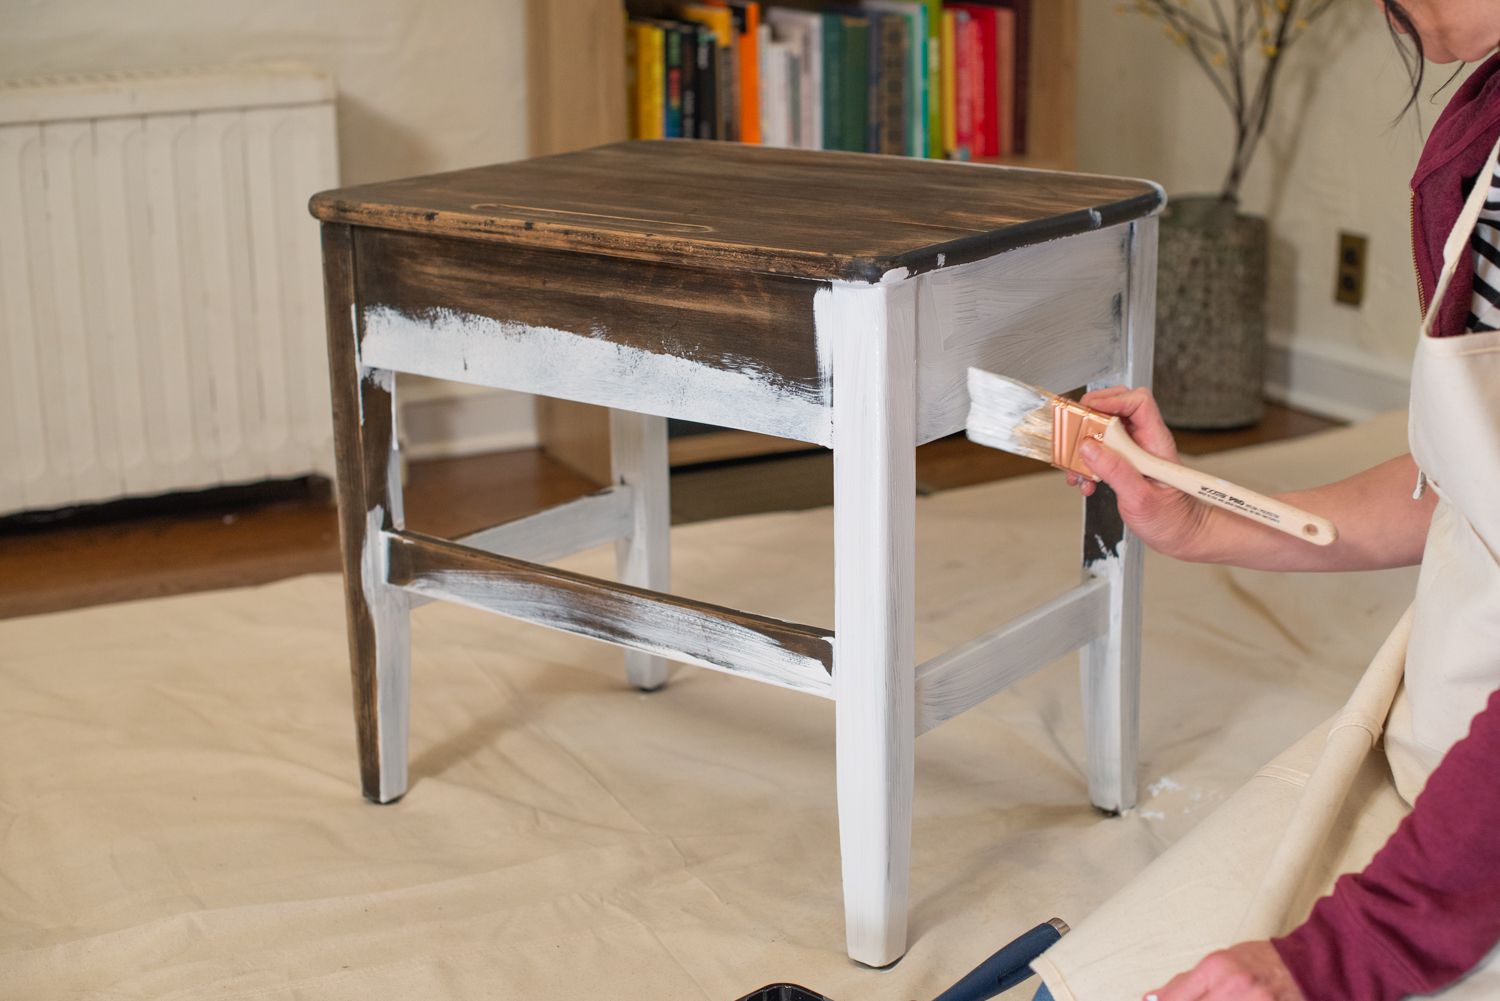
Step 6: Scrape off the Paint
Once the paint stripper has had enough time to work its magic and soften the paint layers, it’s time to begin the paint removal process. Follow these steps to effectively scrape off the paint:
- Equip yourself: Put on your safety goggles and gloves to protect yourself while scraping off the paint. Consider using a dust mask to avoid inhaling any particles.
- Choose the right scraper: Select a scraper or putty knife that is suitable for the size and intricacy of the wood surface. A wide putty knife works well for larger, flat areas, while smaller scrapers are better for detailed or curved surfaces.
- Begin scraping: Starting from one edge of the wood surface, gently scrape the softened paint, using even pressure. Work in small sections and continue scraping until all the loose paint has been removed. Be careful not to dig into the wood surface or apply excessive force, which can cause damage.
- Dispose of the scraped paint: Place the scraped paint into a disposable container or a garbage bag. Make sure to follow the proper disposal guidelines for paint and paint residue in your area.
- Reapply the paint stripper if necessary: If there are stubborn or multiple layers of paint remaining, you may need to reapply the paint stripper and repeat the scraping process. Follow the instructions provided by the manufacturer for applying a second coat.
As you scrape off the paint, regularly wipe the scraper blade or putty knife on a cloth or rag to remove any accumulated paint residue. This will ensure that you have a clean scraping surface throughout the process.
Take your time and work methodically, being thorough in your scraping efforts. Remember that removing multiple layers of paint may require more time and effort. Be patient and focus on achieving a smooth and evenly stripped surface.
Read more: How To Paint Wood Blinds
Step 7: Clean the Wood Surface
After successfully removing the paint, it’s crucial to clean the wood surface to remove any residual paint stripper and prepare it for further treatment or finishing. Follow these steps to ensure a clean and prepared surface:
- Wipe away the paint stripper: Take a clean cloth or rag and wipe away any leftover paint stripper from the wood surface. Make sure to remove all traces of the chemical to prevent any potential damage or interference with the next steps.
- Use a neutralizer if necessary: Some paint strippers require a neutralizing agent or solvent to deactivate any remaining chemicals. Read the instructions provided with your paint stripper to determine if a neutralizer is needed and follow the recommended process.
- Rinse with water: Dampen a cloth or sponge with clean water and gently wipe the wood surface to remove any residual paint stripper or neutralizer. This will help ensure that the wood is free from any chemical residue.
- Dry the wood surface: Allow the wood surface to air dry completely before proceeding to the next steps. This will ensure that the wood is ready for sanding or applying a new finish without any moisture present.
- Inspect for any remaining paint or residue: Carefully examine the wood surface to check for any missed paint spots or stubborn residue. If necessary, use a scraper or sandpaper to remove any remaining traces of paint or residue, taking care not to damage the wood.
By following these steps, you will remove any residual paint stripper and create a clean and prepared surface for the next stage of the project, whether that involves sanding, staining, painting, or applying a protective finish.
Remember to dispose of any used cloths, rags, or materials soaked with paint stripper properly and in accordance with local regulations.
Step 8: Sand the Wood
After cleaning the wood surface, the next step is to sand it to achieve a smooth and even finish. Sanding helps remove any remaining paint residues, smooth out imperfections, and prepare the surface for a new stain, paint, or protective finish. Follow these steps to sand the wood effectively:
- Select the right sandpaper: Choose the appropriate grit sandpaper depending on the condition of the wood surface. Coarser grits like 80 or 120 are suitable for removing paint and rough imperfections, while finer grits like 220 or higher are ideal for achieving a smooth finish.
- Protect yourself: Put on safety goggles and a dust mask to protect yourself from the dust generated during the sanding process.
- Start with coarse sandpaper: Begin sanding the wood surface using the coarser grit sandpaper. Move the sandpaper in a circular or back-and-forth motion, applying even pressure to remove any remaining paint, rough areas, or blemishes. Sand in the direction of the wood grain for a smoother finish.
- Progress to finer grits: Once you have achieved a smooth surface with the coarse grit sandpaper, gradually progress to finer grits. This will help refine the surface and eliminate any visible scratches left by the coarser sandpaper.
- Clean the surface: After sanding with each grit, use a brush or cloth to remove the sanding dust from the wood surface. Wipe away any residue before moving on to the next grit. This will help you assess the progress and ensure a consistent finish.
- Finish with a final sanding: For a truly smooth and flawless finish, consider doing a final sanding with a very fine grit sandpaper, such as 320 or higher. This will help create a surface ready for staining, painting, or applying a protective finish.
Remember to sand any intricate or hard-to-reach areas by hand or with the appropriate tools, such as sanding blocks or sanding sponges. Take your time and be thorough in the sanding process, ensuring that the wood surface is uniformly smooth and free from paint remnants or imperfections.
After sanding, make sure to clean the wood surface again to remove any lingering dust particles before proceeding with the next steps of your project.
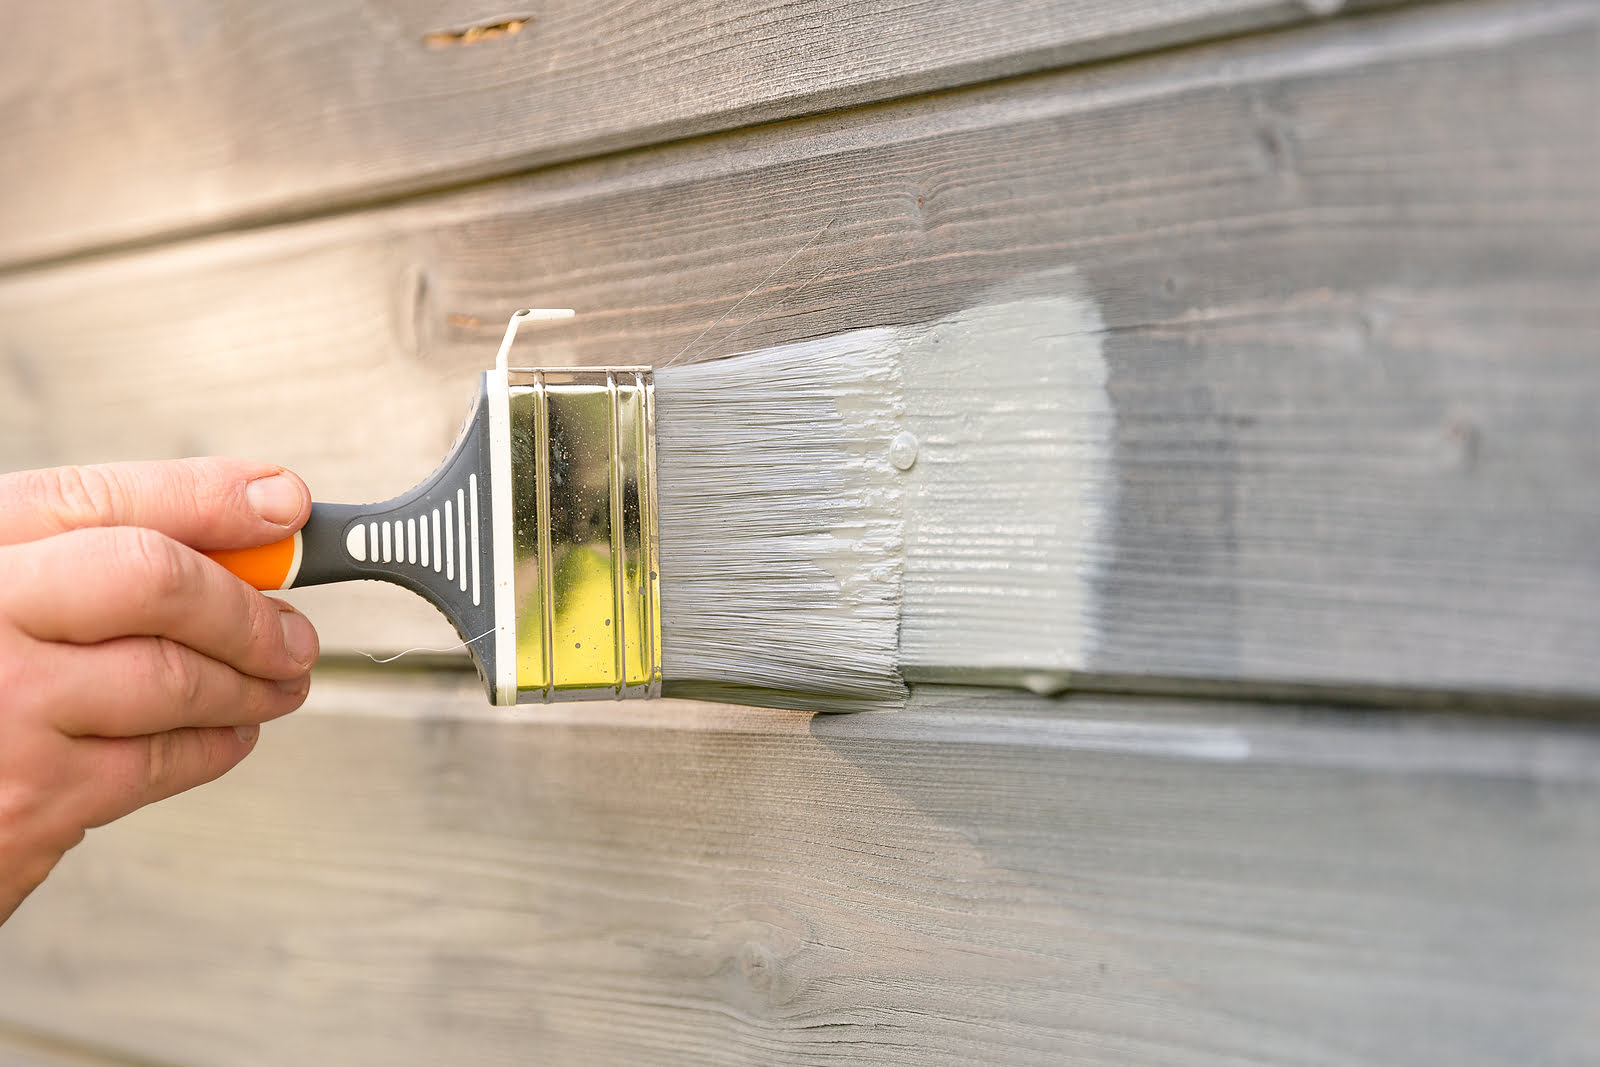
Step 9: Apply a Finish or Repaint
Once you have successfully stripped the paint, cleaned, and sanded the wood surface, it’s time to apply a finish or repaint the wood to achieve your desired aesthetic. This final step will not only protect the wood but also enhance its appearance. Here’s what you need to know:
- Choose the appropriate finish: Depending on your preference and the desired look, you can apply a variety of finishes, such as stain, varnish, paint, or a clear protective coat. Consider the type of wood you’re working with and the overall style and theme of your space when selecting the finish.
- Follow the manufacturer’s instructions: Read and follow the instructions provided with your chosen finish to ensure proper application and drying times. Different finishes may have specific requirements, such as multiple coats or sanding between layers.
- Prepare the surface: Before applying the finish, ensure that the wood surface is clean and free from any dust or debris from the sanding process. Use a brush or vacuum to remove any residual dust.
- Apply the finish: Use a brush, roller, or sprayer to apply the finish evenly and consistently across the wood surface. Follow the recommended application technique and allow each coat to dry completely before adding subsequent coats.
- Sand between coats if necessary: Depending on the finish and the desired smoothness, you may need to lightly sand the surface between coats to achieve a flawless finish. Gently sand with fine-grit sandpaper to remove any imperfections or brush marks.
- Protect the finish: Once you have achieved your desired finish, consider applying an additional protective coat, especially if the wood surface will be exposed to wear and tear. This will help prolong the life of the finish and provide added durability.
Whether you choose to stain the wood to enhance its natural beauty or paint it to match your interior design scheme, applying a finish will complete the transformation. Follow the instructions provided with your chosen finish, be patient during the drying process, and enjoy the stunning results of your hard work.
Remember, proper maintenance of the finished wood surface will help preserve its beauty and ensure its longevity. Follow any care instructions provided with your chosen finish to keep it looking its best for years to come.
Conclusion
Stripping paint from wood surfaces can be a rewarding and transformative process in interior design. By following the steps outlined in this guide, you can refresh the look of your furniture, doors, or architectural elements, revealing the natural beauty of the wood and creating a stunning focal point in your space.
Throughout the paint stripping process, it’s essential to prioritize safety and take the necessary precautions to protect yourself and the environment. Always wear protective gear, work in a well-ventilated area, and follow the instructions provided with the paint stripper product you’re using.
Proper preparation, including removing hardware, taping off, and setting up your work area, sets the stage for a successful project. Choosing the right paint stripping method, whether it’s using a liquid stripper, gel stripper, paste stripper, or heat gun, ensures efficient paint removal.
Allowing the paint stripper sufficient time to work, followed by careful scraping and cleaning of the wood surface, prepares it for the next steps. Sanding the wood creates a smooth and even surface, ready for the application of a finish or repaint that suits your style and design preferences.
Remember, patience and attention to detail are essential throughout the entire process. Take your time, follow instructions, and strive for excellence in each step to achieve the best results.
Now that you have the knowledge and confidence to strip paint from wood surfaces, it’s time to unleash your creativity, transform your space, and enjoy the beauty and charm of a revitalized wood surface in your interior design.
Happy paint stripping!
Frequently Asked Questions about How To Strip Paint From Wood To Refresh The Surface
Was this page helpful?
At Storables.com, we guarantee accurate and reliable information. Our content, validated by Expert Board Contributors, is crafted following stringent Editorial Policies. We're committed to providing you with well-researched, expert-backed insights for all your informational needs.


0 thoughts on “How To Strip Paint From Wood To Refresh The Surface”