Home>Articles>How To Build A Freestanding Food Pantry Cabinet

Articles
How To Build A Freestanding Food Pantry Cabinet
Modified: February 26, 2024
Learn how to build a freestanding food pantry cabinet with our informative articles. Discover step-by-step instructions and helpful tips to create your own functional and stylish storage solution.
(Many of the links in this article redirect to a specific reviewed product. Your purchase of these products through affiliate links helps to generate commission for Storables.com, at no extra cost. Learn more)
Introduction
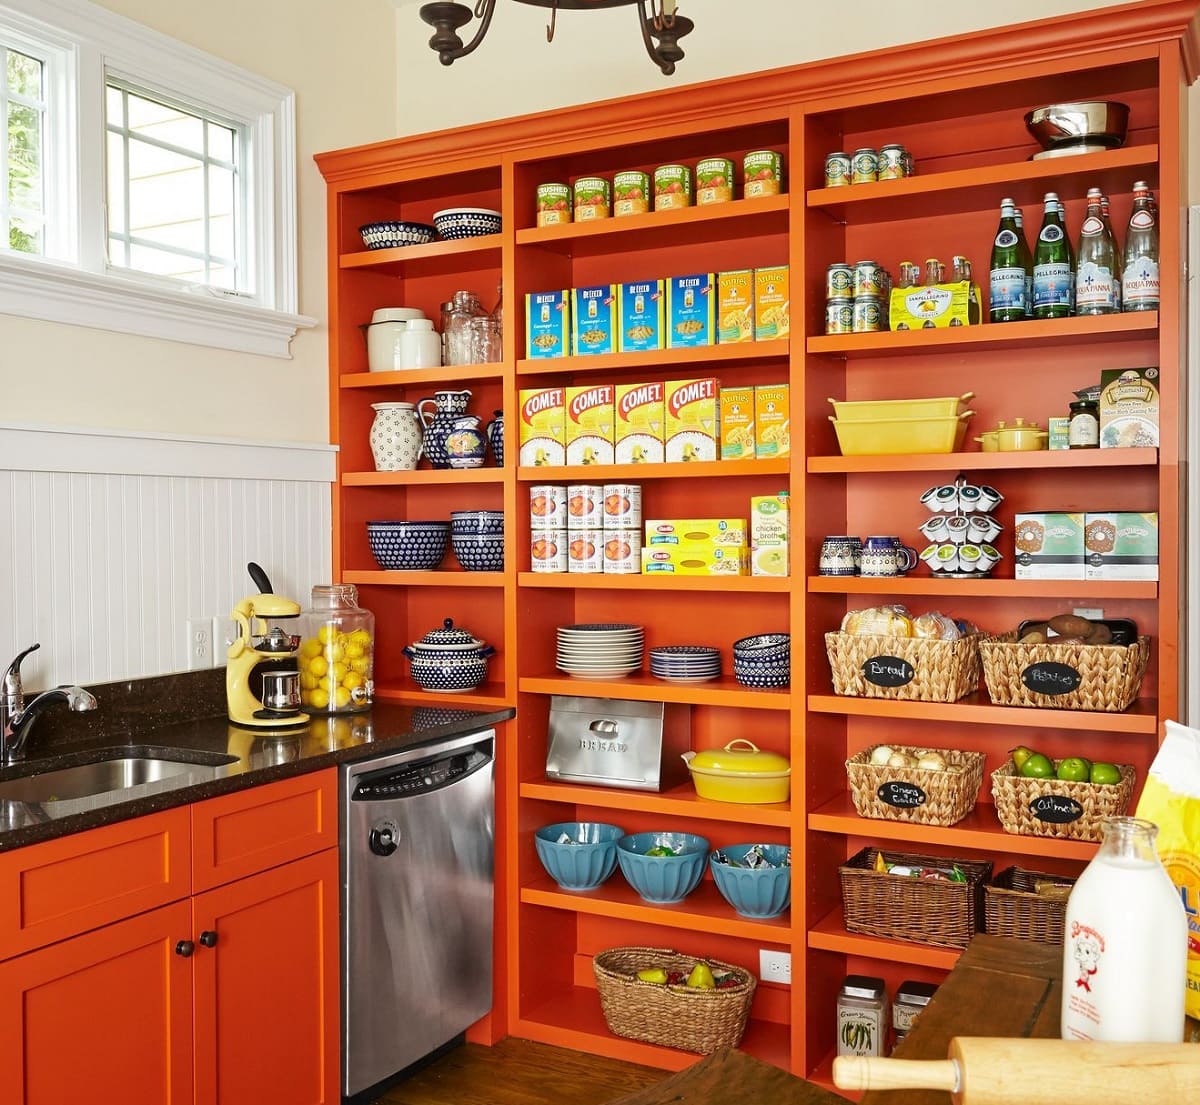
Welcome to this comprehensive guide on how to build a freestanding food pantry cabinet. If you find yourself in need of extra storage space in your kitchen or pantry area, a freestanding food pantry cabinet can be a great solution. Not only does it provide ample space for storing your canned goods, dry ingredients, and small appliances, but it also adds a stylish and functional element to your kitchen decor.
Building your own food pantry cabinet allows you to customize the size, design, and features to perfectly fit your space and storage needs. Plus, it can be a rewarding and cost-effective DIY project that will add value to your home. In this article, we will guide you through the step-by-step process of building your own freestanding food pantry cabinet.
Before we dive into the construction process, let’s go over the materials and tools you will need for this project.
Key Takeaways:
- Building a freestanding food pantry cabinet allows for customization of size, design, and features to perfectly fit your space and storage needs, providing a rewarding and cost-effective DIY project.
- Prioritize safety, accurate measurements, and proper techniques when building your own food pantry cabinet. Enjoy ample storage space, organization, and a touch of style in your kitchen decor.
Materials Needed
To build a freestanding food pantry cabinet, you will need the following materials:
- 3/4-inch plywood sheets for the cabinet structure, shelves, and back panel
- 2×4 boards for the frame and supports
- Wood screws
- Wood glue
- Circular saw or table saw for cutting the plywood and boards
- Measuring tape and ruler for taking accurate measurements
- Screwdriver or drill for assembling the cabinet
- Sandpaper for sanding the surfaces
- Paint or stain for finishing the cabinet
- Paintbrushes or rollers for applying the paint or stain
- Cabinet hardware such as handles or knobs
These materials can be easily found at your local hardware store or home improvement center. Make sure to choose high-quality materials that are durable and appropriate for kitchen use. You may also need additional hardware or accessories based on your design and preferences.
Now that you have gathered all the necessary materials, it’s time to move on to the first step: planning and measurements.
Step 1: Planning and Measurements
Before you start cutting any wood or assembling the cabinet, it’s essential to plan and take accurate measurements. This step will ensure that your food pantry cabinet fits perfectly in your desired space and meets your storage needs.
First, measure the area where you plan to place the freestanding food pantry cabinet. Take note of the height, width, and depth available for the cabinet. Consider any obstructions, such as nearby appliances or doors, that might affect the size and placement of your cabinet.
Next, decide on the overall design and style of your food pantry cabinet. Do you want a simple and sleek cabinet, or do you prefer a more ornate and decorative look? Consider the existing decor of your kitchen or pantry and choose a design that complements the overall aesthetic.
Based on your measurements and design preferences, sketch out a rough plan for the dimensions and layout of your cabinet. Determine the number of shelves you want and their spacing, as well as any additional features such as drawers or doors.
Once you have a clear plan and measurements, make a detailed list of all the materials you will need for the construction. This will help you ensure that you have everything on hand before you begin the project.
With the planning and measurements complete, you’re now ready to move on to the next step: cutting the wood.
Step 2: Cutting the Wood
Now that you have your measurements and plan in hand, it’s time to cut the wood for your freestanding food pantry cabinet. This step requires precision and attention to detail to ensure that all the pieces fit together seamlessly.
Using your circular saw or table saw, cut the plywood sheets according to your measurements. Start with the sides of the cabinet, making sure to cut the pieces to the desired height. Then, cut the top and bottom pieces, ensuring they match the width and depth of your cabinet.
Next, cut the 2×4 boards to create the frame and supports for the cabinet. Cut the vertical frame pieces based on the height of your cabinet, and cut the horizontal supports to match the width and depth. These pieces will provide stability and strength to the cabinet structure.
Take your time and double-check your measurements before making any cuts. It’s always better to be slightly cautious and trim off excess wood later, rather than cutting too short and having to start over with new materials.
Once all the wood pieces are cut, use sandpaper to smooth any rough edges or surfaces. It’s important to have clean and smooth edges for a professional finish on your cabinet.
With the wood cut and prepared, you are now ready to move on to the next step: assembling the cabinet structure.
Step 3: Assembling the Cabinet Structure
With your wood pieces cut and sanded, it’s time to assemble the structure of your freestanding food pantry cabinet. This step will bring your cabinet to life and give it its basic form.
Start by laying out the bottom piece of plywood on a flat surface. Place the vertical frame pieces at the corners and attach them using wood screws. Make sure the screws are countersunk to create a flush finish. Repeat this process for the top piece of plywood, completing the basic frame of the cabinet.
Next, attach the horizontal supports inside the frame to provide additional stability. Place them evenly along the top and bottom of the cabinet and secure them with wood screws. This will ensure that the structure is solid and able to withstand the weight of the stored items.
Check for any gaps or misalignments in the frame and make adjustments as needed. It’s important to have a sturdy and level structure before moving on to the next steps.
Now, it’s time to install the shelves within the cabinet. Measure the desired height for each shelf and cut additional pieces of plywood accordingly. Place the shelves inside the cabinet, making sure they are level and secure. You can use wood glue or additional screws for added stability.
Once the shelves are in place, double-check the overall stability and squareness of the cabinet structure. Make any necessary adjustments before proceeding to the next step.
Congratulations! You’ve successfully assembled the basic structure of your freestanding food pantry cabinet. In the next step, we will learn how to add shelves to maximize your storage space.
Read more: How To Build Kitchen Pantry Cabinet
Step 4: Adding Shelves
Adding shelves to your freestanding food pantry cabinet will help maximize your storage space and keep your items organized. In this step, we will guide you through the process of installing the shelves.
First, determine the number of shelves you want in your cabinet and the spacing between them. Measure and mark the desired heights on the inner sides of the cabinet.
Next, cut additional pieces of plywood to the width and depth of your cabinet. These will serve as the shelves. Sand the edges and surfaces to ensure a smooth finish.
Now, you have two options for installing the shelves: using shelf brackets or creating shelf supports. If you prefer the first option, install shelf brackets on the inner sides of the cabinet at the marked heights. Place the shelves on the brackets, ensuring they sit securely. If you choose to create shelf supports, attach small wooden blocks to the inner sides of the cabinet at the marked heights. Place the shelves on top of these supports.
Regardless of the method you choose, make sure the shelves are level and stable. You can use a spirit level to check for accuracy. Adjust the brackets or supports as needed to achieve a balanced and secure placement.
Repeat the process for each shelf, ensuring consistent spacing between them. This will provide you with ample storage options for your pantry items.
With the shelves in place, you have now created the main storage compartments of your food pantry cabinet. In the next step, we will learn how to attach the back panel for added stability and aesthetics.
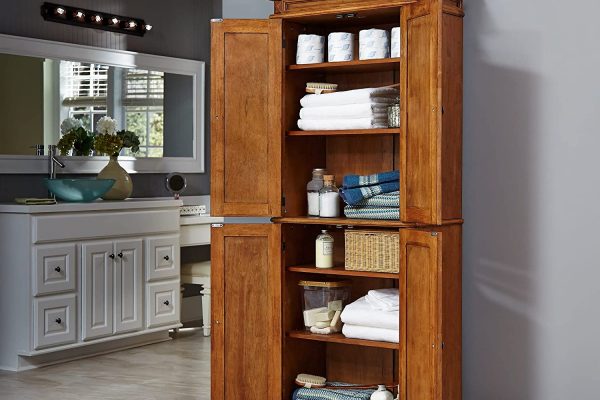
When building a freestanding food pantry cabinet, make sure to use sturdy materials such as plywood or solid wood to ensure it can support the weight of the food items. Also, consider adding adjustable shelves to accommodate different sized items.
Step 5: Attaching the Back Panel
Attaching the back panel to your freestanding food pantry cabinet serves two purposes: it adds stability to the structure and gives the cabinet a finished look. In this step, we will guide you through the process of securing the back panel.
Start by measuring and cutting a piece of plywood to match the dimensions of the back of your cabinet. Make sure the edges are smooth and even.
Place the back panel against the back of the cabinet, ensuring it aligns with the edges. Use wood screws to attach the panel to the cabinet frame. Make sure to space the screws evenly along the edges of the panel for secure attachment.
If desired, you can also use wood glue in conjunction with the screws for added strength. Apply the glue to the back of the cabinet frame before positioning the back panel.
Once the back panel is attached, check for any gaps or misalignments. Make any necessary adjustments to ensure a snug fit.
Attaching the back panel will not only stabilize the cabinet but also provide a clean and finished appearance from all angles.
With the back panel securely in place, it’s time to move on to the next step: sanding and finishing the cabinet.
Step 6: Sanding and Finishing
After constructing the main structure of your freestanding food pantry cabinet, it’s essential to sand and finish the surfaces to create a smooth and polished look. This step will not only enhance the appearance of the cabinet but also protect it from moisture and wear over time.
Start by using a medium-grit sandpaper to sand all the surfaces of the cabinet. This will help remove any rough spots, imperfections, or splinters. Sand in the direction of the wood grain for the best results.
Once you have sanded the surfaces with the medium-grit sandpaper, switch to a fine-grit sandpaper to achieve a smoother finish. Sand the surfaces again, paying attention to details such as the edges and corners.
After sanding, wipe down the entire cabinet with a clean cloth or tack cloth to remove any dust or debris. This will ensure a clean surface for applying the finish.
Now it’s time to choose your preferred finish for the cabinet. You can opt to paint the cabinet in a color that matches your kitchen decor, or you can choose to stain the wood to enhance its natural beauty. Apply the finish of your choice using a paintbrush or roller, following the manufacturer’s instructions.
Allow the finish to dry completely based on the recommended drying time. Depending on the type of finish used, this may take a few hours or even overnight.
Once the finish is dry, you may consider applying a clear top coat for added protection and durability. This step is optional but can help extend the life of your cabinet and provide a sleek, glossy finish.
With the sanding and finishing complete, your freestanding food pantry cabinet is starting to look like a stunning addition to your kitchen. In the next step, we will discuss how to install cabinet hardware for added functionality and style.
Step 7: Installing the Cabinet Hardware
Installing cabinet hardware is an important step in completing the look and functionality of your freestanding food pantry cabinet. Cabinet hardware includes handles, knobs, and pulls that allow for easy opening and closing of doors and drawers. In this step, we will guide you through the process of installing cabinet hardware.
Start by measuring and marking the desired placement of the hardware on the cabinet doors and drawers. Consider the overall design and functionality of your cabinet when determining the positioning of the hardware.
Using a drill, create holes at the marked positions. The size of the holes should match the screws provided with your cabinet hardware. Make sure to drill straight and avoid going too deep, as this can damage the front surface of the cabinet.
Next, insert the screws provided with the hardware through the back of the cabinet door or drawer front and align them with the holes you drilled. Tighten the screws using a screwdriver or a drill, but be careful not to overtighten, as this can strip the holes or damage the hardware.
Repeat this process for each piece of hardware, ensuring that they are all securely attached to the cabinet surfaces.
Installing cabinet hardware is a small but crucial detail that can elevate the overall look and functionality of your freestanding food pantry cabinet. Take your time and ensure proper placement to achieve a finished and polished appearance.
With the hardware installed, your food pantry cabinet is almost complete. In the final step, we will discuss the positioning and securing of the cabinet in your desired location.
Step 8: Positioning and Securing the Cabinet
In the last step of building your freestanding food pantry cabinet, you will need to carefully position and secure the cabinet in its designated location. This step is crucial to ensure stability, safety, and proper functionality of the cabinet.
Start by clearing the area where you plan to place the cabinet. Remove any obstructions or debris that could interfere with the positioning or installation process.
Next, carefully lift the cabinet and position it in the desired location. Use a level to ensure that the cabinet is straight and even. Check for any gaps between the cabinet and the surrounding walls or furniture.
Once you are satisfied with the positioning of the cabinet, it’s time to secure it in place. Depending on the type of flooring in your kitchen or pantry area, there are several methods you can use to secure the cabinet.
If you have a hardwood or tiled floor, you can use L-brackets to attach the cabinet to the wall. Drill pilot holes into the wall studs, insert wall anchors if needed, and attach the L-brackets to both the wall and the cabinet using appropriate screws.
For a carpeted floor, you can use furniture straps or anchors to secure the cabinet. Attach one end of the strap or anchor to the back of the cabinet and the other end to a wall stud or an anchor point.
Make sure to follow the manufacturer’s instructions and use appropriate hardware for securing the cabinet. This will help prevent any tipping or instability, ensuring the safety of anyone using the pantry cabinet.
With the cabinet securely positioned and fastened, double-check its stability and make any necessary adjustments. Once you are confident in its placement, your freestanding food pantry cabinet is ready to be filled with your favorite ingredients and kitchen essentials.
Congratulations! You have successfully completed all the steps to build your very own freestanding food pantry cabinet. Enjoy the satisfaction of your DIY project and the convenience of having a functional and stylish storage solution in your kitchen or pantry area.
Remember to regularly maintain and clean your food pantry cabinet to keep it in optimal condition. With proper care, your cabinet will continue to serve as a valuable addition to your home for years to come.
Thank you for following this comprehensive guide. Happy organizing!
Conclusion
Building a freestanding food pantry cabinet is a rewarding and practical DIY project that can enhance the storage capacity and aesthetics of your kitchen or pantry area. Throughout this comprehensive guide, we have walked you through the step-by-step process of constructing your own food pantry cabinet. From planning and measurements to securing the cabinet in its designated location, each step plays a crucial role in creating a functional and stylish storage solution.
By building your own food pantry cabinet, you have the opportunity to customize the size, design, and features to perfectly suit your needs and preferences. You have learned how to cut and assemble the wood, add shelves for organization, attach a back panel for stability, sand and finish the surfaces, install cabinet hardware for convenience, and finally, position and secure the cabinet in its desired location.
Remember to always prioritize safety when undertaking any DIY project. Take accurate measurements, use appropriate tools and materials, and follow proper techniques to ensure a successful outcome. Additionally, regularly maintain and clean your food pantry cabinet to extend its lifespan and keep it in tip-top condition.
Now that you have completed your freestanding food pantry cabinet, enjoy the pleasure of having ample storage space for your pantry items, canned goods, and small appliances. Organize your supplies with ease and add a touch of style to your kitchen decor.
Thank you for joining us on this DIY journey. We hope this guide has empowered you to take on the challenge of building your own freestanding food pantry cabinet. Happy building and organizing!
Frequently Asked Questions about How To Build A Freestanding Food Pantry Cabinet
Was this page helpful?
At Storables.com, we guarantee accurate and reliable information. Our content, validated by Expert Board Contributors, is crafted following stringent Editorial Policies. We're committed to providing you with well-researched, expert-backed insights for all your informational needs.


0 thoughts on “How To Build A Freestanding Food Pantry Cabinet”