Home>Technology>Smart Home Devices>How Do I Uninstall And Reinstall HP Printer On Mac

Smart Home Devices
How Do I Uninstall And Reinstall HP Printer On Mac
Modified: February 18, 2024
Learn how to efficiently uninstall and reinstall your HP printer on your Mac to ensure seamless printing for your smart home devices. Simplify your printing process now!
(Many of the links in this article redirect to a specific reviewed product. Your purchase of these products through affiliate links helps to generate commission for Storables.com, at no extra cost. Learn more)
**
Introduction
**
So, you've decided to bid adieu to your HP printer on your Mac. Whether it's to troubleshoot an issue, upgrade to a newer model, or simply declutter your device list, uninstalling and reinstalling an HP printer on a Mac can seem like a daunting task. But fear not! With the right guidance, this process can be smooth and hassle-free.
In this comprehensive guide, we'll walk you through the step-by-step process of uninstalling and reinstalling your HP printer on your Mac. By the end of this article, you'll be equipped with the knowledge and confidence to navigate this task with ease.
Let's dive in and unravel the mystery of managing your HP printer on a Mac!
**
Key Takeaways:
- Uninstalling and reinstalling your HP printer on a Mac is a manageable task with the right guidance. Follow the step-by-step process to confidently maintain a seamless printing experience on your device.
- By disconnecting the printer, removing it from the list, deleting associated software, and reinstalling the latest software, you can efficiently manage your HP printer installation and maintain a streamlined and efficient printing setup on your Mac.
Read more: How To Connect To HP Printer On Mac
Uninstalling the HP Printer on Mac
**
Before reinstalling your HP printer on your Mac, it's essential to ensure that the existing installation is removed completely. Here's a detailed guide on how to uninstall your HP printer:
1. Disconnect the Printer: Start by disconnecting the HP printer from your Mac and removing any connected cables. This step ensures that the uninstallation process can proceed smoothly without any active connections.
2. Access System Preferences: Navigate to the Apple menu on the top-left corner of your screen and select “System Preferences.” This will open a window with various system settings.
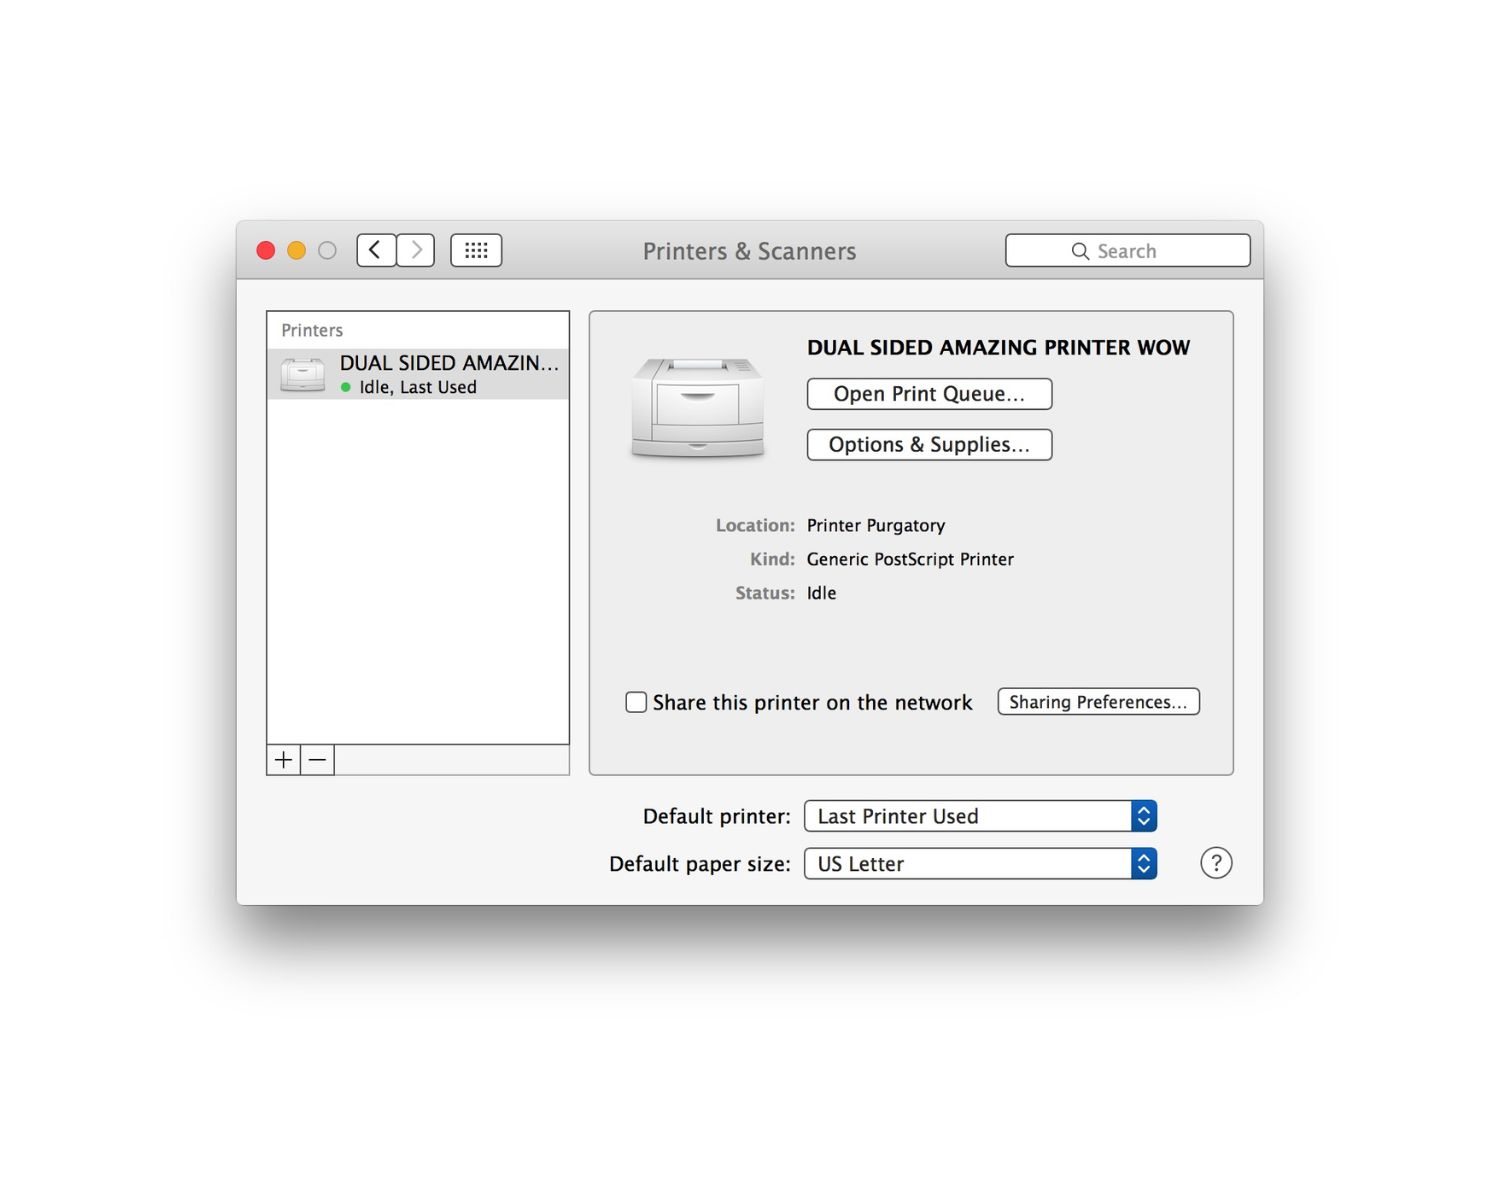
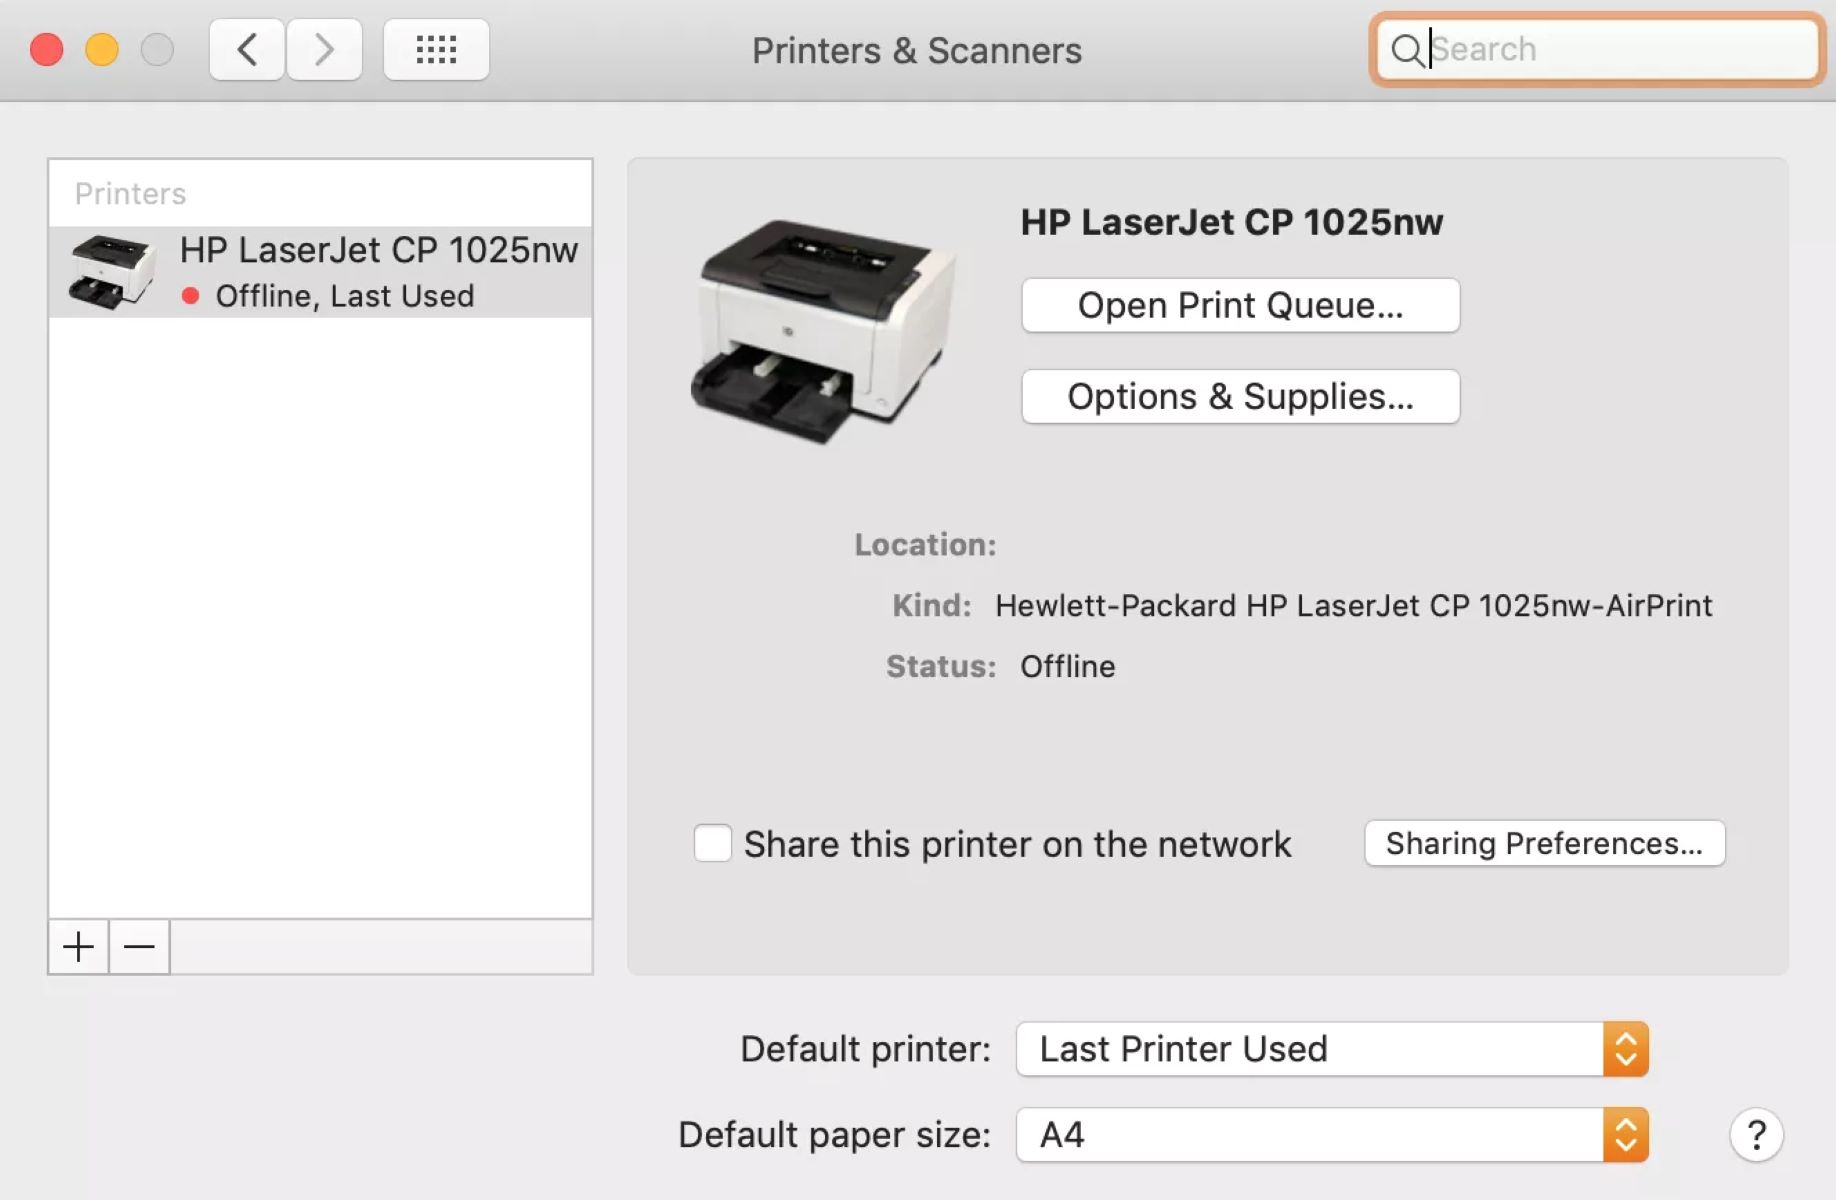
3. Select Printers & Scanners: Within System Preferences, locate and select the “Printers & Scanners” icon. This will display a list of installed printers and scanners on your Mac.
4. Remove the HP Printer: In the Printers & Scanners window, select the HP printer that you want to uninstall from the list of installed devices. Once selected, click on the “-” (minus) sign located below the list of printers. A confirmation prompt will appear asking if you want to remove the printer. Click “Delete Printer” to proceed with the uninstallation.
5. Delete Printer Software: After removing the printer from the Printers & Scanners list, it's crucial to delete the associated printer software. This step ensures that all components of the HP printer installation are completely removed from your Mac.
6. Navigate to Applications: Open the “Applications” folder on your Mac and search for any HP printer-related software. This may include drivers, utilities, or any additional tools associated with your HP printer. Once located, move these items to the Trash.
7. Empty the Trash: After moving the HP printer software to the Trash, it's essential to empty the Trash to permanently delete these items from your Mac. Right-click on the Trash icon in the Dock and select “Empty Trash” to complete this step.
By following these steps, you can effectively uninstall your HP printer from your Mac, ensuring that all associated software and drivers are removed from your system.
**
To uninstall and reinstall an HP printer on a Mac, first, disconnect the printer, then go to System Preferences > Printers & Scanners, select the printer and click the “-” button to remove it. To reinstall, connect the printer and click the “+” button to add it back.
Reinstalling the HP Printer on Mac
**
Now that you've successfully uninstalled your HP printer from your Mac, it's time to embark on the reinstalling process. Here's a comprehensive guide on how to reinstall your HP printer:
1. Prepare the Printer: Before reinstalling, ensure that your HP printer is powered on and properly connected to your Mac. This includes establishing the necessary physical connections such as power and USB cables, or configuring wireless connectivity if applicable.
2. Download the Latest Software: Visit the official HP website and navigate to the “Support” or “Drivers” section. Enter your printer model and select your operating system as macOS to access the latest software and drivers for your HP printer. Download the recommended software package to your Mac.
3. Install the Software: Locate the downloaded software package and double-click to initiate the installation process. Follow the on-screen instructions to install the HP printer software on your Mac. This typically involves agreeing to the terms of use, selecting the installation location, and allowing the installation process to complete.
4. Add the Printer: Once the software is installed, navigate to System Preferences on your Mac and select “Printers & Scanners.” Click the “+” (plus) sign to add a new printer. Your HP printer should be detected during this process. Select the printer and follow any additional prompts to complete the installation.
5. Test the Printer: After successfully reinstalling the HP printer, it's important to test its functionality. Print a test page or a document to ensure that the printer is communicating with your Mac and producing the expected output.
6. Configure Printer Preferences: Customize the printer preferences based on your specific requirements. This may include setting default paper sizes, print quality options, and other preferences to optimize the printing experience on your Mac.
By following these steps, you can effectively reinstall your HP printer on your Mac, enabling seamless printing functionality and ensuring that your device is ready to meet your printing needs.
**
Conclusion
**
Uninstalling and reinstalling an HP printer on a Mac may initially appear daunting, but with the right guidance, it becomes a manageable task. By following the step-by-step process outlined in this guide, you can navigate the removal and reinstallation of your HP printer with confidence and ease.
Whether you're troubleshooting printer issues, upgrading to a new HP printer model, or simply optimizing your device setup, the ability to uninstall and reinstall your HP printer empowers you to maintain a seamless printing experience on your Mac.
Remember, the key steps include disconnecting the printer, removing it from the Printers & Scanners list, deleting associated software, and then reinstalling the latest software package from the official HP website. By adhering to these steps, you can efficiently manage your HP printer installation, ensuring that it aligns with your printing needs.
With this knowledge at your disposal, you can confidently maneuver through the uninstallation and reinstallation process, empowering you to maintain a streamlined and efficient printing setup on your Mac.
So, fear not the complexities of printer management—embrace the simplicity that comes with understanding how to uninstall and reinstall your HP printer on your Mac!
Frequently Asked Questions about How Do I Uninstall And Reinstall HP Printer On Mac
Was this page helpful?
At Storables.com, we guarantee accurate and reliable information. Our content, validated by Expert Board Contributors, is crafted following stringent Editorial Policies. We're committed to providing you with well-researched, expert-backed insights for all your informational needs.



0 thoughts on “How Do I Uninstall And Reinstall HP Printer On Mac”