Home>Technology>Smart Home Devices>How To Fix Printer Alignment On HP

Smart Home Devices
How To Fix Printer Alignment On HP
Modified: February 18, 2024
Learn how to fix printer alignment on HP for optimal printing results. Get step-by-step instructions for resolving alignment issues with smart home devices.
(Many of the links in this article redirect to a specific reviewed product. Your purchase of these products through affiliate links helps to generate commission for Storables.com, at no extra cost. Learn more)
Introduction
Welcome to the world of modern printing technology, where the precision of your printer's alignment plays a crucial role in producing high-quality documents and images. Whether you're a home user or a business professional, encountering alignment issues with your HP printer can be frustrating. However, fear not! In this comprehensive guide, we will delve into the intricacies of printer alignment, specifically focusing on HP printers. By the end of this article, you'll have a clear understanding of how to diagnose and fix alignment problems, ensuring that your printer consistently delivers impeccable results.
Let's embark on this journey to unravel the mysteries of printer alignment and equip ourselves with the knowledge and skills necessary to overcome any alignment challenges that may come our way. Whether you're a seasoned HP printer user or a newcomer to the world of printing, this guide will provide you with valuable insights and practical solutions to enhance your printing experience. So, without further ado, let's dive into the fascinating realm of printer alignment troubleshooting for HP devices.
Key Takeaways:
- Ensure your HP printer delivers high-quality output by checking and fixing alignment issues. Test alignment across various documents and images for consistent, precise printing results.
- Regular maintenance and testing are key to preserving optimal alignment and print quality for your HP printer. Stay informed about software updates and best practices for print alignment.
Read more: How To Airprint To HP Printer
Understanding Printer Alignment Issues
Printer alignment refers to the precise positioning of the print heads and paper feed mechanisms to ensure that the printed output is accurately placed on the page. When a printer experiences alignment issues, it can manifest in various ways, such as misaligned text, skewed images, or inconsistent margins. These issues can detract from the professional appearance of documents and compromise the quality of printed materials.
Several factors can contribute to printer alignment problems. Mechanical issues within the printer, such as misaligned print heads or faulty paper feed mechanisms, can lead to improper alignment. Additionally, software-related issues, including outdated printer drivers or incorrect settings, may also result in alignment discrepancies.
It’s important to note that alignment issues can arise in both inkjet and laser printers. While inkjet printers rely on liquid ink and microscopic nozzles to deposit ink onto the paper, laser printers use toner and a complex electrostatic process to transfer and fuse the toner onto the paper. Despite the differences in their printing mechanisms, both types of printers require precise alignment to produce high-quality output.
Understanding the root causes of alignment issues is essential for effectively troubleshooting and resolving these problems. By gaining insight into the underlying factors that can impact printer alignment, you’ll be better equipped to identify and address alignment issues in your HP printer. In the following sections, we’ll explore the steps for checking and fixing printer alignment on HP devices, empowering you to maintain optimal printing performance and output quality.
Checking Printer Alignment
Before delving into the process of fixing printer alignment on your HP device, it’s crucial to perform a thorough assessment to identify any existing alignment issues. By systematically checking the alignment of your printer, you can pinpoint deviations from the intended positioning and take the necessary steps to rectify them.
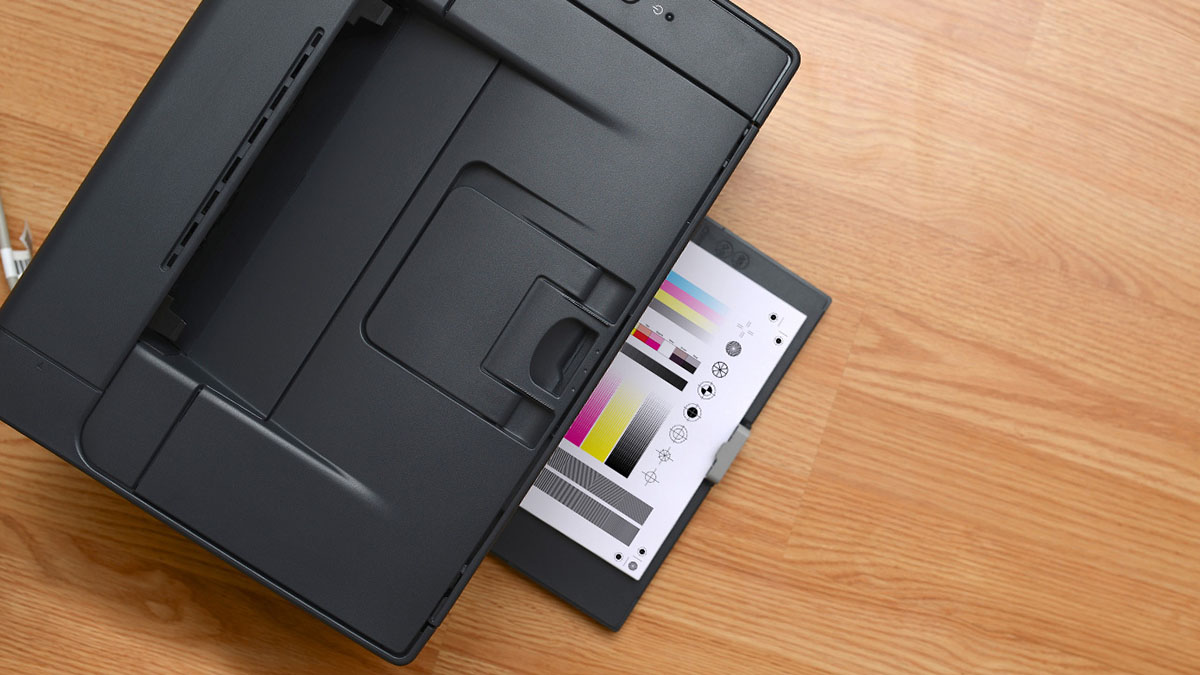
One of the primary methods for checking printer alignment involves conducting a test print. Most HP printers are equipped with built-in alignment test features that enable users to assess the accuracy of the printed output. To initiate a test print, access the printer’s control panel or the accompanying software interface and navigate to the alignment test option. By following the on-screen instructions, you can initiate the test print and evaluate the alignment of the printed elements, such as text, graphics, and borders.
Another crucial aspect of checking printer alignment involves examining the physical components of the printer, including the print heads and paper feed mechanisms. Inspect the print heads for any signs of misalignment or damage, as these components play a pivotal role in depositing ink or toner onto the paper in the correct positions. Additionally, ensure that the paper feed mechanisms are functioning smoothly and are free from any obstructions that could impede proper paper alignment.
Furthermore, it’s beneficial to review the printer settings and configurations to verify that the alignment settings are optimized for the type of documents you intend to print. By accessing the printer’s settings menu or the accompanying software on your computer, you can cross-reference the alignment settings with the recommended specifications for the desired print output.
By meticulously checking the printer alignment through test prints, physical inspections, and settings verification, you can gain valuable insights into the alignment status of your HP printer. This comprehensive assessment serves as a crucial foundation for the subsequent steps involved in fixing printer alignment, ensuring that you address any identified issues with precision and efficacy.
To fix printer alignment on HP, try running the printer’s alignment tool from the control panel or printer software. Follow the on-screen instructions to align the cartridges for better print quality.
Fixing Printer Alignment on HP
Once you’ve identified alignment issues with your HP printer, it’s time to delve into the process of rectifying these discrepancies to restore optimal printing performance. The steps for fixing printer alignment on HP devices encompass a combination of software adjustments, hardware inspections, and calibration procedures to ensure that the print heads and paper feed mechanisms are perfectly aligned for accurate output.
Begin by accessing the printer’s settings menu either through the control panel or the accompanying software on your computer. Navigate to the alignment settings, where you may find options for adjusting print head alignment, paper feed calibration, and other relevant parameters. Follow the on-screen prompts to fine-tune these settings based on the specific alignment issues you’ve observed during the test prints.
For HP inkjet printers, the software interface often includes tools for aligning the print heads, which is essential for achieving precise ink deposition on the paper. Utilize these alignment tools to calibrate the position of the print heads, ensuring that they accurately dispense ink during the printing process. This step is instrumental in addressing misalignment-related issues, such as blurred or streaked printouts.
In the case of HP laser printers, the calibration process may involve adjusting the paper feed mechanisms to ensure that the paper is fed through the printer in a straight and consistent manner. Misaligned paper feed mechanisms can result in skewed printouts and inconsistent margins, impacting the overall alignment of the printed output. By calibrating the paper feed settings, you can mitigate these alignment discrepancies and achieve uniform print placement.
Additionally, it’s advisable to inspect the physical components of the printer, such as the print heads, paper trays, and rollers, for any signs of misalignment or damage. Ensure that the print heads are securely positioned and free from obstructions, and verify that the paper trays and rollers are aligned to facilitate smooth paper feeding. Addressing any mechanical misalignments can significantly contribute to improving the overall alignment of the printer.
By combining software adjustments with meticulous hardware inspections and calibrations, you can effectively fix printer alignment on your HP device, setting the stage for consistent and accurate printing. These proactive measures empower you to overcome alignment issues and optimize the performance of your HP printer, ensuring that it delivers pristine output across various printing tasks.
Testing the Alignment
After implementing the necessary adjustments to fix the printer alignment on your HP device, it’s essential to conduct thorough testing to validate the effectiveness of the corrective measures. The testing phase serves as a critical evaluation of the alignment improvements, allowing you to assess the quality and accuracy of the printed output across different types of documents and images.
Initiate the testing process by printing a series of sample documents that encompass varying content, including text, graphics, and images. By generating these sample prints, you can evaluate the alignment of different elements within the documents, identifying any residual misalignment issues that may persist despite the corrective measures. Pay close attention to the positioning of text, the clarity of graphics, and the consistency of margins to gauge the overall alignment accuracy.
Furthermore, it’s beneficial to print documents with different paper sizes and orientations to assess the printer’s alignment versatility. By testing alignment across diverse paper formats, such as letter, legal, or A4, and experimenting with both portrait and landscape orientations, you can ascertain the printer’s ability to maintain consistent alignment regardless of the specific printing parameters.
As part of the testing phase, consider printing high-resolution images to evaluate the printer’s alignment capabilities when reproducing intricate details and fine textures. Assess the sharpness and clarity of the printed images, ensuring that the alignment adjustments have effectively mitigated any issues related to image skewing, misplacement, or distortion.
During the testing process, it’s also advisable to compare the test prints against reference documents or digital representations to validate the alignment accuracy. By juxtaposing the printed output with the original digital files or standardized reference documents, you can discern any deviations in alignment and make informed assessments regarding the effectiveness of the corrective actions.
By meticulously testing the alignment across a diverse range of print scenarios, you can gain comprehensive insights into the printer’s alignment performance following the corrective measures. This thorough evaluation enables you to identify any residual alignment issues and fine-tune the printer settings or hardware adjustments as needed, ensuring that the printer consistently delivers impeccably aligned output across various printing tasks.
Read more: How To Fax With A HP Printer
Conclusion
Congratulations! You’ve embarked on a journey to unravel the intricacies of printer alignment troubleshooting for HP devices, equipping yourself with the knowledge and skills necessary to address alignment issues and optimize the performance of your printer. Throughout this comprehensive guide, we’ve delved into the nuances of printer alignment, explored the factors contributing to alignment issues, and outlined the steps for checking, fixing, and testing the alignment of HP printers.
By gaining a deeper understanding of printer alignment and its impact on print quality, you’ve empowered yourself to proactively diagnose and resolve alignment discrepancies, ensuring that your HP printer consistently delivers pristine and accurately aligned output. Whether you’ve encountered misaligned text, skewed images, or inconsistent margins, the insights and techniques presented in this guide have equipped you to overcome these challenges with confidence and precision.
As you navigate the realm of printer alignment troubleshooting, remember that regular maintenance and vigilance are key to preserving optimal alignment and print quality. By periodically checking and calibrating the alignment settings, inspecting the physical components of the printer, and conducting test prints to validate alignment accuracy, you can uphold the performance and reliability of your HP printer over time.
Furthermore, staying informed about software updates, driver enhancements, and best practices for print alignment will enable you to leverage the latest advancements in printing technology to enhance the alignment capabilities of your HP device. Embracing a proactive approach to alignment maintenance and optimization will contribute to a seamless and rewarding printing experience, whether you’re producing professional documents, vibrant images, or captivating presentations.
As you apply the knowledge and strategies gleaned from this guide, may your HP printer continue to be a reliable companion in your printing endeavors, consistently delivering impeccably aligned output that meets and exceeds your expectations. With a firm grasp of printer alignment troubleshooting techniques, you’re well-equipped to navigate the dynamic landscape of printing technology and ensure that alignment issues never hinder the quality and precision of your printed materials.
Here’s to seamless alignment, impeccable prints, and a rewarding printing journey with your HP device!
Frequently Asked Questions about How To Fix Printer Alignment On HP
Was this page helpful?
At Storables.com, we guarantee accurate and reliable information. Our content, validated by Expert Board Contributors, is crafted following stringent Editorial Policies. We're committed to providing you with well-researched, expert-backed insights for all your informational needs.


0 thoughts on “How To Fix Printer Alignment On HP”