Home>Technology>Smart Home Devices>How To Enable Scan On HP Printer
Smart Home Devices
How To Enable Scan On HP Printer
Modified: October 19, 2024
Learn how to enable scan on your HP printer and integrate it with your smart home devices for seamless functionality. Improve your printing experience today!
(Many of the links in this article redirect to a specific reviewed product. Your purchase of these products through affiliate links helps to generate commission for Storables.com, at no extra cost. Learn more)
Introduction
Welcome to the world of smart home devices! If you own an HP printer, you're likely already familiar with its exceptional printing capabilities. However, did you know that many HP printers also come equipped with scanning functionality? Enabling the scan feature on your HP printer can significantly enhance its utility, allowing you to digitize documents, photos, and more with ease.
In this comprehensive guide, we'll walk you through the process of enabling scanning on your HP printer, providing step-by-step instructions and valuable insights to ensure a seamless setup. Whether you're a tech enthusiast or a casual user, this article is designed to demystify the process and empower you to make the most of your HP printer's impressive capabilities.
By the end of this guide, you'll be well-equipped to harness the full potential of your HP printer, transforming it into a versatile scanning powerhouse that seamlessly integrates into your digital lifestyle. Let's dive in and unlock the scanning prowess of your HP printer!
Key Takeaways:
- Ensure your HP printer supports scanning by checking the user manual or HP website. Once confirmed, install the HP Scan software on your computer to enable seamless communication with the printer for scanning.
- After connecting your HP printer to the computer, customize scan settings such as resolution, color mode, and file format using the HP Scan software. Test the scanner to ensure optimal performance and familiarize yourself with its features.
Read more: How To Scan From A HP Printer
Step 1: Check for Compatibility
Before embarking on the journey to enable scanning on your HP printer, it's crucial to ensure that your printer model supports this functionality. While most modern HP printers are equipped with scanning capabilities, it's always wise to double-check to avoid any potential compatibility issues.
Start by referring to the user manual or visiting the official HP website to verify whether your specific printer model includes scanning features. If you no longer have the user manual, you can typically find a digital version on the manufacturer’s website or access the support section for your printer model.
Additionally, some HP printers offer multifunctionality, combining printing, scanning, and even faxing capabilities into a single device. If you own a multifunction printer, it’s highly likely that scanning is already integrated. However, it’s still beneficial to confirm this information to proceed with confidence.
Once you’ve confirmed the scanning compatibility of your HP printer, you’re ready to move on to the next steps, confident that your device is equipped to handle the scanning process effectively. With compatibility verified, you’re one step closer to unlocking the full potential of your HP printer’s scanning capabilities.
Step 2: Install HP Scan Software
Now that you’ve confirmed the scanning compatibility of your HP printer, the next essential step is to install the HP Scan software on your computer. This software serves as the bridge between your computer and the HP printer, enabling seamless communication and control over the scanning process.
To begin, navigate to the official HP website or use the installation CD that came with your printer to locate the HP Scan software. If you’re obtaining the software from the website, ensure that you download the version compatible with your operating system, whether it’s Windows, macOS, or another platform.
Once you’ve obtained the HP Scan software, follow the installation instructions provided by HP. Typically, the installation process involves running the setup file and following the on-screen prompts to complete the installation. During the installation, you may have the option to customize certain settings, such as the installation directory and additional components.
After the installation is complete, take a moment to familiarize yourself with the HP Scan software’s interface and features. This software often offers various scanning options, including the ability to adjust scan settings, choose the scanning destination, and preview scanned documents before saving them.
By installing the HP Scan software, you’re equipping your computer with the necessary tools to seamlessly interact with your HP printer’s scanning functionality. This software acts as a crucial link in the scanning process, empowering you to initiate, customize, and manage scans with ease.
With the HP Scan software successfully installed, you’re now prepared to move on to the next steps, bringing you closer to harnessing the full scanning potential of your HP printer.
Step 3: Connect the Printer to the Computer
With the HP Scan software installed on your computer, the next pivotal step is to establish a seamless connection between your HP printer and the computer. This connection is essential for enabling direct communication and control over the scanning process, ensuring that your computer can effectively command the printer to initiate and complete scans.
Start by ensuring that your HP printer is powered on and properly connected to your computer. Depending on your printer model, you may connect it to your computer using a USB cable, a wired Ethernet connection, or via a wireless network. If you’re using a wireless connection, make sure that both the printer and the computer are connected to the same network to facilitate smooth communication.
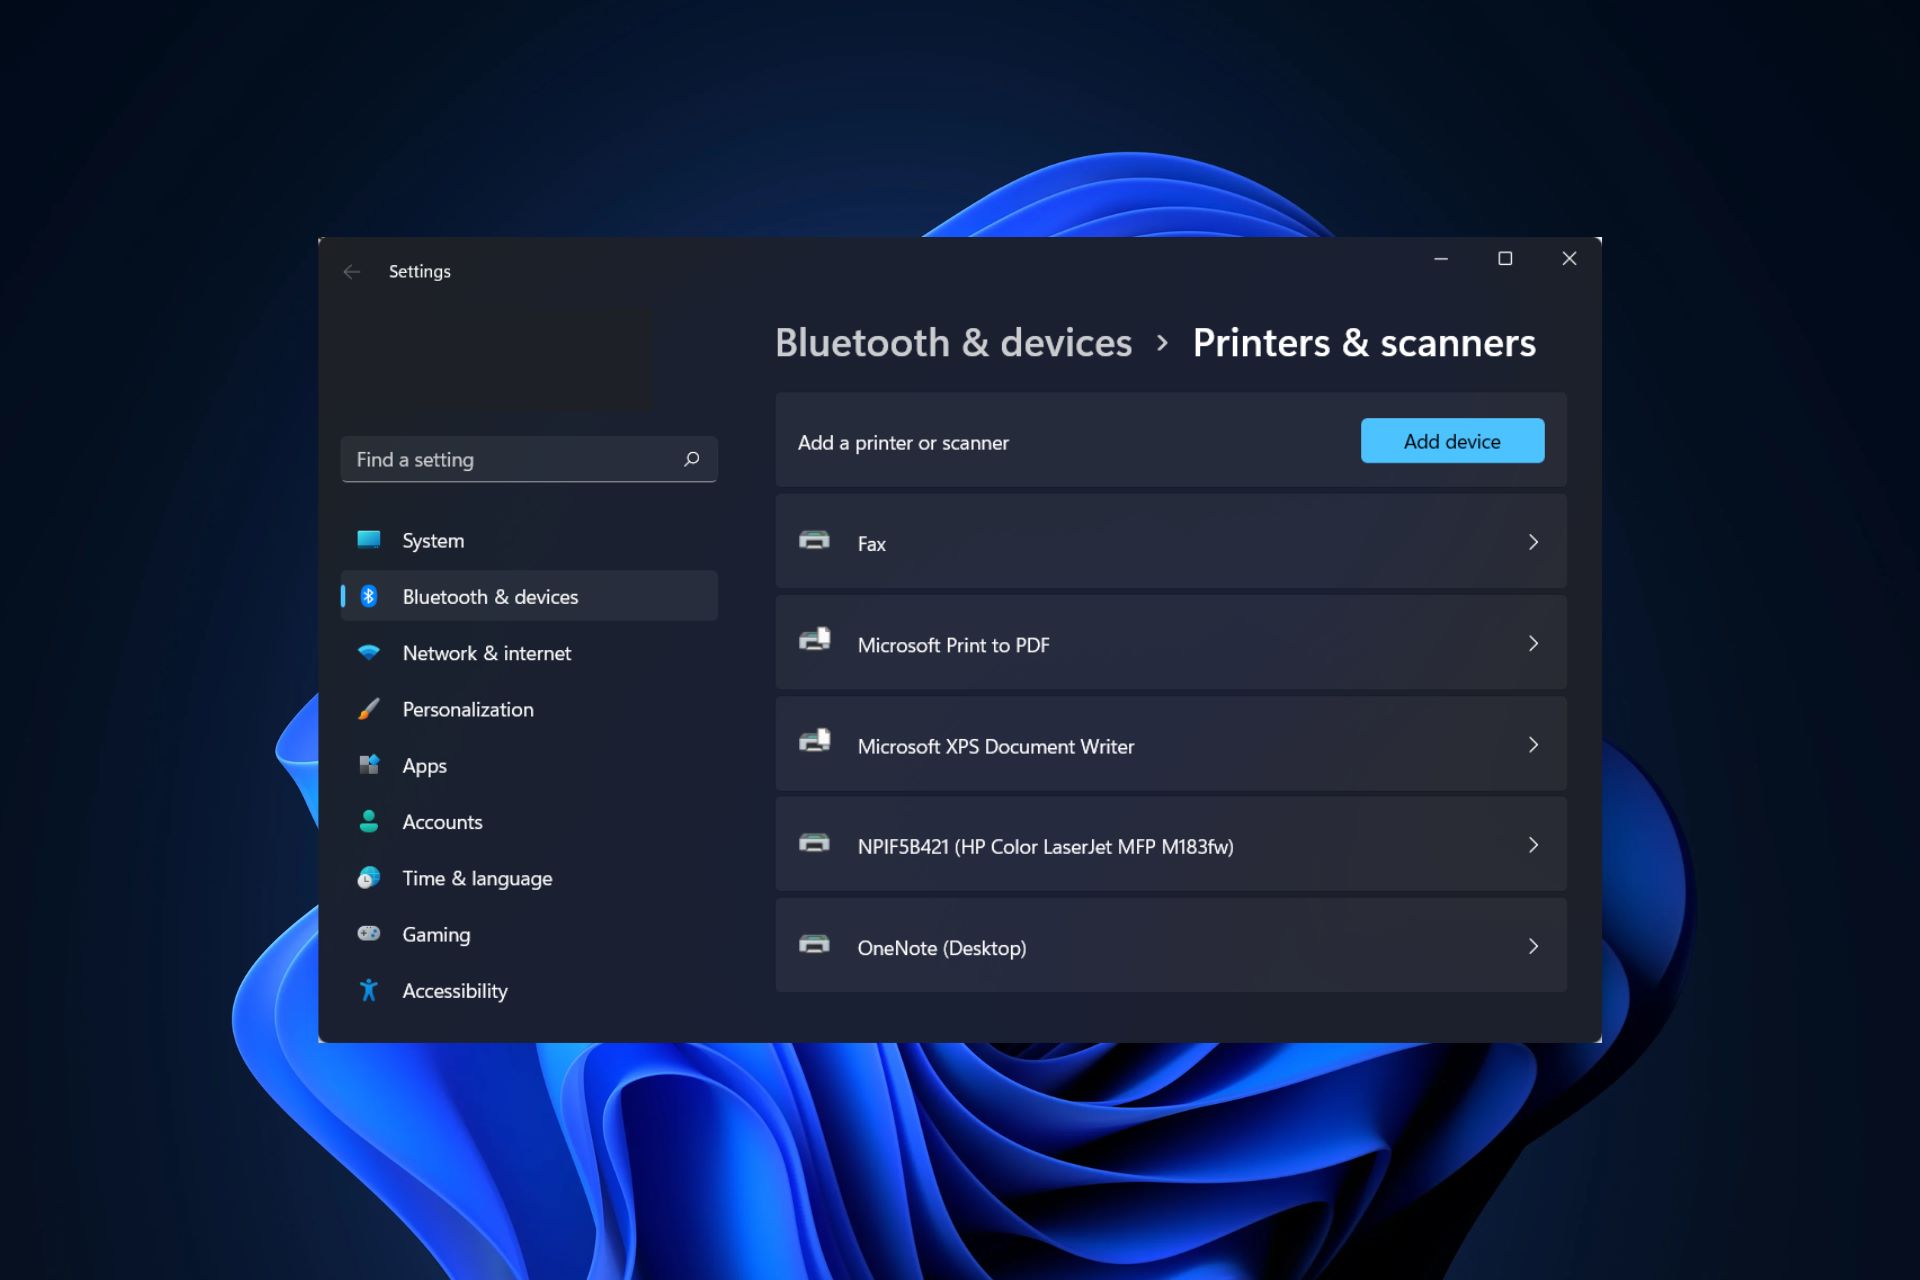
Once the physical connection is established, it’s time to configure the printer settings on your computer. Navigate to the Control Panel or System Preferences, depending on your operating system, and locate the “Devices and Printers” or “Printers & Scanners” section. Here, you can add your HP printer to the list of available devices, allowing your computer to recognize and communicate with the printer seamlessly.
If you’re using a wireless connection, you may need to follow specific instructions provided by HP to ensure that the printer is properly connected to your wireless network. This typically involves accessing the printer’s control panel, selecting the network settings, and entering the network credentials to establish the connection.
Once the printer is successfully connected to your computer, you’re one step closer to unleashing the scanning capabilities of your HP printer. This seamless connection paves the way for effortless communication, enabling you to initiate scans directly from your computer and receive the scanned documents with ease.
With the printer successfully connected to your computer, you’re now poised to delve into the next steps, bringing you closer to a seamless scanning experience with your HP printer.
To enable scan on your HP printer, install the HP scanning software on your computer, connect the printer to the network, and then open the scanning software to start scanning.
Step 4: Configure Scan Settings
With your HP printer connected to the computer and the necessary software in place, it’s time to delve into configuring the scan settings to align with your specific preferences and requirements. Customizing the scan settings allows you to tailor the scanning process to suit the type of document or image being scanned, ensuring optimal results and efficiency.
Launch the HP Scan software on your computer and navigate to the settings or preferences section, where you’ll find a range of options to fine-tune the scanning process. Depending on the software version and your printer model, you may encounter various settings that offer control over aspects such as scan resolution, color mode, file format, and destination folder.
Begin by adjusting the scan resolution, which determines the level of detail captured in the scanned document or image. For text-based documents, a standard resolution of 300 DPI (dots per inch) is often sufficient, while high-resolution images may require 600 DPI or higher for optimal clarity and detail.
Next, consider the color mode settings, especially if you’re scanning images or color documents. The software typically offers options such as black and white, grayscale, and color scanning modes, allowing you to select the most appropriate mode for the content being scanned. This customization ensures that the scanned output accurately reflects the original document or image.
Furthermore, explore the file format options available within the scan settings. Common file formats include PDF, JPEG, and TIFF, each offering distinct advantages based on the intended use of the scanned content. For text documents, PDF is often preferred for its universal compatibility and ability to preserve formatting, while JPEG and TIFF are ideal for image-centric scans.
Lastly, designate the destination folder where the scanned files will be saved. This step ensures that your scanned documents are organized and easily accessible, streamlining your workflow and enhancing productivity. You can create specific folders for different types of scans, such as “Documents,” “Photos,” or “Receipts,” simplifying file management.
By meticulously configuring the scan settings, you’re optimizing the scanning process to align with your specific needs, ensuring that the scanned output meets your expectations in terms of quality, file format, and organization. These tailored settings empower you to streamline the scanning workflow and achieve consistent, high-quality results.
With the scan settings finely tuned to your preferences, you’re now prepared to embark on the final steps, culminating in a successful scanning experience with your HP printer.
Read more: How To Scan With HP 4100 Printer
Step 5: Test the Scanner
As you approach the culmination of the scanning setup process, it’s essential to conduct a comprehensive test of the scanner to ensure that all components are functioning seamlessly. Testing the scanner not only validates the successful integration of your HP printer with the computer but also allows you to familiarize yourself with the scanning process and make any necessary adjustments before embarking on regular scanning tasks.
Initiate the testing phase by placing a sample document or image on the scanner glass or into the automatic document feeder, depending on your printer model and the type of content being scanned. With the document in place, launch the HP Scan software on your computer and select the option to initiate a scan. Depending on the software interface, you may have the choice to customize scan settings before proceeding.
Upon initiating the scan, observe the printer as it processes the document or image. Take note of the scanning speed, the accuracy of document capture, and the overall quality of the scanned output. If you encounter any anomalies or suboptimal results, consider revisiting the scan settings to make necessary adjustments, such as modifying the resolution, color mode, or file format.
Once the scan is complete, review the scanned output on your computer to ensure that it meets your expectations in terms of clarity, color accuracy, and overall fidelity to the original document or image. This step allows you to identify any potential areas for improvement and refine the scan settings to achieve the desired results.
Additionally, take this opportunity to explore the additional features offered by the HP Scan software, such as the ability to crop, rotate, or enhance the scanned content. Familiarizing yourself with these features empowers you to optimize the scanned output and address any imperfections or irregularities that may arise during the scanning process.
By thoroughly testing the scanner and reviewing the scanned output, you’re not only validating the successful setup of the scanning functionality but also gaining valuable insights into the capabilities and performance of your HP printer. This hands-on experience equips you with the confidence and knowledge to leverage the scanning capabilities effectively in your day-to-day tasks.
With the scanner successfully tested and the scanned output meeting your expectations, you’ve reached the culmination of the setup process, ready to embark on a seamless and productive scanning journey with your HP printer.
Conclusion
Congratulations! You’ve successfully unlocked the scanning prowess of your HP printer, transforming it into a versatile and indispensable tool for digitizing documents, photos, and more. By following the comprehensive steps outlined in this guide, you’ve gained a deep understanding of the process and equipped yourself with the knowledge to harness the full potential of your HP printer’s scanning capabilities.
Enabling scanning on your HP printer not only expands its utility but also integrates seamlessly into your digital lifestyle, offering convenience, efficiency, and a myriad of possibilities for managing and preserving essential documents and images. Whether you’re digitizing receipts, archiving important paperwork, or capturing cherished memories, your HP printer now stands ready to fulfill these tasks with remarkable ease and precision.
As you embark on your scanning journey, remember to explore the diverse features offered by the HP Scan software, allowing you to customize scan settings, enhance scanned content, and streamline your scanning workflow. Familiarize yourself with the intricacies of the software to unlock its full potential, empowering you to achieve exceptional results with every scan.
Furthermore, don’t hesitate to experiment with different types of documents, images, and scan settings to gain a comprehensive understanding of your HP printer’s scanning capabilities. This hands-on approach not only enhances your proficiency but also enables you to tailor the scanning process to suit a wide range of scanning tasks, ensuring consistent and high-quality results.
With scanning now seamlessly integrated into your HP printer’s repertoire of features, you’re poised to embrace a more efficient and organized approach to document management, photo archiving, and digital preservation. Your HP printer stands as a reliable ally in your quest for digital convenience, ready to transform physical content into digital assets at your command.
As technology continues to evolve, your HP printer remains a steadfast companion, adapting to your changing needs and empowering you to navigate the digital landscape with confidence. Embrace the scanning capabilities of your HP printer, and unlock a world of possibilities as you embark on a seamless and enriching scanning experience.
Now, armed with the knowledge and expertise gained from this guide, you’re prepared to embark on your scanning endeavors, leveraging the full potential of your HP printer to conquer the challenges of the digital age with unparalleled ease and efficiency.
Frequently Asked Questions about How To Enable Scan On HP Printer
Was this page helpful?
At Storables.com, we guarantee accurate and reliable information. Our content, validated by Expert Board Contributors, is crafted following stringent Editorial Policies. We're committed to providing you with well-researched, expert-backed insights for all your informational needs.


0 thoughts on “How To Enable Scan On HP Printer”