Home>Articles>15 Important Steps To Get Your House Prepped For Winter
Articles
15 Important Steps To Get Your House Prepped For Winter
Modified: August 31, 2024
Get your house ready for winter with these 15 important steps. Read our informative articles to learn how to prepare your home for the colder months.
(Many of the links in this article redirect to a specific reviewed product. Your purchase of these products through affiliate links helps to generate commission for Storables.com, at no extra cost. Learn more)
Importance of Preparing Your House for Winter
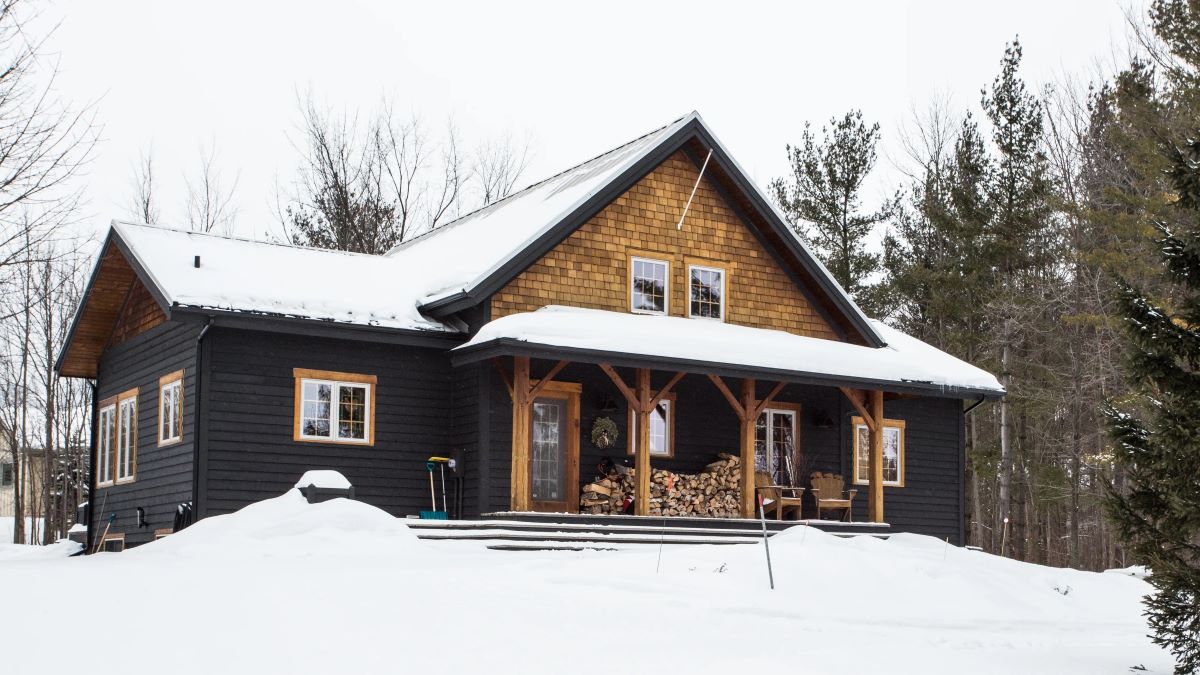
Winter can be a harsh and unforgiving season, especially for your home. The plummeting temperatures, freezing winds, and heavy snowfall can take a toll on your house if it is not adequately prepared. That is why it is essential to take proactive steps to protect your home from the winter elements.
By properly preparing your house for winter, you can prevent costly repairs, ensure the comfort and safety of your family, and even reduce energy consumption. Here are 15 important steps to get your house prepped for winter:
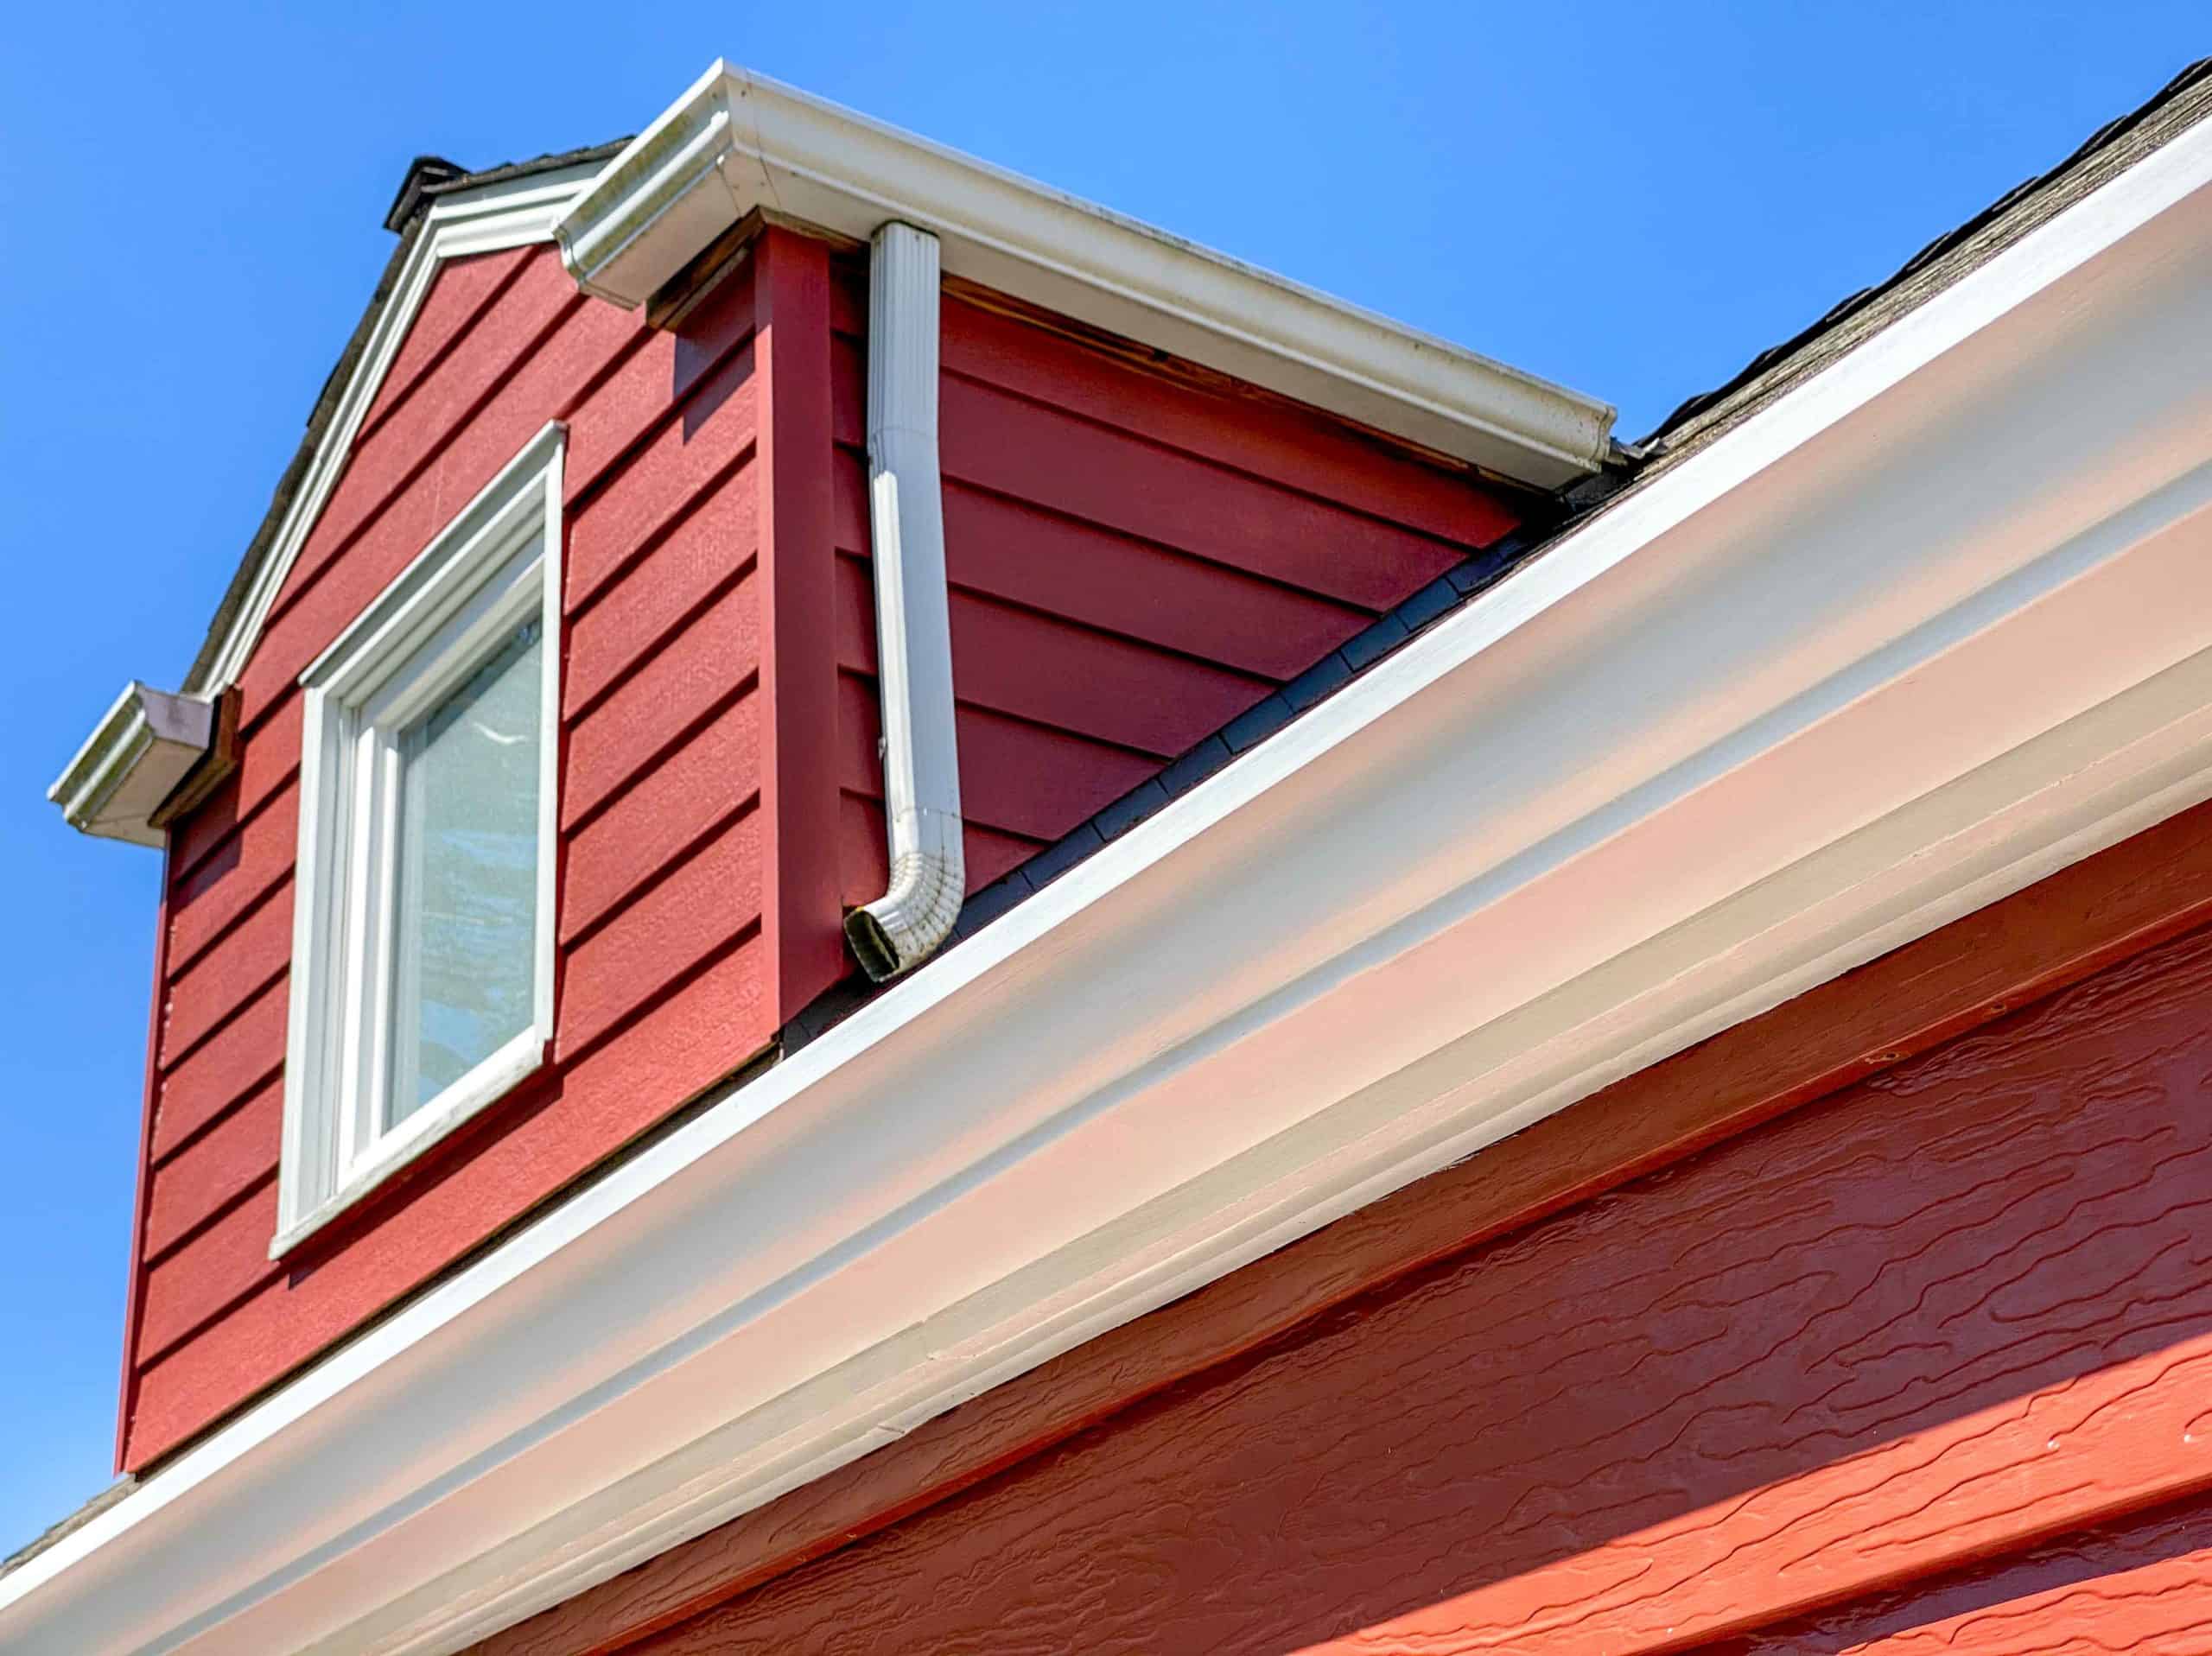
- Inspect and Clean Gutters: Fallen leaves, debris, and ice dams can clog your gutters, leading to water damage and potential leaks. Clean and inspect them before winter arrives.
- Check for Roof Damage: Inspect your roof for any missing or damaged shingles that could result in leaks or ice dams. Address any roof issues promptly.
- Seal Cracks and Gaps in Windows and Doors: Seal any gaps or cracks around windows and doors to prevent drafts and heat loss. Use weatherstripping or caulking for an effective seal.
- Insulate Pipes and Water Lines: Insulate exposed pipes to prevent them from freezing and bursting during cold snaps. Use pipe insulation or heat tape for added protection.
- Service Your Heating System: Schedule a professional inspection and maintenance for your heating system to ensure optimal performance throughout the winter.
- Check and Replace Furnace Filters: Clean or replace the filters in your furnace to improve indoor air quality and enhance energy efficiency.
- Test Smoke and Carbon Monoxide Detectors: Check the batteries and functionality of your smoke and carbon monoxide detectors to ensure they are in proper working condition.
- Prevent Drafts with Weatherstripping and Caulking: Use weatherstripping and caulking to seal gaps around windows, doors, and other openings to prevent drafts and reduce energy waste.
- Clean and Insulate Attic: Remove any debris or pests from your attic and add insulation if necessary to prevent heat loss and improve energy efficiency.
- Prepare Outdoor Faucets and Sprinkler Systems: Shut off and drain outdoor faucets and irrigation systems to prevent freezing and potential damage.
- Trim Overgrown Trees and Shrubs: Trim any overgrown branches or tree limbs that could pose a risk of falling and causing damage during winter storms.
- Clean Chimney and Fireplace: Schedule a professional chimney cleaning to remove any creosote buildup and ensure your fireplace is safe to use.
- Store Outdoor Furniture and Equipment: Protect your outdoor furniture and equipment by storing them in a covered area or using weatherproof covers.
- Stock Up on Cold-Weather Supplies: Prepare for winter storms by stocking up on essentials such as rock salt, snow shovels, and emergency supplies.
- Create an Emergency Kit: Assemble an emergency kit that includes flashlights, batteries, non-perishable food, blankets, and first aid supplies.
By following these 15 important steps, you can ensure that your house is well-prepared to withstand the challenges of winter. Taking the time to properly prepare your home will not only safeguard your investment but also provide you with peace of mind knowing that you are ready to face whatever winter may bring.
Key Takeaways:
- Properly preparing your home for winter by following these 15 important steps can prevent costly repairs, ensure the safety and comfort of your family, and reduce energy consumption.
- From inspecting and cleaning gutters to creating an emergency kit, each step plays a vital role in winterizing your home and safeguarding it from the harsh winter elements.
Step 1: Inspect and Clean Gutters
Inspecting and cleaning your gutters is an essential part of preparing your house for winter. Gutters play a crucial role in diverting rainwater and melting snow away from your home’s foundation. When your gutters are clogged with leaves, debris, and ice dams, they cannot function properly, leading to potential water damage and leaks.
Here are some steps to help you effectively inspect and clean your gutters:
- Clear out debris: Put on a pair of gloves and use a scoop or trowel to remove any leaves, twigs, and other debris from your gutters. Place the debris in a bucket or bag for easy disposal.
- Check for clogs: Once the debris is cleared, check for any clogs in the downspouts. Use a downspout snake or a hose to flush out any blockages. Ensure that the downspouts are directing water away from the foundation.
- Inspect for cracks or damage: While cleaning, take the opportunity to carefully inspect the gutters for any cracks, holes, or loose sections. These can contribute to leaks and require immediate repairs.
- Consider gutter guards: If you frequently deal with clogged gutters, consider installing gutter guards or screens to prevent debris from accumulating. These can save you time and effort in the long run.
- Repair or replace: If you find any damage or significant issues during the inspection, repair or replace the affected sections promptly to ensure proper functioning of your gutters.
Regularly maintaining and cleaning your gutters is essential to prevent water damage and protect the structural integrity of your home. Neglecting this step can lead to problems such as basement flooding, foundation damage, and even roof leaks.
It is recommended to inspect and clean your gutters at least twice a year, preferably in the fall before winter and in the spring after the snow and ice have melted. Regular gutter maintenance will go a long way in preserving the value of your home and preventing future headaches and costly repairs.
Step 2: Check for Roof Damage
Checking for roof damage is a critical step in preparing your house for winter. Your roof acts as the first line of defense against the elements, and any issues or damage can lead to leaks, water infiltration, and structural problems. Taking the time to assess the condition of your roof can help you identify potential issues and take the necessary steps to address them before winter arrives.
Here’s how to effectively check for roof damage:
- Inspect from the ground: Start by examining your roof from the ground using binoculars. Look for any obvious signs of damage, such as missing or damaged shingles, sagging areas, or signs of wear and tear.
- Check for loose or damaged shingles: If it is safe to do so, carefully climb a ladder and visually inspect the surface of your roof. Look for loose, cracked, or curled shingles, as they can allow water to seep through. Replace any damaged shingles as soon as possible.
- Look for signs of leaks: Check your attic for any signs of water stains or dampness. This could indicate a hidden leak in your roof. Inspect the ceilings and walls for any water spots or discoloration.
- Examine flashing and seals: Inspect the flashing, which is the material that seals the roof edges, valleys, and around chimneys and vents. Look for any signs of damage and deterioration. Replace or repair any damaged flashing to prevent water penetration.
- Consider a professional inspection: If you are unsure about the condition of your roof or if it’s difficult to access, consider hiring a professional roofing contractor to perform a thorough inspection. They have the expertise and can identify any underlying issues.
Addressing roof damage before winter will help prevent leaks, protect your home’s interior, and extend the lifespan of your roof. It’s important to note that attempting to repair or inspect your roof can be dangerous. If you are uncomfortable or uncertain about doing it yourself, it is best to hire a professional.
Remember, proactive maintenance and timely repairs are key to keeping your roof in good condition and ensuring the safety and comfort of your home during the winter months.
Step 3: Seal Cracks and Gaps in Windows and Doors
Sealing cracks and gaps in windows and doors is an essential step in preparing your house for winter. These openings are common sources of drafts, allowing cold air to enter and warm air to escape. By properly sealing these cracks and gaps, you can increase energy efficiency, improve comfort, and reduce heating costs.
Here’s how to effectively seal cracks and gaps in windows and doors:
- Identify the problem areas: Inspect your windows and doors for any visible cracks, gaps, or areas where there is noticeable air leakage. Pay attention to areas where different materials meet, such as window frames, sashes, and door frames.
- Weatherstripping: Depending on the type of gap or crack, choose the appropriate weatherstripping material. Options include adhesive-backed foam tape, V-strip, door sweeps, and silicone caulk. Apply weatherstripping to the gaps to create an airtight seal.
- Caulking: Use a high-quality silicone or latex caulk to fill any cracks or gaps around window frames and door frames. Apply the caulk in a continuous bead and use a caulking gun for precise application. Smooth out the caulk with a caulk tool or your finger.
- Replace or repair damaged weatherstripping: Inspect the existing weatherstripping and replace any damaged or worn-out sections. Ensure that the weatherstripping is snug and covers the entire length of the window or door.
- Install draft stoppers: Use draft stoppers or door sweeps at the bottom of doors to prevent cold air from entering. These can be made of fabric, rubber, or foam and are easy to install.
Sealing cracks and gaps in windows and doors not only helps to keep your home warmer but also reduces the strain on your heating system. This can result in energy savings and lower utility bills, making it a cost-effective solution.
Remember to check for cracks and gaps regularly and address any issues promptly. By properly sealing these openings, you can create a more comfortable and energy-efficient living environment for the winter months.
Step 4: Insulate Pipes and Water Lines
Insulating your pipes and water lines is a crucial step in preparing your house for winter. When temperatures drop, exposed pipes can freeze, leading to burst pipes and significant water damage. By properly insulating your pipes, you can prevent freezing and ensure a steady water supply throughout the winter.
Here’s how to effectively insulate pipes and water lines:
- Identify the exposed pipes: Locate all the exposed pipes in your home, including those in unheated areas such as the basement, attic, crawl spaces, and exterior walls.
- Select the right insulation material: Choose the appropriate insulation material for your pipes. Common options include foam pipe sleeves, fiberglass pipe wraps, and pipe insulation tape. Ensure that the insulation material is suitable for the diameter and length of your pipes.
- Measure and cut: Measure the length of the exposed pipe and use scissors or a utility knife to cut the insulation material to the appropriate size. Leave no gaps or exposed areas.
- Install the insulation: Open the insulation material and wrap it tightly around the pipe, starting from one end and moving towards the other. Secure the insulation with duct tape or cable ties as needed. Pay special attention to joints and bends in the pipes.
- Insulate outdoor faucets: Don’t forget to insulate your outdoor faucets and hoses. Install faucet covers or use insulated faucet socks to protect them from freezing temperatures.
- Consider heat tape: In extremely cold climates, you may also want to consider using heat tape for added protection. Heat tape can be applied directly to the pipes and provides a constant source of heat to prevent freezing.
Insulating your pipes not only prevents freezing but also conserves energy by reducing heat loss in hot water pipes. This can lead to lower energy bills and a more sustainable home.
Remember to periodically check the insulation for any signs of wear or damage. Replace any worn-out or damaged insulation immediately to ensure optimal protection.
By taking the necessary steps to properly insulate your pipes and water lines, you can avoid the potential disasters and costly repairs that come with frozen and burst pipes. Prepare your pipes for winter, and enjoy a worry-free season with a reliable water supply.
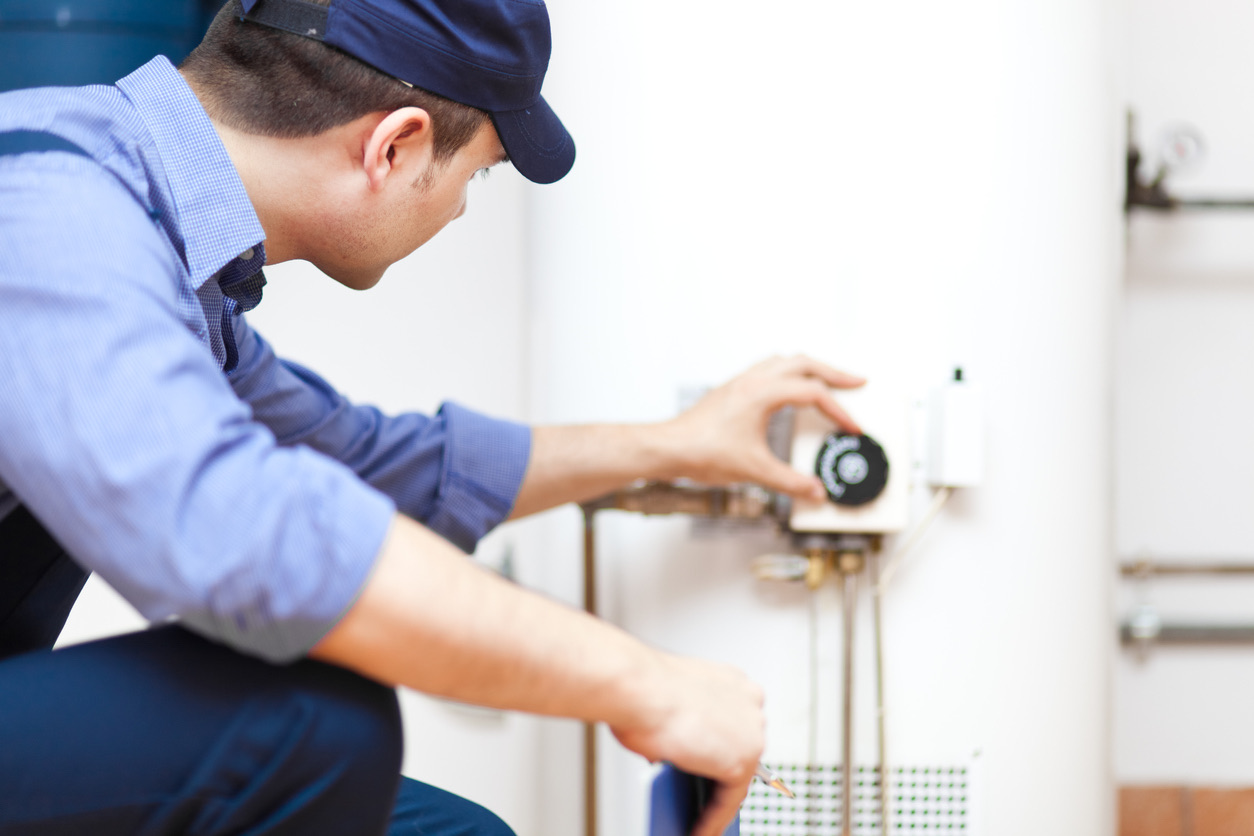
Step 5: Service Your Heating System
Servicing your heating system is a crucial step in preparing your house for winter. It ensures that your heating system is running efficiently and effectively, providing you with the warmth and comfort you need during the cold months. Neglecting routine maintenance can lead to reduced performance, higher energy bills, and potential breakdowns when you need heat the most.
Here’s what you need to do to effectively service your heating system:
- Schedule a professional inspection: Contact a licensed HVAC technician to perform a comprehensive inspection of your heating system. They will check for any potential issues and ensure that your system is functioning optimally.
- Clean or replace filters: Dirty air filters can restrict airflow and reduce efficiency. Clean or replace the filters in your furnace or heat pump to maintain good air quality and improve energy efficiency. Follow the manufacturer’s recommendations for filter maintenance.
- Check and lubricate moving parts: The moving parts in your heating system, such as fan motors and belts, may require lubrication. Consult the owner’s manual or have a professional technician perform this task.
- Inspect and clean vents and ducts: Check the vents and ducts throughout your home for any blockages or obstructions. Vacuum or clean them to ensure proper airflow and heat distribution.
- Test the thermostat: Verify that your thermostat is functioning correctly. Replace the batteries and ensure that it is properly calibrated. Consider upgrading to a programmable thermostat for added energy savings and comfort.
- Check carbon monoxide detectors: Test your carbon monoxide detectors to ensure they are in proper working condition. Replace the batteries if needed.
- Ensure proper ventilation: Check that all vents and registers are clear and unobstructed. Proper ventilation is essential for efficient heating.
Regular servicing of your heating system can extend its lifespan, improve indoor air quality, and save you money on energy costs. It is recommended to have your heating system serviced once a year, ideally before the start of winter.
Remember, working with heating systems can be hazardous, so it’s essential to leave the more complex tasks to professionals. By investing in regular maintenance, you can enjoy a cozy and efficient heating system throughout the winter season.
Step 6: Check and Replace Furnace Filters
Checking and replacing your furnace filters is a crucial step in preparing your house for winter. Furnace filters help improve indoor air quality by trapping dust, dirt, allergens, and other particles. Over time, these filters can become clogged, restricting airflow and straining your heating system. Regularly checking and replacing furnace filters ensures optimal performance and energy efficiency.
Here’s how to effectively check and replace your furnace filters:
- Locate the filter: Find the location of the furnace filter. It is usually in the air return duct or near the furnace itself.
- Turn off the furnace: Before removing the filter, it is important to turn off the power to the furnace to avoid any potential accidents.
- Inspect the filter: Take out the old filter and inspect it for dirt, debris, and clogging. A dirty or clogged filter will have a significant impact on airflow and efficiency.
- Determine the filter type: Note the size and type of the filter (e.g., disposable fiberglass, pleated, electrostatic) so you can purchase the correct replacement.
- Replace the filter: Insert the new filter in the same direction as the old one, following the arrows or airflow indicators marked on the filter. Ensure a snug fit.
- Set a reminder: Record the date of filter replacement and set a reminder to check and replace the filter again in the future, typically every one to three months.
Regularly checking and replacing furnace filters has several benefits. It improves indoor air quality, reduces the strain on your heating system, and increases energy efficiency. Clean filters also help prolong the lifespan of your furnace and reduce maintenance costs.
When selecting a new filter, consider the MERV (Minimum Efficiency Reporting Value) rating. Higher MERV ratings indicate better filtration but may also restrict airflow. Consult your furnace’s manufacturer guidelines or consult with an HVAC professional if you’re unsure about the appropriate filter rating for your system.
Take the time to check and replace your furnace filters before winter to ensure a clean and efficient heating system. It’s a simple and cost-effective step that can make a significant difference in your indoor comfort and energy savings throughout the winter months.
Step 7: Test Smoke and Carbon Monoxide Detectors
Testing your smoke and carbon monoxide detectors is a crucial step in ensuring the safety of your home during the winter months. As the use of heating systems, fireplaces, and other sources of heat increases, the risk of fire and carbon monoxide poisoning also rises. Testing these detectors regularly is essential to protect your family from potential dangers.
Here’s how to effectively test your smoke and carbon monoxide detectors:
- Locate all detectors: Identify the locations of your smoke and carbon monoxide detectors throughout your home. They are typically installed in hallways, near bedrooms, and on each level of your house.
- Check power source: Ensure that all detectors are properly powered. Battery-operated detectors should have fresh batteries installed, while hard-wired detectors should have a steady power supply.
- Press the test button: Most detectors have a test button located on the device. Press and hold the button for a few seconds to initiate the test. You should hear a loud, audible alarm sound.
- Ensure all detectors are working: Go through each detector in your home and verify that they are functioning correctly. Pay attention to any detectors that do not sound the alarm or emit a weak sound.
- Replace old or malfunctioning detectors: If you encounter any detectors that fail the test or are outdated, replace them immediately. Detectors typically have a lifespan of 5 to 10 years, depending on the manufacturer’s recommendations.
Testing your smoke and carbon monoxide detectors should be done on a regular basis, ideally once a month. It is a simple yet crucial task that can save lives and prevent severe damage from fire or carbon monoxide leakage.
Remember to keep your detectors clean and free from dust and debris, as this can impact their performance. Use a vacuum cleaner or a soft cloth to gently clean the detectors and ensure they are in proper working condition.
By regularly testing your smoke and carbon monoxide detectors, you can have peace of mind knowing that your home is well-equipped to detect and alert you to any potential threats. Maintaining and testing these devices is an important part of keeping your family safe throughout the winter season and beyond.
Step 8: Prevent Drafts with Weatherstripping and Caulking
Preventing drafts in your home is essential to maintain a comfortable and energy-efficient living environment during the winter. Drafts occur when there are gaps or cracks around windows, doors, and other openings, allowing cold air to seep in and warm air to escape. By effectively weatherstripping and caulking these areas, you can reduce drafts, improve insulation, and lower energy costs.
Here’s how to effectively prevent drafts with weatherstripping and caulking:
- Identify problem areas: Inspect your windows and doors for any gaps, cracks, or areas where you feel cold air entering or warm air escaping. Check for visible light around frames, as this indicates a potential draft.
- Choose the right materials: Select the appropriate weatherstripping material for your needs. Common options include adhesive-backed foam tape, V-strip, door sweeps, and silicone caulk. Choose materials that are durable, weather-resistant, and suitable for the specific area you are sealing.
- Apply weatherstripping: Measure and cut the weatherstripping material to the desired lengths. Apply it to the gaps and cracks around windows and doors, ensuring a tight and continuous seal. Follow the manufacturer’s instructions for proper installation.
- Add door sweeps: Install or adjust door sweeps at the bottom of doors to provide an additional barrier against drafts. Door sweeps create a seal that prevents air from entering or escaping under the door.
- Caulk gaps and cracks: Use a high-quality silicone or latex caulk to fill any visible gaps or cracks around windows, doors, and other openings. Apply the caulk in a continuous bead, and use a caulking gun for precise application. Smooth the caulk with a caulk tool or your finger.
- Inspect and reseal as needed: Regularly check the weatherstripping and caulked areas for signs of wear or damage. Reseal or replace these materials as necessary to maintain an airtight barrier.
Preventing drafts with weatherstripping and caulking helps to keep your home more comfortable, reduce energy waste, and lower heating bills. It also reduces the strain on your heating system, maximizing its efficiency and longevity.
Remember to periodically check the weatherstripping and caulked areas and make any necessary repairs or adjustments. Additionally, ensure that windows and doors close tightly and latch properly, as this also contributes to preventing drafts.
By taking the time to properly weatherstrip and caulk your home, you can create a more energy-efficient and comfortable living space, free from unwanted drafts. Enjoy a cozier winter and significant savings on your heating costs.
Make sure to clean out your gutters and downspouts to prevent ice dams and water damage during the winter months. This will help to ensure proper drainage and prevent potential issues with your roof and foundation.
Read more: What Are The Steps In Building A House
Step 9: Clean and Insulate Attic
Cleaning and insulating your attic is an important step in preparing your house for winter. The attic plays a crucial role in maintaining the overall temperature and energy efficiency of your home. By properly cleaning and insulating this space, you can prevent heat loss, reduce energy consumption, and create a more comfortable living environment.
Here’s how to effectively clean and insulate your attic:
- Clear out debris: Remove any clutter, old insulation, or debris present in the attic. This will provide a clean and smooth surface for the insulation installation.
- Seal any air leaks: Identify and seal any air leaks in the attic. Common areas where air can escape include around vents, plumbing pipes, chimneys, and electrical outlets. Use insulation, caulk, or expanding foam to seal these gaps.
- Inspect and repair the roof: Check the roof for any signs of damage, such as leaks or missing shingles. Address any issues promptly to prevent water infiltration and potential damage to the attic insulation.
- Choose the right insulation: Research and select the appropriate insulation material for your attic. Common options include fiberglass batts, blown-in insulation, or spray foam insulation. Consider factors such as R-value, moisture resistance, and fire safety when making your decision.
- Install the insulation: Follow the manufacturer’s guidelines for installation. Whether using batts, blown-in, or spray foam insulation, ensure that it is evenly distributed and covers all areas, including the walls, attic floor, and roof rafters.
- Protect access points: Install an insulated attic access cover, such as a hatch or door, to prevent heat loss from this entry point. Make sure it fits securely and is properly sealed.
- Consider ventilation: Ensure that your attic has proper ventilation to prevent moisture buildup. This can be achieved through soffit vents, gable vents, or ridge vents. Consult with a professional to determine the ventilation needs for your attic.
Properly cleaning and insulating your attic helps to create a thermal barrier, preventing heat from escaping and cold air from entering. This can significantly reduce your heating costs and improve the overall energy efficiency of your home.
Remember to periodically inspect your attic insulation to ensure that it remains in good condition without any signs of damage or degradation. If needed, consider adding additional insulation over time to maintain its effectiveness.
By cleaning and insulating your attic, you can create a more energy-efficient home, improve thermal comfort, and save on heating expenses. Take the time to invest in this important step, and enjoy a cozy and efficient living space throughout the winter season.
Step 10: Prepare Outdoor Faucets and Sprinkler Systems
Preparing your outdoor faucets and sprinkler systems for winter is essential to prevent freezing and potential damage. When water freezes inside these systems, it can cause pipes to burst, leading to expensive repairs. By taking proactive measures to protect your outdoor water sources, you can ensure they remain in good condition and ready for use when warmer weather returns.
Here’s how to effectively prepare your outdoor faucets and sprinkler systems:
- Turn off the water supply: Locate the shut-off valve for your outdoor faucets and sprinkler system. Turn off the water supply and drain any remaining water from the pipes.
- Disconnect and drain hoses: Disconnect garden hoses from outdoor faucets, allowing any trapped water to drain out. Coil and store the hoses in a shed or garage to protect them from the elements.
- Install faucet covers: Install insulated faucet covers on outdoor faucets to protect them from freezing temperatures. These covers help prevent water inside the faucet from freezing and causing damage. Ensure a tight seal around the faucet with the cover in place.
- Drain sprinkler system: If you have an in-ground sprinkler system, you’ll need to blow out the water to prevent freezing. Hire a professional sprinkler technician or use an air compressor to blow out all the water from the system, including all sprinkler heads and pipes. This step is crucial to prevent any leftover water from freezing and causing extensive damage.
- Winterize above-ground sprinklers: For above-ground sprinkler systems, detach and drain any remaining water from the system, including the sprinkler heads and pipes. Store them in a dry location to prevent damage from cold temperatures.
Preparing your outdoor faucets and sprinkler systems for winter helps avoid costly repairs and ensures they are ready for use in the warmer months. Taking these preventive measures will extend the longevity of your outdoor water sources and protect them from the damaging effects of freezing temperatures.
As a homeowner, it’s important to remain vigilant during winter and be prepared to handle any unexpected cold snaps to prevent damage to your outdoor water systems.
By following these steps and taking the time to prepare your outdoor faucets and sprinkler systems for winter, you can protect your investment and ensure smooth operation when you start using them again in the spring.
Step 11: Trim Overgrown Trees and Shrubs
Trimming overgrown trees and shrubs is an important step in preparing your house for winter. Overgrown foliage can pose risks during harsh weather conditions, such as heavy winds, snowstorms, and ice buildup. By proactively trimming and pruning these plants, you can protect your property from potential damage and maintain the health and beauty of your landscape.
Here’s how to effectively trim overgrown trees and shrubs:
- Identify problem areas: Inspect your trees and shrubs for branches that are touching your home, power lines, or are structurally weak. Look for overhanging limbs that might pose a risk to roofs, windows, and other structures.
- Plan your cuts: Determine the appropriate branches to remove for the desired shape and overall health of the plant. Consider using the three-cut method for larger branches to prevent damage to the plant.
- Use proper tools: Equip yourself with the appropriate tools for the job, such as pruning shears, loppers, and a pruning saw. Ensure they are sharp and in good condition to make clean cuts.
- Trim for safety: Begin by removing any dead, damaged, or diseased branches. Next, trim back any branches that are touching or too close to your home, power lines, or nearby structures.
- Consider shape and aesthetics: Prune to maintain the desired shape and size of the tree or shrub. Remove any excessive growth or crossing branches that may hinder the plant’s overall health and appearance.
- Dispose of trimmings: Properly dispose of the trimmings by either composting or arranging for green waste pickup in your area.
Trimming overgrown trees and shrubs not only protects your property from potential damage but also enhances the overall aesthetics of your landscape. It allows for better airflow and sunlight penetration, which promotes the health and vigor of the plants.
Remember to consult local regulations and consider hiring a professional tree service or arborist for large or high-risk trimming tasks. They have the expertise, equipment, and knowledge to safely perform the job.
By taking the time to trim overgrown trees and shrubs, you can create a safer environment, minimize potential hazards, and maintain the beauty of your landscape throughout the winter season and beyond.
Step 12: Clean Chimney and Fireplace
Cleaning your chimney and fireplace is a crucial step in preparing your house for winter. Over time, soot, debris, and creosote can accumulate in the chimney, posing a fire hazard and reducing the efficiency of your fireplace. By keeping these areas clean, you can ensure the safety of your home and enjoy cozy fires during the colder months.
Here’s how to effectively clean your chimney and fireplace:
- Inspect for blockages: Before starting, ensure that the chimney is clear of nests, debris, or any other obstructions that may hinder proper airflow.
- Protect your surroundings: Place a tarp or protective sheets around the fireplace to catch any debris that may fall during the cleaning process.
- Wear protective gear: Put on safety goggles, gloves, and a dust mask to protect yourself from soot, ash, and other particles.
- Remove any ash: If there is ash in the fireplace, use a fireplace shovel or ash vacuum to carefully remove and dispose of it in a metal container. Double-check that all embers are extinguished.
- Clean the chimney: Use a chimney brush and extension rods to clean the inside of the chimney. Scrub the walls of the chimney from top to bottom, removing any creosote buildup or other debris. Consider hiring a professional chimney sweep for a thorough cleaning if you’re unsure how to do it yourself.
- Clean the fireplace: Use a vacuum or brush to clean the fireplace walls, floor, and grate. Remove any remaining soot or debris.
- Inspect the damper and flue: Check that the damper is functioning properly and opens and closes easily. Inspect the flue for any damage or cracks that may require repair.
- Dispose of debris: After cleaning, dispose of the debris properly by sealing it in a plastic bag or container and disposing of it according to local regulations.
Regularly cleaning your chimney and fireplace reduces the risk of chimney fires, improves ventilation, and ensures proper functioning. It is recommended to clean your chimney at least once a year or more frequently if you use your fireplace extensively.
If you’re unsure about the cleaning process or if there are any structural or operational concerns with your fireplace or chimney, it’s best to consult a professional chimney sweep or fireplace technician. They can provide expert guidance and ensure that your chimney and fireplace are in optimal condition.
By incorporating chimney and fireplace cleaning into your winter preparation routine, you can enjoy the warmth and ambiance of a safe and efficient fire throughout the season.
Read more: How To Get Motivated To Declutter Your House
Step 13: Store Outdoor Furniture and Equipment
Storing your outdoor furniture and equipment is an important step in preparing your house for winter. Harsh winter weather conditions can damage or deteriorate these items if left exposed. By properly storing them, you can prolong their lifespan and ensure they are in good condition when spring arrives.
Here’s how to effectively store your outdoor furniture and equipment:
- Clean and dry: Before storing, thoroughly clean and dry all outdoor furniture and equipment. Remove any dirt, debris, or stains using appropriate cleaning supplies.
- Disassemble if necessary: If possible, disassemble larger furniture pieces to save space and make them easier to store. Keep track of screws, bolts, and other small parts by organizing them in bags or containers.
- Protective covers: Use protective covers specifically designed for outdoor furniture to shield it from dust, moisture, and UV rays. Cover both individual pieces and entire sets, ensuring a secure fit.
- Indoor storage: Whenever possible, store your furniture and equipment indoors, such as in a basement, garage, or a dedicated storage area. These enclosed spaces provide better protection against harsh winter conditions.
- Elevate off the ground: If storing items outdoors, elevate them off the ground to prevent moisture damage. Use pallets, tarps, or specially designed racks to keep the items away from damp surfaces.
- Secure loose items: Secure any loose cushions, pillows, or accessories by storing them in sealed containers or placing them in airtight bags to prevent moisture or pest damage.
- Store smaller items together: Keep smaller items and accessories, like garden tools, grilling utensils, or outdoor decor, in labeled storage containers or bins. This makes it easier to locate and retrieve them once spring arrives.
- Maintain equipment: Service and prepare any outdoor equipment, such as lawnmowers, trimmers, or grills, before storing them. Clean, lubricate, and ensure proper drainage to prevent damage during the off-season.
- Monitor storage conditions: Periodically check the storage area to ensure it remains dry and pest-free. Address any issues promptly to prevent damage to your stored items.
Properly storing your outdoor furniture and equipment during the winter months helps protect your investment and extend its lifespan. By taking the time to clean, cover, and store these items, you can enjoy them for years to come.
Remember, different materials may require specific care instructions, so consult the manufacturer’s recommendations for cleaning and storage. Additionally, ensure you have sufficient space and appropriate storage solutions to accommodate your items.
By following these steps, you can ensure that your outdoor furniture and equipment are well-preserved and ready to be enjoyed when warmer weather returns.
Step 14: Stock Up on Cold-Weather Supplies
Stocking up on cold-weather supplies is an important step in preparing your house for winter. Severe winter storms or unexpected power outages can leave you stranded or without essential items. By being well-prepared and having the necessary supplies on hand, you can stay safe, warm, and comfortable throughout the winter season.
Here’s what you need to do to effectively stock up on cold-weather supplies:
- Emergency food and water: Have a supply of non-perishable food items, such as canned goods, dried fruits, nuts, and energy bars. Stock up on bottled water or consider having a water storage system in place.
- Portable heating options: Invest in portable heaters that are safe for indoor use. Options include electric space heaters, propane heaters, or wood-burning stoves. Follow safety guidelines and keep them away from flammable materials.
- Extra blankets and warm clothing: Ensure you have enough blankets, sleeping bags, and warm clothing, including hats, gloves, scarves, and thermal layers, to keep you warm if the heating system fails.
- Flashlights and batteries: Have multiple flashlights and extra batteries readily available. Place them in easily accessible areas in case of a power outage.
- Emergency heating sources: Consider alternative heating sources, such as a generator, kerosene heater, or a fireplace, to provide warmth during power outages.
- Backup power supply: If possible, invest in a backup power supply, such as a generator or a battery-powered inverter, to keep essential devices and equipment running during power outages.
- Winterizing supplies: Have a supply of rock salt, ice melt, or sand to prevent slips and falls on icy surfaces. Keep snow shovels, snow blowers, and ice scrapers easily accessible.
- Communication devices: Ensure you have a fully charged cell phone, a portable battery charger, and a battery-powered radio to stay connected and receive emergency updates.
- Medications and first aid supplies: Stock up on necessary medications and have a well-stocked first aid kit in case of injuries or emergencies.
- Entertainment and comfort items: Keep some board games, books, or other forms of entertainment to help pass the time during power outages. Have comfort items like extra pillows or sleeping mats for added warmth and comfort.
It’s important to periodically check and rotate your supplies to ensure they are fresh and in good working condition. Consider creating an emergency preparedness kit with these supplies and keeping it in a readily accessible location.
By stocking up on cold-weather supplies, you can face winter storms and unexpected events with confidence and peace of mind. Being prepared ensures that you and your family are well-equipped to handle any challenges that may arise during the winter season.
Step 15: Create an Emergency Kit
Creating an emergency kit is a crucial step in preparing your house for winter. Severe weather events, power outages, or other emergencies can occur unexpectedly, leaving you without essential supplies. By having an emergency kit ready, you can ensure the safety and well-being of your family during challenging times.
Here’s what you need to do to effectively create an emergency kit:
- Emergency contact information: Include a list of emergency phone numbers, including local authorities, utility companies, and medical facilities.
- Food and water: Pack a supply of non-perishable food items such as canned goods, granola bars, and dried fruits. Store at least three days’ worth of water (one gallon per person per day) in sealed containers.
- First aid kit: Include a comprehensive first aid kit that contains bandages, adhesive tape, antiseptic wipes, pain relievers, and any necessary prescription medications.
- Lighting and communication: Include flashlights with extra batteries, a battery-powered or hand-crank radio, and a whistle to signal for help.
- Warmth and shelter: Pack extra blankets, sleeping bags, and warm clothing. Include rain ponchos, emergency blankets, and a tent or tarp for shelter if necessary.
- Hygiene and sanitation: Add personal hygiene items such as toilet paper, wet wipes, hand sanitizer, and menstrual products. Include small plastic bags for waste disposal.
- Tools and supplies: Include a multi-purpose tool, duct tape, a fire extinguisher, and a manual can opener. Add a set of extra batteries, a portable phone charger, and a basic tool kit.
- Important documents: Safeguard copies of vital documents such as identification cards, insurance policies, medical records, and proof of address. Keep them in a waterproof and portable container.
- Emergency cash: Keep some cash in small bills in case ATMs or credit card systems are inaccessible during emergencies.
- Entertainment and comfort: Include items like books, playing cards, puzzles, or toys to alleviate stress and pass the time.
Regularly check and update your emergency kit to ensure that it is well-maintained and stocked with fresh supplies. Consider your family’s specific needs, including any special medications, pet supplies, or baby essentials.
Store your emergency kit in an easily accessible and secure location. Make sure all family members know where it is located and educate them on the importance of preparedness.
An emergency kit can make a significant difference during challenging situations. By being prepared, you can effectively navigate through unexpected events and ensure the safety and well-being of your loved ones.
Conclusion
Preparing your house for winter is crucial to ensure the comfort, safety, and efficiency of your home during the cold months. By following the 15 important steps outlined in this guide, you can proactively protect your house from the harsh winter elements and potential damages.
From inspecting and cleaning gutters to creating an emergency kit, each step plays a vital role in winterizing your home. By properly maintaining your gutters, roof, windows, and doors, you can prevent leaks, drafts, and other issues that can impact your home’s integrity and energy efficiency. Servicing your heating system and testing smoke and carbon monoxide detectors are essential for the safety and well-being of your family.
In addition, insulating pipes, cleaning the chimney and fireplace, and storing outdoor furniture and equipment help safeguard your property and enhance the longevity of these items. Stocking up on cold-weather supplies and creating an emergency kit ensure that you are well-prepared for any unexpected events or emergencies that may arise during winter.
By following these steps and maintaining a proactive approach, you can enjoy a warm, comfortable, and secure home throughout the winter season. Regular maintenance and preparation not only protect your investment but also provide you with peace of mind as you face the challenges that winter brings.
Remember, safety should always be prioritized during any winter preparations. If you are unsure about any tasks or if there are complex issues, do not hesitate to seek professional help.
Take the time to prepare your house for winter, and enjoy the season with confidence, knowing that your home is well-equipped to handle whatever winter has in store.
Frequently Asked Questions about 15 Important Steps To Get Your House Prepped For Winter
Was this page helpful?
At Storables.com, we guarantee accurate and reliable information. Our content, validated by Expert Board Contributors, is crafted following stringent Editorial Policies. We're committed to providing you with well-researched, expert-backed insights for all your informational needs.


0 thoughts on “15 Important Steps To Get Your House Prepped For Winter”