Home>Articles>How Long Does It Take To Replace A Water Pump On A 2016 Ford Explorer
Articles
How Long Does It Take To Replace A Water Pump On A 2016 Ford Explorer
Modified: February 22, 2024
Learn how long it takes to efficiently replace a water pump on a 2016 Ford Explorer with helpful articles and expert advice.
(Many of the links in this article redirect to a specific reviewed product. Your purchase of these products through affiliate links helps to generate commission for Storables.com, at no extra cost. Learn more)
Introduction
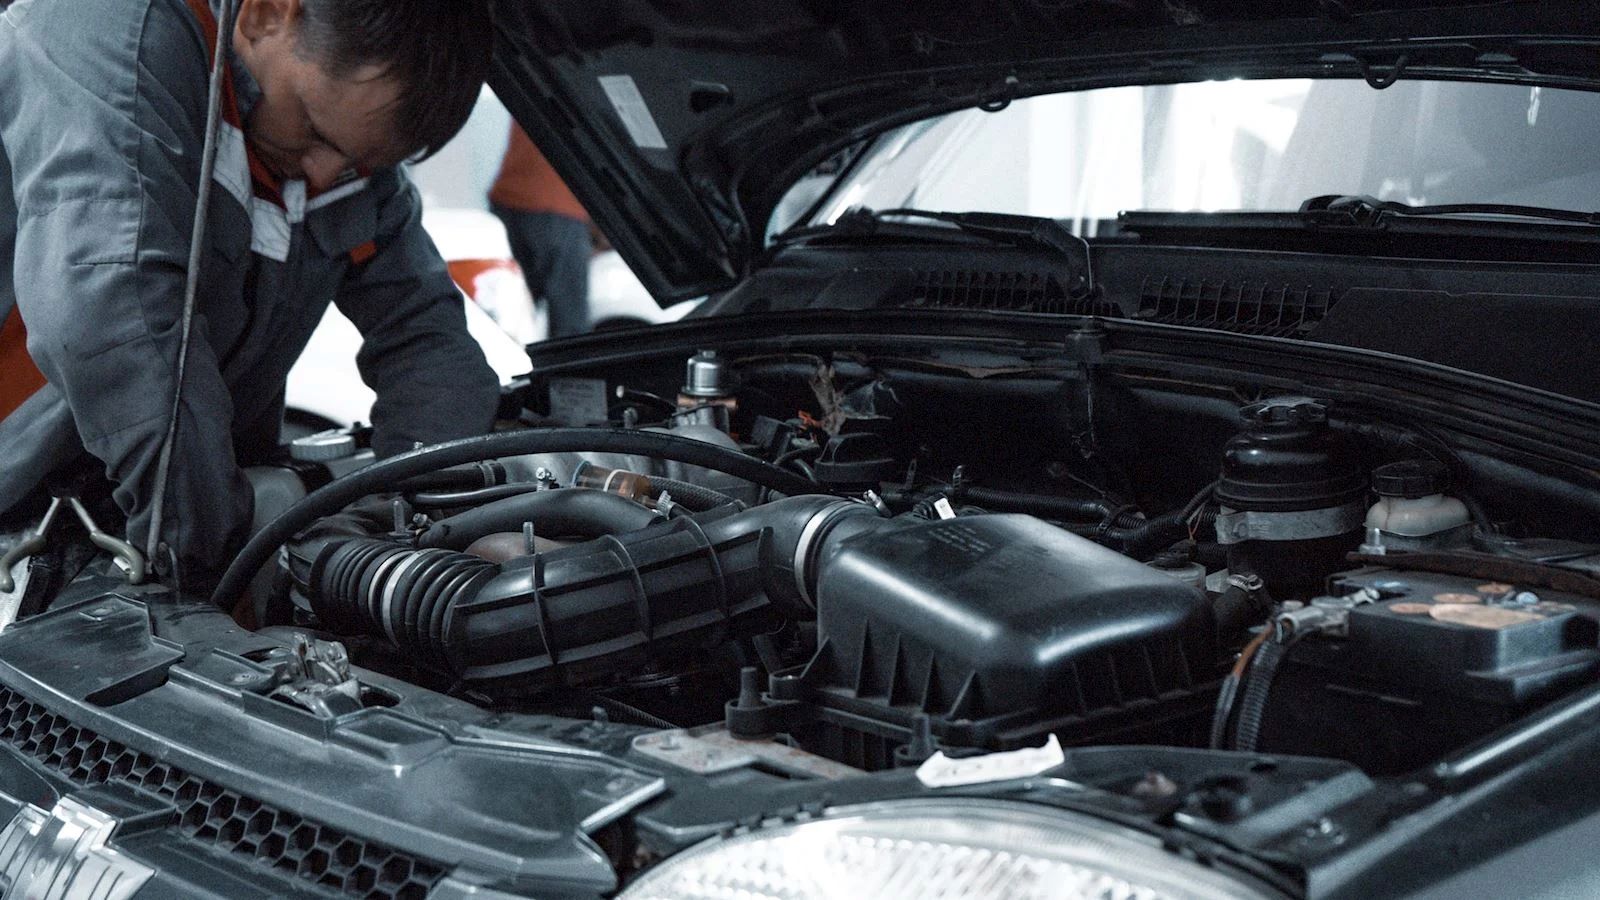
Replacing a water pump is a common task in automotive maintenance, and it is important to know how long it takes to complete the job. In this article, we will explore the process of replacing a water pump on a 2016 Ford Explorer, and discuss the estimated time required for this repair.
The water pump in a vehicle is responsible for circulating coolant throughout the engine, preventing it from overheating. Over time, the water pump may develop leaks, experience bearing failure, or show signs of wear and tear. When these issues arise, it is essential to replace the water pump promptly to avoid engine damage.
Before delving into the specific steps involved in replacing a water pump on a 2016 Ford Explorer, it is important to note that the time required for this repair can vary depending on several factors. These factors include the level of expertise of the person performing the repair, the availability of tools and resources, and the overall condition of the vehicle.
On average, replacing a water pump on a 2016 Ford Explorer can take anywhere from two to four hours. However, this estimate is only a rough guideline, and the actual time required may be longer or shorter depending on the individual circumstances.
It is important to allocate sufficient time for this repair to ensure that it is performed correctly and thoroughly. Rushing through the process can lead to mistakes or overlooked steps, potentially causing additional issues down the road.
In the following sections, we will outline the step-by-step process for replacing a water pump on a 2016 Ford Explorer. We will also provide some tips and recommendations to help streamline the repair and ensure a successful outcome.
Remember, if you are not comfortable performing this repair on your own, it is always recommended to seek professional assistance. Working on a vehicle can be complex and requires a certain level of expertise. With that being said, let’s dive into the specific steps required to replace a water pump on a 2016 Ford Explorer.
Key Takeaways:
- Replacing a water pump on a 2016 Ford Explorer can take anywhere from two to four hours, but it’s crucial to allocate sufficient time to avoid mistakes and ensure a thorough repair process.
- Proper preparation, gathering necessary tools and parts, and thorough testing for leaks are essential for a successful water pump replacement. Prioritizing safety and caution throughout the process is key.
Read more: How Long Does It Take To Replace Water Pump
Step 1: Gather necessary tools and parts
Before starting the water pump replacement process, it is important to gather all the necessary tools and parts. Having everything organized and readily available will help streamline the repair and minimize any potential delays. Here is a list of the tools and parts you will need:
1. Socket set: A socket set with various sizes will be essential for removing bolts and fasteners.
2. Wrenches: You will need a set of wrenches to assist in loosening and tightening certain components.
3. Screwdrivers: A selection of screwdrivers, including both flathead and Phillips, will be necessary for removing screws and other fasteners.
4. Pliers: Pliers will come in handy for gripping and manipulating certain components during the repair.
5. Gasket sealant: It is recommended to have gasket sealant on hand to ensure a proper seal when installing the new water pump.
6. Antifreeze/coolant: You will need a sufficient amount of antifreeze/coolant to refill the system once the repair is complete.
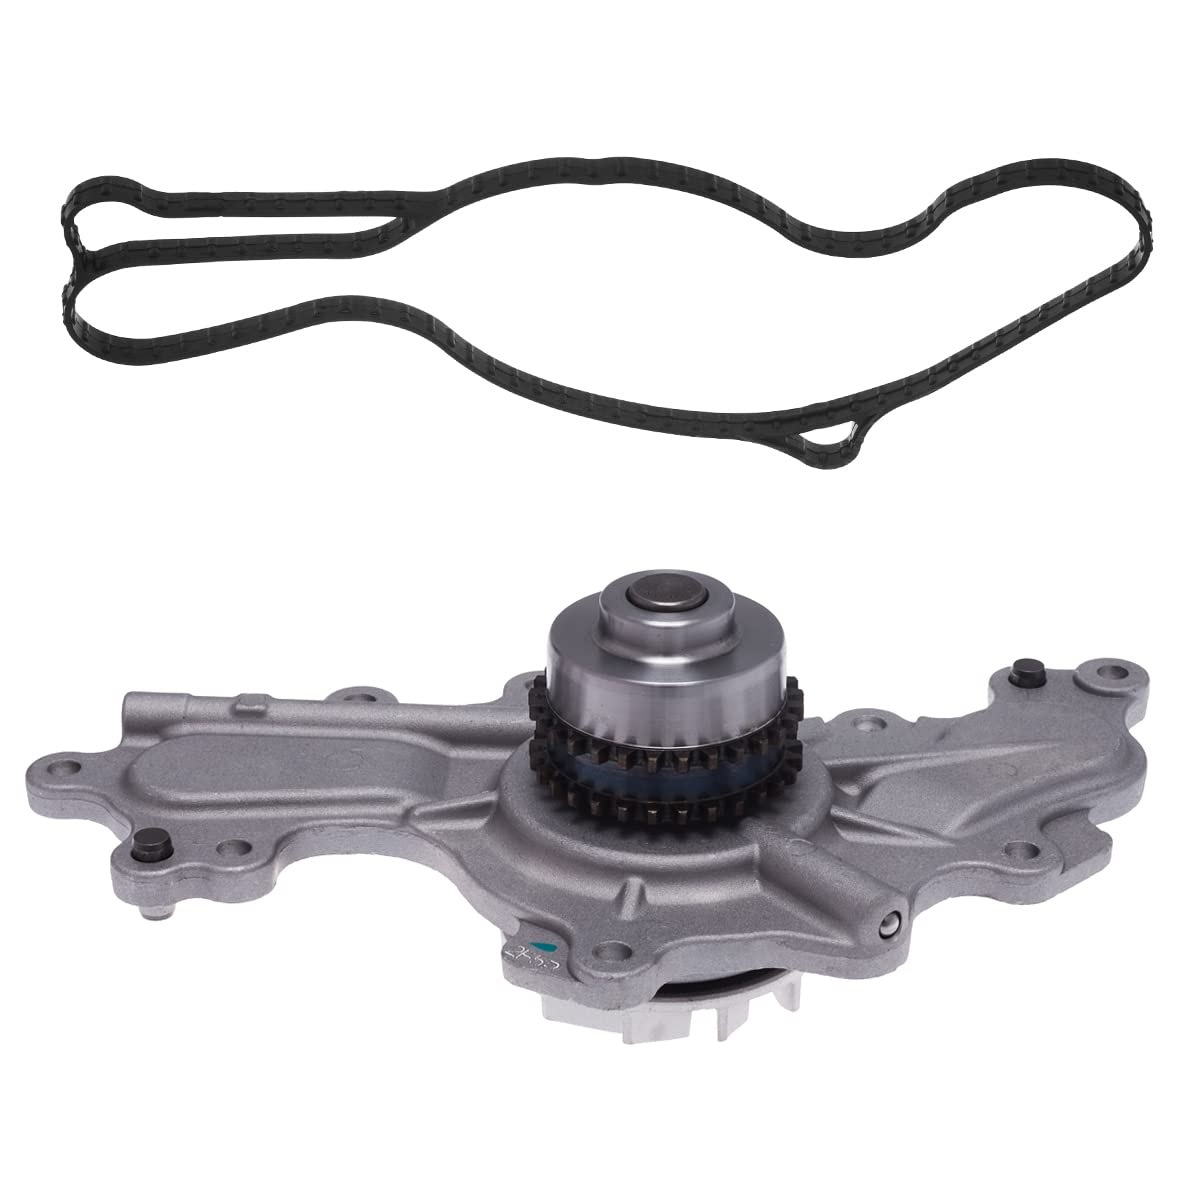
7. New water pump: It is crucial to have a high-quality replacement water pump that is compatible with your 2016 Ford Explorer.
8. New drive belts (optional): While not always necessary, it is a good idea to inspect the drive belts and replace them if they show signs of wear or damage.
By having all these tools and parts readily available, you can avoid interruptions during the water pump replacement process. It is recommended to inspect the new water pump and ensure it matches the old one before proceeding with the repair.
Additionally, it is a good idea to have a clean and organized work area. Lay out a work mat or towel to prevent any small parts from rolling away or getting lost. Labeling or organizing small components in containers can also help keep everything organized and easy to find.
Once you have gathered all the necessary tools and parts, you are ready to move on to the next step: preparing your work area.
Step 2: Prepare your work area
Preparing your work area before starting the water pump replacement is essential to ensure a smooth and efficient repair process. By taking the time to organize and set up your workspace properly, you can minimize the risk of accidents, lost parts, and unnecessary delays. Here are the key steps to prepare your work area:
1. Find a suitable location: Choose a flat and well-lit area to work on your 2016 Ford Explorer. Ideally, you should have enough space to move around freely and access all the necessary tools and parts.
2. Gather protective gear: Before starting any repair work, it is important to prioritize safety. Remember to wear appropriate protective gear, such as gloves and safety glasses, to protect yourself from any potential hazards.
3. Disconnect the battery: To avoid any electrical accidents, disconnect the negative terminal of the battery. This will prevent the vehicle’s electrical system from being engaged while you work on the water pump.
4. Lay down a protective covering: Place a sturdy cardboard or plastic sheet on the ground beneath the vehicle. This will help catch any spilled fluids and prevent them from staining or damaging the floor.
5. Organize your tools and parts: Lay out all the tools and parts you gathered in Step 1 on a clean and organized work surface. Arrange them in a logical manner, making it easy to access everything you need during the repair process.
6. Secure the service manual: If available, refer to the vehicle’s service manual or a reliable online resource for detailed instructions specific to your 2016 Ford Explorer. Having this information readily accessible will help guide you through each step of the water pump replacement.
Taking the time to properly prepare your work area not only contributes to a more efficient repair process but also promotes safety and reduces the likelihood of any mistakes or mishaps. A well-organized and clean workspace will allow you to focus on the task at hand without unnecessary distractions.
Once you have completed the preparation stage, you are now ready to move on to the next step: draining the coolant from the system.
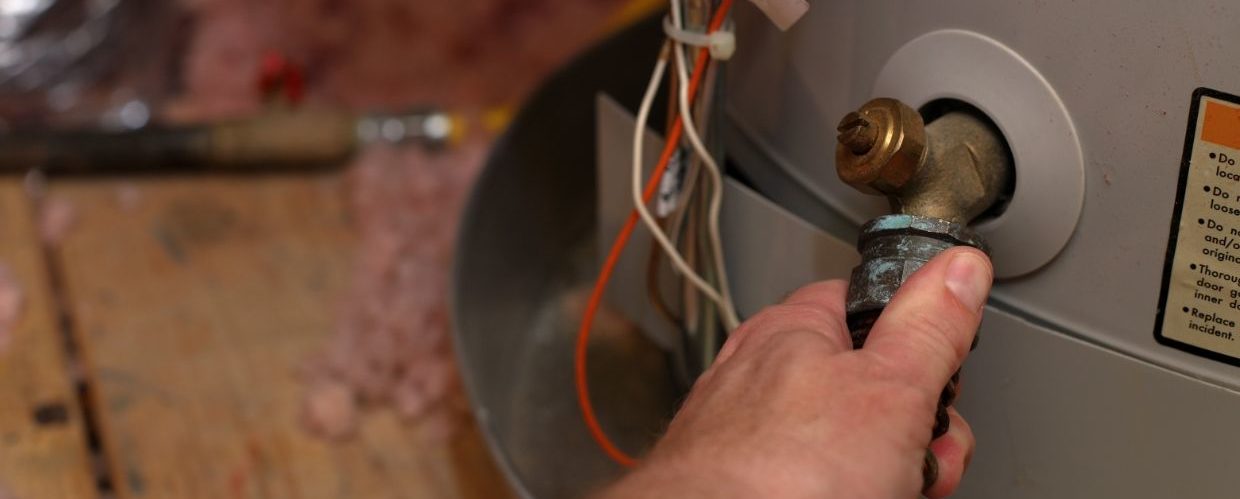
Step 3: Drain the coolant
Draining the coolant is a crucial step in the water pump replacement process. The coolant circulates through the engine, keeping it cool and preventing it from overheating. Before removing the water pump, it is important to drain the coolant from the system to avoid any spills or leaks. Here’s how you can effectively drain the coolant from your 2016 Ford Explorer:
1. Allow the engine to cool: Before working on the cooling system, it is essential to let the engine cool down completely. Opening the coolant system when the engine is hot can cause burns or serious injury.
2. Locate the coolant drain plug: The coolant drain plug is typically located on the bottom of the radiator or at the lowest point of the cooling system. Refer to your vehicle’s service manual or consult online resources for the specific location of the drain plug.
3. Place a container for coolant collection: Position a suitable container, such as a drain pan or bucket, beneath the drain plug to collect the coolant. Ensure that the container is large enough to hold the entire volume of coolant in the system.
4. Open the drain plug: Using an appropriate wrench or socket, loosen and remove the drain plug. Be cautious as the coolant will start to flow out once the plug is removed.
5. Allow the coolant to drain completely: Allow the coolant to drain fully into the container. This may take a few minutes, so be patient. Once the flow slows down to a trickle, ensure that all the coolant has been drained from the system.
6. Dispose of the coolant properly: Coolant is toxic and harmful to the environment, so it is vital to handle and dispose of it carefully. Check with local regulations on how to properly dispose of coolant in your area. Many auto shops or recycling centers accept used coolant for proper disposal.
7. Tighten the drain plug: Once all the coolant has been drained, securely tighten the drain plug to prevent any leaks.
By following these steps, you can effectively drain the coolant from your 2016 Ford Explorer. This will prepare the cooling system for the water pump replacement process, ensuring a clean and organized work environment. With the coolant drained, you can now move on to the next step: removing the drive belts.
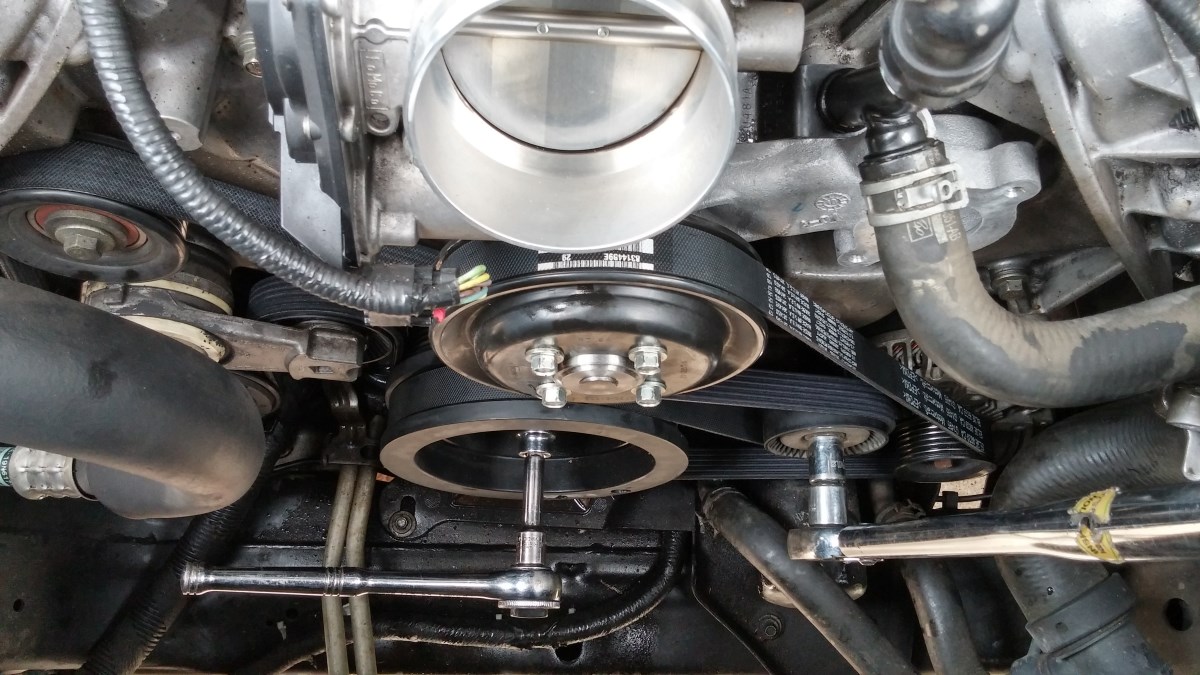
Step 4: Remove the drive belts
With the coolant drained, the next step in replacing the water pump on your 2016 Ford Explorer is to remove the drive belts. The drive belts are responsible for transferring power from the engine to various components, including the water pump. Here’s how you can remove the drive belts:
1. Identify the drive belts: Locate the drive belts in the engine compartment. Depending on your Ford Explorer model and engine configuration, there may be multiple belts, such as a serpentine belt or V-belts.
2. Determine belt tensioner location: Identify the belt tensioner pulley associated with each drive belt. The tensioner pulley applies tension to the belt, allowing it to rotate properly.
3. Loosen the belt tension: To remove the drive belts, you need to relieve tension from each belt. This can be done by either using a belt tensioner tool designed for your specific vehicle model or by using a wrench to rotate the tensioner pulley in the appropriate direction. Refer to your vehicle’s service manual for the specific instructions and diagrams.
4. Slide the belts off: Once the tension is relieved, carefully slide each belt off the pulleys and remove them from the engine compartment. Pay attention to the routing of the belts as you will need to reinstall them correctly later.
5. Inspect the belts: Take this opportunity to inspect the condition of the drive belts. Look for signs of wear, cracking, or damage. If any of the belts show significant wear or damage, it is recommended to replace them with new ones at this time.
6. Set the belts aside: Once removed, set the drive belts aside in a clean and safe location. It is advisable to label them or take note of their placement to ensure correct reinstallation later.
By following these steps, you can successfully remove the drive belts from your 2016 Ford Explorer. Remember to exercise caution while working around the engine components, and refer to the service manual or online resources for any specific instructions related to your vehicle model.
With the drive belts removed, you have completed an important step in preparing for the water pump replacement. The next step involves removing the water pump pulley, which will be covered in the following section.
Read more: How To Replace Water Pump Ford Taurus
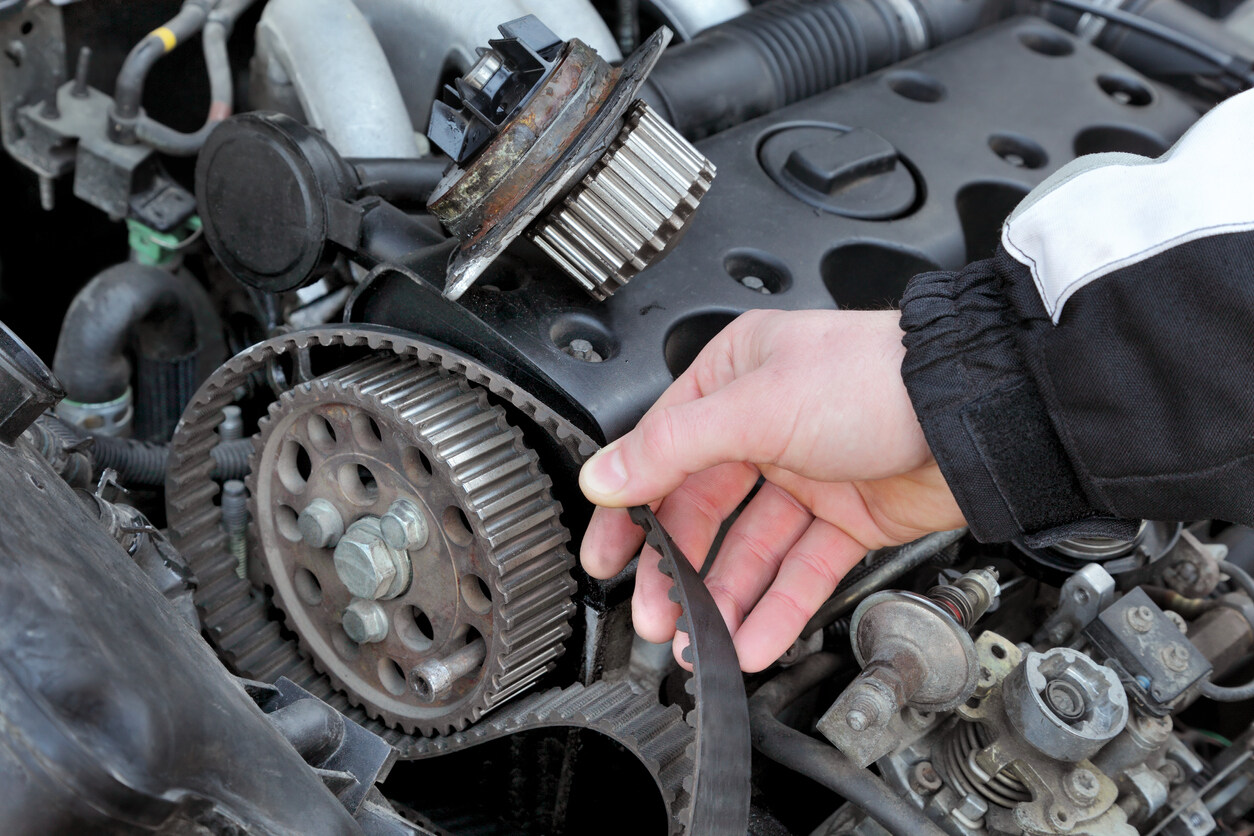
Step 5: Remove the water pump pulley
After removing the drive belts, the next step in replacing the water pump on your 2016 Ford Explorer is to remove the water pump pulley. The pulley is connected to the water pump and needs to be taken off before accessing the water pump itself. Here’s how you can remove the water pump pulley:
1. Locate the water pump pulley: The water pump pulley is typically mounted on the front of the water pump and is easily identifiable. It is connected to the water pump shaft and is responsible for driving the belts that power various engine components.
2. Secure the pulley: It’s important to ensure the water pump pulley is held securely in place before attempting to loosen the bolts. You can use a strap clamp or a belt wrench to hold the pulley steady during the removal process.
3. Remove the pulley bolts: Using an appropriate socket wrench or a set of wrenches, loosen and remove the bolts that secure the water pump pulley to the water pump. The number of bolts and the exact size can vary depending on your specific Ford Explorer model.
4. Slide off the pulley: Once the bolts are removed, carefully slide the water pump pulley off the water pump shaft. If there is any resistance, ensure that all bolts have been fully removed and gently wiggle the pulley back and forth until it comes free.
5. Inspect the pulley: Take a moment to inspect the condition of the water pump pulley. Look for any signs of damage, wear, or bearing issues. If the pulley shows signs of wear or damage, it is recommended to replace it with a new one.
6. Set the pulley aside: Once removed, place the water pump pulley in a safe and clean location. It’s a good idea to label it or take note of its position for easy reinstallation.
By following these steps, you can successfully remove the water pump pulley from your 2016 Ford Explorer. Taking the time to remove the pulley allows for easier access to the water pump, making the overall replacement process smoother.
With the water pump pulley removed, you are now ready to move on to the next step: removing the old water pump itself. We will discuss this in detail in the following section.
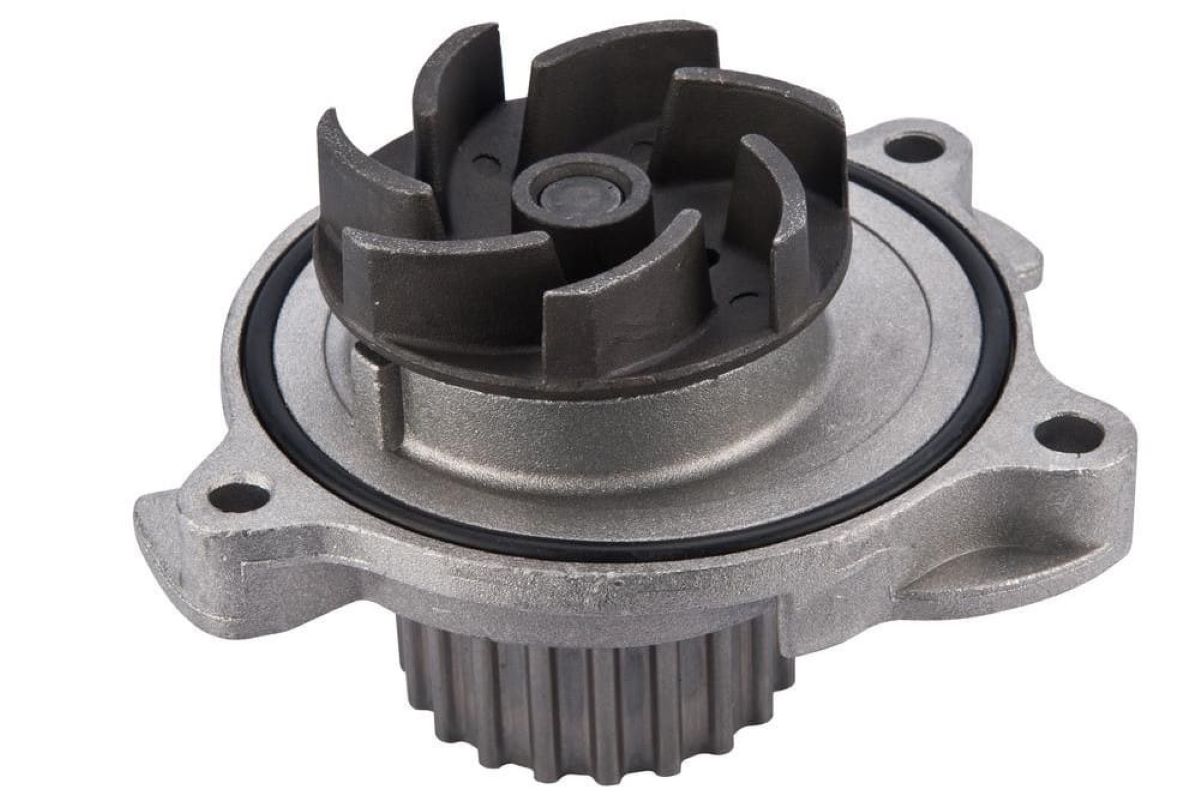
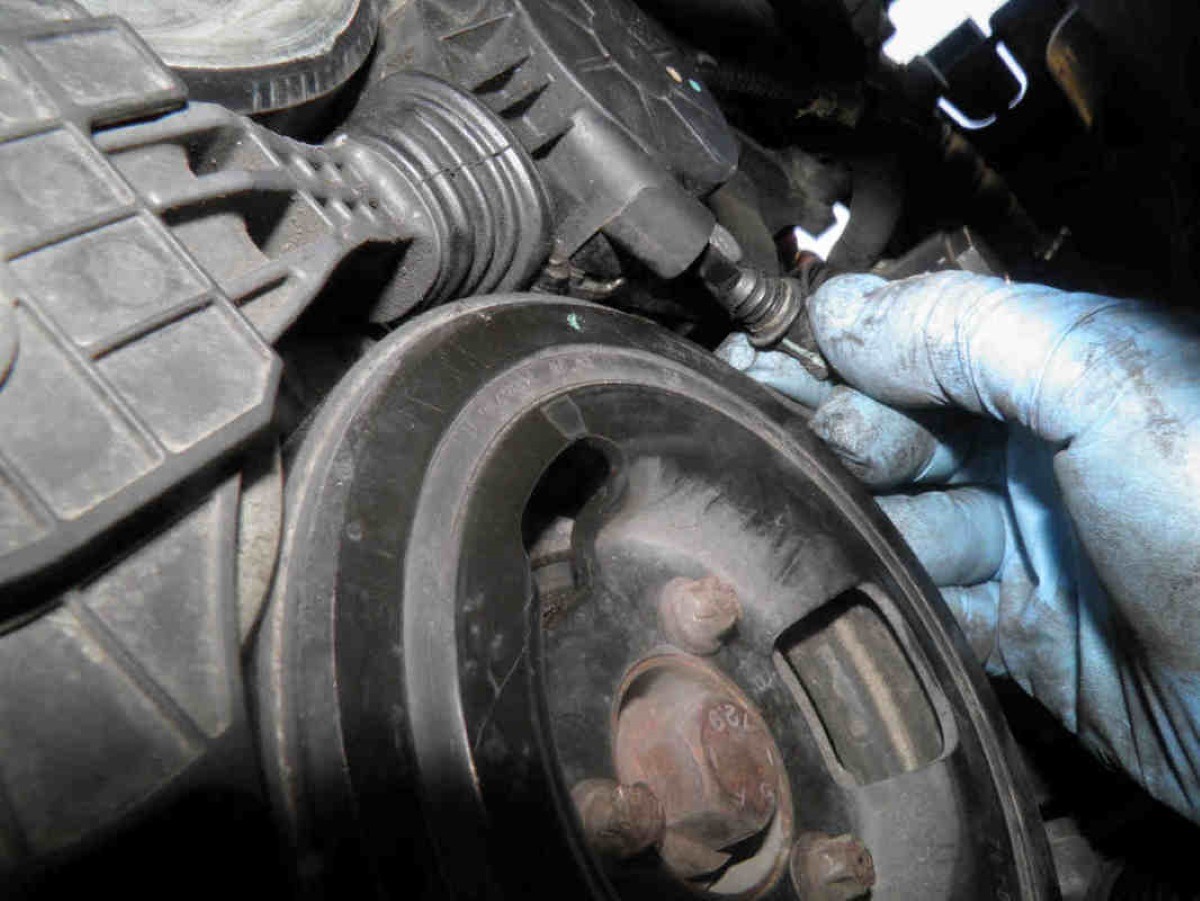
Step 6: Remove the old water pump
Now that the water pump pulley has been removed, it is time to take the next step in replacing the water pump on your 2016 Ford Explorer – removing the old water pump itself. Removing the old water pump is a critical part of this process, as it paves the way for installing the new one. Here are the steps to remove the old water pump:
1. Locate the water pump: The water pump is typically positioned on the front of the engine, driven by a pulley and connected to various hoses and coolant passages. Take note of the water pump’s location for reference.
2. Disconnect the hoses: Before proceeding, ensure that the engine is cool and the coolant has been drained (as covered in Step 3). Identify the coolant hoses connected to the water pump and use the appropriate tools or clamps to detach them. Be prepared for some coolant spillage during this step, so it’s a good idea to have a drain pan or absorbent material in place.
3. Remove the mounting bolts: Locate and remove the mounting bolts that hold the water pump in place. The number and position of the bolts can vary, so consult your vehicle’s service manual or online resources for specific details. Use the appropriate socket or wrench to loosen and remove the bolts, keeping track of their location and size.
4. Separate the water pump from the engine: Once all the mounting bolts are removed, gently separate the old water pump from the engine. It may require a bit of wiggling or slight prying with a flathead screwdriver to loosen it if it’s stuck due to gasket sealant.
5. Clean the mounting surface: With the old water pump removed, take a moment to clean the mounting surface on the engine block. Use a scraper or a clean cloth to remove any residue or remnants of the old gasket material. Ensure the surface is clean and free from any debris to ensure proper sealing of the new water pump.
6. Inspect the old water pump: Before discarding the old water pump, inspect it for any signs of damage, leaks, or bearing issues. If any significant problems are detected, it is recommended to replace the water pump with a new one.
7. Dispose of old parts and gaskets responsibly: Properly dispose of the old water pump, mounting bolts, and any gaskets or seals. Follow local regulations on the disposal and recycling of automotive parts and fluids.
By following these steps, you can successfully remove the old water pump from your 2016 Ford Explorer. Ensure you exercise caution during the process to avoid any damage to surrounding components. With the old water pump out of the way, you are now ready to move on to the next step: installing the new water pump.
When replacing the water pump on a 2016 Ford Explorer, it typically takes around 2-3 hours for a professional mechanic. Make sure to have the necessary tools and a replacement pump ready before starting the job.
Step 7: Install the new water pump
With the old water pump removed, it’s time to proceed with installing the new water pump on your 2016 Ford Explorer. Proper installation of the new water pump is crucial for optimal engine performance and coolant circulation. Follow these steps to ensure a successful installation:
1. Prepare the new water pump: Before installing the new water pump, take a moment to inspect it. Ensure that it matches the specifications of your Ford Explorer and that all necessary gaskets and seals are included. If any parts are missing or damaged, contact the manufacturer or supplier for replacements.
2. Apply gasket sealant: To ensure a proper seal, apply a thin layer of gasket sealant to both sides of the new water pump gasket. This will help prevent coolant leaks and ensure a secure fit.
3. Position the new water pump: Carefully position the new water pump on the engine block, aligning the mounting holes with the corresponding holes on the engine. Ensure that the pump is oriented correctly and that any guide pins or dowels are properly aligned.
4. Insert and tighten mounting bolts: Once the new water pump is properly positioned, insert the mounting bolts through the holes and hand-tighten them. Gradually tighten the bolts in a crisscross pattern using the appropriate socket or wrench, ensuring even and secure tightening. Be mindful not to overtighten the bolts, as this may damage the threads or the pump itself.
5. Reconnect coolant hoses: Reattach the coolant hoses to the new water pump, ensuring a secure and proper connection. Check for any signs of leakage or loose connections and make any necessary adjustments.
6. Check for proper alignment: After tightening the mounting bolts and reconnecting the coolant hoses, double-check that the new water pump is properly aligned. Ensure that there is no interference or misalignment that may cause issues with belt operation or coolant flow.
7. Refill the coolant: With the new water pump installed, it’s time to refill the cooling system with fresh coolant. Refer to your vehicle’s owner manual or service manual for the correct coolant type and the recommended coolant filling procedure. Make sure to add the appropriate amount of coolant to achieve the correct level.
8. Inspect for leaks: Once the coolant has been refilled, start the engine and monitor for any signs of coolant leakage. Check around the water pump and coolant hoses for any visible signs of leaks. If any leaks are detected, investigate and rectify the issue before proceeding.
By following these steps, you can successfully install the new water pump on your 2016 Ford Explorer. Take your time and ensure that all connections and bolts are tightened securely. With the new water pump in place, you can move on to the next step: reinstalling the water pump pulley.
Step 8: Reinstall the water pump pulley
After successfully installing the new water pump, the next step in replacing the water pump on your 2016 Ford Explorer is to reinstall the water pump pulley. The water pump pulley ensures proper rotation and functionality of the drive belts. Here’s how you can reinstall the water pump pulley:
1. Inspect the pulley and shaft: Before reinstalling the water pump pulley, inspect it for any signs of damage or wear. Also, ensure that the water pump shaft is clean and free from any debris.
2. Align the pulley: Place the water pump pulley onto the water pump shaft, making sure it aligns properly. The pulley should fit snugly onto the shaft without any wiggle or misalignment.
3. Install the pulley bolts: Insert and hand-tighten the bolts that hold the water pump pulley in place. Ensure that the bolts are threaded correctly and aligned with the holes on the pulley.
4. Tighten the pulley bolts: Use a socket wrench or a set of wrenches to securely tighten the bolts. Tighten them in a crisscross pattern to ensure even tightening and prevent any issues with the pulley’s balance.
5. Double-check the pulley alignment: After tightening the bolts, double-check the alignment of the water pump pulley. Ensure that it is centered and aligned with the other engine components, such as the other pulleys and drive belts.
6. Verify pulley rotation: Give the water pump pulley a gentle spin by hand to verify that it rotates smoothly and freely without any obstruction or excessive noise. If you experience any issues, recheck the alignment and bolt tightness.
7. Confirm proper belt alignment: Before proceeding further, check the alignment of the drive belts on the various pulleys, including the newly installed water pump pulley. Verify that the belts are properly seated and aligned with their respective pulleys to avoid any belt slippage or performance issues.
By following these steps, you can successfully reinstall the water pump pulley on your 2016 Ford Explorer. Ensure that the pulley is securely tightened and aligned correctly to ensure optimal performance and functionality. Once the water pump pulley is reinstalled, you can proceed to the next step: replacing the drive belts.
Step 9: Replace the drive belts
After reinstalling the water pump pulley, the next step in replacing the water pump on your 2016 Ford Explorer is to replace the drive belts. The drive belts transmit power from the engine to various components, including the water pump. It is essential to ensure that the belts are in good condition and properly installed for optimal performance. Here’s how you can replace the drive belts:
1. Identify the correct belt routing: Before removing the old belts, take note of their routing. Refer to the diagram provided on the vehicle’s service manual, under the hood, or use online resources specific to your Ford Explorer model. This will help ensure that the new belts are installed correctly.
2. Loosen belt tension: Locate the belt tensioner pulley or adjuster for each belt that needs to be replaced. Depending on your vehicle model, there may be multiple belts, such as a serpentine belt or V-belts. Use the appropriate tool or method to relieve tension on each belt, making it easier to remove and install the new ones.
3. Remove the old belts: Once the tension is relieved, slide the old belts off the pulleys. Take note of how each belt is routed, ensuring you have a clear reference for the installation of the new belts.
4. Compare and match the new belts: Before installing the new belts, compare them to the old ones to ensure they are the correct length and have the same width and number of ridges (if applicable). Mismatched or incorrect belts can lead to performance issues or premature wear.
5. Install the new belts: Following the correct belt routing, begin by placing the first new belt onto the appropriate pulleys. Work your way along the belt path, ensuring each belt is properly seated on each pulley. Use the tensioner or adjuster to provide enough tension for each belt without overstretching or causing excessive strain.
6. Double-check belt alignment: Once all the new belts are installed, visually inspect each one to confirm proper alignment. Ensure that the belts are seated correctly on each pulley, following the predetermined routing diagram or belt alignment guide.
7. Tension the new belts: Using the appropriate tool or method, apply tension to each belt according to the manufacturer’s specifications or the vehicle’s service manual. It’s essential to achieve the correct tension to enable proper operation without causing stress or slippage.
8. Verify belt operation: After tensioning the new belts, start the engine and listen for any abnormal noises or vibrations. Observe the belt operation for a few minutes to ensure that they are running smoothly on the pulleys without any slipping or unusual movement.
9. Perform a final inspection: Conduct a final visual inspection of the new belts to verify that they are properly installed, aligned, and tensioned. Check for any signs of misalignment, rubbing, or abnormalities that may require adjustment.
By following these steps, you can successfully replace the drive belts on your 2016 Ford Explorer. Properly installed and tensioned drive belts will ensure the efficient operation of the water pump and other engine components. With the new belts in place, you are now ready for the next step: refilling the coolant.
Step 10: Refill the coolant
After completing the water pump replacement and ensuring all components are properly installed, the next crucial step is to refill the coolant in your 2016 Ford Explorer. Adequate coolant levels are essential for maintaining proper engine temperature and preventing overheating. Follow these steps to safely refill the coolant:
1. Verify coolant requirements: Ensure that you have the correct type and quantity of coolant specified for your Ford Explorer. Consult the owner’s manual, service manual, or manufacturer’s recommendations for the appropriate coolant specifications.
2. Prepare the coolant mixture: If necessary, dilute the coolant with water according to the manufacturer’s recommendations. It is crucial to achieve the correct coolant-to-water ratio for optimal performance and anti-freeze protection, especially in extreme temperatures.
3. Locate the coolant reservoir: Locate the coolant reservoir in the engine compartment. It is typically a translucent plastic container with marked maximum and minimum levels. Clean the reservoir if there is any debris or residue present.
4. Add the coolant mixture: Slowly pour the coolant mixture into the coolant reservoir, being mindful not to exceed the maximum fill line. It is advisable to use a funnel to avoid spillage and ensure accurate pouring.
5. Bleed the cooling system: To prevent air pockets that can hinder coolant circulation, it may be necessary to bleed the cooling system. Refer to the vehicle’s service manual for the specific instructions on how to bleed the cooling system, as procedures may vary depending on the Ford Explorer model.
6. Monitor the coolant level: Monitor the coolant level in the reservoir. If necessary, add more coolant mixture to reach the appropriate level between the maximum and minimum marks. Do not overfill the reservoir, as excess coolant may be expelled during operation.
7. Secure the coolant reservoir cap: Once the coolant level is correctly filled, securely fasten the cap on the coolant reservoir.
8. Start the engine: Start the engine and allow it to idle for a few minutes. Keep an eye on the coolant temperature gauge to ensure it remains within the normal operating range. Observe for any signs of coolant leaks or unusual behavior.
9. Check for leaks: After the engine has reached operating temperature, inspect the engine compartment, particularly around the water pump and coolant hoses, for any signs of coolant leakage. Address any leaks promptly to avoid coolant loss and potential engine damage.
10. Recheck coolant level: Once the engine has cooled down, recheck the coolant level in the reservoir. Adjust as necessary to maintain it within the recommended range.
By following these steps, you can safely refill the coolant in your 2016 Ford Explorer after replacing the water pump. Proper coolant levels will ensure optimal engine performance and protection against overheating. With the coolant refilled, your water pump replacement process is almost complete. The final step in this process is to test for leaks.
Step 11: Test for leaks
After completing the water pump replacement and refilling the coolant in your 2016 Ford Explorer, the final step is to thoroughly test the system for any coolant leaks. Detecting and addressing leaks promptly is crucial to prevent coolant loss, engine overheating, and potential damage. Follow these steps to effectively test for leaks:
1. Visually inspect the engine compartment: Once the engine has cooled down, visually inspect the engine compartment, specifically focusing on the water pump, coolant hoses, and fittings. Look for any signs of coolant leaks, such as puddles or wet spots, around these areas. Check for any loose connections or damaged components.
2. Run the engine: Start the engine and allow it to idle for a few minutes. Keep a close eye on the temperature gauge to ensure it remains within the normal operating range. Observe the engine compartment for any signs of leaking coolant during this time.
3. Check the coolant reservoir: After running the engine, inspect the coolant reservoir and its surrounding area for any signs of leakage. Look for any coolant stains, wetness, or a significant decrease in the coolant level that may indicate a leak.
4. Monitor for steam or odors: While the engine is running, pay attention to any unusual steam or coolant odors emanating from the engine compartment. These signs may indicate a coolant leak that is evaporating due to engine heat.
5. Check for coolant smell inside the vehicle: If you detect a sweet, distinctive coolant smell inside the vehicle’s cabin, it could be a sign of a coolant leak. This may indicate a compromised heater core, a component connected to the cooling system.
6. Inspect for drips or stains under the vehicle: Park the vehicle on a clean surface and let it idle for a few minutes. Once you move the vehicle, check the ground under the engine area for any coolant drips, stains, or puddles. This can indicate an external leak that requires immediate attention.
7. Monitor coolant levels over time: After the initial test for leaks, monitor the coolant levels over the next few days or weeks. Keep an eye on the coolant reservoir to ensure the level remains consistent and does not experience any significant drops. A sudden decrease in coolant level may indicate an ongoing or persistent leak.
If you detect any coolant leaks during the testing process, it is crucial to identify and address them promptly. Common causes of leaks can include loose connections, damaged hoses, faulty gaskets, or improper installation. Depending on the severity of the leak, you may need to retighten connections, replace damaged components, or consult a professional mechanic for further investigation.
By following these steps and conducting a thorough leak test, you can ensure that the water pump replacement in your 2016 Ford Explorer has been successful. It is essential to address any leaks immediately to maintain the proper functioning of the cooling system and prevent potential engine damage.
Conclusion
Replacing a water pump on a 2016 Ford Explorer is a task that requires careful attention to detail, proper tools, and a systematic approach. By following the step-by-step process outlined in this guide, you can successfully replace the water pump and restore the optimal functioning of your vehicle’s cooling system.
Throughout the process, it is essential to prioritize safety and take necessary precautions. Always allow the engine to cool down before starting any work, wear appropriate protective gear, and exercise caution when working with coolant and moving engine components.
Remember, the estimated time for replacing a water pump on a 2016 Ford Explorer can vary depending on factors such as experience level, availability of tools, and the overall condition of the vehicle. It is important to allocate sufficient time and not rush through the repair to ensure a thorough and accurate installation.
Properly preparing your work area, gathering the necessary tools and parts, and following each step diligently will contribute to a successful water pump replacement. Additionally, thorough testing for leaks and monitoring the coolant system after the repair is crucial to confirm its integrity and address any potential issues promptly.
If you are unsure or uncomfortable performing the water pump replacement yourself, it is always recommended to seek professional assistance. Experienced technicians have the expertise and knowledge to handle the repair efficiently and ensure that all steps are executed correctly.
By replacing the water pump in your 2016 Ford Explorer, you are proactively maintaining the health and longevity of your vehicle. A properly functioning water pump ensures reliable cooling system performance, preventing engine overheating and potential damage.
In conclusion, by following the outlined steps, preparing adequately, exercising caution, and testing for leaks, you can successfully replace the water pump on your 2016 Ford Explorer. Remember to consult your vehicle’s service manual or reliable online resources for any specific instructions or details related to your particular vehicle model.
Frequently Asked Questions about How Long Does It Take To Replace A Water Pump On A 2016 Ford Explorer
Was this page helpful?
At Storables.com, we guarantee accurate and reliable information. Our content, validated by Expert Board Contributors, is crafted following stringent Editorial Policies. We're committed to providing you with well-researched, expert-backed insights for all your informational needs.


0 thoughts on “How Long Does It Take To Replace A Water Pump On A 2016 Ford Explorer”