Articles
How To Replace Water Pump Ford Taurus
Modified: August 27, 2024
Learn how to replace the water pump in your Ford Taurus with our helpful articles. Find step-by-step instructions and tips to get the job done right.
(Many of the links in this article redirect to a specific reviewed product. Your purchase of these products through affiliate links helps to generate commission for Storables.com, at no extra cost. Learn more)
Introduction
Replacing the water pump in your Ford Taurus is a task that may seem daunting, but with the right tools and a little know-how, it’s a job you can tackle yourself. The water pump is an essential component of the cooling system, responsible for circulating the coolant throughout the engine to prevent overheating. Over time, the water pump may develop leaks or fail, requiring replacement to keep your vehicle running smoothly. In this article, we will guide you through the step-by-step process of replacing the water pump in your Ford Taurus.
Before we begin, it’s important to note that working on your vehicle’s cooling system can be dangerous, as it involves handling hot coolant and working near moving parts. It’s crucial to take the necessary safety precautions and consult your vehicle’s manual for specific instructions. If you’re not comfortable performing this task or have any doubts, we recommend taking your vehicle to a professional mechanic.
Now, let’s gather the necessary tools and materials to get started on replacing the water pump in your Ford Taurus.
Key Takeaways:
- Replacing the water pump in your Ford Taurus may seem daunting, but with the right tools and step-by-step guidance, it’s a manageable DIY task that can save you time and money.
- Prioritize safety, gather necessary tools, and follow each step meticulously to ensure a successful water pump replacement. Proper preparation, installation, and coolant refill are crucial for optimal engine performance.
Read more: How To Replace A Water Pump On A Ford F150
Step 1: Gather Necessary Tools and Materials
Before you begin the process of replacing the water pump in your Ford Taurus, it’s important to gather all the necessary tools and materials. Having everything on hand will ensure a smooth and efficient workflow. Here’s a list of the tools and materials you’ll need:
1. Socket set – Make sure you have a socket set with various sizes to remove bolts and nuts.
2. Wrench set – A set of open-end wrenches and combination wrenches will be useful for removing certain components.
3. Screwdrivers – Both flathead and Phillips head screwdrivers will come in handy for loosening screws and removing certain parts.
4. Pliers – A set of pliers, including regular pliers and needle-nose pliers, will be useful for gripping and maneuvering small parts.
5. Hose clamp pliers – These specialized pliers will make it easier to remove and reattach hose clamps.
6. Coolant drain pan – You’ll need a pan to catch the coolant when you drain the cooling system.
7. Gasket scraper or plastic scraper – This will be used to clean the mounting surface of the old gasket debris.
8. New water pump – Make sure you have the replacement water pump ready before starting the process.
9. New gaskets – Depending on the model and brand of your water pump, you may need one or more gaskets for installation.
10. Coolant – It’s recommended to have a fresh supply of coolant on hand to refill the cooling system.
11. Shop towels or rags – These will be useful for cleaning spills and wiping away any debris.
12. Penetrating oil – If any bolts or nuts are stubborn and difficult to loosen, penetrating oil can help loosen them up.
By gathering these tools and materials in advance, you’ll be well-prepared to tackle the water pump replacement in your Ford Taurus. With everything ready, let’s move on to the next step: draining the cooling system.
Step 2: Drain the Cooling System
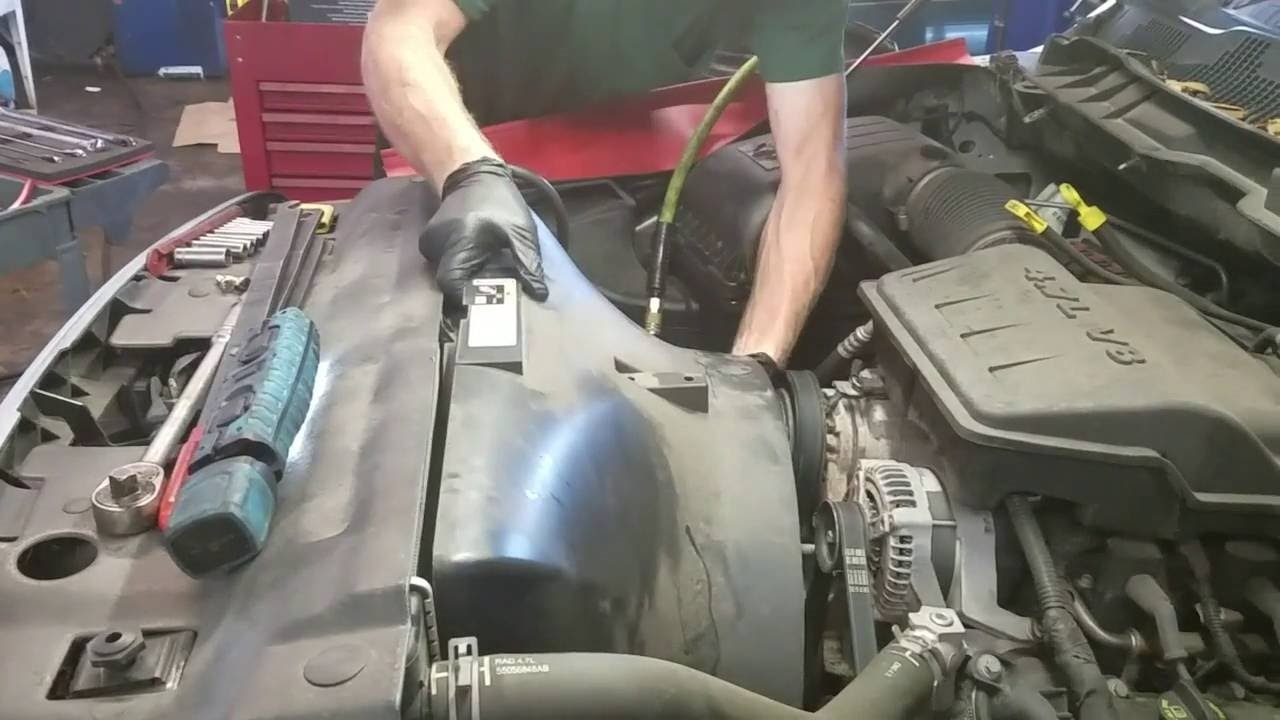
Before you can remove the water pump from your Ford Taurus, you’ll need to drain the cooling system to prevent any coolant spills or leaks. Here’s how you can do it:
1. Safety precautions: Ensure the engine has cooled down completely before proceeding. It’s advisable to work with gloves and safety goggles to protect yourself from any potential spills or splashes.
2. Locate the radiator drain plug: The radiator drain plug is usually located at the bottom of the radiator. It can be a bolt or a petcock valve. Position a coolant drain pan beneath the drain plug to catch the coolant.
3. Open the drain plug: Use a wrench or pliers to loosen and remove the radiator drain plug. Allow the coolant to drain completely into the drain pan.
4. Remove the radiator cap: Removing the radiator cap will help facilitate the draining process and allow air to flow through the system. Remember to put the cap in a safe place to avoid misplacing it.
5. Additional draining (optional): In some cases, there might be residual coolant that remains in the engine block. To ensure a thorough drainage, locate the engine block drain plug, usually positioned on the side or bottom of the engine block. Loosen and remove the plug, allowing any remaining coolant to drain out.
6. Dispose of the coolant properly: Coolant is toxic and harmful to the environment. It’s important to dispose of it responsibly by taking it to a local hazardous waste facility or an auto parts store that accepts used coolant for recycling.
7. Flush the cooling system (optional): If the coolant appears dirty or contaminated, it’s a good idea to flush the cooling system before proceeding with the water pump replacement. Follow the manufacturer’s instructions on how to flush the system properly.
By thoroughly draining the cooling system, you’ll minimize the risk of coolant spills and ensure a clean workspace for the rest of the water pump replacement process. With the cooling system emptied, it’s time to move on to the next step: removing the serpentine belt.
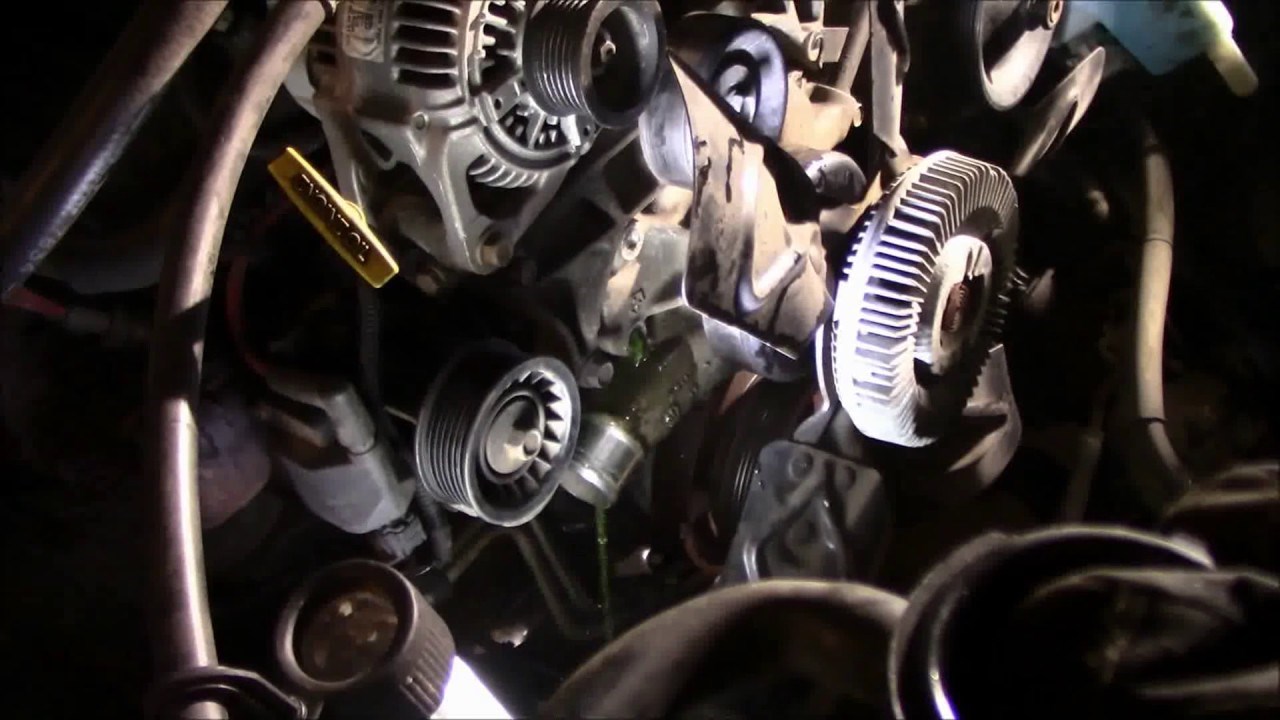
Step 3: Remove the Serpentine Belt
To access the water pump in your Ford Taurus, you’ll need to remove the serpentine belt that drives various components of the engine. Here’s how you can do it:
1. Locate the tensioner pulley: The tensioner pulley is responsible for keeping the serpentine belt tight. Use a wrench or a socket and ratchet to turn the tensioner pulley in the direction specified by the manufacturer. This will relieve the tension on the belt.
2. Slide the belt off: While holding the tensioner pulley in its released position, carefully slide the serpentine belt off one of the pulleys. Make note of the belt’s routing so that you can reinstall it correctly later. You can also take a picture or draw a diagram for reference.
3. Release the tensioner: Slowly release the tensioner pulley, allowing it to return to its original position. Ensure that the belt is fully removed from all the pulleys.
4. Inspect the belt: Take this opportunity to inspect the serpentine belt for any signs of damage or excessive wear. If the belt shows any signs of cracking, fraying, or glazing, it’s recommended to replace it with a new one.
5. Keep the belt in a safe place: Set the removed serpentine belt aside in a clean and safe area. Keeping it organized and protected will ensure it can be reused or properly disposed of if necessary.
Removing the serpentine belt will provide you with the necessary space to access and remove the water pump. With the belt safely removed, you’re ready to move on to the next step: removing the water pump pulley.
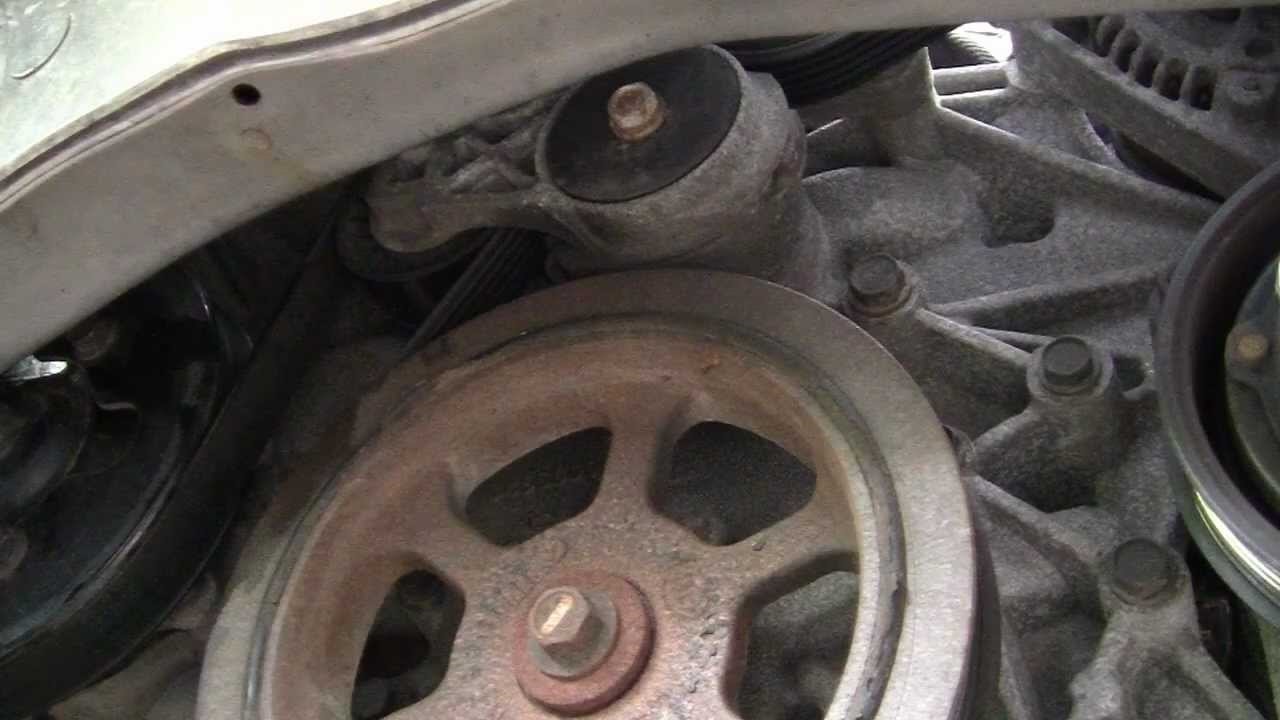
Step 4: Remove the Water Pump Pulley
Once you have removed the serpentine belt, the next step is to remove the water pump pulley. Here’s how you can do it:
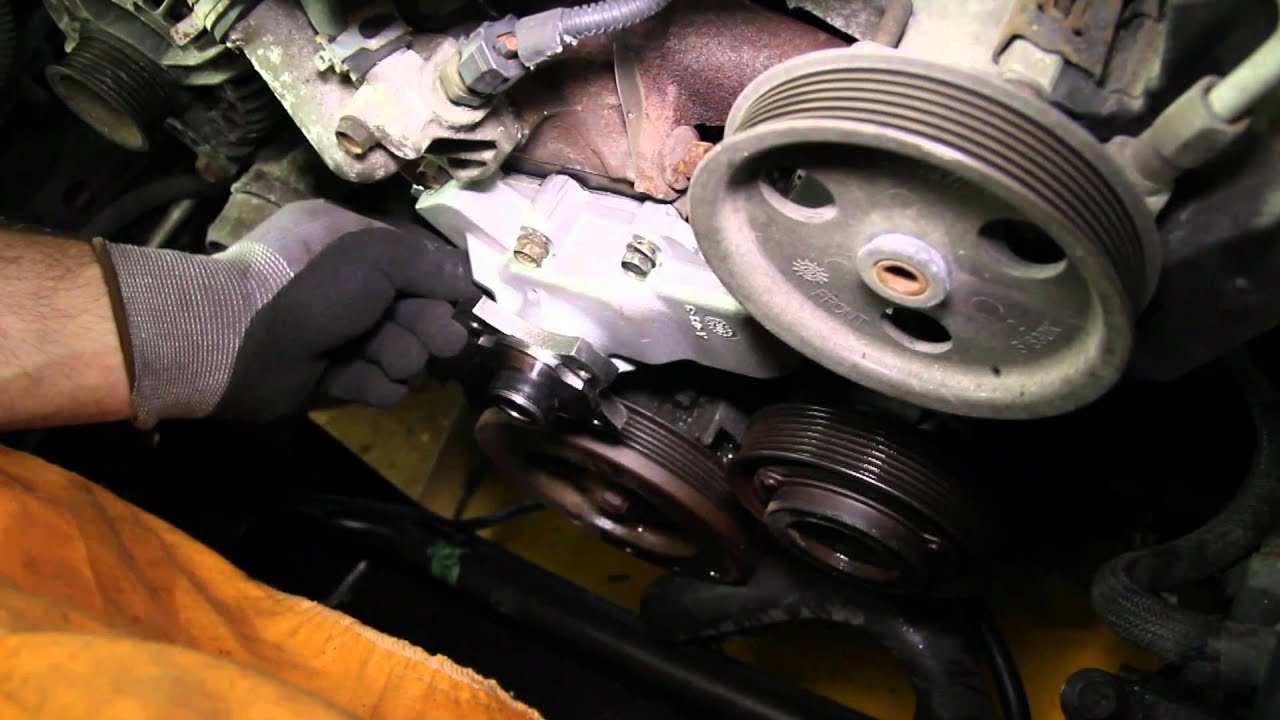
1. Access the water pump pulley: Locate the water pump pulley, which is typically connected to the water pump by bolts or screws. It is usually located on the front side of the engine, near the water pump.
2. Secure the pulley: To prevent the pulley from rotating while you loosen the bolts, you can use various methods. One common option is to use a strap wrench to hold the pulley in place. Alternatively, you can use a breaker bar or a ratchet with an appropriate socket to secure the pulley.
3. Loosen and remove the bolts: Use a socket and ratchet or a wrench to loosen and remove the bolts or screws that connect the water pump pulley to the water pump. Turn the bolts counterclockwise to loosen them.
4. Remove the pulley: Once the bolts are fully removed, carefully slide or pry the water pump pulley off the water pump.
5. Inspect the pulley: Take a moment to inspect the water pump pulley for any signs of damage or wear. If the pulley is damaged, it’s recommended to replace it with a new one to ensure proper functioning of the cooling system.
6. Keep the pulley in a safe place: Set the removed water pump pulley aside in a designated area where it won’t get lost or damaged. Keeping it organized will ensure it can be reinstalled correctly if needed.
By removing the water pump pulley, you’ll have better access to the water pump itself for the upcoming steps. With the pulley out of the way, you’re ready to move on to the next step: disconnecting hoses and electrical connections.
Read more: How Much It Cost To Replace Water Pump
Step 5: Disconnect Hoses and Electrical Connections
In this step, you will need to disconnect the hoses and electrical connections connected to the water pump. Follow these instructions to ensure a smooth disconnection process:
1. Identify the hoses and electrical connections: Take a close look at the water pump and identify the hoses and electrical connections that need to be disconnected. These may include the upper and lower radiator hoses, heater hoses, and any electrical connectors attached to the water pump.
2. Prepare a catch pan: Place a catch pan beneath the hoses to catch any coolant that may spill during the disconnection process.
3. Loosen hose clamps: If the hoses are secured with clamps, use hose clamp pliers to loosen the clamps. Slide them away from the connection point to provide enough clearance for removing the hoses.
4. Remove the hoses: Firmly grasp each hose near the connection point and twist or wiggle it to break the seal. Pull the hoses away from the water pump and let any remaining coolant drain into the catch pan.
5. Disconnect electrical connections: If there are any electrical connections attached to the water pump, carefully detach them by pressing on the release tabs or removing any connectors. Take note of the arrangement of the connections to ensure proper reinstallation later.
6. Inspect the hoses and connections: Take this opportunity to inspect the hoses for any signs of damage, such as cracks, leaks, or deterioration. Replace any damaged hoses as necessary. Similarly, inspect the electrical connections for any signs of corrosion or damage.
7. Keep hoses and electrical connections organized: To avoid confusion during reinstallation, keep the hoses and electrical connections in a safe and organized manner. You can label them or secure them in a separate container or bag.
By disconnecting the hoses and electrical connections, you’ll clear the way for the removal of the water pump. With these disconnections complete, you’re prepared to move on to the next step: removing the water pump itself.
Step 6: Remove the Water Pump
With the hoses and electrical connections disconnected, it’s time to remove the water pump from your Ford Taurus. Here’s how you can do it:
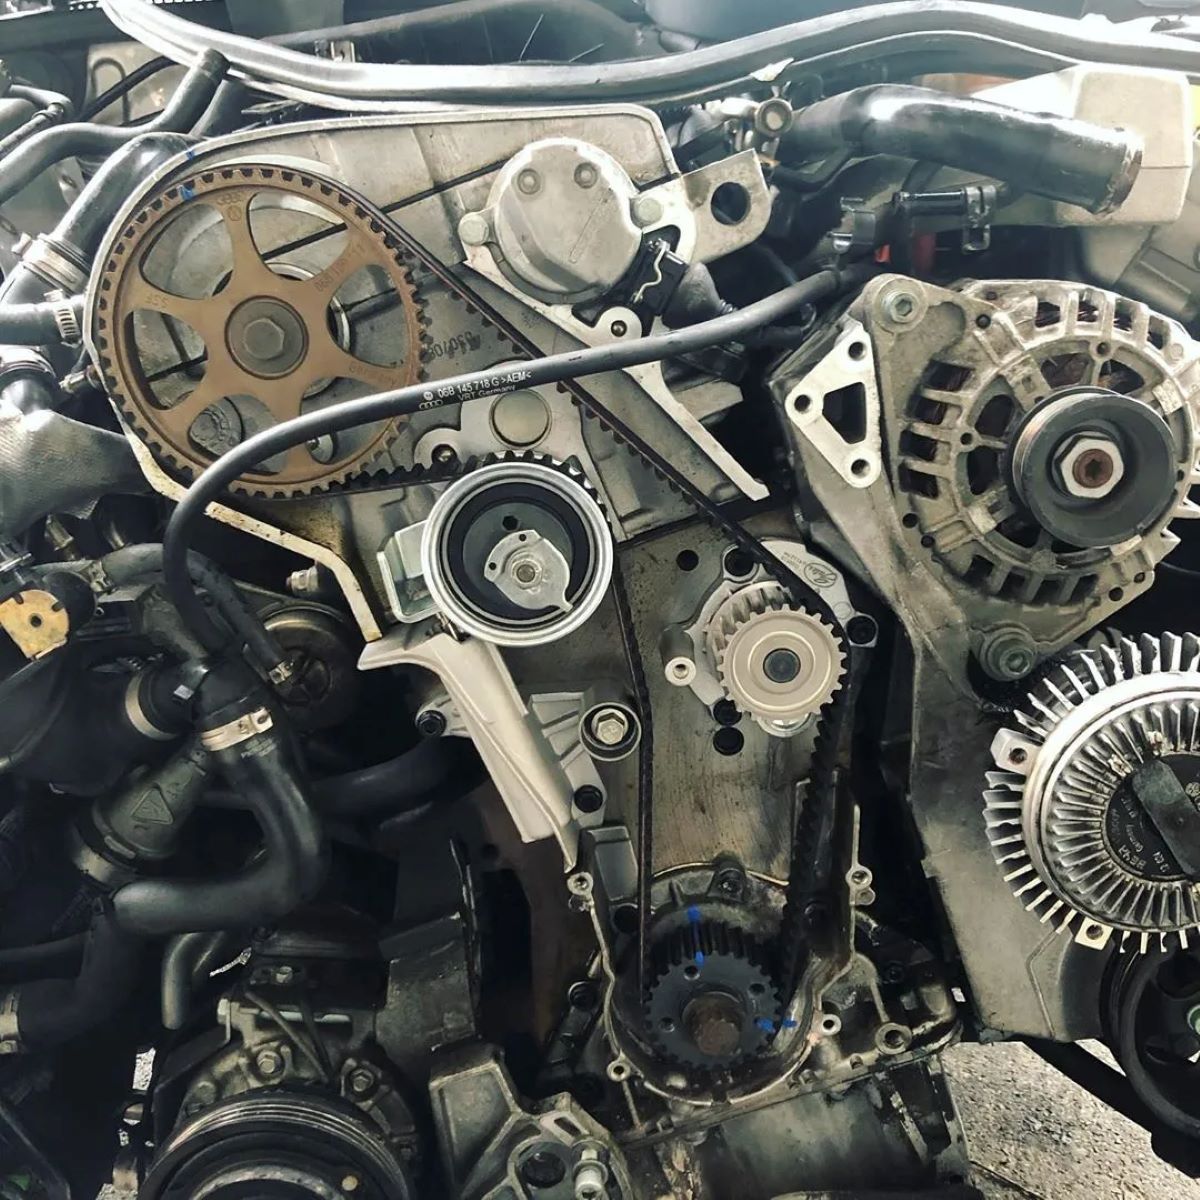
1. Locate the water pump: The water pump is typically located on the front side of the engine, often driven by a pulley. Identify the water pump’s position and take note of any bolts or fasteners securing it.
2. Remove the mounting bolts: Use a socket and ratchet or a wrench to loosen and remove the bolts that secure the water pump to the engine block. Depending on the model of your Ford Taurus, there may be multiple bolts to remove.
3. Gently pry or tap the water pump: After removing the bolts, the water pump may still be sealed to the engine block by a gasket. Use a rubber mallet or a wooden block to gently tap on the water pump or insert a pry tool to free it from the engine block. Be careful not to damage the engine or any surrounding components.
4. Remove the water pump: Once the water pump is loosened, carefully lift it away from the engine block, taking care not to spill any residual coolant. Keep in mind that the water pump may still be connected to other components by a gasket or seal.
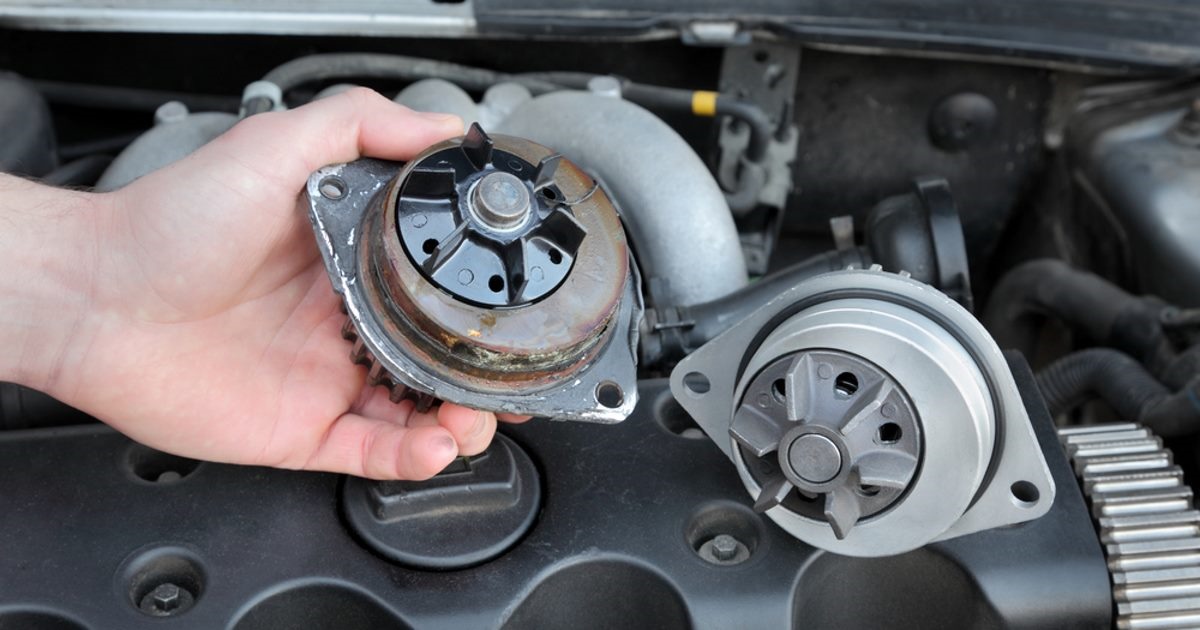
5. Inspect the water pump: Take a close look at the removed water pump for any signs of leaks, damage, or wear. Pay attention to the impeller, which should spin freely without any obstruction. If the water pump is damaged or shows signs of failure, it’s recommended to replace it with a new one.
6. Clean the mounting surface: Use a gasket scraper or a plastic scraper to remove any remnants of the old gasket from the engine block. Ensure that the mounting surface is clean and free from debris before installing the new water pump.
Once the old water pump has been removed and the mounting surface is clean, you’re ready to move on to the next step: cleaning and preparing the mounting surface for the new water pump installation.
When replacing the water pump on a Ford Taurus, make sure to drain the coolant first to avoid a mess. Also, take note of the belt routing before removing it to make reinstallation easier.
Step 7: Clean and Prepare the Mounting Surface
Before installing the new water pump, it’s crucial to ensure that the mounting surface on the engine block is clean and properly prepared. Here’s what you need to do:
1. Remove any remnants: Inspect the mounting surface for any leftover gasket material, debris, or dirt. Use a gasket scraper, plastic scraper, or a soft cloth to carefully remove any remnants. Be gentle to avoid scratching or damaging the surface.
2. Clean the surface: Wipe down the mounting surface with a clean, lint-free cloth or a shop towel. Ensure that there is no grease, oil, or coolant residue left behind. You can also use a mild detergent or a gasket cleaner to remove any stubborn grime, but be sure to rinse and dry the surface thoroughly afterwards.
3. Check for damage: Take a close look at the mounting surface for any signs of damage, such as cracks, erosion, or unevenness. If any damage is detected, it may be necessary to consult a professional mechanic to assess and repair the issue before proceeding.
4. Apply a sealant (if required): Depending on the instructions provided with the new water pump or the specifications outlined by the manufacturer, you may need to apply a thin layer of sealant to the mounting surface. Be sure to adhere to the recommended sealant and application method to ensure a proper seal between the water pump and the engine block.
5. Let the sealant dry (if required): If you have applied sealant, allow it to dry according to the manufacturer’s instructions. This will ensure that the sealant forms a tight and secure bond, creating an effective barrier against coolant leaks.
By cleaning and preparing the mounting surface, you create an optimal environment for the installation of the new water pump. With the surface ready, you’re now ready to move on to the next step: installing the new water pump.
Step 8: Install the New Water Pump
With the mounting surface clean and prepared, it’s time to install the new water pump in your Ford Taurus. Follow these steps to ensure a proper installation:
1. Position the gasket: If the new water pump requires a gasket, carefully place it onto the mounting surface of the engine block. Ensure that it aligns properly with the bolt holes and covers the entire surface area.
2. Align the new water pump: Line up the new water pump with the mounting surface, making sure that the bolt holes on the water pump align with those on the engine block. Be cautious not to disturb or dislodge the gasket during this process.
3. Install the mounting bolts: Insert the mounting bolts into their respective holes and tighten them by hand until they are snug. Avoid overtightening at this stage, as it may damage the gasket or strip the threads.
4. Torque the bolts: Use a torque wrench to tighten the mounting bolts to the manufacturer’s specified torque specifications. Refer to your vehicle’s manual or the instructions provided with the water pump for the appropriate torque values.
5. Double-check the alignment: Verify that the water pump is securely attached to the engine block and that it sits flush against the mounting surface. Make any necessary adjustments to ensure proper alignment.
6. Reconnect hoses and electrical connections: Reattach the hoses and electrical connections that were previously disconnected. Ensure that each connection is secure and properly seated. Tighten any hose clamps as necessary.
7. Inspect and wipe away excess sealant: Take a moment to inspect the water pump installation for any excess sealant that may have seeped out. Use a clean cloth or a shop towel to carefully wipe away any excess sealant for a neat finish.
By following these steps, you’ll successfully install the new water pump in your Ford Taurus. With the new water pump securely in place, you’re ready to move on to the next step: reconnecting hoses and electrical connections.
Step 9: Reconnect Hoses and Electrical Connections
After successfully installing the new water pump, the next step is to reconnect the hoses and electrical connections. Follow these steps to ensure a proper reconnection:
1. Identify the hoses and electrical connections: Take a close look at the water pump and identify the hoses and electrical connections that were previously disconnected. These may include the upper and lower radiator hoses, heater hoses, and any electrical connectors attached to the water pump.
2. Clean the connections: Before reconnecting the hoses and electrical connections, ensure that the connection points are clean and free from debris or residue. Use a clean cloth or a shop towel to wipe away any dirt or contaminants.
3. Reconnect the hoses: Carefully slide the hoses back onto their respective connection points on the water pump. Ensure that the hoses are aligned properly and fully inserted. If applicable, use hose clamp pliers to secure any hose clamps in place.
4. Reconnect the electrical connections: Attach any electrical connectors to their respective ports on the water pump. Ensure that each connector clicks or locks into place securely. Consult your vehicle’s manual if you need assistance in identifying the correct connections.
5. Double-check the connections: Verify that all hoses and electrical connections are securely attached and properly seated. Wiggle each connection gently to confirm that it is snugly in place.
6. Inspect for leaks: Once all connections are reestablished, carefully inspect the area around the water pump for any signs of leaks. Keep an eye out for coolant or any fluid dripping or pooling. If you notice any leaks, address them immediately before proceeding further.
7. Clean up any spills: If there were any coolant spills during the reconnection process, clean up the spills using a clean cloth or a shop towel. It’s essential to maintain a clean working environment and ensure safety.
By meticulously reconnecting the hoses and electrical connections, you’ll restore the proper functioning of the cooling system. With all connections secure, you’re ready to move on to the next step: reinstalling the water pump pulley.
Step 10: Reinstall the Water Pump Pulley
With the hoses and electrical connections reconnected, it’s time to reinstall the water pump pulley. Here’s how you can do it:
1. Locate the water pump pulley: Position the water pump pulley in its original location, aligning it with the water pump shaft. Take note of any alignment indicators or marks on the pulley.
2. Slide the pulley onto the water pump: Carefully slide the water pump pulley onto the water pump shaft, ensuring that it sits flush against the water pump.
3. Align the bolt holes: Align the bolt holes on the water pump pulley with the corresponding holes on the water pump. Ensure that the pulley is centered and properly aligned.
4. Install and tighten the bolts: Insert the bolts through the pulley and into the water pump. Begin tightening the bolts by hand to ensure they are properly aligned. Once hand-tightened, use a socket and ratchet or a wrench to tighten the bolts fully. Be cautious not to overtighten, as this can damage the pulley or water pump.
5. Double-check the alignment: Confirm that the water pump pulley is aligned properly and spins freely without any obstruction. The pulley should rotate smoothly on the water pump shaft.
6. Inspect for any issues: Take a moment to inspect the pulley installation for any signs of misalignment or interference. Ensure that the pulley is securely fastened and doesn’t wobble or make any strange noises. If you notice any issues, address them before proceeding.
7. Clean up any spills or debris: If there were any spills or debris during the pulley installation, clean up the area using a clean cloth or a shop towel. Maintaining cleanliness will help prevent any further issues.
With the water pump pulley successfully reinstalled, you’re one step closer to completing the water pump replacement in your Ford Taurus. Next, we’ll move on to the penultimate step: installing the serpentine belt.
Step 11: Install the Serpentine Belt
Now that the water pump pulley is securely in place, it’s time to install the serpentine belt. Follow these steps to ensure a proper installation:
1. Refer to the belt routing diagram: Locate the belt routing diagram under the hood of your Ford Taurus. This diagram illustrates the path the serpentine belt should follow around the various components of the engine.
2. Identify the belt tensioner: Locate the belt tensioner, usually a spring-loaded pulley, that provides tension to the serpentine belt. Use a wrench or a socket and ratchet to relieve tension on the belt by rotating the tensioner in the direction specified in the belt routing diagram.
3. Slide the belt onto the pulleys: While keeping tension on the belt tensioner, carefully slide the serpentine belt onto the pulleys according to the belt routing diagram. Follow the proper order and path, ensuring that the belt rests on each pulley groove.
4. Check belt alignment: Double-check the alignment of the serpentine belt on the pulleys. The belt should be properly seated in each pulley groove without any twists or misalignment.
5. Release the tensioner: Slowly release the tension on the belt tensioner, allowing it to move back into its original position. Confirm that the tensioner applies sufficient pressure to the serpentine belt, maintaining proper tension.
6. Inspect the belt: Take a moment to inspect the serpentine belt for proper installation. Ensure that it is properly seated on each pulley and properly routed according to the belt routing diagram. Confirm that there are no visible signs of misalignment or excessive wear.
7. Perform a test run: Start the engine and allow it to run for a few moments, carefully observing the movement of the serpentine belt. Ensure that the belt rotates smoothly around each pulley without any slippage or noise. If you notice any issues, immediately turn off the engine and reevaluate the belt installation.
By following these steps, you’ll successfully install the serpentine belt in your Ford Taurus. With the belt in place, you’re now ready for the final step: refilling the cooling system with fresh coolant.
Step 12: Refill the Cooling System
After completing the water pump replacement in your Ford Taurus, it’s important to refill the cooling system with fresh coolant to ensure proper engine cooling. Follow these steps to properly refill the cooling system:
1. Choose the appropriate coolant: Consult your vehicle’s manual or the manufacturer’s recommendations to determine the type and specifications of the coolant suitable for your Ford Taurus. Purchase the recommended coolant to ensure compatibility and optimal performance.
2. Locate the coolant reservoir: Locate the coolant reservoir in the engine bay, usually a translucent plastic container with level markings indicating the minimum and maximum levels.
3. Open the coolant reservoir cap: If the engine is cool to the touch, carefully remove the coolant reservoir cap. If the engine is still warm, wait until it has cooled down before proceeding. This will prevent coolant from spraying or splashing due to built-up pressure.
4. Mix the coolant (if necessary): If you have purchased concentrated coolant, follow the manufacturer’s instructions to properly mix it with distilled water in the recommended coolant-to-water ratio. Pre-mixed coolant does not require dilution.
5. Slowly pour the coolant: Using a funnel, slowly pour the coolant into the coolant reservoir. Pour steadily to avoid any spills or overflow. Avoid pouring coolant directly into the radiator.
6. Monitor the coolant level: As you pour the coolant, keep an eye on the coolant level in the reservoir. Ensure that you do not overfill the reservoir. Refer to the level markings on the reservoir and maintain the level within the recommended range.
7. Close the coolant reservoir cap: Once the coolant reservoir is filled to the appropriate level, securely tighten the coolant reservoir cap.
8. Start the engine and monitor coolant flow: Start the engine and let it idle. Observe the flow of coolant in the coolant reservoir. Bubbles or fluctuating coolant levels may indicate air pockets. Allow the engine to run for a few minutes, periodically checking the coolant reservoir to ensure stability and proper circulation of coolant.
9. Check for leaks: After the engine has reached operating temperature and cooled down, inspect the area around the water pump and other connection points for any signs of coolant leaks. Address any leaks promptly to prevent further issues.
By properly refilling the cooling system with fresh coolant, you’ll ensure proper engine cooling and maintain the health of your Ford Taurus. With the cooling system refilled, your water pump replacement is complete and your Ford Taurus is ready for the road ahead.
Read more: How To Replace Omc Cobra Water Pump
Conclusion
Replacing the water pump in your Ford Taurus is a task that may seem intimidating at first, but with the right tools, knowledge, and attention to detail, you can successfully complete the process. By following the steps outlined in this guide, you will be able to navigate through each stage of the water pump replacement, ensuring the proper functioning of your vehicle’s cooling system.
Throughout the process, it is important to prioritize safety and adhere to the recommended safety precautions. Working on the vehicle’s cooling system involves handling hot coolant and being mindful of moving parts. If you encounter any difficulties or lack the necessary expertise, it is always advisable to seek the assistance of a professional mechanic.
Remember to gather all the necessary tools and materials before beginning the water pump replacement. This will save time and ensure that you have everything you need to complete the job smoothly. Take the time to clean and prepare the mounting surface for a proper seal, and pay attention to the correct installation of gaskets or sealants.
Properly reconnecting the hoses and electrical connections is crucial to maintaining the integrity of the cooling system and preventing leaks. Take care to align the water pump pulley correctly, and ensure the serpentine belt is installed according to the belt routing diagram to prevent any belt slippage or damage.
Once the water pump replacement is complete, refill the cooling system with the appropriate coolant, following the recommended instructions. Monitor for any leaks or issues with the coolant flow, and rectify them promptly.
By following these steps, you can successfully replace the water pump in your Ford Taurus, ensuring optimal engine performance and preventing overheating. Regular maintenance and attention to your vehicle’s cooling system will help prolong its lifespan and ensure a smooth driving experience.
Please note that while this guide provides a general overview of the water pump replacement process for a Ford Taurus, it is essential to consult your vehicle’s manual and manufacturer’s guidelines for specific instructions and specifications.
With the knowledge gained from this guide and the right tools in hand, you are ready to take on the water pump replacement in your Ford Taurus. Drive safely, and enjoy the reliable cooling system that will keep your engine running smoothly for miles to come.
Now that you've mastered replacing your Ford Taurus's water pump, you might be wondering about the best time for this task. Don't miss our detailed guide on optimal timing for water pump replacement, ensuring your vehicle runs smoothly without unexpected breakdowns. Keep your car in top shape by understanding the signs and scheduling maintenance accordingly.
Frequently Asked Questions about How To Replace Water Pump Ford Taurus
Was this page helpful?
At Storables.com, we guarantee accurate and reliable information. Our content, validated by Expert Board Contributors, is crafted following stringent Editorial Policies. We're committed to providing you with well-researched, expert-backed insights for all your informational needs.


0 thoughts on “How To Replace Water Pump Ford Taurus”