Articles
How Long Does It Take To Replace Water Pump
Modified: August 31, 2024
Learn how long it takes to replace a water pump in this informative article. Find out the typical time frame and steps involved in the process.
(Many of the links in this article redirect to a specific reviewed product. Your purchase of these products through affiliate links helps to generate commission for Storables.com, at no extra cost. Learn more)
Introduction
Welcome to our comprehensive guide on understanding and replacing a water pump. The water pump is a vital component of a vehicle’s cooling system, responsible for circulating coolant to prevent engine overheating. Over time, water pumps can wear out and fail, requiring replacement to maintain the overall health and performance of the engine.
In this article, we will provide you with a step-by-step guide on how to identify the signs of a failing water pump, gather the necessary tools and materials, and perform the replacement process. Whether you are a seasoned DIY enthusiast or a novice in automotive maintenance, this article will equip you with the knowledge and confidence to tackle this task.
Before we dive into the details, it’s important to note that the time required to replace a water pump can vary depending on several factors, such as the make and model of your vehicle, your level of experience, and the availability of tools and resources. However, with the right approach and preparation, you can typically complete the replacement process within a few hours.
Now, let’s begin our journey by understanding the function and importance of the water pump in your vehicle’s cooling system.
Key Takeaways:
- Properly replacing a water pump is crucial for maintaining engine health. By understanding the signs of a failing water pump and following a step-by-step process, you can confidently tackle this task and ensure your vehicle’s longevity.
- After replacing the water pump, testing its functionality is essential. By observing the temperature gauge, listening for unusual noises, and checking for leaks, you can verify the proper operation of the new water pump and ensure a trouble-free driving experience.
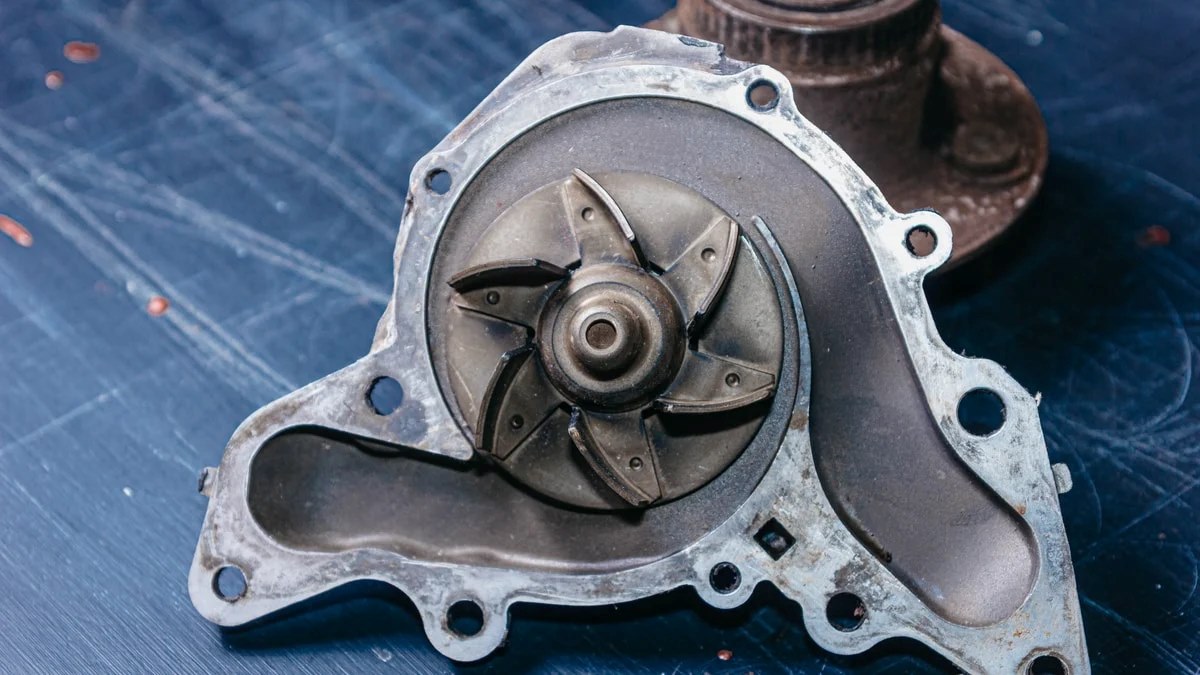
Understanding the Water Pump
The water pump is a crucial component of a vehicle’s cooling system, responsible for circulating coolant throughout the engine to prevent overheating. Its primary function is to move the coolant from the radiator to the engine and back again, maintaining a consistent temperature to ensure optimal engine performance.
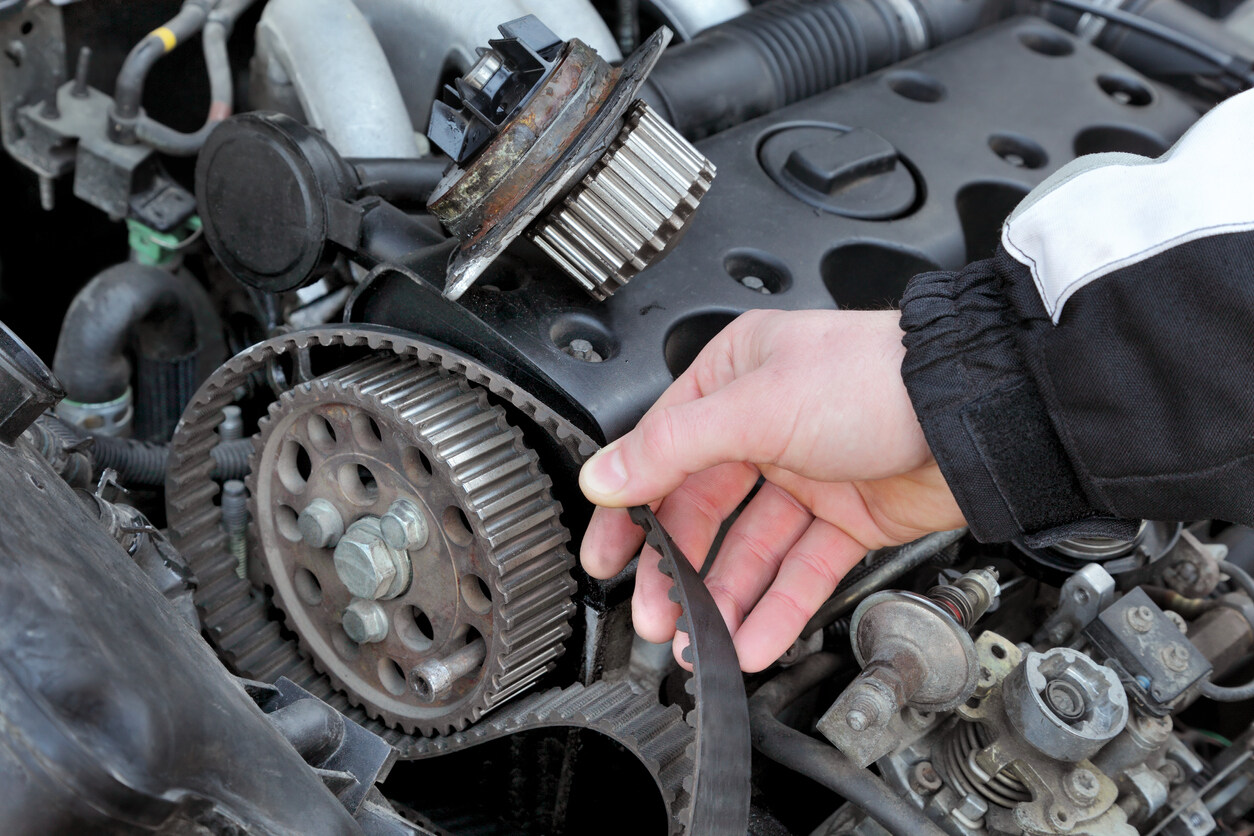
The water pump is typically located at the front of the engine, driven by a belt connected to the crankshaft. As the engine runs, the water pump uses impellers to create the necessary pressure to circulate coolant through the engine block, cylinder heads, and radiator. This continuous flow of coolant helps to dissipate excess heat generated by the engine and prevent it from reaching dangerous levels.
Water pumps are usually constructed with a durable housing, a pulley to connect to the drive belt, and a shaft with impellers or blades to propel the coolant. The impellers play a critical role in creating the necessary pressure and ensuring efficient circulation of the coolant.
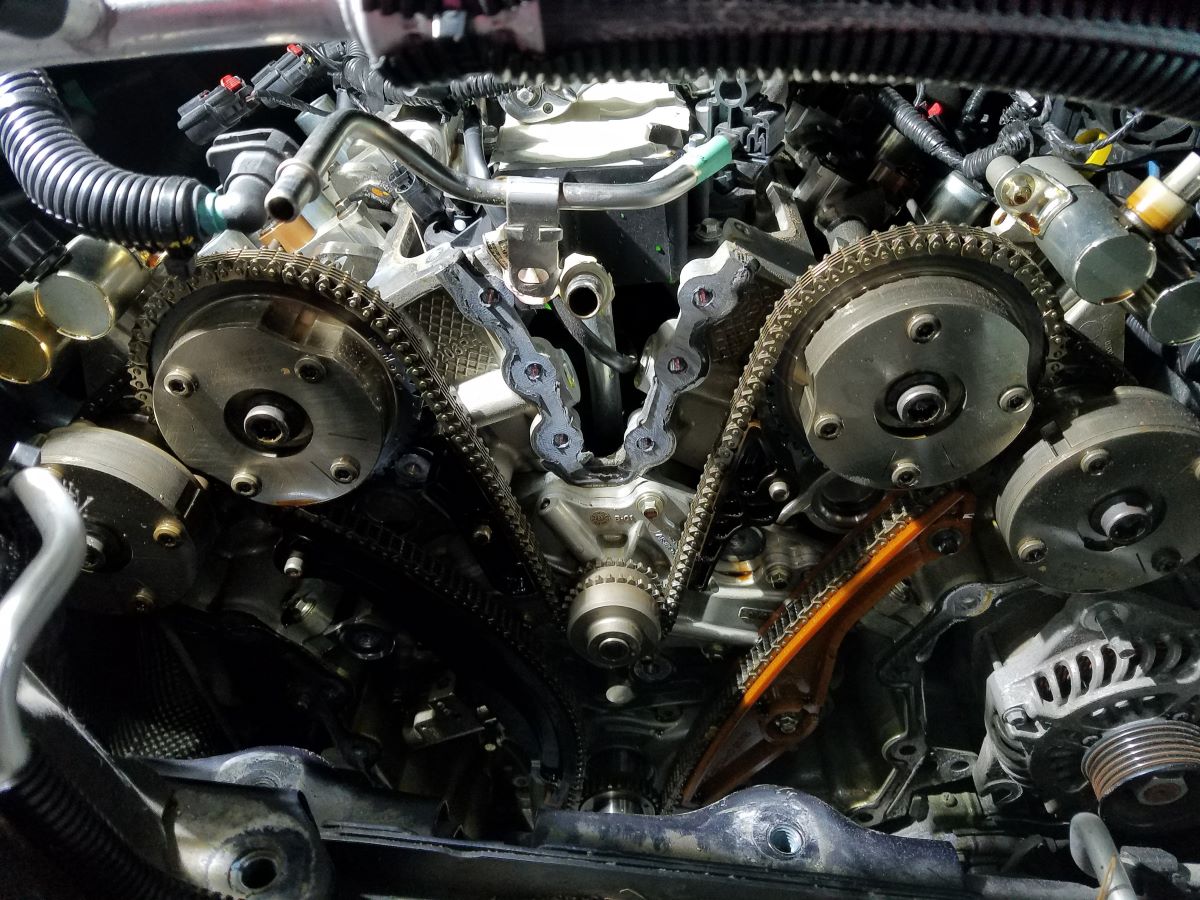
It’s important to note that water pumps are often driven by the timing belt or serpentine belt, depending on the engine configuration. Therefore, if you are planning to replace the water pump, it might be a good time to also inspect and replace the belt if necessary, as they often wear out at a similar rate.
Now that we have a better understanding of the water pump’s function within the cooling system, let’s move on to the next section, where we will explore the signs that indicate a failing water pump.
Signs of a Failing Water Pump
Recognizing the signs of a failing water pump is crucial in order to prevent potential engine damage and overheating. While water pumps are designed to be durable, they can still wear out over time due to factors such as age, mileage, and lack of proper maintenance. Here are some common signs to look out for:
- Engine overheating: One of the most obvious signs of a failing water pump is engine overheating. If your vehicle’s temperature gauge starts to rise into the red zone or you notice steam coming from under the hood, it’s likely that the water pump is not circulating coolant effectively.
- Coolant leaks: Inspect your vehicle for any signs of coolant leakage, such as puddles underneath the engine or a visible decrease in coolant levels. A leaking water pump can result in a loss of coolant, leading to engine overheating and potential damage.
- Whining or grinding noise: If you hear a persistent whining or grinding noise coming from the front of the engine, it could indicate a problem with the water pump. This noise is often caused by worn-out bearings or impellers in the pump, affecting its performance and efficiency.
- Visible rust or corrosion: Over time, the water pump can develop rust or corrosion due to exposure to coolant and other elements. Inspect the pump for any signs of rust or corrosion, as this can impair its functionality and lead to leaks or coolant flow issues.
- Excessive vibration: A failing water pump can also cause increased vibration in the engine, noticeable through the steering wheel or the vehicle’s overall performance. This vibration is typically caused by a misaligned or damaged water pump pulley.
If you notice any of these signs, it’s important to address the issue promptly and replace the water pump to prevent further damage to your engine. Now that we’ve discussed the signs of a failing water pump, let’s move on to gathering the necessary tools and materials for the replacement process.
Gathering the Necessary Tools and Materials
Before you start the water pump replacement process, it’s essential to gather all the necessary tools and materials. Having everything prepared in advance will make the task smoother and more efficient. Here is a list of commonly required tools and materials:
- Socket set and ratchet: A socket set with various sizes of sockets and an accompanying ratchet will be necessary to remove bolts and fasteners during the water pump replacement.
- Wrench set: A set of wrenches will come in handy for removing and tightening different components, such as hoses and bolts.
- Screwdrivers: Both flathead and Phillips screwdrivers are commonly used in automotive repairs. They can be useful for removing screws or prying off components.
- Pliers: A set of pliers, preferably including both regular and needle-nose pliers, can be useful for gripping and manipulating small parts or clamps.
- Gasket scraper: A gasket scraper or a razor blade can be used to clean off old gasket material from the mating surfaces of the water pump and engine block.
- Replacement gasket: Make sure to have a new water pump gasket or seal on hand. It is important to replace the gasket to ensure a proper seal and prevent any leaks.
- New water pump: Purchase a replacement water pump for your specific make and model of vehicle. Ensure that it meets OEM specifications and comes with all the necessary components.
- Coolant: You will need coolant to replace what you drain from the cooling system during the water pump replacement. Make sure to use the correct type of coolant recommended by the vehicle manufacturer.
- Cooling system sealer (optional): If you notice any small leaks or want to ensure a tight seal, you may consider using a cooling system sealer as per the manufacturer’s instructions.
- Rubber gloves and safety glasses: Always prioritize safety during any automotive repair. Rubber gloves will protect your hands from coolant and other chemicals, while safety glasses will shield your eyes from debris.
It’s important to note that the specific tools and materials required may vary depending on your vehicle’s make and model. Always consult your vehicle’s owner’s manual or refer to trusted automotive resources for any specific requirements.
With all the necessary tools and materials gathered, you are now ready to proceed with the water pump replacement process. In the next section, we will guide you through draining the cooling system.
Draining the Cooling System
Before removing the old water pump, it is important to drain the cooling system to prevent coolant from spilling everywhere during the replacement process. Here are the steps to drain the cooling system:
- Ensure that the vehicle is completely cool before starting. Working on a hot engine can be dangerous.
- Park the vehicle on a level surface and engage the parking brake to prevent any accidental movement.
- Locate the radiator drain valve or petcock. It is typically located at the bottom of the radiator on one side. If you are unsure, consult your vehicle’s owner’s manual or a trusted automotive resource.
- Place a container or drain pan beneath the radiator drain valve to catch the coolant.
- Carefully open the radiator drain valve or petcock to allow the coolant to flow out into the container. It is a good practice to wear gloves and safety glasses during this step to protect yourself from coolant splashes.
- Once the coolant has drained completely, securely close the radiator drain valve or petcock.
- If your vehicle has a coolant reservoir or overflow tank, remove any remaining coolant from it as well.
- Dispose of the old coolant in accordance with local regulations and environmental guidelines.
After successfully draining the cooling system, you are now ready to move on to the next step: removing the old water pump. Stay tuned for the next section, where we will guide you through this process.
Read more: How Long Does A Water Pump Last
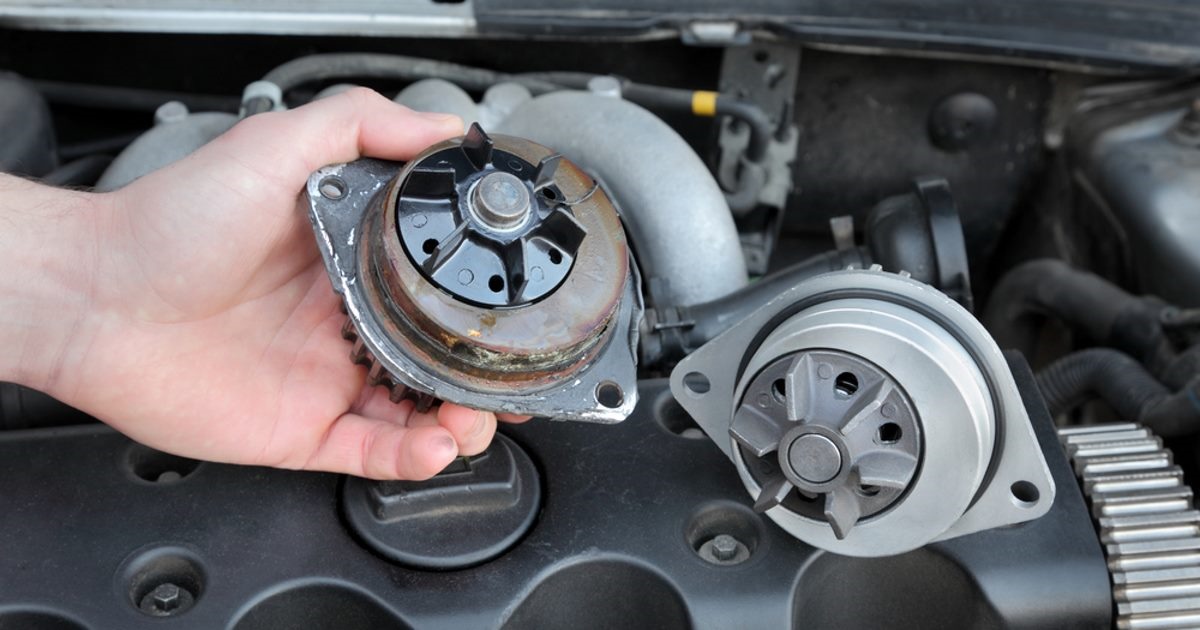
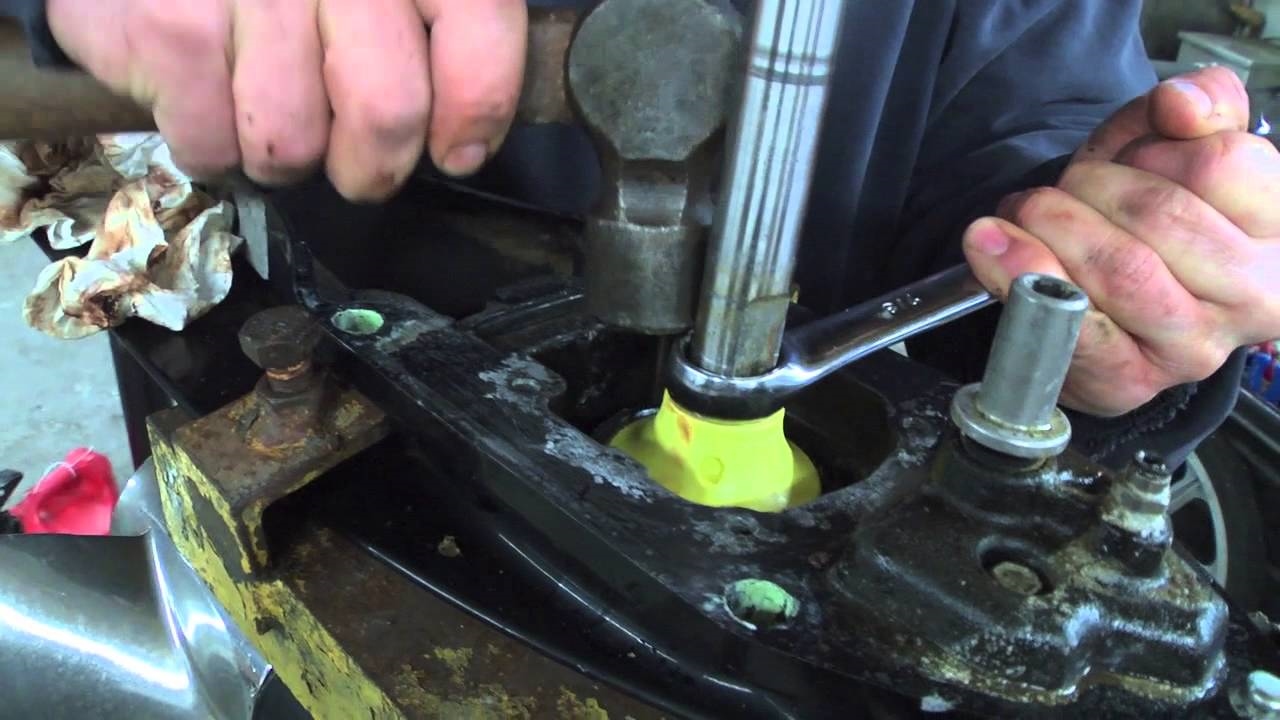
Removing the Old Water Pump
With the cooling system drained, it’s time to remove the old water pump. Follow these steps to ensure a successful removal:
- Start by locating the water pump on your engine. It is typically located at the front of the engine, driven by a belt and attached to the engine block.
- Before removing any components, take note of the belt routing or take a picture for reference when installing the new water pump.
- Begin by disconnecting the negative terminal of the battery to prevent any electrical mishaps.
- Remove any accessories or components blocking access to the water pump, such as the fan shroud, belts, or pulleys. Refer to your vehicle’s service manual or consult a trusted automotive resource for specific instructions.
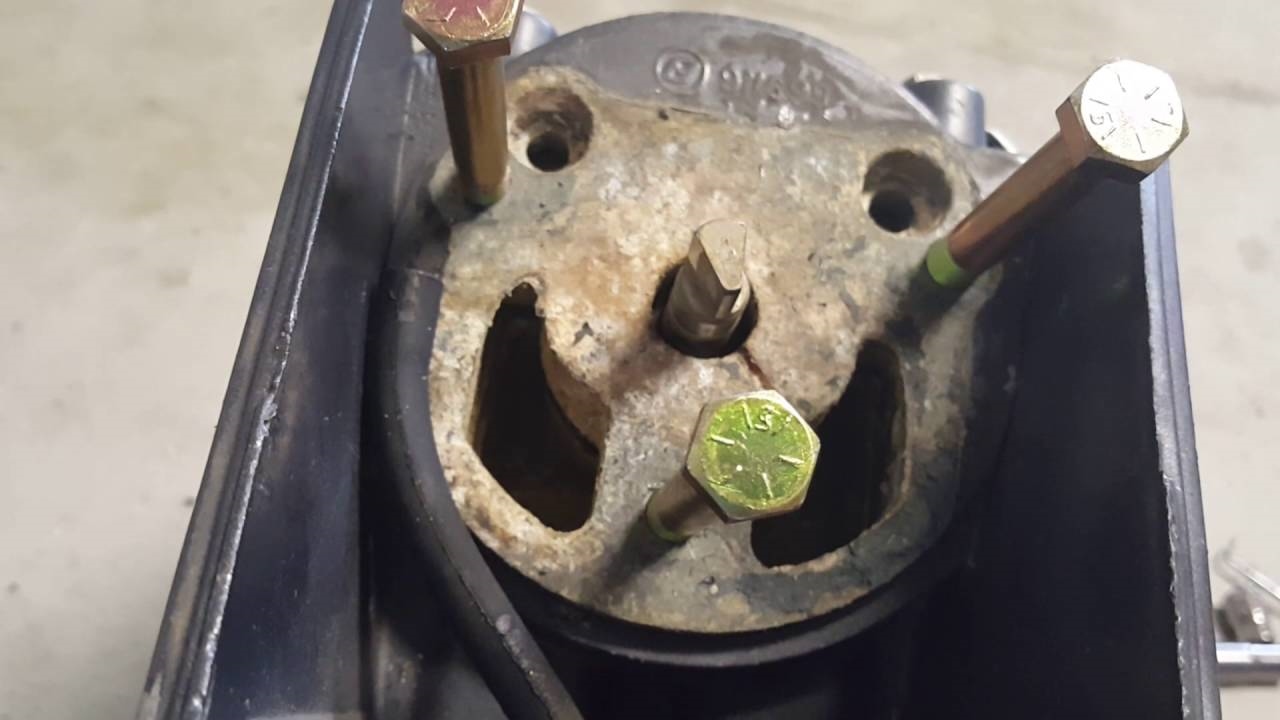
- Once you have clear access to the water pump, locate and remove the bolts securing it to the engine block. Make sure to keep track of the bolts and their placement for ease of reinstallation later.
- Gently separate the old water pump from the engine block. It might require some wiggling or prying, but avoid using excessive force to prevent damage to the engine or other components.
- Carefully remove any remaining gasket material or sealant from the engine block to ensure a clean mating surface for the new water pump.
- Inspect the old water pump for any signs of damage or wear, such as leaking, damaged bearings, or worn-out impellers. This will help confirm the need for replacement and provide valuable information during the installation of the new water pump.
Once the old water pump has been successfully removed, you can proceed to the next step: preparing the new water pump. But before that, take a moment to ensure that you have all the necessary tools and materials ready for the rest of the replacement process.
When replacing a water pump, it typically takes around 2-4 hours for a professional mechanic. However, this can vary depending on the make and model of the vehicle, as well as any additional complications that may arise during the process.
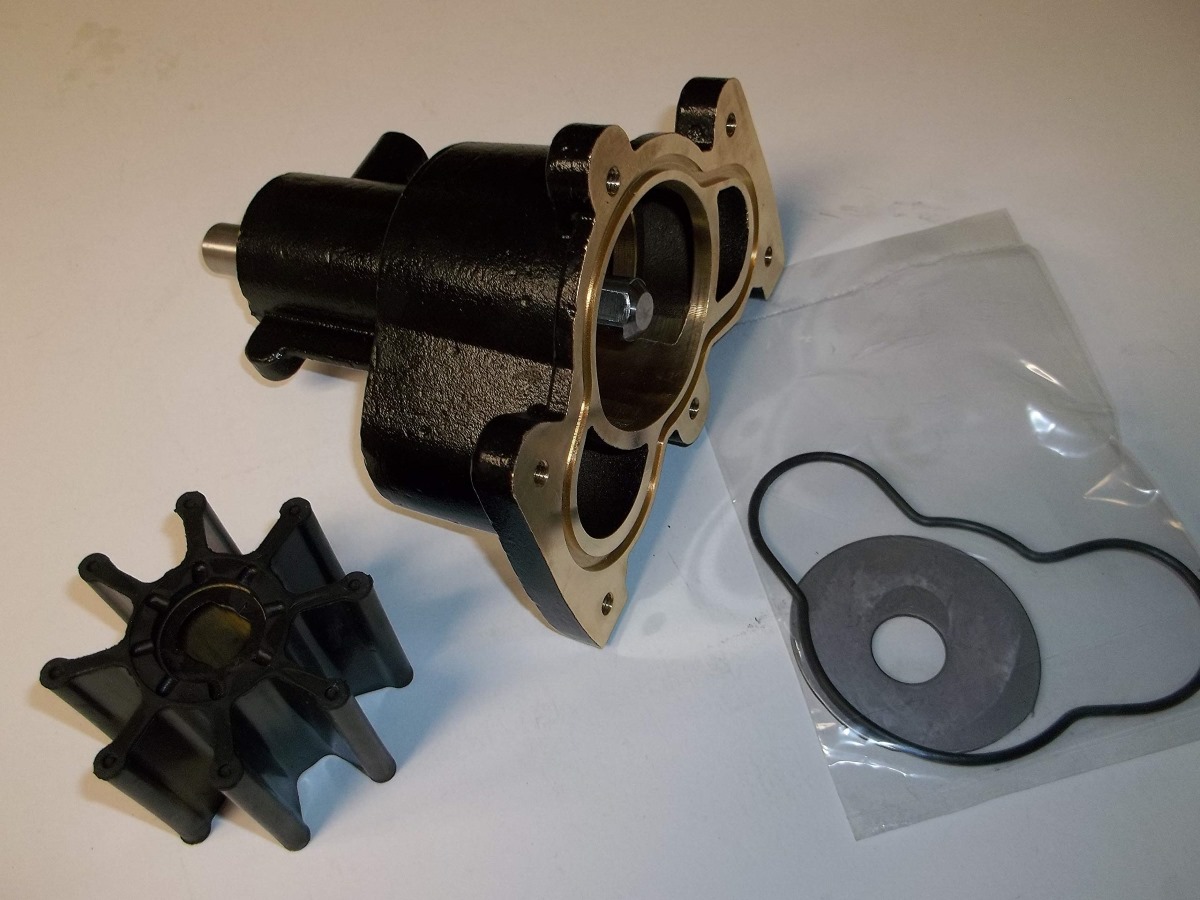
Preparing the New Water Pump
Now that the old water pump has been removed, it’s time to prepare the new water pump for installation. Follow these steps to ensure a smooth and successful preparation process:
- Inspect the new water pump for any damages or defects. Check for any signs of manufacturing defects or shipping damages. If you notice any issues, contact the supplier or manufacturer for a replacement.
- Compare the new water pump with the old one to ensure they are identical in terms of size, fitting, and mounting points. This will help ensure a proper fit and function.
- Check the manufacturer’s instructions or packaging for any included components, such as gaskets, seals, or O-rings. Ensure that you have all the necessary components for the installation process.
- Clean the mating surface of the engine block where the water pump will be installed. Use a gasket scraper or a razor blade to remove any residue or old gasket material. It’s crucial to have a clean and smooth surface for a proper seal and prevent any leaks.
- If the new water pump did not come with a gasket or seal, apply an appropriate gasket sealant or silicone to the mating surface of the engine block. This will help ensure a proper seal and prevent any leaks.
- Inspect the impeller blades of the new water pump. Ensure that they are in good condition with no signs of damage or wear. The impellers play a crucial role in the water pump’s functionality, so any issues should be addressed before installation.
- Apply a thin coat of grease or coolant-compatible lubricant to the impeller shaft of the new water pump. This will help prevent any corrosion or binding and ensure smooth operation.
- Double-check the belt routing and alignment before installing the new water pump. Ensure that it matches the original configuration and follow your vehicle’s service manual or trusted resources for guidance if needed.
By following these steps, you can ensure that the new water pump is in optimal condition and prepared for a successful installation. In the next section, we will guide you through the process of installing the new water pump. Stay tuned!
Installing the New Water Pump
With the old water pump removed and the new water pump prepared, it’s time to install the new water pump. Follow these steps to ensure a proper and secure installation:
- Begin by placing the new gasket or seal onto the mating surface of the engine block. Ensure that it is aligned properly to match the mounting holes of the water pump. If needed, use a small amount of gasket sealer or silicone to hold it in place.
- Position the new water pump onto the engine block, aligning it with the mounting holes and the gasket or seal.
- Insert and hand-tighten the mounting bolts into the corresponding holes of the water pump. Ensure that the pump is properly aligned and seated flush against the engine block.
- Gradually tighten the mounting bolts using a crisscross pattern. This ensures even distribution of pressure and prevents warping or damaging the water pump housing. Refer to the manufacturer’s recommended torque specifications for the specific vehicle model.
- Double-check the alignment of the water pump pulley and the other engine components, such as belts and pulleys, to ensure they are properly aligned and tensioned.
- If applicable, reinstall any components or accessories that were removed earlier to gain access to the water pump, such as the fan shroud, belts, or pulleys. Make sure to follow the proper installation procedures and tighten all fasteners securely.
- Reconnect the negative terminal of the battery that was disconnected earlier to restore electrical power.
Once the new water pump is securely installed, it’s time to move on to the next section: refilling the cooling system. This is a crucial step to ensure that the engine is properly cooled and protected. Stay tuned for the next section, where we will guide you through this important process.
Refilling the Cooling System
After successfully installing the new water pump, it’s time to refill the cooling system to ensure adequate coolant circulation and efficient engine cooling. Follow these steps to properly refill the cooling system:
- Locate the radiator cap or coolant reservoir cap. In some vehicles, the coolant reservoir serves as the fill point for the cooling system.
- Carefully remove the radiator cap or coolant reservoir cap. If the engine is still warm, use a rag or towel to protect your hand from any hot steam or coolant.
- Using a funnel, slowly pour the coolant mixture into the radiator or reservoir. Start with a 50/50 mixture of coolant and distilled water. Be mindful not to overfill the system, as it can cause overflow and lead to air pockets.
- As the coolant fills the system, you may notice air bubbles escaping. This is normal and indicates the release of trapped air. Continue filling until the coolant level stabilizes, usually just below the neck of the radiator or at the appropriate fill level designated on the coolant reservoir.
- Replace the radiator cap or coolant reservoir cap securely.
- Start the engine and let it run. Keep an eye on the temperature gauge to ensure it remains within the normal operating range. Additionally, monitor the coolant level to ensure it stays at the appropriate level.
- Once the engine reaches operating temperature, the thermostat should open, allowing coolant to flow through the system. This may cause the coolant level to drop slightly. Add more coolant if needed to maintain the proper level.
- Allow the engine to run for a few more minutes to ensure that the new water pump and cooling system are functioning properly.
- Check for any signs of coolant leaks or abnormal noises from the water pump area. If you detect any issues, stop the engine immediately and address the problem before continuing.
It’s important to note that the cooling system may require periodic maintenance, such as burping air bubbles or topping off coolant levels. Consult your vehicle’s owner’s manual or trusted automotive resources for any specific instructions or guidelines for your particular vehicle.
With the cooling system properly refilled, you have successfully completed a major step in the water pump replacement process. In the final section of this guide, we will discuss how to test the new water pump. Stay tuned!
Read more: How Long Does A Roof Replacement Take
Testing the New Water Pump
After installing the new water pump and refilling the cooling system, it’s crucial to test the functionality of the water pump to ensure that it is working properly. Follow these steps to test the new water pump:
- Start the engine and let it idle. Observe the temperature gauge to ensure that the engine remains at the normal operating temperature range. If the temperature begins to rise significantly, there may be an issue with the water pump or the cooling system.
- Listen for any unusual noises coming from the water pump area. Grinding, squealing, or whining noises could indicate a problem with the water pump or its components.
- Inspect the water pump housing for any signs of leaks. A properly functioning water pump should not leak coolant. If you notice any leaks, it could indicate a faulty seal or gasket that may need to be addressed.
- Check the coolant levels after the engine has run for a few minutes. Ensure that the coolant level remains stable and does not drop significantly. A significant drop in coolant level could indicate a leak in the cooling system.
- If you have an infrared thermometer, you can also check the temperature of the water pump housing. It should remain within a normal range, indicating that the water pump is effectively circulating the coolant and dissipating heat.
- If the water pump passes these tests and operates without any issues, then it is functioning correctly.
It’s important to note that while these tests can indicate the performance of the water pump, they are not exhaustive. If you suspect any issues with the water pump or the cooling system, it is always advisable to consult a qualified mechanic or seek professional advice to diagnose and address the problem.
Congratulations! You have now completed the water pump replacement process and tested the functionality of the new water pump. With proper installation and testing, you can enjoy a properly functioning cooling system, ensuring the longevity and performance of your vehicle’s engine.
Remember to consult your vehicle’s owner’s manual or trusted automotive resources for any specific instructions or guidelines pertaining to your particular vehicle model. Safe travels!
Conclusion
Congratulations on successfully replacing your water pump! The water pump plays a vital role in maintaining the proper temperature and efficiency of your vehicle’s engine. By understanding the signs of a failing water pump, gathering the necessary tools and materials, and following the step-by-step process outlined in this guide, you have taken an important step in maintaining the health and performance of your vehicle.
Replacing a water pump may seem like a daunting task, but with the right knowledge and preparation, it can be accomplished by both seasoned DIY enthusiasts and those new to automotive maintenance. Remember to always prioritize safety and consult your vehicle’s owner’s manual or trusted automotive resources for any specific instructions or guidelines pertaining to your particular vehicle model.
By properly installing and testing the new water pump, you can rest assured knowing that your vehicle’s cooling system is efficient, and the engine is protected from overheating. Regularly monitoring the cooling system and addressing any issues promptly will help ensure the longevity and performance of your vehicle.
We hope this comprehensive guide has provided you with the information and confidence needed to successfully replace your water pump. Always remember to follow proper maintenance practices and consult professionals when needed. Here’s to smooth and trouble-free drives ahead!
Frequently Asked Questions about How Long Does It Take To Replace Water Pump
Was this page helpful?
At Storables.com, we guarantee accurate and reliable information. Our content, validated by Expert Board Contributors, is crafted following stringent Editorial Policies. We're committed to providing you with well-researched, expert-backed insights for all your informational needs.


0 thoughts on “How Long Does It Take To Replace Water Pump”