Articles
How To Remove Water Pump Pulley?
Modified: August 31, 2024
Learn how to remove a water pump pulley in this comprehensive article. Find step-by-step instructions and expert tips to successfully complete the task.
(Many of the links in this article redirect to a specific reviewed product. Your purchase of these products through affiliate links helps to generate commission for Storables.com, at no extra cost. Learn more)
Introduction
When it comes to maintaining your vehicle’s cooling system, the water pump plays a crucial role in circulating coolant and preventing your engine from overheating. Over time, the water pump pulley may become damaged or require replacement due to wear and tear. While it may seem like a daunting task, removing the water pump pulley can be done with the right tools and a little bit of know-how.
In this article, we will guide you through the step-by-step process of removing the water pump pulley. By following these instructions, you can confidently tackle this task and keep your vehicle’s cooling system in optimal condition. So, let’s get started!
Key Takeaways:
- Safely and effectively remove the water pump pulley by following step-by-step instructions, prioritizing safety, and properly preparing the vehicle and gathering the necessary tools and materials.
- After reinstalling the pulley and belt, perform final checks and testing to ensure proper functioning of the cooling system, and seek professional assistance if encountering difficulties or uncertainties.
Read more: How To Remove Air Lock In Water Pump
Tools and Materials Needed
Before you begin the process of removing the water pump pulley, it’s essential to gather all the necessary tools and materials. Here’s a list of what you’ll need:
- Socket set
- Wrench set
- Serpentine belt removal tool
- Water pump pulley removal tool
- New water pump pulley (if necessary)
- Clean cloth or towel
- Penetrating oil or rust remover
- Thread-locking compound
- Coolant (for topping up if needed)
It’s important to have these tools and materials ready before you start the process to ensure a smooth and efficient removal of the water pump pulley.
Step 1: Safety Precautions
Prior to starting any repair or maintenance work on your vehicle, it’s crucial to prioritize safety. Here are some safety precautions to keep in mind before removing the water pump pulley:
- Allow the engine to cool: Working on a hot engine can be dangerous. Make sure to let your vehicle sit for at least an hour to cool down before starting the process.
- Disconnect the battery: To avoid any accidental electrical shocks, disconnect the negative terminal of the battery to cut off power to the engine.
- Wear protective gear: It’s important to protect yourself during the repair process. Wear safety goggles, gloves, and a dust mask to shield yourself from any debris or harmful substances.
- Work in a well-ventilated area: Ensure that you are working in a well-ventilated and well-lit area to have maximum visibility and avoid inhaling any fumes.
- Refer to the vehicle manual: Consult your vehicle manual for specific safety instructions or precautions related to your vehicle’s make and model.
By following these safety precautions, you can minimize the risk of accidents and ensure a safer working environment while removing the water pump pulley.
Step 2: Preparing the Vehicle
Before you can proceed with removing the water pump pulley, it’s important to properly prepare the vehicle. Follow these steps to ensure a smooth and hassle-free process:
- Park the vehicle on a flat and level surface: Find a safe and level area to park your vehicle. Engage the parking brake and turn off the engine.
- Open the hood: Pop the hood of your car and secure it in place using the hood prop or latch.
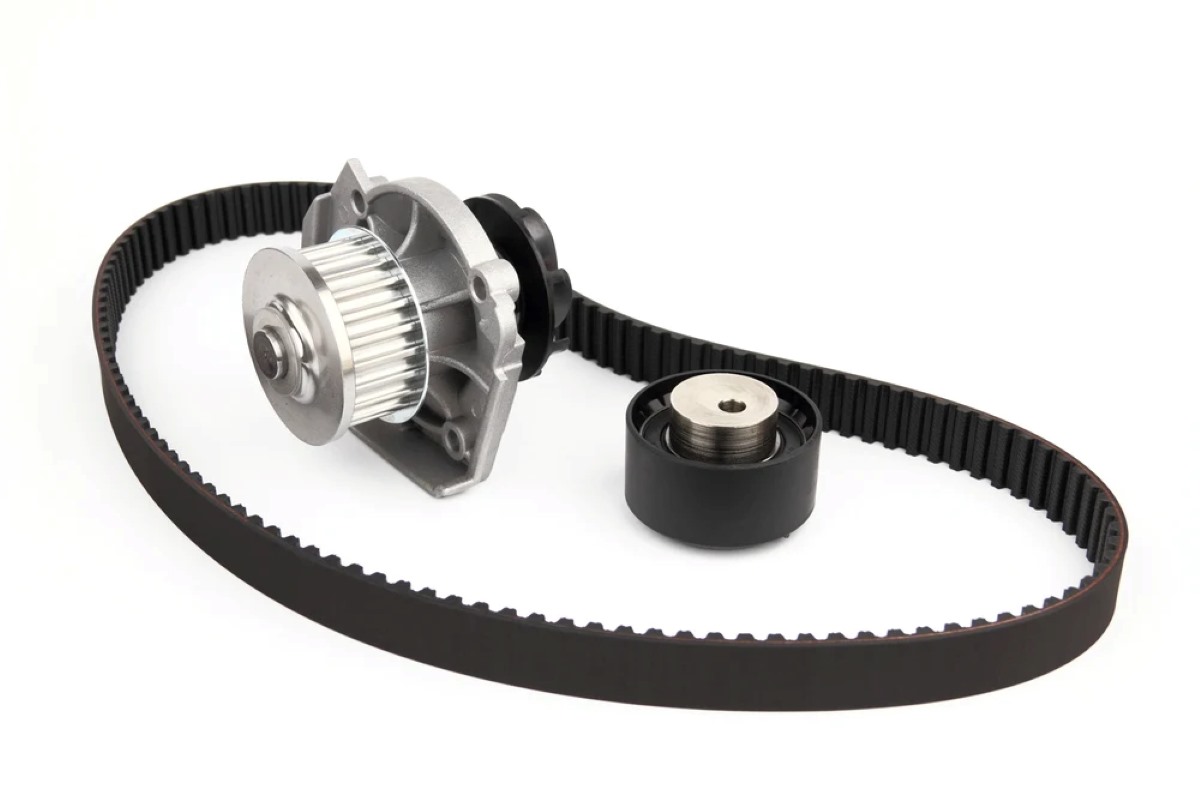
- Locate the water pump pulley: The water pump pulley is typically located on the front of the engine, driven by the serpentine belt. Take a moment to locate it and familiarize yourself with its position.
- Inspect the pulley: Before proceeding, visually inspect the water pump pulley for any signs of damage or wear. If it appears to be damaged or making unusual noises, it may need to be replaced.
- Gather the necessary tools and materials: Ensure that you have all the required tools and materials within reach to avoid any interruptions during the process.
By properly preparing the vehicle, you can work efficiently and avoid any potential complications while removing the water pump pulley.
Step 3: Removing the Serpentine Belt
Before you can remove the water pump pulley, you’ll need to remove the serpentine belt that drives it. Follow these steps to safely remove the serpentine belt:
- Locate the belt tensioner: Look for the belt tensioner, which is a spring-loaded pulley that applies tension to the serpentine belt. It may be labeled or indicated in your vehicle manual.
- Insert the serpentine belt removal tool: Insert the serpentine belt removal tool into the square or hex opening on the tensioner.
- Rotate the tensioner: Apply pressure to the tool and rotate the tensioner in the direction specified in your vehicle manual. This will release the tension on the serpentine belt.
- Slide the serpentine belt off: While holding the tensioner in the released position, carefully slide the serpentine belt off the water pump pulley and other components.
- Inspect the serpentine belt: Take a moment to inspect the serpentine belt for any signs of damage, such as cracking or fraying. If it appears to be worn or damaged, it’s a good idea to replace it.
Once the serpentine belt has been removed, you can proceed to the next step of removing the water pump pulley.
Read more: How To Remove Fan From Water Pump Dodge Ram
Step 4: Loosening the Water Pump Pulley
Now that you have removed the serpentine belt, it’s time to loosen the water pump pulley to prepare for its removal. Follow these steps to loosen the water pump pulley:
- Secure the pulley: Use a clamp or vise grip to secure the water pump pulley in place. This will prevent it from rotating while you loosen the fasteners.
- Apply penetrating oil: If the pulley bolts are rusty or stuck, apply a generous amount of penetrating oil or rust remover to help loosen them. Let it sit for a few minutes to penetrate the rust.
- Select the appropriate socket and wrench: Choose the socket and wrench that fit the fasteners on the water pump pulley. Ensure a secure fit to avoid stripping or damaging the bolts.
- Place the wrench on the pulley bolt: Position the wrench on one of the pulley bolts. Apply firm pressure in the counterclockwise direction to loosen the bolt.
- Loosen all the bolts: Repeat the process for each bolt on the water pump pulley. Loosen them gradually and in a diagonal pattern to ensure even pressure and prevent damage.
By following these steps, you can successfully loosen the water pump pulley and prepare it for removal in the next step. Take your time and be cautious to avoid any accidents or damage to the pulley or surrounding components.
When removing a water pump pulley, use a pulley removal tool to prevent damage. Loosen the bolts in a crisscross pattern to release tension evenly.
Step 5: Removing the Water Pump Pulley
With the water pump pulley loosened, it’s time to remove it from the vehicle. Follow these steps to safely remove the water pump pulley:
- Remove the pulley bolts: Use your socket and wrench to fully remove all of the bolts that were loosened in the previous step. Set the bolts aside in a safe place where they won’t get lost.
- Gently tap the pulley: Use a rubber mallet or a block of wood and a regular hammer to gently tap the back of the pulley. This will help break any remaining rust or corrosion and loosen the pulley from the water pump shaft.
- Carefully pull the pulley: Once the pulley is loosened, carefully pull it straight off the water pump shaft. It may require a bit of force, but be careful not to damage any other components in the process.
- Inspect the pulley and shaft: Take a moment to inspect the water pump pulley and the shaft it was attached to. Look for any signs of damage or wear, such as cracks or excessive play. If necessary, replace the pulley or seek professional advice.
Once the water pump pulley is removed, you can proceed to the next step of inspecting, cleaning, and preparing the pulley for reinstallation.
Step 6: Inspecting and Cleaning the Pulley
After removing the water pump pulley, it’s important to inspect and clean it before reinstallation. Follow these steps to properly inspect and clean the pulley:
- Inspect for damage: Thoroughly examine the pulley for any signs of damage, such as cracks, chips, or excessive wear. If the pulley shows any significant damage, it is recommended to replace it with a new one.
- Check for debris: Look for any dirt, debris, or coolant residue on the pulley. Use a clean cloth or towel to wipe away any debris, ensuring that the pulley is clean and free of any contaminants.
- Inspect the bearing: Spin the pulley and listen for any unusual noises or resistance. A smooth and quiet rotation indicates a healthy bearing. If you notice any grinding or excessive noise, the bearing may need to be replaced.
- Clean the pulley: If the pulley is dirty or greasy, use a mild detergent or degreaser along with a soft brush or toothbrush to clean it. Be gentle to avoid damaging any delicate components.
- Dry the pulley: Once cleaned, dry the pulley thoroughly with a clean cloth or allow it to air dry before proceeding to the reinstallation process.
By inspecting and cleaning the water pump pulley, you ensure that it is in good condition and free from any debris that could interfere with its performance. This step contributes to the overall effectiveness and longevity of the cooling system.
Step 7: Reinstalling the Pulley and Serpentine Belt
After inspecting, cleaning, and preparing the water pump pulley, it’s time to reinstall it along with the serpentine belt. Follow these steps to successfully reinstall the pulley and belt:
- Align the pulley: Position the water pump pulley onto the shaft, ensuring that it is properly aligned. Take note of any keyway or grooves that need to align with the shaft. Be careful not to force the pulley.
- Hand-tighten the bolts: Insert and hand-tighten all of the pulley bolts. Start with one bolt and work in a diagonal pattern, gradually tightening each bolt to ensure even pressure.
- Use a torque wrench: Once all the bolts are hand-tightened, use a torque wrench to tighten them to the manufacturer’s specifications. Refer to your vehicle manual for the specific torque values.
- Reinstall the serpentine belt: Refer to the belt routing diagram under the hood or in your vehicle manual to properly guide the serpentine belt back onto the pulleys. Follow the same routing pattern as before, ensuring it sits securely in the grooves.
- Release the tensioner: Use the serpentine belt removal tool to apply pressure to the tensioner and release it so that it applies tension to the serpentine belt.
- Ensure proper belt tension: Check the tension of the serpentine belt by pressing down on it with moderate pressure. It should have some give but not be too loose. Adjust the tensioner if needed.
Once the water pump pulley and serpentine belt are properly reinstalled, you are ready to move on to the final steps of checking and testing the cooling system.
Read more: How To Lubricate A Water Pump
Step 8: Final Checks and Testing
After reinstalling the water pump pulley and serpentine belt, it’s crucial to perform final checks and testing to ensure everything is functioning properly. Follow these steps for the final checks and testing:
- Inspect for proper alignment: Double-check the alignment of the water pump pulley to ensure it is centered and not misaligned. Make any adjustments if necessary.
- Check for secure fastening: Confirm that all the bolts securing the water pump pulley are tightly fastened. Recheck the torque values to ensure they are within the manufacturer’s recommended range.
- Verify belt tension: Ensure that the serpentine belt is tensioned properly. It should have enough tension to prevent slipping but not be too tight. Adjust the tensioner if needed.
- Check for any leaks: Start the engine and visually inspect the water pump area for any signs of coolant leaks. If you detect any leaks, it may indicate a problem with the water pump or its seals.
- Monitor engine temperature: Observe the engine temperature gauge or indicator as the vehicle idles and eventually warms up. Ensure that the engine maintains a stable temperature within the normal operating range.
- Listen for abnormal noises: Pay attention to any unusual noises coming from the water pump area. Grinding, squealing, or rattling noises may indicate issues that need to be addressed.
By performing these final checks and testing, you can verify that the water pump pulley has been properly installed, the serpentine belt is correctly tensioned, and the cooling system is functioning as expected. If you encounter any problems or abnormalities during this process, consult a professional mechanic for further assistance.
Conclusion
Removing the water pump pulley may seem like a daunting task, but with the right tools and step-by-step guidance, it can be a manageable DIY project. By following the steps outlined in this article, you can safely and effectively remove the water pump pulley to replace it if necessary or perform maintenance on your vehicle’s cooling system.
Remember to prioritize safety by taking the necessary precautions before starting the process, including allowing the engine to cool, disconnecting the battery, wearing protective gear, and working in a well-ventilated area. Properly preparing the vehicle and gathering the required tools and materials will ensure a smooth and efficient process.
Throughout the removal process, inspecting and cleaning the pulley, as well as checking the serpentine belt and tensioner, are essential steps to maintain the effectiveness of the cooling system. Additionally, after reinstalling the pulley and belt, performing final checks and testing will help identify any issues and ensure the proper functioning of the system.
If at any point you encounter difficulties or are unsure about the process, it is always recommended to seek professional assistance or consult your vehicle’s manual for specific instructions and guidelines.
By following these steps and taking the time to properly remove and reinstall the water pump pulley, you can ensure the longevity and reliability of your vehicle’s cooling system, keeping your engine running smoothly and avoiding any overheating issues in the future.
Frequently Asked Questions about How To Remove Water Pump Pulley?
Was this page helpful?
At Storables.com, we guarantee accurate and reliable information. Our content, validated by Expert Board Contributors, is crafted following stringent Editorial Policies. We're committed to providing you with well-researched, expert-backed insights for all your informational needs.


0 thoughts on “How To Remove Water Pump Pulley?”