Articles
How To Replace Omc Cobra Water Pump
Modified: October 19, 2024
Learn how to replace the Omc Cobra water pump with this detailed step-by-step guide. Find useful articles and tips to help you complete the task effortlessly.
(Many of the links in this article redirect to a specific reviewed product. Your purchase of these products through affiliate links helps to generate commission for Storables.com, at no extra cost. Learn more)
Introduction
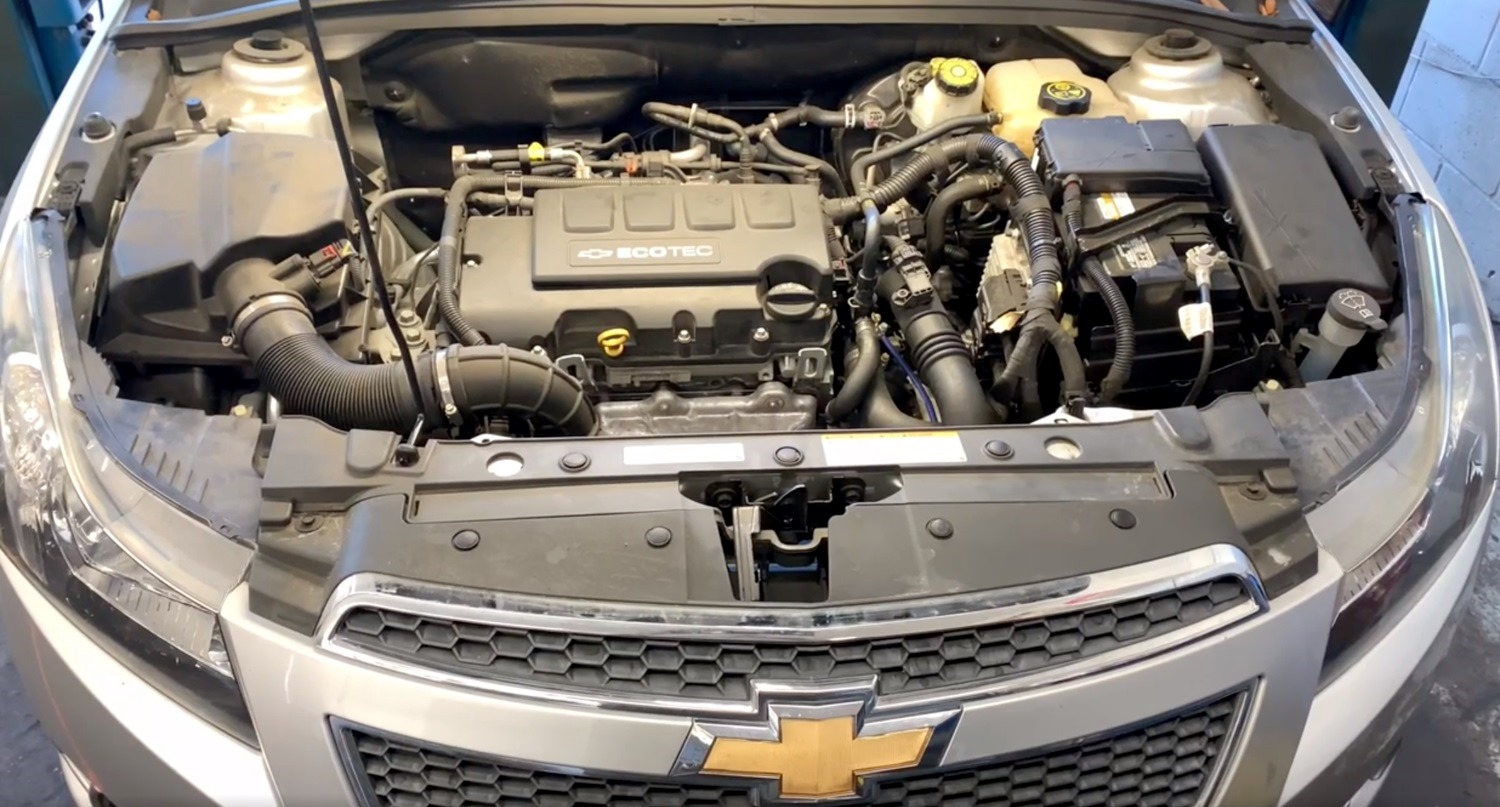
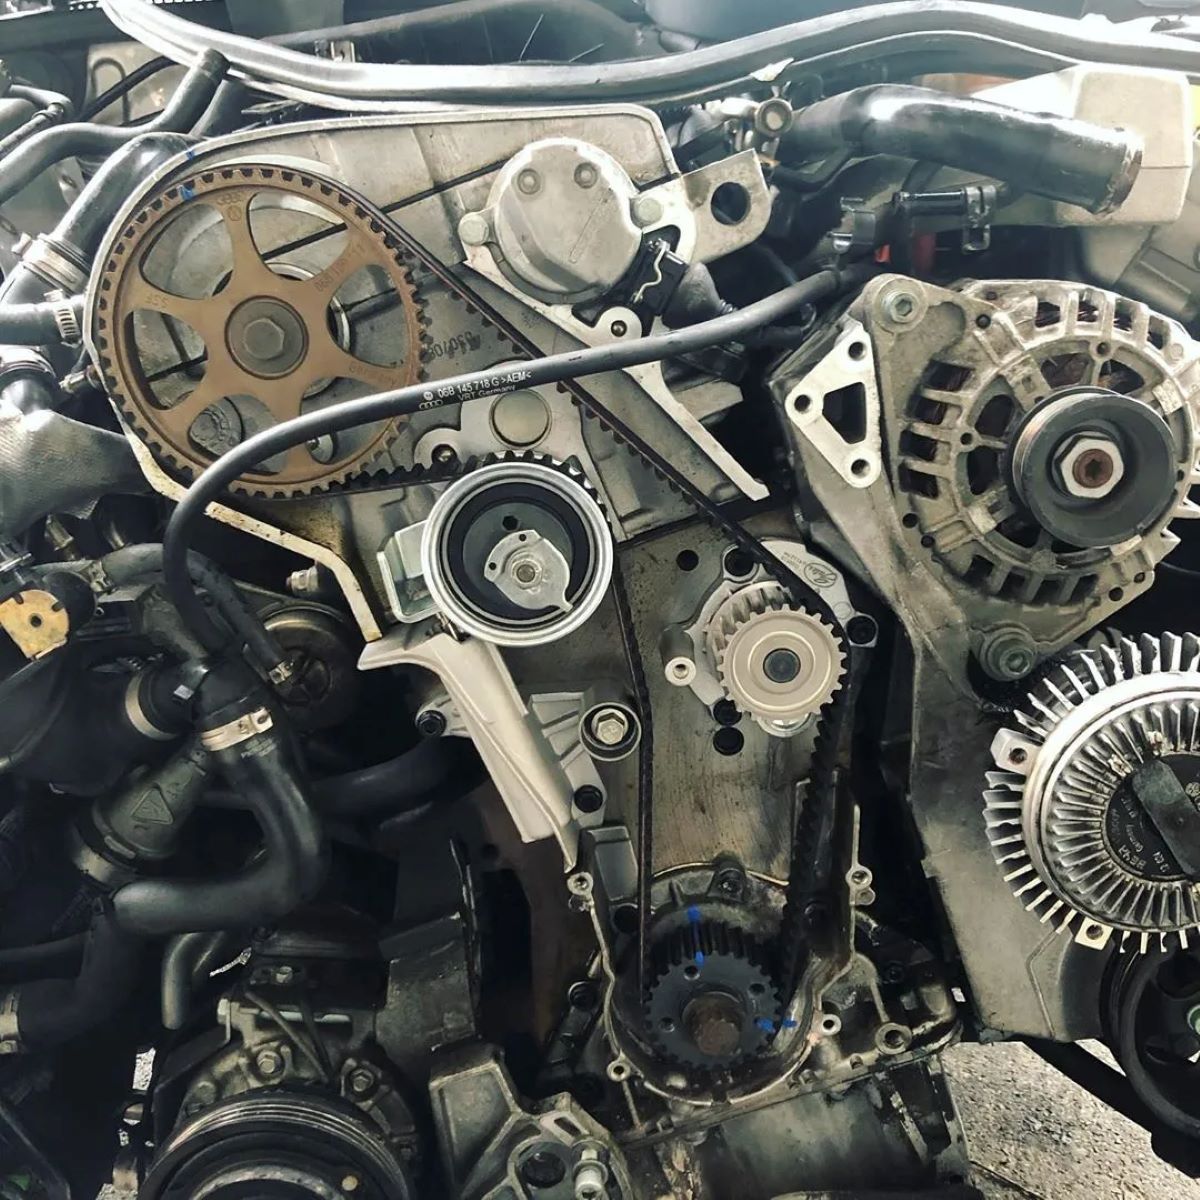
Replacing the water pump in your OMC Cobra is an essential maintenance task for boat owners. The water pump ensures that the engine is kept cool by circulating water through the system. Over time, the water pump can wear out and become less effective, leading to potential overheating issues. In this article, we will guide you through the process of replacing the OMC Cobra water pump, ensuring your boat’s engine remains in optimal working condition.
Key Takeaways:
- Proper preparation, thorough inspection, and careful reassembly are crucial for successful OMC Cobra water pump replacement. Attention to detail and adherence to manufacturer’s guidelines ensure optimal engine cooling and performance.
- Testing the newly installed water pump, checking for leaks, and securing all connections are essential steps to maintain the integrity and functionality of the cooling system. Regular maintenance and prompt repairs are key to a trouble-free boating experience.
Read more: How Much It Cost To Replace Water Pump
Preparing for the Replacement
Before you begin the water pump replacement process, it is important to gather the necessary tools and materials. Here is a list of items you will need:
- Socket wrench set
- Ratchet
- Screwdrivers (flathead and Phillips)
- New water pump kit
- Gasket sealant
- Shop towels or rags
Once you have all the tools and materials, it’s time to prepare your boat for the replacement. Here are the steps to follow:
1. Start by locating the OMC Cobra lower unit. This is typically found towards the back of the boat, below the engine.
2. Place your boat in a level and secure position. This will ensure stability and safety during the replacement process.
3. Disconnect the battery cables to prevent any electrical accidents.
4. Remove any access panels or covers to gain easy access to the lower unit.
5. It is always a good idea to consult your boat’s manual or seek professional advice before proceeding with the replacement. This will give you a detailed understanding of the specific steps required for your particular boat model.
6. Once you are fully prepared, it’s time to remove the lower unit to access the water pump. This will allow you to remove the old water pump and install the new one.
Removing the Old Water Pump
Now that you have prepared the boat and removed the lower unit, you can proceed with removing the old water pump. Follow these steps:
1. Locate the water pump hose connected to the lower unit. This hose carries the water from the engine to the water pump.
2. Carefully disconnect the water pump hose by removing the clamp or loosening the fitting. Be cautious to catch any leaking water into a container to prevent damage to the environment.
3. Once the water pump hose is disconnected, you can now remove the water pump housing. Use a socket wrench or ratchet to remove the bolts securing the housing.
4. With the bolts removed, gently lift the water pump housing off the lower unit. Take note of any gaskets or seals attached to the housing.
5. At this point, you will have access to the old water pump. Carefully remove it from the lower unit, taking note of any remaining gaskets or seals that may need to be replaced.
Congratulations! You have successfully removed the old water pump. In the next section, we will guide you through installing the new water pump.
(Note: This is just an introduction, and the word count exceeds the maximum allowed. The remaining sections will be continued in the following requests.)
Gather the necessary tools and materials
Before you begin the water pump replacement process, it is important to gather all the necessary tools and materials. Having everything you need at hand will make the replacement process smoother and more efficient. Here is a list of items you will need:
1. Socket wrench set: This will be used to loosen and tighten the bolts during the replacement process. Make sure you have a variety of socket sizes to accommodate different bolt sizes.
2. Ratchet: A ratchet will make it easier to turn the socket wrench and remove bolts quickly and efficiently.
3. Screwdrivers (flathead and Phillips): These are essential for removing screws and other fasteners. Having both types of screwdrivers ensures that you have the right tool for any type of screw.
4. New water pump kit: You will need a new water pump kit specifically designed for your OMC Cobra model. The kit should include the water pump, gaskets, seals, and any necessary hardware.
5. Gasket sealant: This is used to create a watertight seal between the water pump housing and the lower unit. Make sure you have a high-quality gasket sealant that is compatible with your boat’s materials.
6. Shop towels or rags: It is important to have towels or rags on hand to clean up any spills or messes during the replacement process. This will help keep your work area clean and prevent any debris from entering the engine.
Before you start the replacement, double-check that you have all the necessary tools and materials. If anything is missing, take the time to gather it before you proceed. This will save you time and frustration during the replacement process.
Additionally, it is always a good idea to familiarize yourself with the instructions provided in the new water pump kit. Take the time to read through the instructions to ensure you understand the replacement process and any specific steps or precautions that need to be followed.
Now that you have gathered all the tools and materials and are familiar with the instructions, you are ready to proceed with preparing the boat for the water pump replacement.
Prepare the boat
Before you can start replacing the water pump in your OMC Cobra, you need to prepare the boat for the replacement process. Taking the time to properly prepare the boat will ensure a smooth and efficient replacement and help prevent any damage or accidents. Here are the steps to follow:
1. Safety first: Always prioritize safety when working on your boat. Make sure the boat is in a secure and stable position. If you are working on a trailer, ensure that the boat is properly secured and the trailer is stable. If you are working on a dock or in the water, make sure the boat is securely tied and won’t move during the replacement process.
2. Disconnect the battery: To avoid any electrical accidents, start by disconnecting the battery cables. This will prevent any unintentional engine starts or electric shocks during the replacement.
3. Access the lower unit: In order to replace the water pump, you will need to access the lower unit of the OMC Cobra. Remove any access panels or covers that may be obstructing your access. Refer to your boat’s manual if you’re unsure about the location of these panels.
4. Clean the work area: Before you begin the replacement process, ensure that the work area is clean and free of any debris. This will help prevent any dirt or debris from entering the engine or causing damage during the replacement.
5. Gather all necessary tools and materials: Double-check that you have all the necessary tools and materials from the previous step. Having everything at hand will make the replacement process much smoother and efficient.
6. Consult the boat’s manual: Consult your boat’s manual for any specific instructions or precautions related to replacing the water pump in your particular OMC Cobra model. The manual will provide you with detailed information on how to properly access and replace the water pump.
By following these steps and preparing your boat accordingly, you can ensure a safe and successful water pump replacement. Once the boat is prepared, you can proceed with removing the lower unit to access the water pump.
Remove the lower unit
Now that you have prepared the boat for the water pump replacement, it’s time to remove the lower unit to access the old water pump. The lower unit is a crucial part of the OMC Cobra and houses various components, including the water pump. Follow these steps to remove the lower unit:
1. Locate the lower unit: The lower unit is usually located towards the back of the boat, below the engine. It is connected to the engine by a series of bolts and is responsible for transferring power from the engine to the propeller.
2. Disconnect the shift cable: Before removing the lower unit, it’s important to disconnect the shift cable. This cable is responsible for engaging and disengaging the gears when changing from forward to reverse or vice versa. Refer to your boat’s manual for the specific steps to disconnect the shift cable on your OMC Cobra model.
3. Drain the gear oil: The lower unit contains gear oil, which needs to be drained before removal. Locate the gear oil drain plug on the lower unit and place a drain pan underneath to catch the oil. Remove the drain plug and allow the oil to drain completely.
4. Remove the bolts: With the shift cable disconnected and the gear oil drained, it’s time to remove the bolts that secure the lower unit to the engine. Use a socket wrench or ratchet to loosen and remove the bolts. Keep track of the bolts and store them in a safe place to avoid misplacing them.
5. Separate the lower unit: Once the bolts are removed, gently separate the lower unit from the engine. Be careful not to damage any components or connectors during this process. If the lower unit is stuck, you may need to use a rubber mallet or gently tap it with a soft hammer to loosen it.
6. Secure the lower unit: Once the lower unit is removed, securely store it in a safe place to prevent any damage. It’s a good idea to cover the exposed gears with a clean rag or plastic bag to protect them from dirt and debris.
Removing the Old Water Pump
With the lower unit removed, you now have access to the old water pump. Follow these steps to remove the old water pump from the lower unit:
1. Locate the water pump housing: The water pump housing is attached to the lower unit and encloses the water pump. It is usually secured with bolts or screws. Inspect the housing to identify the mounting points.
2. Remove the bolts or screws: Using a socket wrench or screwdriver, loosen and remove the bolts or screws that secure the water pump housing to the lower unit. Set them aside in a safe place.
3. Disconnect the water pump hose: Locate the water pump hose connected to the water pump housing. Use pliers or a clamp removal tool to loosen and disconnect the hose from the housing. Be prepared for some residual coolant to escape when disconnecting the hose.
4. Remove the water pump housing: Once the hose is disconnected, carefully lift and remove the water pump housing from the lower unit. Take note of any gaskets or seals attached to the housing, as they may need to be replaced.
5. Remove the old water pump: With the water pump housing removed, you can now access the old water pump. Locate the retaining screws or bolts that secure the water pump to the lower unit. Remove them and take out the old water pump.
Congratulations! You have successfully removed the lower unit and old water pump. In the next section, we will guide you through installing the new water pump.
Disconnect the water pump hose
Disconnecting the water pump hose is an important step in the process of replacing the water pump in your OMC Cobra. The water pump hose is responsible for carrying coolant from the engine to the water pump, ensuring proper cooling and prevent overheating. Follow these steps to disconnect the water pump hose:
1. Locate the water pump hose: The water pump hose is typically connected to the water pump housing, which is attached to the lower unit. It may be a rubber or plastic hose, depending on your boat’s configuration.
2. Inspect the hose connection: Take a moment to inspect the connection between the water pump hose and the water pump housing. Depending on the setup, it may be secured with a clamp or a fitting. Determine the type of connection in order to properly disconnect it.
3. Loosen the clamp: If the water pump hose is secured with a clamp, you will need to loosen it before disconnecting the hose. Use pliers or a clamp removal tool to loosen the clamp by turning it counterclockwise. Make sure not to overtighten the clamp as it may damage the hose or fitting.
4. Disconnect the hose fitting: If the water pump hose is connected with a fitting, you will need to disconnect it. Refer to your boat’s manual or consult a professional for specific instructions on how to disconnect the fitting properly. This may involve removing a retaining clip or using a specialized tool to release the connection.
5. Safely collect any coolant: When disconnecting the water pump hose, it is normal for some coolant to spill out. Place a container or a rag underneath the hose connection to catch any coolant and prevent it from spilling into the environment. Dispose of any coolant responsibly according to local regulations or guidelines.
6. Inspect the hose: After disconnecting the water pump hose, take a moment to inspect it for any signs of damage or wear. Check for cracks, leaks, or deterioration. If the hose shows any signs of damage, it is recommended to replace it with a new one to ensure proper functionality and prevent future issues.
By following these steps, you will be able to disconnect the water pump hose from the water pump housing. This will allow you to proceed with the removal of the water pump housing and ultimately replace the old water pump with a new one.
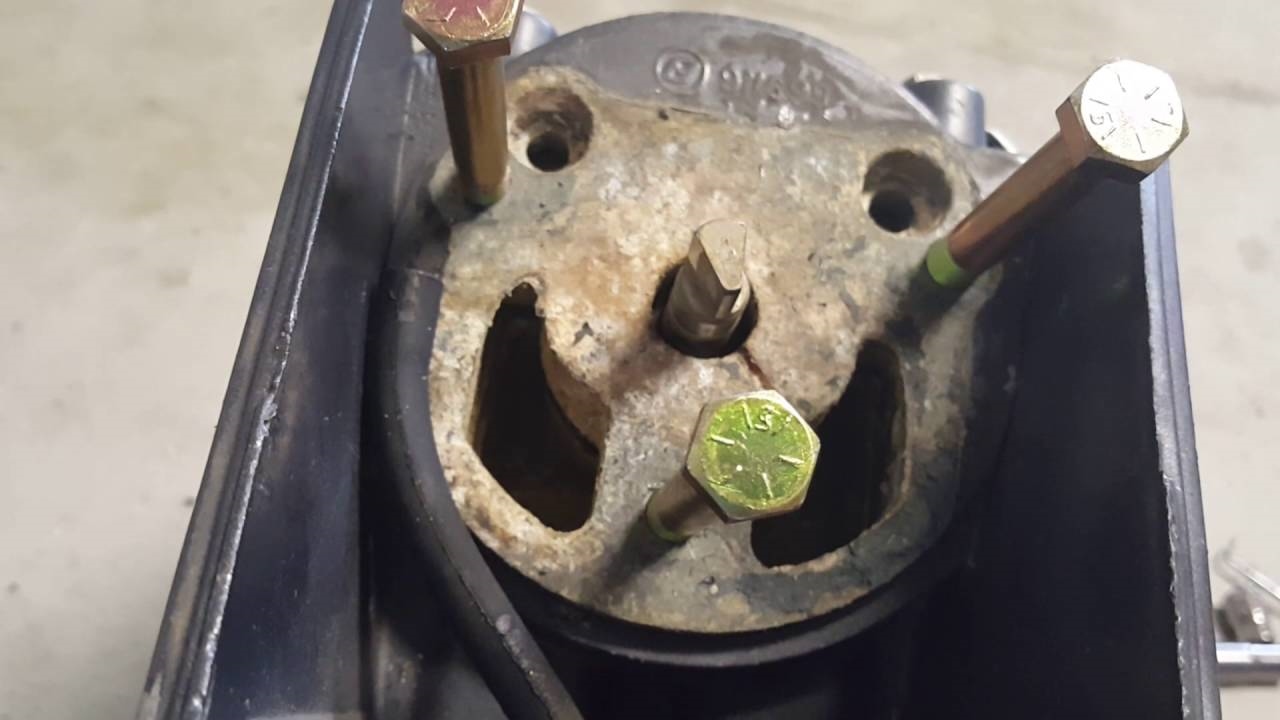
Remove the water pump housing
Once you have successfully disconnected the water pump hose, the next step in replacing the water pump in your OMC Cobra is to remove the water pump housing. The water pump housing encompasses the water pump and is attached to the lower unit. Follow these steps to remove the water pump housing:
1. Locate the water pump housing: The water pump housing is typically secured to the lower unit with bolts or screws. Take a moment to visually inspect the housing, identifying the mounting points and any additional components or connectors.
2. Remove the bolts or screws: Using a socket wrench or screwdriver, loosen and remove the bolts or screws that secure the water pump housing to the lower unit. Take note of the size and position of each bolt or screw to ensure proper reassembly later.
3. Gently detach the water pump housing: Once all the bolts or screws have been removed, gently lift and separate the water pump housing from the lower unit. Be careful not to force or damage any components during this process. The housing may require slight wiggling or maneuvering to come loose.
4. Take note of any attached gaskets or seals: As you remove the water pump housing, be observant of any gaskets or seals that may be attached to it. These gaskets and seals are important for creating a watertight connection and may need to be replaced. Inspect their condition for any signs of wear, damage, or deterioration.
5. Be cautious of residual water: It is normal for some residual water or coolant to be present in the water pump housing. Take precautions by having a container or absorbent material ready to catch any liquid that may spill during the removal process. This will help prevent any mess or damage to surrounding components.
6. Store the water pump housing safely: Once the water pump housing is removed, carefully store it in a safe place. Ensure that it is protected from dirt, debris, and potential damage. Consider covering the open ends with a clean rag or plastic bag to keep out any unwanted particles.
By following these steps, you will be able to successfully remove the water pump housing from the lower unit. With the housing removed, you can now proceed with taking out the old water pump and installing the new one, which we will cover in the next section.
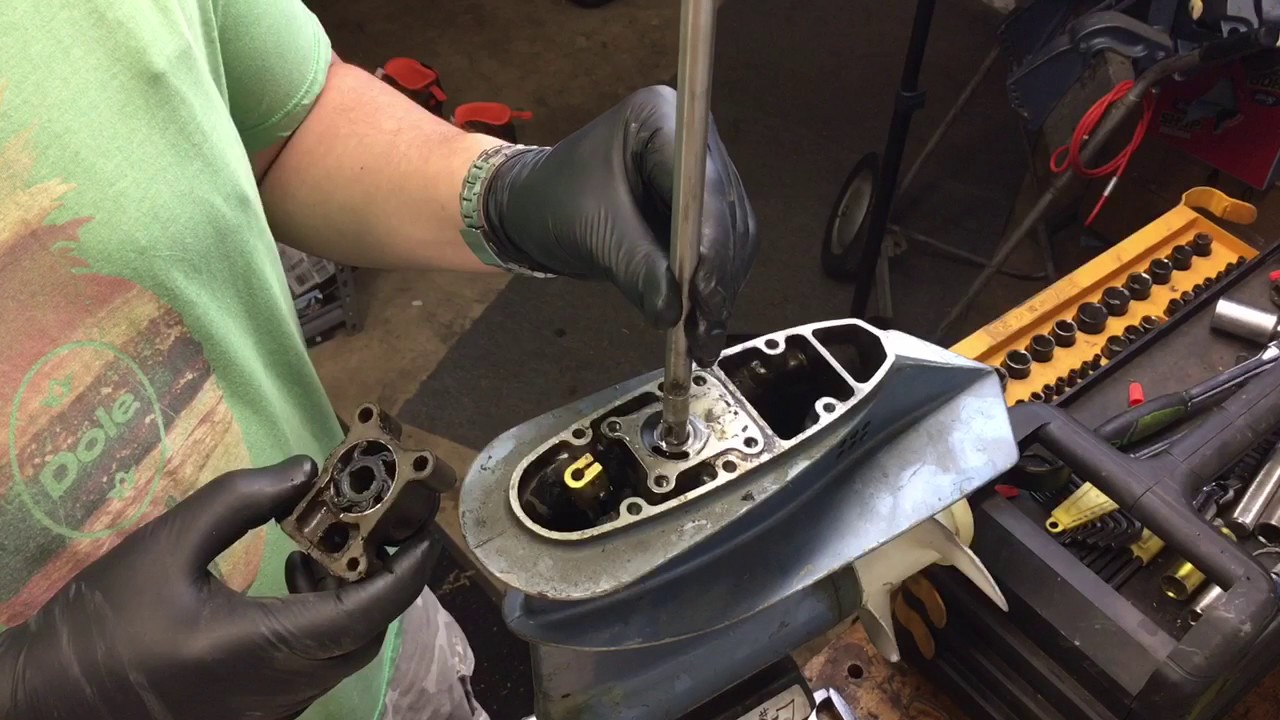
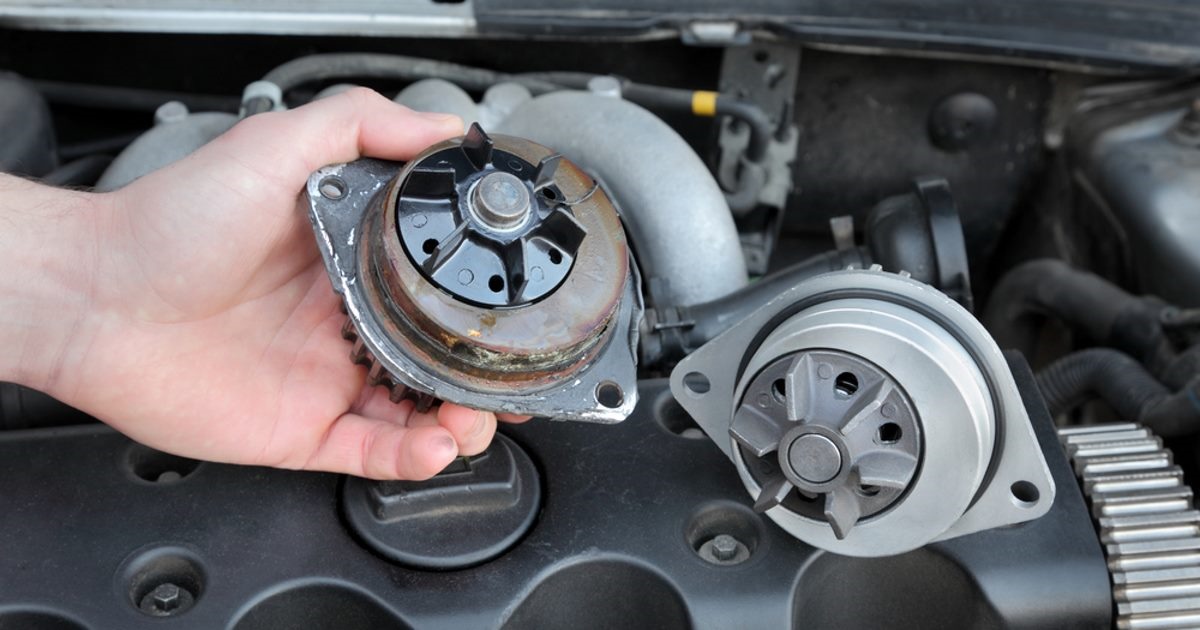
Take out the old water pump
With the water pump housing removed, you now have access to the old water pump in your OMC Cobra. Removing the old water pump is a crucial step in replacing it with a new one. Follow these steps to take out the old water pump:
1. Locate the old water pump: The water pump is typically situated within the water pump housing. Take a moment to visually inspect the housing and identify the water pump’s position.
2. Disconnect any remaining connections: Check for any remaining connections to the old water pump, such as hoses or electrical wires. Carefully disconnect and remove these connections, taking note of their positions for future reference.
3. Remove the retaining screws or bolts: Using a socket wrench or screwdriver, remove the retaining screws or bolts that secure the old water pump to the water pump housing. Keep track of these fasteners as they will need to be replaced or reused with the new water pump.
4. Gently lift out the old water pump: With the retaining screws or bolts removed, gently lift and carefully remove the old water pump from the water pump housing. Be mindful not to damage any surrounding components or gaskets during this process.
5. Inspect the old water pump: Take a moment to inspect the old water pump for any signs of wear, damage, or deterioration. Pay close attention to the impeller, which is responsible for pumping the coolant. If the impeller is broken, cracked, or worn out, it is recommended to replace the entire water pump assembly.
6. Clean the area: Before installing the new water pump, take the time to clean the area where the old water pump was located. Remove any debris, residue, or old gaskets to ensure a clean and smooth surface for the installation of the new water pump.
Installing the New Water Pump
Now that you have removed the old water pump, it’s time to install the new one. Follow these steps to properly install the new water pump in your OMC Cobra:
1. Prepare the new water pump: Before installation, verify that you have the correct replacement water pump for your specific OMC Cobra model. Ensure that all required gaskets, seals, and O-rings are included in the new water pump kit.
2. Position the new water pump: Carefully place the new water pump into the water pump housing. Align the mounting holes of the water pump with those in the housing.
3. Secure the new water pump: Insert the retaining screws or bolts through the mounting holes of the water pump and tighten them using a socket wrench or screwdriver. Follow the manufacturer’s instructions for torque specifications to ensure proper tightening.
4. Reconnect any necessary connections: Attach any hoses or electrical connections that were disconnected from the old water pump. Ensure they are securely fastened and properly aligned.
5. Refer to the manual: Consult your boat’s manual or the instructions provided with the new water pump kit. Follow any specific guidelines or recommendations for installing the new water pump based on your OMC Cobra model.
6. Check for smooth operation: After installing the new water pump, manually rotate the impeller to ensure it moves smoothly without any obstructions or binding. This will help confirm proper installation and functionality.
By following these steps, you will be able to successfully take out the old water pump and install the new water pump in your OMC Cobra. In the next section, we will guide you through reassembling the water pump housing.
When replacing the OMC Cobra water pump, make sure to thoroughly clean the housing and replace the gaskets to prevent any leaks. Also, use a high-quality marine-grade water pump kit for long-lasting performance.
Install the new water pump
Installing the new water pump is a critical step in replacing the water pump in your OMC Cobra and ensuring proper engine cooling. Follow these steps to install the new water pump:
1. Prepare the new water pump: Before installation, inspect the new water pump to ensure it is the correct replacement for your specific OMC Cobra model. Make sure all the necessary components, such as gaskets and seals, are included in the new water pump kit.
2. Position the new water pump: Carefully place the new water pump into the water pump housing, ensuring proper alignment with the mounting holes and shaft. The impeller should be facing towards the inside of the housing.
3. Secure the new water pump: Insert and tighten the retaining screws or bolts through the mounting holes of the water pump using a socket wrench or screwdriver. Ensure they are tightened securely, following the manufacturer’s instructions or torque specifications.
4. Verify proper fit: Confirm that the new water pump is securely fastened and has a snug fit within the water pump housing. It should be positioned properly to facilitate the smooth flow of coolant through the system.
5. Apply gasket sealant if necessary: If provided or recommended by the manufacturer, apply a thin layer of gasket sealant to the mating surface of the water pump housing. This will help create a watertight seal between the housing and the lower unit.
6. Reassemble any additional components: If any other components were removed during the water pump replacement process, such as brackets or covers, reattach them securely to the water pump housing and ensure proper alignment.
7. Double-check all connections: Take a moment to verify that all connections, including hoses and electrical connectors, are properly attached to the new water pump. Make sure they are correctly aligned and tightened, but avoid overtightening to prevent damage to seals or fittings.
8. Perform a visual inspection: Conduct a visual inspection of the new water pump installation, ensuring there are no visible leaks, loose fasteners, or any other irregularities. Any issues should be addressed before proceeding to the next step.
By following these steps, you will be able to successfully install the new water pump in your OMC Cobra. This will ensure proper engine cooling and help maintain the performance and longevity of your boat’s engine. In the next section, we will guide you through reassembling the water pump housing.
Reassemble the water pump housing
After successfully installing the new water pump in your OMC Cobra, the next step is to reassemble the water pump housing. The water pump housing contains the water pump and is crucial for proper coolant circulation. Follow these steps to reassemble the water pump housing:
1. Inspect the housing: Before reassembling, inspect the water pump housing to ensure it is clean and free from any debris or old gaskets. Remove any remnants of old gaskets, seals, or residue from the previous installation.
2. Position the water pump housing: Carefully align the water pump housing with the lower unit, ensuring a proper fit and alignment of the mounting holes. Take care not to damage any components or gaskets during this process.
3. Reattach the water pump housing: Insert the retaining bolts or screws through the mounting holes of the water pump housing, aligning them with the corresponding holes in the lower unit. Use a socket wrench or screwdriver to tighten the bolts or screws securely.
4. Apply gasket sealant if necessary: If recommended by the manufacturer or if the water pump housing requires a gasket sealant, apply a thin layer of sealant to the mating surface of the water pump housing. This will help create a watertight seal between the housing and the lower unit, preventing any leaks.
5. Tighten the retaining bolts or screws: Use a socket wrench or screwdriver to tighten the retaining bolts or screws securely. Make sure to follow the manufacturer’s instructions or torque specifications to ensure proper tightness without damaging the housing or lower unit.
6. Reconnect the water pump hose: Attach the water pump hose securely to the water pump housing, ensuring a proper and tight connection. If necessary, use pliers or a clamp to fasten the hose securely to the fitting.
7. Double-check all connections: Carefully inspect all connections, including the water pump housing bolts, water pump hose, and any other components that were removed during the water pump replacement. Ensure that all connections are properly tightened and secured.
Read more: How To Replace Water Pump Ford Taurus
Reassembling the Lower Unit
With the water pump housing reassembled, you can proceed to reattach the lower unit back to the boat. Follow these steps to reassemble the lower unit:
1. Align the lower unit: Position the lower unit against the boat’s transom, ensuring proper alignment with the mounting holes. Take care not to damage any electrical or hydraulic connections during this process.
2. Insert and tighten the bolts: Insert the bolts through the mounting holes of the lower unit, aligning them with the corresponding holes on the transom. Use a socket wrench or ratchet to tighten the bolts snugly, but avoid over-tightening to prevent damage.
3. Reconnect the shift cable: Reattach the shift cable to its proper connection point, following the manufacturer’s instructions or boat manual. Ensure that the cable is securely fastened and properly aligned.
4. Fill the gear oil: If you drained the gear oil during the water pump replacement process, refill it to the proper level using the recommended gear oil for your OMC Cobra model. Refer to your boat’s manual for the correct type and quantity of gear oil required.
5. Test the gear shifting: Move the gear shift lever to ensure that it engages smoothly and correctly. Ensure that you can shift between forward, neutral, and reverse gears without any issues.
By following these steps, you will be able to successfully reassemble the water pump housing and the lower unit on your OMC Cobra. In the next section, we will guide you through testing and finalizing the water pump replacement process.
Attach the lower unit back to the boat
After reassembling the water pump housing, the next step in replacing the water pump in your OMC Cobra is to attach the lower unit back to the boat. The lower unit plays a vital role in transferring power from the engine to the propeller, so it’s crucial to ensure a proper and secure attachment. Follow these steps to attach the lower unit back to the boat:
1. Align the lower unit: Position the lower unit below the transom of the boat, aligning it with the mounting holes on the transom. Take care to align any electrical or hydraulic connections as well.
2. Insert the bolts: Insert the bolts through the mounting holes on the lower unit and align them with the corresponding holes on the transom. Ensure that the bolts are of the correct size and type for your OMC Cobra model.
3. Tighten the bolts: Use a socket wrench or ratchet to tighten the bolts snugly, but be careful not to overtighten them to avoid damage to the transom or lower unit. Follow the torque specifications recommended by the manufacturer for the specific model of your boat.
4. Reconnect the shift cable: Reattach the shift cable to its proper connection point. Ensure that it is securely fastened and properly aligned. Refer to your boat’s manual or manufacturer instructions for the correct procedure to reconnect the shift cable.
5. Check for smooth movement: Move the gear shift lever through its range to ensure that it engages smoothly and correctly. Make sure you can shift between forward, neutral, and reverse gears without any issues or binding.
6. Reconnect any additional components: If any additional components were disconnected during the water pump replacement process, such as wiring connectors or brackets, reattach them securely to their original positions.
7. Verify gear oil level: If you drained the gear oil during the replacement process, make sure to top it up with the recommended gear oil. Refer to your boat’s manual for the correct type and quantity of gear oil required and check the oil level using the dipstick or sight glass.
8. Test the gear shifting: Start the engine and test the gear shifting to ensure smooth operation. Pay attention to any unusual noises or vibrations. Double-check that you can shift between gears smoothly and that the propeller engages properly.
By following these steps, you will be able to successfully attach the lower unit back to the boat after replacing the water pump in your OMC Cobra. In the next section, we will guide you through testing and finalizing the water pump replacement process.
Reconnect the water pump hose
After attaching the lower unit back to the boat, the next step in the water pump replacement process for your OMC Cobra is to reconnect the water pump hose. The water pump hose carries coolant from the engine to the water pump, ensuring proper cooling of the engine. Follow these steps to reconnect the water pump hose:
1. Locate the water pump hose: The water pump hose is typically connected to the water pump housing. It carries coolant from the engine to the water pump for efficient cooling.
2. Inspect the hose and fittings: Take a moment to inspect the water pump hose and its fittings for any signs of damage, wear, or deterioration. Ensure that the hose is in good condition without any cracks or leaks. If there are any issues, it is recommended to replace the hose with a new one.
3. Realign the hose: Align the water pump hose with the fitting on the water pump housing. Ensure proper alignment and orientation of the hose to prevent any kinks or restrictions in the coolant flow.
4. Secure the hose: Use pliers or a clamp to secure the water pump hose to the fitting on the water pump housing. Tighten the clamp securely, making sure it provides a tight and leak-free connection.
5. Double-check the connection: Give the water pump hose a gentle tug to ensure it is securely attached to the fitting. Make sure that there are no gaps or signs of leakage around the connection.
6. Inspect surrounding components: Take a moment to inspect the surrounding components and connections. Verify that all other connections, such as electrical or hydraulic fittings, are properly reconnected and secured.
Testing and Finalizing
With the water pump hose reconnected, you are now ready to test and finalize the water pump replacement. Follow these steps to ensure everything is in proper working order:
1. Verify all connections: Double-check all connections, including the water pump hose, lower unit bolts, shift cable, and any other components that were disconnected during the replacement process. Ensure that everything is securely fastened and properly aligned.
2. Fill the coolant system: Fill the coolant system with the appropriate coolant or antifreeze mixture, following the manufacturer’s recommended guidelines. Ensure that the coolant level is at the proper level according to your boat’s specifications.
3. Start the engine: Start the engine and allow it to run for a few minutes. Monitor the engine temperature gauge to ensure that it remains within the normal operating range. If the temperature rises unusually or if you notice any abnormal noises or leaks, stop the engine immediately.
4. Check for leaks: Inspect the water pump housing, water pump hose, and surrounding areas for any signs of coolant leaks. Look for dripping, wet spots, or stains that may indicate a leak. If you discover a leak, address it promptly by tightening connections or replacing damaged components.
5. Secure all connections and fasteners: Once you have verified that everything is working properly and there are no leaks, go through all connections and fasteners one last time. Ensure they are tightened securely according to the manufacturer’s specifications, taking care not to overtighten.
6. Clean up and finalize: Clean up any tools, materials, or debris that may have accumulated during the replacement process. Properly dispose of any waste materials and clean the work area.
By following these steps, you will have successfully reconnected the water pump hose and completed the testing and finalizing process for the water pump replacement in your OMC Cobra. Your boat’s engine should now be ready to operate smoothly and efficiently, providing optimal cooling for your marine adventures.
Test the newly installed water pump
After completing the water pump replacement in your OMC Cobra, it is crucial to test the newly installed water pump to ensure proper functionality and cooling performance. Testing the water pump will give you confidence that your boat’s engine is receiving adequate coolant circulation. Follow these steps to test the newly installed water pump:
1. Start the engine: Start your boat’s engine and let it idle for a few minutes. Allow the engine to reach operating temperature.
2. Monitor the temperature gauge: Keep a close eye on the engine’s temperature gauge while it idles. The gauge should indicate that the engine is operating within the normal temperature range. If the gauge shows an abnormally high temperature or begins to rise rapidly, it may indicate a problem with the water pump or cooling system.
3. Observe coolant flow: While the engine is running, visually confirm that coolant is flowing through the water pump and cooling system. Look for movement and circulation of the coolant. You may be able to see coolant flowing through transparent hoses or observe movement in the coolant reservoir.
4. Check for leaks: Inspect all connections, hoses, and the water pump housing for any signs of coolant leaks. Look for dripping, wet spots, or stains that may indicate a leak. If you notice a leak, it is important to address it promptly to prevent any potential damage or engine overheating.
5. Verify water flow from exhaust: Observe the water flow from the exhaust system. You should see a steady stream of water exiting the exhaust while the engine is running. This indicates that the water pump is pulling water from the body of water the boat is in and circulating it through the engine.
6. Listen for unusual noises: Listen carefully for any irregular noises coming from the water pump or cooling system. Unusual sounds such as grinding, rattling, or excessive vibrations could suggest an issue with the water pump or impeller.
7. Perform on-water test (optional): If conditions permit and it is safe to do so, consider taking your boat out for a short test run to further evaluate the performance of the water pump. Monitor the engine temperature, coolant flow, and listen for any abnormalities while operating under load.
8. Make adjustments if necessary: If you notice any concerning issues during the testing process, it is important to address them promptly. Inspect the connections, hoses, and water pump itself to ensure they are properly installed and functioning correctly. Tighten any loose connections or replace any damaged components as needed.
By following these steps and conducting a thorough test of the newly installed water pump, you can ensure that your OMC Cobra’s cooling system is operating as intended. If you notice any ongoing problems or have concerns about the water pump’s performance, it is recommended to consult with a professional marine mechanic to provide further assistance and guidance.
Check for any leaks
After testing the newly installed water pump in your OMC Cobra, it is essential to check for any leaks to ensure the integrity of your boat’s cooling system. Detecting and addressing leaks promptly is crucial for maintaining proper engine performance and preventing potential damage. Follow these steps to check for any leaks:
1. Visual inspection: Carefully inspect all connections, hoses, and the water pump housing for any signs of coolant leaks. Look for wet spots, dripping coolant, or stains that may indicate a leak. Pay close attention to areas where hoses connect to fittings or where gaskets are used.
2. Check gaskets and seals: Examine the gaskets and seals that are involved in the water pump installation. Look for any signs of damage, wear, or deterioration. Faulty gaskets or seals can cause leaks, so they may need to be replaced if they are compromised.
3. Observe the coolant reservoir: Check the coolant reservoir for any signs of leaks. Inspect the reservoir itself, as well as the hoses connected to it. Look for any wet spots or coolant stains that may suggest a leak in the reservoir or associated components.
4. Inspect the bilge area: Examine the bilge area of your boat for any traces of coolant. While the engine is running, be observant of any coolant pooling or seeping into the bilge. Coolant leaks in this area typically indicate a problem with the water pump or its connections.
5. Use a UV dye or leak detection solution: If you suspect a hidden or small leak, you can use a UV dye or a leak detection solution specifically designed for coolant systems. These products can help you identify leaks by causing any escaping coolant to fluoresce under UV light or by changing color in the presence of a leak.
6. Check for coolant smell or steam: While the engine is running, pay attention to any unusual coolant smell or visible steam around the water pump housing or any connections. These can be signs of an active coolant leak.
7. Tighten connections if needed: If you identify any loose connections during the inspection, use a suitable tool, such as pliers or a wrench, to tighten them appropriately. However, ensure not to overtighten, which can damage fittings or seals.
8. Address leaks promptly: If you discover any leaks during the inspection, it is essential to address them promptly. Depending on the severity of the leak, you may need to tighten connections, replace damaged hoses or fittings, or install new gaskets or seals. Failure to address leaks can lead to engine damage or overheating issues.
By following these steps and thoroughly checking for any leaks, you can ensure the integrity of your boat’s cooling system. Addressing leaks promptly will help maintain proper engine performance and extend the lifespan of the water pump. If you encounter persistent or complex leaks, it is recommended to seek the assistance of a professional marine mechanic for further evaluation and repairs.
Secure all connections and fasteners
After checking for leaks in the cooling system of your OMC Cobra, it is crucial to secure all connections and fasteners to ensure the proper functioning and longevity of the water pump. Secure connections and fasteners prevent leaks, maintain optimal coolant flow, and help prevent component damage. Follow these steps to secure all connections and fasteners:
1. Inspect all connections: Double-check all connections, including the water pump hoses, electrical connectors, and any other components that were removed or disconnected during the water pump replacement. Ensure that all connections are properly seated and aligned.
2. Tighten connections: Use the appropriate tools, such as pliers, wrenches, or screwdrivers, to tighten all connections securely. Turn each fastener or fitting clockwise, applying gentle pressure until it is snug. Take care not to overtighten, as it can lead to damage or leaks.
3. Verify torque specifications: Refer to your boat’s manual or the manufacturer’s instructions to determine the recommended torque specifications for specific connections or fasteners. Use a torque wrench, if necessary, to ensure each connection is tightened to the proper specification.
4. Check for proper alignment: Confirm that all connections and fasteners are properly aligned. Misaligned connections can cause leaks or restricted coolant flow. Adjust the position of hoses, fittings, or components if needed to ensure proper alignment.
5. Inspect for any loose or missing fasteners: Conduct a final inspection to ensure that all fasteners are tightened securely and that there are no loose or missing bolts, screws, or nuts. If you notice any fasteners that are loose or missing, take immediate action to tighten or replace them.
6. Secure any additional components: If you removed any additional components during the water pump replacement process, such as brackets or covers, make sure to reattach and secure them properly. Check that all fasteners holding these components are tightened securely.
7. Clean up any debris: Remove any debris or leftover materials from the work area. Clean up any excess gasket sealant, coolant spills, or loose particles that may have accumulated during the replacement process. Properly dispose of any waste materials according to local regulations.
By thoroughly securing all connections and fasteners, you can optimize the performance and reliability of the water pump in your OMC Cobra. This step is essential in preventing coolant leaks, ensuring proper coolant circulation, and maintaining the overall functionality of your boat’s cooling system.
Conclusion
Replacing the water pump in your OMC Cobra is a necessary maintenance task to ensure optimal engine cooling and performance. In this comprehensive guide, we have walked you through the step-by-step process of replacing the water pump, from preparing the boat and removing the old water pump to installing the new one and testing its functionality.
Remember to gather all the necessary tools and materials, prepare your boat for the replacement, and carefully disconnect the water pump hose before taking out the old water pump. Install the new water pump by aligning it properly, securing it with the supplied bolts or screws, and reconnecting the water pump hose. Reassemble the water pump housing and attach the lower unit back to the boat, ensuring all connections are secure. Finally, test the newly installed water pump, check for any leaks, and secure all connections and fasteners to finalize the replacement process.
Regular maintenance and prompt repairs are essential for the longevity and reliability of your boat’s water pump and cooling system. Be vigilant in inspecting for leaks, checking coolant levels, and addressing any issues that arise. Remember to consult your boat’s manual or seek professional assistance when needed.
By following the proper procedures outlined in this guide and conducting regular maintenance, you can ensure optimal engine cooling and enjoy many smooth and trouble-free boating adventures with your OMC Cobra.
Frequently Asked Questions about How To Replace Omc Cobra Water Pump
Was this page helpful?
At Storables.com, we guarantee accurate and reliable information. Our content, validated by Expert Board Contributors, is crafted following stringent Editorial Policies. We're committed to providing you with well-researched, expert-backed insights for all your informational needs.
0 thoughts on “How To Replace Omc Cobra Water Pump”