Articles
How To Add A Humidifier To HVAC
Modified: August 16, 2024
Learn how to add a humidifier to your HVAC system with these informative articles. Improve indoor air quality and maintain optimal comfort.
(Many of the links in this article redirect to a specific reviewed product. Your purchase of these products through affiliate links helps to generate commission for Storables.com, at no extra cost. Learn more)
Introduction
Adding a humidifier to your HVAC (Heating, Ventilation, and Air Conditioning) system can have numerous benefits for your home and the people living in it. HVAC systems are designed to regulate temperature and control airflow, but they often fall short when it comes to maintaining proper humidity levels. This is especially true during dry winter months or in areas with low humidity.
Humidity plays a crucial role in indoor comfort. Low humidity can lead to dry skin, irritated respiratory systems, and even damage to furniture and wooden structures. By incorporating a humidifier into your HVAC system, you can achieve optimal humidity levels, creating a more comfortable and healthier living environment.
Additionally, having a humidifier integrated into your HVAC system offers convenience and efficiency. Instead of relying on standalone humidifiers in each room, a centralized humidification system can evenly distribute moisture throughout your entire home.
In this article, we will guide you through the process of adding a humidifier to your HVAC system. We will discuss the different types of humidifiers available, the necessary tools and materials, and provide a step-by-step installation guide to help you successfully incorporate a humidifier into your HVAC system.
Key Takeaways:
- Adding a humidifier to your HVAC system can significantly improve indoor comfort, respiratory health, and energy efficiency. It also protects furniture and extends the life of your HVAC equipment, making it a valuable investment for your home.
- When adding a humidifier to your HVAC system, it’s crucial to assess your HVAC system, choose the right humidifier type, prepare the system, install and connect the humidifier properly, and regularly adjust and test its operation for optimal performance.
Read more: How To Add A Dehumidifier To HVAC
Benefits of Adding a Humidifier to HVAC
Adding a humidifier to your HVAC system offers a multitude of benefits, ranging from improved comfort to enhanced health and energy efficiency. Let’s explore some of the key advantages:
- Optimal Indoor Comfort: A balanced humidity level in your home can help alleviate discomfort caused by dry air. It prevents dryness of the skin, eyes, and throat, reducing issues like chapped lips and irritated respiratory systems.
- Improved Respiratory Health: Proper humidity levels make it easier to breathe and can reduce the occurrence of respiratory ailments. Dry air can exacerbate allergies, asthma, and other respiratory conditions, while properly humidified air can soothe nasal passages and alleviate symptoms.
- Preserved Furniture and Woodwork: Dry indoor air can damage wooden furniture, flooring, and other wooden structures in your home. Adding a humidifier helps maintain the ideal moisture levels, preventing wood from drying out and potentially cracking or warping over time.
- Protection Against Static Electricity: Dry air often leads to an increase in static electricity, causing annoying shocks and damaging sensitive electronics. Proper humidity helps to reduce static electricity, creating a more comfortable and safe living environment.
- Energy Efficiency: Humidified air feels warmer than dry air at the same temperature. By maintaining optimal humidity, you can lower your thermostat and still enjoy the same level of comfort, leading to potential energy savings and reduced heating costs.
- Prolonged Life of HVAC Equipment: Dry air can impact the performance and lifespan of your HVAC system. Adding a humidifier helps keep the internal components of your HVAC unit properly lubricated, reducing wear and tear and prolonging its overall lifespan.
- Reduced Static Sensitivity: Dry air can cause discomfort, dry eyes, and even skin irritations. By maintaining adequate humidity levels, you can minimize these issues and experience a higher level of comfort in your home.
Adding a humidifier to your HVAC system provides numerous advantages, improving your overall comfort, health, and energy efficiency. It’s a valuable addition to any home, especially in regions with dry climates or during winter months when humidity levels tend to drop. In the following sections, we will delve into the different types of humidifiers for HVAC systems and guide you through the installation process.
Types of Humidifiers for HVAC Systems
When it comes to selecting a humidifier for your HVAC system, there are several types available, each with its own advantages and considerations. Let’s explore the most common types:
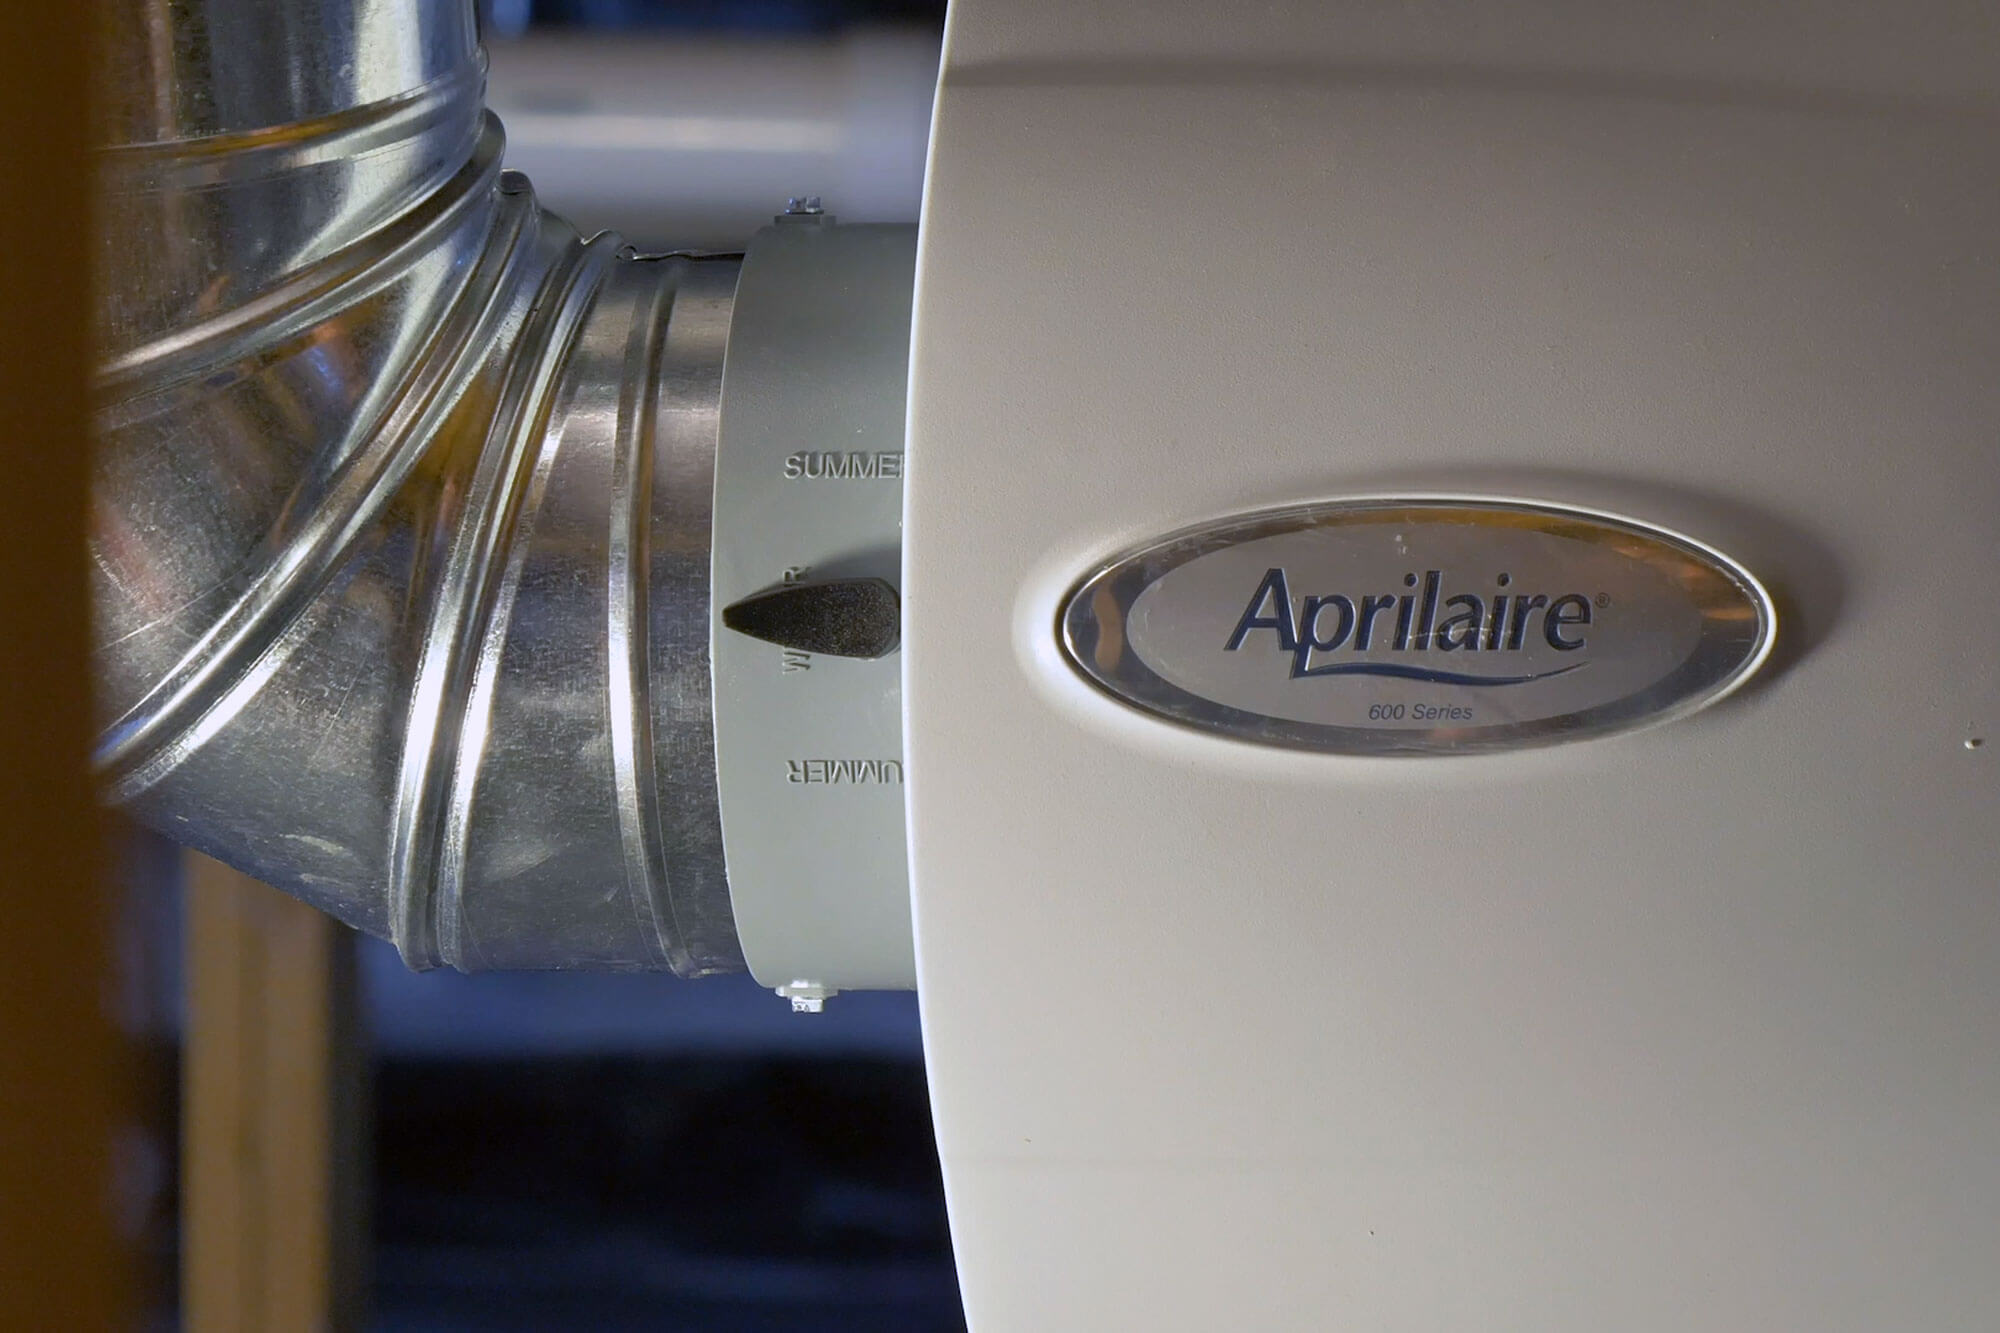
- Evaporative Humidifiers: Also known as bypass humidifiers, these devices work by using the warm air from the HVAC system to evaporate water and disperse moisture throughout your home. They are installed on the supply or return duct of your HVAC system. Evaporative humidifiers are energy-efficient and require minimal maintenance. However, they may require a separate drain line for excess water disposal.
- Steam Humidifiers: Steam humidifiers generate steam by heating water using an electric element or electrode. The steam is then distributed into the HVAC system, increasing the humidity level. These humidifiers are highly effective in providing precise control over humidity levels and are suitable for homes where greater humidity control is desired. They require a water supply and a drain line, and they are relatively easy to install.
- Drum Humidifiers: Drum humidifiers, also known as evaporative pad humidifiers, feature a rotating drum that absorbs water from a reservoir. As the drum spins, a built-in fan blows air across the moist surface, releasing moisture into the HVAC system. These humidifiers are typically inexpensive but may require more frequent attention and maintenance due to the potential for mold or mineral build-up on the pad.
- Ultrasonic Humidifiers: Ultrasonic humidifiers use ultrasonic vibrations to create a fine mist of water particles that are then dispersed into the air. These humidifiers are quiet and energy-efficient, and they can provide both cool and warm mist options. However, they require a water supply and regular cleaning to prevent mineral buildup.
Choosing the right type of humidifier for your HVAC system depends on factors such as the size of your home, the desired level of humidity control, and your maintenance preferences. It’s essential to consider these factors before making a decision. Additionally, consult with a professional HVAC technician or contractor to ensure proper installation and compatibility with your existing HVAC system.
In the next section, we will outline the tools and materials you’ll need to successfully install a humidifier into your HVAC system.
Tools and Materials Needed
Before you begin the installation process, make sure you have the following tools and materials on hand:
Tools:
- Screwdriver (Phillips and flathead)
- Adjustable wrench
- Tape measure
- Pliers
- Drill (if necessary)
- Utility knife
- Hacksaw or tin snips
- Level
Materials:
- Humidifier unit (chosen based on the type suitable for your HVAC system)
- Humidistat or hygrometer
- Humidifier pad or water panel
- Water supply line (optional, depending on the humidifier type)
- Drain line (optional, depending on the humidifier type)
- Duct tape or foil tape
- Screws and mounting brackets
- Electrical cables and connectors (if required for the humidifier model)
It’s important to note that the specific tools and materials needed may vary depending on the type and model of the humidifier you choose, as well as any additional requirements unique to your HVAC system.
Before you proceed with the installation, double-check the humidifier’s manufacturer guidelines and consult with an HVAC professional if you have any questions.
In the following sections, we will guide you through the step-by-step process of adding a humidifier to your HVAC system.
Step 1: Assessing Your HVAC System
Before you begin the installation process, it’s crucial to assess your HVAC system to determine its compatibility with a humidifier. Here are a few key factors to consider:
1.1. HVAC System Type:
Identify the type of HVAC system you have in your home. Common types include forced air systems, heat pumps, and radiant heating systems. It’s essential to understand your HVAC system’s components and layout to select the appropriate humidifier and ensure a successful installation.
1.2. Available Space:
Consider the available space within your HVAC system for the humidifier unit. Measure the dimensions of the area where the humidifier will be installed to ensure compatibility with the chosen humidifier model.
Read more: How Much Is A Humidifier
1.3. HVAC System Capacity:
Check your HVAC system’s capacity to determine if it can handle the added load of a humidifier. Consult your HVAC system’s specifications or contact a professional technician for guidance on the maximum capacity it can handle.
1.4. Water Source and Drain Access:
Identify the proximity of a water source and potential drain access for the humidifier. Some humidifier types, such as steam humidifiers, require a water supply and drain line. If these resources are not readily available near the HVAC system, you may need to modify or extend the water and drain lines during the installation.
1.5. Electrical Requirements:
Determine if your chosen humidifier requires an electrical connection. Check the electrical capacity of your HVAC system and ensure that it can support the additional power requirements. If needed, consult an electrician to ensure the electrical work is done safely and correctly.
By thoroughly assessing your HVAC system, you can ensure a smooth installation process and avoid any potential issues or incompatibilities. Once you have gathered all the necessary information, you can proceed to the next step: choosing the right humidifier for your HVAC system.
Step 2: Choosing the Right Humidifier
Now that you have assessed your HVAC system, it’s time to choose the right humidifier that suits your specific needs. Consider the following factors when selecting a humidifier:
Read more: How To Fill A Humidifier
2.1. Type of Humidifier:
Based on your HVAC system’s compatibility and your preferences, determine which type of humidifier is suitable. Consider factors such as the size of your home, the desired level of humidity control, and any specific features you may require.
2.2. Humidifier Capacity:
Ensure the humidifier capacity matches the square footage of your home. Different models have varying capacities, so select a humidifier that can effectively humidify the entire living space without overworking the system.
2.3. Maintenance Requirements:
Consider the maintenance requirements of the humidifier model you are considering. Some humidifiers may need regular cleaning or replacement of filters or water panels. Ensure you are willing to commit to the necessary maintenance tasks to keep the unit running efficiently.
2.4. Humidistat and Controls:
Check if the humidifier comes with a built-in humidistat or if you need to purchase one separately. A humidistat helps monitor and control the humidity levels, ensuring optimal comfort and preventing over-humidification. Additionally, consider the control options available, such as manual controls or digital displays.
Read more: How To Make A Humidifier
2.5. Noise Level:
Consider the noise level of the humidifier, especially if it will be installed near living areas. Look for models that operate quietly to avoid any disturbances or disruptions.
2.6. Energy Efficiency:
Opt for a humidifier that is energy efficient to minimize energy consumption and reduce operating costs. Look for models with energy-saving features such as automatic shut-off or adjustable humidity settings.
Once you have considered these factors and chosen the right humidifier for your HVAC system, you are ready to move on to the next step: preparing your HVAC system for installation.
Step 3: Preparing Your HVAC System
Before installing the humidifier, it’s essential to properly prepare your HVAC system to ensure a seamless and efficient integration. Follow these steps to get your HVAC system ready:
3.1. Shut off the Power:
Turn off the power to your HVAC system to avoid any accidental electrical shocks during the installation process. Locate the main power switch or circuit breaker and switch it to the “off” position.
Read more: How Humidifier Works
3.2. Locate the Access Point:
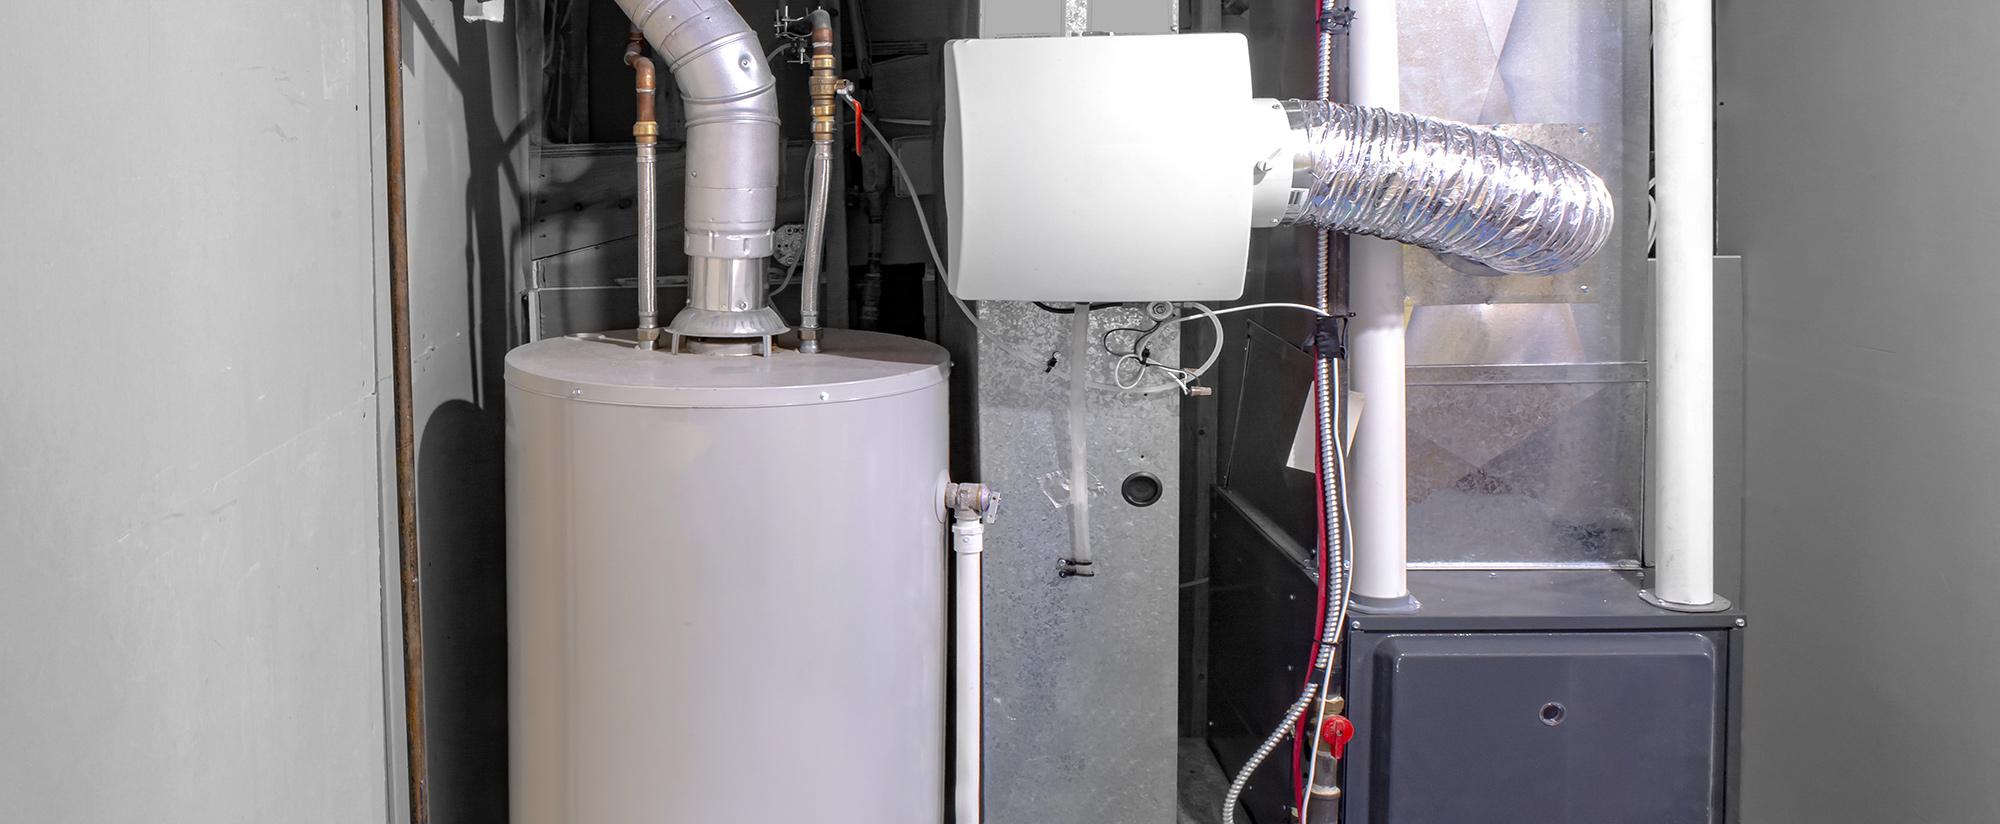
Identify the access point on your HVAC system where the humidifier will be installed. This is typically on the supply or return duct, near the furnace or air handler. Refer to the humidifier’s installation instructions to determine the recommended location.
3.3. Clear the Area:
Clear the area around the access point to ensure there is sufficient space for the humidifier and any necessary attachments. Remove any obstacles or debris that may hinder the installation process.
3.4. Measure and Mark:
Using a tape measure and level, measure and mark the precise location where the humidifier will be mounted. Double-check the measurements to ensure accuracy and make any necessary adjustments before proceeding.
3.5. Cut the Duct Opening:
If required by the humidifier model, use a utility knife or appropriate cutting tool to create the necessary opening in the supply or return duct. Follow the manufacturer’s guidelines for the recommended size and shape of the opening.
Read more: How To Prevent Mold In Humidifier
3.6. Clean the Duct Surface:
Thoroughly clean the surface of the duct where the humidifier will be attached. Remove any dust or debris to ensure a secure connection and optimal performance of the humidifier.
By properly preparing your HVAC system, you are setting the stage for a successful installation. Once your system is adequately prepared, you can proceed to the next step: installing the humidifier into your HVAC system.
Step 4: Installing the Humidifier
Now that your HVAC system is prepared, it’s time to install the humidifier. Follow these steps to install the humidifier onto your HVAC system:
4.1. Mount the Humidifier:
Using the appropriate screws and mounting brackets, securely attach the humidifier to the marked location on the supply or return duct. Ensure that the humidifier is level and firmly attached to prevent any movement or vibration during operation.
4.2. Connect the Water Supply (if applicable):
If your humidifier requires a water supply, carefully connect the water line according to the manufacturer’s instructions. Ensure a proper seal to prevent any leaks. If necessary, consult a professional plumber to assist with this step.
Read more: What To Put In A Humidifier
4.3. Install the Humidifier Pad or Water Panel:
Insert the humidifier pad or water panel into the designated slot on the humidifier. Follow the manufacturer’s instructions to ensure correct placement and orientation. This component is crucial for moisture evaporation and proper functioning of the humidifier.
4.4. Secure Electrical Connections:
If the humidifier requires an electrical connection, carefully secure the electrical cables and connectors according to the manufacturer’s instructions. Ensure that all connections are properly insulated and protected from any excess moisture.
4.5. Check for Proper Placement:
Double-check the placement of the humidifier, making sure it is secure and correctly positioned. Ensure that there is sufficient clearance around the unit for proper airflow and maintenance access.
Note: It is highly recommended to follow the manufacturer’s installation instructions provided with your specific humidifier model. If you are unsure of any installation steps or encounter any difficulties, consult a professional HVAC technician for assistance.
With the humidifier securely installed, you are now ready to move on to the next step: connecting the humidifier to your HVAC system.
Step 5: Connecting the Humidifier to the HVAC System
Now that the humidifier is installed, the next step is to connect it to your HVAC system. Follow these steps to properly connect the humidifier:
Read more: How To Use A Humidifier For Congestion
5.1. Connect the Supply and Return Air Ducts:
Using appropriate ductwork and fittings, connect the supply and return air ducts of the humidifier to the corresponding ductwork of your HVAC system. Ensure a secure and airtight connection to prevent any air leakage.
5.2. Use Foil Tape or Duct Tape:
Secure the connected ducts with foil tape or duct tape to provide additional reinforcement and ensure a tight seal. This will help maintain proper airflow and prevent any air leakage around the connection points.
5.3. Insulate the Ductwork (if necessary):
If recommended by the humidifier manufacturer or required for your specific setup, insulate the connected ductwork using HVAC insulation. This will help prevent condensation and maintain optimal temperature levels within the ducts.
5.4. Check for Airflow Direction:
Verify that the airflow direction of the humidifier is aligned with the direction of the HVAC system’s airflow. This ensures that the moist air is properly distributed throughout your home.
Read more: How To Use Vicks Humidifier
5.5. Reconnect the Power:
After completing the connection between the humidifier and the HVAC system, reconnect the power to your HVAC system. Restore power by flipping the main power switch or turning on the circuit breaker.
It is important to note that the connection process may vary depending on the specific model and type of humidifier you are installing. Always refer to the manufacturer’s instructions for your humidifier and consult with an HVAC professional if you have any uncertainties or questions.
With the humidifier successfully connected to your HVAC system, you can proceed to the final step: adjusting and testing the humidifier.
Step 6: Adjusting and Testing the Humidifier
Once the humidifier is connected to your HVAC system, it’s important to adjust and test its operation to ensure optimal performance. Follow these steps to properly adjust and test the humidifier:
6.1. Set the Desired Humidity Level:
Refer to the humidifier’s instructions or humidistat controls to set your desired humidity level. Keep in mind that the recommended indoor humidity level typically ranges between 30% and 50%. Adjust the humidistat accordingly to achieve your desired comfort level.
6.2. Monitor Humidity Levels:
Once the humidifier is running, regularly monitor the humidity levels in your home using a hygrometer or the built-in humidistat. This will help you determine if the humidifier is effectively maintaining the desired humidity range.
Read more: How To Clean Frida Humidifier
6.3. Check for Proper Water Flow:
Observe the water flow within the humidifier to ensure that it is working properly. Verify that water is being supplied to the humidifier pad or water panel and that excess water is properly draining (if applicable). If there are any issues with water flow, consult the humidifier’s instructions or seek assistance from an HVAC professional.
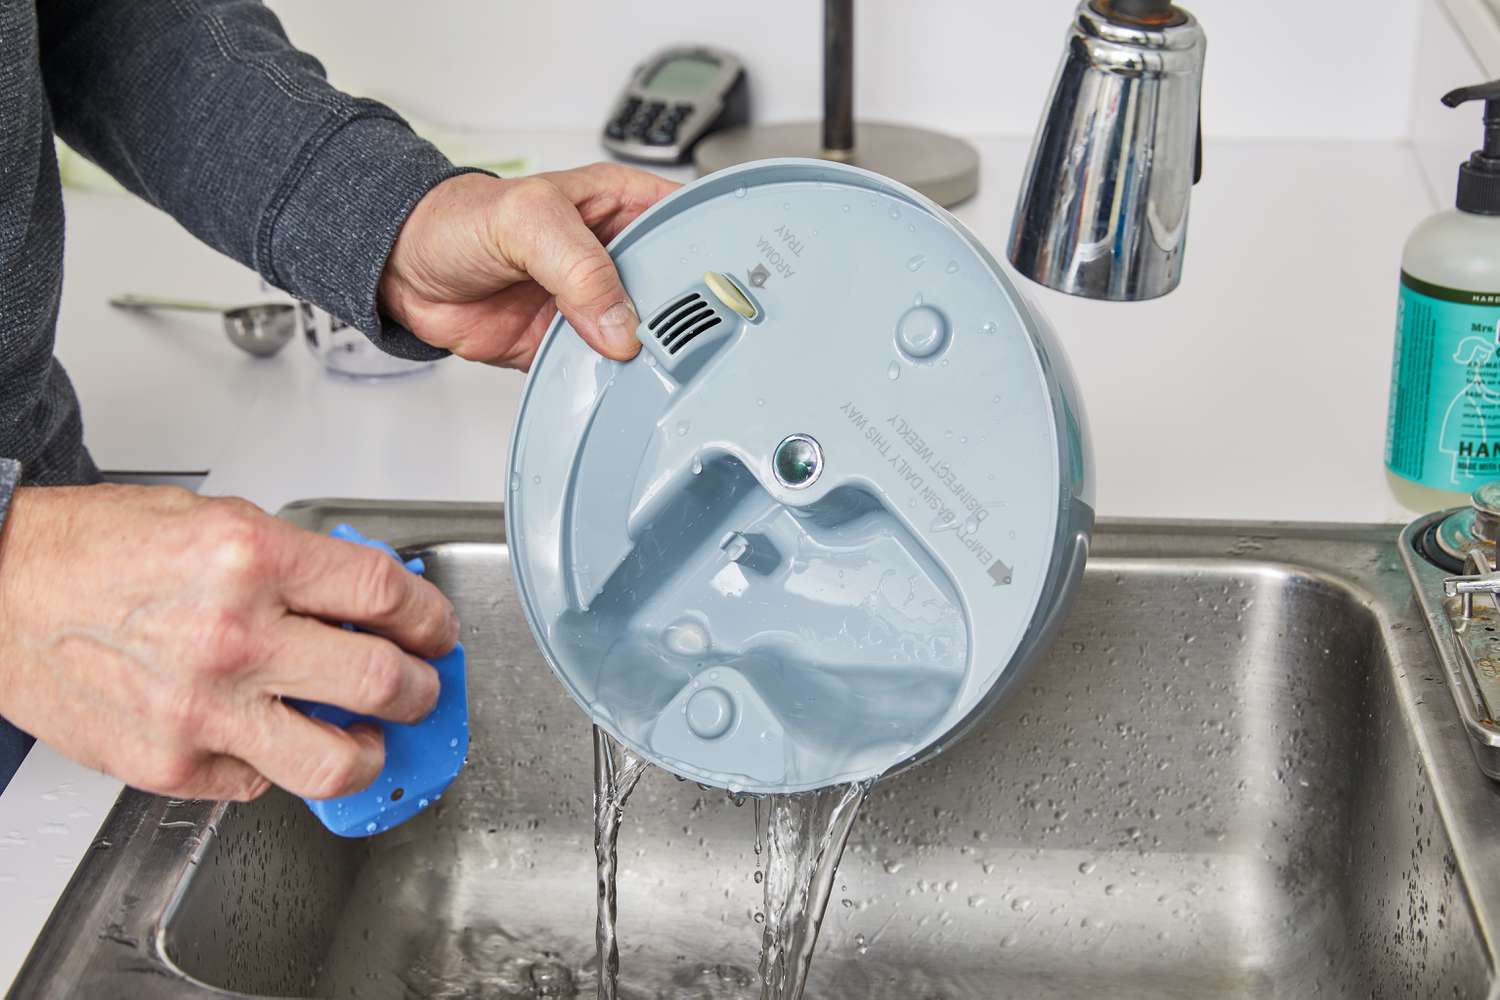
6.4. Perform Regular Maintenance:
Follow the recommended maintenance procedures outlined in the humidifier’s instructions. This may include cleaning or replacing the humidifier pad or water panel, checking for mineral buildup, and inspecting for any leaks or malfunctions. Proper maintenance is critical for optimal performance and longevity of the humidifier.
6.5. Adjust Settings as Needed:
Depending on seasonal changes or personal preferences, you may need to adjust the humidifier settings throughout the year. Modify the humidity level as necessary to maintain a comfortable and healthy indoor environment.
Regularly monitor and maintain your humidifier to ensure it continues to operate effectively. If you encounter any issues or concerns with the humidifier’s performance, consult the manufacturer’s instructions or seek professional assistance.
With the humidifier adjusted and tested, you have successfully completed the installation process. Enjoy the benefits of a properly humidified home, providing enhanced comfort and improved overall well-being.
Finally, remember to refer to the manufacturer’s instructions and local building codes throughout the installation process, and when in doubt, consult with a qualified HVAC professional for guidance and assistance.
Conclusion
Adding a humidifier to your HVAC system can greatly improve the comfort, health, and overall quality of your indoor environment. By maintaining optimal humidity levels, you can alleviate dryness, reduce respiratory issues, and protect your furniture and wooden structures from damage.
In this article, we covered the benefits of adding a humidifier to your HVAC system, the different types of humidifiers available, and the step-by-step installation process. We discussed assessing your HVAC system, choosing the right humidifier, preparing your HVAC system, installing the humidifier, connecting it to your HVAC system, and adjusting and testing its operation.
Throughout the installation process, it is essential to follow the manufacturer’s instructions and consult with an HVAC professional if needed. Additionally, regular maintenance and monitoring of your humidifier will ensure optimal performance and longevity.
By incorporating a humidifier into your HVAC system, you can create a more comfortable and healthier living environment for you and your family. Say goodbye to dry skin, irritated respiratory systems, and static electricity, and embrace the benefits that a properly humidified home can bring.
Remember to regularly check and adjust the humidity levels as necessary, especially during different seasons, and perform routine maintenance to keep your humidifier running efficiently. Enjoy the enhanced indoor comfort and the improved well-being that a humidifier integrated with your HVAC system can provide.
Investing in a humidifier for your HVAC system is an investment in your home and your health. So, don’t hesitate to take the necessary steps to add a humidifier to your HVAC system and experience the difference it can make in your everyday life.
Frequently Asked Questions about How To Add A Humidifier To HVAC
Was this page helpful?
At Storables.com, we guarantee accurate and reliable information. Our content, validated by Expert Board Contributors, is crafted following stringent Editorial Policies. We're committed to providing you with well-researched, expert-backed insights for all your informational needs.
0 thoughts on “How To Add A Humidifier To HVAC”