Articles
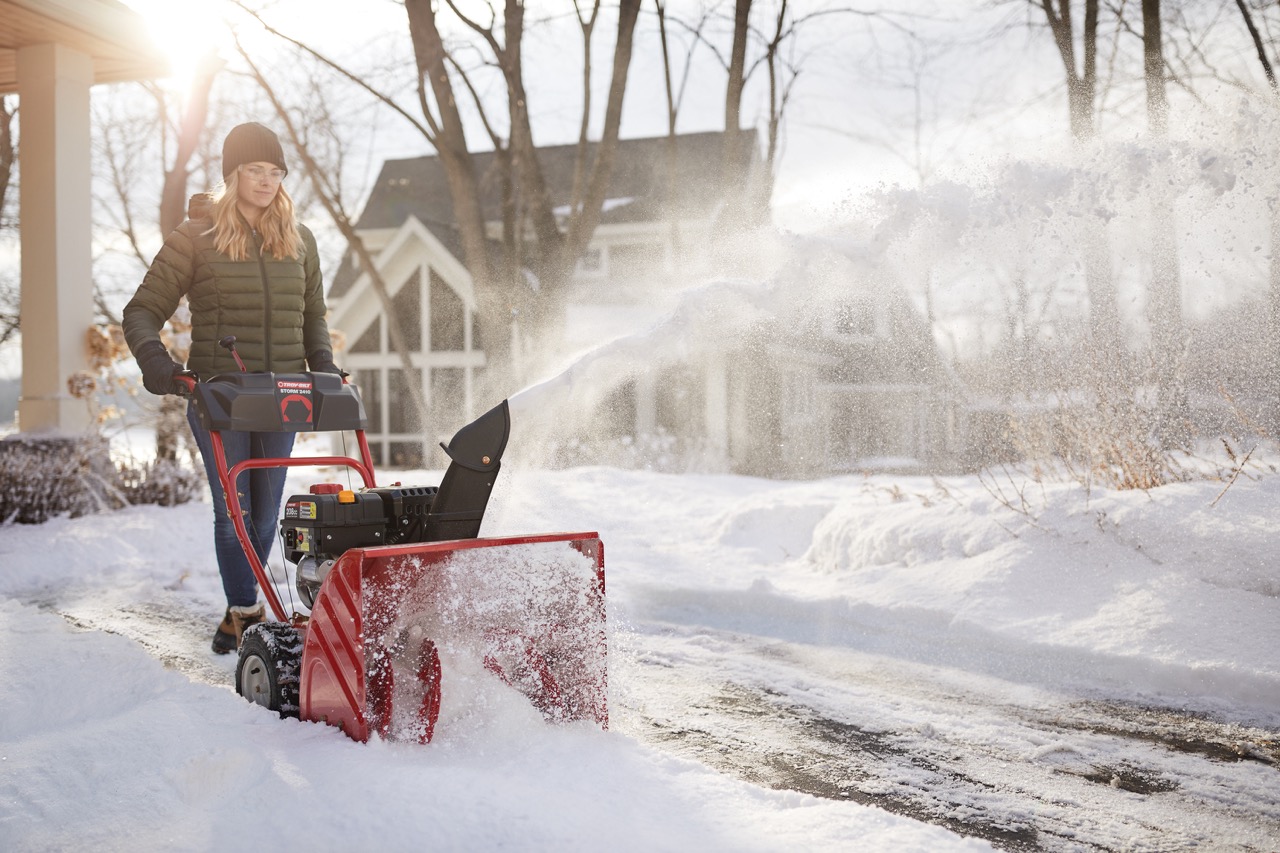
How To Snow Blow A Driveway
Modified: February 23, 2024
Learn how to snow blow your driveway with these informative articles on the best snow blowing techniques and equipment. Get expert advice and tips to make your winter maintenance easier.
(Many of the links in this article redirect to a specific reviewed product. Your purchase of these products through affiliate links helps to generate commission for Storables.com, at no extra cost. Learn more)
Introduction
Welcome to the complete guide on how to snow blow a driveway! As winter approaches, one of the biggest challenges homeowners face is dealing with the snow piled up on their driveways. Shoveling can be time-consuming and exhausting, but with the right equipment and techniques, you can easily clear your driveway and get on with your day. This guide will walk you through the process of using a snow blower to efficiently and effectively tackle the snow that plagues your driveway.
Before we dive in, it’s important to understand the basics of a snow blower. A snow blower, also known as a snow thrower, is a machine specifically designed to move snow out of the way, making clearing snow-covered surfaces much simpler. There are two main types of snow blowers: single-stage and two-stage.
A single-stage snow blower is typically smaller and more lightweight, making it suitable for clearing light to moderate snowfall. They are equipped with a rotating auger that scoops up the snow and throws it out of the chute in one motion. These are ideal for small driveways or walkways as they are easy to maneuver.
On the other hand, a two-stage snow blower is larger and more powerful, designed to handle heavy snowfall and clear larger areas. They have an auger that collects the snow and an impeller that throws it out through the chute. This type of snow blower is more suitable for larger driveways or areas with frequent heavy snowfall.
Now that you have an understanding of the types of snow blowers, let’s move on to preparing your snow blower for use. It’s essential to get your snow blower ready before the winter season to ensure it’s in working condition when you need it the most. In the next section, we will cover the necessary steps to prepare your snow blower for snow blowing your driveway.
Key Takeaways:
- Efficiently clear your driveway of snow by understanding the types of snow blowers, preparing them for use, and employing proper snow blowing techniques. Stay safe, take breaks, and enjoy a worry-free winter season with a well-maintained driveway.
- Tackle snow drifts and obstacles with patience and caution, and wrap up by cleaning and storing your snow blower for longevity. With practice and proper maintenance, you’ll confidently conquer the snow and keep your driveway clear.
Read more: How To Remove Snow From A Driveway
Understanding the Snow Blower
Before you start snow blowing your driveway, it’s essential to have a good understanding of how your snow blower works. This knowledge will not only help you operate the machine safely but also maximize its efficiency in clearing snow.
The key components of a snow blower include:
- Engine: The engine is the power source of the snow blower. It provides the necessary energy to drive the machine and operate the auger and impeller.
- Auger: The auger is the rotating spiral-like mechanism at the front of the snow blower. It scoops up the snow and feeds it into the machine for further processing.
- Impeller: The impeller is responsible for propelling the collected snow out of the snow blower through the chute. It generates a strong force to throw the snow away from the cleared area.
- Chute: The chute is the pathway through which the snow is expelled from the snow blower. It can usually be rotated to control the direction in which the snow is thrown.
- Control Panel: The control panel contains various settings and controls to operate the snow blower. These may include speed adjustments, chute rotation controls, and ignition switches.
Before operating your snow blower, thoroughly read the user manual provided by the manufacturer. It will provide specific instructions on how to safely start, operate, and maintain your particular model. Understanding the specific features and functions of your snow blower will enable you to operate it with confidence.
Additionally, familiarize yourself with the various safety features of your snow blower. These may include features like an emergency stop button, safety shields, and protective covers. Knowing how these features work and their importance will help prevent accidents and ensure a safe snow blowing experience.
Lastly, be aware of the limitations of your snow blower. Different snow blowers have different capabilities in terms of snow depth and density they can handle effectively. Knowing the limitations of your machine will help you avoid overloading it and potentially damaging its components.
Now that we have a good understanding of the snow blower itself, let’s move on to preparing it for snow blowing your driveway in the next section.
Preparing the Snow Blower
Before you start snow blowing your driveway, it’s important to prepare your snow blower to ensure its optimal performance and longevity. Proper preparation will not only make your snow blowing experience smoother but also help prevent any potential issues or damage. Here are the necessary steps to prepare your snow blower:
- Inspect and clean: Begin by inspecting your snow blower for any signs of damage or wear. Check the spark plug, belts, and other components for any cracks, fraying, or loose connections. If you notice any issues, address them before using the snow blower. Next, clean the snow blower of any debris or dirt accumulated from previous use. Ensure the intake area and chute are clear to allow for efficient snow removal.
- Check the fuel: Verify that there is enough fuel in the snow blower to last for the intended snow blowing session. If the fuel level is low, refill it with fresh gasoline, ensuring you use the fuel recommended by the manufacturer. It’s also a good idea to add a fuel stabilizer to prevent the fuel from deteriorating over time.
- Check the oil: Refer to the user manual to locate the oil reservoir in your snow blower. Check the oil level and top it up if necessary. Make sure to use the recommended oil type and follow the manufacturer’s instructions for proper oil maintenance.
- Inspect the tires or tracks: If your snow blower has tires or tracks, examine them for proper inflation and any signs of wear or damage. Ensure the tires or tracks are in good condition to provide the necessary traction for maneuvering the snow blower on your driveway.
- Adjust the skid shoes or scraper blade: Skid shoes and scraper blade settings affect how close the auger and impeller are to the surface. Adjust them according to the depth of snow you anticipate on your driveway. Setting them too low may cause the snow blower to scrape against the surface, while setting them too high may result in inefficient snow removal.
By taking the time to properly prepare your snow blower, you can ensure that it functions optimally and effectively clears snow from your driveway. Remember to always refer to the user manual specific to your snow blower model for detailed instructions on maintenance and preparation.
Once your snow blower is well-prepared, it’s time to move on to clearing pathways and addressing any obstacles in the next section.
Clearing Pathways and Obstacles
Now that you have prepared your snow blower, it’s time to focus on clearing pathways and addressing any obstacles that may hinder the snow blowing process. Properly clearing the pathways ensures an efficient and safe snow removal experience. Follow these steps to effectively clear your driveway:
- Remove debris: Before you begin snow blowing, clear any loose debris such as branches, rocks, or toys from your driveway. These objects can damage the snow blower and cause accidents.
- Mark obstacles: Identify any fixed obstacles on your driveway, such as curbs, rocks, or decorative features. Mark these obstacles with bright-colored flags or reflector strips to avoid accidentally hitting them with the snow blower.
- Clear small walkways first: Start by clearing any smaller walkways or paths leading to your driveway. This will ensure that you have enough room to maneuver the snow blower and prevent snow from being pushed onto these walkways as you clear the driveway.
- Establish a clearing pattern: Choose a clearing pattern that works best for your driveway’s layout. Some common options include starting from the center and working your way outward or clearing one side of the driveway first and then the other. Stick to your chosen pattern to ensure thorough and efficient snow removal.
- Overlapping passes: When snow blowing your driveway, make overlapping passes to ensure that you remove all the snow. This means that each pass you make should cover a portion of the previous pass. Overlapping the passes guarantees even snow removal and prevents any missed spots.
- Pay attention to the wind direction: Take note of the wind direction while snow blowing your driveway. If possible, blow the snow in the direction opposite to the wind to prevent it from blowing back onto the cleared areas.
- Clear build-up along the edges: As you clear the main part of your driveway, pay attention to any snow build-up along the edges. Use the edge of the snow blower or a snow shovel to clear this accumulated snow and create neat edges.
- Be mindful of the chute: Regularly check and clear any snow build-up in the snow blower’s chute. If the chute gets clogged, it can affect the throwing distance and efficiency of the snow blower.
Remember, always prioritize safety when operating the snow blower. Pay attention to your surroundings, especially when working near roads or driveways shared with other vehicles. Avoid any steep slopes or uneven surfaces that may pose a risk while snow blowing.
By following these steps and techniques, you can efficiently clear pathways and tackle obstacles for a snow-free driveway. In the next section, we will explore different snow blowing techniques to further enhance your snow removal process.
When snow blowing a driveway, start from the center and work your way out to the edges. This will help to evenly distribute the snow and make the job more efficient.
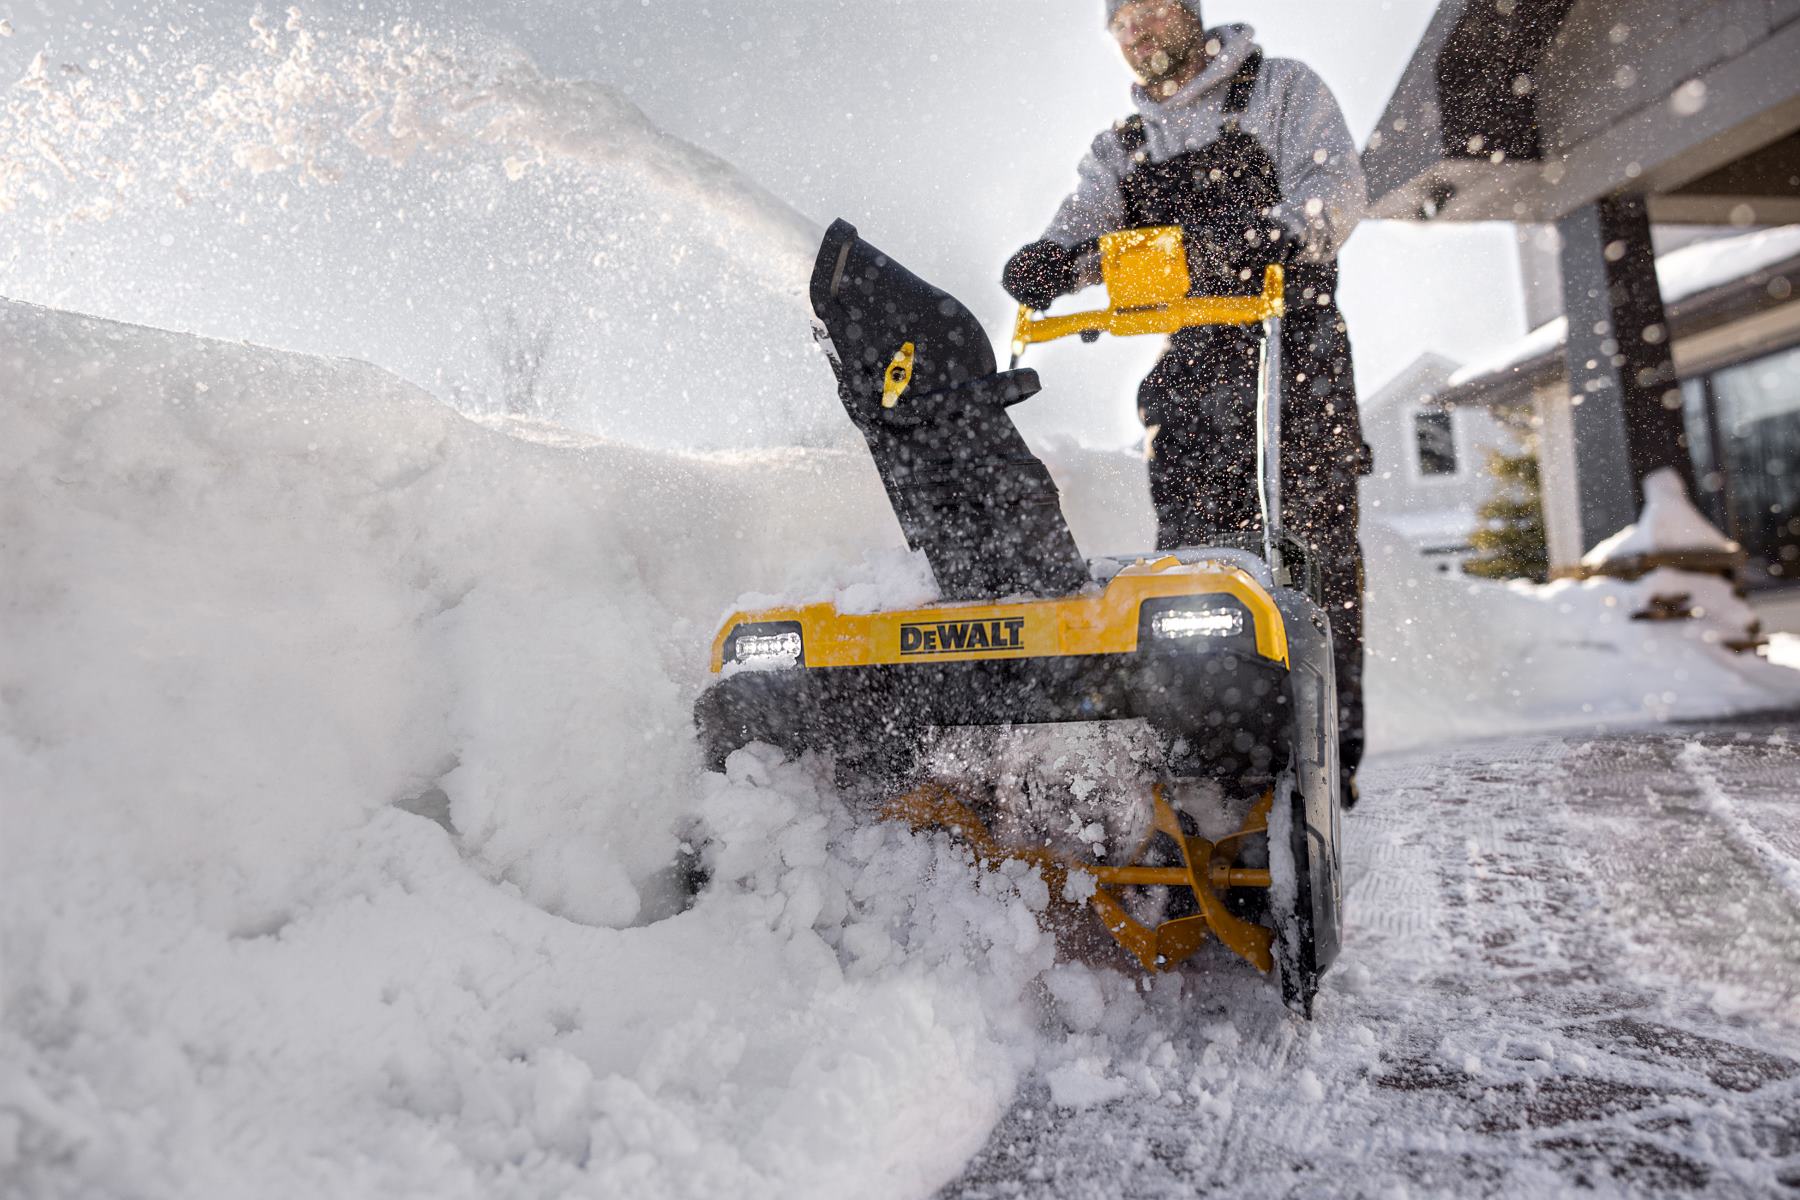
Snow Blowing Techniques
To achieve maximum efficiency and effectiveness when snow blowing your driveway, it’s important to employ proper snow blowing techniques. These techniques will help you clear the snow quickly and evenly, ensuring a well-maintained and safe driveway. Here are some essential snow blowing techniques to consider:
- Start with fresh snow: It’s easier to remove fresh, powdery snow as opposed to compacted or wet snow. Whenever possible, try to start snow blowing while the snow is still falling or shortly after it has stopped to take advantage of the lighter and easier-to-move snow.
- Work your way from top to bottom: Begin snow blowing at the top of your driveway, working your way down towards the street or the edge of your property. This method ensures that any snow pushed towards the lower part of the driveway will get cleared away efficiently.
- Overlap passes: As mentioned in the previous section, make overlapping passes while snow blowing. This technique ensures that no snow is missed and helps evenly distribute the snow across the cleared area.
- Adjust speed and throttle: When operating your snow blower, adjust your speed and throttle according to the snow conditions. Adjust the speed to a comfortable pace that allows for effective snow removal without being too fast or too slow. Additionally, adjust the throttle in accordance with the snow density and depth to maintain optimal performance.
- Clear deeper snow in stages: If you’re dealing with deep snow, it may be more efficient to clear it in stages rather than trying to remove it all at once. Make initial passes to remove the top layer of snow and then make subsequent passes to clear the remaining snow, gradually working your way down to the surface.
- Use the chute control strategically: Take advantage of the chute control on your snow blower to direct the thrown snow away from areas you don’t want it to accumulate. Be mindful of nearby walkways, entrances, or sensitive areas like gardens to prevent snow from piling up where it may cause inconvenience or damage.
- Blow the snow downwind: If there’s a prevailing wind, try to blow the snow in the same direction to prevent it from getting blown back onto the cleared areas. This technique reduces the need for additional clearing and keeps the cleared areas free from drifting snow.
- Clear snow before it gets packed: It’s easier to remove snow before it becomes compacted or hardened due to foot traffic or passing vehicles. Aim to clear your driveway soon after each snowfall to prevent the accumulation from turning into a harder, more challenging snow to remove.
Remember to always operate your snow blower according to the manufacturer’s instructions and safety guidelines. Take breaks when needed, stay hydrated, and dress appropriately for the weather conditions to ensure a comfortable and safe snow blowing experience.
With these snow blowing techniques in mind, you’ll be equipped to efficiently and effectively clear your driveway of snow. In the next section, we will explore strategies for handling snow drifts, a common challenge during winter.
Read more: How To Keep Snow From Drifting On Driveway
Handling Snow Drifts
Snow drifts can pose a significant challenge when it comes to snow blowing your driveway. These accumulated pockets of snow can be deeper and more densely packed than the rest of the snow on your driveway. However, with the right techniques and a little bit of patience, you can effectively handle snow drifts. Here are some strategies to tackle snow drifts:
- Identify the snow drifts: Before you begin snow blowing, locate the areas on your driveway where snow drifts have formed. These areas are typically where the wind has blown the snow into piles. Identifying the drifts will help you focus your efforts and adjust your snow blowing technique accordingly.
- Start with the outer edges: Begin by clearing the snow drifts from the outer edges of your driveway. By removing the excess snow from these areas first, you can create a path for the snow blower to move through and reduce the chance of getting stuck in deeper drifts.
- Overlapping passes: Similar to the technique mentioned earlier, make overlapping passes when clearing snow drifts. This will help ensure that all the snow is adequately loosened and removed, even in tightly packed areas.
- Break up compacted snow: Use the auger of the snow blower to break up any compacted or hardened snow in the drifts. Move the blower slowly across the drift, allowing the auger to break up the snow and throw it out through the chute. If necessary, make multiple passes to fully clear the drift.
- Adjust the skid shoes or scraper blade: In snow drifts, the depth of the snow may vary. Adjust the skid shoes or scraper blade of your snow blower to the appropriate height to ensure proper snow removal without causing damage to the surface beneath the snow.
- Be cautious while clearing: Pay close attention to the surface beneath the snow drifts to avoid hitting any obstacles, such as curbs or rocks, that may be hidden. Clear the drift slowly and methodically to minimize any potential damage to your snow blower or the objects beneath the snow.
- Use a shovel if necessary: In extreme cases where the snow drifts are very high or tightly packed, you may need to use a snow shovel to break up the snow manually before using the snow blower. This will make the snow blower’s work easier and prevent any strain on the machine.
Remember, snow drifts can sometimes be unpredictable, so it’s important to approach them with caution while using your snow blower. Take breaks if needed and be patient as you work through the drifts. With practice, you’ll become more confident in handling snow drifts and efficiently clearing them from your driveway.
Now that we’ve covered handling snow drifts, let’s move on to cleaning up and storing your snow blower in the next section.
Cleaning Up and Storing the Snow Blower
After successfully snow blowing your driveway, it’s important to properly clean up and store your snow blower. This will ensure its longevity and smooth operation when you need it again. Follow these steps to effectively clean up and store your snow blower:
- Turn off the snow blower: Once you have finished using the snow blower, turn off the engine and allow it to cool down before proceeding with the cleaning and storing process.
- Remove any remaining snow: Use a brush or broom to remove any remaining snow from the snow blower. Pay close attention to the chute, auger, and intake areas, ensuring they are completely cleared of snow and debris.
- Disconnect the spark plug: To prevent accidental starting, disconnect the spark plug wire from the spark plug. This will ensure the snow blower remains in a safe and non-operational state during the cleaning process.
- Clean the exterior: Use a damp cloth or sponge to wipe down the exterior surfaces of the snow blower, removing any dirt or grime that may have accumulated during use. Pay extra attention to the control panel, handles, and chute, ensuring they are thoroughly cleaned and free from any debris.
- Check and clean the chute: Inspect the chute for any ice or snow build-up. If necessary, use a brush or your gloved hand to clear any residual ice or snow, allowing the chute to move freely and preventing any potential clogging during storage.
- Inspect and tighten components: Take a moment to inspect all the components of the snow blower, such as the bolts, nuts, and fasteners. If you notice any loose parts, tighten them accordingly to ensure the snow blower is in optimal working condition.
- Drain the fuel: If you do not plan to use the snow blower for an extended period, it’s recommended to drain the fuel from the tank. Follow the manufacturer’s instructions to safely drain the fuel or run the snow blower until the fuel is depleted.
- Store in a clean and dry location: Find a clean and dry storage area for your snow blower. Make sure it is protected from moisture, dust, and potential damage. Ideally, store it in a covered area or use a waterproof cover to shield it from any adverse weather conditions.
- Perform regular maintenance: To keep your snow blower in excellent working condition, perform regular maintenance tasks such as changing the oil, replacing worn-out parts, and conducting routine inspections as recommended by the manufacturer.
By properly cleaning up and storing your snow blower, you are ensuring its longevity and reliable performance season after season. Additionally, regular maintenance will help prevent issues and extend the lifespan of your machine.
Now that you know how to clean up and store your snow blower, it’s time to wrap up this guide. With the knowledge and techniques shared throughout this article, you’ll be well-equipped to effectively and efficiently clear your driveway of snow using a snow blower. Stay safe and enjoy the winter season!
(Word count: 481)
Conclusion
Congratulations! You have reached the end of this comprehensive guide on how to snow blow a driveway. By learning about the different types of snow blowers, preparing them for use, clearing pathways and obstacles, utilizing proper snow blowing techniques, handling snow drifts, and cleaning up and storing your snow blower, you are now well-prepared to tackle the snow on your driveway and keep it clear throughout the winter season.
Using a snow blower not only saves you time and effort compared to traditional shoveling but also ensures a more efficient and thorough snow removal process. By investing in the right equipment and understanding how to use it effectively, you can make winter maintenance a much more manageable task.
Remember, safety should always be a top priority when operating a snow blower. Familiarize yourself with the user manual, wear appropriate clothing and protective gear, and be cautious of any obstacles or potential hazards in your driveway. Take breaks when needed and listen to your body to prevent overexertion.
We hope this guide has provided you with valuable insights and techniques to make your snow blowing experience a success. Keep in mind that practice makes perfect, so don’t be discouraged if it takes a few tries to get the hang of it. As you become more familiar with your snow blower and these techniques, you’ll find yourself clearing your driveway efficiently and confidently.
Lastly, remember to take good care of your snow blower by performing regular maintenance and storing it properly. This will not only prolong its lifespan but also ensure that it’s always ready for use when the next snowfall arrives.
Now, go out there and conquer the snow! Enjoy the convenience and efficiency of using a snow blower to keep your driveway clear and your winters worry-free.
(Word count: 317)
Frequently Asked Questions about How To Snow Blow A Driveway
Was this page helpful?
At Storables.com, we guarantee accurate and reliable information. Our content, validated by Expert Board Contributors, is crafted following stringent Editorial Policies. We're committed to providing you with well-researched, expert-backed insights for all your informational needs.


0 thoughts on “How To Snow Blow A Driveway”