Articles
How To Clean A Fireplace Chimney
Modified: October 22, 2024
Learn how to clean your fireplace chimney effectively with these informative articles. From step-by-step guides to expert tips, get the knowledge you need to maintain a safe and efficient fireplace.
(Many of the links in this article redirect to a specific reviewed product. Your purchase of these products through affiliate links helps to generate commission for Storables.com, at no extra cost. Learn more)
Introduction
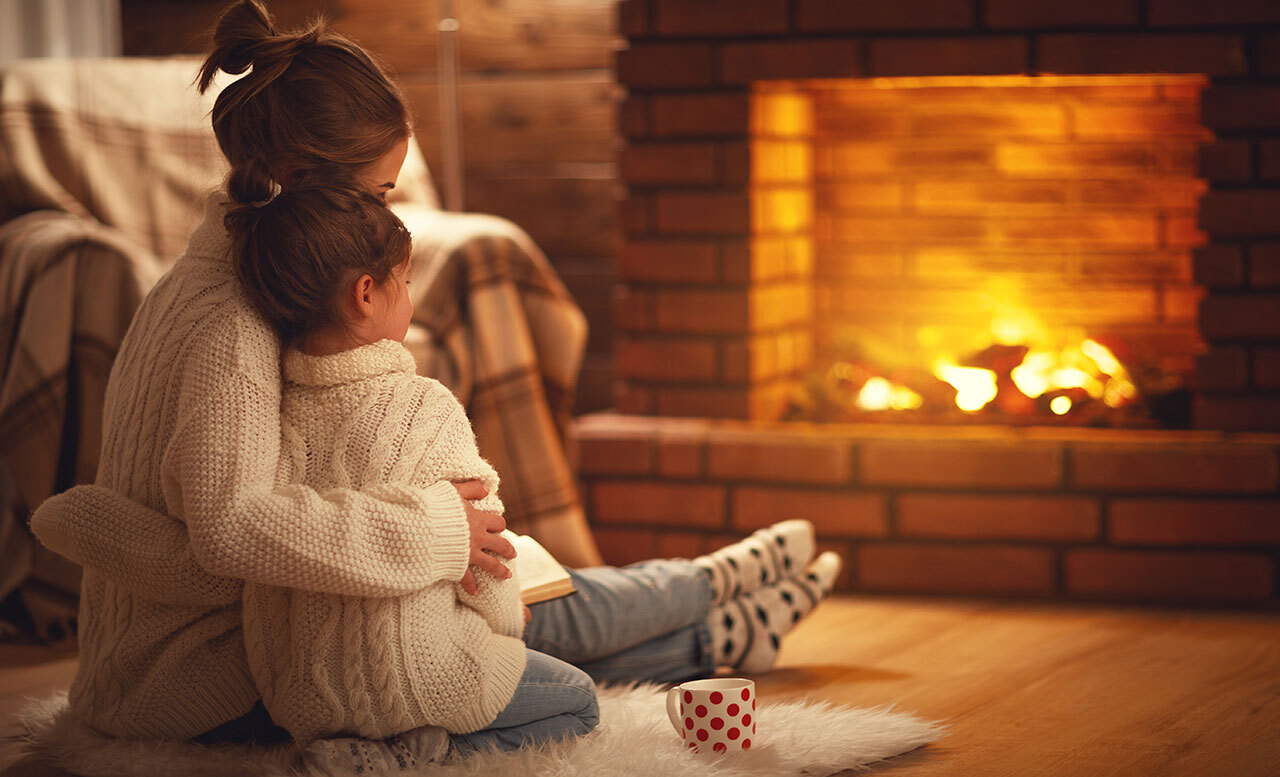
Welcome to our guide on how to clean a fireplace chimney. A fireplace is a cozy addition to any home, providing warmth and ambiance during the colder months. However, regular maintenance is essential to ensure its optimal performance and safety.
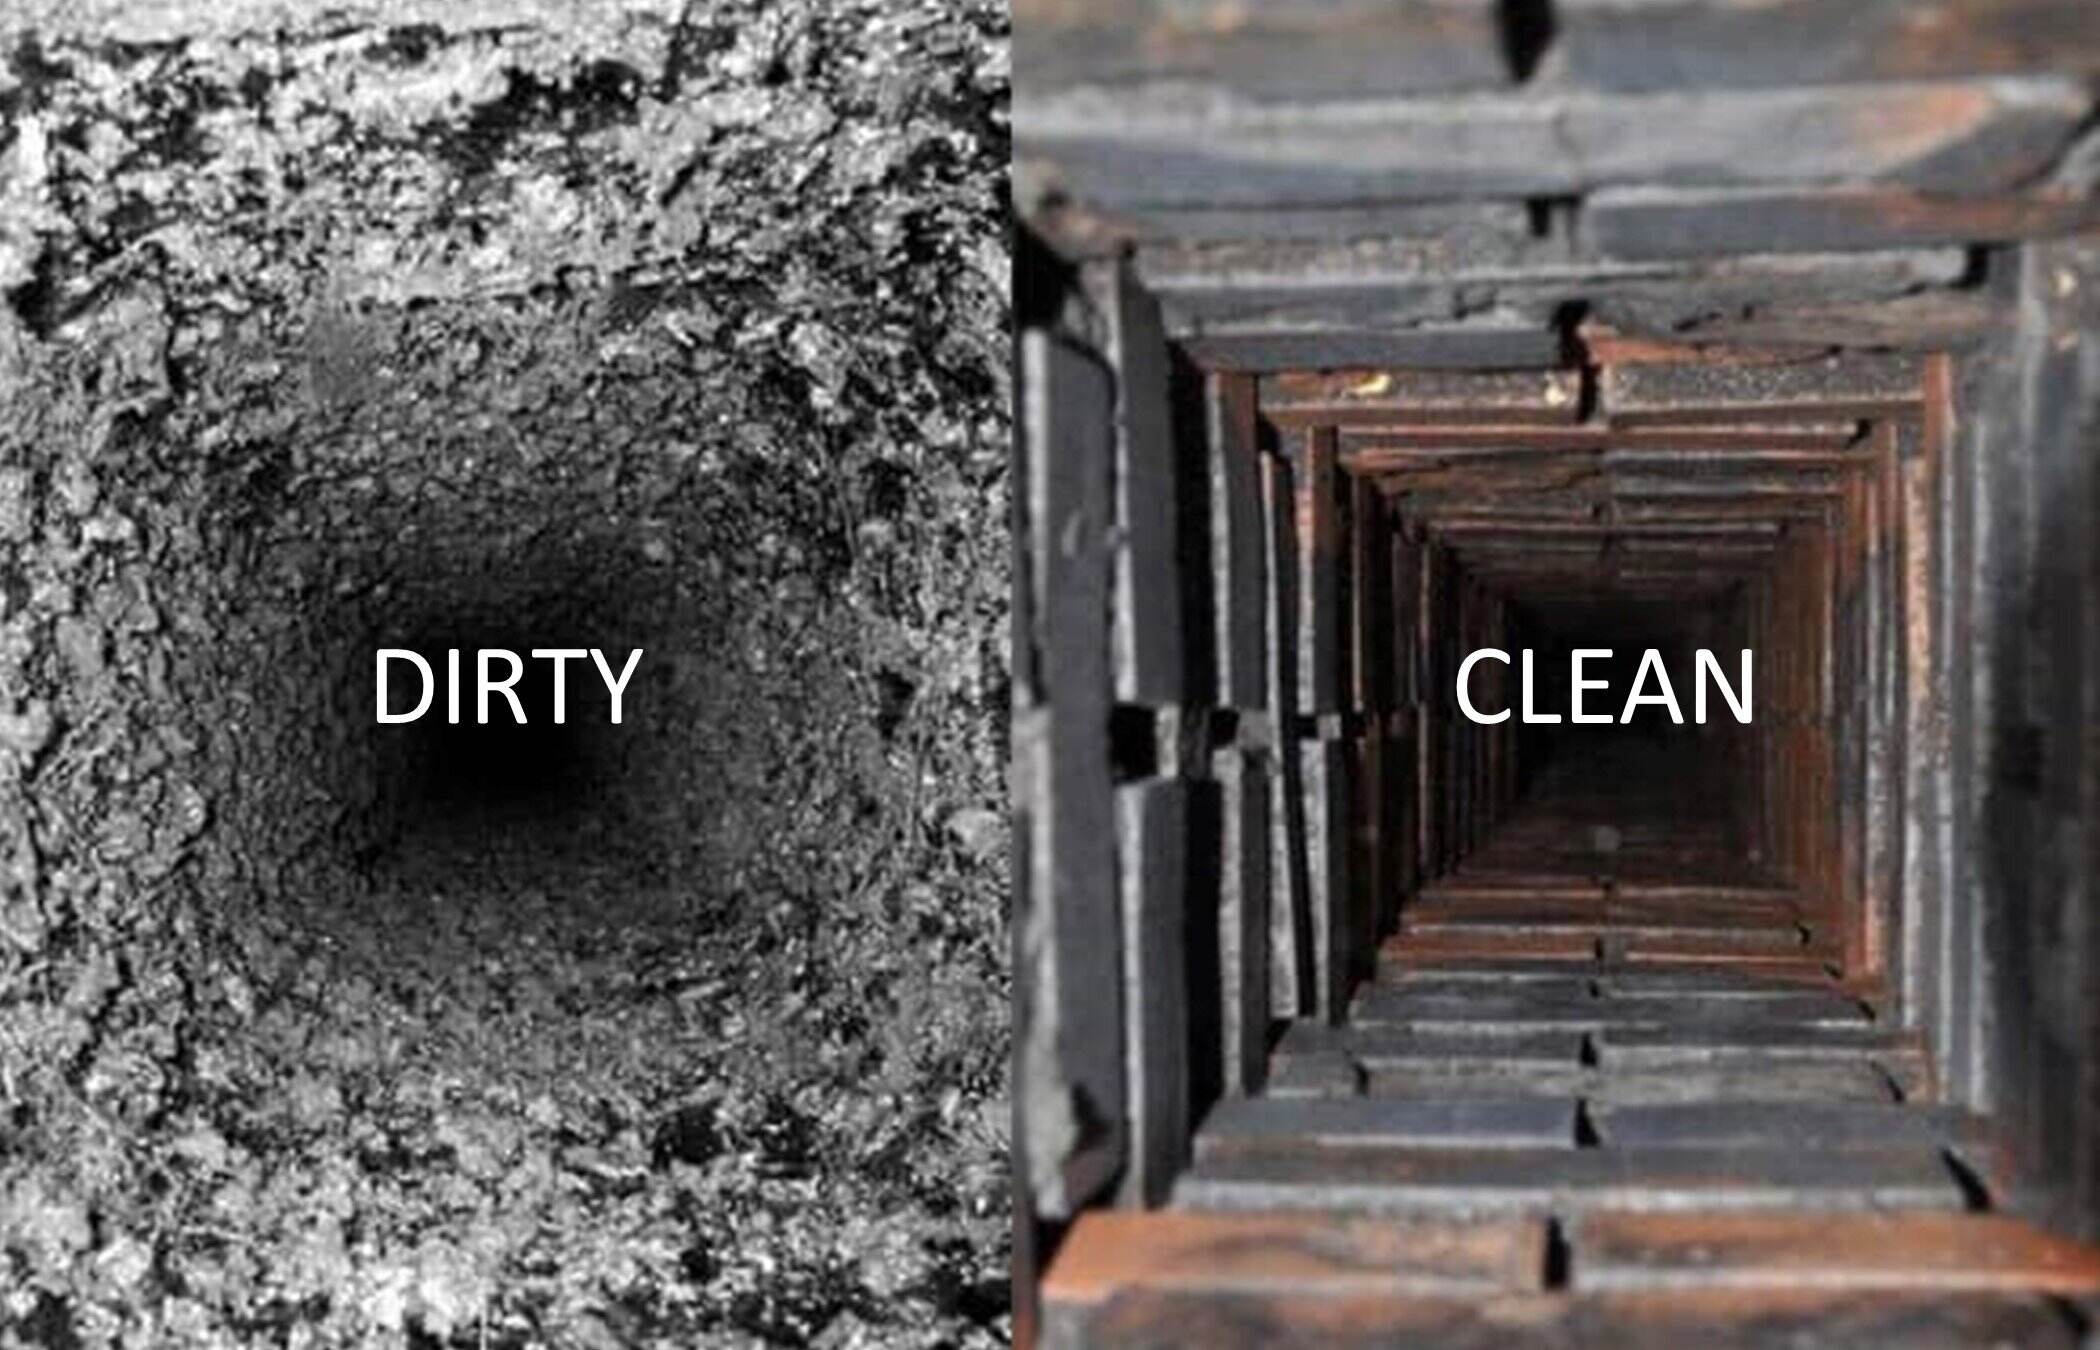
One crucial aspect of fireplace maintenance is cleaning the chimney. Over time, soot, creosote, and debris can accumulate in the chimney, posing a potential fire hazard and reducing its efficiency. A dirty chimney can also lead to poor indoor air quality and unpleasant odors.
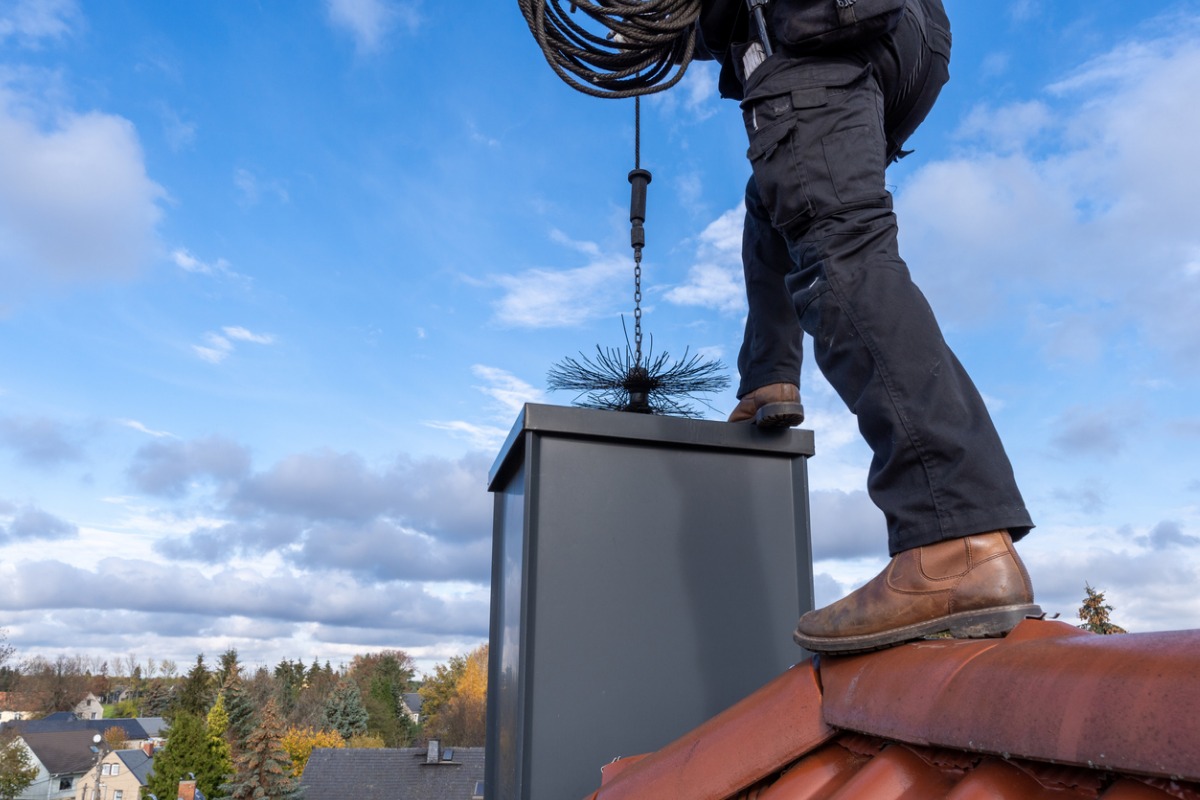
In this comprehensive guide, we will take you through the step-by-step process of cleaning your fireplace chimney. Before we begin, it’s important to note that chimney cleaning can be a challenging task and may require climbing onto the roof. If you are uncomfortable or unsure about performing this task, it’s best to seek professional help.
Before tackling the cleaning process, we’ll go over some important safety precautions to ensure you can clean your chimney with confidence. So let’s get started on this essential maintenance task and keep your fireplace functioning safely and efficiently.
Key Takeaways:
- Regular chimney cleaning is crucial for safety, efficiency, and indoor air quality. Prioritize safety, gather supplies, and follow the step-by-step process for a cozy and safe fireplace experience.
- Inspect for damage, reassemble, and test the fireplace after cleaning. Regular maintenance ensures a well-functioning fireplace for a cozy home atmosphere.
Read more: How Often To Clean Gas Fireplace Chimney
Safety Precautions
Before you begin cleaning your fireplace chimney, it’s crucial to prioritize safety. Chimney cleaning can be a hazardous task, especially if you’re not familiar with working at heights or handling potentially harmful substances. Here are some important safety precautions to keep in mind:
- Protective Gear: Always wear protective gear such as safety goggles, gloves, and a dust mask to shield yourself from soot, creosote, and other debris.
- Sturdy Ladder: If you need to access the chimney from the roof, ensure you have a sturdy ladder that is securely positioned. Consider having someone assist you by holding the ladder to provide added stability.
- Fire Extinguisher: Keep a fire extinguisher nearby in case of any accidental fires that may occur while cleaning.
- Well-Ventilated Area: Ensure the area around the fireplace is well-ventilated by opening windows and doors to allow for proper air circulation and prevent the buildup of toxic gases.
- Check for Animals: Before cleaning, check for any signs of birds, squirrels, or other animals that may have made nests in the chimney. In this case, it’s best to contact a professional chimney sweep to handle the situation.
- Turn Off Appliances: Before starting the cleaning process, make sure that all appliances connected to the chimney, such as gas or wood-burning stoves, are turned off and properly cooled down.
- Notify Others: Inform family members or occupants of the house about the cleaning process to avoid any accidents or confusion.
Remember, if you’re not confident in your ability to clean the chimney safely, it’s always best to hire a professional chimney sweep who has the necessary expertise and equipment to complete the job.
With these safety precautions in mind, you’re now ready to gather the necessary supplies and begin cleaning your fireplace chimney.
Gather Necessary Supplies
Before you start cleaning your fireplace chimney, it’s essential to gather all the necessary supplies. Having the right tools at hand will make the process smoother and more efficient. Here are the supplies you will need:
- Chimney Brush: Invest in a chimney brush that matches the size and shape of your chimney flue. The brush should have sturdy bristles to effectively remove soot and creosote buildup.
- Chimney Rods: Get chimney rods that are compatible with your chimney brush. These rods allow you to extend and maneuver the brush to reach different parts of the chimney.
- Dust Sheet or Plastic Tarp: Protect the area around the fireplace by covering it with a dust sheet or plastic tarp to catch any soot or debris that may fall during the cleaning process.
- Vacuum Cleaner with a HEPA Filter: Use a vacuum cleaner with a high-efficiency particulate air (HEPA) filter to clean up loose soot and debris. This will help prevent it from spreading into the air or being inhaled.
- Broom and Dustpan: Have a broom and dustpan readily available to sweep up any larger debris that may accumulate during the cleaning process.
- Protective Gear: As mentioned earlier, wear protective gear such as safety goggles, gloves, and a dust mask to protect yourself from soot and other potentially harmful substances.
- Flashlight: Use a flashlight to inspect the chimney interior and identify any areas that require special attention or repairs.
- Drop Cloth: If you are cleaning the fireplace interior as well, consider using a drop cloth to protect the surrounding area from any dirt or debris.
- Bucket and Cleaning Solution: Depending on the state of your fireplace interior, you may need a bucket and a suitable cleaning solution to remove stubborn stains or residue.
Once you have gathered all the necessary supplies, you are well-prepared to tackle the cleaning process. Make sure to double-check that you have everything you need before starting to save time and effort.
Now that you have the supplies ready, it’s time to prepare the fireplace for the cleaning process.
Preparing the Fireplace
Before diving into the chimney cleaning process, it’s important to properly prepare the fireplace to ensure a smooth and effective cleaning. Follow these steps to prepare the fireplace:
- Remove Ashes: Start by removing any remaining ashes and debris from the fireplace. Use a handheld shovel or ash bucket to scoop out the ashes and dispose of them safely.
- Clear the Surrounding Area: Clear the area around the fireplace, removing any furniture, rugs, or other objects that could get in the way during the cleaning process.
- Close the Damper: Close the fireplace damper to prevent any debris or cleaning solutions from falling into the room. The damper is usually located above the firebox or inside the chimney flue.
- Protect the Interior: If you are concerned about the interior of the fireplace getting dirty during the chimney cleaning, consider using a drop cloth or plastic sheet to cover the firebox area.
- Open Windows: To ensure proper ventilation during the cleaning process, open windows in the room or nearby to allow fresh air to circulate and prevent the buildup of fumes or odors.
By following these preparation steps, you can set the stage for a successful and efficient chimney cleaning process. Now that the fireplace is prepared, it’s time to move on to the next important step: removing soot and creosote from the chimney.
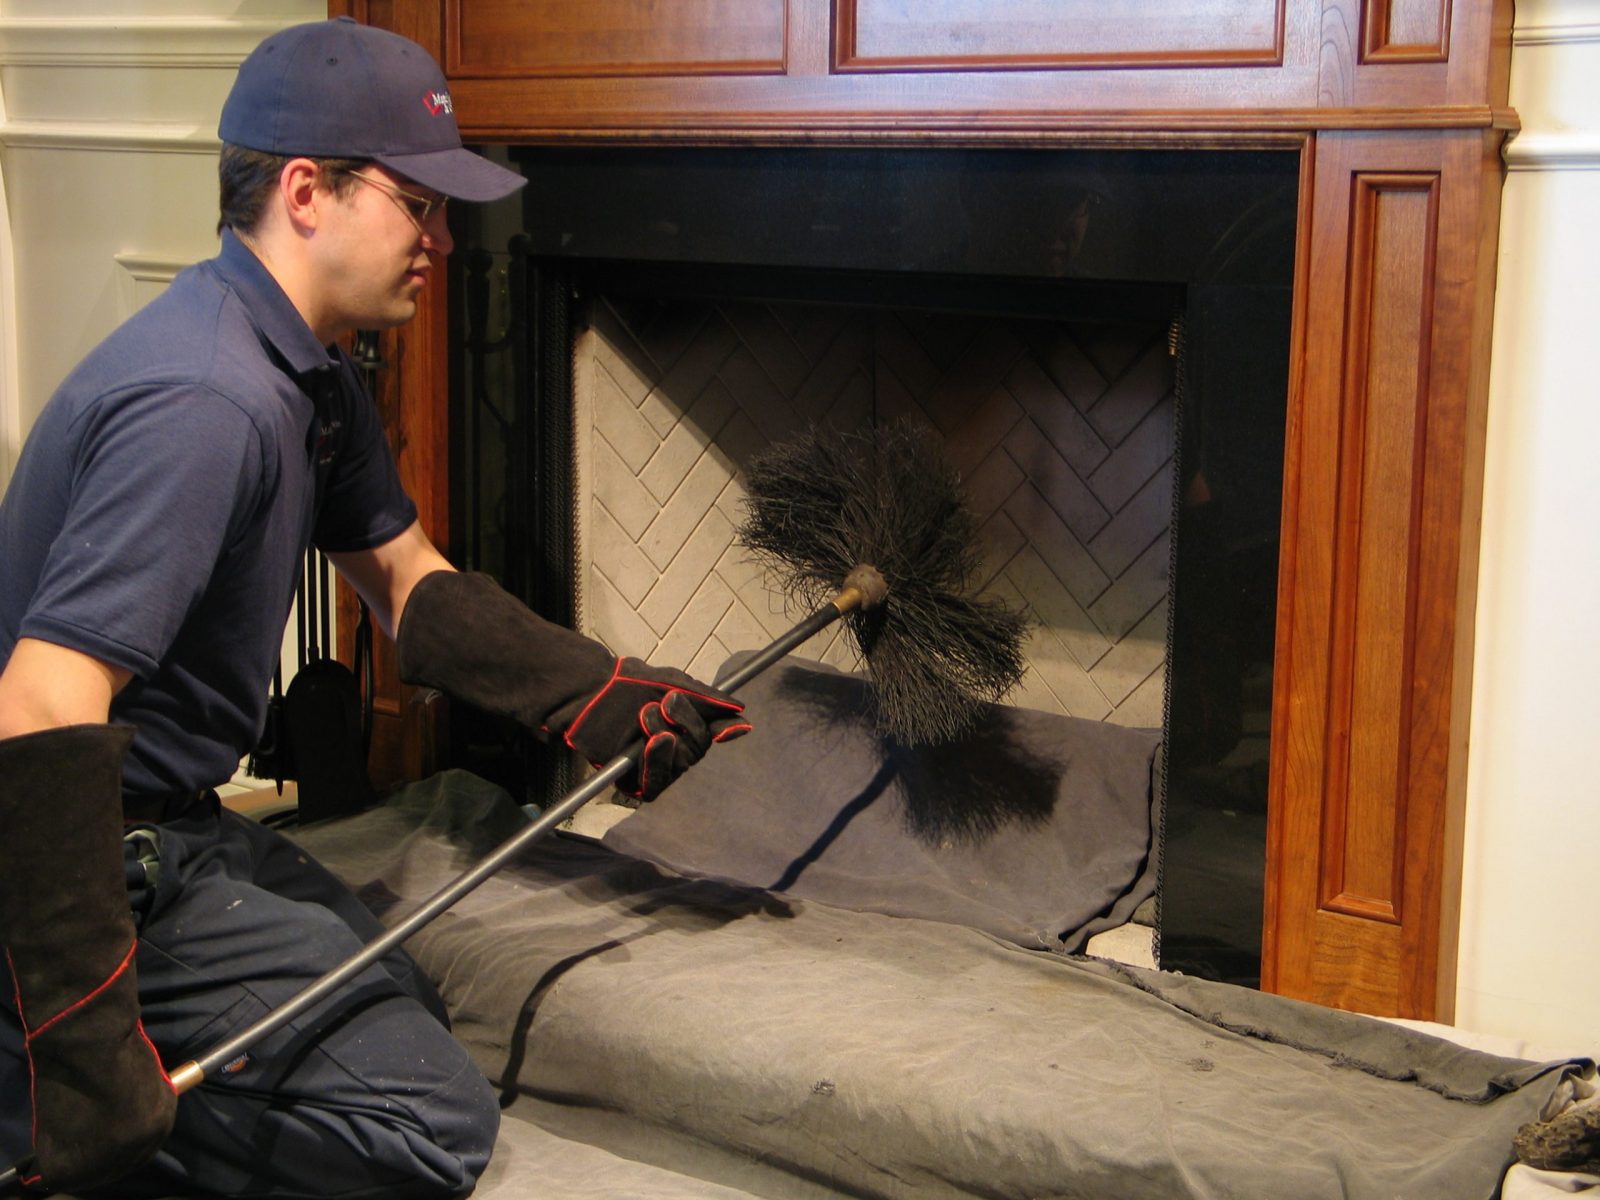
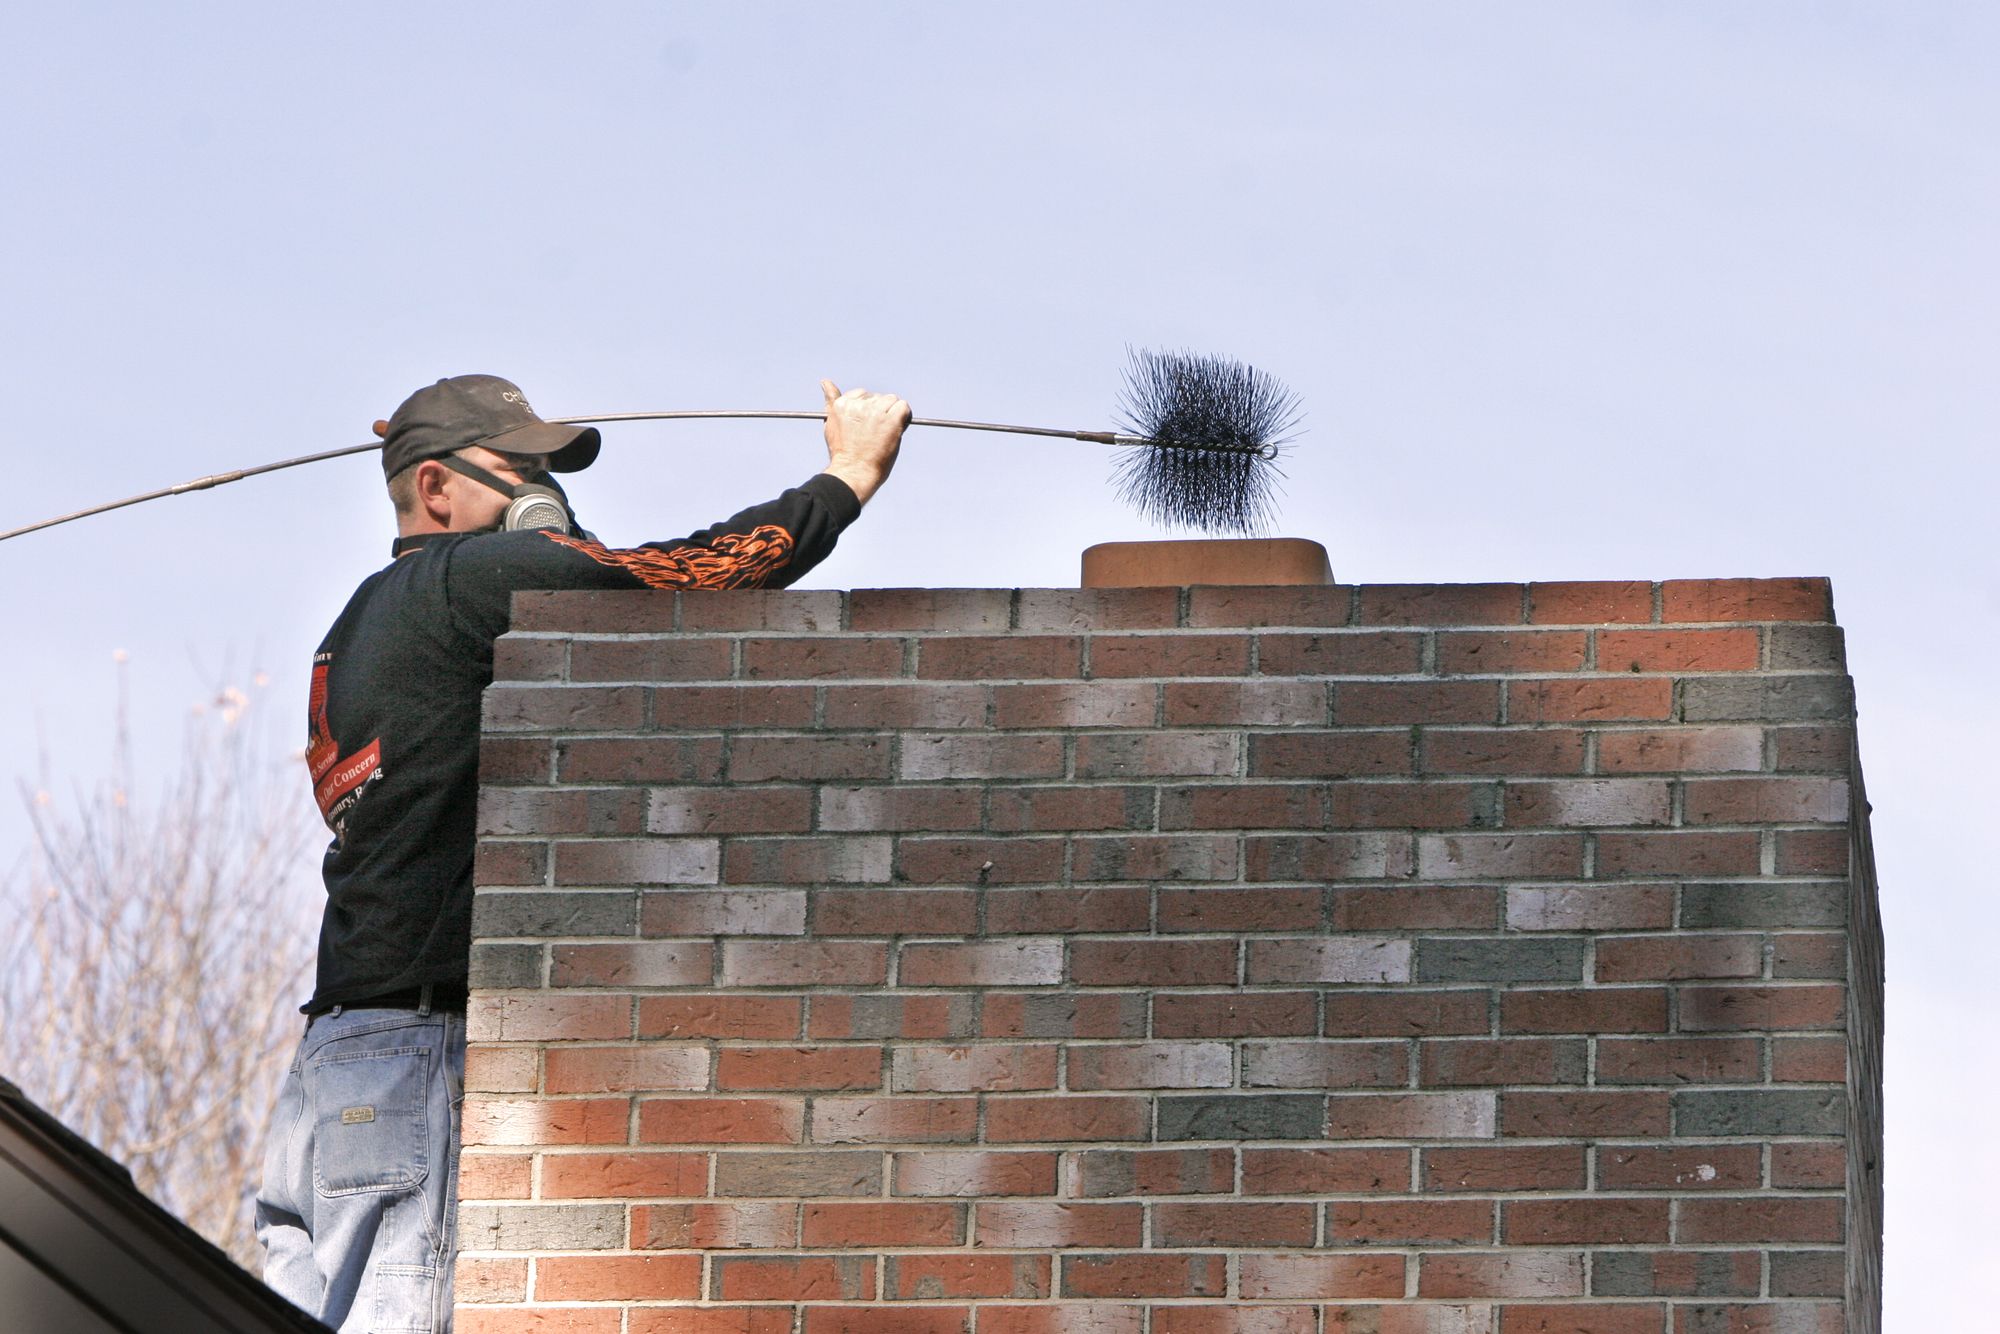
Removing Soot and Creosote
The buildup of soot and creosote inside your chimney is not only unsightly but also poses a fire hazard. This step of the chimney cleaning process focuses on removing these substances to ensure a clear and safe chimney. Follow these steps to effectively remove soot and creosote:
- Put on Protective Gear: Before starting the cleaning process, make sure to put on your safety goggles, gloves, and dust mask to protect yourself from soot and any potentially harmful particles.
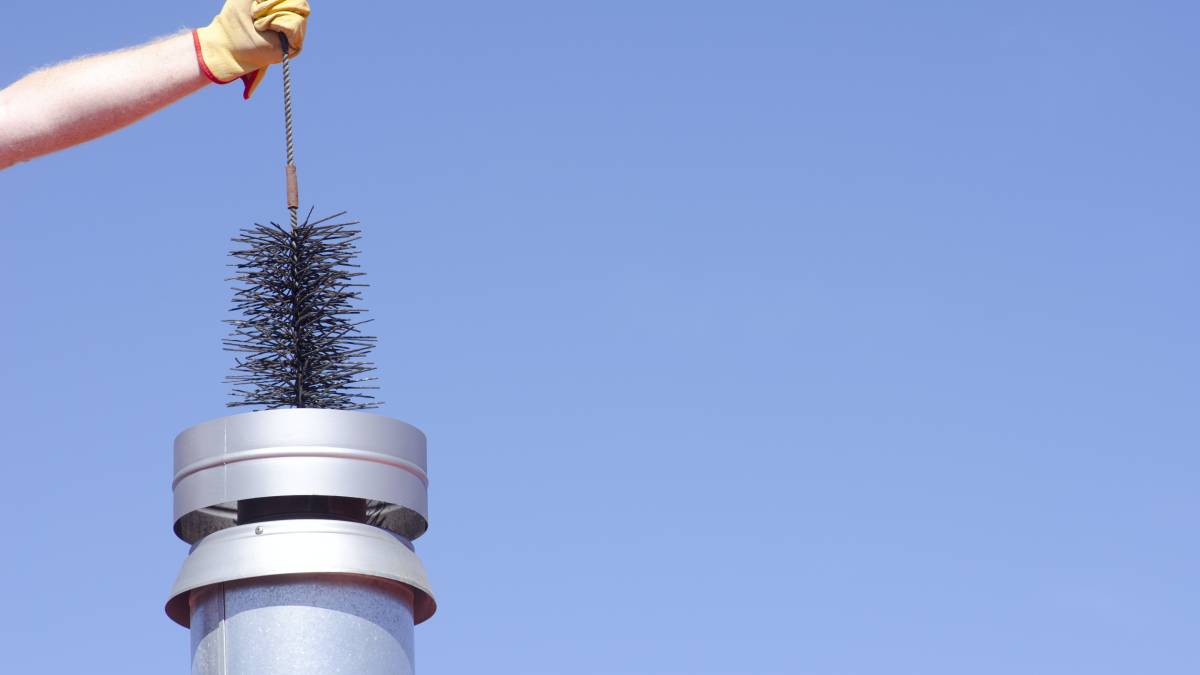
- Attach the Chimney Brush to the Rods: Take your chimney brush and attach it securely to the chimney rods. Make sure the brush fits snugly in the flue opening.
- Scrub Inside the Chimney: Begin by inserting the chimney brush into the flue opening and scrubbing the walls of the chimney. Use a firm but gentle back-and-forth motion, making sure to cover the entire surface area.
- Extend the Rods: As you scrub, extend the chimney rods for better reach and coverage. Add additional rods as necessary to ensure you can reach the full length of the chimney.
- Work from Top to Bottom: For optimal cleaning, start from the top of the chimney and gradually work your way down. This allows the debris to fall to the bottom, making it easier to clean up later.
- Continue Scrubbing: Repeat the scrubbing motion several times, focusing on areas with heavier buildup. Be thorough in your cleaning but avoid using excessive force that may damage the chimney walls.
- Dispose of Debris: As you clean, the debris and soot will fall into the fireplace or flue opening. Take breaks periodically to remove this buildup and dispose of it safely.
During the cleaning process, it’s normal for some dust or debris to fall into the fireplace or room. To minimize mess, place a dust sheet or plastic tarp beneath the chimney opening to catch any falling particles.
Once you have thoroughly scrubbed the chimney walls and removed the majority of the soot and creosote buildup, it’s time to move on to cleaning the chimney flue.
Regularly inspect and clean your fireplace chimney to remove built-up soot and creosote, which can cause chimney fires. Hire a professional chimney sweep if needed.
Read more: How To Build A Fireplace Chimney
Cleaning the Chimney Flue
The chimney flue is a crucial part of the chimney system, responsible for drawing out smoke and gases from the fireplace. Keeping the flue clean is essential for proper ventilation and preventing blockages. Follow these steps to clean the chimney flue:
- Inspect the Flue: Use a flashlight to inspect the chimney flue and check for any visible blockages or obstructions. Look for signs of nests, debris, or excessive creosote buildup that may impede airflow.
- Attach a Brush to Rods: Select a chimney brush that matches the size and shape of your chimney flue. Attach it securely to the chimney rods, ensuring a tight fit.
- Insert the Brush into the Flue: Carefully insert the brush into the chimney flue, making sure it reaches the bottom. Slowly rotate the brush to clean the flue walls, removing any residue or blockages.
- Scrub in a Circular Motion: Use a circular scrubbing motion as you move the brush up and down the flue. This motion helps ensure thorough cleaning of the flue walls.
- Extend the Rods: If necessary, extend the chimney rods to reach the full length of the flue. Adjust the rods as needed to cover the entire surface area.
- Remove the Brush: Once you have thoroughly cleaned the flue, carefully remove the brush from the flue opening. Be cautious not to dislodge any debris that may have accumulated.
After cleaning the chimney flue, it’s important to inspect the chimney for any signs of damage or wear. Move on to the next step to ensure the structural integrity of your chimney.
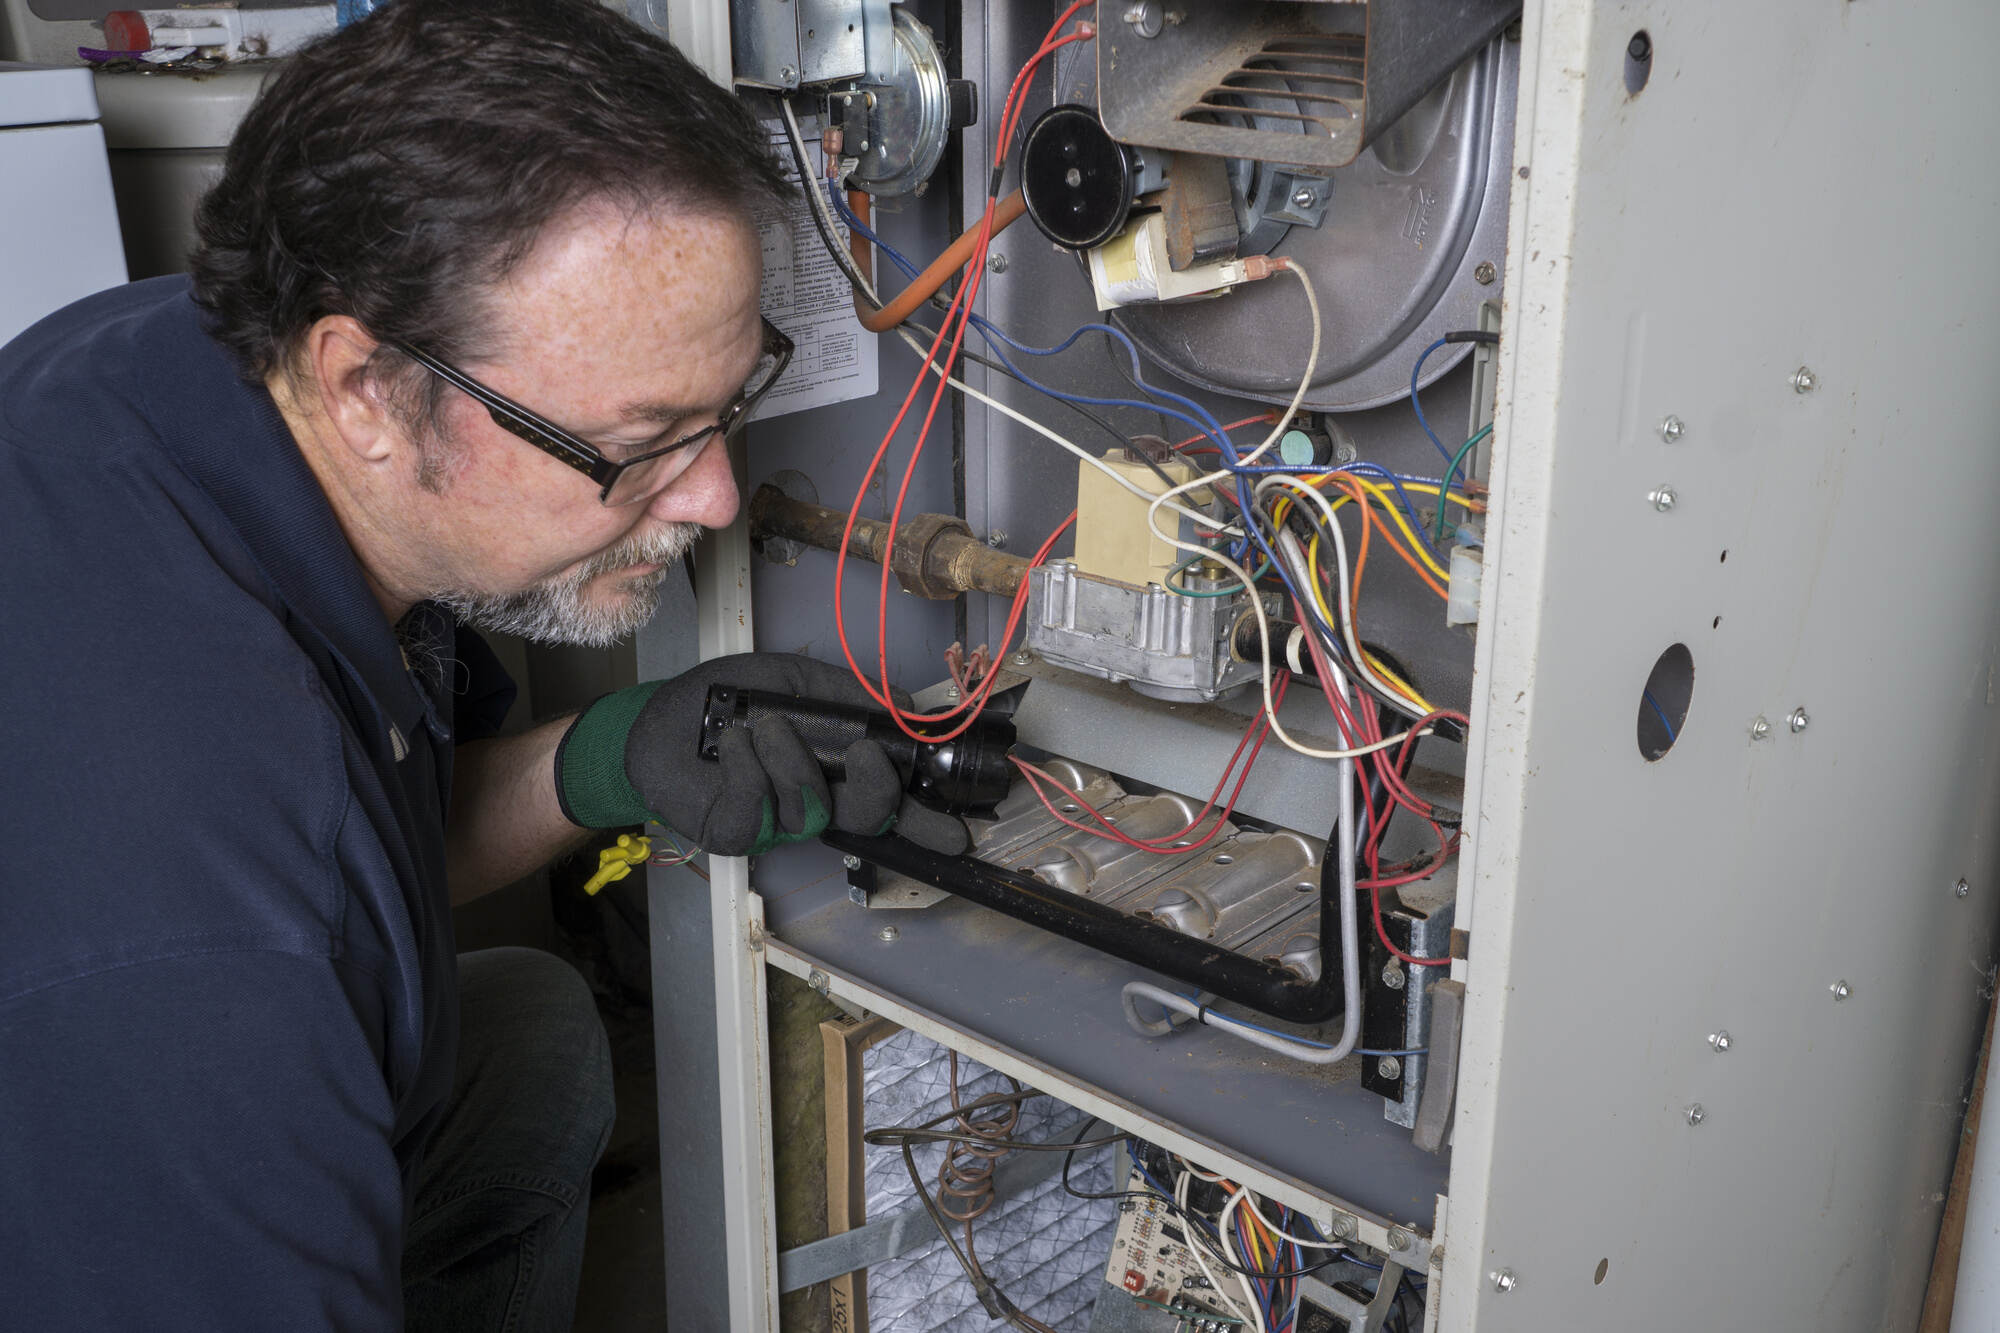
Inspecting for Damage
Inspecting your chimney for damage is a crucial step in the chimney cleaning process. It allows you to identify and address any potential issues before they escalate into more significant problems. Follow these steps to conduct a thorough inspection:
- Examine the Interior: Use a flashlight to carefully inspect the interior of the chimney. Check for any signs of cracks, crumbling mortar, or loose bricks. Pay special attention to the area around the flue opening and the chimney crown.
- Look for Signs of Water Damage: Water damage can lead to structural issues and compromise the integrity of your chimney. Look for staining, peeling paint, or moisture spots that indicate water penetration.
- Check the Chimney Cap: Inspect the chimney cap or spark arrestor for any damage or signs of corrosion. Ensure that it is securely fastened and in good condition to prevent debris, animals, or rainwater from entering the chimney.
- Examine the Chimney Crown: Inspect the chimney crown – the cement or concrete top of the chimney. Look for cracks, deterioration, or signs of water damage. A damaged chimney crown can lead to water entering the chimney and causing further issues.
- Inspect the Flashing: Check the flashing around the base of the chimney where it meets the roof. Look for areas where the flashing may be loose, damaged, or improperly installed. Proper flashing is crucial to prevent water leaks.
- Assess the Chimney Liner: If your chimney has a liner, inspect it for any cracks, deterioration, or signs of damage. A damaged liner can affect the safety and efficiency of your chimney.
If you notice any significant damage or are uncertain about the condition of your chimney, it’s recommended to consult a professional chimney inspector or mason. They can provide a thorough assessment and recommend any necessary repairs.
After completing the inspection and addressing any damage or repairs, it’s time to reassemble the fireplace and perform a final test.
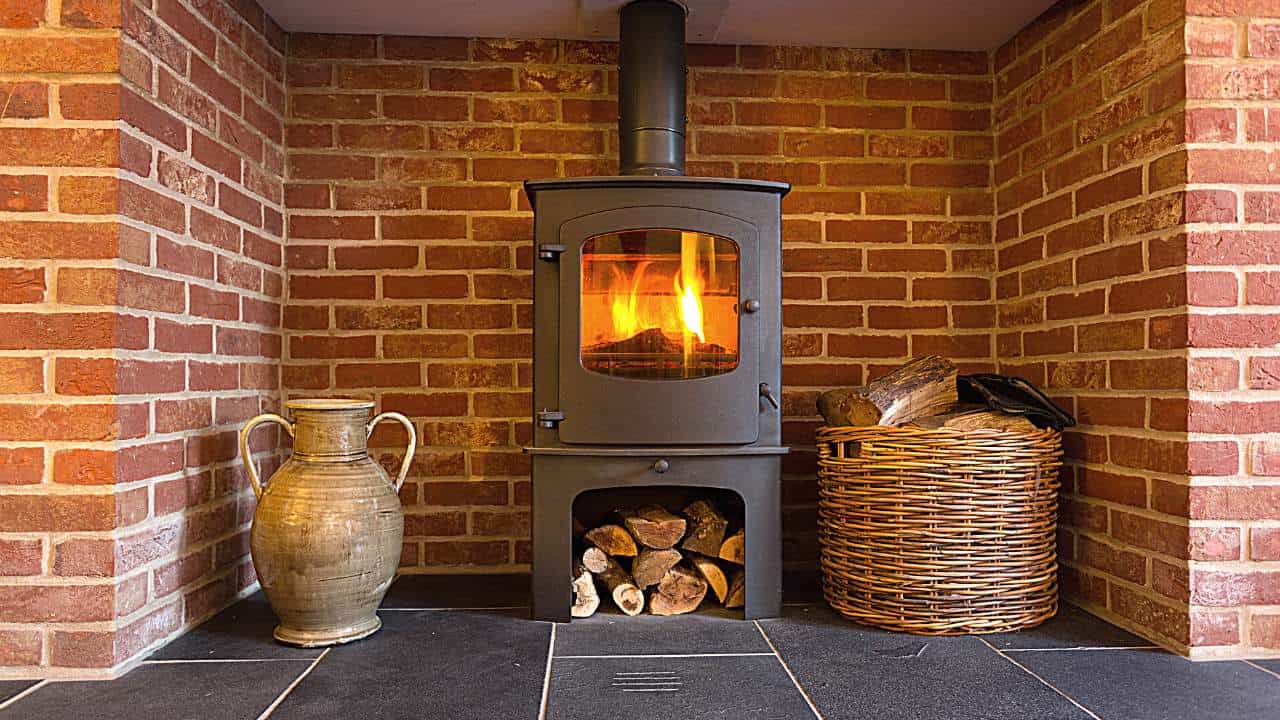
Reassembling and Testing the Fireplace
Once you have completed the chimney cleaning and addressed any necessary repairs, it’s time to reassemble the fireplace and ensure everything is functioning properly. Follow these steps to reassemble and test the fireplace:
- Replace the Chimney Cap: If you removed the chimney cap during the cleaning process, make sure to securely replace it. Ensure that it is properly fastened to keep out debris, animals, and rainwater.
- Clean the Fireplace Interior: If you decided to clean the interior of the fireplace, now is the time to remove the drop cloth or plastic sheet and clean up any remaining dust or debris. Use a vacuum cleaner or broom and dustpan to remove any loose particles.
- Clear the Firebox: Before testing the fireplace, remove any cleaning tools or equipment from the firebox area. Ensure it is clear of any obstructions that could interfere with the proper functioning of the fireplace.
- Open the Damper: Before starting a fire, make sure to fully open the fireplace damper to allow for proper airflow and ventilation.
- Prepare Firewood: Gather dry, seasoned firewood that is suitable for burning. Avoid using damp or unseasoned wood, as it can lead to poor combustion and increased creosote buildup.
- Light a Small Test Fire: Start by lighting a small test fire to assess the draft and ensure the airflow is functioning correctly. Observe the smoke as it rises and exits the chimney to ensure there are no signs of backdraft or poor ventilation.
- Monitor for Proper Operation: As the test fire burns, monitor the fireplace for any unusual odors, excessive smoke, or signs of poor combustion. The fire should burn evenly and create a steady draft up the chimney.
If you notice any issues during the testing phase, such as a weak draft or persistent smoke, it’s advisable to contact a professional chimney sweep or fireplace technician for further assessment. They can help diagnose and address any underlying problems to ensure your fireplace operates safely and efficiently.
With the reassembling and testing complete, you have successfully cleaned and restored your fireplace chimney. Regular maintenance and cleaning will help prolong the lifespan of your chimney and ensure a cozy and safe fireplace experience for years to come.
Conclusion
Cleaning your fireplace chimney is an essential task to maintain its safety, efficiency, and longevity. Regular maintenance and proper cleaning help prevent the buildup of soot, creosote, and debris that can pose fire hazards and compromise indoor air quality. By following the step-by-step process outlined in this guide, you can effectively clean your fireplace chimney and ensure its optimal performance.
Remember to always prioritize safety by wearing protective gear, using a sturdy ladder when needed, and working in a well-ventilated area. If you are uncomfortable or unsure about performing chimney cleaning yourself, it is wise to seek the assistance of a professional chimney sweep.
Gathering the necessary supplies, preparing the fireplace, removing soot and creosote, cleaning the chimney flue, and inspecting for damage are all crucial steps in the chimney cleaning process. By diligently carrying out these steps, you can maintain a clean and safe chimney for cozy fires and a pleasant home environment.
After reassembling the fireplace and conducting a final test, you can enjoy the warmth and comfort of your fireplace with confidence. Remember to regularly schedule chimney cleanings to keep your fireplace in peak condition and to address any potential issues before they escalate.
Stay proactive in maintaining your chimney, and you’ll continue to enjoy the benefits of a well-functioning fireplace for years to come. So go ahead, ensure the cleanliness and safety of your chimney, and embrace the cozy atmosphere it brings to your home.
Frequently Asked Questions about How To Clean A Fireplace Chimney
Was this page helpful?
At Storables.com, we guarantee accurate and reliable information. Our content, validated by Expert Board Contributors, is crafted following stringent Editorial Policies. We're committed to providing you with well-researched, expert-backed insights for all your informational needs.


0 thoughts on “How To Clean A Fireplace Chimney”