
Articles
How To Build Outdoor Fireplace With Chimney
Modified: February 24, 2024
Learn how to build an outdoor fireplace with chimney through step-by-step articles. Enhance your outdoor living space with this practical DIY project.
(Many of the links in this article redirect to a specific reviewed product. Your purchase of these products through affiliate links helps to generate commission for Storables.com, at no extra cost. Learn more)
Introduction
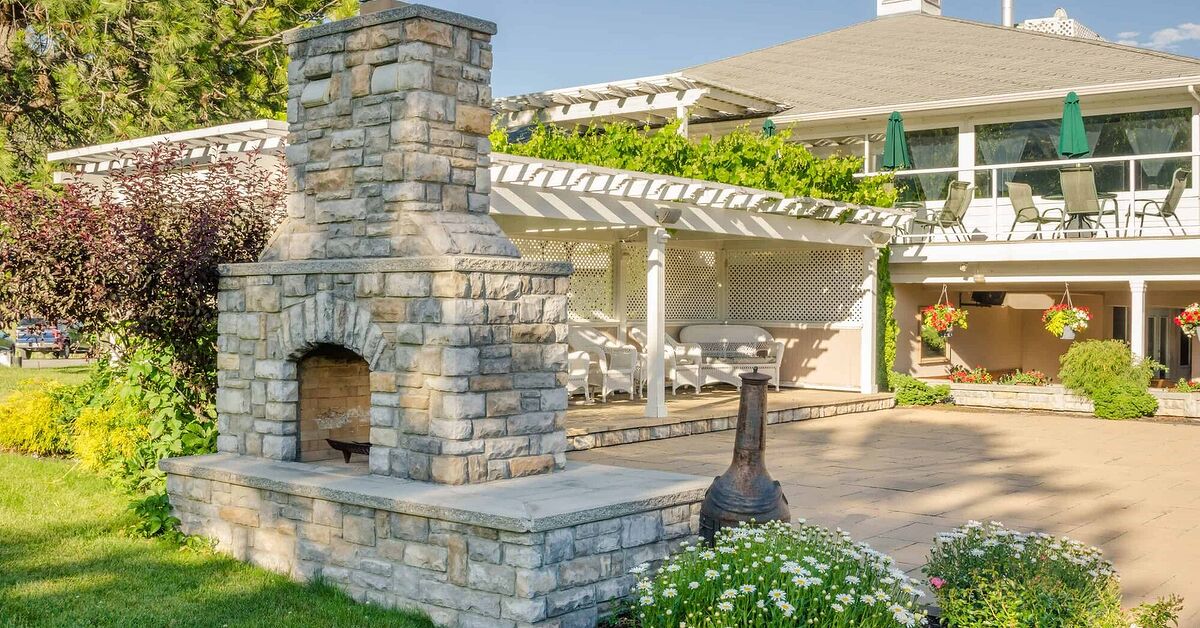
Building an outdoor fireplace with a chimney can transform your backyard into a cozy and inviting space for gatherings and relaxation. Whether you’re planning to entertain guests or simply enjoy a quiet evening by the fire, a well-designed outdoor fireplace can provide warmth, ambiance, and a focal point for your outdoor living area.
However, constructing an outdoor fireplace with a chimney requires proper planning, materials, and careful execution. In this article, we will provide you with a comprehensive guide on how to build an outdoor fireplace with a chimney, step by step.
If you’re ready to embark on this exciting DIY project, let’s get started!
Key Takeaways:
- Planning, permits, and safety are crucial for building an outdoor fireplace with a chimney. Consider purpose, local regulations, and safety measures to ensure a successful and safe construction process.
- From selecting the location to adding finishing touches, building an outdoor fireplace requires meticulous attention to detail and adherence to safety precautions. Enjoy the warmth and ambiance responsibly for lasting memories.
Read more: How To Build A Fireplace Chimney
Step 1: Planning and Permits
Before you start building your outdoor fireplace with a chimney, it’s essential to carefully plan the project and obtain any necessary permits. Planning ensures that you have a clear vision of what you want to achieve, while permits guarantee that your construction adheres to local building codes and regulations.
Here are the key steps to follow:
1. Determine the purpose: Consider how you intend to use the outdoor fireplace. Will it be primarily for ambiance or cooking? This will influence the size, design, and placement of the fireplace.
2. Research local regulations: Contact your local municipality or building department to inquire about any permits required for building an outdoor fireplace. They will provide you with specific guidelines and information related to setbacks, height restrictions, and safety measures.
3. Design and layout: Sketch out your fireplace design, incorporating measurements and dimensions. Consider the overall aesthetics, materials, and functionality. You may also want to consult with a professional designer or architect for expert advice.
4. Materials and budget: Create a list of materials needed for the project, including bricks, mortar, firebox, chimney flue, and any other accessories. Estimate the overall cost to ensure it fits within your budget.
5. Safety considerations: Familiarize yourself with fire safety regulations and precautions. Ensure that your outdoor fireplace location is away from flammable materials, easily accessible to escape routes, and equipped with proper ventilation.
6. Gather references and inspiration: Look for inspiration online or in magazines. Collect images or designs that resonate with your vision to help convey your ideas to contractors or suppliers.
7. Obtain necessary permits: Once you have a detailed plan, submit your building permit application to the appropriate authority. Ensure you provide all the necessary documents, including architectural drawings, engineering reports, and project descriptions.
By thoroughly planning and securing the required permits, you’ll lay a solid foundation for a successful outdoor fireplace project. It’s crucial to abide by regulations to guarantee the safety and longevity of your structure. With this groundwork in place, you can now move on to selecting the perfect location for your outdoor fireplace.
Note: Remember to check the HTML encoding to ensure it’s valid.
Step 2: Choosing the Location
Once you have obtained the necessary permits, it’s time to select the ideal location for your outdoor fireplace with a chimney. The location should not only enhance the overall aesthetic appeal of your backyard but also consider safety, functionality, and ease of use.
Here are some factors to consider when choosing the location:
1. Safety: Ensure that the location is a safe distance away from any flammable structures, trees, or shrubs. Leave enough space for proper ventilation and to prevent smoke from entering your home or neighboring properties.
2. Wind direction: Consider prevailing wind patterns in your area. Choosing a location that is sheltered from strong winds will prevent smoke from blowing excessively towards your seating area.
3. Accessibility: The area surrounding your outdoor fireplace should be easily accessible. You’ll want to have enough space for seating, walking, and gathering around the fire.
4. Views and focal point: Think about how your outdoor fireplace will enhance your backyard’s overall aesthetics. Consider the views you want to enjoy while sitting around the fire and ensure that the fireplace becomes a focal point of your outdoor living area.
5. Privacy: If privacy is a concern, choose a location that is shielded from the view of neighboring properties.
6. Clearance requirements: Be mindful of any clearance requirements specified in local building codes. This includes both horizontal and vertical clearances to ensure safe operation and prevent fire hazards.
7. Ground stability: Ensure that the ground where the outdoor fireplace will be located is stable and level. Avoid areas prone to flooding or with poor drainage.
8. Firewood storage: If you plan on incorporating a firewood storage area, consider a location near the fireplace that is easily accessible and protected from the elements.
Remember to consult with professionals or experienced builders for site assessments before finalizing the location. They can help ensure that your chosen spot meets all the necessary requirements for a safe and efficient outdoor fireplace.
Once you’ve selected the perfect location, you’re ready to gather the materials and tools needed for the construction process. This will be covered in the next step of our guide.
Step 3: Gathering Materials and Tools
Before you begin building your outdoor fireplace with a chimney, it’s important to gather all the necessary materials and tools. Having everything on hand will streamline the construction process and prevent delays. Here’s a list of the essential materials and tools you’ll need:
Materials:
- Firebrick: These are heat-resistant bricks specially designed for fireplace construction.
- Standard bricks or stone: These will be used for the exterior facing of the fireplace.
- Mortar: Choose a high-temperature mortar suitable for outdoor fireplaces.
- Firebox: This is the enclosure where the fire will burn. It can be made of steel, cast iron, or masonry.
- Chimney flue liner: The flue liner provides ventilation and directs smoke out of the fireplace. It can be clay, metal, or stainless steel.
- Reinforcement bars and wire mesh: These will be used for added stability and strength in the foundation and chimney.
- Cement mix: You’ll need cement to mix with the mortar for structural support.
- Gravel and sand: These materials will be used for the foundation and base of the fireplace.
- Facing materials: Depending on your design, you may need additional stone, tile, or decorative elements to enhance the appearance of the fireplace.
Read more: How To Build A Stone Fireplace And Chimney
Tools:
- Masonry saw: This tool is used to cut bricks or stones to size.
- Trowel: You’ll need a trowel for applying mortar and spreading it evenly.
- Level: A level is essential for ensuring that your fireplace is straight and level during construction.
- Measuring tape: This will help you measure and mark accurate dimensions for the fireplace.
- Hammer and chisel: These tools are used for shaping and cutting bricks or stones.
- Wheelbarrow: You’ll need a wheelbarrow to mix mortar and transport materials.
- Safety gear: Don’t forget to wear safety goggles, gloves, and a dust mask to protect yourself during construction.
Make a checklist of all the materials and tools needed and ensure that you have everything before starting the construction process. If necessary, consult with a professional or visit a local home improvement store to ensure you’re purchasing the right materials for your outdoor fireplace.
With everything prepared, you’re now ready to move on to the next step: preparing the foundation. This will provide a stable base for your outdoor fireplace and ensure its longevity and durability.
Step 4: Preparing the Foundation
The foundation is a crucial element in the construction of your outdoor fireplace with a chimney. It provides stability, prevents settling, and ensures the longevity of your structure. Taking the time to properly prepare the foundation will create a solid base for the rest of the construction process. Here’s how to prepare the foundation:
1. Clear the area: Begin by clearing the chosen location of any debris, plants, or rocks. You want to create a clean and level surface for the foundation.
2. Mark the perimeter: Use marking spray paint or stakes and string to demarcate the perimeter of the fireplace. This will help you visualize the area and ensure accurate measurements.
3. Excavate the area: Dig a hole within the marked perimeter, ensuring a depth of at least 6-8 inches. The size of the excavation will depend on the dimensions of your outdoor fireplace and the desired depth of the foundation.
4. Level the excavation: Use a level to ensure that the bottom of the excavation is level and even. You may need to remove or add soil as necessary to achieve a flat surface.
5. Add a layer of gravel: Pour a layer of gravel or crushed stone into the excavation area. This will help with drainage and prevent moisture accumulation.
6. Compact the gravel: Use a tamper or handheld compactor to compact the gravel layer firmly. This will provide a stable base for the concrete foundation.
7. Install reinforcement bars: Place reinforcement bars or wire mesh within the excavation area to provide added strength to the foundation. Make sure they are evenly distributed throughout the space.
8. Mix and pour concrete: Follow the manufacturer’s instructions to mix the concrete. Pour the concrete into the excavation, filling it to the desired height. Use a trowel to smooth the surface, ensuring it is level.
9. Allow curing: Let the concrete cure for the recommended timeframe. This usually takes several days, so be patient and avoid placing any weight on the foundation during this period.
By properly preparing the foundation, you are setting a strong and stable base for the rest of the outdoor fireplace construction. It is crucial to allow the foundation to fully cure before proceeding with the next steps. Once the foundation is ready, you can move on to building the fireplace base, which will form the bottom portion of your outdoor fireplace structure.
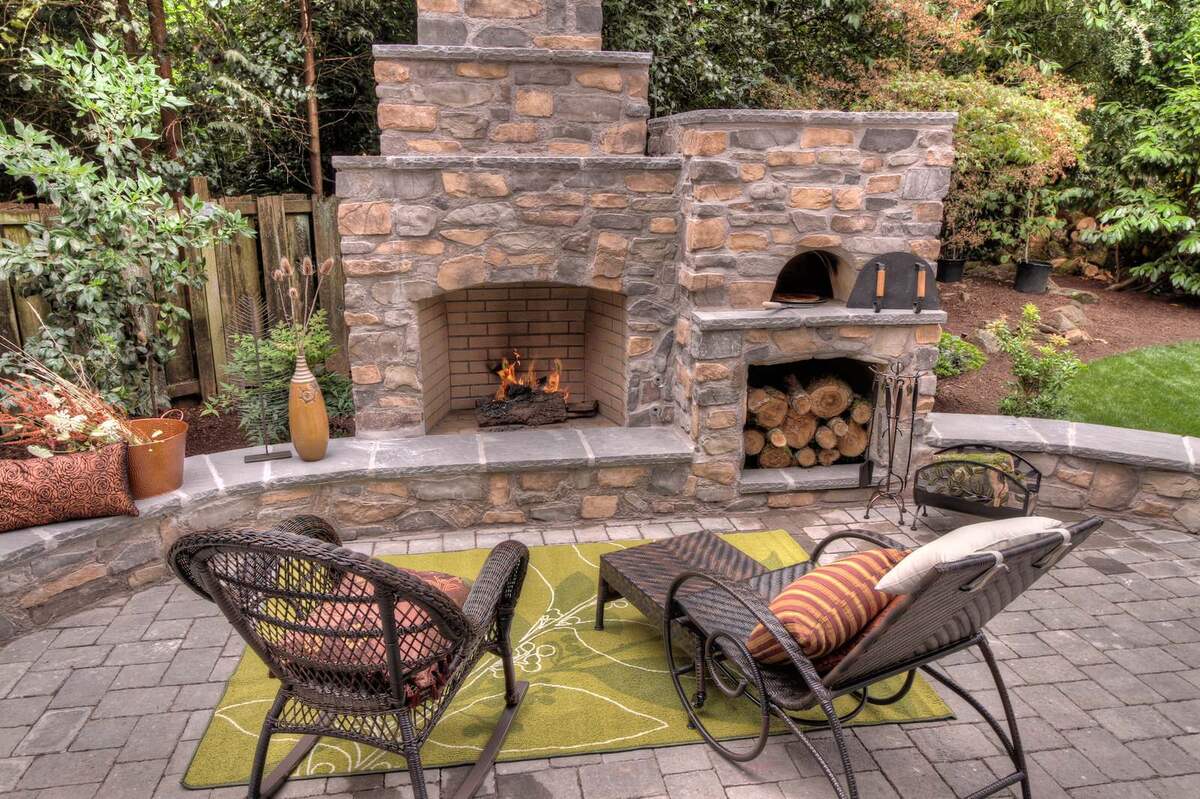
Step 5: Building the Fireplace Base
The fireplace base provides the structural support for your outdoor fireplace. It acts as the foundation for the rest of the fireplace and chimney. Building a sturdy and well-designed base is crucial to ensure the stability and longevity of your outdoor fireplace. Here’s how to build the fireplace base:
1. Lay the first course of bricks: Start by laying a row of fire bricks or standard bricks along the perimeter of the foundation. Use mortar to adhere the bricks together, ensuring they are level and straight. A level and a mason’s line can be helpful in creating a straight and even base.
2. Build up the courses: Continue laying bricks, adding additional courses until you reach the desired height for your fireplace base. Make sure to stagger the joints between bricks to create a strong and stable structure. Use a trowel to apply mortar between each brick and smooth it out.
3. Check for level: Regularly use a level to ensure that each course of bricks is level, both horizontally and vertically. Adjust as necessary to maintain a sturdy and balanced base.
4. Leave openings for airflow: As you build the base, create vents or gaps between the bricks to allow for proper airflow. Adequate airflow is essential for efficient combustion and smoke ventilation.
5. Add reinforcement: If desired, insert reinforcement bars or wire mesh between the courses of bricks for added strength and stability. This can provide extra support, especially for larger fireplace bases.
6. Be mindful of dimensions: Follow your initial design plan and ensure that the fireplace base’s dimensions align with your expectations. Use measurements as a guide to maintain accuracy and proportion throughout the construction process.
7. Finish with a cap layer: Once the base is built to the desired height, finish with a cap layer of bricks or stones. This layer adds a polished look to the base and provides a smooth surface to support the firebox.
8. Allow for proper curing: Give the mortar ample time to cure and harden. Follow the manufacturer’s instructions for the recommended curing time, typically several days. Avoid placing any weight on the base until it is fully cured.
By meticulously building the fireplace base, you create a solid foundation for the rest of the outdoor fireplace construction. The base should be strong, level, and aesthetically pleasing. Once the base is complete, you can move forward with constructing the chimney for your outdoor fireplace.
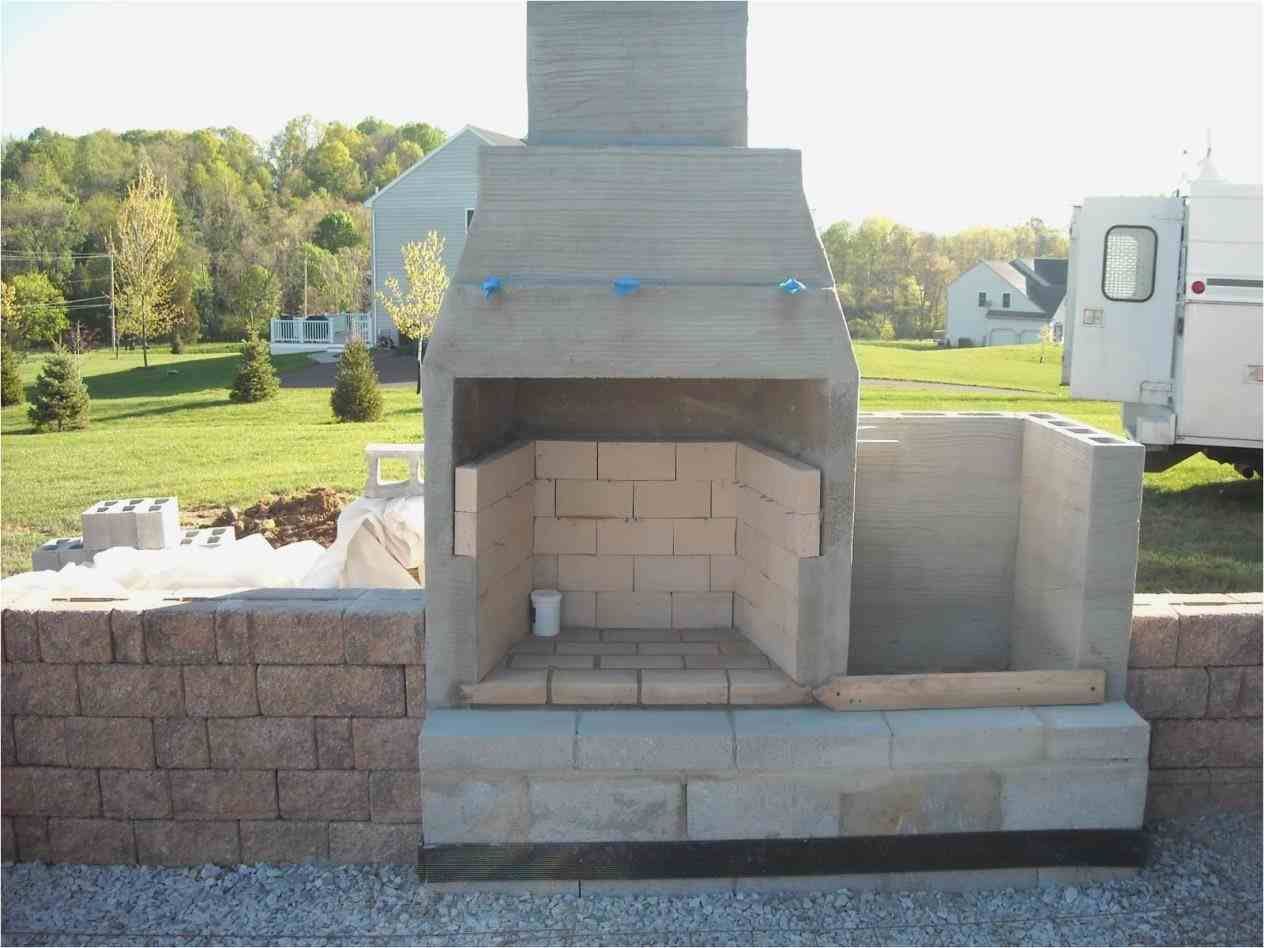
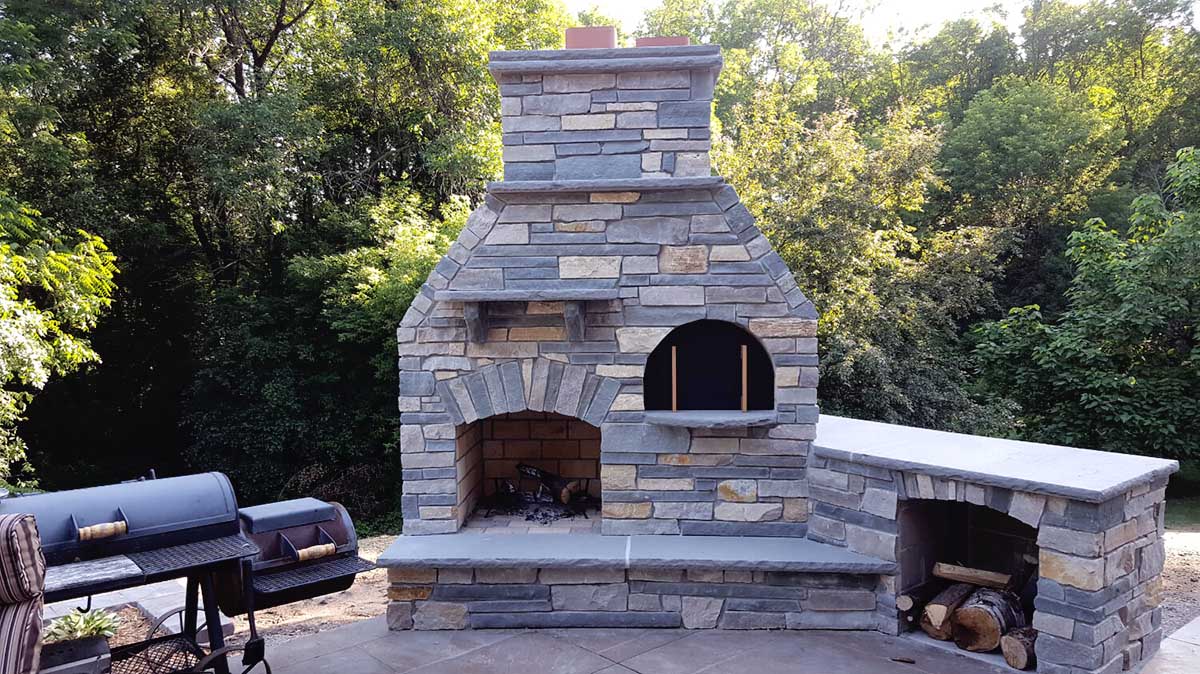
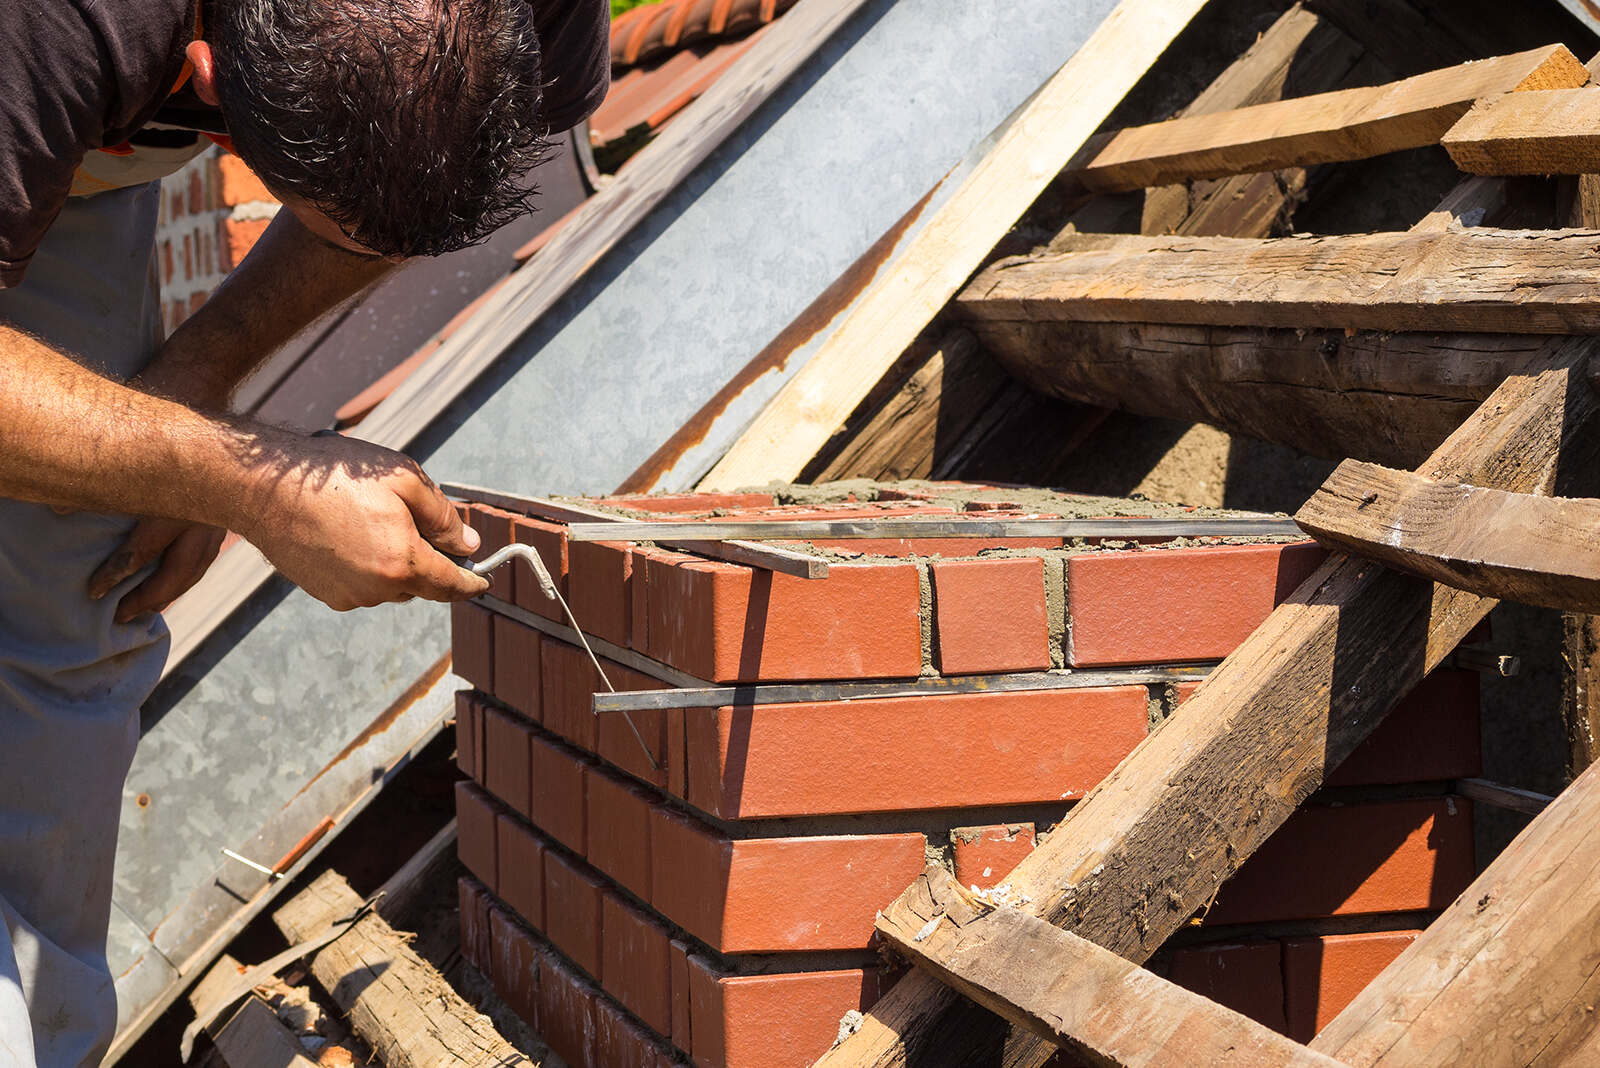
Step 6: Constructing the Chimney
The chimney is a vital component of your outdoor fireplace, as it directs smoke and gases away from your seating area. Constructing the chimney requires careful planning and precise execution to ensure proper ventilation and safety. Here’s a step-by-step guide on how to construct the chimney for your outdoor fireplace:
1. Measure and mark the chimney dimensions: Determine the height and width of the chimney based on your design and the size of your outdoor fireplace. Use a measuring tape and mark the measurements on the fireplace base.
2. Build the chimney base: Begin by laying a course of bricks on the fireplace base, using mortar to secure them in place. Ensure that the bricks are level and straight. Use a level and mason’s line to maintain accuracy.
3. Create the flue liner: The flue liner is the inner lining of the chimney that directs smoke and gases out of the fireplace. It can be clay, metal, or stainless steel. Install the flue liner according to the manufacturer’s instructions, ensuring it extends to the desired height.
4. Build the outer chimney walls: Lay additional courses of bricks around the flue liner, gradually building up the walls of the chimney. Use mortar to secure the bricks in place and make sure they are level and plumb. Continue building until the chimney reaches the desired height.
5. Install a chimney cap: A chimney cap helps to keep out rain, debris, and animals from entering the chimney. Install a chimney cap on top of the chimney to ensure proper airflow while protecting the flue liner.
6. Ventilation gaps: Leave small gaps or vents between the bricks in the chimney walls to allow for proper ventilation and airflow. These gaps help to prevent smoke from stagnating and ensure efficient combustion.
7. Check for stability: Regularly check the stability and alignment of the chimney as you build. Use a level to ensure that the chimney is straight and plumb. Make adjustments as needed to maintain a solid, well-built structure.
8. Allow for curing: Once the chimney is constructed, allow the mortar to cure for the recommended time. Follow the manufacturer’s instructions for the specific curing duration, typically several days. Avoid placing any weight or stress on the chimney during this period.
By following these steps, you will construct a sturdy and well-designed chimney for your outdoor fireplace. Remember to adhere to safety guidelines and building codes to ensure that your chimney is safe and efficient in directing smoke away from your outdoor living area. With the chimney complete, you can move on to the next step of installing the firebox for your outdoor fireplace.
When building an outdoor fireplace with a chimney, make sure to use fire-resistant materials, follow local building codes, and consider the direction of prevailing winds to prevent smoke from blowing into your outdoor living space.
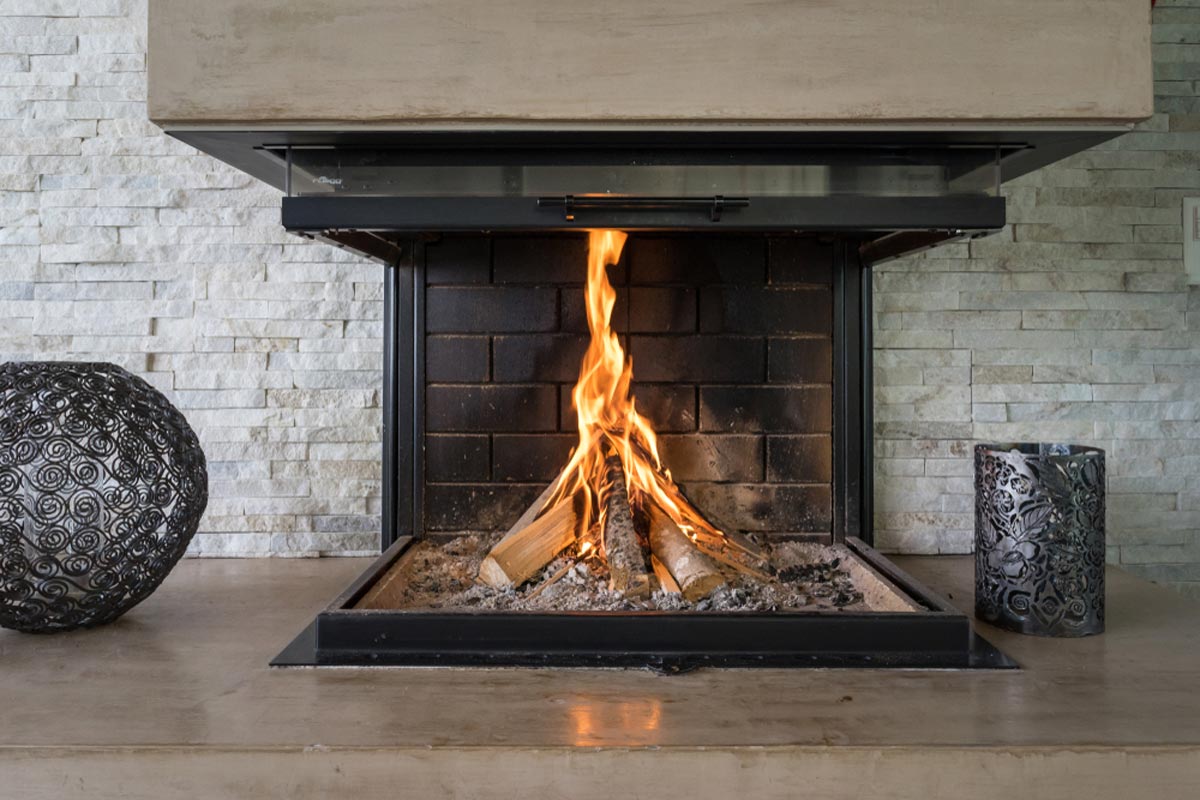
Step 7: Installing the Firebox
The firebox is where the actual fire will burn in your outdoor fireplace. It is essential to install the firebox correctly to ensure the safety and functionality of your outdoor fireplace. Follow these steps to install the firebox:
1. Choose the firebox: Select a firebox that matches the dimensions and style of your outdoor fireplace. Fireboxes come in various materials, such as steel, cast iron, or masonry. Ensure that the firebox is designed for outdoor use and meets safety regulations.
2. Prepare the opening: Measure and mark the opening for the firebox on the front of the fireplace. Use a level and measuring tape to ensure accurate placement. This opening should be slightly larger than the size of the firebox to allow for proper ventilation.
3. Install the firebox: Place the firebox into the prepared opening, ensuring it is centered and level. If necessary, use shims or mortar to secure and level the firebox. Follow the manufacturer’s instructions for proper installation, including any required brackets or support.
4. Connect gas or electrical supply (if applicable): If you are installing a gas or electric firebox, follow the manufacturer’s instructions for connecting the necessary supply lines. Ensure that all connections are done safely and by a qualified professional if needed.
5. Secure the firebox: Once the firebox is in place, secure it to the fireplace structure using appropriate screws or fasteners. This will ensure that it stays firmly in position.
6. Apply heat-resistant mortar: Use heat-resistant mortar to fill any gaps between the firebox and the surrounding bricks or stones. This will provide a secure seal and enhance the overall appearance of the fireplace.
7. Allow for curing: Allow the mortar to cure according to the manufacturer’s instructions. This typically takes several days. Avoid using the firebox or applying any weight on it during this curing period.
8. Install a protective screen or doors: Install a protective screen or doors over the opening of the firebox to prevent sparks and embers from escaping. This will add an important safety feature to your outdoor fireplace.
By properly installing the firebox, you ensure the functionality and safety of your outdoor fireplace. Whether you choose a traditional wood-burning firebox or opt for a gas or electric alternative, following these steps will help you enjoy a cozy and inviting fire in your outdoor living area. With the firebox installed, you can move on to the next step of adding the firebrick to complete the inner lining of your outdoor fireplace.
Step 8: Adding the Firebrick
The firebrick serves as the inner lining of the firebox and plays a crucial role in withstanding high temperatures and ensuring the longevity of your outdoor fireplace. Adding firebrick provides insulation and protection for the surrounding materials. Follow these steps to add the firebrick to your outdoor fireplace:
1. Select the firebrick: Choose high-quality firebrick that is designed to withstand extreme heat. Firebrick is made from refractory clay and is specifically designed for use in fireplaces and stoves. Make sure to purchase enough firebricks to line the entire firebox area.
2. Clean and prepare the firebox: Before starting, ensure that the firebox is clean and free from any dust or debris. This will ensure a clean surface for the firebrick installation.
3. Apply high-temperature mortar: Use a trowel to apply a layer of high-temperature mortar to the bottom of the firebox. This layer of mortar acts as a base for the firebrick and helps to adhere them to the firebox walls.
4. Place the firebrick: Carefully lay the firebrick on the layer of mortar, starting from the bottom and working your way up. Press each firebrick firmly into place, ensuring that they are level and flush against the previous bricks. Leave a small gap of about 1/8 inch between the bricks to allow for thermal expansion.
5. Cut or shape the firebrick if needed: In some cases, you may need to cut or shape the firebrick to fit around corners or edges. Use a masonry saw or a chisel to carefully trim the firebrick to the desired size and shape. Wear protective gloves and goggles when cutting or shaping the firebrick.
6. Secure the firebrick: As you place each firebrick, apply additional mortar to the edges and joints to secure them in place. Use a trowel or your fingers to smooth out the mortar and fill any gaps between the firebricks.
7. Allow for curing: Allow the mortar to cure according to the manufacturer’s instructions. It typically takes several days for the mortar to fully dry and cure. During this time, avoid using the fireplace or applying any stress or weight to the firebrick.
8. Clean up the excess mortar: Once the mortar has cured, use a stiff brush or a scraper to remove any excess mortar from the surface of the firebrick. This will ensure a clean and polished appearance.
By adding the firebrick, you create a durable and heat-resistant lining for your firebox, making it safe and efficient for use. The firebrick also enhances the overall aesthetic appeal of your outdoor fireplace. With the firebrick installed, you can now move on to the final steps of adding finishing touches and decorations to complete your outdoor fireplace project.
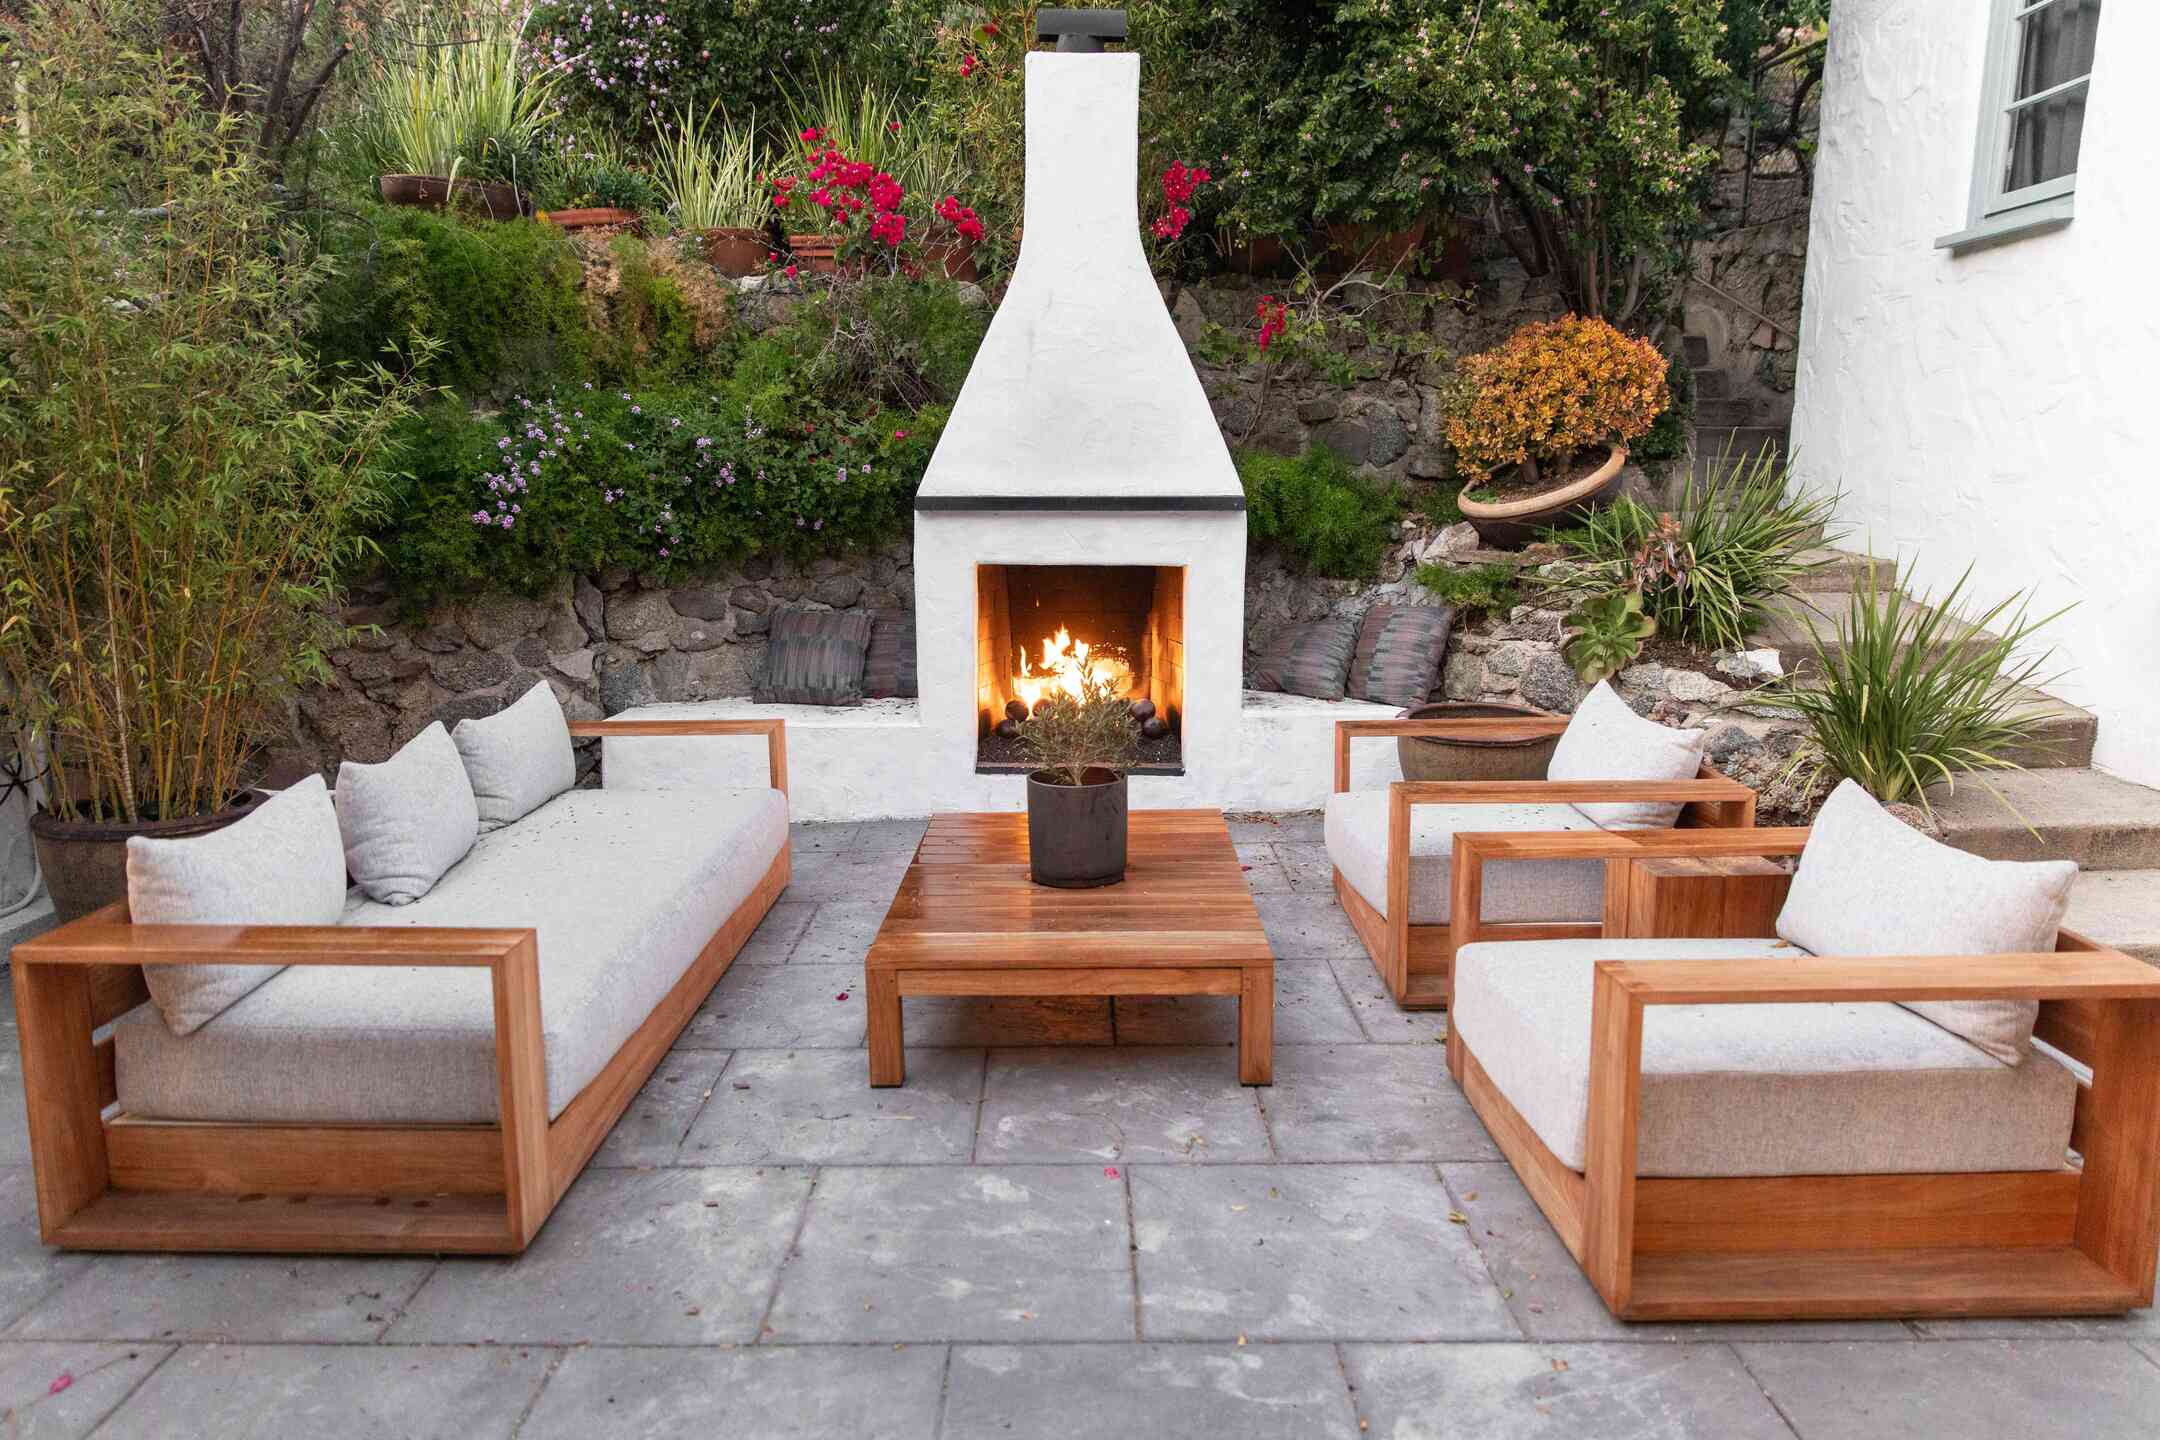
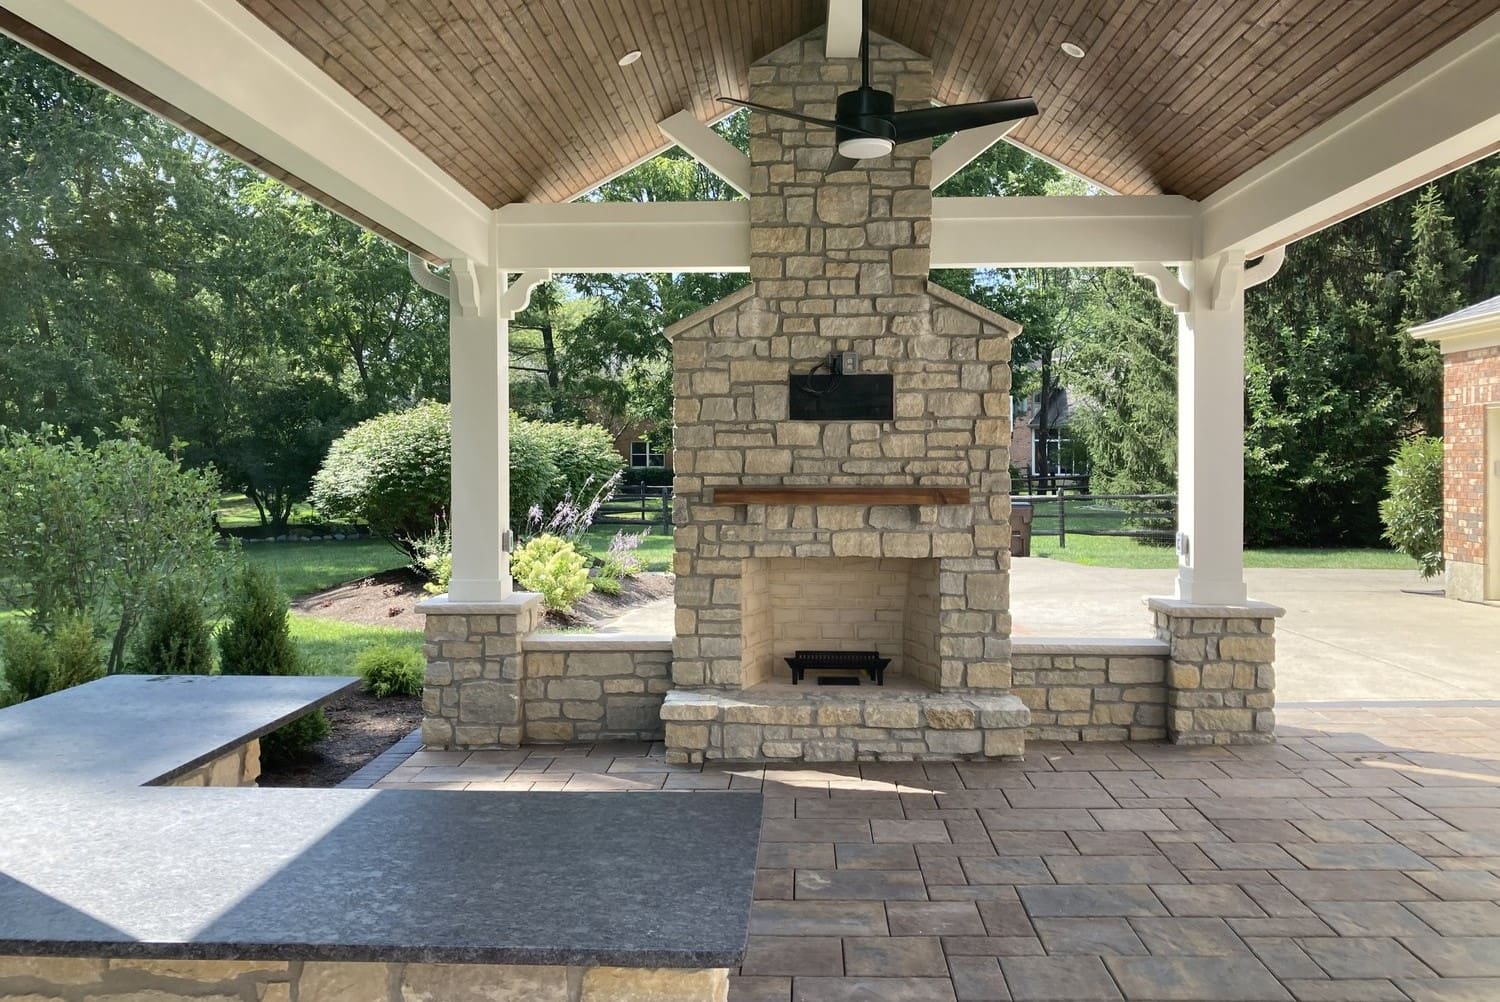
Step 9: Finishing Touches and Decorations
Adding finishing touches and decorations to your outdoor fireplace can elevate its visual appeal and create a welcoming ambiance in your outdoor living area. These final details can provide a personal touch and make your outdoor fireplace a focal point of your backyard. Follow these steps to add the finishing touches and decorations:
1. Clean the fireplace: Before adding any decorations, make sure to clean the fireplace thoroughly. Remove any dust, debris, or residue that may have accumulated during the construction process. Wipe down the surfaces and ensure they are in pristine condition.
2. Choose a mantel: Consider adding a mantel to your outdoor fireplace. A mantel not only serves as a decorative element, but it also provides a functional space for displaying small items, such as plants, candles, or artwork. Select a material that complements the overall design of your outdoor fireplace, such as wood, stone, or metal.
3. Decorate the mantel: Once the mantel is in place, decorate it with items that reflect your personal style and enhance the ambiance of your outdoor living area. Consider adding potted plants, candles, lanterns, decorative objects, or artwork. Just be mindful of the materials you choose, ensuring they are suitable for outdoor use and won’t be damaged by the elements.
4. Install outdoor lighting: To create a cozy and inviting atmosphere around your outdoor fireplace, incorporate outdoor lighting. Consider installing string lights, pathway lights, or spotlights to illuminate the area. This will not only enhance the visual appeal but also provide practical lighting for nighttime enjoyment.
5. Add seating and a gathering area: Arrange comfortable seating around your outdoor fireplace, creating a dedicated gathering area. Choose weather-resistant furniture that complements your outdoor aesthetic. Adding cushions, pillows, and blankets can provide extra comfort and warmth for your guests.
6. Incorporate storage: If space permits, consider adding storage options near your outdoor fireplace. This can include built-in shelves, cabinets, or storage boxes. These storage solutions can be used to store firewood, tools, or other items related to your outdoor fireplace.
7. Landscape around the fireplace: Enhance the overall ambiance by landscaping the area around your outdoor fireplace. Consider adding potted plants, shrubs, flowers, or a garden bed. This will add a touch of greenery and create a natural backdrop for your outdoor living space.
8. Customize your style: Showcasing your personal style is key to creating a unique and inviting outdoor fireplace experience. Consider incorporating specific decor elements, such as artwork, sculptures, or custom tiles, that reflect your taste and personality.
Remember to maintain a balance between functionality and aesthetics when adding finishing touches and decorations. Ensure that any materials or items used are suitable for outdoor use and will withstand the elements. With these final touches, your outdoor fireplace is now complete and ready to be enjoyed for cozy gatherings, relaxation, and creating lasting memories in your outdoor living space.
Step 10: Safety Precautions
When it comes to enjoying your outdoor fireplace with a chimney, safety should always be a top priority. Taking necessary safety precautions ensures the well-being of you, your guests, and your property. Follow these steps to ensure a safe and enjoyable experience with your outdoor fireplace:
1. Clear the area around the fireplace: Keep the immediate area around your outdoor fireplace clear of any flammable materials, including furniture, plants, and debris. Maintain a safe distance to prevent accidental fires and to ensure proper ventilation.
2. Install a spark screen or glass doors: Adding a spark screen or glass doors to your fireplace can prevent sparks and embers from escaping. These safety features can minimize the risk of accidental fires and protect against burns.
3. Provide proper ventilation: Ensure that the chimney and flue are properly installed and functioning to allow for proper ventilation. Adequate airflow is crucial to prevent the buildup of smoke, gases, and carbon monoxide. Regularly clean and inspect the chimney to remove any blockages or debris.
4. Use only appropriate fuel: Use only the recommended type of fuel for your outdoor fireplace. If you have a wood-burning fireplace, use dry, seasoned hardwood that has been properly stored. Avoid burning treated wood, trash, or flammable liquids, as they can release toxic fumes or cause dangerous flare-ups.
5. Practice safe fire starting and extinguishing: When starting the fire, use proper kindling and never use flammable liquids. Keep a fire extinguisher or a bucket of sand nearby for emergencies. Ensure the fire is fully extinguished before leaving the area or going to bed.
6. Supervise children and pets: Keep children and pets at a safe distance from the outdoor fireplace. Educate them about the potential dangers of fire and ensure they understand the importance of fire safety.
7. Maintain a safe distance: Encourage a safe distance between individuals and the fire. Position seating and gathering areas at a suitable distance to prevent accidental contact with the flames or hot surfaces.
8. Monitor weather conditions: Be mindful of weather conditions, such as strong winds or dry conditions, which can increase the risk of fire hazards. Avoid using the outdoor fireplace during unfavorable weather conditions.
9. Install proper lighting: Install adequate lighting around the outdoor fireplace area to ensure visibility and prevent accidents. This includes walkway lighting and proper illumination of the seating area.
10. Educate yourself and others: Stay informed about fire safety guidelines and local regulations. Educate yourself, your family, and your guests about the proper use and handling of the outdoor fireplace. Encourage open communication to address any safety concerns or questions.
By following these safety precautions, you can enjoy your outdoor fireplace with peace of mind. Remember, safety should always be the top priority to ensure a safe and enjoyable experience for everyone.
Read more: How To Build An Outdoor Fireplace
Conclusion
Congratulations! You have successfully completed the construction of your outdoor fireplace with a chimney. By following the step-by-step guide outlined in this article, you have created a beautiful and functional addition to your outdoor living space. Your outdoor fireplace will provide warmth, ambiance, and a focal point for gatherings and relaxation.
Throughout the construction process, you have learned how to plan and obtain necessary permits, choose an ideal location, gather materials and tools, prepare the foundation, build the fireplace base, construct the chimney, install the firebox, add the firebrick, and apply finishing touches and decorations. Additionally, you have also been informed about important safety precautions to ensure the well-being of everyone who enjoys your outdoor fireplace.
Remember, maintaining and using your outdoor fireplace responsibly is key to its continued enjoyment. Regularly clean and inspect the fireplace, follow proper fire safety guidelines, and be mindful of weather conditions that may affect the safe use of the fireplace. By practicing these safety measures, you can create a safe and enjoyable outdoor space for years to come.
Now that your outdoor fireplace is ready, it’s time to sit back, relax, and enjoy the warmth and ambiance it brings to your outdoor living area. Gather with family and friends, tell stories, roast marshmallows, and create unforgettable memories by the glow of the fire.
Thank you for joining us on this journey of building an outdoor fireplace with a chimney. We hope this guide has been helpful in making your outdoor fireplace project a success. Happy fire building!
Frequently Asked Questions about How To Build Outdoor Fireplace With Chimney
Was this page helpful?
At Storables.com, we guarantee accurate and reliable information. Our content, validated by Expert Board Contributors, is crafted following stringent Editorial Policies. We're committed to providing you with well-researched, expert-backed insights for all your informational needs.


0 thoughts on “How To Build Outdoor Fireplace With Chimney”