Home>Articles>How Do I Clean My Maytag Washer Without Affresh
Articles
How Do I Clean My Maytag Washer Without Affresh
Modified: October 20, 2024
Learn how to clean your Maytag washer without using Affresh products. Read our informative article for helpful tips and tricks to keep your washer smelling fresh and performing at its best.
(Many of the links in this article redirect to a specific reviewed product. Your purchase of these products through affiliate links helps to generate commission for Storables.com, at no extra cost. Learn more)
Introduction
Welcome to the world of Maytag washers! As a proud owner of a Maytag washer, it is important to keep your appliance clean and well-maintained. Regular cleaning not only ensures the longevity of your machine but also guarantees optimal performance and hygiene. One effective method for cleaning your Maytag washer is by using Affresh, a specialized cleaner designed to remove residue and odors.
In this article, we will explore the importance of cleaning your Maytag washer and the benefits of using Affresh. Additionally, we will discuss alternative methods for cleaning your washer, including natural solutions and washing machine cleaners. Lastly, we will outline preventive measures to keep your Maytag washer in pristine condition. So, let’s dive in and learn how to clean your Maytag washer without Affresh!
Key Takeaways:
- Regularly cleaning your Maytag washer is crucial for odor-free laundry, efficient performance, and family hygiene. Affresh and natural solutions like vinegar and baking soda can effectively maintain your machine.
- Implement preventive measures such as proper detergent usage, leaving the door open, and regular filter cleaning to ensure a clean and well-maintained Maytag washer. Consistent maintenance leads to long-term efficiency and cost savings.
Read more: How To Bypass Affresh Cycle On Maytag Washer
Why Clean Your Maytag Washer?
Cleaning your Maytag washer is essential for several reasons. First and foremost, a clean washer ensures your clothes come out fresh and odor-free. Over time, dirt, detergent residue, and fabric softener build-up can accumulate in your machine, resulting in unpleasant smells that can transfer to your laundry. By regularly cleaning your washer, you can eliminate these odors and maintain a pleasant fragrance in your freshly washed clothes.
In addition to preventing odors, cleaning your Maytag washer helps to maintain its performance and efficiency. The residue left behind by detergents and fabric softeners can clog the internal components of your machine, such as the hoses, pump, and filters. This build-up can cause blockages, reduce water flow, and ultimately hinder the overall performance of your washer. Proper cleaning ensures that your machine operates at its best, resulting in cleaner clothes and shorter wash cycles.
Furthermore, a clean Maytag washer promotes good hygiene. Moist and warm environments, such as a washer, can be a breeding ground for bacteria and mold. If left unchecked, these microorganisms can not only affect the cleanliness of your clothes but also pose health risks to you and your family. Regular cleaning helps eliminate these harmful elements, ensuring the safety and well-being of everyone in your household.
Lastly, cleaning your Maytag washer is an investment in its longevity. By taking the time to maintain your machine, you can extend its lifespan and minimize the need for expensive repairs or replacements. A well-cleaned washer operates more efficiently, experiences fewer malfunctions, and ultimately saves you money in the long run.
Now that we understand the importance of keeping your Maytag washer clean, let’s explore the benefits and usage of Affresh, a popular cleaning product specifically formulated for washing machines.
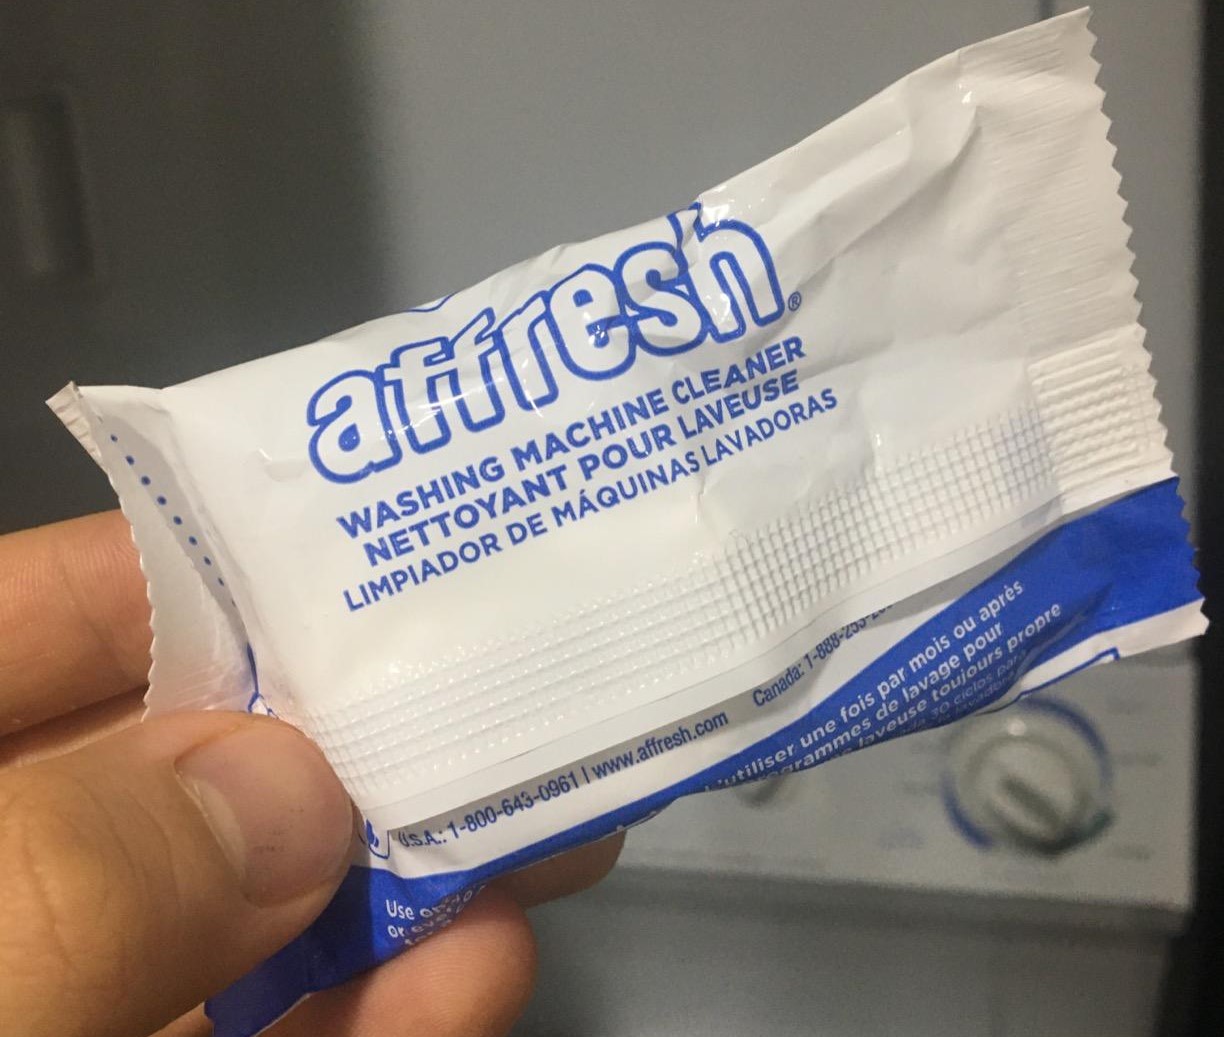
Benefits of Using Affresh
Affresh is a highly effective cleaning product that is specifically designed to target and remove residue and odors from your Maytag washer. Here are some of the key benefits of using Affresh:
- Efficient Residue Removal: Affresh is formulated with powerful cleaning agents that effectively break down and dissolve the built-up residue in your washer. This includes detergent residues, lint, and other deposits that can accumulate over time. By using Affresh, you can ensure a deep and thorough cleaning of your machine’s internal parts.
- Odor Elimination: One of the most common complaints with washing machines is the presence of unpleasant odors, often caused by mold or mildew growth. Affresh contains powerful ingredients that target and eliminate these odors, leaving your Maytag washer smelling fresh and clean. It tackles the root cause of the problem instead of just masking the odor, ensuring a long-lasting freshness.
- Safe and Gentle: Affresh is designed to be safe for your Maytag washer and the environment. It does not contain any harsh chemicals that could potentially damage or corrode your machine’s internal components. It is also septic tank safe, making it a suitable choice for homes with septic systems.
- Convenient and Easy to Use: Affresh comes in tablet form, which makes it incredibly convenient to use. Simply drop a tablet into an empty washer drum and run a normal cycle without any clothes. The tablet will dissolve and go to work, ensuring a hassle-free cleaning experience.
- Recommended by Maytag: Maytag, a trusted brand in the appliance industry, recommends the use of Affresh for cleaning their washers. This endorsement further validates the efficacy and reliability of this cleaning product.
Using Affresh on a monthly basis, or as recommended by the manufacturer, will help you maintain a clean and fresh-smelling Maytag washer. However, if you prefer not to use Affresh or do not have it readily available, there are alternative methods for cleaning your machine, which we will explore next.
Alternative Methods for Cleaning Your Maytag Washer
If you don’t have access to Affresh or prefer to use alternative cleaning methods, there are several natural solutions that can effectively clean your Maytag washer. These methods use common household ingredients and are budget-friendly. Here are a few alternative methods you can try:
- Vinegar and Baking Soda Solution: Vinegar and baking soda are powerful natural cleaners. To use this method, start by pouring two cups of white vinegar into the detergent dispenser or directly into the drum. Then, add half a cup of baking soda into the same dispenser or directly into the drum. Run a regular cycle on hot water. This combination will dissolve residue, eliminate odors, and leave your washer sparkling clean.
- Bleach Solution: Bleach is a strong disinfectant that can effectively kill bacteria and mold in your Maytag washer. Mix half a cup of bleach with a gallon of water. Pour the solution into the detergent dispenser or directly into the drum and run a regular cycle on hot water. Be sure to thoroughly rinse your machine after using bleach, to prevent any residual bleach from coming into contact with your laundry in future washes.
- Citric Acid Solution: Citric acid is another natural cleaner that can help remove mineral deposits and eliminate odors. Dissolve one cup of citric acid in a gallon of hot water. Pour the solution into the detergent dispenser or directly into the drum and run a regular cycle. This method will help remove any build-up and leave your washer fresh and clean.
- Using a Washing Machine Cleaner: If you prefer a ready-made cleaning product other than Affresh, there are several washing machine cleaners available in the market. Look for cleaners specifically designed for removing residue and odors from washing machines. Follow the instructions provided by the manufacturer for optimal results.
When using any of these alternative methods, it’s important to remember to run a rinse cycle afterward to ensure all the cleaning solution is thoroughly rinsed out of your Maytag washer. This will prevent any residue from coming into contact with your laundry and ensure the machine is clean and ready for use.
Now that we have explored alternative cleaning methods, let’s discuss some preventive measures to keep your Maytag washer clean and well-maintained.
Vinegar and Baking Soda Solution
A popular and effective alternative method for cleaning your Maytag washer involves using a combination of vinegar and baking soda. Both ingredients are readily available in most households and offer natural cleaning properties. Here’s how you can use the vinegar and baking soda solution to clean your washer:
- Start by ensuring that the washer drum is empty.
- Measure two cups of white vinegar and pour it into the detergent dispenser or directly into the drum.
- In a separate cup, mix half a cup of baking soda with a little water to create a paste-like consistency.
- Using a soft cloth or sponge, apply the baking soda paste to the inside surfaces of the washer drum, focusing on areas that show the most residue or stains.
- Leave the paste on for a few minutes to allow it to work its magic.
- Next, start a regular cycle using hot water. If your washer has a “clean cycle” option, select that for optimal results.
- Allow the cycle to complete, ensuring that the vinegar and baking soda solution circulates throughout the machine.
- Once the cycle is finished, inspect the drum for any remaining residue or build-up. If needed, use a soft brush or cloth to gently scrub away any stubborn stains.
- After cleaning, run an additional rinse cycle to ensure all traces of the vinegar and baking soda are completely removed.
- Dry the interior of the washer drum thoroughly to prevent any moisture accumulation.
The vinegar and baking soda solution works wonders for removing residue, eliminating odors, and leaving your Maytag washer fresh and clean. The acid in the vinegar helps dissolve the build-up, while the baking soda acts as a mild abrasive, removing stains and freshening the interior surfaces of the machine.
It’s important to note that while vinegar and baking soda are safe for most washing machines, you should always refer to your machine’s manual to ensure compatibility and to follow any specific instructions or precautions provided by the manufacturer.
Remember to incorporate the vinegar and baking soda cleaning method into your regular maintenance routine to ensure your Maytag washer remains in optimal condition. Regular cleaning will help prevent the build-up of residue and keep your washer operating efficiently.
Now let’s move on to another alternative method for cleaning your Maytag washer – the bleach solution.
You can clean your Maytag washer without Affresh by running a hot water cycle with vinegar or baking soda. Simply add 2 cups of vinegar or 1/2 cup of baking soda to the detergent dispenser and run a hot water cycle to help remove any buildup and odors.
Read more: How Old Is My Maytag Washer
Bleach Solution
Another effective alternative method for cleaning your Maytag washer involves using a bleach solution. Bleach is a powerful disinfectant that can kill bacteria, mold, and mildew, ensuring a thorough cleaning of your machine. Here’s how you can use the bleach solution to clean your washer:
- Ensure that the washer drum is empty and there are no clothes or other items inside.
- Mix half a cup of bleach with a gallon of water in a bucket or container.
- Pour the bleach solution into the detergent dispenser or directly into the drum of the washer.
- Start a regular cycle using hot water. If your washer has a “clean cycle” option, select that for optimal results.
- Allow the cycle to complete, ensuring that the bleach solution circulates throughout the machine.
- Once the cycle is finished, open the washer lid or door and carefully inspect the drum for any remaining residue or stains.
- If needed, use a soft brush or cloth to gently scrub away any stubborn stains or build-up.
- After cleaning, run an additional rinse cycle to ensure all traces of the bleach solution are completely removed.
- Leave the washer lid or door open for a while to allow the interior to air dry.
The bleach solution effectively kills bacteria, mold, and mildew that may be present in your Maytag washer. It not only removes residue but also eliminates odors, leaving your machine fresh and clean.
It is important to take precautions when using bleach. Ensure proper ventilation by opening windows or doors during the cleaning process. Also, be cautious not to mix bleach with other cleaning agents, as this can produce harmful fumes. Always follow the instructions provided by the bleach manufacturer and refer to your machine’s manual to ensure compatibility and safety.
When using bleach, it is crucial to thoroughly rinse the washer drum to remove any residual bleach. This will prevent any traces of bleach from coming into contact with your laundry in future washes.
Incorporating the bleach solution method into your regular washer maintenance routine, about once a month or as needed, will help keep your Maytag washer clean, sanitized, and free from harmful microorganisms.
Now, let’s explore another alternative method for cleaning your Maytag washer – the citric acid solution.
Citric Acid Solution
A citric acid solution is another effective alternative method for cleaning your Maytag washer. Citric acid is a natural cleaner known for its ability to remove mineral deposits and eliminate odors. Here’s how you can use the citric acid solution to clean your washer:
- Ensure that the washer drum is empty and there are no clothes or other items inside.
- Dissolve one cup of citric acid in a gallon of hot water in a bucket or container.
- Pour the citric acid solution into the detergent dispenser or directly into the drum of the washer.
- Start a regular cycle using hot water. If your washer has a “clean cycle” option, select that for optimal results.
- Allow the cycle to complete, ensuring that the citric acid solution circulates throughout the machine.
- Once the cycle is finished, open the washer lid or door and carefully inspect the drum for any remaining residue or stains.
- If needed, use a soft brush or cloth to gently scrub away any stubborn stains or build-up.
- After cleaning, run an additional rinse cycle to ensure all traces of the citric acid solution are completely removed.
- Leave the washer lid or door open for a while to allow the interior to air dry.
The citric acid solution is highly effective in removing mineral deposits, such as limescale or rust, that can accumulate in your Maytag washer. It also eliminates odors, leaving your machine fresh and clean.
It is important to check your machine’s manual before using citric acid to ensure compatibility and safety. Some manufacturers may not recommend using citric acid in their washers. If it is safe to use, follow the instructions provided by the citric acid manufacturer for optimal results.
Remember to thoroughly rinse the washer drum after using the citric acid solution to remove any residual solution. This will prevent any traces of citric acid from coming into contact with your laundry in future washes.
By incorporating the citric acid solution method into your regular washer maintenance routine, you can help prevent mineral build-up and maintain the optimal performance of your Maytag washer.
Now that we have explored alternative cleaning methods, let’s move on to another option – using a washing machine cleaner.
Using a Washing Machine Cleaner
If you prefer the convenience of a ready-made cleaning product specifically designed for washing machines, using a washing machine cleaner is a great alternative. These cleaners are formulated to effectively remove residue, eliminate odors, and maintain the cleanliness of your Maytag washer. Here’s how you can use a washing machine cleaner:
- Refer to the instructions provided by the manufacturer of the washing machine cleaner for the recommended usage.
- Typically, you will need to pour the recommended amount of the cleaner into the detergent dispenser or directly into the drum of your Maytag washer.
- Start a regular cycle using hot water. If your washer has a “clean cycle” option, select that for optimal results.
- Allow the cycle to complete, ensuring that the cleaning solution circulates throughout the machine.
- Once the cycle is finished, open the washer lid or door and carefully inspect the drum for any remaining residue or stains.
- If needed, use a soft brush or cloth to gently scrub away any stubborn stains or build-up.
- After cleaning, run an additional rinse cycle to ensure all traces of the cleaning solution are completely removed.
- Leave the washer lid or door open for a while to allow the interior to air dry.
Using a washing machine cleaner takes the guesswork out of cleaning your Maytag washer. These cleaners are specifically designed to target and eliminate residue, odors, and build-up that can accumulate over time. They provide a convenient and effective solution for maintaining the cleanliness and efficiency of your machine.
When choosing a washing machine cleaner, look for products that are compatible with your Maytag washer and follow the instructions provided by the manufacturer. This way, you can ensure optimal performance and results.
By incorporating the use of a washing machine cleaner into your regular maintenance routine, you can keep your Maytag washer in excellent condition, ensuring it continues to provide you with clean and fresh laundry.
Now that we have explored different cleaning methods, let’s discuss some preventive measures to help keep your Maytag washer clean and well-maintained.
Preventive Measures to Keep Your Maytag Washer Clean
In addition to regular cleaning, implementing preventive measures can help keep your Maytag washer clean and well-maintained. These simple practices can go a long way in reducing residue build-up, preventing odors, and prolonging the lifespan of your machine. Here are some preventive measures you can take:
- Properly Measure Detergent: Follow the instructions on your detergent packaging and use the recommended amount for your load size. Using too much detergent can lead to excessive residue build-up, while using too little may result in ineffective cleaning.
- Choose High-Quality Detergent and Fabric Softener: Opt for high-quality detergents and fabric softeners that are specifically formulated for your washing machine. These products are often designed to minimize residue build-up and improve cleaning performance.
- Empty Pockets and Check for Debris: Prior to loading the washer, thoroughly check pockets for any loose items, such as coins or paperclips, which can cause damage or clog the machine. Also, remove any debris, such as lint or pet hair, from clothing before placing them in the washer.
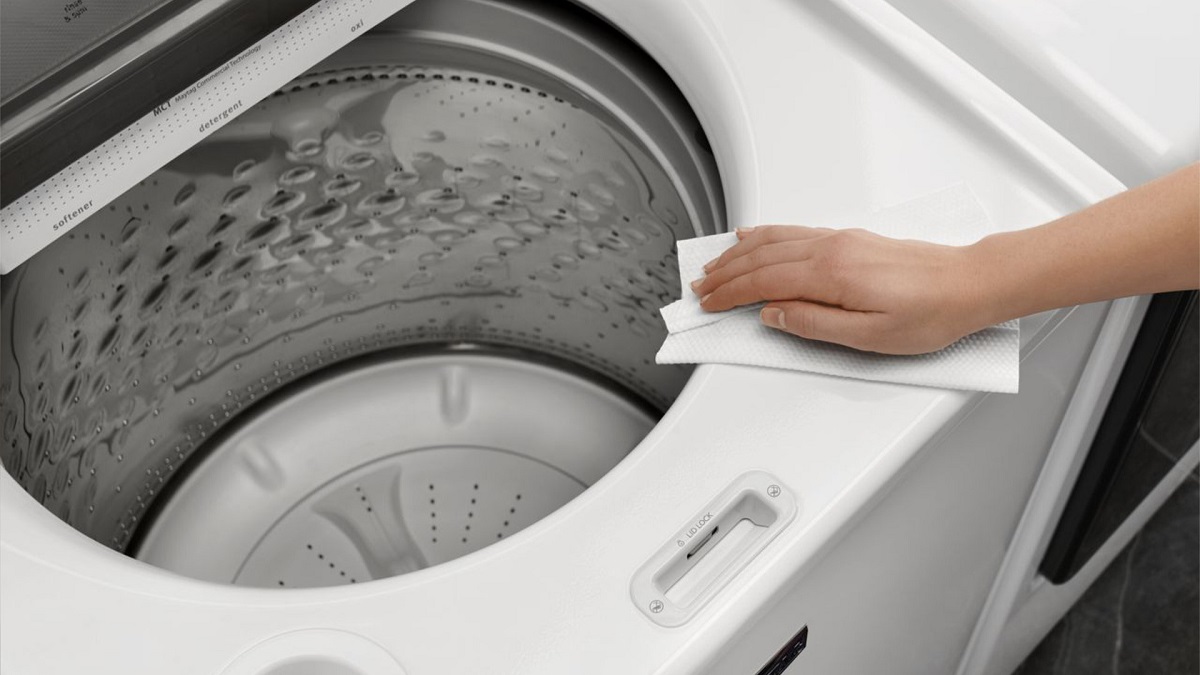
- Leave the Door or Lid Open: After each use, leave the washer door or lid open for a while to allow air to circulate. This helps prevent the growth of mold and mildew by allowing moisture to evaporate.
- Clean the Gasket and Dispenser: Periodically, clean the rubber gasket around the door or lid of your Maytag washer to remove any residue or mold. Additionally, wipe down the detergent and fabric softener dispensers to prevent build-up and ensure proper function.
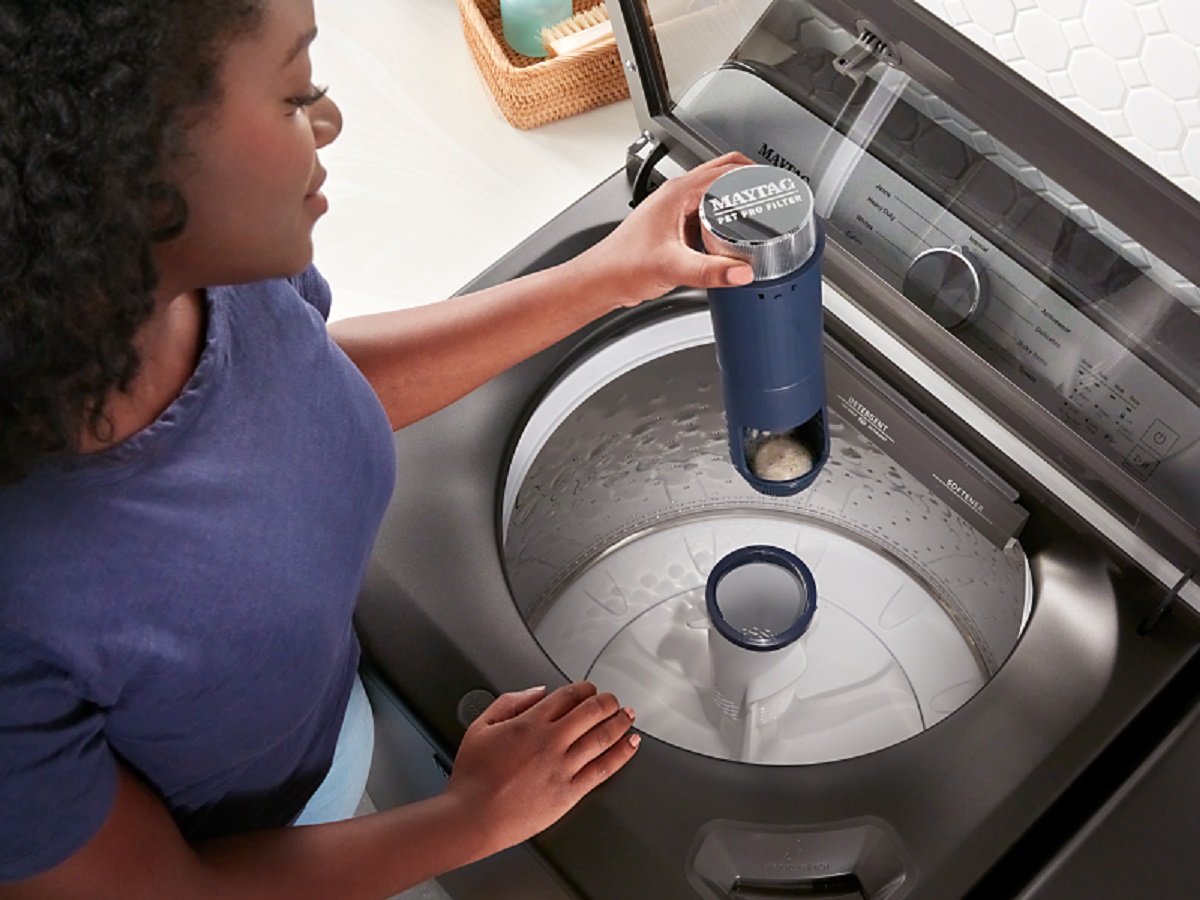
- Regularly Clean the Filter: Refer to your machine’s manual for instructions on how to clean the filter. Regularly removing debris from the filter helps prevent clogs and ensures water flows freely during the wash cycle.
- Avoid Overloading: Do not overload your washer, as this can hinder proper cleaning and may cause strain on the machine. Follow the manufacturer’s guidelines for load sizes to achieve optimal results.
- Keep the Washer Dry: After completing your laundry, wipe down the interior surfaces of your Maytag washer, including the drum and door or lid, to remove any moisture. This helps prevent the growth of mold and mildew.
By incorporating these preventive measures into your laundry routine, you can significantly reduce the likelihood of residue build-up, odors, and maintenance issues with your Maytag washer. Consistent follow-through will ensure your machine continues to perform at its best and provide you with clean and fresh laundry for years to come.
Now that we have discussed preventive measures, let’s wrap up our article.
Read more: Why Is My Maytag Washer Not Spinning
Conclusion
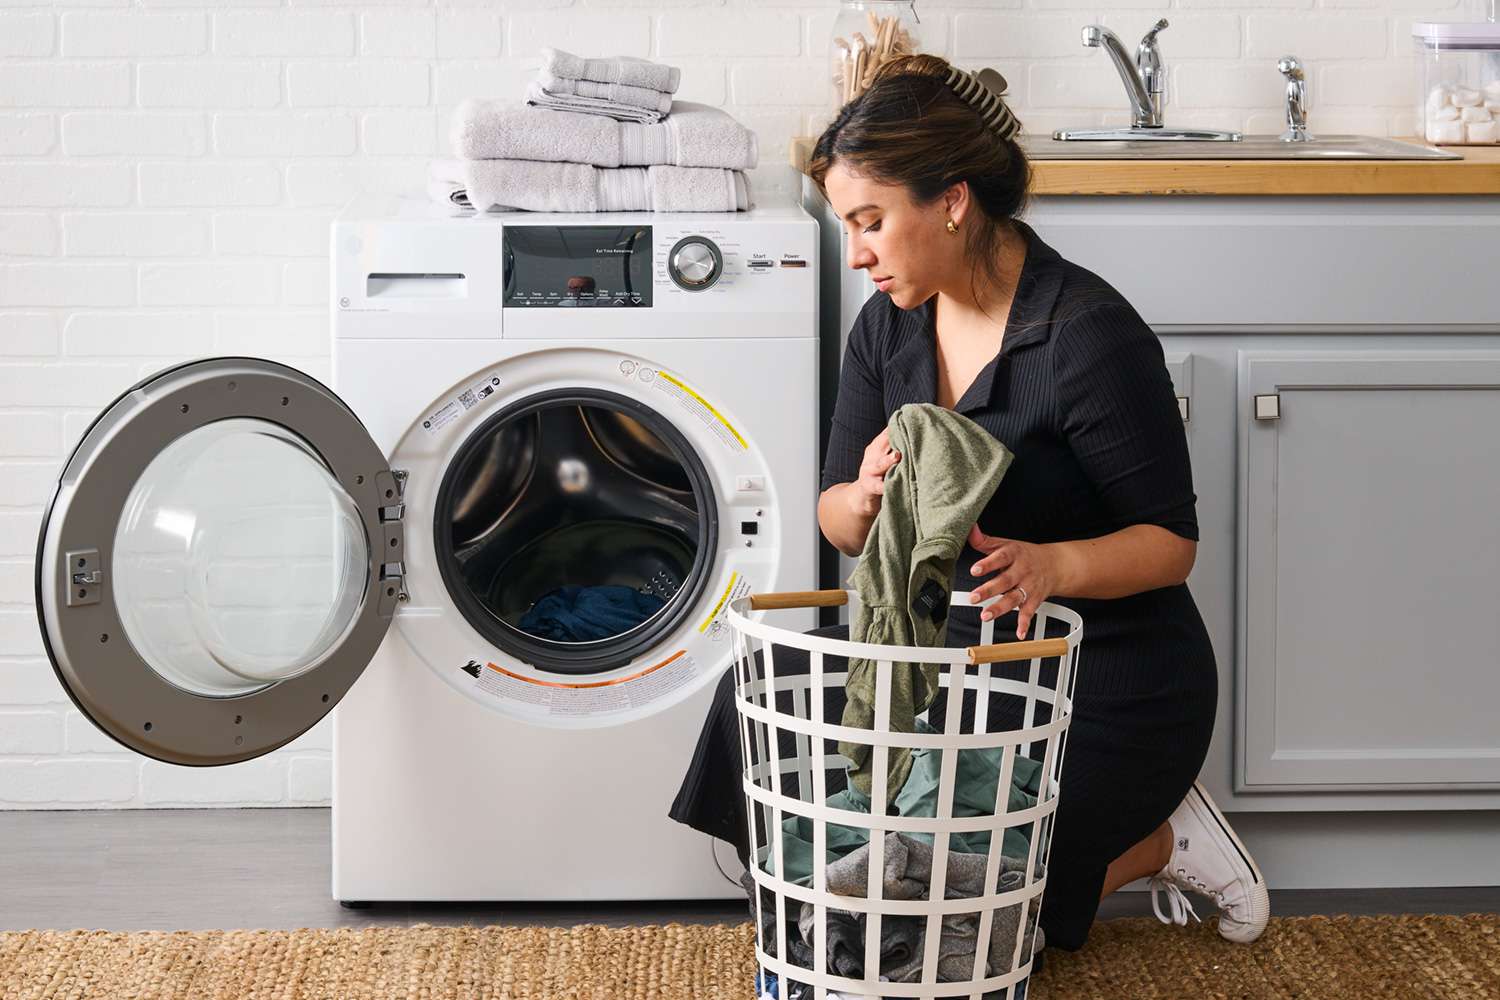
Keeping your Maytag washer clean and well-maintained is essential for ensuring optimal performance, hygiene, and longevity. By following the recommended cleaning methods and incorporating preventive measures into your laundry routine, you can keep your machine running efficiently and provide yourself with fresh and clean clothing.
Affresh is a highly effective cleaner specifically designed for Maytag washers, offering efficient residue removal and odor elimination. However, if you don’t have access to Affresh, there are alternative methods you can use, such as the vinegar and baking soda solution, bleach solution, and citric acid solution. These natural cleaning methods can effectively remove residue and odors from your Maytag washer.
Additionally, you can utilize washing machine cleaners that are readily available in the market. These cleaners are formulated to target and eliminate residue and odors, providing a convenient and effective solution for maintaining the cleanliness of your machine.
Implementing preventive measures, such as properly measuring detergent, using high-quality products, emptying pockets, and leaving the door or lid open, can further contribute to a clean and well-maintained Maytag washer. Regularly cleaning the gasket, dispenser, and filter will help prevent build-up and maintain the optimal performance of your machine.
By following these guidelines and incorporating regular cleaning into your laundry routine, you can enjoy the benefits of a clean and efficient Maytag washer. Your machine will not only provide you with fresh and clean laundry but also extend its lifespan and save you from costly repairs or replacements.
So, take the time to clean and maintain your Maytag washer, and you’ll reap the rewards of a well-functioning machine and fresh-smelling laundry. Happy washing!
Frequently Asked Questions about How Do I Clean My Maytag Washer Without Affresh
Was this page helpful?
At Storables.com, we guarantee accurate and reliable information. Our content, validated by Expert Board Contributors, is crafted following stringent Editorial Policies. We're committed to providing you with well-researched, expert-backed insights for all your informational needs.


0 thoughts on “How Do I Clean My Maytag Washer Without Affresh”