Articles
How To Fix Maytag Washer
Modified: August 16, 2024
Learn how to fix your Maytag washer with our informative articles. Get step-by-step instructions and troubleshooting tips to resolve common issues.
(Many of the links in this article redirect to a specific reviewed product. Your purchase of these products through affiliate links helps to generate commission for Storables.com, at no extra cost. Learn more)
Introduction
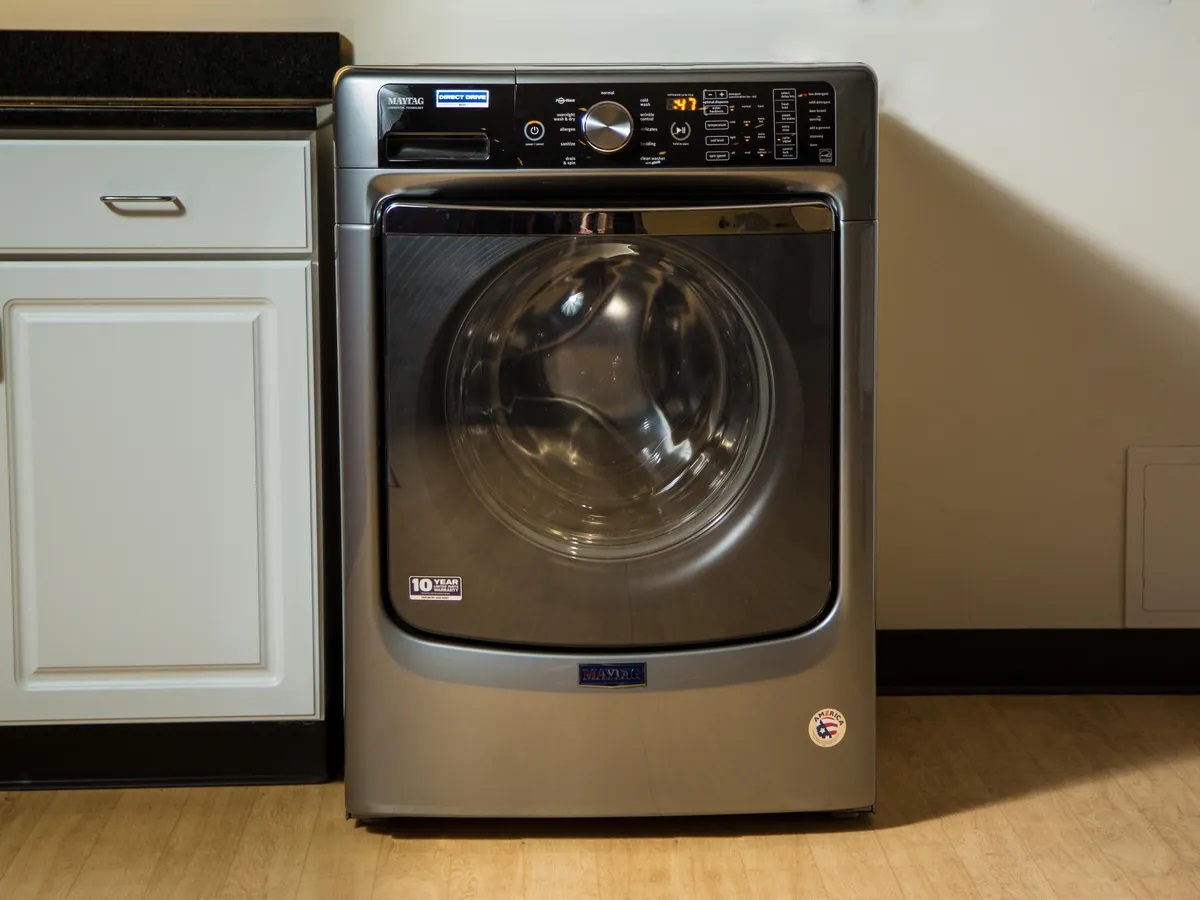
Having a Maytag washer is a convenience that many homeowners enjoy. It allows you to efficiently clean your clothes with ease. However, like any appliance, your Maytag washer may experience issues from time to time. Whether it’s failure to start, lack of water supply, or unusual error codes, these problems can be frustrating and disruptive to your daily routine.
Fortunately, you don’t always need to call a professional for assistance. Many common issues can be resolved with a bit of troubleshooting and know-how. In this article, we will provide you with a comprehensive guide on how to fix common issues with your Maytag washer. From checking the power source to cleaning the filter, we’ll cover everything you need to know to get your washer back up and running.
Before we dive into the troubleshooting steps, it’s important to note that safety should always be a priority. Ensure that your washer is unplugged and that you’re comfortable with the steps involved in the troubleshooting process. If you are uncertain or feel uncomfortable, it’s best to seek professional assistance.
Now, let’s roll up our sleeves and get started on troubleshooting your Maytag washer!
Key Takeaways:
- Troubleshoot common Maytag washer issues like power supply, water supply, and drainage with simple DIY steps to save time and money on professional repairs.
- Regular maintenance, such as cleaning filters and inspecting components, can prevent common Maytag washer issues and extend the appliance’s lifespan.
Read more: How To Fix Lid Lock On Maytag Washer
Troubleshooting Common Issues
When it comes to troubleshooting your Maytag washer, it’s helpful to start by identifying the most common issues that can occur. Understanding these issues can give you a head start in diagnosing and resolving the problem. Let’s take a look at some of the common issues you may encounter:
- Washer not starting: If your Maytag washer is not starting at all, it could be due to a power issue or a malfunctioning lid switch.
- No water supply: If your washer isn’t filling with water, there may be an issue with the water supply valves or the water inlet valve.
- Drainage problems: If water is not draining properly from your washer, it could be due to a clogged drain hose or a faulty drain pump.
- Filter clogging: A dirty or clogged filter can impede the proper functioning of your washer and may lead to issues such as slow water flow or draining problems.
- Water leakage: If you notice water leaking from your washer, it’s essential to identify the source of the leak, which could be a damaged hose, faulty pump, or loose connections.
- Unusual noises: Unusual noises during the wash cycle, such as banging or grinding sounds, may indicate an issue with the motor coupling, belt, or bearings.
- Error codes: Maytag washers are equipped with error codes that indicate specific issues. Familiarizing yourself with these error codes can help you pinpoint the problem.
Now that we’ve identified the common issues, let’s move on to the troubleshooting steps to tackle these problems one by one. Remember, safety should always be prioritized when working on your washer, so be sure to follow the necessary precautions.
Checking the Power Source
If your Maytag washer is not starting, the first step in troubleshooting is to check the power source. Often, the issue may be as simple as a power outage or a tripped circuit breaker. Here’s how you can check the power source:
- Ensure that the washer is plugged in: Double-check that the power cord is securely plugged into a working electrical outlet. If the washer is plugged in but still not turning on, try plugging another device into the same outlet to determine if it’s a power supply issue.
- Check for a tripped circuit breaker: Locate your home’s electrical panel and check if the circuit breaker that controls the washer’s power supply has tripped. If it has, reset the breaker by flipping it to the “off” position and then back to the “on” position.
- Test the outlet: If you suspect there may be an issue with the outlet itself, use a voltage tester or plug in a different device to ensure that power is flowing correctly.
- Inspect the power cord: Examine the power cord for any signs of damage or frayed wires. If you notice any issues, it’s important to replace the power cord before proceeding.
- Reset the washer: Some Maytag washers have a reset button that you can press to reboot the system. Refer to your washer’s user manual to locate the reset button and follow the instructions provided.
After going through these steps, try turning on your Maytag washer to see if the power issue has been resolved. If the washer still doesn’t start, it’s time to move on to the next troubleshooting step.
Ensuring Proper Water Supply
If your Maytag washer is not filling with water, the issue may be related to the water supply. Here are the steps to ensure a proper water supply:
- Check the water supply valves: Make sure the hot and cold water supply valves connected to your washer are fully turned on. Sometimes, these valves may accidentally get partially closed, which can restrict the water flow.
- Inspect the water hoses: Examine the water inlet hoses for any kinks, twists, or signs of damage. If you notice any issues, straighten out the hoses and replace them if necessary.
- Remove debris from the inlet screens: The water inlet screens on the back of the washer can become clogged with sediment or debris over time. Carefully remove the hoses from the back of the washer and inspect the screens. If there is any buildup, gently clean it with a soft brush or toothbrush.
- Check the water pressure: Inadequate water pressure can affect the filling process of your washer. Ensure that the water pressure in your home meets the manufacturer’s recommendations. If the pressure is too low, you may need to contact a professional plumber to resolve the issue.
- Test the water supply to other appliances: To determine if the water supply issue is specific to your washer, try running water from other faucets or appliances in your home. If there are no issues with the water supply, then the problem likely lies within the washer itself.
After following these steps, try starting a wash cycle to see if the water supply problem has been resolved. If your Maytag washer is still not filling with water, it’s time to move on to the next troubleshooting step.
Examining the Drainage System
If your Maytag washer is experiencing drainage problems, it’s important to examine the drainage system. Here are the steps to follow:
- Check the drain hose: Ensure that the drain hose is properly connected to your washer and that it is not kinked or twisted. A kinked hose can prevent proper water flow and cause drainage issues. Straighten out any kinks or twists in the hose as needed.
- Look for clogs: Use a flashlight to inspect the drain hose for any clogs or obstructions. If you see any debris or build-up, remove it carefully using a long, flexible brush or a plumber’s snake. Be cautious not to damage the hose during this process.
- Verify the drain pump: Locate the drain pump, usually located at the bottom of the washer, and check for any blockages or foreign objects that may be preventing it from functioning properly. Clear away any debris and ensure that the pump’s impeller is able to rotate freely.
- Inspect the drain filter: Many Maytag washers have a drain filter that catches lint, coins, and other small objects to prevent them from entering the drain pump. Locate the filter, typically located near the bottom of the washer, and clean it by removing any accumulated debris.
- Check the drain standpipe: Ensure that the drain hose is properly inserted into the drain standpipe. The standpipe should be at least 30 inches high, allowing for proper drainage and preventing water from backing up. If the standpipe is too low, water may not be able to drain effectively.
After performing these steps, run a test cycle to see if the drainage issue has been resolved. If your Maytag washer still has drainage problems, it’s time to move on to the next troubleshooting step.
Read more: How To Fix F5 Error On Maytag Washer
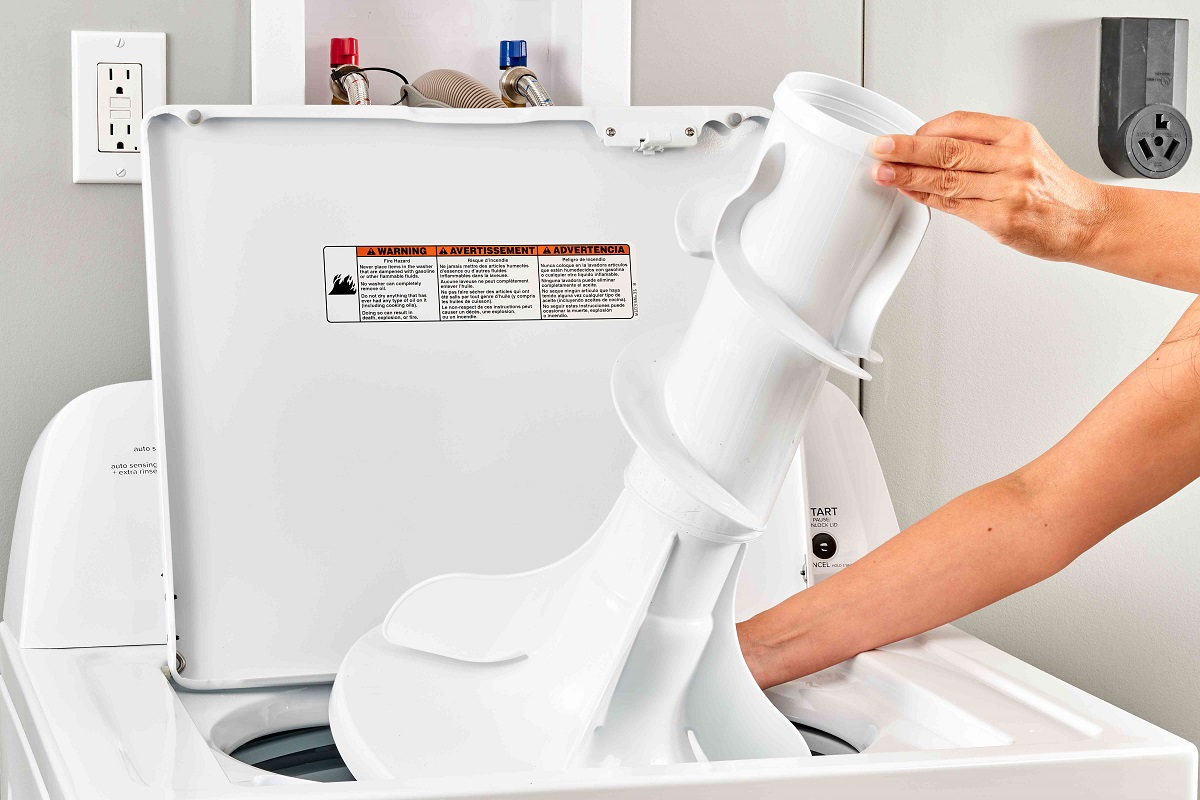
Cleaning the Filter
A dirty or clogged filter can cause various issues with your Maytag washer, such as slow water flow or drainage problems. Cleaning the filter is a relatively simple step that can help improve the performance of your washer. Here’s how you can clean the filter:
- Locate the filter: The filter is typically located at the bottom of the washer, behind a small access panel or cover. Consult your washer’s user manual if you’re unsure of the exact location.
- Unplug the washer: Before accessing the filter, make sure to unplug the power cord to prevent any electrical accidents.
- Remove the access panel: If there’s an access panel or cover, carefully remove it to reveal the filter.
- Clean the filter: Gently twist or pull the filter out of its housing. Rinse the filter under running water to remove any accumulated dirt, lint, or debris. Use a soft brush if necessary to dislodge stubborn particles.
- Inspect the filter housing: While the filter is out, take a few moments to inspect the filter housing for any signs of damage or blockages. Clear away any obstructions that may be hindering the filter’s proper installation.
- Reinstall the filter: Once the filter has been cleaned, insert it back into its housing. Ensure that it is properly aligned and securely in place.
- Replace the access panel: If you removed an access panel or cover, securely put it back in place.
- Plug in the washer: Finally, plug the power cord back into the outlet and test the washer to see if the performance has improved.
Regularly cleaning the filter is a good maintenance practice that can help prevent future issues with your Maytag washer. It’s recommended to clean the filter at least once every three months or as needed, depending on your usage and water conditions.
If cleaning the filter did not resolve your washer issues, proceed to the next troubleshooting step.
Check the power source and make sure the washer is plugged in. Also, check for any tripped circuit breakers or blown fuses. Reset the breaker or replace the fuse if necessary.
Inspecting the Water Inlet Valve
If your Maytag washer is not filling with water or is filling slowly, the issue may lie with the water inlet valve. The water inlet valve is responsible for controlling the flow of water into the washer. Here’s how you can inspect the water inlet valve:
- Disconnect the power: Before examining the water inlet valve, unplug the washer from the power source to ensure safety.
- Locate the water inlet valve: The water inlet valve is usually located at the back of the washer, near the water hose connections. Refer to your washer’s user manual if you need assistance in identifying the water inlet valve.
- Inspect the valve for debris or damage: Carefully examine the water inlet valve for any signs of debris, blockages, or damage. Sediment or foreign objects can obstruct the flow of water and impede the valve’s functionality.
- Clean the valve: If you notice any debris or sediment, use a soft brush or cloth to gently clean the valve. Be cautious not to damage the valve or its components during the cleaning process.
- Check the solenoid: The water inlet valve has solenoids that control the opening and closing of water flow. Test the solenoids by using a multimeter to check for continuity. If the solenoids fail the continuity test, the valve may need to be replaced.
- Inspect the water hoses: While inspecting the water inlet valve, take a few moments to examine the water hoses for any signs of damage or leaks. Replace any worn or damaged hoses as necessary.
- Reconnect and test: Once you have inspected and cleaned the water inlet valve, reattach the water hoses and plug the washer back in. Run a test cycle to see if the issue has been resolved.
If the water inlet valve appears to be functioning properly and the issue persists, it’s recommended to seek professional assistance or contact the Maytag customer service for further guidance.
Now that you have inspected the water inlet valve, let’s move on to the next troubleshooting step if needed.
Testing the Lid Switch
If your Maytag washer is not starting or filling with water, the lid switch may be the culprit. The lid switch is a safety feature that prevents the washer from running when the lid is open. Here’s how you can test the lid switch:
- Disconnect the power: Before conducting any tests, unplug the washer from the power source to ensure safety.
- Locate the lid switch: The lid switch is usually located beneath the lid of the washer. It can be found near the hinge or on the top of the cabinet. Refer to your washer’s user manual for specific instructions on locating the lid switch.
- Inspect the lid switch: Examine the lid switch for any signs of damage or wear. Look for loose connections, cracked housing, or a broken actuator. If any issues are detected, the lid switch may need to be replaced.
- Perform a continuity test: Using a multimeter set to the continuity or ohms setting, test the continuity of the lid switch. With the lid closed, the lid switch should have continuity, indicating that it is functioning properly. If there is no continuity or inconsistent results, the lid switch may be faulty.
- Test the actuator: The lid switch actuator is a small plastic piece that protrudes from the lid and triggers the switch. Press and release the actuator to simulate the lid being opened and closed. If there is no click or resistance when pressing the actuator, it may be broken or misaligned.
- Replace the lid switch if necessary: If the lid switch fails the continuity test or if the actuator is damaged, it’s recommended to replace the lid switch with a new one. Consult your washer’s user manual or contact Maytag customer service for the appropriate replacement part.
- Reconnect and test: After replacing the lid switch, reconnect the wiring and plug the washer back in. Close the lid and run a test cycle to verify if the lid switch was the cause of the problem.
If the lid switch tests positive for continuity and appears to be working correctly, proceed to the next troubleshooting step to identify the issue.
Remember to always prioritize safety when working with electrical components and consult a professional if you are unsure or uncomfortable performing these tests.
Checking the Motor Coupling
If your Maytag washer is experiencing unusual noises or is not agitating or spinning, the motor coupling may be the issue. The motor coupling connects the motor to the transmission and allows the washer to agitate and spin. Here’s how you can check the motor coupling:
- Disconnect the power: Before inspecting the motor coupling, unplug the washer from the power source to ensure safety.
- Access the motor coupling: Depending on the model, you may need to tilt the washer back or remove the rear or front panel to access the motor coupling. Consult your washer’s user manual for specific instructions.
- Examine the motor coupling: Inspect the motor coupling for any signs of damage or wear. Look for cracks, excessive wear, or missing pieces. If any issues are detected, the motor coupling may need to be replaced.
- Rotate the coupling manually: Gently rotate the motor coupling by hand. It should move freely and smoothly. If you encounter resistance or hear grinding sounds, the motor coupling may be damaged.
- Check the rubber bushings: The motor coupling has two rubber bushings that provide cushioning and help absorb vibration. Inspect these bushings for signs of damage or wear. Replace them if necessary.
- Inspect the motor and transmission shaft: While checking the motor coupling, take a moment to examine the motor and transmission shaft for any misalignment or damage. If the shafts are not aligned properly, it can cause the motor coupling to fail.
- Replace the motor coupling if needed: If the motor coupling shows signs of damage, wear, or fails the manual rotation test, it’s advisable to replace it with a new one. Refer to your washer’s user manual for the appropriate replacement part and installation instructions.
- Reassemble and test: After replacing the motor coupling, reassemble any panels or components that were removed. Plug the washer back in, and run a test cycle to check if the new motor coupling resolves the issue.
If the motor coupling appears to be functioning correctly or replacing it does not fix the problem, move on to the next troubleshooting step to identify the cause of the issue.
Remember to always prioritize safety when working on electrical appliances and consult a professional if you are unsure or uncomfortable performing these inspections or replacements.
Read more: How To Drain A Maytag Washer
Inspecting the Belt
If your Maytag washer is not spinning or agitating properly, the issue may lie with the drive belt. The drive belt connects the motor to the drum and drives the rotation of the drum. Here’s how you can inspect the belt:
- Disconnect the power: Before inspecting the belt, unplug the washer from the power source to ensure safety.
- Locate the belt: The drive belt is usually situated at the bottom of the washer, behind an access panel or near the motor. Consult your washer’s user manual for the exact location and access instructions.
- Visually inspect the belt: Carefully examine the belt for any signs of damage, such as cracks, fraying, or stretching. If the belt appears worn or damaged, it may need to be replaced.
- Check the tension of the belt: The belt should be tight and properly aligned. If it feels loose or saggy, it may need to be tightened or replaced.
- Spin the drum manually: Gently rotate the drum by hand to see if the belt remains in place. If the belt slips or comes off the pulleys when you spin the drum, it may indicate a loose or worn belt.
- Inspect the pulleys and motor: While examining the belt, take a moment to inspect the pulleys and motor for any obstructions or misalignment. Clear away any debris or adjust the pulleys if necessary.
- Replace the belt if needed: If the belt shows signs of damage, wear, or does not appear taut, it’s recommended to replace it with a new one. Refer to your washer’s user manual for the appropriate replacement belt and installation instructions.
- Reassemble and test: Once you have replaced or tightened the belt, reassemble any access panels or components that were removed. Plug the washer back in and run a test cycle to see if the new belt resolves the issue.
If the belt appears to be in good condition or replacing it does not solve the problem, proceed to the next troubleshooting step to identify the cause of the issue.
Remember to prioritize safety when working with electrical appliances and consult a professional if you are unsure or uncomfortable performing these inspections or replacements.
Troubleshooting Error Codes
If your Maytag washer displays an error code, it can provide valuable information about the specific issue that needs to be addressed. Error codes are alphanumeric codes that appear on the washer’s display panel. Here’s how you can troubleshoot error codes:
- Refer to the user manual: The first step when encountering an error code is to consult your Maytag washer’s user manual. The manual should contain a list of error codes specific to your model and provide instructions on interpreting and troubleshooting them.
- Decode the error code: Take note of the error code displayed on the panel. Most Maytag washers use a two or three-letter code followed by a number. Use the user manual or online resources to determine the meaning of the error code.
- Follow the recommended actions: Once you have identified the error code, the user manual should provide a set of recommended actions to resolve the issue. This may include steps such as resetting the washer, checking specific components, or contacting customer support.
- Reset the washer: In some cases, an error code may be triggered by a temporary glitch or malfunction. Try resetting the washer by unplugging it from the power source for a few minutes and then plugging it back in. This can sometimes clear error codes and restore normal operation.
- Check associated components: Some error codes may point to a specific component or system that requires attention. Follow the user manual’s instructions to inspect and troubleshoot the associated components. This may involve checking wiring connections, sensors, valves, or other parts related to the error code.
- Contact Maytag customer support: If you have followed the recommended actions and the error code persists, it’s advisable to contact Maytag customer support or a professional technician. They can provide further guidance, diagnose the issue remotely, or schedule a service call if necessary.
By systematically troubleshooting error codes, you can pinpoint the problem and take appropriate measures to resolve it. Always refer to your specific washer’s user manual for accurate information and guidance related to the error codes you encounter.
Remember to prioritize safety and consult professionals when dealing with complex or potentially hazardous issues.
Conclusion
Dealing with issues in your Maytag washer can be frustrating, but with proper troubleshooting techniques, many common problems can be resolved without the need for professional help. By following the steps outlined in this article, you can diagnose and fix issues related to power supply, water supply, drainage, filters, valves, switches, belts, and error codes.
Remember to always prioritize safety when working with electrical appliances. Disconnect the power source, unplug the washer, and follow the necessary precautions to avoid accidents or injuries. If you are unsure or uncomfortable with any step of the troubleshooting process, it is best to seek professional assistance.
Regular maintenance of your Maytag washer, such as cleaning filters and inspecting components, can help prevent issues and extend the lifespan of the appliance. Following the manufacturer’s guidelines and recommendations provided in the user manual will ensure that you are maintaining your washer correctly.
If the troubleshooting steps outlined in this article do not resolve the issue or if you encounter a more complex problem, it is best to contact Maytag customer support or a professional technician. They have the expertise and resources to diagnose and repair your washer effectively.
Remember, a well-functioning washer is crucial for your laundry needs. By taking the time to troubleshoot and fix common issues, you can enjoy the convenience and efficiency that comes with owning a Maytag washer.
Thank you for reading this comprehensive troubleshooting guide. We hope it has been helpful in resolving any issues you may have encountered with your Maytag washer.
Frequently Asked Questions about How To Fix Maytag Washer
Was this page helpful?
At Storables.com, we guarantee accurate and reliable information. Our content, validated by Expert Board Contributors, is crafted following stringent Editorial Policies. We're committed to providing you with well-researched, expert-backed insights for all your informational needs.


0 thoughts on “How To Fix Maytag Washer”