Home>Interior Design>How To Antique A Cabinet
Interior Design
How To Antique A Cabinet
Modified: September 1, 2024
Learn how to antique a cabinet and add a touch of vintage charm to your interior design. Find step-by-step instructions and expert tips to achieve the perfect antique look.
(Many of the links in this article redirect to a specific reviewed product. Your purchase of these products through affiliate links helps to generate commission for Storables.com, at no extra cost. Learn more)
Introduction
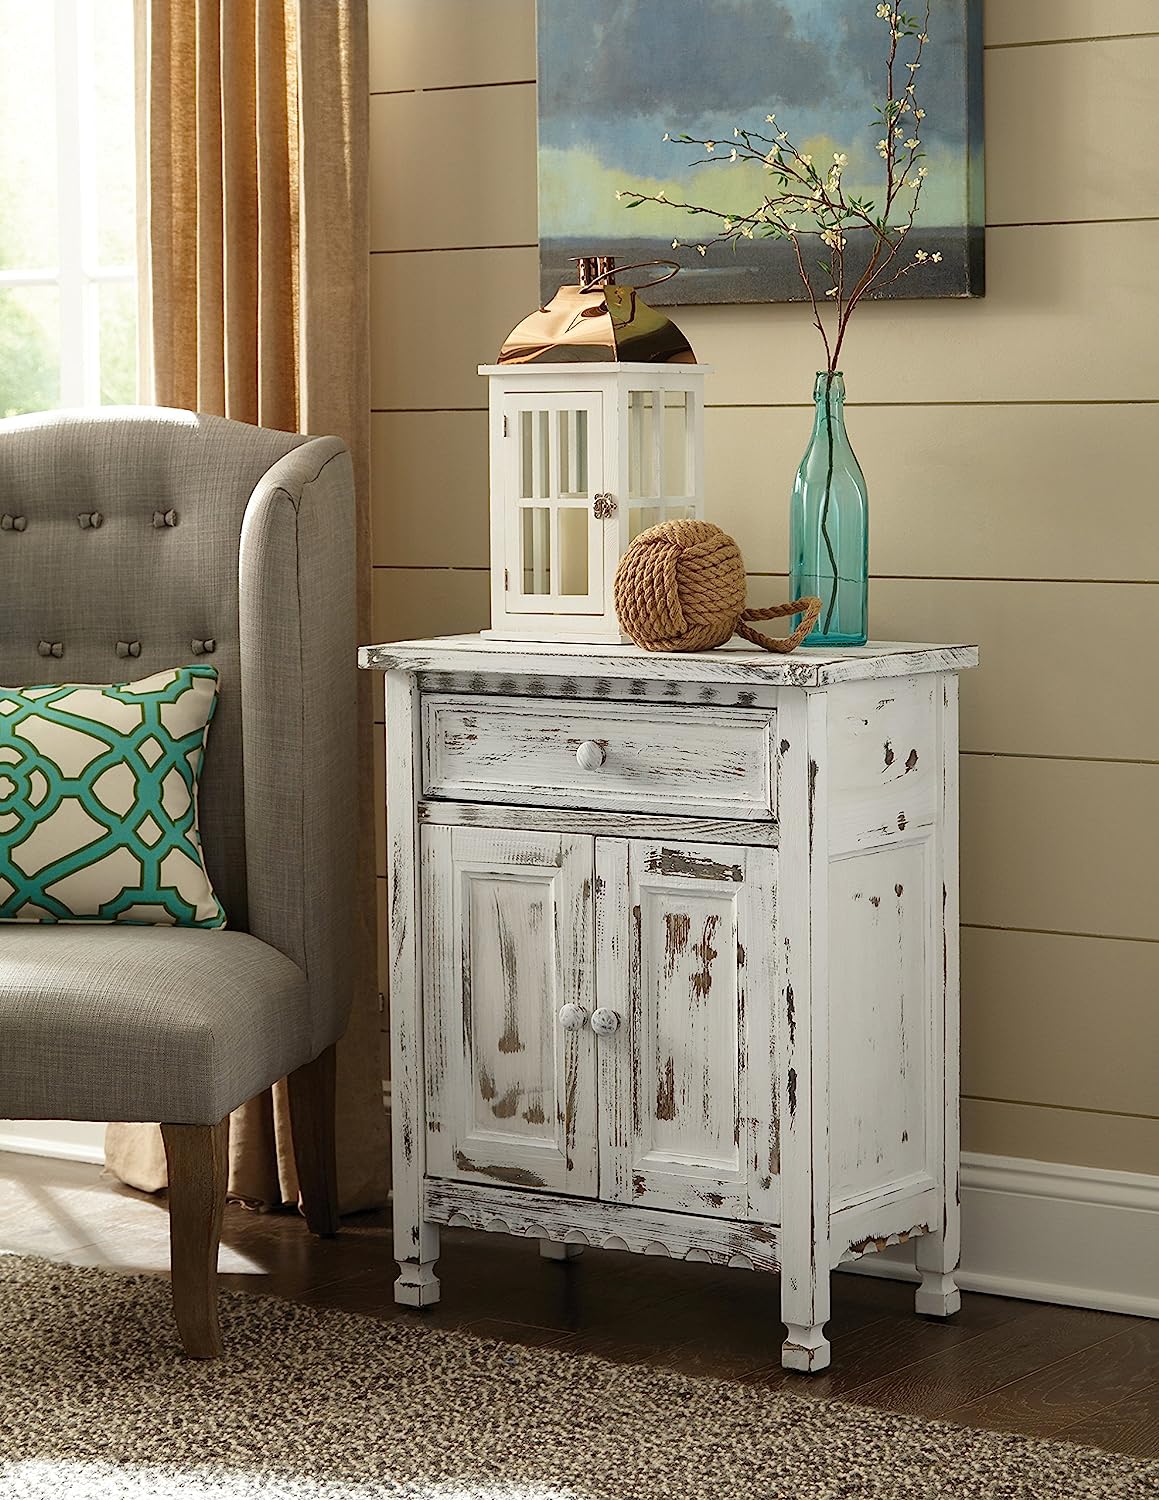
Welcome to the world of antique furniture! Adding an antique touch to your cabinet can completely transform its look and give it a unique charm. Whether you’re a design enthusiast or simply looking to refresh your interior, learning how to antique a cabinet is a great way to add character and depth to your space.
Antiquing a cabinet involves creating a weathered and distressed appearance that mimics the natural aging process of time. This technique is often used to give new or plain furniture a vintage and worn-out look, adding a touch of nostalgia to your home decor.
In this article, we will guide you through the step-by-step process of antiquing a cabinet. You will discover the materials needed, the techniques to achieve an authentic antique look, and helpful tips along the way. So, let’s dive in and learn how to transform your ordinary cabinet into an eye-catching piece with a timeless allure!
Key Takeaways:
- Transform your ordinary cabinet into a timeless piece with authentic antique charm by following the step-by-step process of distressing, glazing, and sealing. Unleash your creativity and infuse your space with vintage allure!
- Master the art of antiquing and create a personalized, weathered look for your cabinet. From distressing techniques to highlighting details, this guide equips you with the skills to achieve an authentic antique finish.
Materials Needed
Before we get started, let’s gather the necessary materials to antique your cabinet. Here’s a list of items you’ll need:
- Protective gloves
- Safety goggles
- Sandpaper (medium grit)
- Paint stripper
- Scraping tool
- Paintbrushes
- Chalk paint or acrylic paint (base coat)
- Antique glaze
- Lint-free cloth
- Artist brushes (for details)
- Clear polyurethane sealant
It’s important to wear protective gloves and safety goggles throughout the process to protect yourself from any potential harm. Sandpaper with a medium grit will help in removing the existing finish, while a paint stripper can be used to strip away layers of paint if necessary.
Having a scraping tool handy will make it easier to remove any stubborn paint or finishes. Additionally, you will need paintbrushes to apply the base coat and antique glaze. For the base coat, you can choose between chalk paint or acrylic paint, depending on your personal preference and the desired effect.
The antique glaze will give your cabinet that aged appearance. You’ll also need a lint-free cloth to wipe away any excess glaze and blend it into the surface. If you want to highlight specific details, small artist brushes will come in handy during that step.
Lastly, a clear polyurethane sealant will protect the finish and give your cabinet a durable surface. This will ensure that your newly antiqued cabinet remains in pristine condition for years to come.
Now that you have all the necessary materials on hand, let’s move on to the step-by-step process of antiquing your cabinet.
Step 1: Preparing the Cabinet
Before you can start the antiquing process, it’s important to properly prepare the cabinet. This involves removing any hardware, cleaning the surface, and ensuring the cabinet is ready for the transformation.
First, remove any knobs, handles, or hinges from the cabinet. This will make it easier to work on the surface and prevent any damage to the hardware during the antiquing process.
Next, thoroughly clean the cabinet to remove any dust, dirt, or grime. You can use a mild detergent or a gentle cleaning solution mixed with water. Make sure to wipe down all surfaces, paying close attention to any crevices or corners.
Once the cabinet is clean and dry, inspect it for any repairs that may be needed. Fill in any dents, scratches, or holes with wood filler, and sand the area smooth once it has dried. This will ensure a seamless finish when you apply the base coat and glaze.
Finally, protect the surrounding area by laying down drop cloths or old newspapers. This will prevent any accidental spills or splatters from staining your floor or furniture.
With your cabinet cleaned, repaired, and protected, you’re now ready to move on to the next step: removing the existing finish.
Step 2: Removing Existing Finish
Now that your cabinet is prepared, it’s time to remove the existing finish. This step is crucial to ensure that the new paint and distressing techniques adhere properly to the surface.
If your cabinet has a thick layer of paint, you may need to use a paint stripper. Follow the instructions on the paint stripper bottle and apply it to the cabinet surface. Allow the stripper to sit for the recommended time period, typically around 10-15 minutes, or as directed by the manufacturer.
Once the paint stripper has loosened the finish, use a scraping tool to gently scrape away the paint. Be careful not to apply too much pressure as it may damage the wood. Work in small sections, moving the scraper in a direction that avoids scratching the wood grain.
If your cabinet has a lighter layer of paint, you may be able to skip the paint stripper step. Instead, use medium-grit sandpaper to sand away the existing finish. Sand in the direction of the wood grain, applying consistent pressure. This will remove any glossy or smooth surfaces and create a rougher texture, making it easier for the new paint to adhere.
After the majority of the existing finish is removed, wipe down the entire cabinet with a clean cloth to remove any remaining residue from the paint stripper or sanding. Ensure that the cabinet surface is smooth and free from any debris before proceeding to the next step.
With the existing finish successfully removed, you are now ready to move on to Step 3: applying a base coat. This is where the transformation of your cabinet begins to take shape, so let’s continue the journey!
Step 3: Applying a Base Coat
Now that you have a clean and prepped surface, it’s time to apply a base coat to your cabinet. The base coat will provide a foundation for the antique finish and serve as a starting point for the distressing process.
There are two popular options for the base coat: chalk paint and acrylic paint. Chalk paint is known for its matte and velvety finish, while acrylic paint offers a wider range of color options. Choose the type of paint that best suits your desired aesthetic and the overall look you want to achieve.
Before applying the base coat, stir the paint thoroughly to ensure it’s well mixed. Using a paintbrush, apply an even layer of paint to the entire cabinet surface, working in the direction of the wood grain. Pay particular attention to any detailed areas or corners, ensuring they are thoroughly covered.
Allow the first coat of paint to dry completely before applying a second coat. This will ensure a smooth and consistent finish. Depending on the paint you’ve chosen, you may need to apply multiple coats to achieve the desired color and coverage.
Once the final coat of paint is dry, inspect the cabinet for any uneven areas or brush strokes. If necessary, lightly sand the surface with a fine-grit sandpaper to smooth out any imperfections. Be careful not to sand too vigorously, as you want to preserve the integrity of the base coat.
After sanding, use a clean cloth to wipe away any sanding dust. This will prepare the cabinet for the next step: creating distressed areas. Distressing the cabinet will give it an aged and weathered appearance, adding character and depth to the overall finish.
With the base coat complete, you’re now ready to proceed to Step 4: creating distressed areas on your cabinet. Get ready to add a touch of vintage charm to your piece!
To antique a cabinet, start by sanding the surface to remove any existing finish. Apply a coat of primer, followed by a base coat of paint. Once dry, use sandpaper to distress the edges and corners. Apply a glaze or dark wax to create an aged look, then seal with a clear topcoat.
Read more: How To Store Antique Furniture
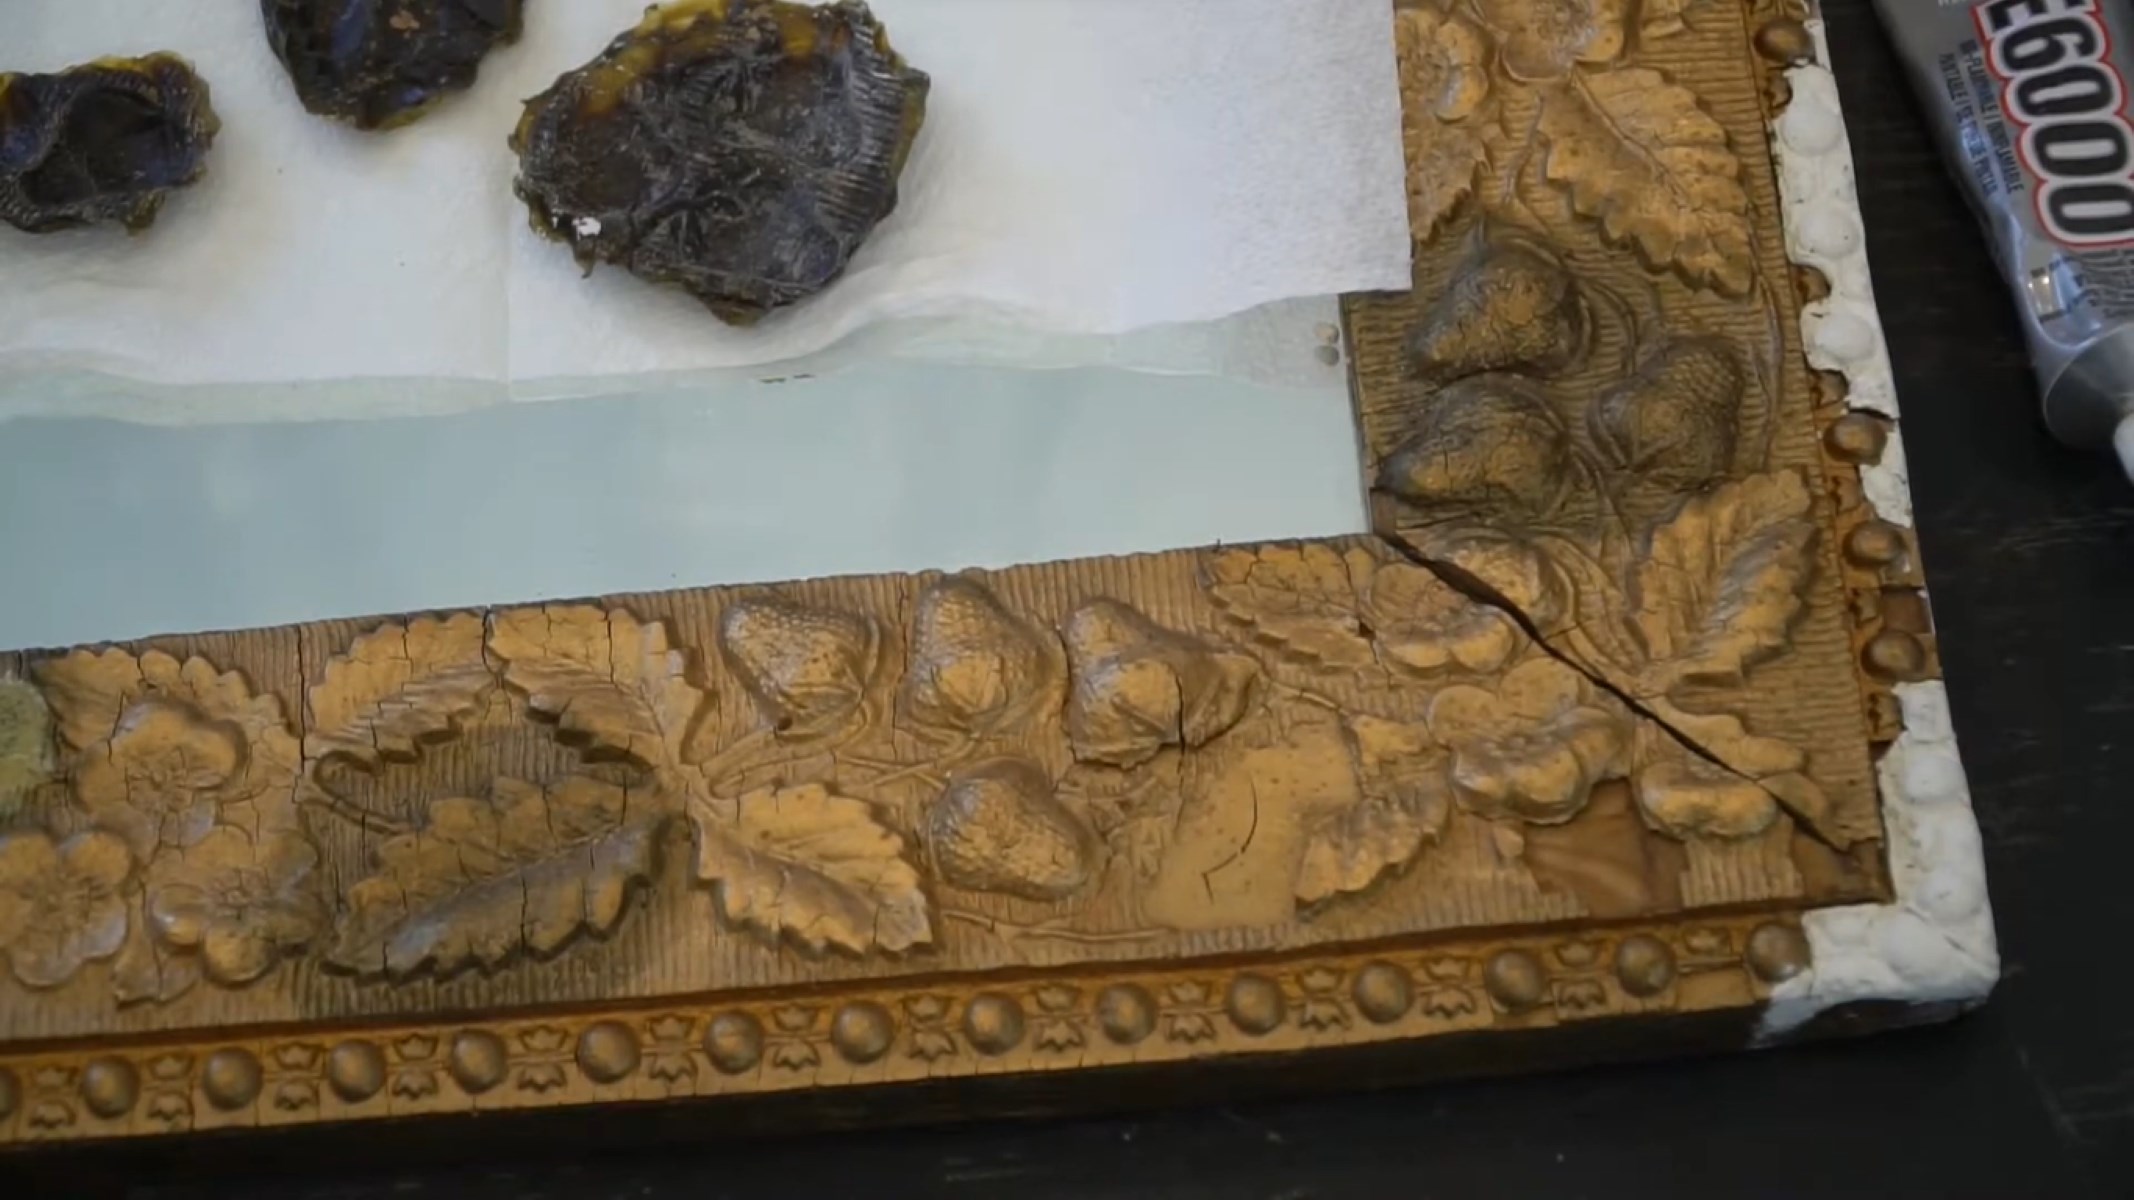
Step 4: Creating Distressed Areas
Creating distressed areas on your cabinet is an essential part of achieving that authentic antique look. This step will give your piece character, as if it has withstood the test of time and undergone natural wear and tear.
There are several techniques you can use to create distressed areas, depending on the desired effect and the look you want to achieve. Here are a few popular methods:
- Sandpaper Method: Use medium-grit sandpaper to gently sand the edges and corners of the cabinet, as well as any other areas that would naturally show signs of wear. Focus on areas where the piece would naturally get bumped or rubbed over time. This will expose the base coat and create a worn and faded look.
- Hammer Method: Lightly tap the surface of the cabinet with a hammer to create small dents and dings. Be careful not to overdo it and cause damage to the wood. This method mimics the effects of years of use and adds a rustic and aged appearance.
- Stain Method: Apply wood stain in a darker shade to certain areas of the cabinet, such as corners, edges, or grooves. Use a cloth to blot and rub the stain, creating a subtle weathered effect. This technique adds depth and dimension to the piece.
When distressing, remember to step back occasionally and assess the overall effect. You want to achieve a balanced look, where the distressing appears natural and intentional. Do not rush the process, as it’s easier to add more distressing than to remove it if you go overboard.
Once you are satisfied with the distressed areas, use a clean cloth to wipe away any dust or debris. This will prepare the cabinet for the next step: adding the antique glaze.
Creating distressed areas is a crucial step in achieving an authentic antique look for your cabinet. Don’t be afraid to experiment with different distressing techniques and find the method that works best for your desired aesthetic. Move on to Step 5 and let’s bring that antique charm to life!
Step 5: Adding Antique Glaze
Adding an antique glaze to your cabinet is a key step in achieving an authentic vintage look. The glaze will enhance the distressed areas, add depth to the finish, and give your cabinet that aged patina.
Before applying the antique glaze, make sure your base coat is completely dry. If necessary, lightly sand any rough areas to ensure a smooth surface for the glaze application.
Start by stirring the antique glaze thoroughly to ensure it is well mixed. Using a paintbrush or a foam brush, apply a thin layer of glaze to the cabinet surface, working in small sections at a time.
Once the glaze is applied, use a clean lint-free cloth to gently wipe away the excess glaze. This will leave the glaze in the crevices, recessed areas, and distressed spots, giving your cabinet an aged and weathered appearance.
Work in small areas and blend the glaze as you go, ensuring a consistent and realistic look across the entire piece. It’s important to work quickly as the glaze dries fast, so you can adjust and control the level of antiquing to your liking.
If you feel that the glaze is too heavy in certain areas, use a damp cloth to lightly wipe away some of the excess glaze, creating a more subtle effect. If you want to add more depth and darkness, you can apply a second coat of glaze once the first coat is dry.
Remember, the goal is to achieve a natural and aged appearance, so take your time and step back occasionally to assess the overall effect. Make adjustments as needed to ensure a cohesive and authentic antique finish.
After applying the antique glaze, allow it to dry completely according to the manufacturer’s instructions. This is an important step to ensure the glaze sets properly before moving on to highlighting the details in the next step.
With the antique glaze applied, your cabinet is truly starting to come to life with that beautifully aged look. Now, let’s move on to Step 6 and highlight the details to add those finishing touches!
Step 6: Highlighting Details
Highlighting the details of your cabinet adds an extra layer of character and depth to the overall antique finish. This step allows you to draw attention to intricate design elements, carvings, or interesting features that make your piece unique.
To highlight the details, you will need small artist brushes and a contrasting color of paint. Choose a paint color that complements your base coat and adds a subtle pop to the highlighted areas.
Dip your artist brush into the contrasting paint color and carefully trace along the edges of the details you want to highlight. This could include edges, grooves, or decorative patterns. Use a light hand and small, precise strokes to ensure accuracy.
As you paint, periodically step back and evaluate the effect. Don’t be afraid to make adjustments or experiment with different areas to highlight. The goal is to bring attention to these details while maintaining a cohesive and harmonious antique finish.
If you accidentally paint outside of the desired area, gently wipe away the excess paint with a damp cloth. Be cautious not to disturb the base coat or antique glaze as you correct any errors.
Once you’re satisfied with the highlighted details, allow the paint to dry completely. This is important to ensure the paint sets and remains vibrant without smearing or smudging.
After the paint has dried, take a moment to clean your brushes thoroughly. Proper brush care will prolong their lifespan and ensure optimal performance for future projects.
With the details highlighted, your cabinet is now adorned with charming accents that truly elevate its antique allure. All that’s left is to seal the finish in the final step.
Before we conclude this antiquing journey, let’s move on to Step 7 and seal the finish to protect your beautifully transformed cabinet.
Step 7: Sealing the Finish
The final step in antiquing your cabinet is to seal the finish to protect it and ensure its longevity. This step will help preserve the beautiful transformation you’ve achieved and keep your cabinet looking stunning for years to come.
To seal the finish, you will need a clear polyurethane sealant. This type of sealant provides a durable and protective coating that will safeguard the paint, glaze, and highlighted details.
Before applying the sealant, ensure that the cabinet is clean and free from any dust or debris. Use a clean cloth or a soft brush to gently remove any particles that may have settled on the surface.
Using a paintbrush, apply a thin and even layer of the polyurethane sealant to the entire cabinet. Start at one end and work your way across, ensuring that you cover all surfaces, including the top, sides, and inside of the cabinet if applicable.
Pay special attention to the areas that may be prone to more wear and tear, such as drawer fronts or cabinet handles. Apply an extra layer of sealant to these areas for added protection.
Once the first coat of sealant is dry, lightly sand the surface with fine-grit sandpaper to create a smooth finish. This will help remove any imperfections and prepare the surface for the final coat.
Apply a second coat of sealant, following the same process as before. This additional layer will provide extra protection and ensure a long-lasting finish.
Allow the sealant to fully dry according to the manufacturer’s instructions before handling or using the cabinet. This will ensure that the sealant fully cures and provides optimal protection.
After the final coat has dried, carefully inspect the cabinet for any areas that may need touch-ups. If necessary, lightly sand and reapply the sealant to those spots to achieve a flawless finish.
With the sealant applied and dried, your cabinet is officially complete! It has been transformed into a stunning piece with an antique charm that will enhance your interior decor.
Congratulations on successfully antiquing your cabinet! Take a moment to appreciate the hard work and creativity you’ve invested in this project. Your efforts have resulted in a beautiful and unique piece that holds a timeless allure.
Remember to maintain the beauty of your antiqued cabinet by regularly dusting and cleaning it with gentle products. Avoid harsh chemicals and abrasive materials that may damage the finish.
Now that you’ve mastered the art of antiquing, feel free to explore this technique on other furniture pieces and continue to infuse your space with the warmth and character of vintage aesthetics. Happy antiquing!
Read more: How To Clean Antique Linens And Clothing
Conclusion
Congratulations on completing the journey of antiquing your cabinet! By following the step-by-step process outlined in this guide, you have transformed an ordinary piece of furniture into a unique and charming focal point for your interior decor.
Antiquing a cabinet allows you to unleash your creativity and create a personalized piece that adds character and depth to your space. The techniques you’ve learned, including preparing the cabinet, removing the existing finish, applying a base coat, distressing, adding antique glaze, highlighting details, and sealing the finish, have given you the skills to achieve an authentic antique look.
Throughout this process, you’ve discovered the importance of proper preparation, attention to detail, and patience. Each step contributes to the overall success and authenticity of your antiquing project.
Remember that antiquing is an art form, and there are no hard and fast rules. Feel free to experiment with different distressing techniques, color combinations, or finishes to create a look that reflects your unique style and vision.
As you continue to explore the world of interior design and home decor, don’t hesitate to apply the techniques you’ve learned here to other furniture pieces or even venture into new projects. The possibilities are endless!
Lastly, maintenance is key to ensuring the longevity of your beautifully antiqued cabinet. Regularly dust and clean the surface, taking care to use gentle products that won’t harm the finish. With proper care, your cabinet will continue to shine and exude its timeless charm for years to come.
Thank you for joining us on this antiquing journey. We hope it has inspired you to unleash your creativity and transform your space with the allure of vintage aesthetics. Happy antiquing!
Frequently Asked Questions about How To Antique A Cabinet
Was this page helpful?
At Storables.com, we guarantee accurate and reliable information. Our content, validated by Expert Board Contributors, is crafted following stringent Editorial Policies. We're committed to providing you with well-researched, expert-backed insights for all your informational needs.


0 thoughts on “How To Antique A Cabinet”