
Articles
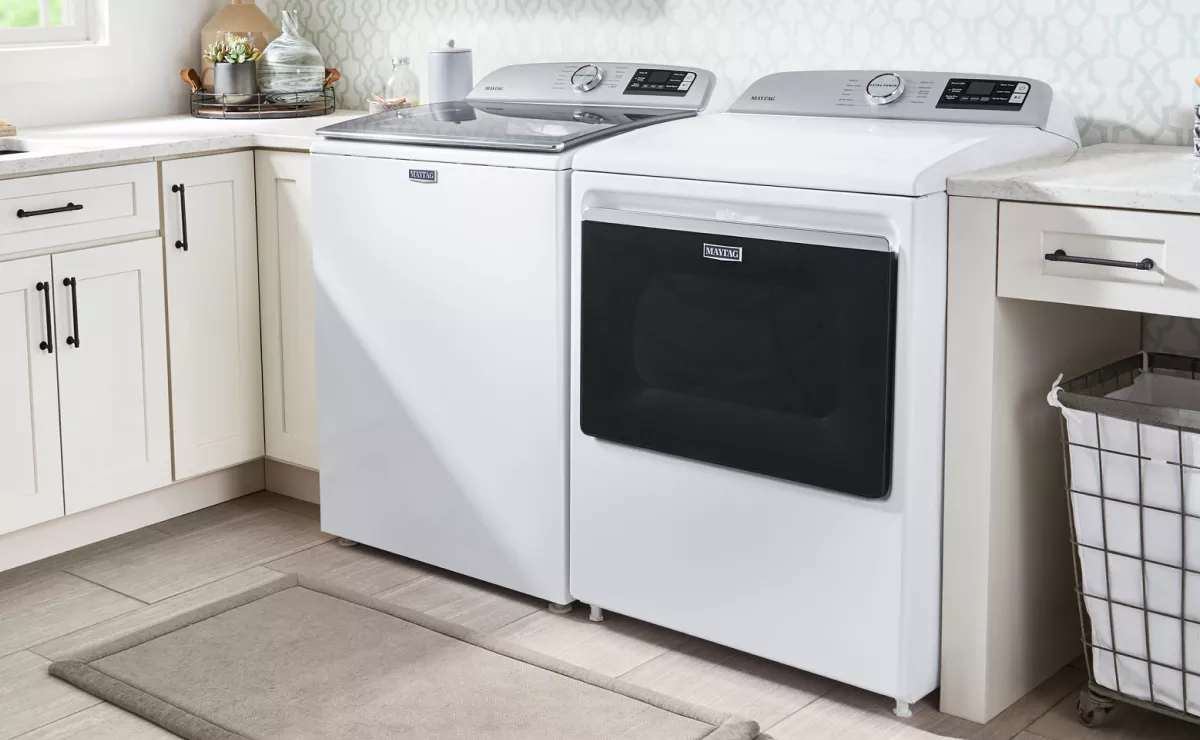
How To Clean Dryer Drum
Modified: August 28, 2024
Learn how to clean dryer drum with these helpful articles. Keep your dryer running efficiently and prevent buildup.
(Many of the links in this article redirect to a specific reviewed product. Your purchase of these products through affiliate links helps to generate commission for Storables.com, at no extra cost. Learn more)
Introduction
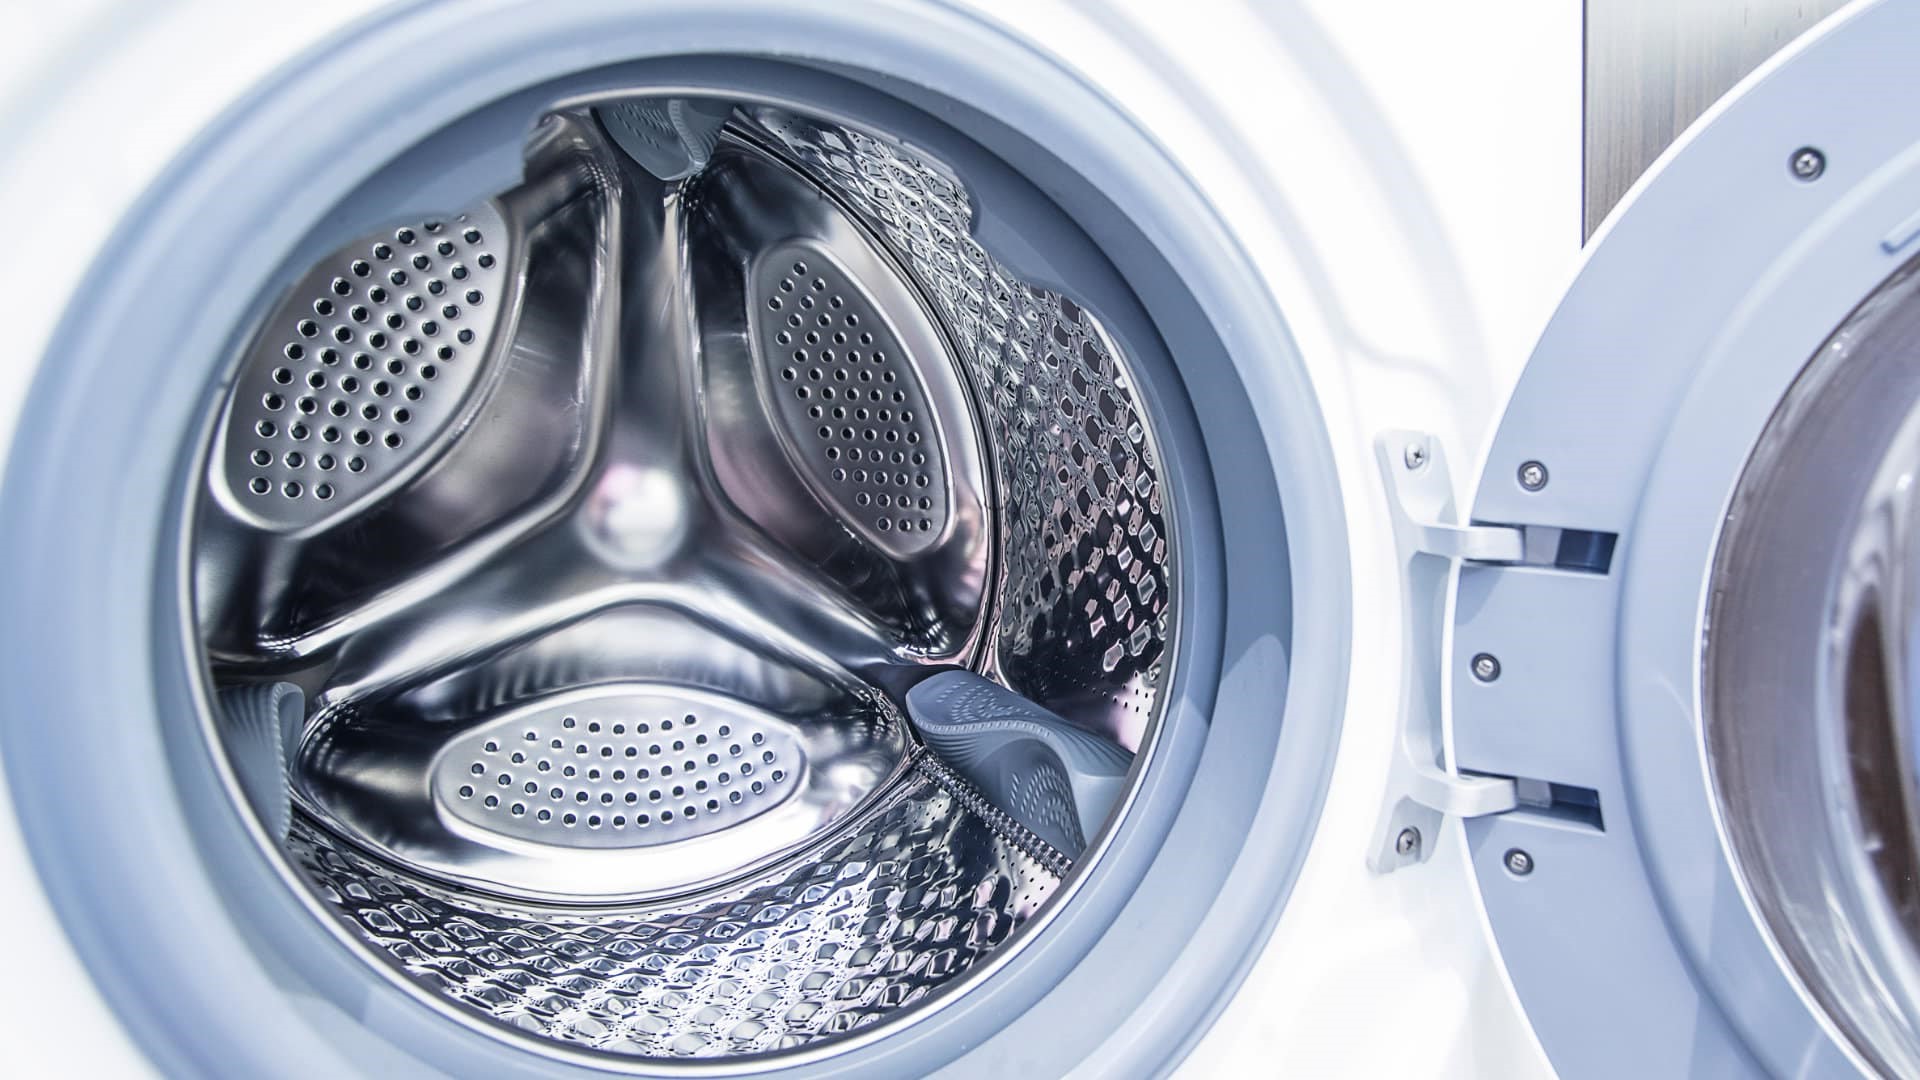
A dryer drum, also known as a dryer tub or barrel, is where wet clothes are placed for drying. Over time, it’s common for the drum to accumulate lint, dust, and even residue from fabric softeners or dryer sheets. This buildup not only affects the efficiency of the dryer but can also impact the freshness and cleanliness of your clothes.
Regularly cleaning the dryer drum is an essential maintenance task that helps prolong the lifespan of your dryer, improve its performance, and ensure your clothes come out looking and smelling fresh. In this article, we’ll guide you through the step-by-step process of cleaning your dryer drum effectively and efficiently.
Before we dive into the cleaning process, let’s take a moment to discuss some important safety precautions to keep in mind. It’s crucial to prioritize your safety during any appliance maintenance task, and cleaning a dryer drum is no exception.
Key Takeaways:
- Regularly cleaning your dryer drum not only prolongs the appliance’s lifespan and improves performance but also ensures your clothes come out looking and smelling fresh. Prioritize safety and follow the step-by-step process for effective maintenance.
- Don’t overlook the importance of cleaning the lint trap and vents, as clogged areas can lead to decreased efficiency and potential fire hazards. Reconnect the dryer safely and perform regular maintenance to keep it running efficiently for years to come.
Read more: How To Clean A Printer Drum
Safety Precautions
Before attempting to clean your dryer drum, it’s important to ensure your safety and prevent any accidents. Follow these safety precautions:
- Turn off the dryer and unplug it from the power source. This step is crucial to avoid any electrical hazards while working on the appliance.
- Allow the dryer to cool down completely. The drum can get hot during operation, so it’s important to let it cool down for a while to avoid burning yourself.
- Wear protective gloves. Cleaning agents and residue in the drum can be harsh on your skin, so it’s advisable to wear gloves to protect your hands.
- Open windows or ensure proper ventilation. Some cleaning agents may emit strong fumes, so it’s important to have proper ventilation in the room to avoid inhaling any harmful chemicals.
- Read the manufacturer’s instructions. Different dryer models may have specific cleaning instructions or precautions. Refer to the user manual or manufacturer’s guidelines for any specific information.
By following these safety precautions, you can ensure a safe and hassle-free cleaning process for your dryer drum.
Gather Necessary Materials
Before you begin cleaning your dryer drum, it’s important to gather all the necessary materials. Having everything prepared beforehand will make the process smoother and more efficient. Here are the materials you’ll need:
- Microfiber or lint-free cloth: These types of cloths are ideal for cleaning the drum as they are gentle and won’t leave behind any lint or fibers.
- All-purpose cleaner or mild detergent: Choose a cleaner that is safe for use on appliances and won’t damage the drum’s surface. Avoid using abrasive cleaners that can scratch or corrode the drum.
- Vacuum cleaner with a brush attachment: A vacuum cleaner with a brush attachment is useful for removing loose debris, lint, or dust from the drum and the surrounding areas.
- Soft-bristle brush or toothbrush: You’ll need a soft-bristle brush or a toothbrush to reach the nooks and crannies of the drum, especially in areas that are hard to reach with a cloth.
- Vinegar or baking soda (optional): Vinegar and baking soda are natural cleaning agents that can help remove stubborn stains or odors from the drum, particularly if you prefer using non-toxic alternatives.
Ensure that you have all these materials on hand before starting the cleaning process. Having everything ready will make the process more convenient and efficient.
Disconnect the Dryer
Before you can start cleaning the dryer drum, you’ll need to disconnect the dryer from the power source and ensure that it is completely turned off. Follow these steps to disconnect your dryer:
- Turn off the dryer: Locate the power button or switch on your dryer and turn it off.
- Unplug the dryer: Locate the power cord of your dryer and unplug it from the electrical outlet. This step is crucial for your safety.
- Ensure it’s cool: Let the dryer cool down completely, especially if it has recently been in use. This will prevent any accidental burns while cleaning.
Once you have safely disconnected the dryer and ensured it is cool, you can proceed to the next steps of cleaning the dryer drum.
Vacuum the Drum
Now that the dryer is disconnected and cool, it’s time to start cleaning the drum. The first step is to remove loose debris, lint, and dust using a vacuum cleaner with a brush attachment. Follow these steps to vacuum the drum:
- Attach the brush attachment to your vacuum cleaner: Most vacuum cleaners come with a brush attachment specifically designed for cleaning delicate surfaces like dryer drums. Attach the brush attachment securely.
- Open the dryer door: Open the door of the dryer and locate the drum. Make sure it is accessible and visible for cleaning.
- Start vacuuming the drum: Turn on the vacuum cleaner and carefully run the brush attachment along the entire surface of the drum. Pay close attention to the crevices, corners, and edges where lint and debris tend to accumulate.
- Continue vacuuming the surrounding areas: While you’re at it, take the opportunity to vacuum the lint trap area, the lint screen, and any other accessible parts of the dryer. This will help improve the overall efficiency of the dryer.
- Repeat if necessary: If there is an excessive amount of lint or debris, you may need to empty the vacuum cleaner and repeat the process until the drum is thoroughly clean.
By vacuuming the drum, you’ll remove the loose debris and lint, which will provide a cleaner surface for the next steps of the cleaning process.
Read more: How To Clean The Drum Of A Washing Machine
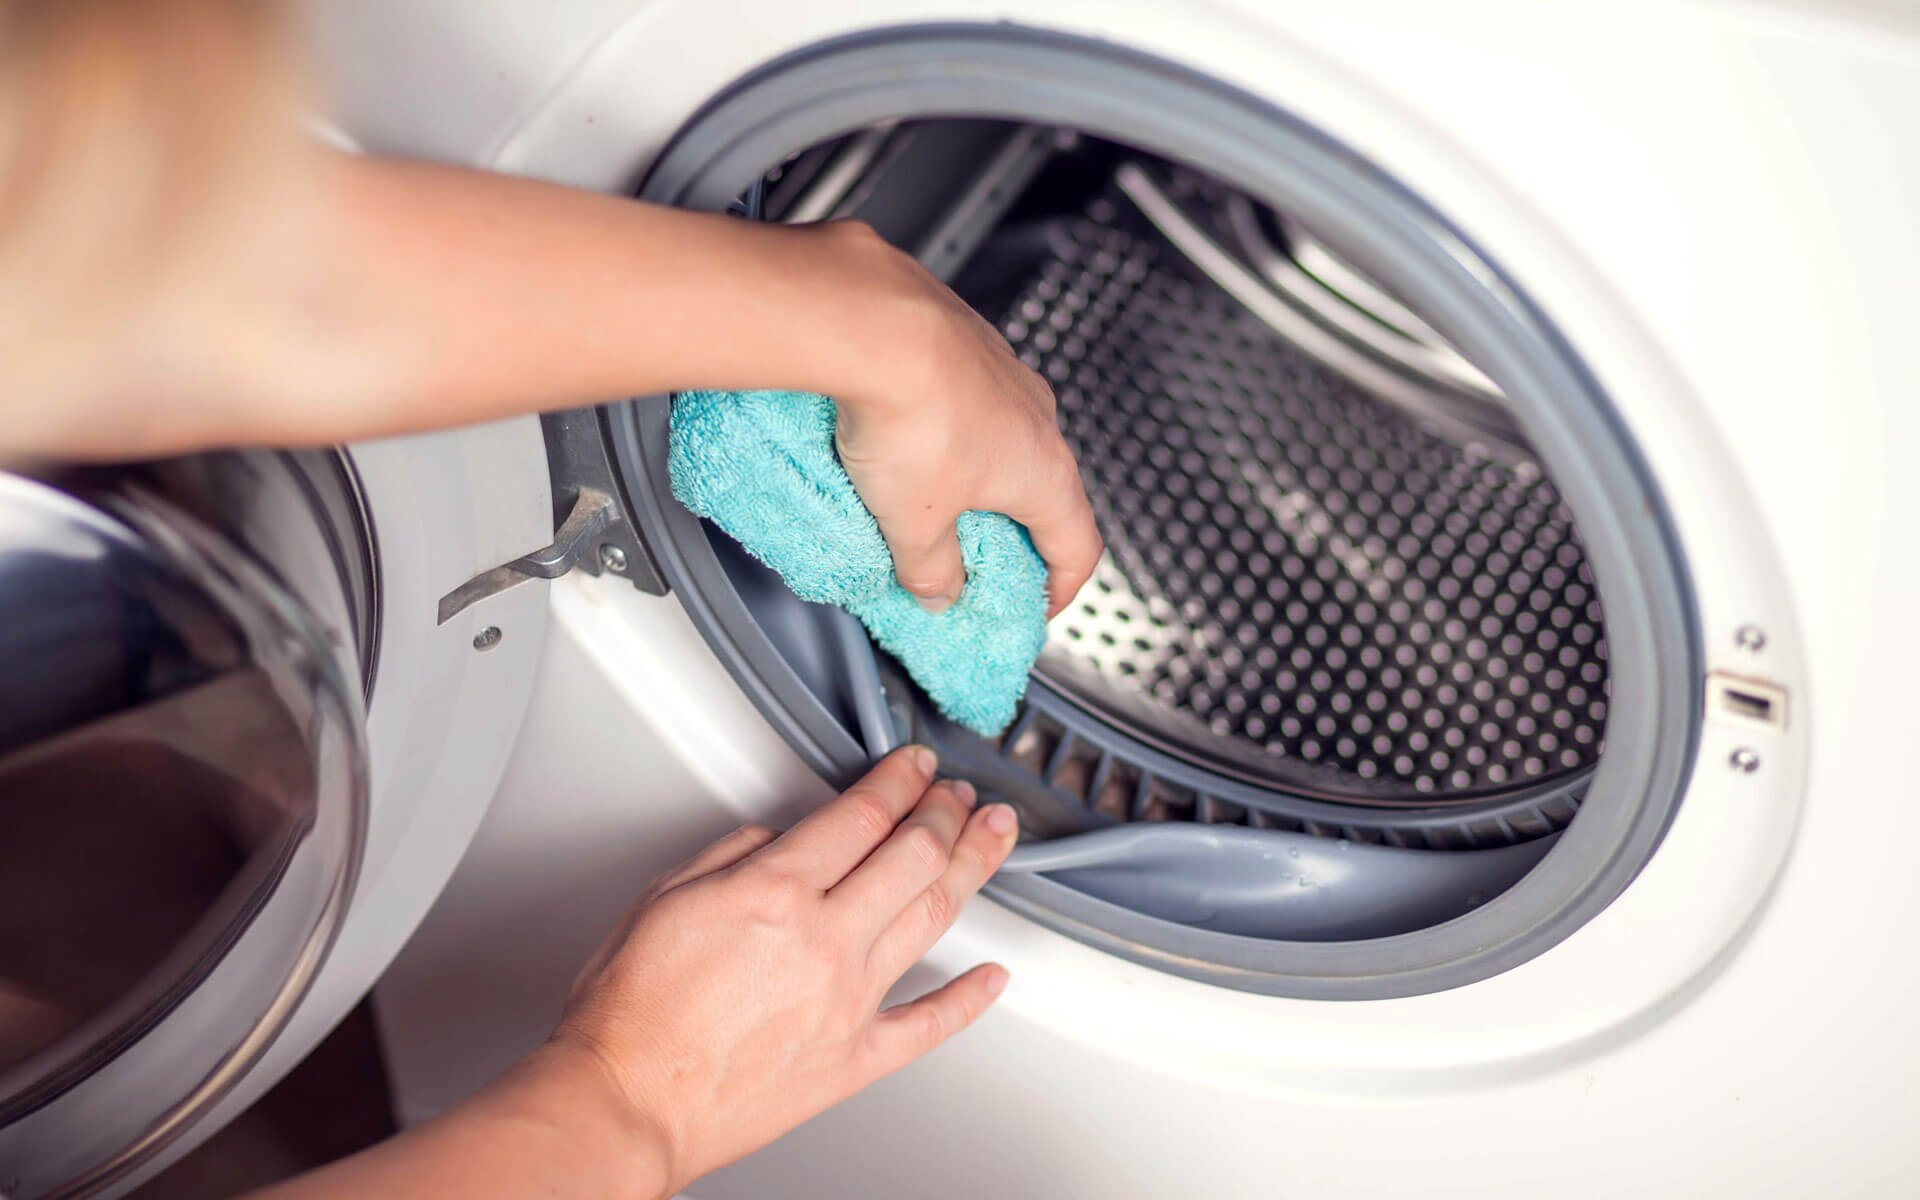
Wipe the Drum with a Damp Cloth
After vacuuming the drum, the next step is to wipe the drum with a damp cloth. This will help remove any remaining residue, stains, or dust that couldn’t be vacuumed away. Follow these steps to effectively wipe the drum:
- Prepare a damp cloth: Take a soft, lint-free cloth and dampen it with water. Make sure the cloth is damp and not soaking wet, as excessive moisture can damage the drum.
- Gently wipe the drum: Start at one end of the drum and work your way across, using gentle, circular motions. Pay close attention to any visible stains or spots on the drum’s surface. For tough stains, you may need to apply a mild detergent or an all-purpose cleaner as recommended by the manufacturer.
- Continuously rinse and wring out the cloth: As you wipe the drum, the cloth may start to accumulate lint or dirt. Rinse the cloth frequently under running water and wring it out thoroughly before continuing to wipe the drum. This will ensure that you’re using a clean cloth throughout the process.
- Reach the drum’s edges and corners: Don’t forget to clean the edges and corners of the drum, as these areas are prone to collecting lint and dust. Use a soft-bristle brush or an old toothbrush to reach these harder-to-reach areas.
- Inspect the drum: After wiping the drum, take a moment to inspect it for any remaining residue or streaks. If necessary, dampen a clean cloth and give the drum a final wipe to ensure it’s completely clean.
Wiping the drum with a damp cloth will help remove any surface grime and leave the drum looking clean and fresh.
Use a damp cloth and mild soap to wipe down the inside of the dryer drum. For stubborn stains, make a paste of baking soda and water and scrub gently. Wipe dry with a clean cloth.
Remove Stubborn Stains
If you come across stubborn stains on the dryer drum that couldn’t be removed with a damp cloth alone, don’t worry. There are a few techniques you can try to tackle those stubborn stains. Follow these steps to remove stubborn stains from your dryer drum:
- Mix a cleaning solution: Depending on the type of stain, you can create a cleaning solution using either vinegar or baking soda. For vinegar, dilute it with equal parts of water. For baking soda, create a paste by mixing it with a small amount of water.
- Apply the cleaning solution: Dip a clean cloth or sponge into the cleaning solution, making sure it’s saturated but not dripping. Apply the solution directly to the stubborn stain on the drum.
- Gently scrub the stain: Use circular motions or a gentle scrubbing motion with the cloth or sponge to work the cleaning solution into the stain. Be careful not to use excessive force or scrub too aggressively, as this may damage the drum’s surface.
- Let the solution sit: After scrubbing, let the cleaning solution sit on the stain for a few minutes. This will give it time to break down the stain and make it easier to remove.
- Wipe away the stain: After allowing the solution to sit, use a clean damp cloth to wipe away the stain. Repeat the process if necessary until the stain is completely removed.
It’s important to note that certain types of stains may require specific stain-removal techniques or products. Always refer to the manufacturer’s instructions or consult a professional if you’re unsure or dealing with a particularly stubborn stain.
Once the stubborn stains have been successfully removed, proceed to the next step of cleaning your dryer drum.
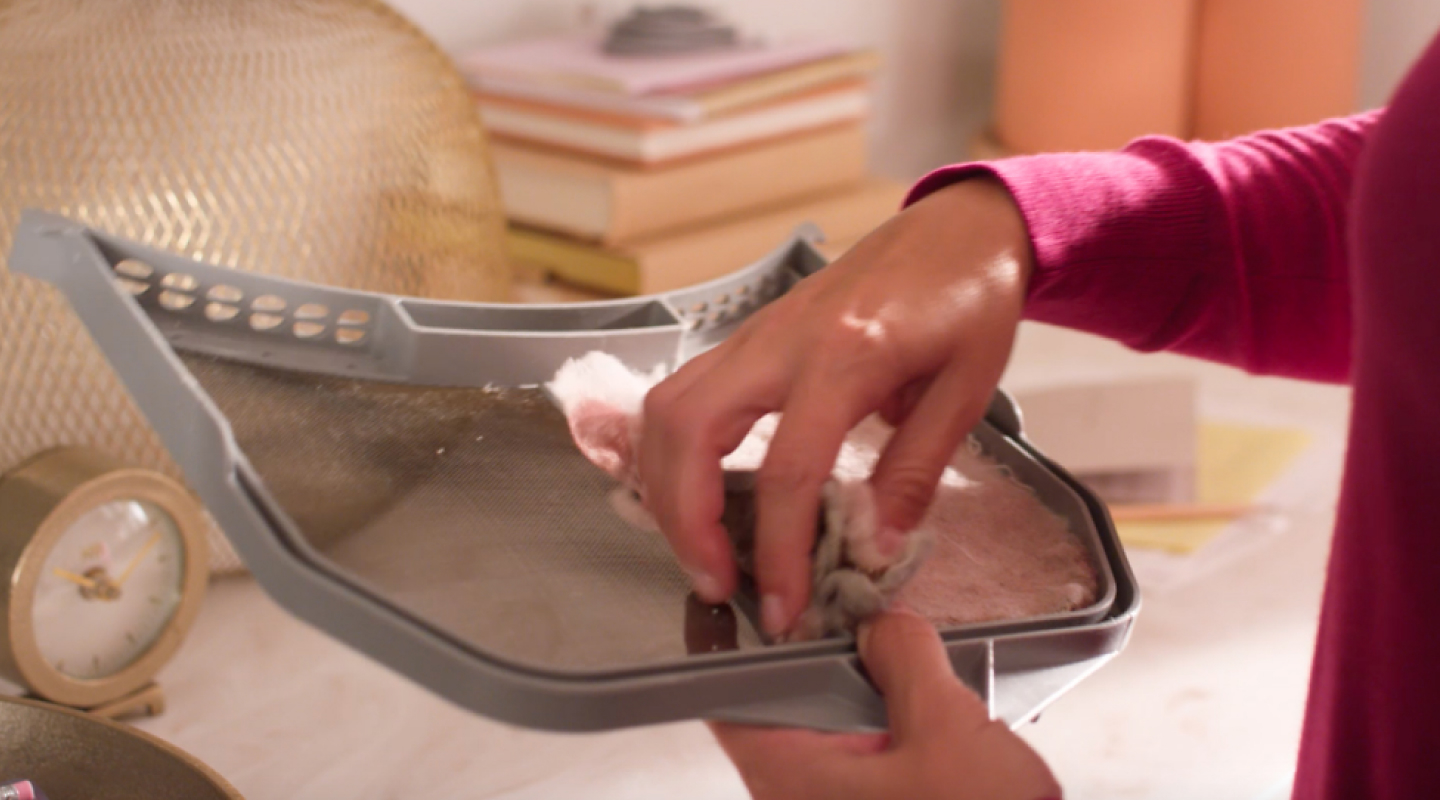
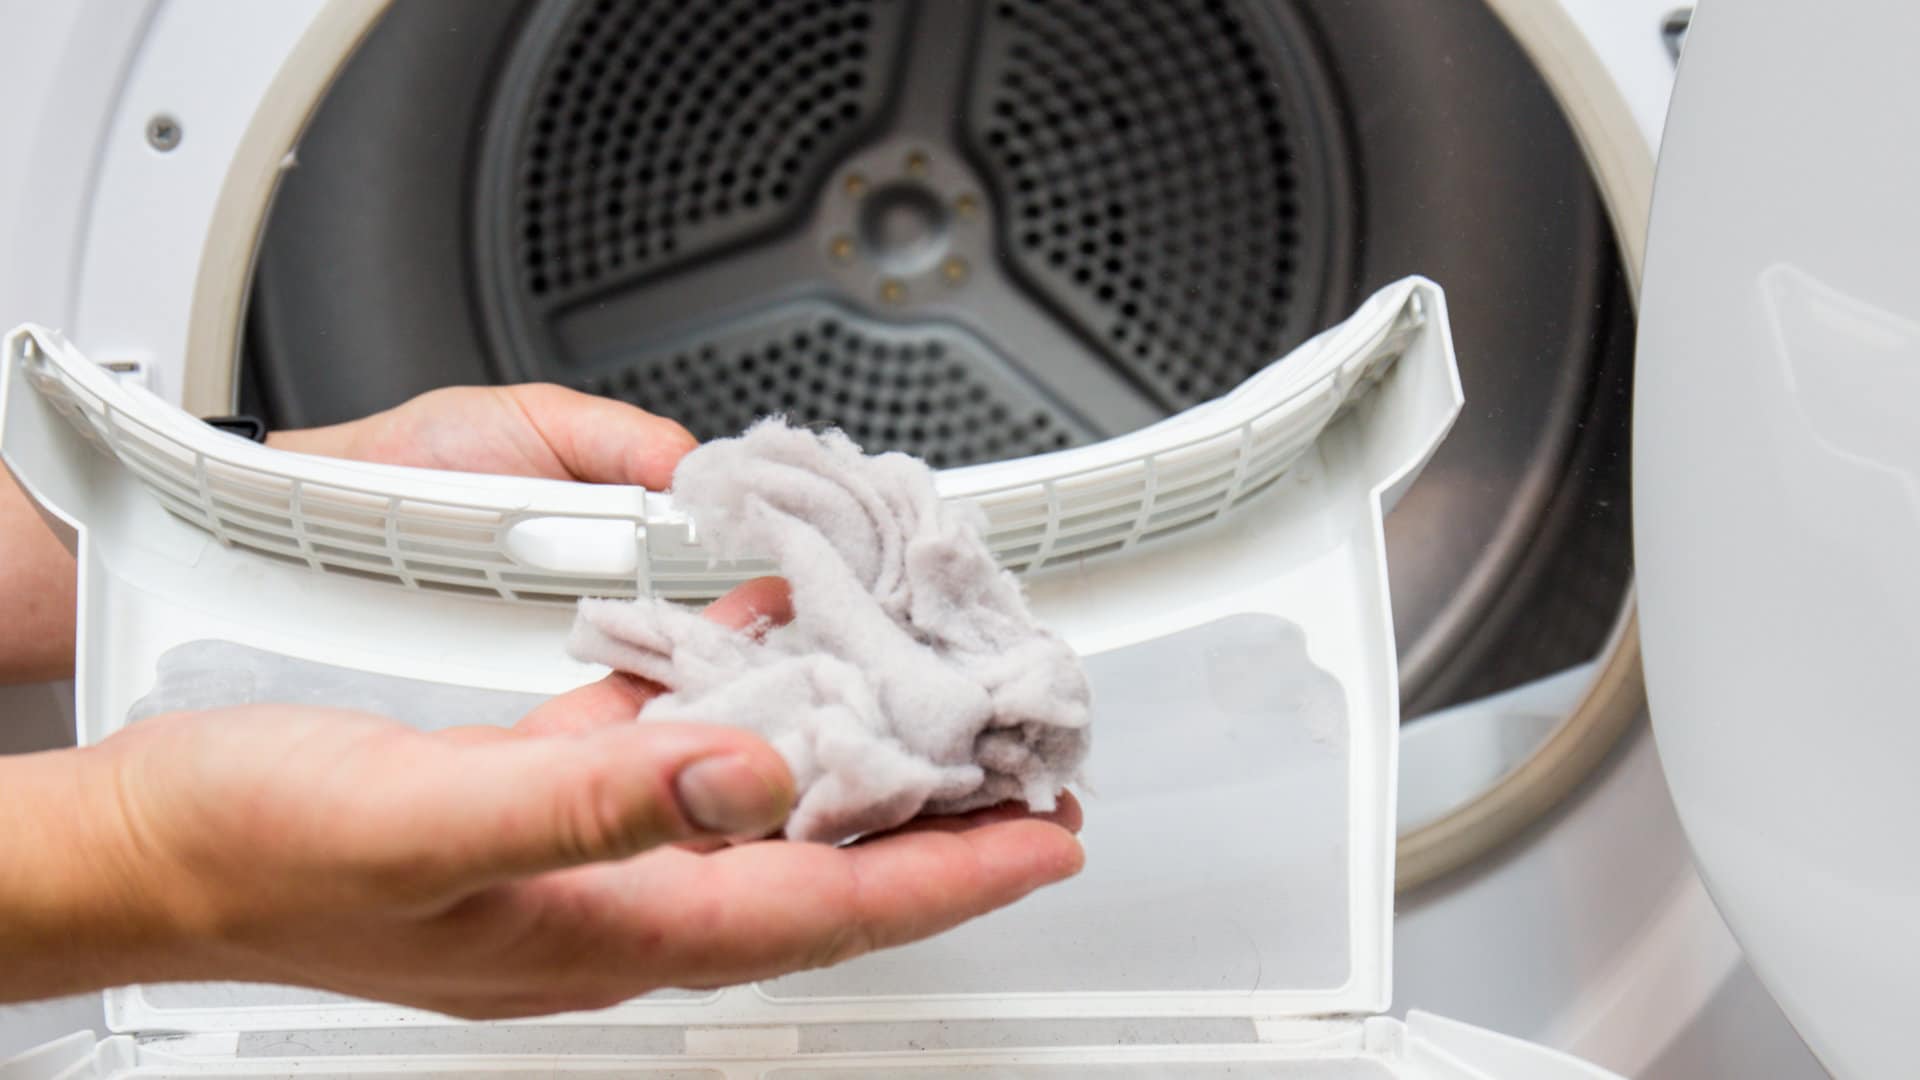
Clean the Lint Trap and Vents
While cleaning the dryer drum, it’s important not to overlook the lint trap and vents. A clogged lint trap or vent can lead to decreased airflow, reduced efficiency, and even potential fire hazards. Follow these steps to clean the lint trap and vents:
- Remove the lint trap: Locate the lint trap, which is typically located inside the dryer door or on top of the dryer. Pull out the lint trap and remove any visible lint or debris by hand.
- Clean the lint trap: Use a soft brush or your fingertips to remove any remaining lint from the lint trap. Alternatively, you can rinse the lint trap under running water and let it dry completely before reinserting it into the dryer.
- Vacuum the lint trap area: Use a vacuum cleaner with a brush attachment or a lint brush to vacuum around the lint trap area, removing any trapped lint, dust, or debris.
- Clean the vent hose: Locate the vent hose, which is typically connected to the back of the dryer. Disconnect the hose and use a vacuum cleaner or lint brush to remove any built-up lint or debris from the hose.
- Inspect the vents: Check the exterior vents of your dryer, which are usually located on the outside of your home. Ensure that they are free from obstructions such as lint, dust, or debris. Use a brush or your fingers to clean any visible buildup.
Regularly cleaning the lint trap and vents will not only improve the performance and efficiency of your dryer but also help prevent potential fire hazards. Make it a habit to clean these areas every few months or as recommended by the manufacturer.
Reconnect the Dryer
After you have completed the cleaning process for your dryer drum, it’s time to reconnect the dryer and get it ready for use. Follow these steps to safely reconnect your dryer:
- Ensure the dryer is dry: Before reconnecting the dryer, make sure that all parts, including the drum and lint trap, are completely dry. This will prevent any potential electrical issues or damage.
- Position the dryer correctly: Move the dryer back into its original position, ensuring that it is level and stable. This will prevent any unnecessary vibrations or movement during operation.
- Reattach the vent hose: Locate the vent hose and securely reattach it to the back of the dryer. Ensure that it is properly connected and tightened to prevent any air leakage.
- Plug in the power cord: Locate the power cord and plug it back into the electrical outlet. Double-check that the cord is securely plugged in and that there are no loose connections.
- Turn on the dryer: Once everything is properly connected, turn on the dryer and test it to make sure it is functioning correctly.
By following these steps, you can safely and effectively reconnect your dryer after cleaning the drum. Take a moment to ensure that everything is properly set up before using the dryer again.
Read also: 15 Unbelievable Samsung Dryer Drum For 2025
Final Tips and Recommendations
Congratulations! You have successfully cleaned your dryer drum and completed the maintenance tasks. To ensure that your dryer continues to work efficiently and effectively, here are some final tips and recommendations:
- Perform regular maintenance: Make it a habit to clean your dryer drum at least every few months or as recommended by the manufacturer. Regular maintenance will prevent the build-up of lint, dust, and residue, and help extend the lifespan of your dryer.
- Clean the lint trap after every use: Always clean the lint trap after each drying cycle. This will prevent lint build-up and ensure proper airflow in the dryer.
- Check the vents regularly: Inspect the exterior vents regularly to ensure they are free from obstructions and are functioning properly. Blocked vents can lead to decreased airflow and pose a fire hazard.
- Follow the manufacturer’s guidelines: Refer to the user manual or manufacturer’s guidelines for specific cleaning instructions or precautions for your particular dryer model.
- Avoid overloading the dryer: Overloading the dryer can reduce its effectiveness and put strain on the drum and other parts. Make sure to follow the recommended load capacity for your dryer model.
- Consider professional maintenance: If you’re unsure about performing maintenance tasks on your dryer, or if you’re experiencing any issues, it’s always a good idea to consult a professional technician for assistance.
By following these tips and recommendations, you can keep your dryer in optimal condition and ensure that it continues to provide efficient and reliable drying performance for years to come.
Conclusion
Cleaning your dryer drum is an important maintenance task that helps keep your dryer running efficiently and ensures your clothes come out fresh and clean. By following the step-by-step process outlined in this article, you can effectively clean your dryer drum and maintain its performance.
Remember to always prioritize safety by disconnecting the dryer and following the necessary precautions. Gathering the necessary materials beforehand will help make the cleaning process more convenient and efficient. Vacuuming the drum and wiping it down with a damp cloth will remove loose debris and grime.
If you encounter stubborn stains, use appropriate cleaning solutions and gently scrub the affected areas. Cleaning the lint trap and vents is also crucial as it improves airflow and reduces fire hazards.
Once you’ve completed the cleaning process, reconnect the dryer and perform regular maintenance to ensure its longevity and optimal performance. Clean the lint trap after each use and check the vents regularly for any obstructions. Following the manufacturer’s guidelines and avoiding overloading the dryer will further contribute to its efficiency and durability.
By incorporating these tips into your dryer maintenance routine, you can keep your dryer drum clean and ensure that your dryer continues to operate effectively and safely for years to come.
Remember, a clean dryer drum not only enhances performance but also contributes to fresh and clean laundry. So, get started with cleaning your dryer drum and enjoy the benefits of a well-maintained appliance!
Frequently Asked Questions about How To Clean Dryer Drum
Was this page helpful?
At Storables.com, we guarantee accurate and reliable information. Our content, validated by Expert Board Contributors, is crafted following stringent Editorial Policies. We're committed to providing you with well-researched, expert-backed insights for all your informational needs.


0 thoughts on “How To Clean Dryer Drum”