
Articles
How To Clean Inside Of Dryer
Modified: October 18, 2024
Learn how to clean the inside of your dryer with these helpful articles. Keep your dryer running smoothly and efficiently for longer.
(Many of the links in this article redirect to a specific reviewed product. Your purchase of these products through affiliate links helps to generate commission for Storables.com, at no extra cost. Learn more)
Introduction:
Keeping your dryer in optimal condition is essential for efficient and safe operation. Regularly cleaning the inside of your dryer helps to remove lint, debris, and residue that can accumulate over time. This not only improves the performance of your dryer but also reduces the risk of fire hazards.
In this article, we will guide you through the process of cleaning the inside of your dryer step by step. From gathering the necessary supplies to properly reassembling your dryer, we will cover everything you need to know to keep your appliance in top shape.
Before we begin, it is important to note that safety should always be a top priority when working with electrical appliances. Make sure to follow the safety precautions outlined in this article and consult your dryer’s manual for any specific instructions or warnings.
Now, let’s dive into the step-by-step process of cleaning the inside of your dryer.
Key Takeaways:
- Regularly cleaning the inside of your dryer not only improves its efficiency but also reduces the risk of fire hazards. Make it a part of your regular maintenance routine, especially if you use your dryer frequently.
- By following these guidelines and taking proper care of your dryer, you can enjoy better performance, energy efficiency, and peace of mind knowing that your appliance is in great shape.
Read more: How To Clean A Dryer Inside And Out
Safety Precautions:
Before you start cleaning the inside of your dryer, it is crucial to take proper safety precautions. By following these guidelines, you can ensure your well-being and prevent any accidents:
- Turn off and unplug the dryer: Always disconnect your dryer from the power source before starting any cleaning procedures. This will eliminate the risk of electric shock or injury.
- Allow the dryer to cool down: Give your dryer ample time to cool down after running a drying cycle. The internal components can become extremely hot, and touching them while they are still hot can result in burns.
- Wear protective gloves: To protect your hands from sharp edges and potential hazards, wear a pair of sturdy gloves throughout the cleaning process.
- Use eye protection: It’s a good practice to wear safety goggles or glasses to shield your eyes from any dust particles or debris that may be dislodged during the cleaning process.
- Ensure proper ventilation: To avoid inhaling airborne particles or chemicals, make sure the area where you are cleaning the dryer is well-ventilated. Open windows or use a fan to improve air circulation.
- Read the dryer manual: Familiarize yourself with the manufacturer’s instructions and recommendations for cleaning your specific dryer model. Some appliances may have specific guidelines or warnings that you need to follow.
- Keep children and pets away: When cleaning the inside of your dryer, it is best to work in a safe and undisturbed environment. Make sure children and pets are kept away from the area to prevent accidents.
- Be cautious when handling chemicals: If you choose to use cleaning agents or solvents, read the labels carefully and follow the instructions. Use them in a well-ventilated area and avoid direct contact with your skin or eyes.
By prioritizing safety and taking these precautions, you can ensure a safe and successful cleaning process for the inside of your dryer. Let’s move on to the next step: gathering the necessary supplies.
Gather Necessary Supplies:
Before you begin cleaning the inside of your dryer, it is important to gather all the necessary supplies. Having the right tools and materials on hand will make the cleaning process smoother and more efficient. Here is a list of supplies you will need:
- Vacuum cleaner: A vacuum cleaner with a hose attachment will help you remove lint and debris from the dryer’s interior.
- Soft-bristle brush: Use a soft-bristle brush to loosen and remove stubborn lint or residue from the dryer drum and other interior parts.
- Mild detergent: A mild detergent, such as dish soap or laundry detergent, will come in handy for cleaning the dryer’s drum and removing any stains or residue.
- Microfiber cloth: A lint-free microfiber cloth is perfect for wiping down the inside of the dryer and tackling any leftover dirt or grime.
- Sponge or scrub brush: Use a sponge or scrub brush to clean the lint filter housing and other removable parts of the dryer.
- Lint brush: A specialized lint brush or dryer vent cleaning kit can be used to reach and remove built-up lint from your dryer’s exhaust vent.
- Rubber gloves: To protect your hands from chemicals and dirt, wear rubber gloves during the cleaning process.
- Bucket or basin: You will need a container to hold warm water for rinsing the interior of the dryer.
- Towels or rags: Keep some towels or rags nearby to catch any drips or excess water during the cleaning process.
By gathering these supplies beforehand, you can ensure a smooth and efficient cleaning process. Ensure that you have all the necessary tools and materials easily accessible before you begin cleaning the inside of your dryer.
Now that you have your supplies ready, it’s time to move on to the next step: disconnecting the power.
Disconnect Power:
Before you start cleaning the inside of your dryer, it is vital to disconnect the appliance from its power source. This step ensures your safety and prevents any accidental injuries. Follow these steps to properly disconnect the power:
- Unplug the dryer: Reach behind the dryer and unplug the power cord from the electrical outlet. Ensure that the dryer is completely disconnected from the power source.
- Turn off the circuit breaker: For added safety, locate the circuit breaker panel in your home and turn off the circuit breaker dedicated to the dryer. This step provides an extra layer of protection by cutting off the electrical supply to the appliance.
- Double-check the power: After unplugging the dryer and turning off the circuit breaker, verify that there is no power running to the appliance. Test the dryer by attempting to turn it on. If it does not start, you can be confident that the power source has been successfully disconnected.
It is crucial to disconnect the power before proceeding with the cleaning process to avoid any electrical shocks or accidents. Remember to not rush this step and double-check that the dryer is indeed disconnected from any power source.
Once you have disconnected the power, it’s time to move on to the next step: removing the lint filter.
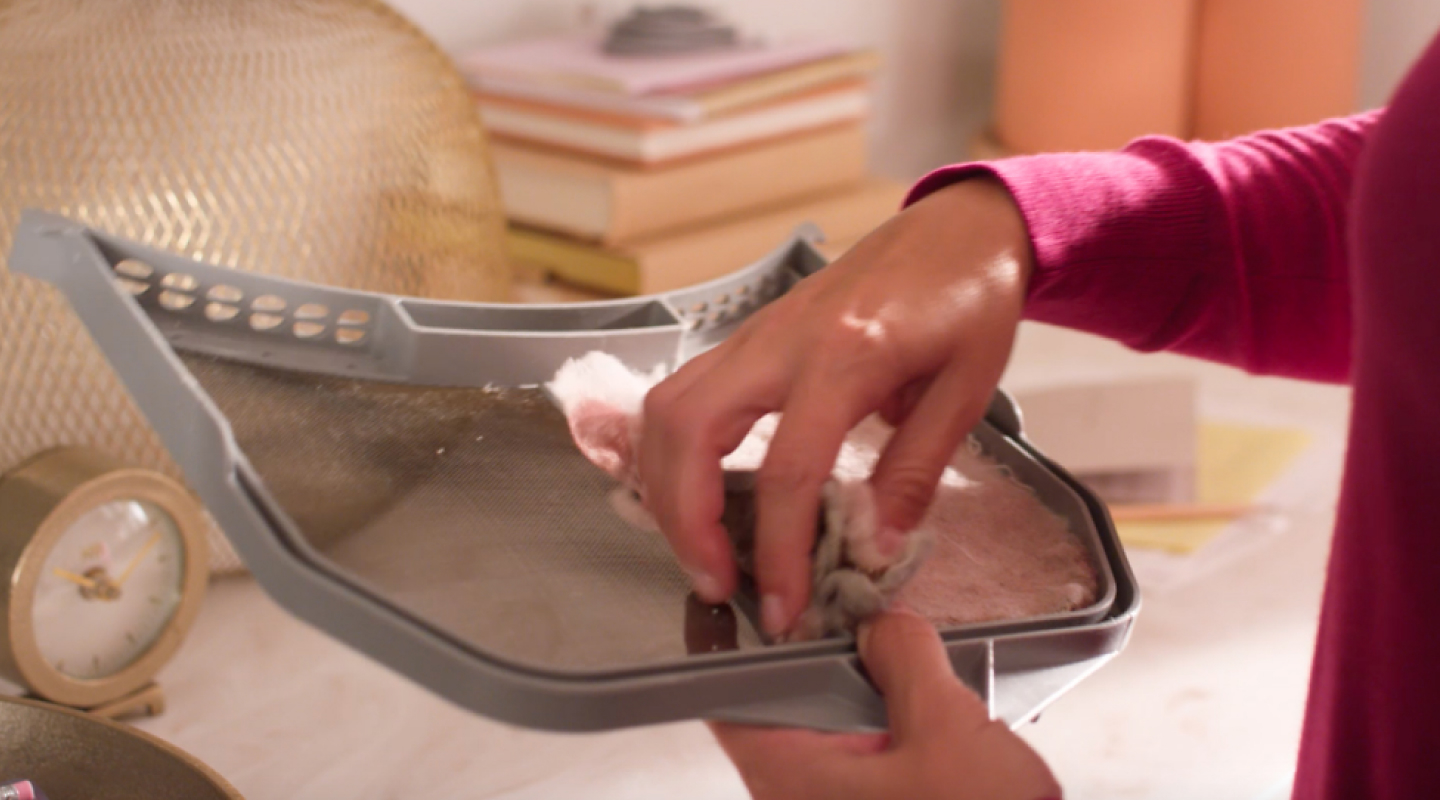
Remove Lint Filter:
The lint filter is an essential component of your dryer that helps to trap lint and debris from your clothes during the drying cycle. Cleaning the lint filter regularly is important for the dryer’s performance and safety. Follow these steps to remove the lint filter:
- Locate the lint filter: Open the dryer door, and you will usually find the lint filter at the front of the dryer drum. It is typically located near the dryer’s opening.
- Remove the lint filter: Grasp the lint filter handle or pull the filter gently to remove it from its slot. Most lint filters can be easily pulled out without much effort.
- Inspect the lint filter: Take a moment to examine the lint filter for any visible buildup of lint, debris, or residue. If you notice a significant amount of lint, it is a good idea to give the filter a quick cleaning before proceeding.
- Clean the lint filter: To clean the lint filter, use your fingers or a soft brush to gently remove any lint or debris trapped on the filter’s surface. Alternatively, you can rinse the filter under running water to remove stubborn lint. Make sure the filter is completely dry before putting it back in place.
- Clear the lint filter housing: While the lint filter is removed, take the opportunity to inspect the filter housing for any excess lint or debris. Use a vacuum cleaner or a soft brush to remove any buildup in the lint filter housing.
Regularly cleaning the lint filter helps to maintain proper airflow in your dryer and prevents lint buildup, which can lead to decreased drying efficiency and even fire hazards. Remember to clean the lint filter after each drying cycle for optimal performance.
Now that the lint filter has been removed and cleaned, it’s time to move on to the next step: vacuuming out the lint filter housing.
Read more: How To Clean The Inside Of A Dryer Vent
Vacuum Out Lint Filter Housing:
After removing the lint filter, it is essential to clean the lint filter housing to remove any accumulated lint or debris. Follow these steps to vacuum out the lint filter housing:
- Prepare the vacuum cleaner: Attach the hose attachment to your vacuum cleaner. Ensure that it is securely connected and ready for use.
- Position the vacuum cleaner: Position the vacuum cleaner near the lint filter housing, making sure it is within reach of the hose attachment.
- Insert the hose attachment: Insert the hose attachment into the lint filter housing, applying gentle pressure to push it in as far as it can go. The hose attachment should create a tight seal to maximize suction.
- Vacuum the lint filter housing: Turn on the vacuum cleaner and carefully run the hose attachment along the inside of the lint filter housing. Move it in a circular motion to thoroughly clean the entire area. Be sure to reach all corners and crevices to remove any trapped lint or debris.
- Remove the vacuum cleaner: Once you have finished vacuuming the lint filter housing, turn off the vacuum cleaner and gently remove the hose attachment from the lint filter housing.
- Inspect the lint filter housing: Take a moment to inspect the lint filter housing for any remaining lint or debris. If you notice any buildup, use a soft brush or a cloth to remove it. Do not use sharp or abrasive tools, as they can damage the housing.
Vacuuming out the lint filter housing ensures that no lint or debris obstructs the airflow inside your dryer. This helps to maintain the dryer’s efficiency and reduces the risk of fire hazards. Make sure to perform this step regularly as part of your dryer maintenance routine.
Now that you have vacuumed out the lint filter housing, it’s time to move on to the next step: cleaning the drum and interior of the dryer.
Use a vacuum with a narrow attachment to remove lint and debris from the inside of the dryer. Be sure to unplug the dryer and clean the lint trap and vent as well.
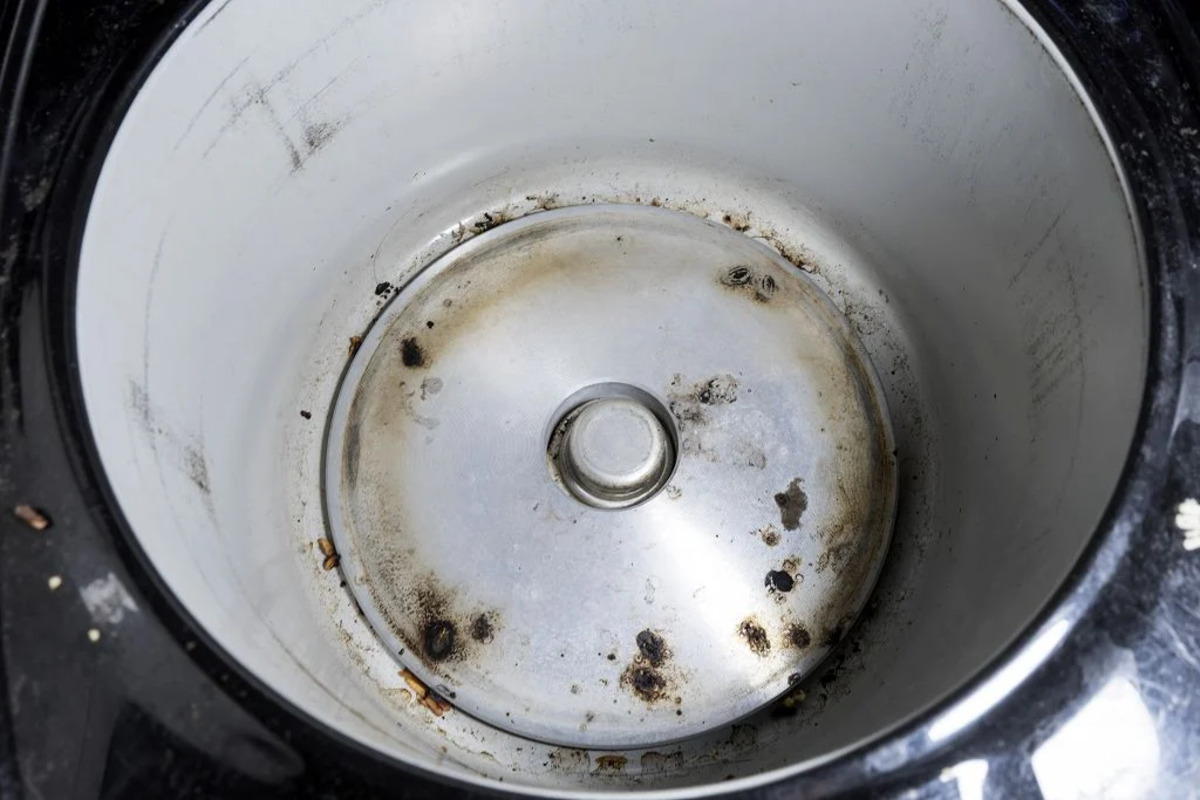
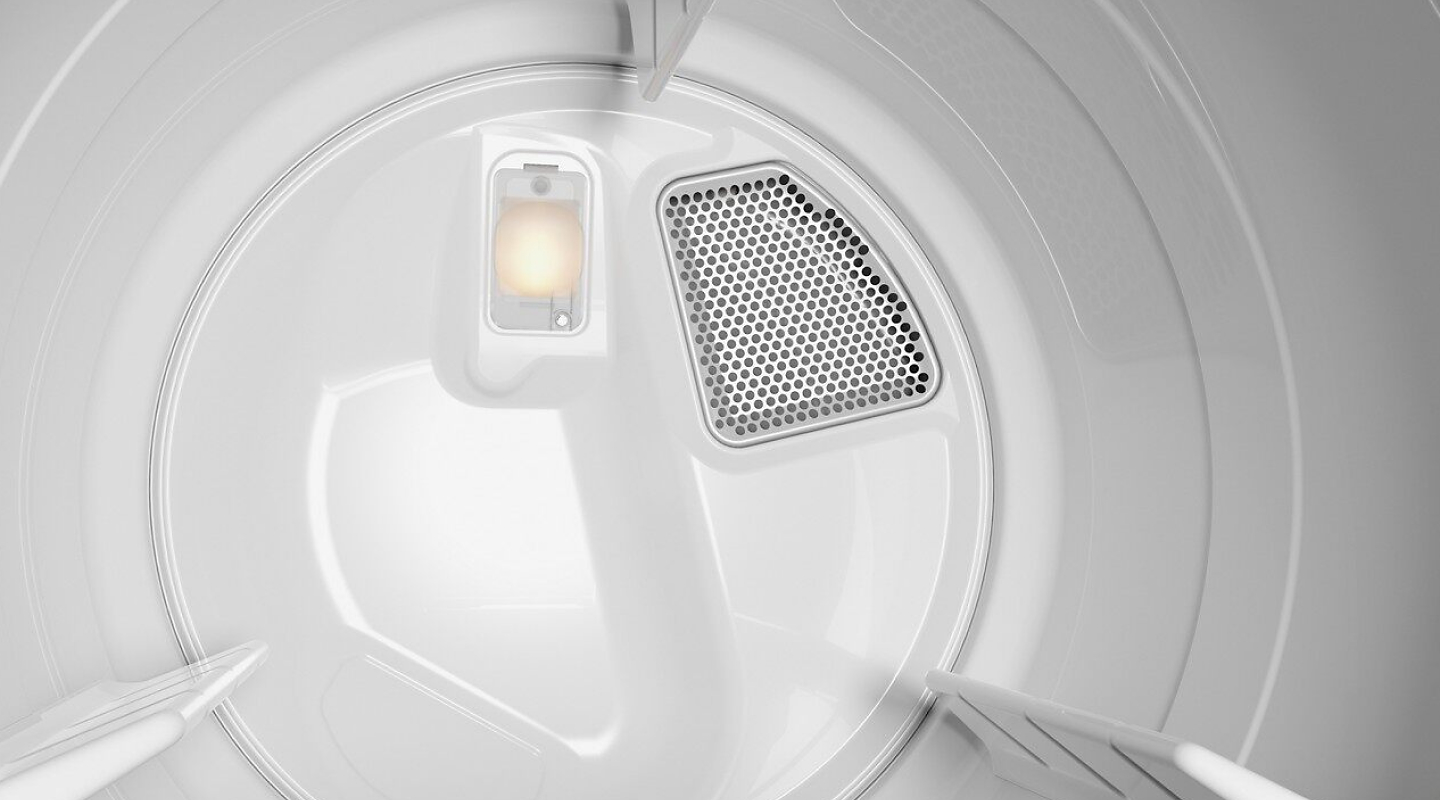
Clean Drum and Interior:
Once you have taken care of the lint filter and the lint filter housing, it’s time to focus on cleaning the drum and interior of your dryer. Here’s how you can do it:
- Check for any visible debris: Inspect the drum and interior of the dryer for any visible debris, such as lint, dirt, or residue. Remove any large pieces of debris with your hands or a soft cloth.
- Use a damp cloth to wipe down the interior: Dampen a cloth with water or a mild detergent solution and wipe down the interior surfaces of the dryer. Pay attention to any areas that appear dirty or stained, and gently scrub them using the damp cloth.
- Scrub stubborn stains: For stubborn stains or residue, use a soft-bristle brush dipped in the mild detergent solution. Gently scrub the stained areas in a circular motion to loosen and remove the stains. Be careful not to use excessive force or scratch the surfaces.
- Remove lint from the drum: Use a vacuum cleaner with a hose attachment or a lint brush to remove any remaining lint from the drum. Pay close attention to the drum’s edges, seams, and the area around the lint trap opening, as lint tends to accumulate in these areas.
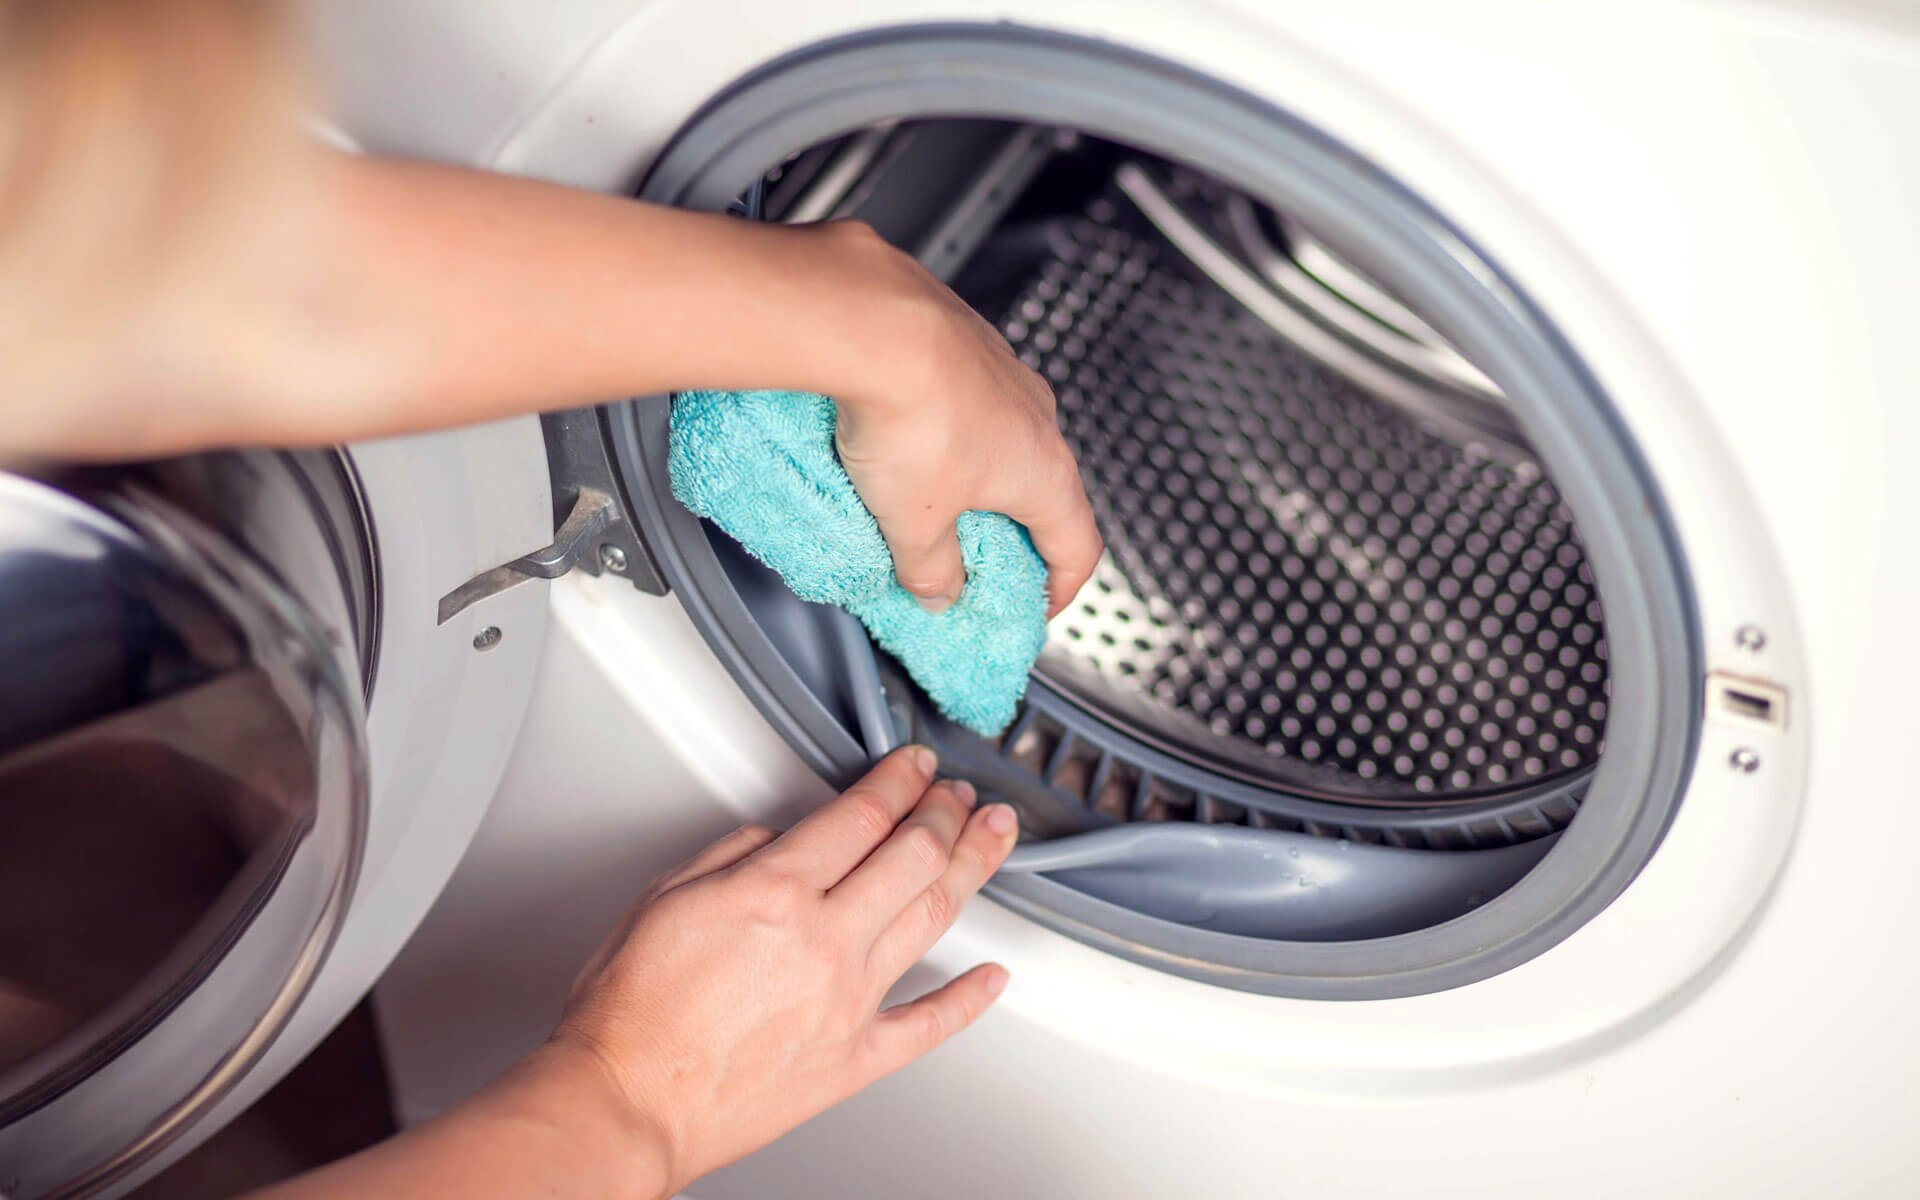
- Wipe down the door seal: Moisture and debris can get trapped in the rubber door seal of the dryer. Use a damp cloth to wipe down the seal, removing any dirt or residue that may have collected.
- Dry the interior: Once you have finished cleaning the drum and interior, use a dry cloth or allow the dryer to air dry before proceeding.
By regularly cleaning the drum and interior of your dryer, you can prevent the buildup of lint, residue, and stains, ensuring optimal performance and extending the lifespan of your appliance. Remember to perform this cleaning process periodically, depending on how frequently you use your dryer.
Now that the drum and interior are clean, it’s time to address any tough stains or residue that may be present. We will cover that in the next step.
Remove Tough Stains or Residue:
If you encounter tough stains or residue on the drum or interior of your dryer, don’t worry. With a few extra steps, you can effectively remove them. Follow these instructions:
- Identify the type of stain or residue: Determine the nature of the stain or residue. Is it a grease or oil stain, ink mark, or adhesive residue? Knowing the type of stain will help you choose the appropriate cleaning method.
- Grease or oil stains: For grease or oil stains, create a paste using a mixture of baking soda and water. Apply the paste to the stained area and let it sit for about 15 minutes. Then, use a soft cloth or sponge to gently scrub the paste in a circular motion, working the stain out. Rinse the area with water and wipe it dry.
- Ink marks: Ink marks can be challenging to remove, but rubbing alcohol or nail polish remover can be effective. Moisten a cloth with the rubbing alcohol or nail polish remover and gently dab the ink mark. Avoid rubbing vigorously to prevent spreading the ink. Continue until the ink mark fades away. Rinse the area with water and wipe it dry.
- Adhesive residue: To remove adhesive residue, you can use a mild solvent, such as rubbing alcohol or WD-40. Apply a small amount of the solvent to a cloth and gently rub the residue until it loosens. Be cautious not to damage any painted surfaces. Once the residue is removed, rinse the area with water and wipe it dry.
- Persistent stains: If the stain persists even after trying the above methods, consider using a specialized cleaning product designed for removing tough stains. Follow the manufacturer’s instructions and test the product on a small, inconspicuous area before applying it to the entire stained area.
Remember to always use gentle cleaning motions and avoid harsh abrasive materials or chemicals that could damage the interior of your dryer. Take your time and be patient when treating tough stains or residue.
Once you have successfully removed the tough stains or residue, it’s time to move on to cleaning the exterior of your dryer in the next step.
Clean Exterior:
While cleaning the inside of your dryer is crucial, it’s also important to keep the exterior clean and well-maintained. Here’s how you can clean the exterior of your dryer:
- Unplug the dryer: Before cleaning the exterior, ensure that the dryer is unplugged from the power source to eliminate any risk of electric shock.
- Wipe down the surface: Start by wiping down the exterior surfaces of the dryer with a soft cloth or microfiber cloth. Remove any loose dirt or dust from the surface. Pay attention to the control panel, knobs, and any other areas that may require extra attention.
- Clean the control panel: If your dryer has a control panel, use a damp cloth or a mild detergent solution to clean it. Be careful not to saturate the controls or let any liquid seep into the electronics. Wipe it clean and dry it thoroughly.
- Remove stubborn stains or marks: For stubborn stains or marks, make a paste using baking soda and water, and gently scrub the affected area using a soft cloth or sponge. Rinse with water and wipe dry.
- Clean the dryer door: Pay special attention to the dryer door, as it can accumulate fingerprints and smudges. Use a glass cleaner or a mixture of vinegar and water to clean the door, using a lint-free cloth for a streak-free finish.
- Polish any metal surfaces: If your dryer has any metal surfaces, such as stainless steel accents or knobs, use a specialized stainless steel cleaner or a mixture of vinegar and water to clean and polish them. Wipe in the direction of the grain for a polished look.
- Inspect the dryer vent: While cleaning the exterior, take a moment to inspect the dryer vent. Remove any lint or debris that may have gathered around the vent. Keeping the vent area clean helps to prevent airflow restrictions and maintain dryer efficiency.
Regularly cleaning the exterior of your dryer not only keeps it looking neat and tidy but also helps to maintain its overall performance and longevity. A clean exterior adds to the aesthetic appeal of your laundry area as well.
Now that you have cleaned the exterior of your dryer, it’s time to reassemble the necessary components and give your dryer a test run. We will cover this final step in the next section.
Read more: How To Clean Inside Of Grill
Reassemble and Test:
After cleaning the inside, lint filter, lint filter housing, drum, and exterior of your dryer, it’s time to reassemble the necessary components and ensure that everything is functioning properly. Follow these steps to reassemble and test your dryer:
- Replace the lint filter: Insert the cleaned or new lint filter back into its slot. Make sure it fits securely in place.
- Connect the power: Plug the power cord of the dryer back into the electrical outlet. If you turned off the circuit breaker, switch it back on.
- Check the dryer’s settings: Set the dryer to the desired settings for a normal drying cycle. Ensure that all control buttons, knobs, and settings are functional and working correctly.
- Close the dryer door: Gently close the dryer door until it latches securely.
- Run a test cycle: Start a test cycle on your dryer to ensure that it is operating smoothly. Listen for any unusual noises, check for proper heating, and monitor the overall performance of the appliance.
- Inspect the airflow: As the dryer runs, check the airflow from the exhaust vent outside your home. Ensure that it is steady and strong, indicating good airflow.
If you notice any issues during the test run, such as strange noises, lack of heating, or poor performance, consult your dryer’s manual or consider contacting a professional technician for further assistance. It’s better to address any problems early on to avoid further damage to your dryer or potential safety hazards.
By reassembling and testing your dryer after cleaning, you can ensure that it is in proper working condition and ready for use.
Finally, let’s conclude our guide on how to clean the inside of your dryer.
Conclusion:
Cleaning the inside of your dryer is a crucial maintenance task that helps to improve its performance, extend its lifespan, and ensure safety. By following the step-by-step guide outlined in this article, you can effectively clean the inside of your dryer and keep it in optimal condition.
Remember to prioritize safety by disconnecting the power and following the recommended safety precautions throughout the cleaning process. Gather the necessary supplies, including a vacuum cleaner, soft-bristle brush, mild detergent, and microfiber cloth.
Start by removing the lint filter and vacuuming out the lint filter housing. Clean the drum and interior, paying attention to tough stains or residue that may require special treatment. Additionally, make sure to clean the exterior of the dryer, including the control panel, door, and any metal surfaces.
Finally, reassemble the necessary components of your dryer and run a test cycle to ensure that everything is functioning properly. Pay attention to the airflow from the exhaust vent to confirm good ventilation.
Regularly cleaning the inside of your dryer not only improves its efficiency but also reduces the risk of fire hazards. Make it a part of your regular maintenance routine, especially if you use your dryer frequently.
By following these guidelines and taking proper care of your dryer, you can enjoy better performance, energy efficiency, and peace of mind knowing that your appliance is in great shape.
Thank you for reading our comprehensive guide on how to clean the inside of your dryer. Happy cleaning!
Frequently Asked Questions about How To Clean Inside Of Dryer
Was this page helpful?
At Storables.com, we guarantee accurate and reliable information. Our content, validated by Expert Board Contributors, is crafted following stringent Editorial Policies. We're committed to providing you with well-researched, expert-backed insights for all your informational needs.

0 thoughts on “How To Clean Inside Of Dryer”