Home>Renovation & DIY>Tools & Equipment>How To Wrap Sandpaper On Drum Sander
Tools & Equipment
How To Wrap Sandpaper On Drum Sander
Published: December 20, 2023
Learn how to wrap sandpaper on a drum sander with our comprehensive guide on tools and equipment. Perfect your sanding technique for professional-quality results.
(Many of the links in this article redirect to a specific reviewed product. Your purchase of these products through affiliate links helps to generate commission for Storables.com, at no extra cost. Learn more)
Introduction
Welcome to the world of woodworking, where precision and finesse meet creativity and craftsmanship. As you embark on your journey to perfect your woodworking projects, one essential tool you’ll encounter is the drum sander. This powerful machine is designed to smooth and finish wood surfaces with remarkable accuracy, making it a must-have for any serious woodworker.
However, to achieve the best results with your drum sander, it’s crucial to understand the art of wrapping sandpaper on its drum. This seemingly simple task can significantly impact the quality of your woodworking projects, making it imperative to master the technique.
In this comprehensive guide, we’ll delve into the intricacies of wrapping sandpaper on a drum sander, ensuring that you’re equipped with the knowledge and skills to elevate your woodworking endeavors. From selecting the right sandpaper to securing it firmly in place, each step plays a pivotal role in optimizing the performance of your drum sander.
So, let’s roll up our sleeves and explore the nuances of this fundamental process, empowering you to unleash the full potential of your drum sander and craft impeccable woodwork masterpieces.
Key Takeaways:
- Choose the right sandpaper based on wood type, surface condition, and task for optimal drum sander performance and impeccable woodworking results.
- Meticulously prepare, wrap, and secure the sandpaper on the drum sander to ensure precise and efficient sanding, setting the stage for woodworking excellence.
Read more: How To Put Sandpaper On A Sander
Choosing the Right Sandpaper
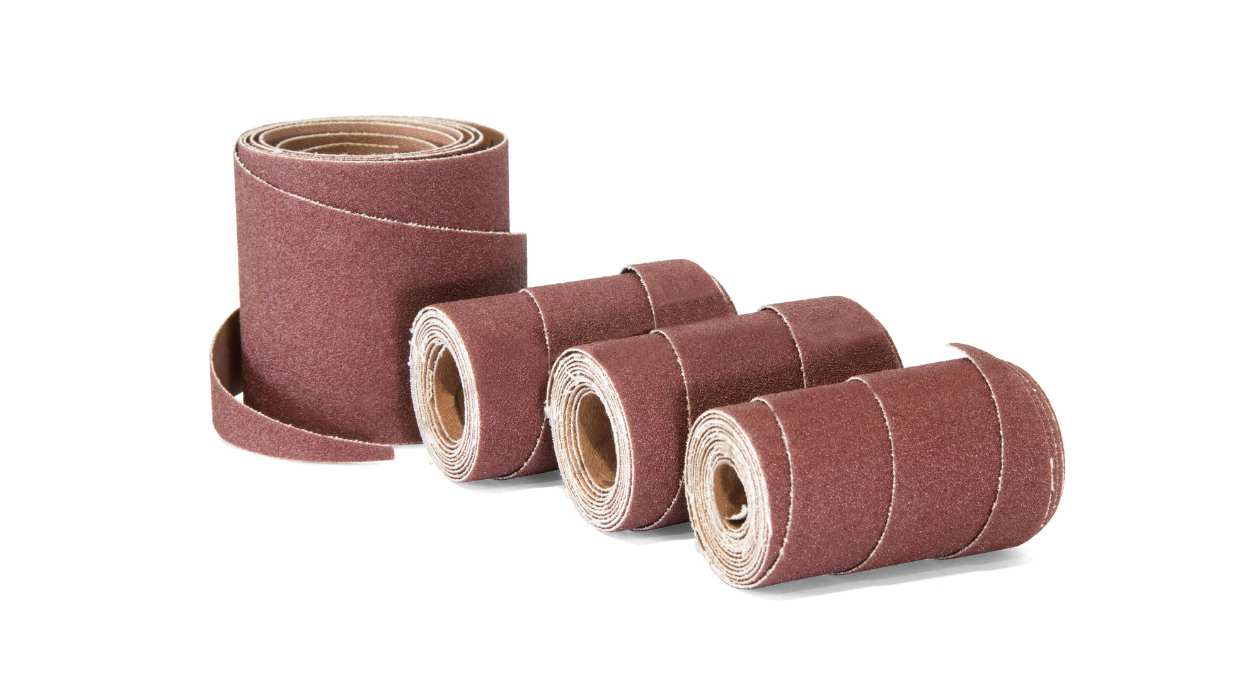
When it comes to achieving exceptional results with your drum sander, the significance of selecting the right sandpaper cannot be overstated. The type and grit of the sandpaper directly influence the smoothness and finish of the wood surface, making it essential to make an informed choice.
First and foremost, consider the type of wood you’ll be working with. Different wood species have varying hardness and grain patterns, necessitating specific types of sandpaper. For softer woods, such as pine or cedar, a coarser grit sandpaper, around 60-80, may be suitable for initial sanding to remove imperfections and rough surfaces. Conversely, harder woods like oak or maple may require finer grits, such as 120-150, for a smoother finish.
Additionally, the condition of the wood surface plays a crucial role in determining the appropriate sandpaper. If you’re refinishing an existing surface, you might need to start with a coarser grit to remove old finishes or imperfections before progressing to finer grits for a polished result. Conversely, for new, untreated wood, starting with a medium grit, around 80-100, can effectively prepare the surface for finishing.
Furthermore, the specific task at hand influences the choice of sandpaper. For heavy material removal or leveling uneven surfaces, a lower grit sandpaper is ideal, while finer grits are more suitable for achieving a smooth, polished finish.
Always opt for high-quality sandpaper to ensure durability and consistent performance. Abrasive materials such as aluminum oxide or silicon carbide are commonly used in premium sandpapers, offering superior sanding capabilities and longevity.
By meticulously considering the wood type, surface condition, and intended task, you can make an informed decision when selecting the right sandpaper for your drum sander. This thoughtful approach sets the stage for impeccable results and sets you on the path to woodworking excellence.
Preparing the Drum Sander
Before embarking on the process of wrapping sandpaper on the drum sander, it’s crucial to ensure that the machine is meticulously prepared for the task at hand. Proper preparation not only enhances the efficiency of the sanding process but also contributes to the longevity of the equipment.
Begin by carefully inspecting the drum sander for any signs of wear and tear, ensuring that all components are in optimal condition. Check the drum for any debris or residue from previous sanding sessions, and clean it thoroughly to create a pristine surface for the new sandpaper.
Next, examine the tensioning mechanism of the drum sander to guarantee that it is functioning smoothly. The tensioning system plays a vital role in maintaining the firmness and stability of the sandpaper on the drum, directly impacting the quality of the sanding results. If any adjustments or maintenance are required, address them promptly to avoid complications during the sanding process.
Furthermore, it’s essential to verify that the conveyor belt, if applicable, is aligned and tensioned correctly. A properly tensioned conveyor belt ensures consistent feeding of the workpiece through the sander, promoting uniform sanding and precise results.
Inspect the dust collection system to ensure that it is unobstructed and fully functional. Effective dust collection not only maintains a clean working environment but also enhances the visibility of the sanding area, allowing for better control and accuracy during the sanding process.
Lastly, if your drum sander is equipped with variable speed settings, consider adjusting the speed based on the type of wood and the intended sanding task. Lower speeds are often suitable for finer sanding, while higher speeds may be preferred for material removal on rough surfaces.
By meticulously preparing your drum sander before wrapping the sandpaper, you set the stage for a seamless and efficient sanding experience. This proactive approach not only optimizes the performance of the machine but also contributes to the precision and quality of your woodworking projects.
When wrapping sandpaper on a drum sander, make sure to overlap the edges slightly to prevent the paper from slipping. Smooth out any wrinkles or bubbles to ensure even sanding.
Wrapping the Sandpaper
As you approach the pivotal step of wrapping sandpaper on the drum sander, precision and attention to detail are paramount. This process lays the foundation for the sanding operation, directly influencing the smoothness and quality of the wood surface. Mastering the art of wrapping sandpaper ensures optimal performance and exceptional results from your drum sander.
Begin by selecting a high-quality sandpaper that aligns with the specific requirements of your woodworking project. Lay the sandpaper flat on a clean, spacious surface, ensuring that it is free from any creases or folds that could affect its adhesion to the drum.
Measure and cut the sandpaper to the appropriate length for the drum, allowing for a slight overlap to ensure complete coverage. A straight, clean cut is essential to facilitate a seamless and secure attachment to the drum.
Once the sandpaper is cut to size, carefully align it with the drum, ensuring that it is positioned evenly and straight. Begin wrapping the sandpaper around the drum, maintaining a consistent tension to prevent wrinkles or unevenness. As you proceed, pay close attention to the alignment and smoothness of the sandpaper, making any necessary adjustments to achieve a uniform and taut fit.
For optimal results, consider using double-sided adhesive tape to secure the leading edge of the sandpaper to the drum. This additional reinforcement ensures that the sandpaper remains firmly in place during the sanding process, minimizing the risk of slippage or detachment.
As you wrap the sandpaper, take the time to smooth out any air pockets or imperfections, ensuring a flawless and secure attachment to the drum. A smooth, wrinkle-free surface promotes consistent sanding and prevents premature wear of the sandpaper.
By meticulously wrapping the sandpaper on the drum sander, you establish the foundation for precise and effective sanding. This meticulous approach sets the stage for exceptional results, enabling you to unleash the full potential of your drum sander and elevate your woodworking endeavors.
Securing the Sandpaper
With the sandpaper expertly wrapped around the drum sander, the next crucial step is to secure it firmly in place, ensuring stability and consistency throughout the sanding process. Properly securing the sandpaper not only safeguards against potential slippage or detachment but also contributes to the longevity of the sandpaper and the overall performance of the drum sander.
One effective method for securing the sandpaper is to utilize the tensioning mechanism of the drum sander. Begin by engaging the tensioning system, gradually tightening it to achieve the desired tautness of the sandpaper. This process ensures that the sandpaper is held securely in place, minimizing the risk of movement or displacement during operation.
For added reinforcement, consider utilizing the built-in clamping or locking mechanisms of the drum sander, if available. These features provide an additional layer of security, further anchoring the sandpaper to the drum and mitigating the potential for shifting or loosening during sanding.
Inspect the edges of the sandpaper to verify that they are firmly secured and free from any signs of peeling or detachment. Any loose edges should be promptly addressed, either by readjusting the tensioning mechanism or applying adhesive reinforcement to ensure a snug and secure fit.
Furthermore, if your drum sander is equipped with an abrasive conveyor belt, ensure that it is aligned and tensioned correctly to complement the secure attachment of the sandpaper on the drum. A harmonized and synchronized setup between the drum and the conveyor belt optimizes the sanding process, promoting uniformity and precision.
Regularly monitor the sandpaper during operation, paying attention to any signs of slippage or irregular movement. Promptly address any issues to maintain the integrity of the sandpaper and uphold the quality of the sanding results.
By diligently securing the sandpaper on the drum sander, you establish a stable and reliable foundation for the sanding process, setting the stage for consistent and high-quality results. This meticulous attention to detail ensures that your drum sander operates at its full potential, empowering you to achieve woodworking excellence with every project.
Read more: How To Change Sandpaper On A Belt Sander
Conclusion
Congratulations! You’ve delved into the intricate world of wrapping sandpaper on a drum sander, gaining valuable insights into the meticulous process that underpins the art of woodworking. By mastering the nuances of this fundamental task, you’ve equipped yourself with the knowledge and skills to elevate your woodworking endeavors and achieve impeccable results with your drum sander.
From the crucial step of choosing the right sandpaper to the meticulous process of wrapping and securing it on the drum sander, each facet of this journey contributes to the precision and finesse of your woodworking projects. The careful consideration of wood type, surface condition, and sandpaper grit sets the stage for optimal sanding results, ensuring that every project reflects the hallmark of craftsmanship and excellence.
As you prepare the drum sander with meticulous attention to detail, you lay the foundation for a seamless and efficient sanding experience. The proactive inspection and maintenance of the machine guarantee its optimal performance, allowing you to embark on your woodworking endeavors with confidence and precision.
Wrapping the sandpaper on the drum sander is an art in itself, demanding precision and finesse. By carefully measuring, cutting, and aligning the sandpaper, you set the stage for consistent and high-quality sanding results. The meticulous attention to detail during this process ensures that the sandpaper adheres flawlessly to the drum, ready to unleash its full sanding potential.
Securing the sandpaper firmly in place is the final crucial step in this journey. By engaging the tensioning and clamping mechanisms of the drum sander, you anchor the sandpaper with unwavering stability, safeguarding against slippage and ensuring a seamless sanding operation. This meticulous approach guarantees the longevity of the sandpaper and the consistent quality of your woodworking projects.
Armed with this comprehensive understanding of wrapping sandpaper on a drum sander, you’re poised to embark on your woodworking ventures with confidence and expertise. Each meticulous step in this process contributes to the precision, finesse, and excellence that define exceptional woodworking. As you unleash the full potential of your drum sander, may your woodworking projects be a testament to your dedication and craftsmanship, leaving an indelible mark of excellence in every creation.
Frequently Asked Questions about How To Wrap Sandpaper On Drum Sander
Was this page helpful?
At Storables.com, we guarantee accurate and reliable information. Our content, validated by Expert Board Contributors, is crafted following stringent Editorial Policies. We're committed to providing you with well-researched, expert-backed insights for all your informational needs.


0 thoughts on “How To Wrap Sandpaper On Drum Sander”