Articles
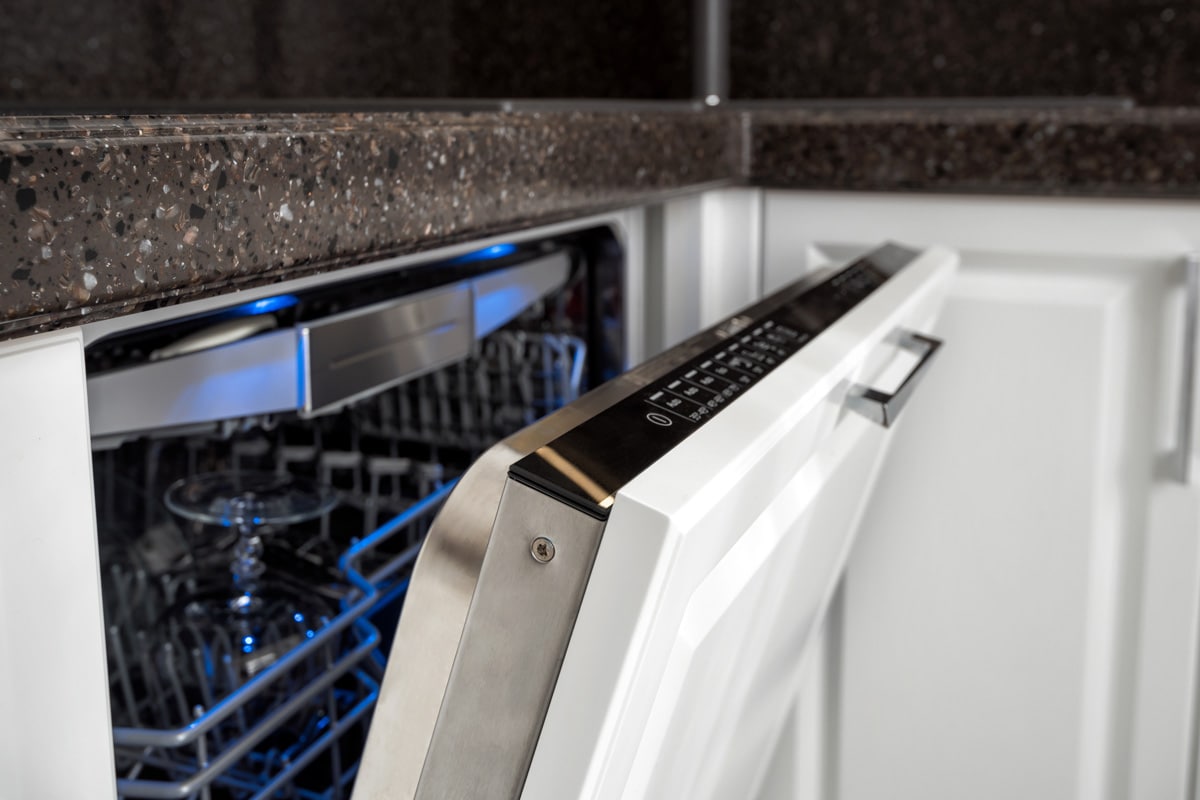
How To Clean Filter On Kitchenaid Dishwasher
Modified: August 28, 2024
Learn how to effectively clean the filter on your Kitchenaid dishwasher with our informative articles, ensuring optimal performance and sparkling clean dishes.
(Many of the links in this article redirect to a specific reviewed product. Your purchase of these products through affiliate links helps to generate commission for Storables.com, at no extra cost. Learn more)
Introduction
Welcome to our guide on how to clean the filter on your Kitchenaid dishwasher. The dishwasher filter plays a crucial role in keeping your dishwasher running efficiently and effectively. Over time, food particles, debris, and residue can accumulate in the filter, causing it to become clogged and reducing its performance. Cleaning the filter regularly is essential to ensure optimal dishwasher function and prevent any potential issues.
In this article, we will walk you through the step-by-step process of cleaning the filter on your Kitchenaid dishwasher. By following these simple instructions, you can maintain the cleanliness and longevity of your dishwasher, ensuring that your dishes come out sparkling clean every time.
Before we dive into the cleaning process, let’s take a look at the tools and materials you’ll need:
Key Takeaways:
- Regularly cleaning the filter on your Kitchenaid dishwasher is essential for maintaining optimal performance and preventing clogs, ensuring sparkling clean dishes every time.
- By following the step-by-step cleaning process and using simple tools and materials, you can easily maintain your dishwasher’s efficiency and longevity.
Read more: How To Clean Filter On Maytag Dishwasher
Tools and Materials Needed
Before you begin cleaning the filter on your Kitchenaid dishwasher, gather the following tools and materials:
- Screwdriver (if required for filter removal)
- Soft-bristle brush or toothbrush
- Warm water
- Mild dish soap or vinegar
- Clean cloth or sponge
These items will help you effectively clean the filter and remove any built-up residue. Once you have everything ready, you can proceed with the cleaning process.
Next, we will guide you through the step-by-step instructions on how to clean the filter on your Kitchenaid dishwasher, ensuring its optimal performance.
Step 1: Turn off the dishwasher
Before starting the cleaning process, it is important to ensure that your Kitchenaid dishwasher is turned off and unplugged. This step is essential to avoid any accidents or injuries while working on the dishwasher.
To turn off the dishwasher, locate the power button or switch on the control panel. Press the button or flip the switch to the “Off” position. Additionally, it is advisable to unplug the dishwasher from the power outlet to ensure complete safety.
By turning off the dishwasher and disconnecting it from the power source, you eliminate the risk of electric shock or injury while handling the filter. It is crucial to prioritize safety throughout the cleaning process.
Once you have successfully turned off and unplugged the dishwasher, you can proceed to the next step of removing the bottom rack.
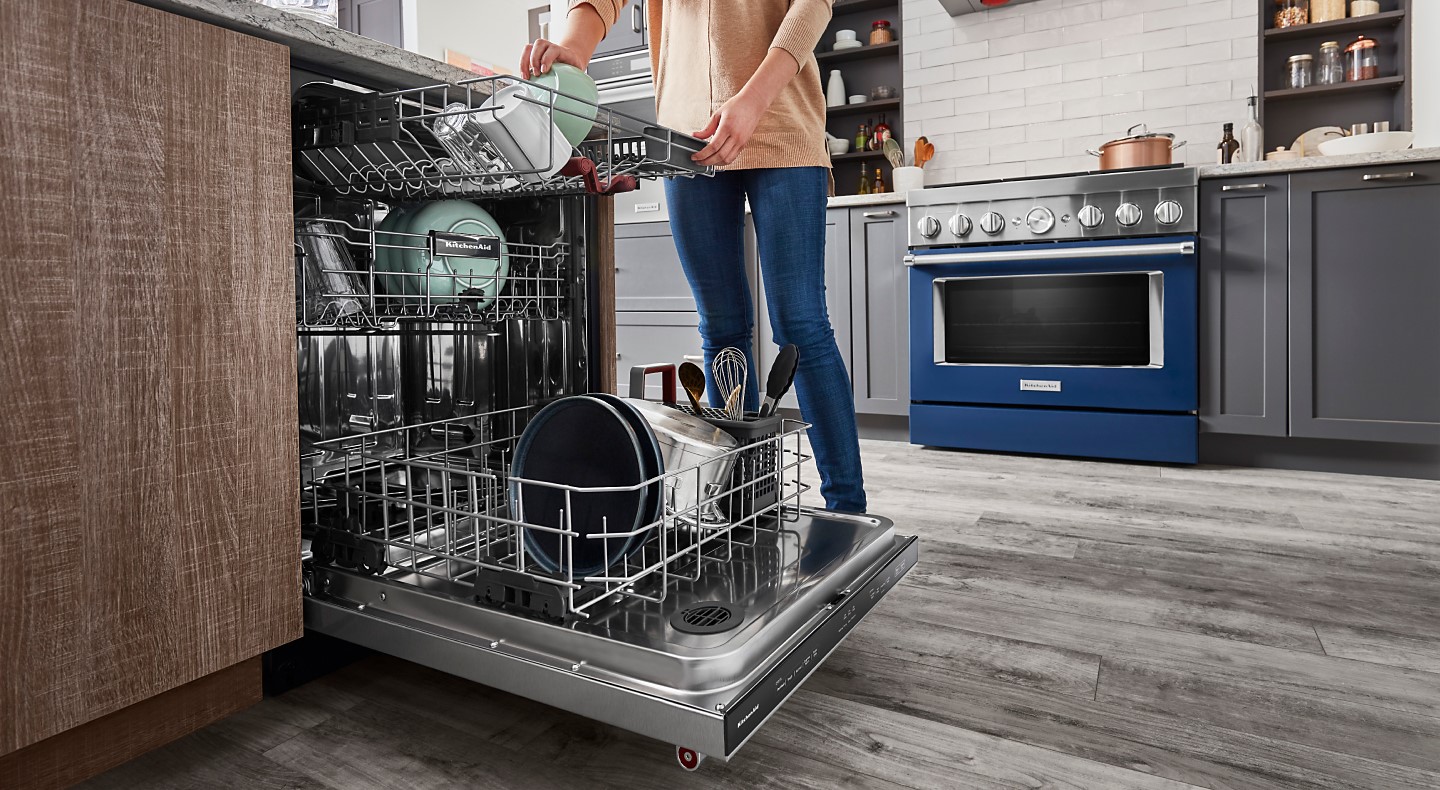
Step 2: Remove the bottom rack
With the dishwasher turned off and unplugged, you can now proceed to remove the bottom rack of your Kitchenaid dishwasher. The bottom rack is designed to hold your dishes and utensils, and removing it will provide access to the filter for cleaning.
Start by fully extending the bottom rack out of the dishwasher. This will allow you to have a clear view and easy access to the filter located at the bottom of the dishwasher.
Next, locate the clips or levers on the sides of the bottom rack that secure it in place. These clips or levers may vary depending on the model of your Kitchenaid dishwasher. Once you locate them, push or lift them to release the bottom rack from its position.
Gently pull the bottom rack towards you, sliding it out of the dishwasher. Take care not to force or damage the rack during this process.
Set the bottom rack aside in a safe place, away from the cleaning area. This will ensure that it does not interfere with the cleaning process and prevent any accidental damage to the rack.
With the bottom rack removed, you can now proceed to the next step of locating the filter in your Kitchenaid dishwasher.
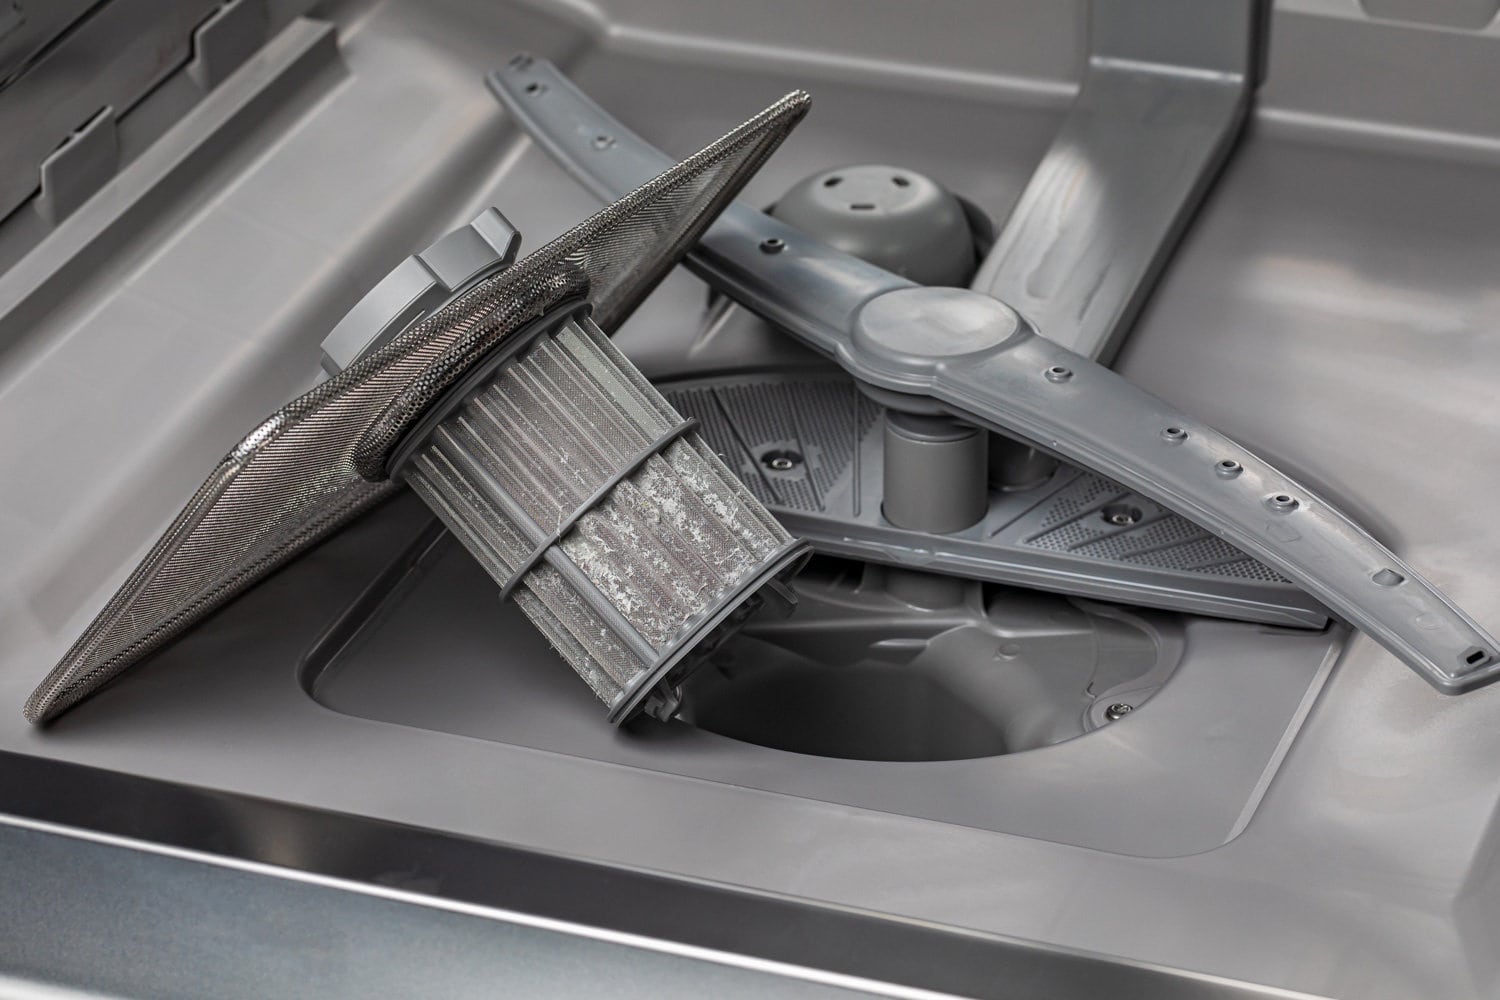
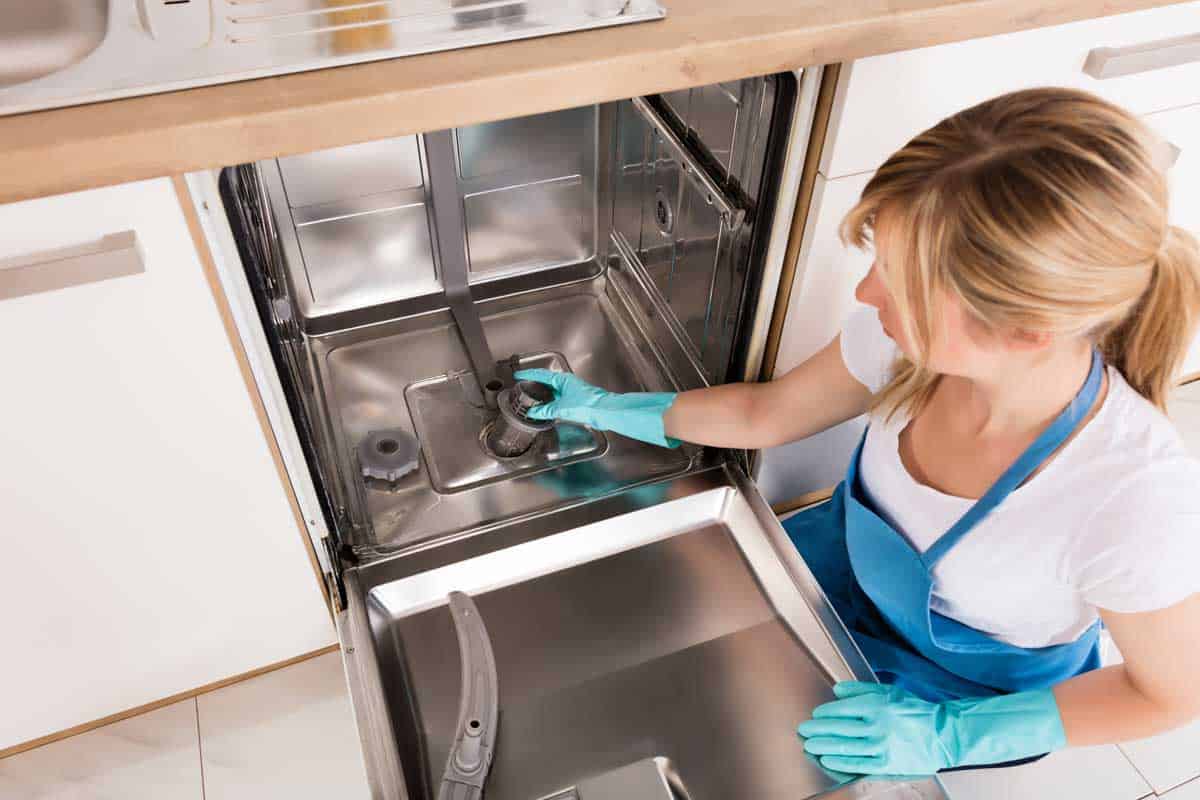
Step 3: Locate the filter
Now that the bottom rack has been removed, it’s time to locate the filter in your Kitchenaid dishwasher. The filter is responsible for trapping food particles and debris, preventing them from clogging the dishwasher’s drain system.
In most Kitchenaid dishwasher models, the filter is located at the bottom of the dishwasher tub, near the back. It may be covered by a removable cover or grate, which needs to be taken off to access the filter.
To locate the filter, carefully examine the bottom of the dishwasher tub. Look for any signs of a removable covering or grate. It may have a tab or handle that allows you to lift or slide it out.
If you’re unsure about the location of the filter, refer to your Kitchenaid dishwasher’s user manual. The manual will provide specific instructions and illustrations on how to locate and access the filter for cleaning.
Once you have located the filter and removed any covering or grate, you are ready to proceed to the next step of removing the filter for cleaning.
Read more: How To Clean Samsung Dishwasher Filter
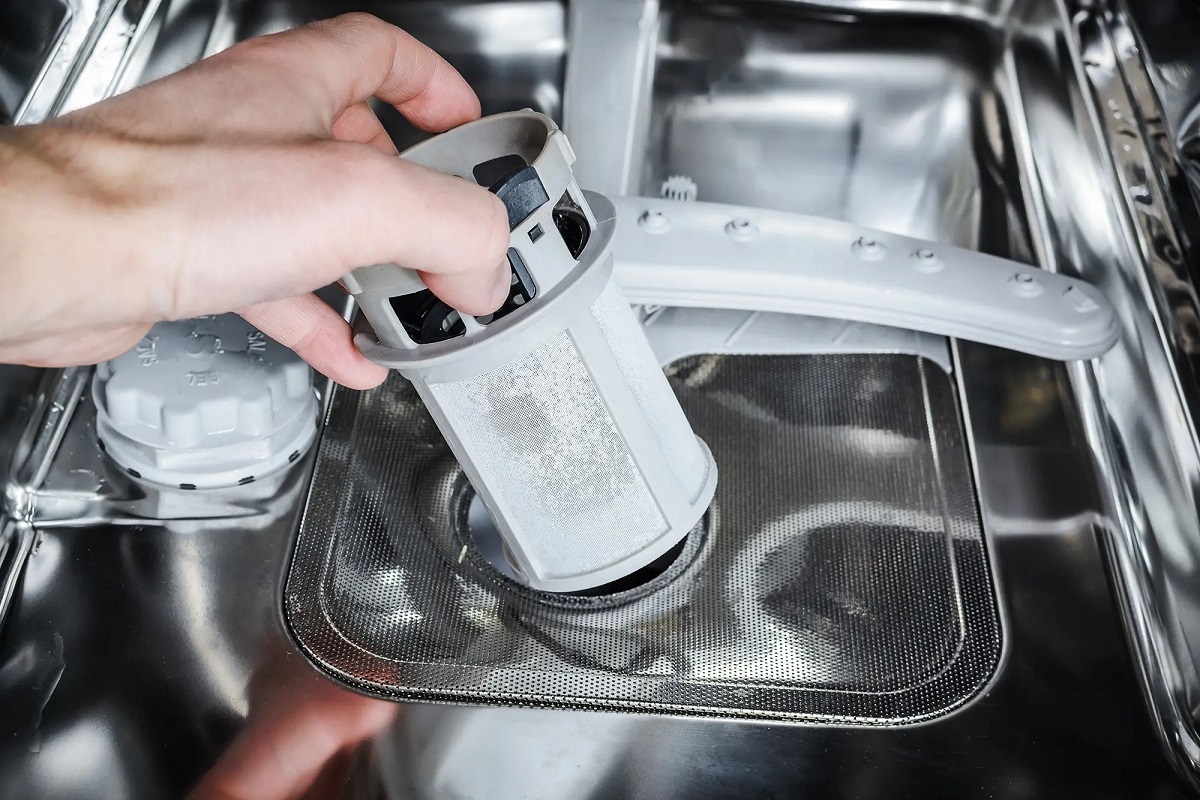
Step 4: Remove the filter
With the filter located and any covering or grate removed, you can now proceed to remove the filter from your Kitchenaid dishwasher. Removing the filter will allow you to thoroughly clean it and remove any trapped debris or residue.
Depending on the model of your Kitchenaid dishwasher, the filter may be held in place by clips, screws, or simply by a twist-lock mechanism. Carefully examine the filter and its surroundings to determine the method of removal.
If your dishwasher’s filter is held in place by clips, gently press or release the clips to disengage them from the filter. Use your fingers or a screwdriver, if necessary, to assist with this process.
If the filter is secured with screws, use a screwdriver to carefully unscrew and remove them. Set the screws aside in a safe place to avoid misplacement.
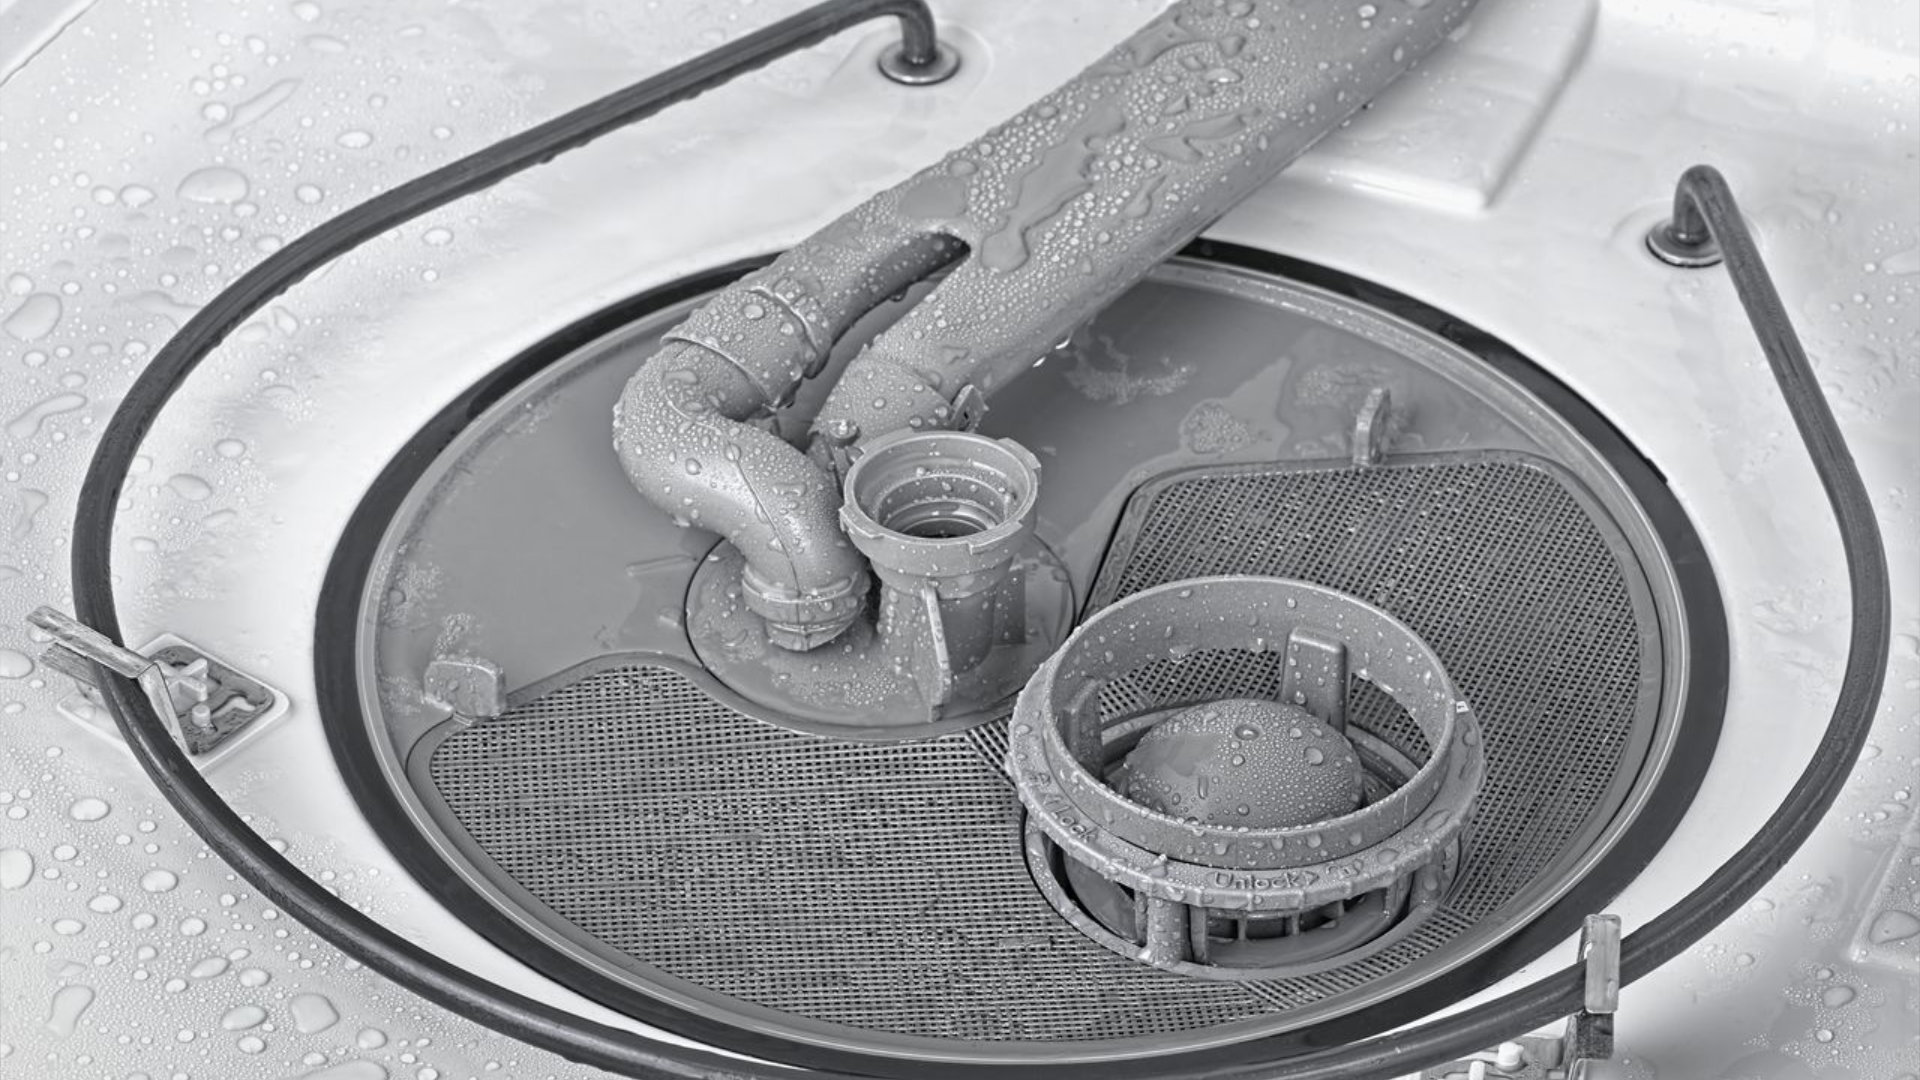
In some cases, the filter may have a twist-lock mechanism. To remove the filter with a twist-lock mechanism, twist it counterclockwise until it unlocks from its position. Then, gently lift it out of the dishwasher.
Once you have successfully disengaged the filter from its holding mechanism, carefully lift it out of the dishwasher, ensuring not to spill any accumulated debris. Place the filter aside in a safe and clean area, ready for the next step of cleaning.
Now that the filter has been removed, you are ready to proceed to the next step of cleaning it thoroughly.
To clean the filter on a Kitchenaid dishwasher, remove the lower rack and unscrew the filter cover. Clean the filter under running water and use a soft brush to remove any debris. Reassemble the filter and replace the lower rack.
Step 5: Clean the filter
Now that you have removed the filter from your Kitchenaid dishwasher, it’s time to give it a thorough cleaning. Over time, the filter can become clogged with food particles and residue, affecting the dishwasher’s performance. Cleaning the filter regularly is crucial to maintain optimal functionality.
Start by rinsing the filter under warm water to remove any loose debris. Use a gentle stream of water to ensure that all particles are washed away.
Next, inspect the filter for any stubborn residue or build-up. If you notice any, use a soft-bristle brush or a toothbrush to scrub the filter gently. Make sure to clean all sides of the filter, paying extra attention to the crevices and mesh areas where debris tends to accumulate.
If the filter is greasy or has a strong odor, you can also soak it in a mix of warm water and mild dish soap or vinegar for about 15-20 minutes. This will help break down any stubborn residue and eliminate unwanted smells.
After soaking or scrubbing, thoroughly rinse the filter under warm water again to remove any soap or vinegar residue. This step is essential to ensure that no cleaning agents are left behind that could potentially affect the dishwasher’s performance.
Once the filter is clean and free of debris, gently pat it dry with a clean cloth or allow it to air dry completely. Ensure that the filter is completely dry before reinserting it back into the dishwasher to prevent any potential moisture-related issues.
Now that the filter is clean and dry, let’s move on to the next step of reinstalling it into your Kitchenaid dishwasher.
Step 6: Reinstall the filter
After cleaning and drying the filter of your Kitchenaid dishwasher, it’s time to reinstall it. Properly reinstalling the filter is essential for maintaining the dishwasher’s efficiency and preventing any potential issues.
Start by carefully aligning the filter with its designated position in the dishwasher. Ensure that it is inserted correctly and fits snugly into place.
If your filter was held in place by clips or screws, reattach them to secure the filter in its position. Gently press or tighten the clips or screws to ensure a firm hold. Take care not to overtighten and risk damaging the filter.
If your filter has a twist-lock mechanism, align it with its designated position and twist it clockwise until it locks into place securely.
Once the filter is properly installed, visually inspect it to confirm that it is correctly positioned and securely fastened.
With the filter securely in place, you have successfully completed the reinstallation process. Move on to the next step of replacing the bottom rack in your Kitchenaid dishwasher.
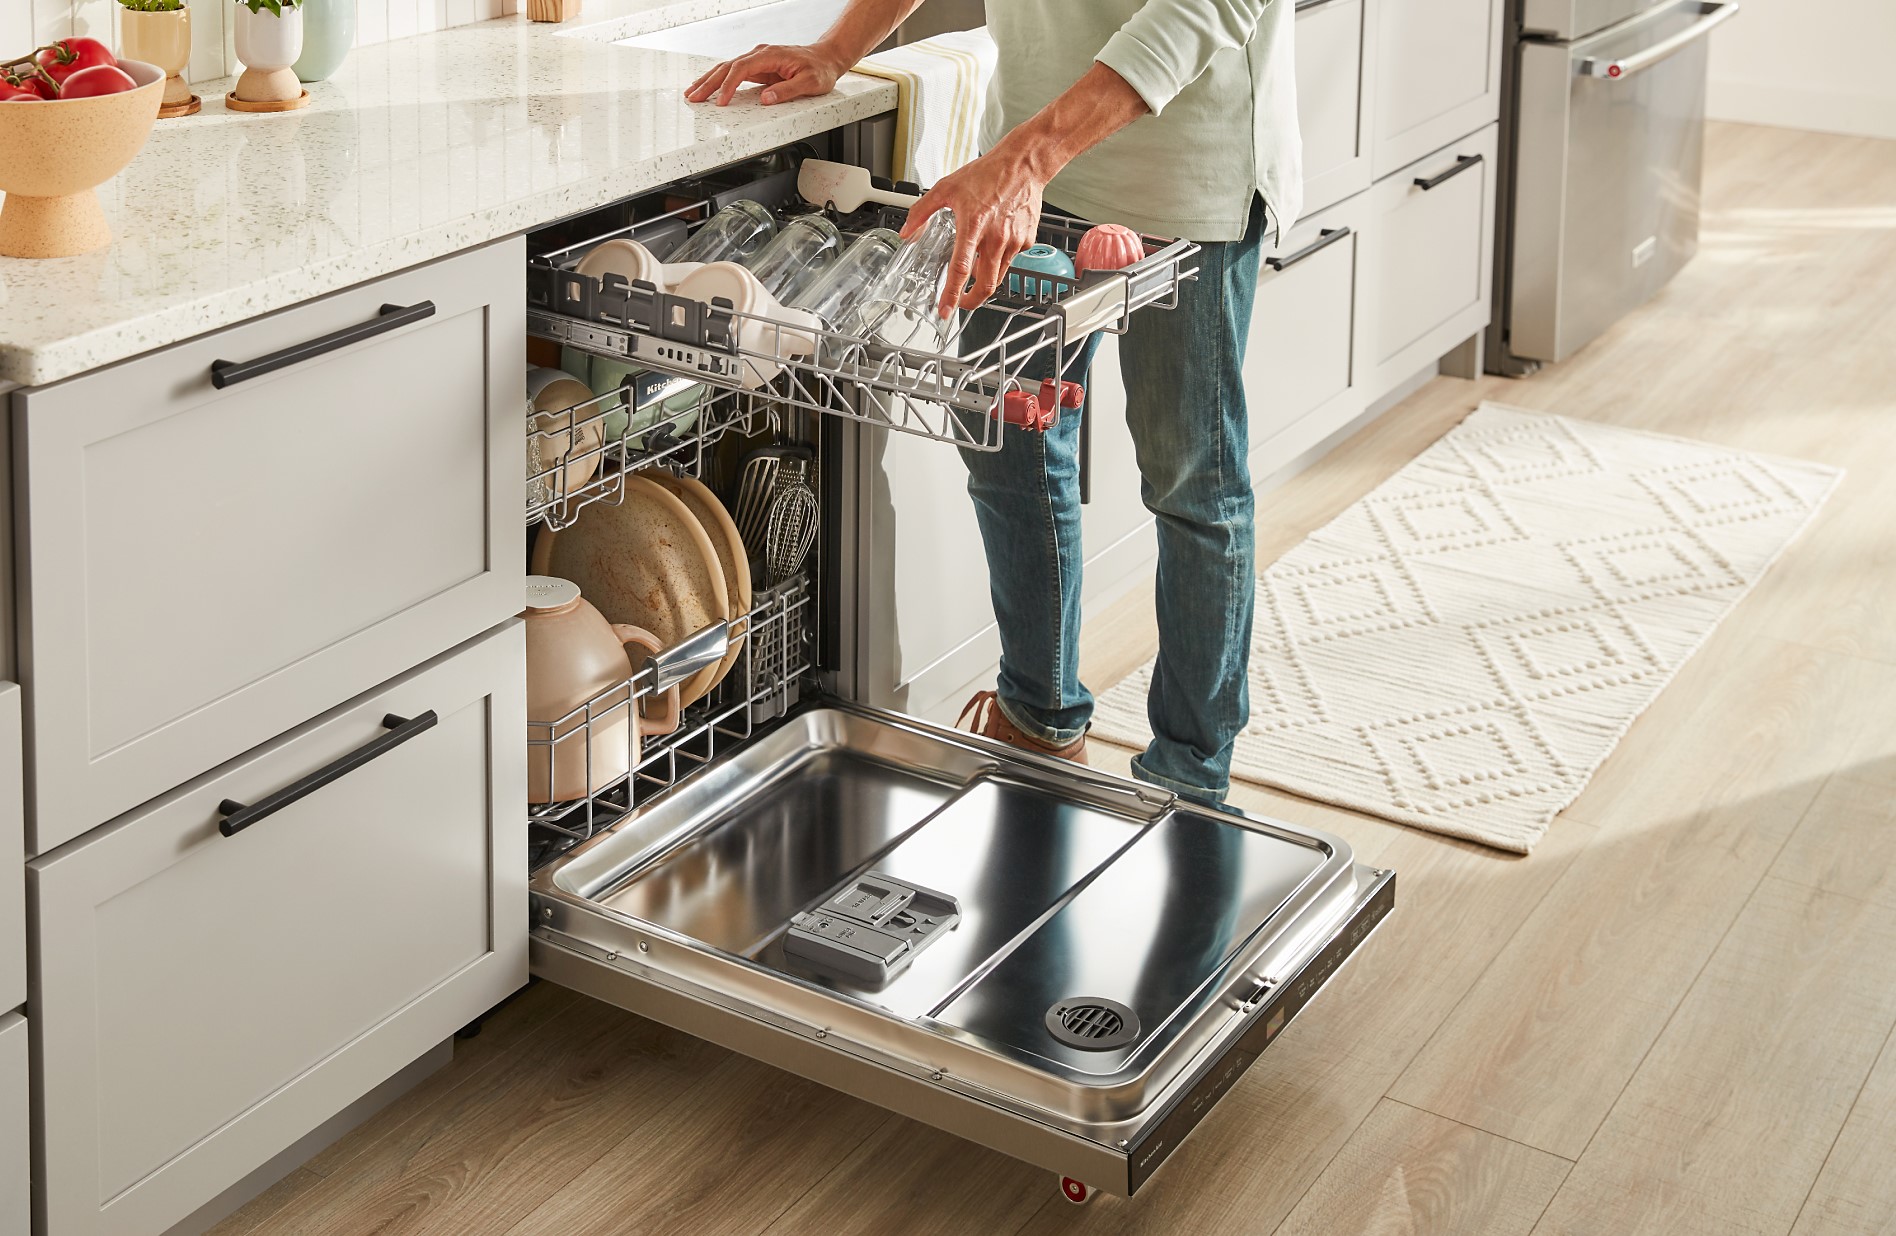
Step 7: Replace the bottom rack
Now that the filter is back in its place, it’s time to reassemble your Kitchenaid dishwasher by replacing the bottom rack. The bottom rack is where you load your dishes, and reattaching it will allow you to start using the dishwasher again.
Start by carefully sliding the bottom rack back into the dishwasher, aligning it with the tracks on the sides of the dishwasher tub. Ensure that the rack is properly aligned and glides smoothly along the tracks as you push it in.
Once the rack is fully inserted, push it all the way back until it is in its original position. Take care not to force or jam the rack as you push it back.
Next, check if any clips or levers need to be engaged to secure the bottom rack in place. These clips or levers may be located on the sides of the dishwasher or on the rack itself. Push or lock them into place to ensure that the bottom rack is secured and won’t move during operation.
Gently give the bottom rack a little wiggle to confirm that it is securely in place and won’t come loose during use.
With the bottom rack properly replaced, you’re almost done! Move on to the final step of turning on the dishwasher and testing its functionality.
Read more: How To Clean Ge Dishwasher Filter
Step 8: Turn on the dishwasher and test
Congratulations! You’ve successfully cleaned the filter, reinstalled the filter and replaced the bottom rack of your Kitchenaid dishwasher. Now it’s time to test the dishwasher to ensure that everything is functioning properly.
Before turning on the dishwasher, double-check that the water supply is connected and the drain hose is properly positioned. This will help prevent any leaks or drainage issues during operation.
Once you’ve verified the water supply and drain hose, plug the dishwasher back into the power outlet. Take a moment to review the control panel settings and turn on any necessary wash cycles or options. Refer to your dishwasher’s user manual for specific instructions on operating the control panel.
After selecting the desired settings, close the dishwasher door securely. Make sure it is properly latched to prevent any leaks during the washing cycle.
Now, it’s time to start the dishwasher and observe its performance. Listen for any unusual noises or vibrations that may indicate a problem. As the dishwasher progresses through each cycle, check if it is operating smoothly and efficiently.
Once the dishwasher has completed its cycle, carefully open the door and inspect the dishes. Ensure that they have been cleaned effectively and that there are no signs of residue or debris.
If everything looks and sounds good, congratulations! You have completed the cleaning process and tested the functionality of your Kitchenaid dishwasher.
Remember, it’s important to clean the filter regularly to maintain the dishwasher’s performance and prevent clogs. A clean filter will ensure that your dishes come out sparkling clean every time.
Thank you for following our guide on how to clean the filter on your Kitchenaid dishwasher. We hope this article has been helpful and that your dishwasher continues to work efficiently for a long time to come.
Happy dishwashing!
Conclusion
Cleaning the filter of your Kitchenaid dishwasher is a crucial step to maintain its efficiency and prevent clogs. By regularly cleaning and maintaining the filter, you can ensure that your dishwasher continues to function optimally, providing you with sparkling clean dishes every time.
In this guide, we have provided you with a step-by-step process to clean the filter on your Kitchenaid dishwasher. From turning off the dishwasher and removing the bottom rack to locating and removing the filter, we have covered all the necessary steps to effectively clean and reinstall the filter.
Remember to gather the necessary tools and materials before starting the cleaning process. Ensure that you have a screwdriver, soft-bristle brush, warm water, mild dish soap or vinegar, and a clean cloth or sponge at hand.
By following the cleaning process outlined in this guide, you can effectively remove trapped debris and residue from the filter. Take your time to thoroughly clean all sides of the filter and use a soft-bristle brush or toothbrush to scrub away stubborn residue.
Once the filter is clean, reinstall it securely in its place and replace the bottom rack. Double-check that everything is properly positioned and locked in place before turning on the dishwasher and testing its functionality.
Regular maintenance and cleaning of your Kitchenaid dishwasher, including the filter, will ensure that it continues to perform at its best. Make it a habit to clean the filter on a regular basis, such as once every month, to prevent any issues and maintain the longevity of your dishwasher.
We hope this guide has been helpful to you in cleaning the filter on your Kitchenaid dishwasher. If you have any further questions or need assistance, consult the user manual or reach out to a professional for guidance.
Thank you for reading, and enjoy your clean and efficient dishwasher!
Now that you've mastered cleaning your dishwasher filter, why stop there? Keeping appliances in tip-top shape maximizes their efficiency and lifespan. Dive into our next guide on keeping your fridge spotless and fresh. We cover everything from scrubbing those hard-to-reach spots to maintaining an odor-free environment, ensuring your food storage is as pristine as your freshly washed dishes.
Frequently Asked Questions about How To Clean Filter On Kitchenaid Dishwasher
Was this page helpful?
At Storables.com, we guarantee accurate and reliable information. Our content, validated by Expert Board Contributors, is crafted following stringent Editorial Policies. We're committed to providing you with well-researched, expert-backed insights for all your informational needs.
0 thoughts on “How To Clean Filter On Kitchenaid Dishwasher”