Articles
How to Clean GE Front Load Washer
Modified: October 28, 2024
Discover effective methods and tips for cleaning your GE front load washer with our informative articles. Keep your appliance in top shape for optimal performance and longevity.
(Many of the links in this article redirect to a specific reviewed product. Your purchase of these products through affiliate links helps to generate commission for Storables.com, at no extra cost. Learn more)
Introduction
Keeping your GE front load washer clean is essential for its optimal performance and longevity. Over time, dirt, grime, and detergent residue can accumulate in various parts of the washer, leading to unpleasant odors and even affecting the cleanliness of your laundry. Regularly cleaning your washer not only ensures it stays in top condition but also helps maintain the hygiene of your clothes.
In this article, we will guide you through step-by-step instructions on how to effectively clean your GE front load washer. From the exterior to the inner parts, we will cover all the areas that require attention. With the right supplies and techniques, you can easily restore your washer’s cleanliness and prevent any future issues.
Before you begin the cleaning process, make sure to unplug your washer from the power outlet to avoid any accidents. Additionally, remember to consult your user manual for any specific instructions or precautions provided by the manufacturer.
Now, let’s gather the necessary supplies and get started with cleaning your GE front load washer.
Key Takeaways:
- Regularly cleaning your GE front load washer, from the exterior to the drum and filter, ensures optimal performance and hygiene for your laundry. Follow the step-by-step guide for a sparkling clean washer and fresh clothes.
- Incorporating maintenance tips like leaving the door ajar, using the right detergent amount, and regular maintenance cycles will keep your GE front load washer running smoothly and efficiently for years to come. Happy laundering!
Read more: How To Clean A Front Load Washer With Bleach
Supplies Needed
Before you begin cleaning your GE front load washer, gather the following supplies:
- Mild detergent or washer cleaner
- Vinegar
- Baking soda
- Soft microfiber cloth
- Toothbrush or small cleaning brush
- Bowl or bucket
- Water
- Towel or absorbent cloth
Having these supplies ready will ensure a smooth and effective cleaning process.
Once you have gathered all the necessary supplies, it’s time to prepare your GE front load washer for cleaning. Proceed to the next section for the preparation steps.
Preparation
Before you begin the cleaning process, there are a few important steps to follow to ensure a successful outcome:
- Unplug the washer: Safety is paramount, so make sure to disconnect the washer from the power outlet before you begin cleaning. This will minimize the risk of any electrical accidents during the process.
- Empty the washer: Remove any clothes or laundry items from the washer and double-check that the drum is completely empty. This will allow you to access all the necessary areas for cleaning without any obstructions.
- Gather the supplies: Make sure you have all the supplies mentioned in the previous section readily available. Having everything prepared beforehand will save you time and ensure a smooth cleaning process.
- Refer to the user manual: It’s always a good idea to consult the user manual provided by GE for any specific instructions or precautions related to cleaning your particular model of front load washer. This will ensure that you follow the manufacturer’s guidelines and prevent any inadvertent damage to your appliance.
- Put on protective gloves: While not essential, wearing gloves can provide an extra layer of protection for your hands, especially if you have sensitive skin or are using cleaning agents.
Once you have completed these preparation steps, you are ready to start cleaning the different parts of your GE front load washer. In the following sections, we will guide you through the cleaning process, step by step.
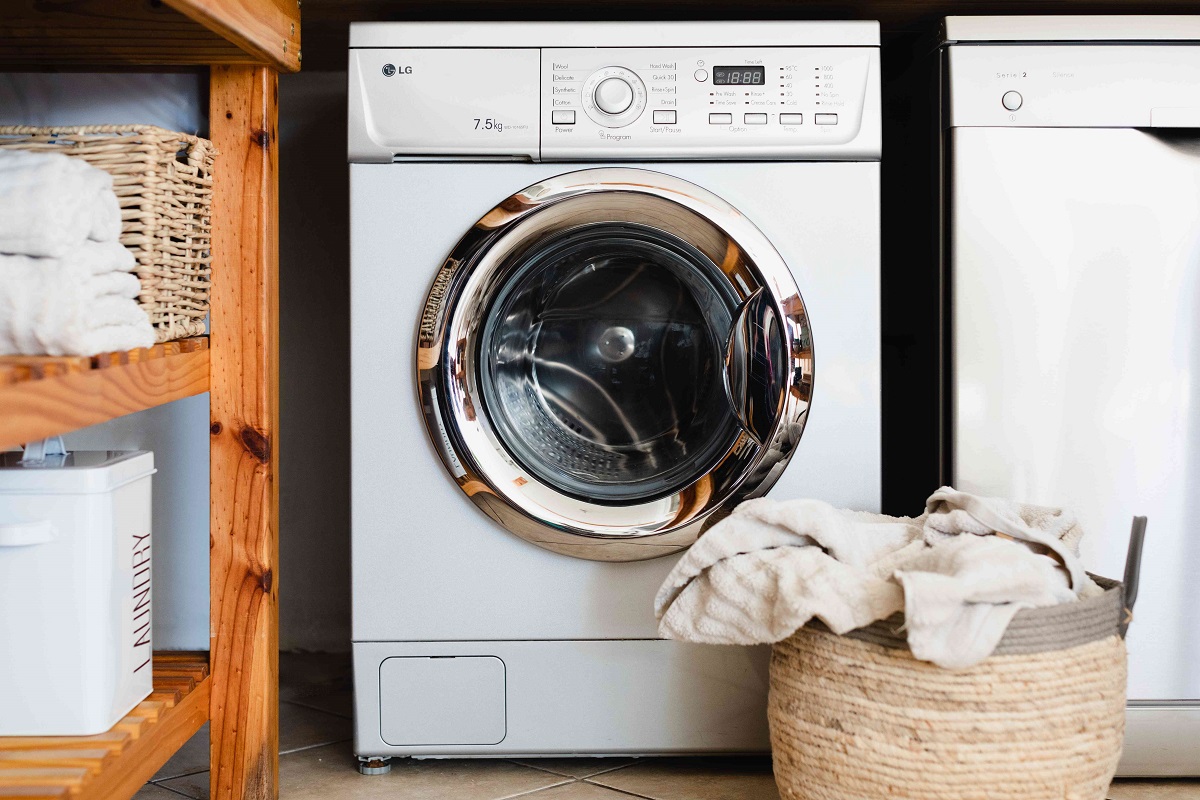
Cleaning the Exterior
The exterior of your GE front load washer is exposed to dust, dirt, and fingerprints, so it’s important to clean it regularly to maintain its appearance. Follow these steps to clean the exterior:
- Wipe down with a damp cloth: Start by dampening a soft microfiber cloth with water. Gently wipe the entire exterior surface of the washer, including the control panel, door, and sides. This will remove any loose dirt or dust.
- Mix mild detergent or washer cleaner with water: In a bowl or bucket, mix a small amount of mild detergent or a designated washer cleaner with water. Be sure to follow the instructions on the cleaner’s packaging for the appropriate dilution ratio.
- Clean with the solution: Dip the cloth into the soapy water solution and wring out any excess moisture. Begin wiping the exterior surfaces again, this time using the soapy cloth. Pay special attention to any areas with stains or grime. For stubborn stains, you can gently scrub the surface with a soft brush or toothbrush.
- Rinse with a damp cloth: After cleaning with the soapy solution, rinse the cloth with clean water and wring out any excess moisture. Use this damp cloth to wipe off any remaining soap residue from the exterior of the washer.
- Dry with a towel: Finally, use a clean towel or absorbent cloth to dry the exterior of the washer. This will prevent any water spots or streaks from forming and leave the surface looking clean and shiny.
Remember to avoid using abrasive cleaners or harsh chemicals as they can damage the finish of your washer. Stick to mild detergent or specifically formulated washer cleaners for best results.
With the exterior of your GE front load washer now sparkling clean, it’s time to move on to cleaning the door seal. Continue reading for the next step.
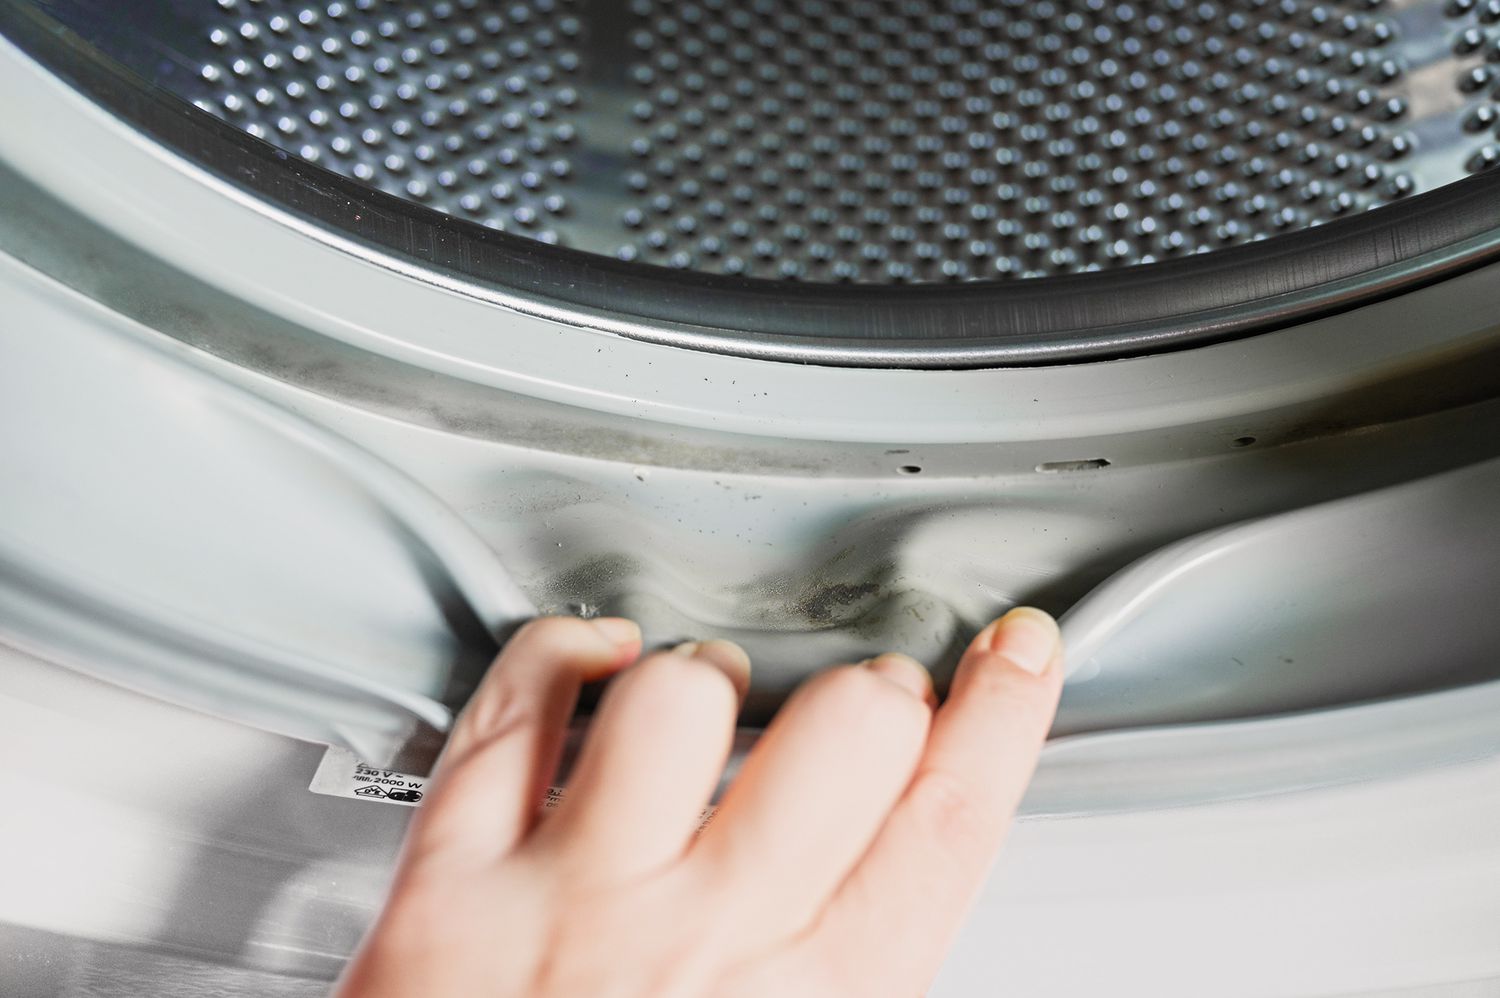
Cleaning the Door Seal
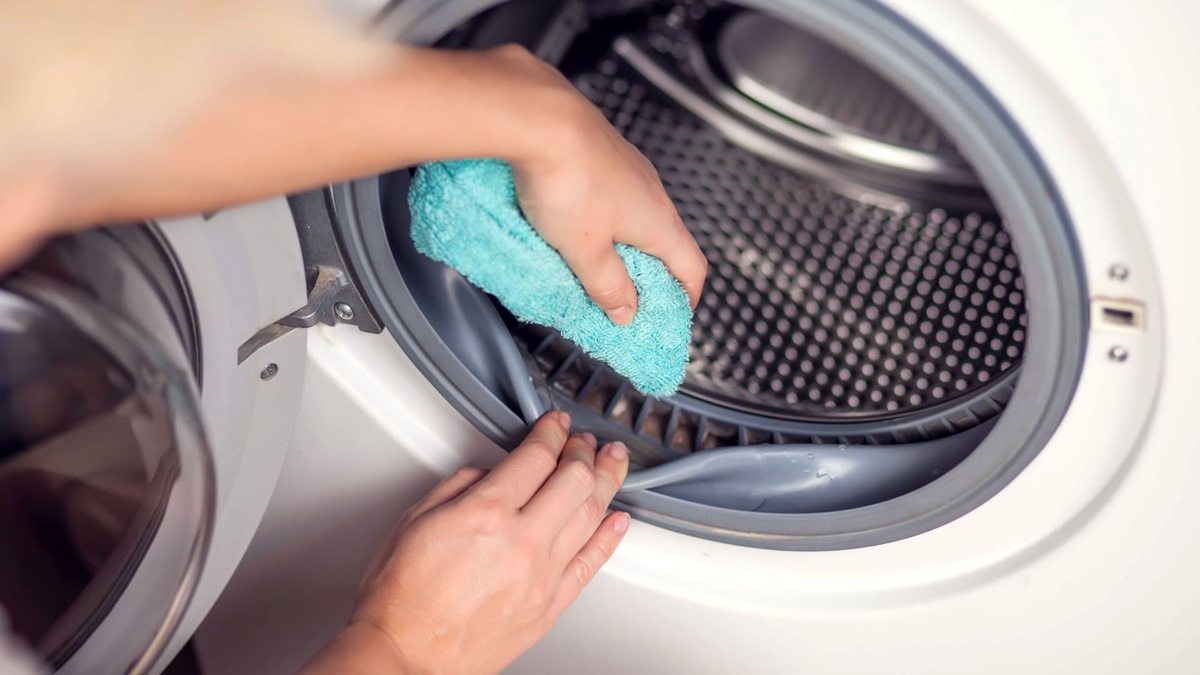
The door seal, also known as the door gasket, is a crucial part of your GE front load washer that ensures a watertight seal when the door is closed. However, over time, debris, lint, and mold can accumulate in the folds of the seal, leading to unpleasant odors and potential leaks. Follow these steps to clean the door seal:
- Inspect the seal: Take a close look at the door seal and check for any visible signs of dirt, debris, or mold. Pay attention to the folds and crevices where buildup is most common.
- Mix a cleaning solution: In a bowl or bucket, prepare a solution of equal parts water and vinegar. The acidity of vinegar helps remove mold and disinfect the seal. Alternatively, you can mix baking soda with water to create a paste for a more abrasive cleaning option.
- Apply the cleaning solution: Dip a soft cloth or sponge into the cleaning solution and gently scrub the door seal. Pay extra attention to any areas with visible buildup or stains. If you’re using the baking soda paste, apply it to the seal and let it sit for a few minutes before scrubbing.
- Deep clean the folds: To thoroughly clean the folds of the door seal, use a toothbrush or small cleaning brush. Dip it into the cleaning solution, and carefully scrub the folds to remove any stubborn dirt or mold. Take your time and be thorough in this step.
- Rinse and dry: After scrubbing, rinse the door seal with clean water to remove any residual cleaning solution. Wipe down the seal with a dry cloth or towel to ensure it’s dry.
- Leave the door open: To prevent mold growth and maintain the cleanliness of the seal, it’s essential to leave the washer door slightly ajar after each use. Allowing air to circulate will help dry out the seal and prevent any moisture buildup.
By regularly cleaning the door seal of your GE front load washer, you can prevent mold and bacterial growth while ensuring a tight and effective seal for your laundry cycles. The next section will focus on cleaning the detergent tray.
Read more: How To Deep Clean Top Load Washer
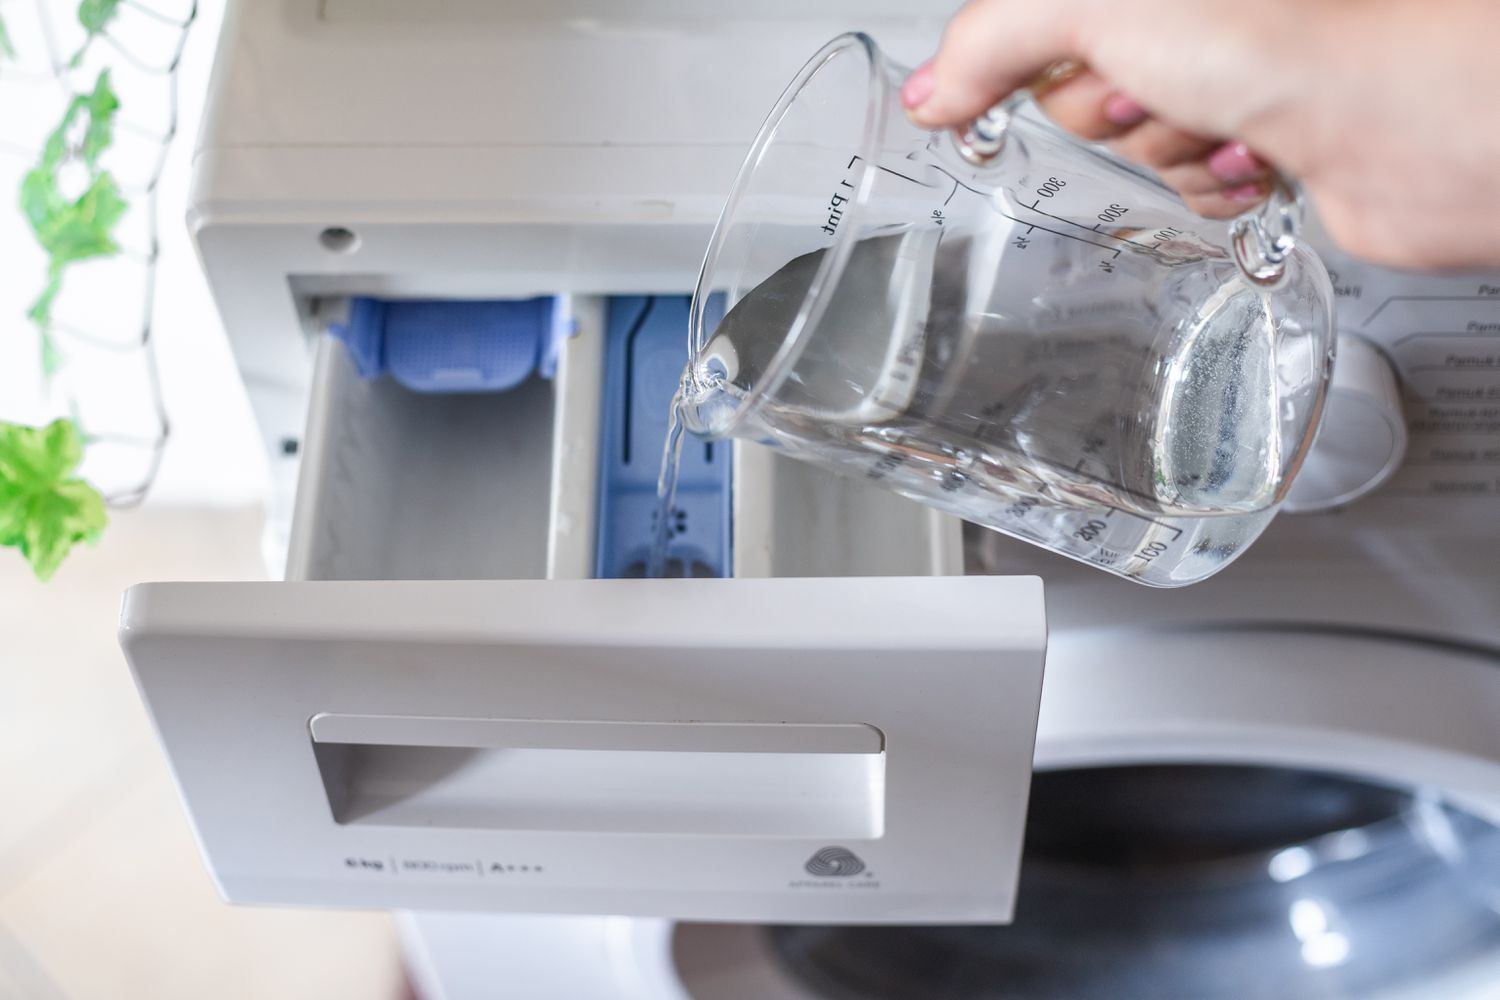
Cleaning the Detergent Tray
The detergent tray of your GE front load washer can accumulate soap residue, fabric softener, and other debris over time. This buildup not only hampers the performance of your washer but also creates an unhygienic environment. Follow these steps to clean the detergent tray:
- Remove the tray: Begin by removing the detergent tray from your washer. Most GE front load washers have a release button or lever that allows you to easily detach the tray.
- Separate the components: Once the tray is removed, disassemble its components, such as the main detergent compartment, fabric softener compartment, and any other attachments. Check for any visible residue or debris.
- Soak in warm soapy water: Fill your sink or a basin with warm water and add a mild detergent. Place the detergent tray components into the soapy water and let them soak for a few minutes. This will loosen any stubborn residue.
- Scrub with a toothbrush: Take a toothbrush or a small cleaning brush and gently scrub the components to remove any remaining buildup. Pay attention to the narrow crevices where detergent and fabric softener tend to accumulate.
- Rinse thoroughly: After scrubbing, rinse each component under running water to remove the soap residue and any loosened debris. Ensure that all parts are completely clean and free from any remaining detergent or fabric softener.
- Dry completely: Once rinsed, place the detergent tray components on a clean towel or absorbent cloth to air dry. Ensure that they are completely dry before reassembling and placing them back into the washer.
- Wipe down the tray slot: While the components dry, use a damp cloth to wipe down the empty detergent tray slot within the washer. This will remove any residue that may have built up in that area.
- Reassemble and insert: Once everything is dry, reassemble the detergent tray components and carefully insert them back into the appropriate slots in your GE front load washer. Make sure they fit securely.
Regularly cleaning the detergent tray of your GE front load washer will ensure effective detergent distribution and prevent any residue from affecting your laundry. Next, we will focus on cleaning the drum of the washer.
Use a mixture of equal parts vinegar and water to clean the rubber gasket and door seal. Run a hot water cycle with vinegar to clean the drum and remove any residue. Wipe down the exterior with a damp cloth.
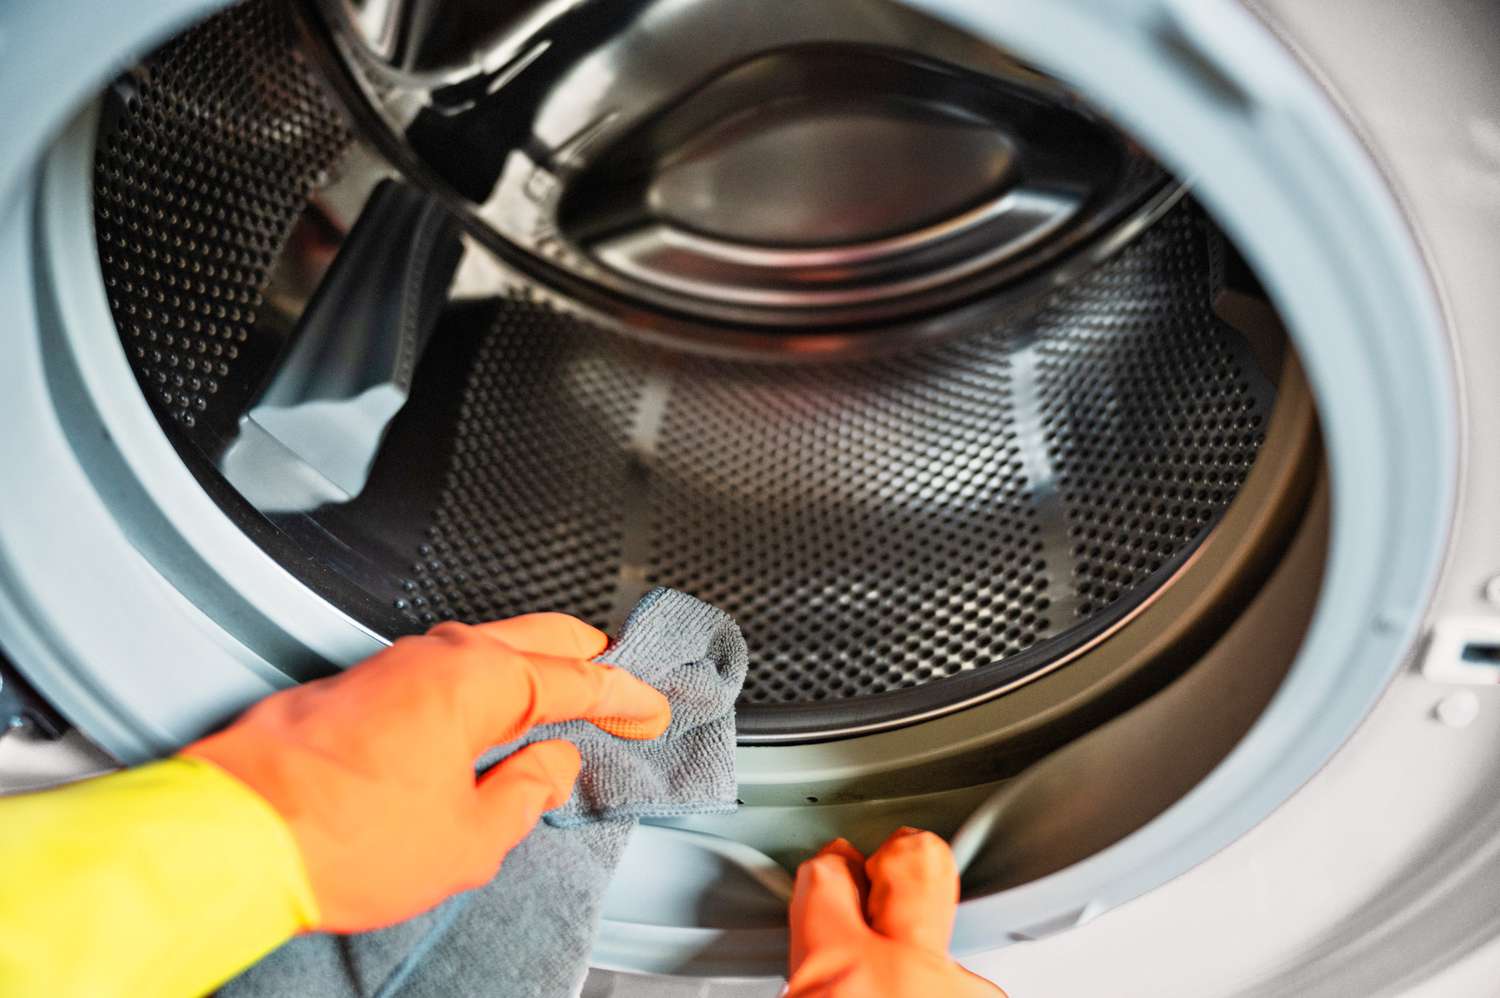
Cleaning the Drum
The drum of your GE front load washer can collect dirt, lint, and residue from laundry, leading to unpleasant odors and affecting the cleanliness of your clothes. It’s important to regularly clean the drum to maintain its performance and prevent any buildup. Follow these steps to clean the drum:
- Empty the drum: Ensure that the drum is completely empty before proceeding with the cleaning process. Remove any remaining clothes or laundry items.
- Prepare a cleaning solution: In a bowl or bucket, mix equal parts water and vinegar. This natural cleaning solution helps to remove odors and disinfect the drum. Alternatively, you can use a commercial washer cleaner that is specifically designed for front load washers.
- Wipe the drum’s interior: Dip a soft cloth or sponge into the cleaning solution and wring out any excess moisture. Wipe the interior of the drum thoroughly, paying attention to any visible stains or residue. For stubborn stains, you can use a soft brush or toothbrush to gently scrub the affected areas.
- Run a cleaning cycle: After wiping the drum, pour the remaining cleaning solution into the detergent tray. Set your washer to a cleaning or maintenance cycle, using hot water and a high spin speed if available. Allow the cycle to complete to ensure thorough cleaning of the drum.
- Remove and clean the door glass: While the cleaning cycle is running, take the opportunity to clean the door glass. Mix a solution of equal parts water and vinegar in a spray bottle. Spray the solution onto a microfiber cloth and wipe the door glass clean. Pay attention to any smudges or fingerprints.
- Dry the drum and door: Once the cleaning cycle has finished, open the door and allow the drum and interior surfaces to air dry. Wipe down the door gasket and glass with a dry cloth to remove any moisture.
It’s recommended to clean the drum of your GE front load washer at least once a month, or more frequently if you notice any odors or buildup. This will ensure that your washer operates at its best and keeps your clothes fresh and clean. Next, we will discuss cleaning the filter.
Cleaning the Filter
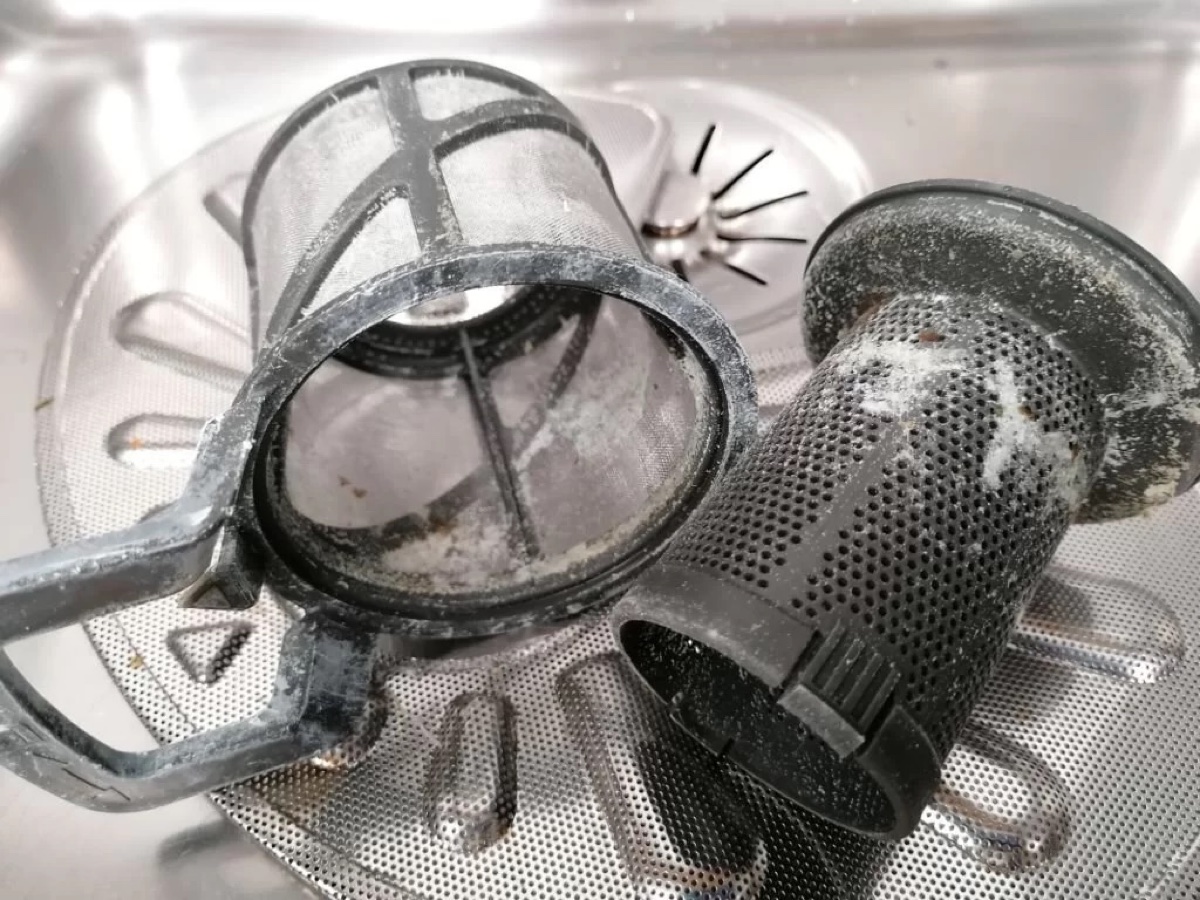
The filter in your GE front load washer plays a crucial role in trapping lint, debris, and other residues from your laundry. Over time, a clogged or dirty filter can hinder the washer’s performance and potentially cause drainage issues. It’s important to clean the filter regularly to maintain optimal functionality. Follow these steps to clean the filter:
- Locate the filter: Depending on the model of your GE front load washer, the filter can be found either behind a small access panel at the front of the machine or at the bottom of the washer behind a kick panel. Refer to your user manual to determine the exact location of the filter.
- Prepare a towel or bucket: Place a towel or a shallow bucket beneath the filter location to catch any water that may spill out during the cleaning process.
- Open the filter access panel: If the filter is behind an access panel, gently open it using a screwdriver or by following the instructions provided in your user manual.
- Drain any remaining water: If your washer has a drain tube or plug, use it to drain any excess water from the washer. This step is important to prevent water from spilling when you clean the filter.
- Remove the filter: Carefully unscrew or unclip the filter to remove it from the washer. Pay attention to any clips or screws that may be holding it in place.
- Clean the filter: Rinse the filter under running water to remove any lint, debris, or residue. Use a soft brush or toothbrush to gently scrub away any stubborn buildup. Ensure that all sides of the filter are thoroughly cleaned.
- Check the filter housing: While the filter is removed, inspect the filter housing for any dirt or debris. Use a damp cloth or sponge to wipe the housing clean.
- Reinstall the filter: Once the filter is clean and the housing is free from any dirt, place the filter back into its original position. Screw or clip it securely in place.
- Close the access panel: If the filter is behind an access panel, make sure to close it properly. Double-check that it is securely fastened to prevent any leaks.
It’s recommended to clean the filter of your GE front load washer every few months or as needed. Regular maintenance of the filter will ensure proper drainage and help prolong the lifespan of your washer. Finally, let’s move on to cleaning the dispenser drawer.
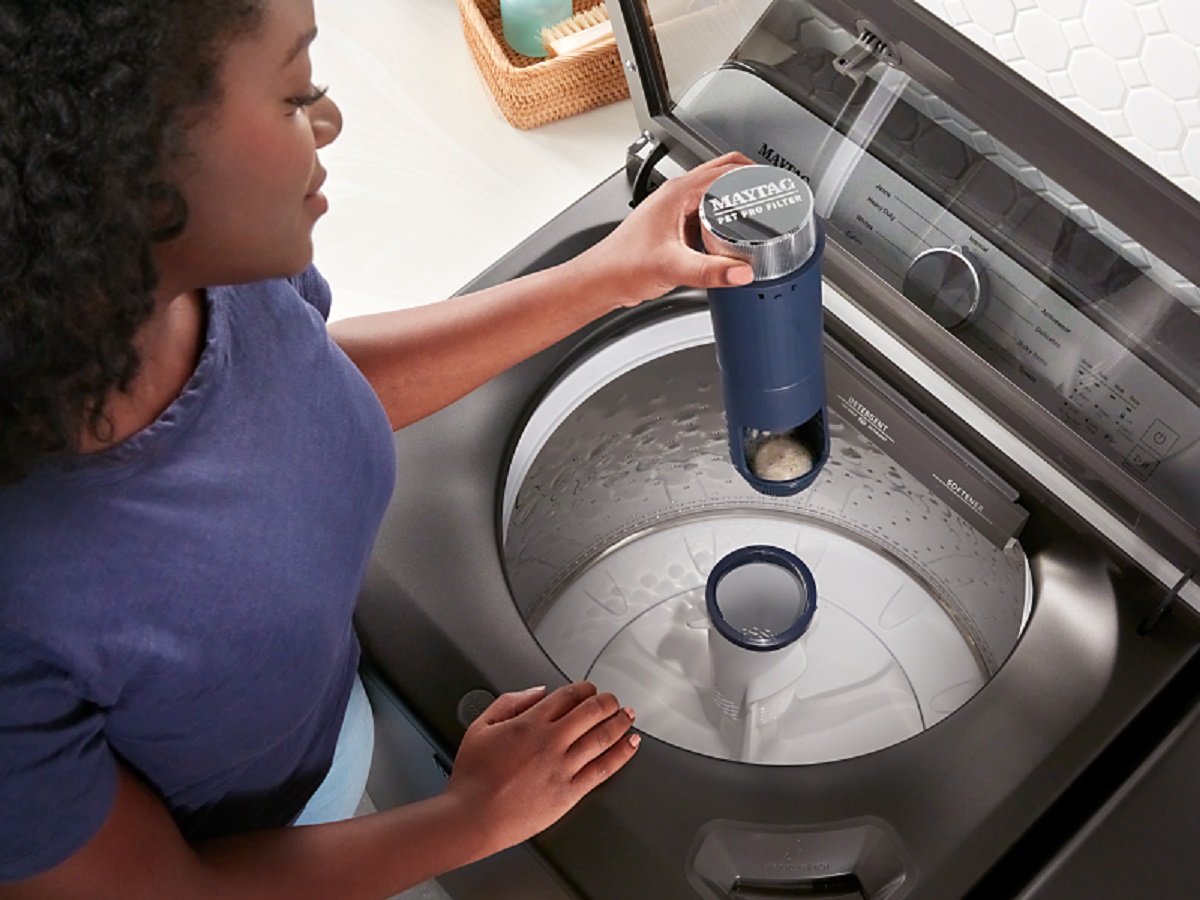
Cleaning the Dispenser Drawer
The dispenser drawer of your GE front load washer can accumulate detergent residue, fabric softener, and other debris over time, leading to blockages and inefficient distribution of cleaning agents. Cleaning the dispenser drawer regularly is essential for maintaining the cleanliness and functionality of your washer. Follow these steps to clean the dispenser drawer:
- Remove the dispenser drawer: Pull out the dispenser drawer completely from the washer. Depending on the model, you may need to press a release button or lever to detach it.
- Disassemble the components: Separate the different compartments of the dispenser drawer, such as the main detergent compartment and the fabric softener compartment. Check for any visible residue or clogs.
- Soak in warm soapy water: Fill your sink or a basin with warm water and add a small amount of mild detergent. Place the dispenser drawer components into the soapy water and let them soak for a few minutes. This will help loosen any stubborn residue.
- Scrub the compartments: Take a toothbrush or a small cleaning brush and gently scrub each compartment to remove any buildup or residue. Pay attention to the narrow openings or corners where detergent and fabric softener tend to accumulate.
- Rinse thoroughly: After scrubbing, rinse each compartment under running water to remove any soap residue or loosened debris. Ensure all parts are clean and free from any remaining detergent or fabric softener.
- Dry completely: Once rinsed, place the dispenser drawer components on a clean towel or absorbent cloth to air dry. Ensure that they are completely dry before reassembling and placing them back into the washer.
- Clean the dispenser housing: While the components dry, use a damp cloth or sponge to clean the empty dispenser housing inside the washer. Remove any residue or buildup that may have accumulated in that area.
- Reassemble and insert: Once everything is dry, reassemble the dispenser drawer components and carefully insert them back into the appropriate slots in your GE front load washer. Make sure they fit securely.
Regularly cleaning the dispenser drawer of your GE front load washer will ensure proper distribution of detergents and fabric softeners, preventing any blockages or dispensing issues. With the dispenser drawer clean and functional, you are now ready to move on to the final steps and maintenance tips.
Read more: How To Clean A Samsung Top Load Washer
Final Steps and Maintenance Tips
Now that you have thoroughly cleaned your GE front load washer, here are some final steps and maintenance tips to ensure its continued performance and longevity:
- Wipe down the exterior regularly: To keep the exterior of your washer looking clean and shiny, wipe it down with a damp cloth on a regular basis. This will prevent the buildup of dust and dirt.
- Leave the door open between uses: After each laundry cycle, leave the washer door slightly ajar to allow air to circulate and dry out the drum and interior. This helps prevent mold and mildew growth.
- Check and clean the drain pump filter: Periodically inspect the drain pump filter, located at the bottom of your washer. Remove any debris or lint that may have accumulated to ensure proper drainage.
- Use the right amount of detergent: Avoid using excessive amounts of detergent, as this can lead to residue buildup and affect the performance of your washer. Follow the manufacturer’s guidelines for the recommended detergent quantity.
- Perform regular maintenance cycles: Run maintenance cycles on your washer every few months, using a dedicated washer cleaner or a mixture of vinegar and water. This helps keep the drum and internal parts clean and free from residue.
- Keep the washer door gasket dry: After each use, wipe down the door gasket with a dry cloth to remove any moisture. This prevents mold or mildew from forming in the folds of the seal.
- Inspect and clean the detergent dispensing tray: Regularly inspect the detergent dispensing tray for residue or clogs. Clean it as needed to ensure proper distribution of detergents.
Following these maintenance tips and incorporating them into your routine will help ensure the optimal performance of your GE front load washer. With a clean and well-maintained washer, you can enjoy fresh and clean laundry every time.
At this point, you have successfully cleaned your GE front load washer and learned how to maintain it. By incorporating these cleaning and maintenance practices into your routine, you can keep your washer running smoothly and efficiently for years to come.
Remember to always refer to your user manual for specific instructions related to your model and reach out to GE customer support if you have any concerns or issues.
Happy laundering!
Conclusion
Cleaning your GE front load washer is an essential part of its maintenance and upkeep. By regularly cleaning the exterior, door seal, detergent tray, drum, filter, and dispenser drawer, you can ensure optimal performance, prevent odors, and maintain the cleanliness of your laundry. With the step-by-step instructions provided in this article, you have all the necessary knowledge to effectively clean every part of your washer.
Remember to gather the supplies needed before starting the cleaning process, and always refer to your user manual for any specific instructions or precautions. Taking the time to properly clean and maintain your washer will not only extend its lifespan but also ensure the cleanliness and freshness of your clothes.
In addition to the cleaning steps, we have highlighted the importance of regular maintenance and provided some tips to keep your washer in top condition. By incorporating these practices into your laundry routine, you can avoid common issues, such as mold or clogs, and enjoy the full benefits of your GE front load washer for years to come.
With a clean and well-maintained washer, you can have peace of mind knowing that your laundry is being done efficiently and hygienically. So, follow the steps outlined in this article and make cleaning your GE front load washer a regular part of your laundry routine.
Thank you for taking the time to read this comprehensive guide. We hope it has been helpful and will assist you in maintaining the cleanliness and performance of your GE front load washer. Happy washing!
Frequently Asked Questions about How To Clean GE Front Load Washer
Was this page helpful?
At Storables.com, we guarantee accurate and reliable information. Our content, validated by Expert Board Contributors, is crafted following stringent Editorial Policies. We're committed to providing you with well-researched, expert-backed insights for all your informational needs.


0 thoughts on “How to Clean GE Front Load Washer”