Articles
How To Clean Bottom Load Water Dispenser
Modified: October 18, 2024
Looking for articles on how to clean a bottom load water dispenser? Find expert tips and step-by-step guides to keep your dispenser clean and functioning efficiently.
(Many of the links in this article redirect to a specific reviewed product. Your purchase of these products through affiliate links helps to generate commission for Storables.com, at no extra cost. Learn more)
Introduction
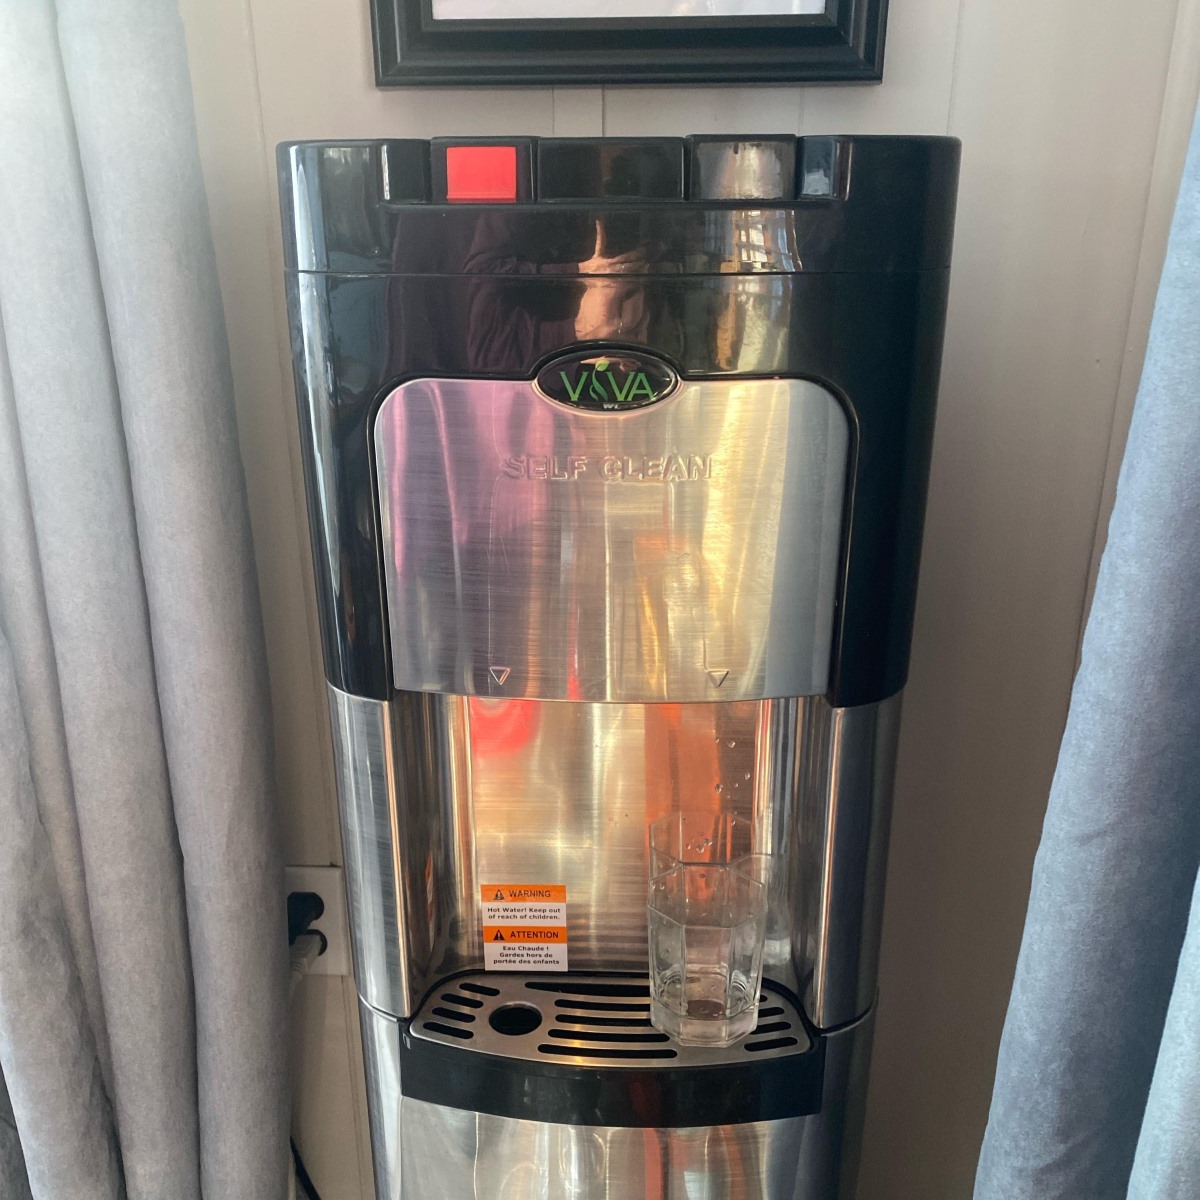
Welcome to our guide on how to clean a bottom load water dispenser. Water dispensers are a convenient and popular appliance found in many households and offices, providing easy access to refreshing drinking water. Over time, however, these dispensers can accumulate dirt, grime, and mineral deposits, compromising the quality and taste of the water. Regular cleaning is essential to maintain a clean and hygienic environment.
In this article, we will walk you through a step-by-step process of cleaning and maintaining your bottom load water dispenser. We will also share some important safety precautions to ensure a safe cleaning experience. By following these instructions, you can rest assured that your water dispenser will provide pure and delicious water for you and your family.
Before we get started, please note that the specific cleaning instructions may vary depending on the model and manufacturer of your water dispenser. It is always recommended to refer to the user manual for any specific guidelines or recommendations provided by the manufacturer.
Now, let’s dive into the cleaning process and get your bottom load water dispenser looking and performing its best!
Key Takeaways:
- Regularly cleaning and maintaining your bottom load water dispenser is essential to ensure clean, refreshing water for you and your family. Follow the step-by-step guide and safety precautions for a safe and effective cleaning experience.
- Incorporate regular maintenance practices, such as cleaning the exterior, replacing filters, and monitoring for leaks, to extend the lifespan and efficiency of your bottom load water dispenser. Prioritize safety and enjoy a healthier drinking experience.
Read also: 12 Best Bottom Load Water Dispenser for 2025
Safety Precautions
Before you begin cleaning your bottom load water dispenser, it is important to take some safety precautions to ensure a safe and accident-free experience. Here are some key safety measures to keep in mind:
- Unplug the dispenser: Before cleaning, make sure to unplug the dispenser from the power outlet to avoid any electric shocks or accidents.
- Allow the water to cool down: If your dispenser has been recently used, give it sufficient time to cool down before starting the cleaning process. Hot water can cause burns or injuries.
- Wear protective gloves: It is advisable to wear rubber gloves to protect your hands from any chemicals, cleaning agents, or debris during the cleaning process.
- Work in a well-ventilated area: Cleaning products may emit strong fumes, so make sure to work in a well-ventilated area to avoid inhaling any toxic substances.
- Read the label instructions: If you are using any cleaning solutions or agents, carefully read the label instructions and follow them accordingly. Some chemicals may be harmful if not used properly.
- Keep children and pets away: To prevent accidents or ingestion of cleaning agents, ensure that children and pets are kept at a safe distance from the cleaning area.
- Use a stable surface: Place your water dispenser on a stable and flat surface while cleaning to prevent any accidental tipping or falling.
By following these safety precautions, you can minimize the risk of accidents and injuries during the cleaning process. Now that we have established the safety guidelines, let’s gather the necessary supplies to begin cleaning your bottom load water dispenser.
Gather Necessary Supplies
Before you begin the cleaning process, gather the necessary supplies to efficiently clean your bottom load water dispenser. Having these items on hand will make the task easier and more effective. Here’s a list of supplies you will need:
- Warm water: You will need warm water for rinsing and cleaning the various parts of the dispenser. Warm water helps to dissolve any buildup and provides a thorough clean.
- Vinegar or lemon juice: Vinegar and lemon juice are natural and effective cleaning agents. They can help remove stubborn stains, odor, and mineral deposits from the dispenser.
- Mild dish soap: Use a mild dish soap to clean the removable parts of the dispenser, such as the drip tray and nozzle. Make sure the dish soap is gentle and free of any harsh chemicals.
- Clean cloth or sponge: You’ll need a clean cloth or sponge to wipe down the exterior and interior surfaces of the dispenser. Choose a non-abrasive cloth to avoid scratching the plastic or stainless steel.
- Cotton swabs or small brush: Cotton swabs or a small brush will be handy for cleaning hard-to-reach areas, such as the nozzle and dispensing area.
- Bucket or basin: Prepare a bucket or basin to collect the water as you drain and clean the dispenser. This will help prevent any mess or water damage.
Once you have gathered all the necessary supplies, you’ll be ready to start the cleaning process. Ensure that you have everything easily accessible to avoid interruptions or delays during the cleaning process. With the supplies gathered, let’s move on to unplugging and emptying the dispenser.
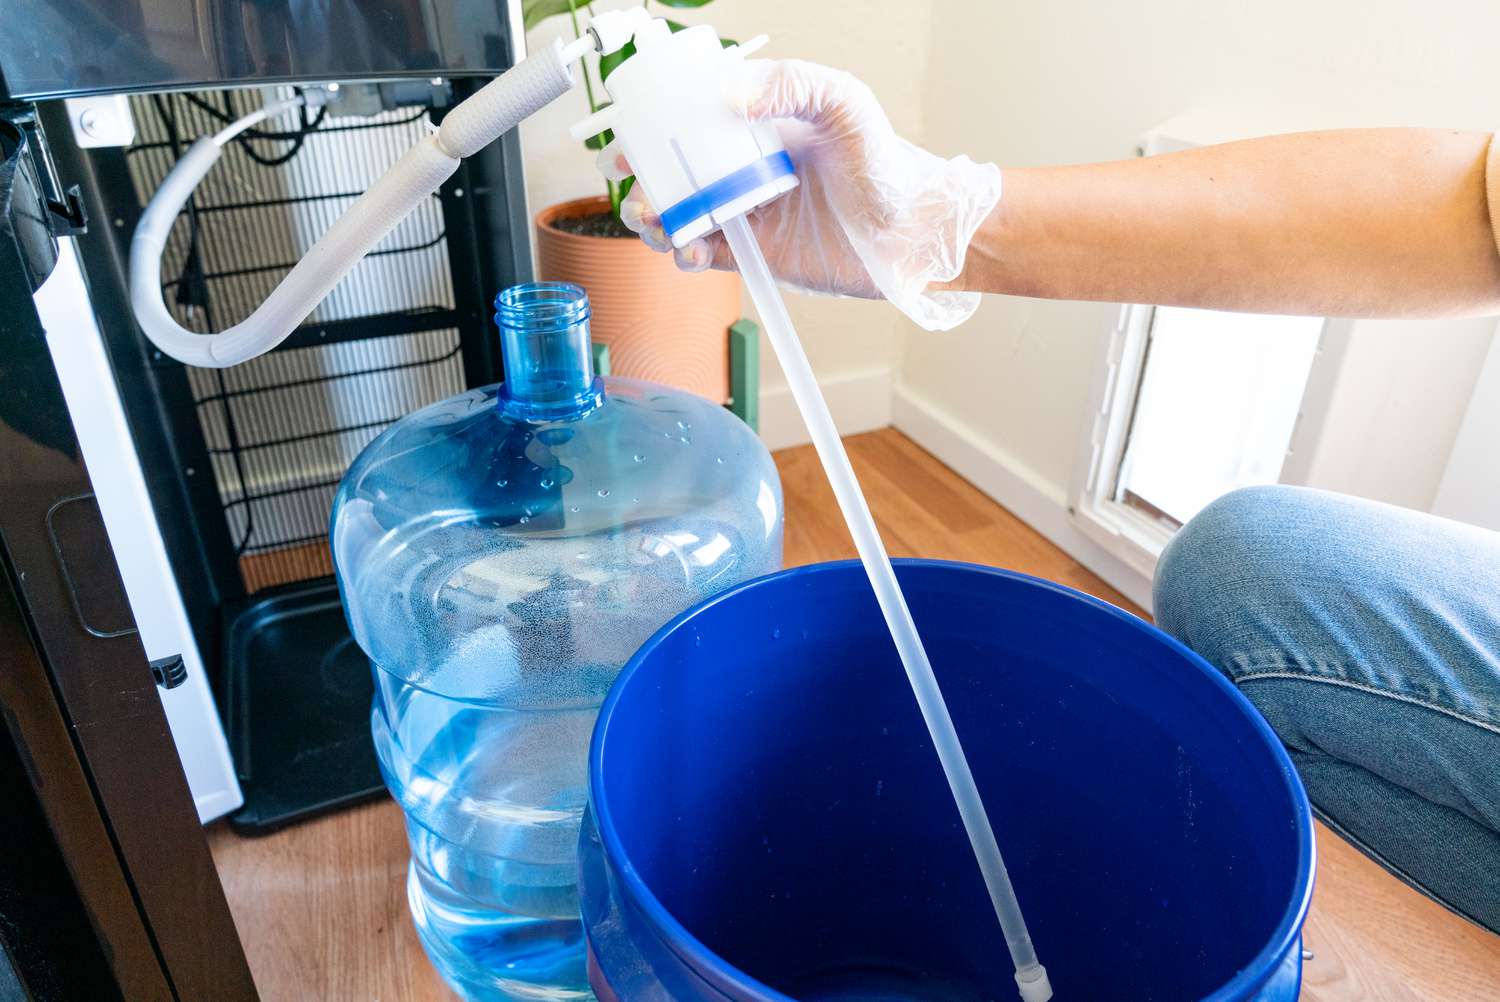
Unplug and Empty the Dispenser
The first step in cleaning your bottom load water dispenser is to unplug it from the power outlet and empty out any remaining water. This will ensure your safety and prevent any accidental spills or leaks. Follow these steps to unplug and empty the dispenser:
- Turn off the dispenser: Locate the power switch or button on the dispenser and turn it off.
- Unplug the dispenser: Carefully unplug the power cord from the electrical outlet. This step is crucial to prevent any accidental electric shocks while cleaning.
- Drain the water: Place a bucket or basin beneath the drip tray or the water outlet of the dispenser. Allow the remaining water to drain out completely. You may need to press the dispenser lever or button to release the water.
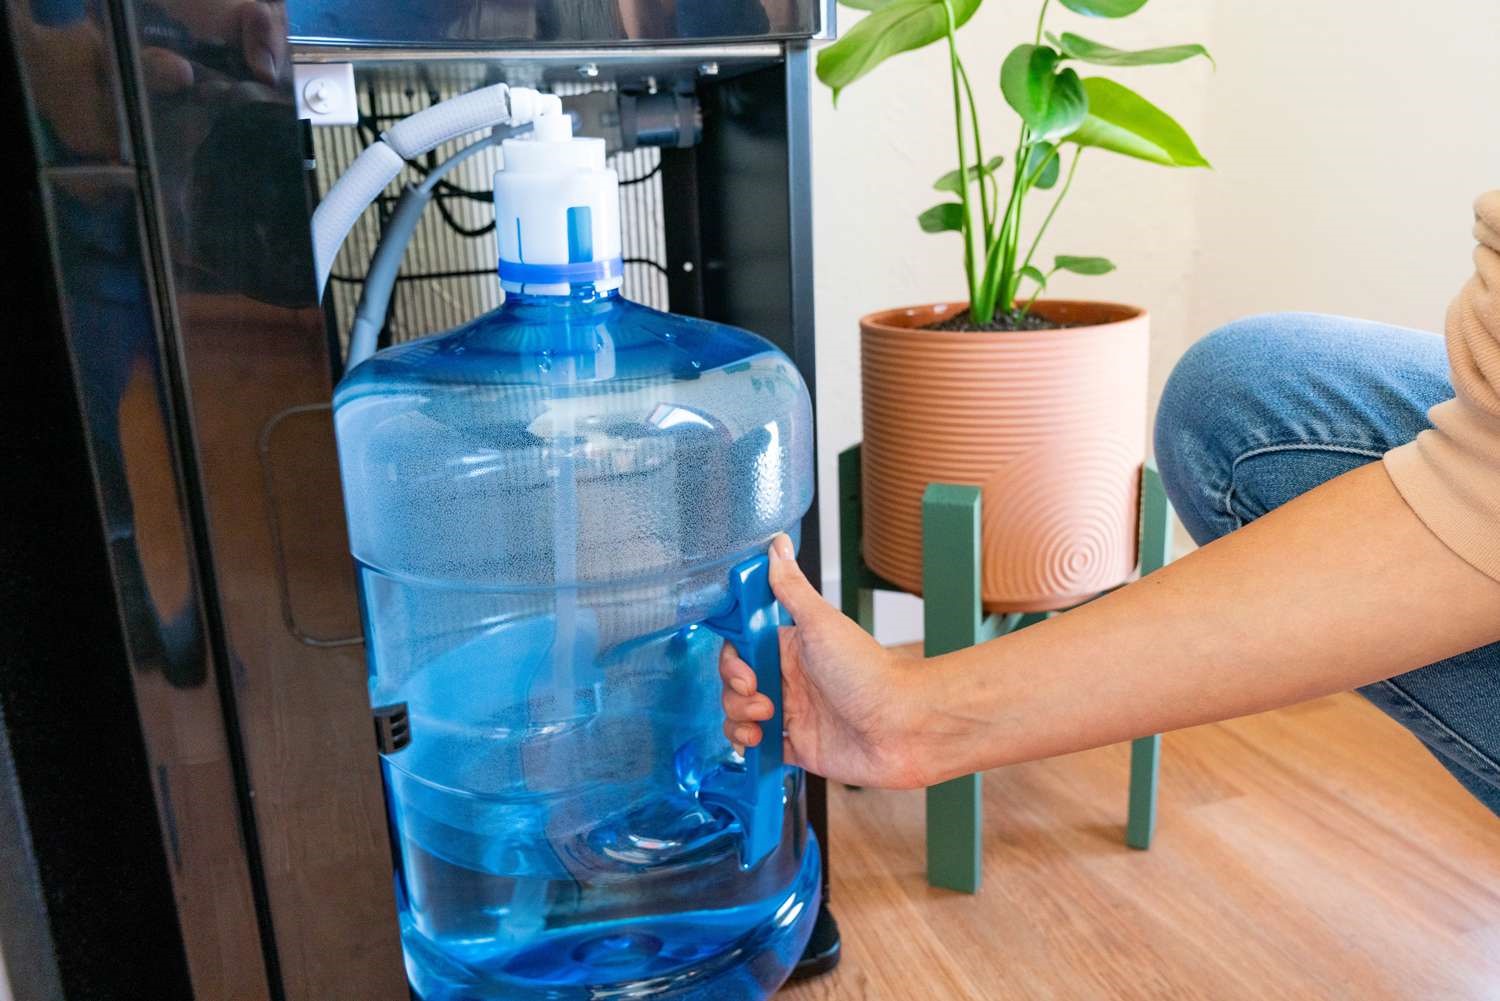
- Remove the water bottle: If there is a water bottle attached to the dispenser, carefully remove it and set it aside.
- Discard the remaining water: Empty the water collected in the bucket or basin and clean it thoroughly. Do not reuse the water as it may contain impurities or residues from the dispenser.
Once you have successfully unplugged and emptied the dispenser, it’s time to move on to the next step – removing and cleaning the drip tray.
Remove and Clean the Drip Tray
The drip tray is located at the bottom of the water dispenser and collects any excess water that may spill during dispensing. It is important to regularly remove and clean the drip tray to prevent the buildup of bacteria, mold, and mineral deposits. Follow these steps to remove and clean the drip tray:
- Locate the drip tray: The drip tray is usually located at the bottom of the dispenser, beneath the dispensing area. It may be attached with clips or screws, depending on the model of your dispenser.
- Remove the drip tray: Gently detach the drip tray from the dispenser. Be careful not to spill any water or debris that may have collected in it.
- Empty and rinse the drip tray: Empty any water and debris from the drip tray into the sink. Rinse it thoroughly with warm water to remove any residue or buildup.
- Clean the drip tray: Prepare a mixture of warm water and mild dish soap. Use a sponge or cloth to scrub the drip tray, paying special attention to any stains or stubborn residue. Rinse it thoroughly to remove any soap residue.
- Dry and reassemble the drip tray: Wipe the drip tray dry with a clean cloth or allow it to air dry completely. Once dry, reattach the drip tray back into its original position in the dispenser.
By regularly cleaning the drip tray, you can maintain a clean and hygienic environment for your bottom load water dispenser. Now, let’s move on to cleaning the water reservoir and filter.
Read more: How To Clean A Vitapur Water Dispenser
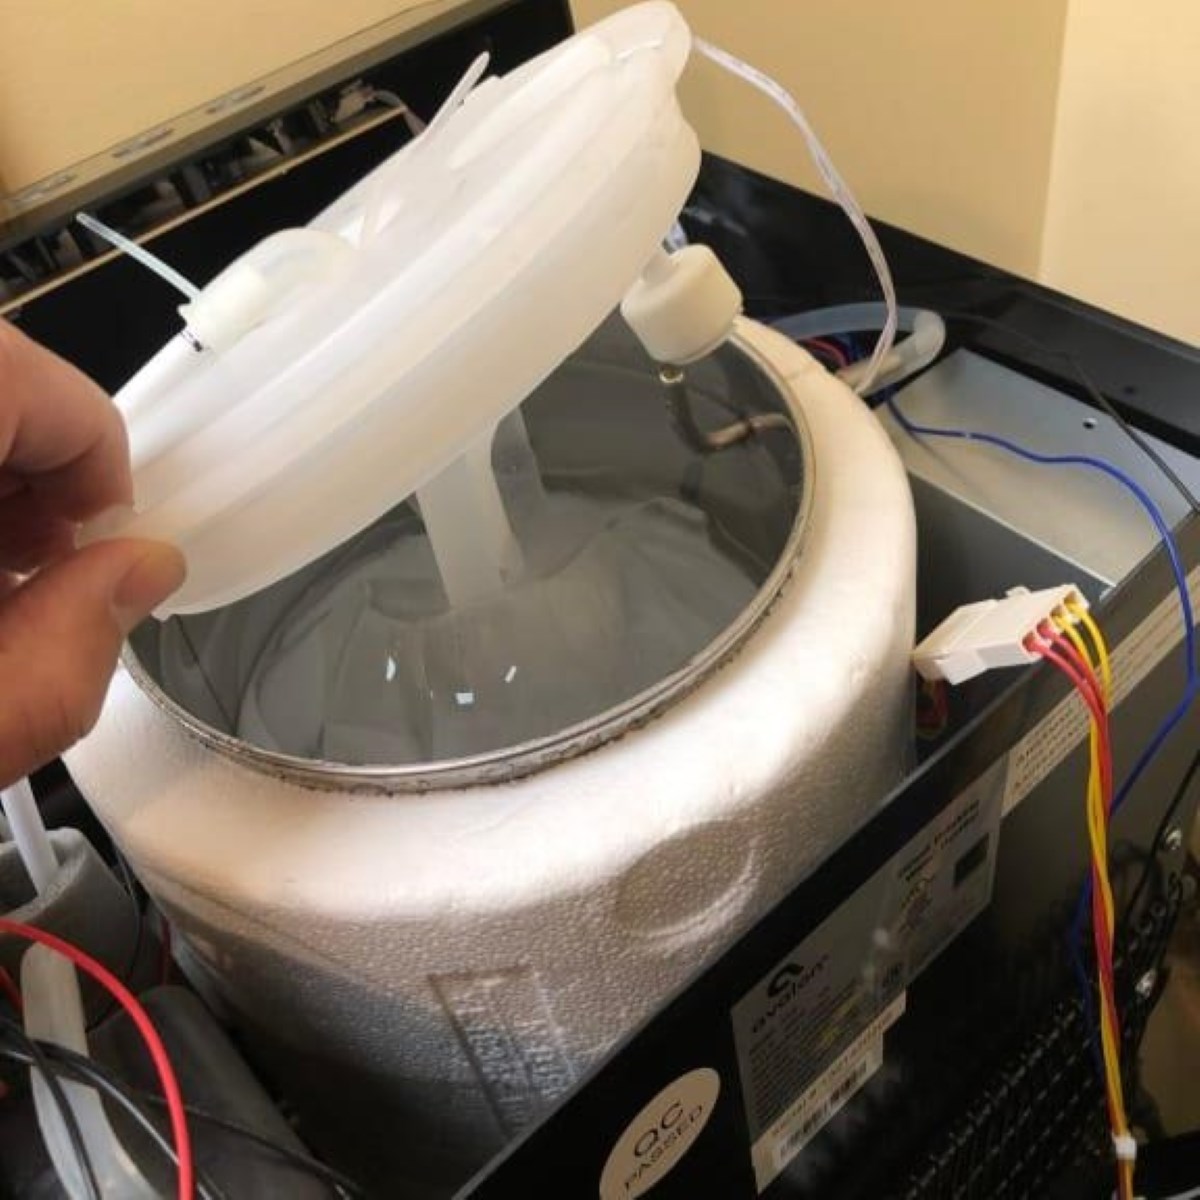
Clean the Water Reservoir and Filter
The water reservoir and filter are vital components of your bottom load water dispenser. Cleaning these parts regularly is essential to ensure the quality and taste of the water. Follow these steps to effectively clean the water reservoir and filter:
- Empty the water reservoir: Ensure that the dispenser is unplugged and the water bottle is removed. Carefully remove the water reservoir from the dispenser, following the manufacturer’s instructions if necessary. Pour out any remaining water into the sink.
- Prepare a cleaning solution: Fill a bowl or container with a mixture of warm water and either vinegar or lemon juice. The acid in these natural cleaning agents will help dissolve mineral deposits and remove any odor or stains.
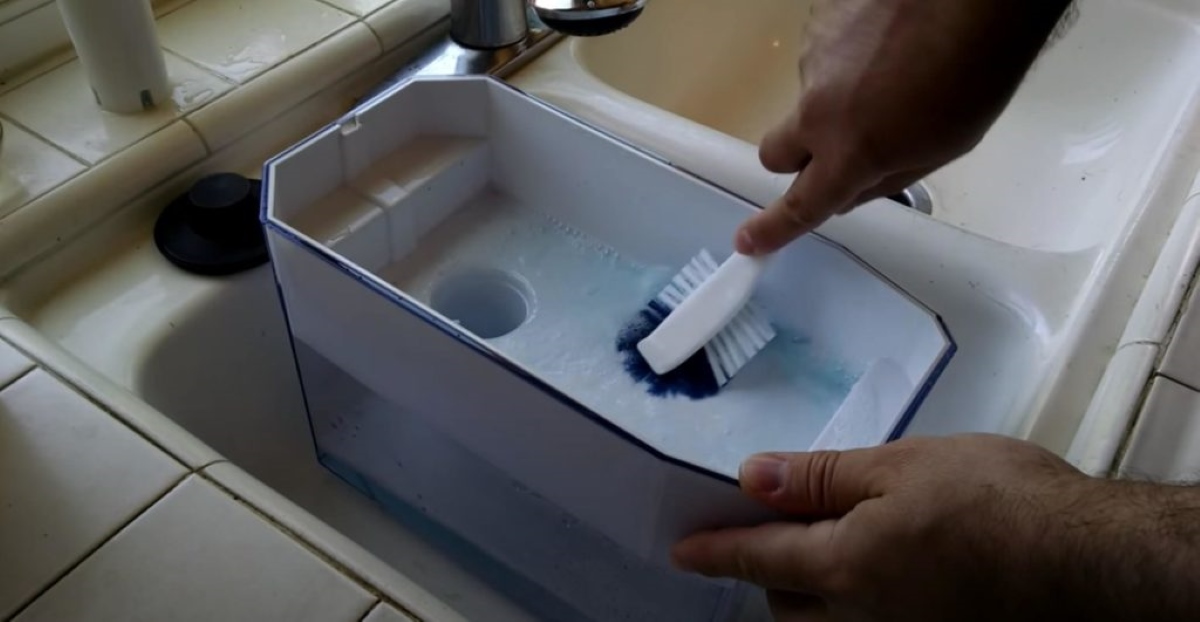
- Submerge the water reservoir: Immerse the water reservoir in the cleaning solution and let it soak for about 15-20 minutes. This will allow the solution to loosen any buildup and grime.
- Scrub the reservoir: Using a soft brush or sponge, gently scrub the interior and exterior of the water reservoir. Pay special attention to any areas with stubborn stains or deposits. Rinse thoroughly with warm water to remove any cleaning solution residue.
- Clean the filter: If your bottom load water dispenser has a filter, refer to the manufacturer’s instructions on how to clean or replace it. Some filters may be washable, while others may need to be replaced periodically. Follow the proper procedure to maintain the optimal performance of the filter.
- Allow to dry: After cleaning, thoroughly dry the water reservoir and filter with a clean cloth or allow them to air dry completely.
Once the water reservoir and filter are clean and dry, you can proceed to the next step – cleaning the nozzle and dispensing area.
Use a mixture of vinegar and water to clean the inside of the water dispenser. Let it sit for a few hours, then rinse thoroughly with clean water. Wipe the exterior with a damp cloth.
Clean the Nozzle and Dispensing Area
The nozzle and dispensing area of your bottom load water dispenser can accumulate residue, bacteria, and mineral deposits over time. Cleaning these parts regularly is important to ensure the continuous flow of clean and fresh water. Follow these steps to effectively clean the nozzle and dispensing area:
- Remove any detachable parts: Check if there are any detachable parts around the nozzle and dispensing area, such as a removable guard or cover. If there are, carefully remove them for cleaning.
- Prepare a cleaning solution: Fill a bowl or container with warm water and a small amount of mild dish soap. This gentle solution will help remove any buildup without damaging the dispenser.
- Soak the detached parts (if applicable): If you have any detachable parts, immerse them in the cleaning solution and let them soak for a few minutes. This will help loosen any residue or debris.
- Clean the nozzle: Dip a cotton swab or small brush into the cleaning solution. Gently scrub the nozzle to remove any buildup or debris. Pay attention to the small openings and crevices where bacteria and residue can accumulate.
- Clean the dispensing area: Using a clean cloth or sponge, wipe down the surrounding area of the nozzle and the dispensing region. Make sure to remove any residue or stains that may have accumulated.
- Rinse and dry: Rinse the detached parts and the cleaned area thoroughly with warm water to remove any soapy residue. Dry them completely using a clean cloth.
- Reassemble the dispenser: Once all the parts are clean and dry, reattach any detachable parts and ensure that they are securely in place.
With the nozzle and dispensing area clean, you are one step away from enjoying clean and refreshing water from your bottom load water dispenser. Let’s move on to the final step – reassembling the dispenser and testing its functionality.
Reassemble the Dispenser
After thoroughly cleaning all the individual components of your bottom load water dispenser, it’s time to reassemble everything and get it back into working order. Follow these simple steps to reassemble your dispenser:
- Replace the water reservoir: Carefully place the cleaned and dried water reservoir back into its designated position in the dispenser. Make sure it is securely in place.
- Reattach the drip tray: Place the cleaned and dried drip tray back into its original position beneath the dispensing area. Ensure that it is securely attached with any clips or screws.
- Reinstall any detachable parts: If you had removed any detachable parts during the cleaning process, now is the time to reinstall them. Place them back onto the nozzle and dispensing area according to the manufacturer’s instructions.
- Insert the water bottle: If your dispenser requires a water bottle for operation, carefully place a fresh, clean water bottle onto the dispenser’s top load or rear load area. Follow the manufacturer’s instructions on how to properly install the water bottle.
With the dispenser reassembled, the final step is to plug it back in and test its functionality.
Plug In and Test the Dispenser
After reassembling your bottom load water dispenser, it’s time to plug it back in and ensure that everything is functioning properly. Follow these steps to plug in and test your dispenser:
- Plug in the dispenser: Carefully insert the power cord into a nearby electrical outlet. Ensure that the cord is securely connected.
- Turn on the dispenser: Locate the power switch or button on the dispenser and turn it on. You should hear the dispenser activate.
- Check for leaks: Watch the dispensing area and the bottom of the dispenser for any signs of leaks. If you notice any dripping or leakage, immediately turn off the dispenser and inspect for possible causes, such as loose connections or damaged seals. Rectify the issue before using the dispenser.
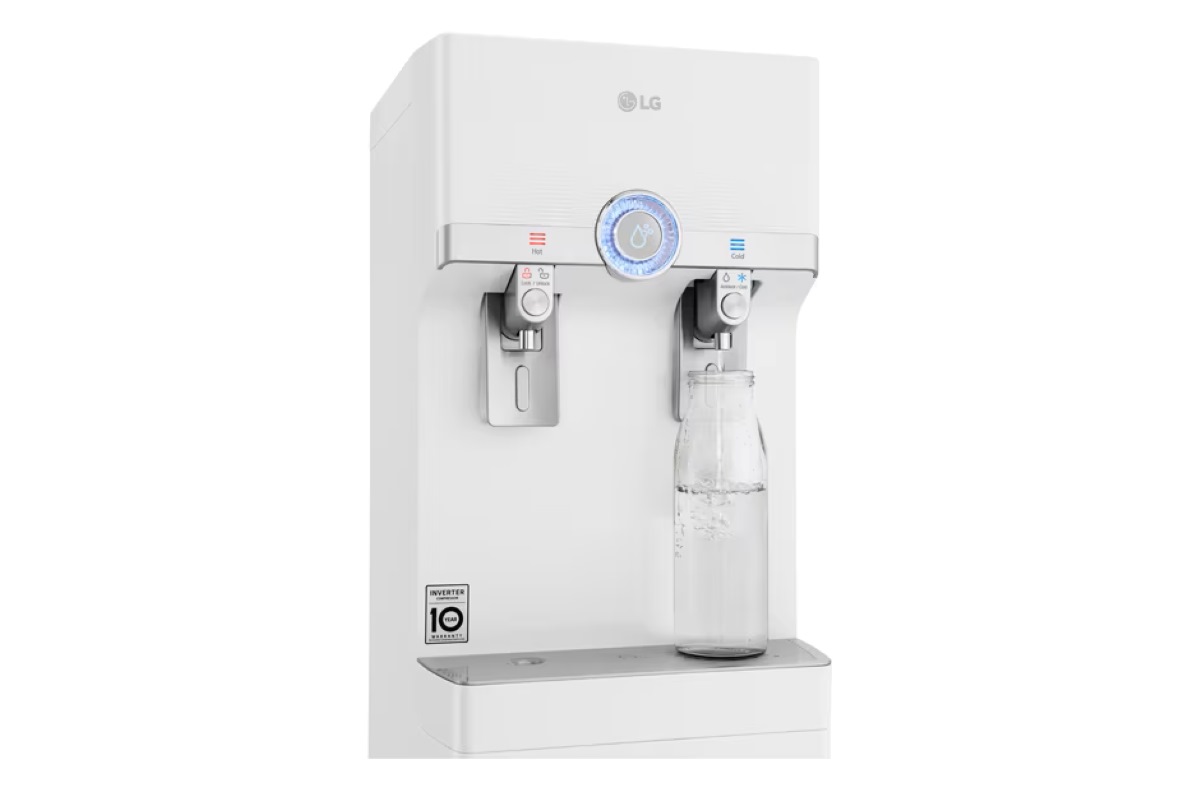
- Activate the water flow: Press the dispenser lever or button to initiate the water flow. Ensure that water is smoothly and consistently flowing from the nozzle without any blockages or irregularities.
- Taste the water: After a few moments of water flow, taste a small amount of water from the dispenser to ensure its quality and taste. It should be clean, fresh, and free from any strange odors or tastes.
- Monitor for any malfunctions: Keep an eye on the dispenser during its initial use after cleaning. Watch out for any unusual noises, erratic water flow, or other malfunctions. If you notice any issues, refer to the manufacturer’s instructions or contact their customer service for assistance.
If everything appears to be in working order and the water is clean and refreshing, congratulations! You have successfully cleaned and tested your bottom load water dispenser. Please refer to the maintenance tips below to keep your dispenser in optimal condition for future use.
Read more: How To Clean Pur Water Dispenser
Maintenance Tips
To ensure the longevity and efficiency of your bottom load water dispenser, it’s important to incorporate regular maintenance into your routine. Here are some essential maintenance tips to follow:
- Clean the dispenser regularly: Plan to clean your water dispenser at least once every 2-3 months, or more frequently if you notice any buildup or changes in water quality.
- Replace the filter: If your dispenser has a filter, follow the manufacturer’s recommendations for replacing it. This will help maintain water quality and prevent clogs.
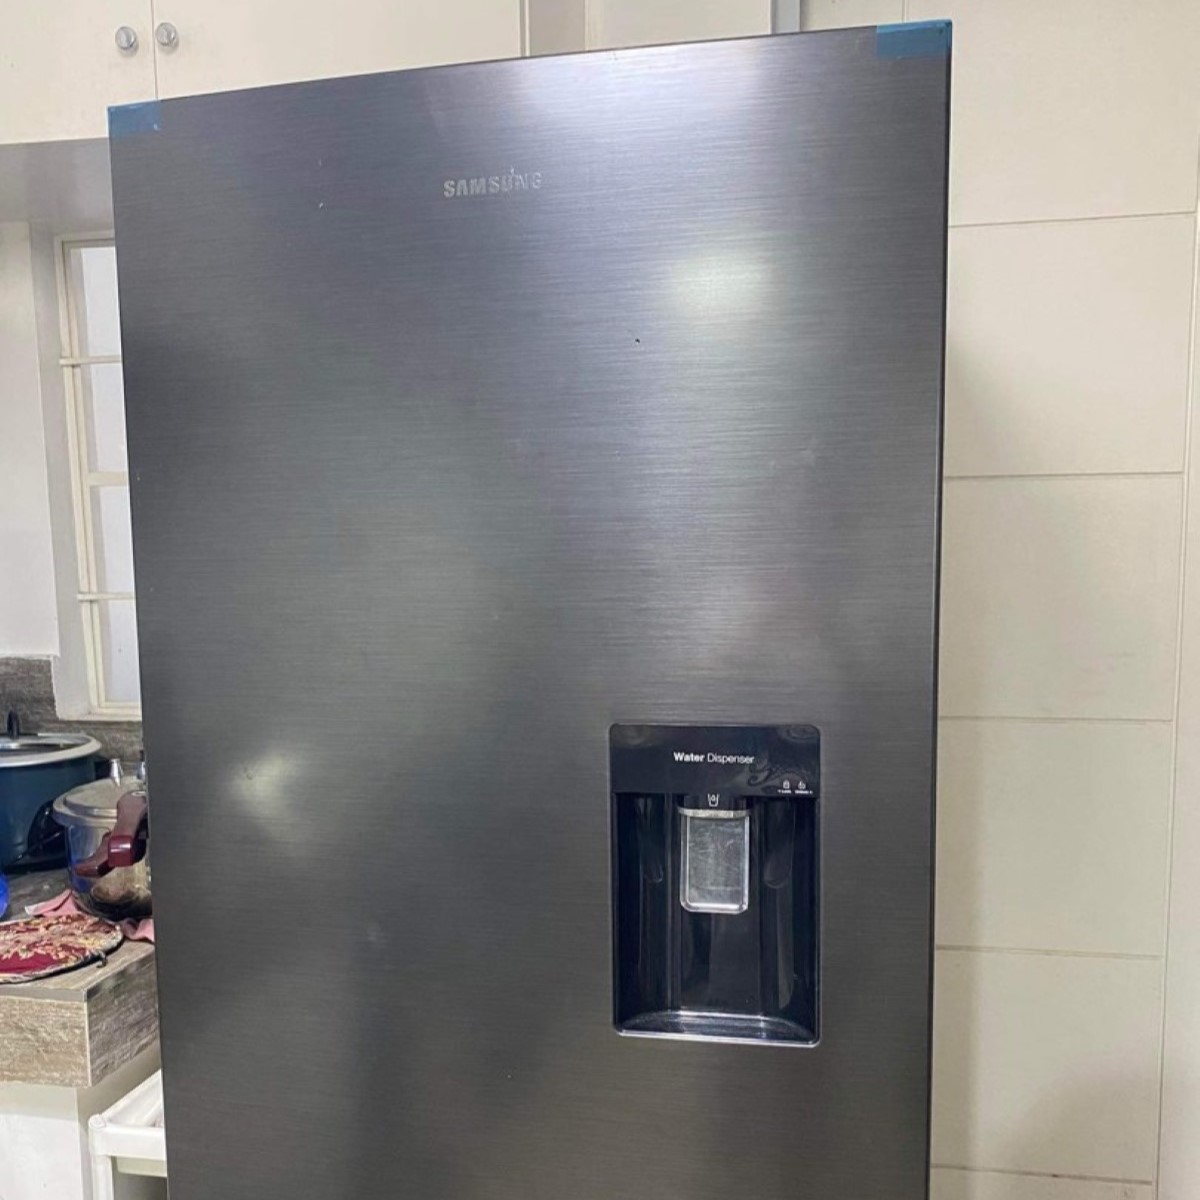
- Keep the exterior clean: Wipe down the exterior of the dispenser with a damp cloth regularly to prevent the accumulation of dust and dirt. This will help keep it looking clean and presentable.
- Monitor the water bottle: If your dispenser uses water bottles, periodically check them for signs of wear or damage. Replace them as needed to prevent any leaks or contamination.
- Check for leaks: Regularly inspect the dispenser for any signs of leaks, especially around the nozzle and dispensing area. Address any leaks promptly to prevent water damage and ensure proper functioning.
- Use clean and filtered water: Use clean and filtered water when filling the dispenser to prevent the buildup of mineral deposits and impurities. This will prolong the lifespan of the dispenser and improve water quality.
- Read the user manual: Familiarize yourself with the specific guidelines and instructions provided by the manufacturer. Each dispenser may have unique features or maintenance requirements.
- Replace damaged parts: If you notice any damaged or malfunctioning parts of the dispenser, contact the manufacturer or a professional technician for assistance. Avoid using the dispenser if it is not in proper working condition.
- Keep the area clean: Ensure that the area around the water dispenser is clean and free from any debris. This will help maintain a hygienic environment and prevent any contamination of the water.
By following these maintenance tips, you can enjoy clean and refreshing water from your bottom load water dispenser for years to come. Remember, regular maintenance is key to the proper functioning and longevity of your appliance.
Conclusion
Cleaning your bottom load water dispenser is an important task that ensures the quality, taste, and overall performance of your drinking water. By following the step-by-step process outlined in this guide, you can easily and effectively clean your dispenser, allowing you and your family to enjoy fresh and clean water at all times.
Remember to prioritize safety by following the recommended safety precautions before starting the cleaning process. Gather all the necessary supplies and take your time to thoroughly clean each component, including the drip tray, water reservoir, filter, nozzle, and dispensing area. Ensure that all parts are properly reassembled and test the dispenser’s functionality before regular use.
In addition to regular cleaning, implementing proper maintenance practices will extend the lifespan and efficiency of your dispenser. Clean the exterior, monitor and replace filters as needed, and address any leaks or malfunctions promptly. Following these maintenance tips will contribute to a hygienic and optimal performance of your bottom load water dispenser.
Take pride in the cleanliness and functionality of your water dispenser, knowing that you are providing safe and refreshing water for yourself and your loved ones. Cheers to a healthier and more enjoyable drinking experience!
Frequently Asked Questions about How To Clean Bottom Load Water Dispenser
Was this page helpful?
At Storables.com, we guarantee accurate and reliable information. Our content, validated by Expert Board Contributors, is crafted following stringent Editorial Policies. We're committed to providing you with well-researched, expert-backed insights for all your informational needs.


0 thoughts on “How To Clean Bottom Load Water Dispenser”