
Articles
How To Clean Oven Racks In Bathtub
Modified: October 19, 2024
Learn how to clean oven racks in the bathtub with this easy step-by-step guide. Take care of your kitchen furniture and enjoy a spotless oven!
(Many of the links in this article redirect to a specific reviewed product. Your purchase of these products through affiliate links helps to generate commission for Storables.com, at no extra cost. Learn more)
Introduction
Cleaning oven racks can be a daunting task, especially when they’re covered in stubborn grease and grime. While there are various methods to tackle this chore, one effective and convenient way is to clean your oven racks in the bathtub. This method not only allows you to easily soak and scrub the racks, but also minimizes the mess and effort involved.
In this article, we will guide you through the step-by-step process of cleaning your oven racks in the bathtub. From gathering supplies to thoroughly cleaning and drying the racks, we will cover all the necessary details to make this task a breeze. So, grab your gloves and let’s get started!
Key Takeaways:
- Easily clean oven racks in the bathtub by gathering supplies, preparing the tub, soaking, scrubbing, and drying. Follow safety tips and warnings for a spotless and efficient oven.
- Regularly cleaning oven racks not only improves appearance but also enhances oven performance and extends its lifespan. Enjoy a sparkling clean oven with a time-saving and efficient bathtub cleaning method.
Gathering Supplies
Before you begin the process of cleaning your oven racks in the bathtub, it is important to gather all the necessary supplies. Having everything prepared ahead of time will make the task more efficient and ensure that you have everything you need. Here are the supplies you will need:
- Dishwashing liquid or oven cleaner: Choose a powerful cleaning agent that is suitable for removing grease and grime. You can use a dishwashing liquid that is designed to cut through tough stains, or an oven cleaner specifically formulated for this purpose.
- Rubber gloves: Protect your hands by wearing rubber gloves throughout the cleaning process. This will not only keep your hands clean, but also provide a layer of safety when dealing with potentially harsh cleaning chemicals.
- Scrub brush or sponge: Select a scrub brush or sponge that has sturdy bristles or an abrasive side. This will help you to effectively scrub away the built-up residue on the oven racks.
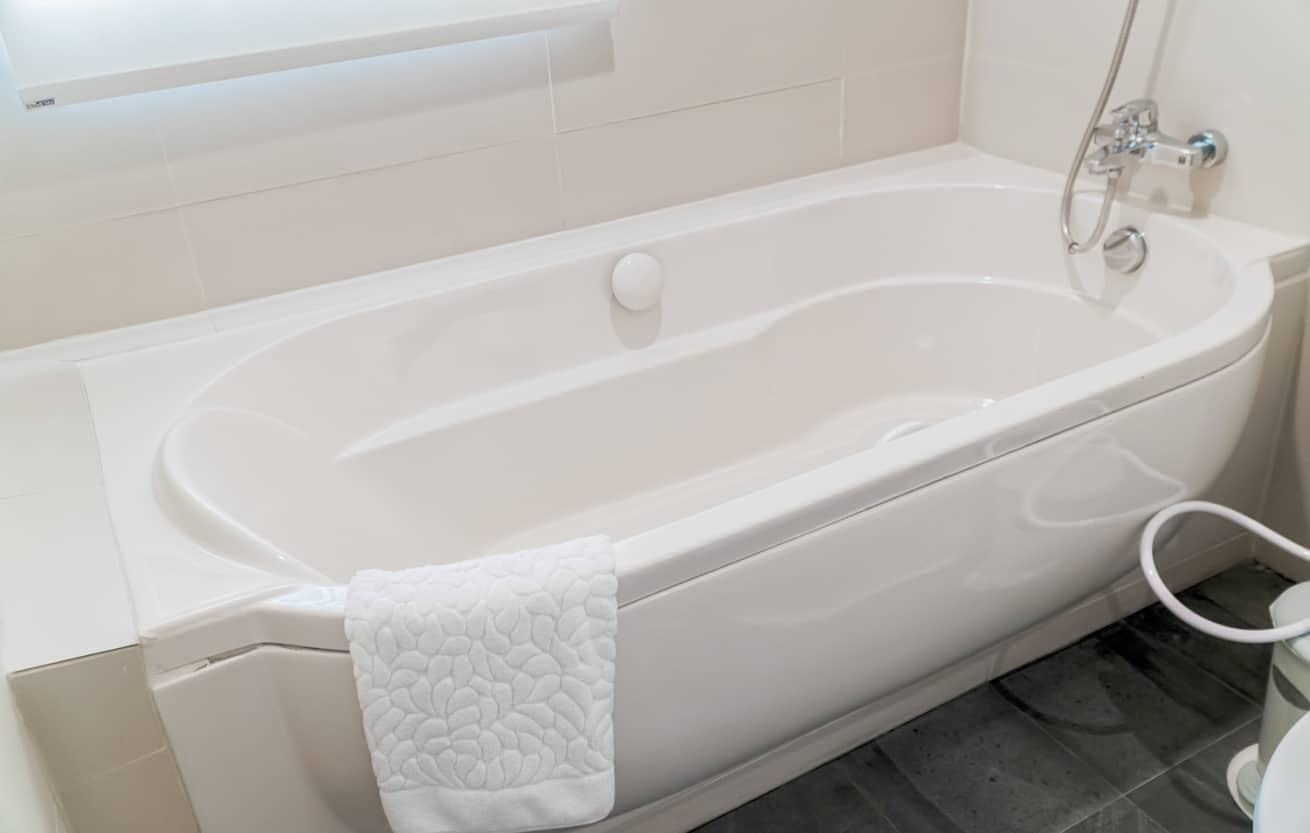
- Bathtub mat or towel: To prevent any scratches or damage to your bathtub, place a bathtub mat or a towel at the bottom of the tub. This will provide a protective layer between the racks and the tub’s surface.
- Hot water: You will need hot water to create a soaking solution and to rinse off the racks after scrubbing. Make sure you have access to hot water before starting the cleaning process.
- Old newspaper or plastic bags: To minimize the mess, lay down old newspapers or plastic bags around the bathtub area. This will catch any drips or spills and make the cleanup process easier.
- Optional: If you prefer to use natural cleaning solutions, you can gather ingredients like baking soda, vinegar, or lemon juice. These can be effective in removing grease and grime, and are environmentally friendly alternatives to harsh chemicals.
Once you have gathered all of these supplies, you will be well-equipped and ready to tackle the task of cleaning your oven racks in the bathtub. Now that you have everything prepared, let’s move on to the next step and prepare the bathtub for the cleaning process.
Preparing the Bathtub
Now that you have gathered all the necessary supplies, it’s time to prepare the bathtub for cleaning your oven racks. This step is crucial as it ensures that your bathtub remains undamaged during the cleaning process. Follow these steps to prepare the bathtub:
- Clear the bathtub: Remove any items or personal belongings from the bathtub to create a clean and spacious workspace. This will prevent any interference during the cleaning process and allow you to have ample room to work with the oven racks.
- Lay down a protective layer: To protect the surface of your bathtub from scratches or damage, place a bathtub mat or a folded towel at the bottom of the tub. This will act as a buffer between the racks and the tub’s surface, preventing any potential harm.
- Close the drain: Ensure that the bathtub drain is closed tightly to prevent any small parts or pieces of debris from going down the drain. You don’t want to risk clogging the drain or damaging your plumbing system.
- Line the edges with newspaper or plastic bags: To catch any drips or spills and make the cleanup process easier, line the edges of the bathtub with old newspapers or plastic bags. This will prevent any cleaning solution or residue from staining or damaging the surrounding area.
Once you have followed these steps, your bathtub will be properly prepared for the cleaning process. By taking these precautions, you can ensure that your bathtub stays in pristine condition while you work on cleaning your oven racks. With the preparations complete, it’s time to move on to the next step: removing the oven racks.
Removing the Oven Racks
With the bathtub prepared, it’s time to tackle the task of removing the oven racks. Follow these steps to safely and efficiently remove the racks from your oven:
- Turn off the oven: Before removing the racks, make sure that your oven is turned off and completely cool. You don’t want to risk burning yourself on hot surfaces while handling the racks.
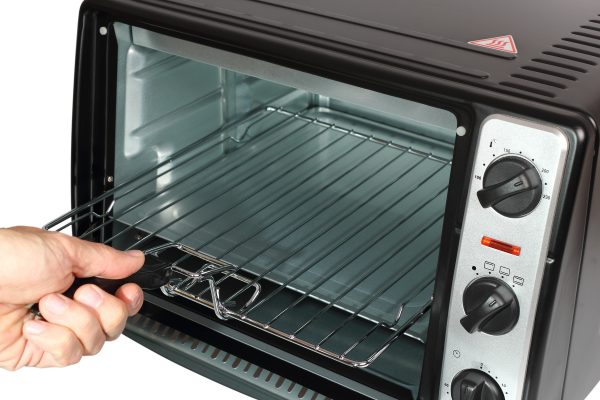
- Open the oven door: Gently open the oven door and locate the racks inside. Most ovens have two racks, but this may vary depending on the model of your oven. Take note of their positions for easy reinstallation later.
- Remove any loose items: Before attempting to remove the racks, check for any loose items such as baking sheets or aluminum foil that may be on top of or underneath the racks. These should be removed to avoid any accidents or interference during the removal process.
- Slide the racks out: Grasp the middle of each oven rack with both hands and slowly slide them towards you. Be cautious of any sharp edges or corners as you remove the racks from the oven. If the racks seem stuck, gently wiggle them back and forth until they come loose.
- Place the racks in the bathtub: Once the oven racks are removed, carefully carry them to the prepared bathtub and place them on top of the protective layer. Make sure they are evenly spread out and not stacked on top of each other.
By following these steps, you can safely remove the oven racks and have them ready for the next stage of the cleaning process. With the racks placed in the bathtub, you’re now ready to move on to the next step: soaking the racks to loosen dirt and grime.
Soaking the Racks
Now that you have successfully removed the oven racks and placed them in the bathtub, it’s time to start the process of soaking them. Soaking is an essential step as it helps to loosen stubborn dirt, grease, and grime, making it easier to clean and scrub off. Follow these steps to effectively soak your oven racks:
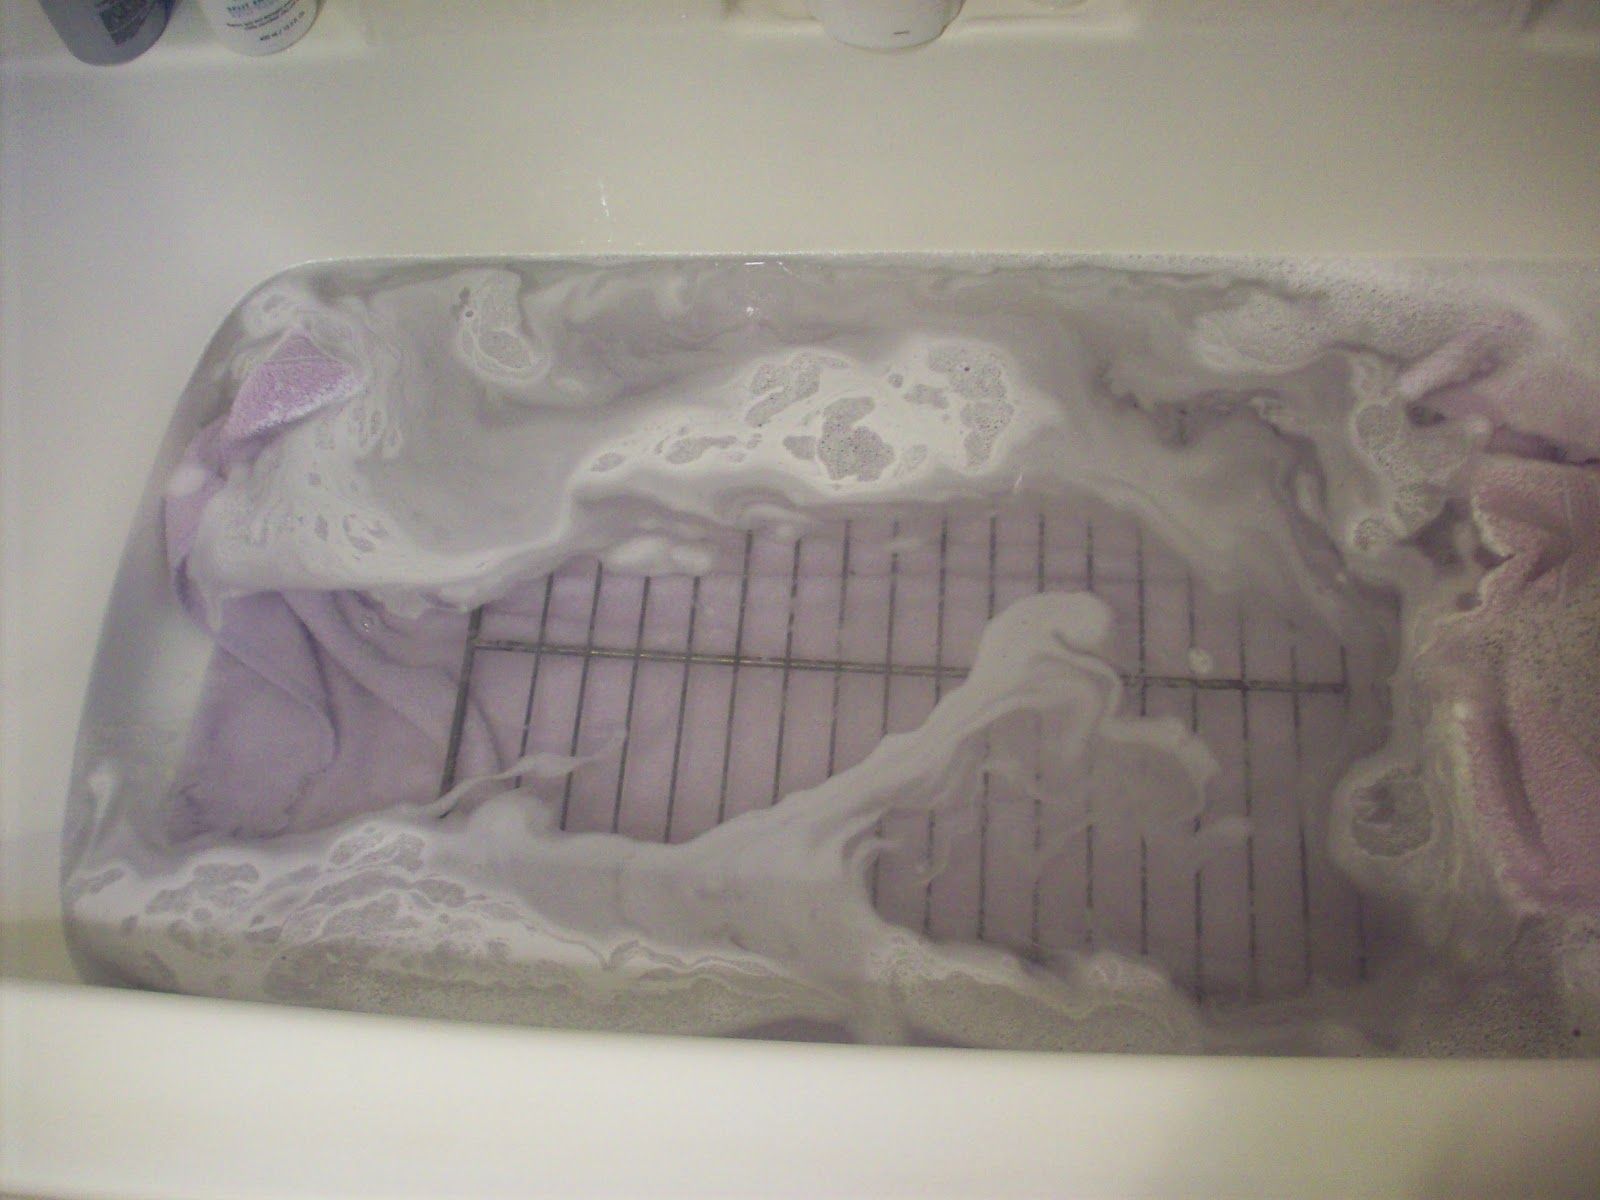
- Fill the bathtub with hot water: Start by filling the bathtub with enough hot water to completely submerge the oven racks. The hot water will help to break down the built-up residue and make it easier to clean.
- Add dishwashing liquid or oven cleaner: Depending on your preference, you can add a few tablespoons of dishwashing liquid or oven cleaner to the water. These cleaning agents will help to cut through the grease and grime on the racks.
- Ensure the racks are fully submerged: Gently push down on the oven racks to ensure they are fully immersed in the water. This will allow the cleaning solution to penetrate and loosen the stubborn residue.
- Let the racks soak for at least a few hours: It is recommended to let the oven racks soak for a minimum of two to four hours, or even overnight for optimal results. This will give the cleaning solution enough time to work its magic and soften the baked-on dirt and grease.
- Occasionally agitate the racks: While the racks are soaking, you can occasionally agitate them by gently stirring or swishing them around in the water. This will help to dislodge any stuck-on grime and allow the cleaning solution to reach all areas of the racks.
Once the oven racks have soaked for the recommended duration, they will be ready for the next step: scrubbing off the loosened dirt and grime. Soaking them in hot water and cleaning solution significantly reduces the effort required to clean the racks and ensures a thorough and effective cleaning process. Now that the racks have had sufficient time to soak, let’s move on to scrubbing them clean.
Read more: How To Put In Oven Racks
Scrubbing the Racks
With the oven racks thoroughly soaked and the dirt and grime loosened, it’s time to roll up your sleeves and start scrubbing. Scrubbing the racks will help to remove the remaining residue and make them shine like new. Follow these steps to effectively scrub your oven racks:
- Put on your rubber gloves: Before you begin scrubbing, make sure to put on your rubber gloves to protect your hands from any harsh cleaning chemicals or abrasive scrubbing.
- Use a scrub brush or sponge: Take a scrub brush or sponge that is suitable for scrubbing and has sturdy bristles or an abrasive side. This will help you to effectively remove the loosened dirt and grime from the racks.
- Dip the brush or sponge in the soaking water: Start by dipping the scrub brush or sponge into the water in which you soaked the racks. This will provide some extra cleaning power and ensure a smoother scrubbing process.
- Scrub the racks thoroughly: Begin scrubbing the oven racks, focusing on areas with stubborn residue. Use firm but gentle pressure to scrub in circular motions, paying extra attention to any greasy spots or baked-on residue.
- Continue scrubbing until clean: Repeat the scrubbing process until you have removed all visible dirt and grime from the racks. You may need to rinse and reapply the scrubbing solution if necessary.
- Flip and scrub the other side: Once you are satisfied with one side of the racks, flip them over and repeat the scrubbing process on the other side. This will ensure that both sides are thoroughly clean and free from any residue.
By diligently scrubbing the oven racks, you will be able to restore their original shine and remove all traces of dirt and grime. Once you have thoroughly scrubbed the racks, it’s time to move on to the next step: rinsing and drying them in order to complete the cleaning process.
Place oven racks in a bathtub with hot water and dish soap. Let them soak for a few hours, then scrub with a sponge or steel wool. Rinse and dry thoroughly before placing back in the oven.
Rinsing and Drying the Racks
After successfully scrubbing the oven racks and removing all traces of dirt and grime, it’s time to give them a thorough rinse and ensure they are completely dry before returning them to your oven. Follow these steps to effectively rinse and dry your oven racks:
- Rinse off the scrubbing solution: Start by rinsing the oven racks under hot running water to remove any remaining scrubbing solution. Ensure that you rinse off both sides of the racks to ensure a thorough cleaning.
- Inspect for any missed spots: While rinsing, take the opportunity to inspect the racks for any missed spots. If you notice any lingering residue or stains, go back and scrub those areas again until they are completely clean.
- Pat dry with a towel: Once the racks have been rinsed, gently pat them dry with a clean towel. This will remove any excess water and speed up the drying process.
- Air drying: After patting them dry, allow the oven racks to air dry completely. You can place them on a clean towel or drying rack in a well-ventilated area. Make sure they are not stacked on top of each other to allow for proper airflow.
- Accelerate the drying process: If you’re in a hurry and need the racks to dry quickly, you can use a hairdryer on a low, cool setting to speed up the drying process. Hold the hairdryer a few inches away from the racks and move it back and forth until they are completely dry.
It’s important to ensure that the oven racks are completely dry before placing them back in your oven. Any remaining moisture could lead to rust or other issues. Once the racks are fully dry, you can move on to the next step: cleaning the bathtub and returning it to its original state.
Cleaning the Bathtub
Now that the oven racks are clean and drying, it’s time to shift our focus to cleaning the bathtub itself. After all, we want to leave the bathtub sparkling and free of any residue from the soaking and scrubbing process. Follow these steps to effectively clean the bathtub:
- Empty the water: Start by emptying the water from the bathtub. Pull the drain plug and let the water flow out. If there are any debris or particles left in the tub, use a paper towel or cloth to remove them.
- Remove any remaining residue: Take a sponge or clean cloth and dampen it with warm water. Wipe down the inside of the bathtub to remove any remaining residue or cleaning solution. Make sure to get into all the corners and crevices.
- Scrub stubborn stains: If there are any stubborn stains or grime on the tub surface, create a paste using baking soda and water. Apply the paste to the stained area and gently scrub with a sponge or brush. Rinse thoroughly afterwards.
- Rinse the bathtub: Once you have successfully wiped down the entire bathtub, rinse it thoroughly with warm water. This will remove any cleaning residue and leave the tub fresh and clean.
- Dry the bathtub: Use a clean towel to dry the surface of the bathtub. Make sure to dry the entire tub to prevent any lingering moisture that could lead to mold or mildew.
By following these steps, you can ensure that your bathtub is clean and ready for its next use. Cleaning the bathtub after soaking and scrubbing the oven racks helps to maintain the cleanliness of your bathroom and ensures that no residue remains behind. With the bathtub now clean and the oven racks properly dried, you’re almost done with the entire cleaning process. Let’s move on to the final section: tips and warnings to keep in mind when cleaning oven racks in the bathtub.
Tips and Warnings
Cleaning oven racks in the bathtub can be a convenient and effective method, but it’s important to keep a few tips and warnings in mind to ensure a safe and successful cleaning process. Consider the following:
Read more: How To Clean Non-Slip Bathtub
Tips:
- For a natural cleaning alternative, you can use a paste made of baking soda and water to scrub the racks. It is effective at removing grease and environmentally friendly.
- If your oven racks have a heavy accumulation of grease and grime, you can let them soak overnight to help loosen the built-up residue.
- Regularly cleaning your oven racks can help improve the overall efficiency and performance of your oven.
- Use a non-abrasive sponge or brush to avoid scratching the surface of the oven racks.
- Consider wearing old clothes or an apron to avoid getting cleaning solution or grease on your clothing.
Warnings:
- Always follow the manufacturer’s instructions when using oven cleaner or any other cleaning products. Some cleaners may be harmful if ingested or if they come in contact with your skin or eyes.
- Avoid using abrasive cleaners or steel wool as they can scratch and damage the surface of your oven racks.
- Be cautious when handling hot water and hot oven racks to prevent burns. Allow the racks to cool slightly before handling them.
- Ensure proper ventilation in the bathroom by opening windows or using exhaust fans to avoid inhaling fumes from cleaning products.
- Do not reuse the bathtub until you have thoroughly cleaned it after the oven rack cleaning process.
By following these tips and warnings, you can ensure a safe and effective cleaning process for your oven racks in the bathtub. Remember to prioritize safety and take necessary precautions when handling cleaning products and hot surfaces. With these guidelines in mind, you’re ready to successfully clean your oven racks and enjoy a spotless and efficient oven.
Conclusion
Cleaning oven racks in the bathtub can be a time-saving and efficient method to restore the shine and cleanliness of your oven racks. By following the step-by-step process outlined in this article, you can easily remove stubborn dirt and grease, leaving your oven racks looking brand new. From gathering the necessary supplies to preparing the bathtub, removing the racks, soaking, scrubbing, rinsing, and drying, each step plays a vital role in achieving optimal results.
Remember to take the necessary precautions, such as wearing rubber gloves, using appropriate cleaning agents, and ensuring proper ventilation in your bathroom. It’s important to follow the manufacturer’s instructions on cleaning products and be mindful of potential hazards.
Maintaining clean oven racks not only improves the appearance of your oven but also helps to enhance its performance. Regularly cleaning your oven racks can contribute to a more efficient cooking experience and even extend the lifespan of your oven.
So, the next time your oven racks are covered in grease and grime, don’t hesitate to clean them in the bathtub. With a little time and effort, you can achieve remarkable results and enjoy the satisfaction of a sparkling clean oven.
Remember to refer back to this article as a handy guide whenever you need to clean your oven racks in the bathtub. Happy cleaning!
Frequently Asked Questions about How To Clean Oven Racks In Bathtub
Was this page helpful?
At Storables.com, we guarantee accurate and reliable information. Our content, validated by Expert Board Contributors, is crafted following stringent Editorial Policies. We're committed to providing you with well-researched, expert-backed insights for all your informational needs.

0 thoughts on “How To Clean Oven Racks In Bathtub”