Home>Articles>How To Convert A Wood Burning Fireplace To Electric

Articles
How To Convert A Wood Burning Fireplace To Electric
Modified: September 2, 2024
Learn how to convert your existing wood burning fireplace to an efficient and convenient electric fireplace with our informative articles. Get step-by-step instructions and expert tips now.
(Many of the links in this article redirect to a specific reviewed product. Your purchase of these products through affiliate links helps to generate commission for Storables.com, at no extra cost. Learn more)
Introduction
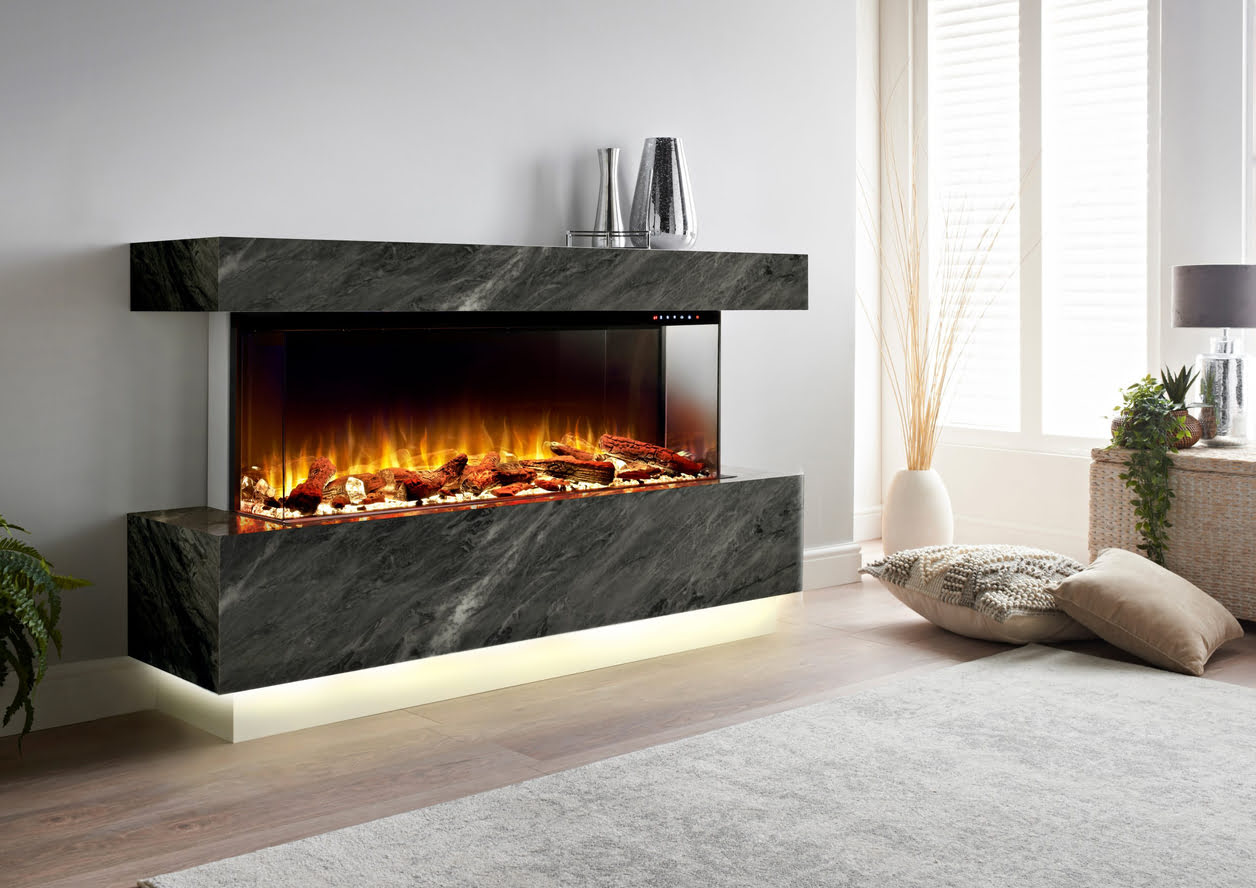
Converting a wood burning fireplace to electric is a popular choice for homeowners looking to update their living spaces and create a cozy and convenient ambiance. Electric fireplaces offer a range of benefits, including ease of use, energy efficiency, and the absence of smoke and mess associated with traditional wood burning fireplaces. By following a few simple steps, you can transform your wood burning fireplace into a stunning electric centerpiece that will provide warmth and relaxation all year round.
Before starting the conversion process, it’s important to determine the type and condition of your existing wood burning fireplace. Assessing the functionality and suitability of your fireplace will help you make informed decisions throughout the conversion process. Additionally, ensure that you have the necessary tools and materials on hand to complete the conversion seamlessly.
In this article, we will guide you through the step-by-step process of converting a wood burning fireplace to electric. From gathering the necessary tools to the final testing and enjoyment of your new electric fireplace, we will cover every aspect of the conversion process to ensure a successful and stress-free experience.
Keep in mind that while converting your wood burning fireplace to electric can be completed by most homeowners, it may require some technical skill. If you’re unsure about any part of the process, it’s always best to consult a professional. Safety should be a top priority when working with any electrical or heating systems.
Are you ready to transform your wood burning fireplace into a stunning electric focal point? Let’s get started on this exciting project!
Key Takeaways:
- Converting a wood burning fireplace to electric offers convenience, energy efficiency, and a cleaner, safer alternative. Follow the step-by-step process to transform your living space with a stunning electric centerpiece.
- Prioritize safety, gather necessary tools, and enjoy the warmth and ambiance of your newly converted electric fireplace. Modernize your living space and create a clean, comfortable environment with adjustable flame settings and convenient remote operation.
Step 1: Gather Necessary Tools and Materials
Before you begin the conversion process, it’s essential to have all the tools and materials at hand. Gathering these items beforehand will ensure a smooth and uninterrupted workflow. Here’s a list of the tools and materials you’ll need:
- Tape Measure: To accurately measure the dimensions of your fireplace and ensure that the electric fireplace insert fits perfectly.
- Screwdriver Set: To remove any screws or fasteners holding the wood burning fireplace components in place.
- Jigsaw or Hammer: To carefully remove any bricks or mortar that may be obstructing the installation of the electric fireplace insert.
- Vacuum Cleaner: To clean out any debris, soot, or ash that may have accumulated in the wood burning fireplace.
- Electric Fireplace Insert: Choose an electric fireplace insert that fits the dimensions of your wood burning fireplace. Look for a model that offers desired features like adjustable flame settings, heat settings, and a remote control.
- Extension Cord: If the electric fireplace insert’s power cord is not long enough to reach an electrical outlet, you may need an extension cord.
- Heat Resistant Sealant: To seal any gaps between the electric fireplace insert and the surrounding fireplace opening, ensuring a secure fit and preventing drafts.
- Cable Management Kit: To hide and organize the electrical wires for a clean and professional-looking installation.
Make sure to double-check the measurements of your fireplace and the dimensions of the electric fireplace insert to ensure compatibility. It’s always better to have everything you need upfront rather than pausing the project to go buy additional tools or materials.
Once you’ve gathered all the necessary tools and materials, you’re ready to move on to the next step: preparing the area for the conversion.
Step 2: Prepare the Area
Preparing the area before starting the conversion process is crucial for a successful and efficient installation. Follow these steps to ensure a clean and well-prepared space:
- Clean the Fireplace: Start by thoroughly cleaning the wood burning fireplace. Use a vacuum cleaner or a brush to remove any dirt, soot, or debris that might be present. This will create a clean surface for the installation and prevent any particles from interfering with the electric fireplace’s functionality.
- Clear the Surrounding Area: Remove any furniture, decorations, or flammable materials from the immediate vicinity of the fireplace. This will provide ample space for the installation and minimize the risk of accidental damage or fires.
- Protect the Flooring: Lay down a protective covering, such as a drop cloth or a plastic sheet, in front of the fireplace to safeguard the flooring from dust, debris, and potential damage during the installation process.
- Check the Chimney: If your wood burning fireplace is connected to a chimney, inspect it for any blockages or structural issues. It’s important to ensure that the chimney is in good condition to prevent any safety hazards or complications during the conversion process.
- Switch off Power: Locate the breaker or fuse box that controls the power supply to the wood burning fireplace. Turn off the power to eliminate the risk of electric shocks or accidental activation of the fireplace during the conversion.
Once you’ve completed these steps, the area will be adequately prepared for the conversion process. With a clean and safe environment, you can now proceed to the next step: removing the wood burning fireplace components.
Step 3: Remove the Wood Burning Fireplace Components
Before installing the electric fireplace insert, it’s necessary to remove the existing wood burning fireplace components. Follow these steps to safely and effectively remove the components:
- Remove the Grate and Ash Pan: Carefully lift out the grate and ash pan from the fireplace. Set them aside for cleaning or disposal if needed.
- Detach the Fireplace Doors: If your wood burning fireplace has doors, unscrew or unlatch them to detach them from the fireplace. Keep all the hardware in a safe place in case you decide to reinstall the doors in the future.
- Take Out the Damper: Locate the damper, which is a metal flap that controls the airflow into the chimney. Unscrew or unlatch the damper and remove it from the fireplace. This step may require a screwdriver or wrench depending on the damper mechanism.
- Remove the Surround and Mantel (if applicable): If your wood burning fireplace has a surround or mantel, carefully remove them using a screwdriver or appropriate tools. Take note of the location and orientation of each piece to facilitate easy reinstallation later.
- Clear Out Any Remaining Debris: Use a vacuum cleaner or a brush to clear out any remaining debris, ashes, or soot in the fireplace. A clean surface will ensure a proper fit for the electric fireplace insert.
Take your time during this step to ensure that all components are removed safely and without causing any damage to your existing fireplace. If you encounter any difficulties or if components are stuck, consider seeking professional assistance to avoid accidents or unnecessary complications.
With the wood burning fireplace components successfully removed, you’re now ready to move on to the next step: installing the electric fireplace insert.
Step 4: Install the Electric Fireplace Insert
Now that you’ve cleared out the wood burning fireplace components, it’s time to install the electric fireplace insert. Follow these steps to ensure a proper and secure installation:
- Position the Electric Fireplace Insert: Carefully place the electric fireplace insert into the fireplace opening, making sure it fits snugly. Adjust the position for optimal visual appeal and accessibility.
- Check for Proper Clearance: Ensure that the electric fireplace insert has the necessary clearance from the surrounding fireplace walls, mantel, and any other obstructions. Refer to the manufacturer’s guidelines for specific clearance requirements.
- Level the Electric Fireplace Insert: Use a level to ensure that the electric fireplace insert is perfectly horizontal. Adjust the positioning as needed to achieve a level installation.
- Secure the Electric Fireplace Insert: Depending on the model, your electric fireplace insert may require securing brackets or screws to hold it in place. Follow the manufacturer’s instructions to securely fasten the insert to the fireplace opening.
- Attach Trims and Surrounds (optional): If your electric fireplace insert includes decorative trims or surrounds, follow the manufacturer’s instructions to attach them securely. These additions can enhance the appearance and give the electric fireplace a finished look.
Throughout the installation process, refer to the manufacturer’s guidelines and instructions to ensure that you follow the specific requirements for your electric fireplace insert. If you encounter any difficulties, consult the manufacturer’s customer support or seek professional assistance for guidance.
Once the electric fireplace insert is properly installed, you’re ready to proceed to the next step: connecting the electric fireplace insert to power.
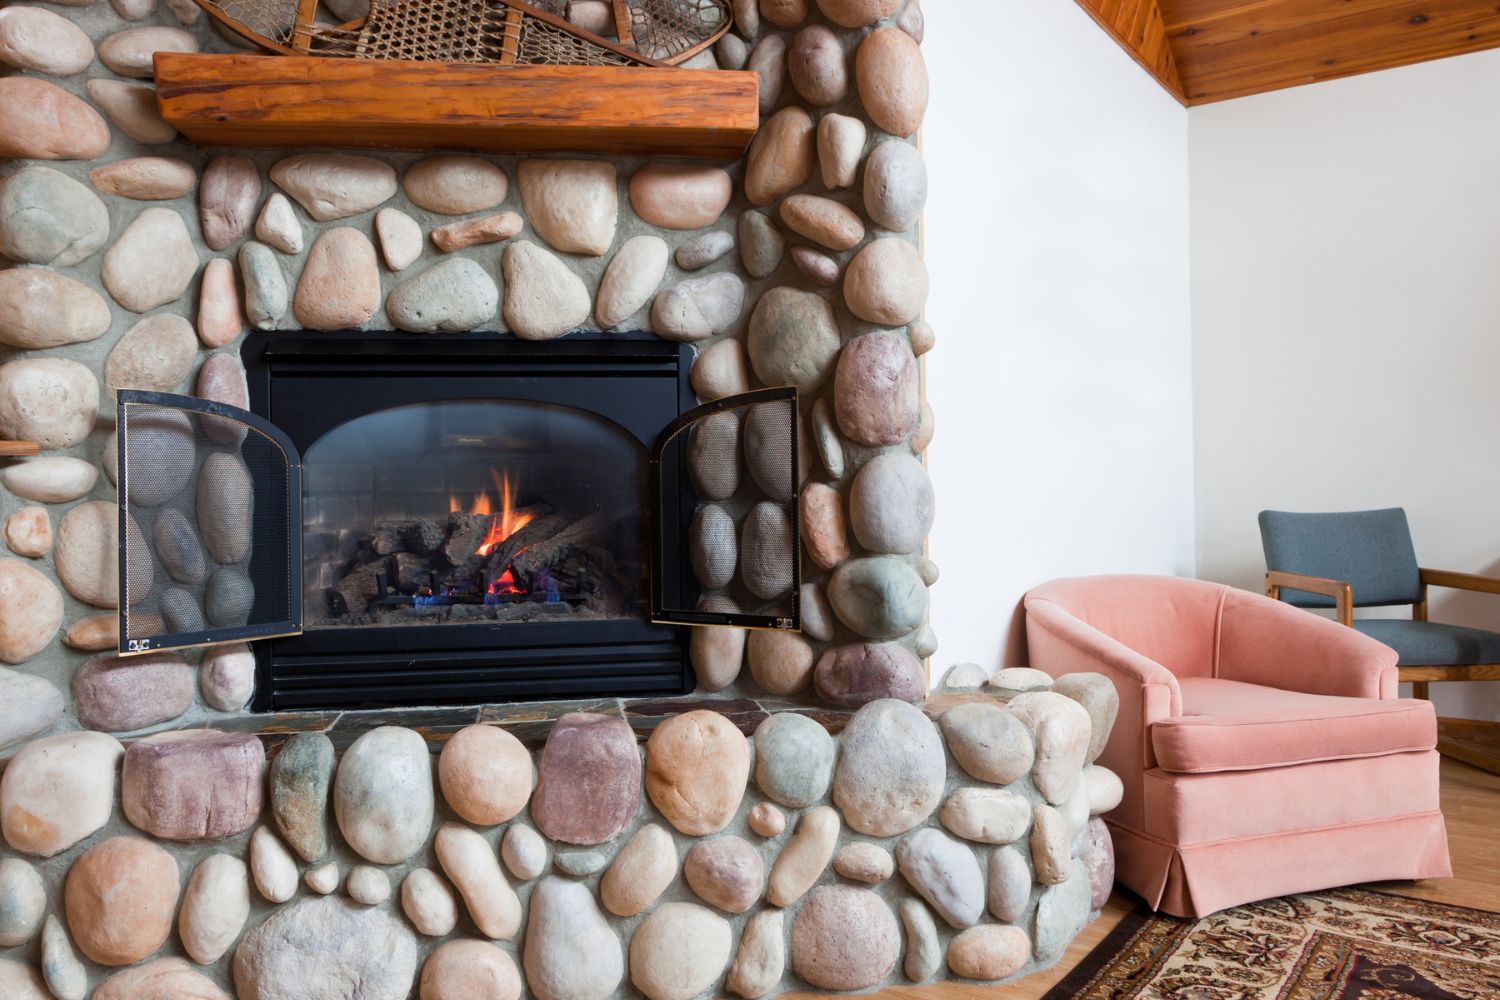
Consider installing an electric fireplace insert to convert your wood burning fireplace. This will provide the ambiance of a real fire without the hassle of wood and cleanup.
Read more: How To Build Wood Burning Fireplace
Step 5: Connect the Electric Fireplace Insert
Connecting the electric fireplace insert to power is a crucial step in the conversion process. Follow these steps to ensure a safe and functional connection:
- Locate the Power Source: Identify the nearest electrical outlet or junction box that will supply power to the electric fireplace insert. Ensure that the outlet is compatible with the voltage and amperage requirements of the insert.
- Route the Power Cord: Carefully route the power cord of the electric fireplace insert to the power source. Avoid placing the cord near heat sources or areas where it can be tripped over or pulled on.
- Plug in the Power Cord: Insert the power cord plug into the electrical outlet or connect it to the junction box, following the appropriate wiring procedures. Ensure a secure and stable connection.
- Test the Electric Fireplace Insert: Switch on the power and test the functionality of the electric fireplace insert. Check if the flames, heat, and any additional features are working as expected. Familiarize yourself with the remote control or control panel to adjust settings and modes.
- Ensure Proper Grounding: Verify that the electric fireplace insert is properly grounded to prevent any electrical hazards. If necessary, consult an electrician to ensure correct grounding.
It’s important to read and follow the manufacturer’s instructions for connecting the electric fireplace insert to power. If you have any doubts or concerns regarding the electrical connections, it’s recommended to consult a licensed electrician for professional assistance.
Once you’ve established the power connection and verified the functionality of the electric fireplace insert, it’s time to move on to the next step: hiding wires and sealing gaps for a clean and seamless finish.
Step 6: Hide Wires and Seal Gaps
After connecting the electric fireplace insert, it’s important to hide any visible wires and seal gaps to create a clean and seamless appearance. Follow these steps to effectively hide wires and seal gaps:
- Use a Cable Management Kit: Purchase a cable management kit designed to hide and organize electrical wires. These kits usually include adhesive-backed cable channels or raceways that can be easily attached to the walls or baseboards. Carefully route the wires from the electric fireplace insert through the cable channels to keep them neatly organized and hidden from view.
- Secure the Wires: Use zip ties or cable clips to secure the wires within the cable management kit. This will prevent them from becoming tangled or sagging, ensuring a tidy and professional-looking installation.
- Seal Gaps: Inspect the area around the electric fireplace insert for any gaps or openings that may exist between the insert and the fireplace opening. Use heat-resistant sealant or fireplace caulk to seal these gaps, creating a tight and secure fit. Pay special attention to areas where drafts or air leakage may occur.
- Paint or Decorate: If desired, paint or decorate the exposed portions of the cable management kit to match the surrounding walls or decor. This will further enhance the seamless integration of the electric fireplace insert into your living space.
By utilizing a cable management kit and sealing any gaps, you can achieve a clean and professional-looking installation. This step not only ensures aesthetic appeal but also prevents potential tripping hazards and improves the overall safety of the electric fireplace.
Once you’ve hidden the wires and sealed the gaps, you’re ready for the final step: testing and enjoying your newly converted electric fireplace.
Step 7: Test and Enjoy Your Electric Fireplace
With the conversion process complete, it’s time to test and enjoy the warmth and ambiance of your electric fireplace. Follow these steps to ensure optimal performance and maximize your enjoyment:
- Double Check Safety Measures: Before operation, ensure that you’ve read the manufacturer’s safety guidelines and precautions. Familiarize yourself with any safety features and ensure they are properly functioning.
- Turn on the Electric Fireplace: Use the remote control or control panel to power on the electric fireplace. Test the different features such as adjustable flame settings, heat settings, and any additional functions that your electric fireplace offers.
- Adjust Flame and Heat Settings: Experiment with the different flame and heat settings to find your desired level of brightness and warmth. Some electric fireplaces offer options like flame colors, flame speeds, and adjustable thermostat settings.
- Enjoy the Ambiance: Sit back, relax, and enjoy the beautiful and realistic flames of your electric fireplace. Electric fireplaces create a cozy and inviting atmosphere without the hassle and mess of a traditional wood burning fireplace.
- Maintain and Clean Regularly: Follow the manufacturer’s instructions for routine maintenance and cleaning of your electric fireplace. This may include dusting the flame area, wiping down the glass or screen, and keeping the exterior surfaces free from debris.
- Consider Additional Accessories: Enhance your electric fireplace experience by adding complementary accessories such as decorative logs, faux ember beds, mantel decor, or even a TV mounted above the fireplace for a complete entertainment center.
Take the time to fully enjoy and appreciate the convenience and beauty of your newly converted electric fireplace. Whether it’s creating a cozy ambiance on a chilly evening or simply adding a focal point to your living space, your electric fireplace is sure to bring comfort and style to your home.
Remember to periodically inspect and maintain your electric fireplace to ensure its continued performance and safety. With proper care, your electric fireplace will provide years of enjoyment for you and your family.
Congratulations on successfully converting your wood burning fireplace to electric, and may you have many wonderful moments by the warm glow of your new electric fireplace!
Conclusion
Converting a wood burning fireplace to electric offers numerous advantages, from convenience and energy efficiency to a cleaner and safer alternative. Following the step-by-step process outlined in this article, you can successfully transform your wood burning fireplace into a stunning electric centerpiece that enhances the ambiance of your living space.
From gathering the necessary tools and materials to testing and enjoying your newly converted electric fireplace, each step plays a crucial role in ensuring a seamless and satisfying experience. Remember to prioritize safety throughout the process and consult professionals if needed.
An electric fireplace provides the warmth and visual appeal of a traditional fireplace without the drawbacks of maintenance, smoke, or the need for wood. With adjustable flame settings, heat output control, and convenient remote operation, you have full control over creating the perfect atmosphere for any occasion.
Additionally, the conversion to electric provides an opportunity to modernize your living space. By eliminating the need for wood and the associated mess, you can create a cleaner and more comfortable environment. The clean lines and sleek design of an electric fireplace can also complement various interior styles and serve as a focal point in your room.
Remember to regularly maintain and clean your electric fireplace to ensure its longevity and optimal performance. By following the manufacturer’s guidelines and keeping the fireplace in good condition, you can enjoy its benefits for years to come.
Converting your wood burning fireplace to electric is a rewarding and worthwhile project that brings both practicality and aesthetic appeal to your home. Now that you have the knowledge and understanding of the conversion process, you can confidently embark on this exciting journey and enjoy the warmth and beauty of your new electric fireplace.
Frequently Asked Questions about How To Convert A Wood Burning Fireplace To Electric
Was this page helpful?
At Storables.com, we guarantee accurate and reliable information. Our content, validated by Expert Board Contributors, is crafted following stringent Editorial Policies. We're committed to providing you with well-researched, expert-backed insights for all your informational needs.


0 thoughts on “How To Convert A Wood Burning Fireplace To Electric”